Tag Archives: Upgrade

How to upgrade your Windows Server Evaluation/Trial

Scenario: You downloaded the evaluation copy of Windows Server and you have 180 days to test out whatever you are working on.  Fast forward a few months and you only have a few days left and you are so happy with how it works, you go out and buy the whole license key.  When you go to apply the license key under System, you get a big ol' error that says: "This edition cannot be upgraded."

Solution:

You can use the DISM tool to figure out what versions of Windows Server you can upgrade to, and also use the tool to help change the product key of the version installed.

Easy enough, let's go ahead and open up command prompt as an administrator (right click on windows flag/start icon, Command Prompt (Admin):

Execute the following command to find out what versions you can upgrade to:

Dism /Online /Get-TargetEditions

In this case, you can see I can upgrade to ServerStandard or ServerDatacenter

Next, let's go ahead and actually upgrade the edition and inject my license key:

Dism /Online /Set-Edition:TheEditionListedYouWantToGoTo /AcceptEula /ProductKey:XXXXX-XXXXX-XXXXX-XXXXX-XXXXX

Viola!  At this point, I simply need to reboot and my instance will be upgraded accordingly.

Upgrading DirSync to AADSync for Office 365 and Azure environments

As of 11/11/2014, Microsoft has released their next generation tool for providing synchronization between an on-premise Active Directory environment and Microsoft based cloud service (Azure, Office 365 Suite (Lync Online, CRM, SharePoint, Exchange, etc.)).  The utility is now referenced as Microsoft Azure Active Directory Sync Services (AADSync).

In this tutorial, we will go over the process to ensure you are on the new generation of their synchronization tool.  The process is fairly straight forward, uninstall the old DirSync utility, install the new AADSync utility.  If you wish to install the utility on a new server, stop the DirSync service, install the AADSync utility on the new server, and then uinstall DirSync after you have verified synchronization is successful on the new machine.

Here is the uninstall DirSync and install AADSync process

  1. Download a copy of the AADSync utility from Microsoft's website: http://www.microsoft.com/en-us/download/details.aspx?id=44225
  2. Login to the server currently running DirSync
  3. Open up Control Panel
    Server - Start Menu - Control Panel
  4. Select Programs and Features (notice I am in the View By Small icons view)
    Control Panel - Small Icons - Programs and Features
  5. Uninstall the Windows Azure Active Directory Sync tool
  6. Select Yes to uninstall when prompted
    Windows Azure Active Directory Sync - Another instance dialog - Uninstall
  7. Uninstall Forefront Identity Manager Synchronization Service if it wasn't uninstalled already
    Uninstall - Forefront identity Manager Synchronization Service
  8. Run the MicrosoftAzureADConnectionTool.exe application you downloaded from Microsoft
    MicrosoftAzureADConnectionTool Installer
  9. Check I agree to the license terms and click Install
    Microsoft Azure Active Directory Sync Services - Install
  10. Once the install has finished, open up Computer Management and navigate to System Tools -> Local Users and Groups, Groups, and double click on ADSyncAdmins
    Computer Management - Local Users and groups - Groups - ADSyncAdmins
  11. Ensure your user account, user group, or local machine has been added to the security group
    ADSyncAdmins - Group Membership
  12. Log out of Windows
    Windows 8-Server 2012 - Sign Out

    1. Note: This step is needed to ensure you have proper user privileges when running the sync tool.  When running through the sync tool's installer, your user account will automatically be placed in a local security group called ADSyncAdmins.  A logout is needed to update your session otherwise you may receive the following error message:
      Your account is not a member of the ADSyncAdmins security group.  If you have recently installed Azure AD Sync, sign out before running this installation guide again.
      Microsoft Azure Active Directory Sync Services - Your account is not a member of the ADSyncAdmins security group
  13. Upon login, open up the DirectorySyncTool application
    DirectorySyncTool
  14. Enter your Azure or Office 365 admin credentials and click Next
    Microsoft Azure Active Directory Sync Services - Azure AD Credentials
  15. Enter in your forest name, username (must be in domain\username format), and password (Active Directory on-premise credentials) and click Add Forest
    Microsoft Azure Active Directory Sync Services - AD DS Credentials

    1. Note: If you are unsure what your forest name is, login to your domain controller and execute the following powershell command to list all forests in your deployment:
       Get-AdForest | FT Name
  16. Click Next once your forest has been validated
    Microsoft Azure Active Directory Sync Services - AD DS Credentials - Forests Validated
  17. Click Next on User Matching
    Microsoft Azure Active Directory Sync Services - User Matching
  18. Check the boxes that are applicable to your deployment and click Next
    Microsoft Azure Active Directory Sync Services - Optional Features
  19. Click Configure
    Microsoft Azure Active Directory Sync Services - Configure
  20. Click Finish
    Microsoft Azure Active Directory Sync Services - Finish


[Tutorial] Upgrading the firmware on a Cisco 5508 Wireless LAN Controller

This guide will show you what steps are needed to get your Cisco 5508 Wireless LAN Controller to the latest and greatest state.

  1. Download and install a TFTP Server program
    1. TFTPD is the recommend program to be used by Cisco.  It is a free and can be obtained from here: http://tftpd32.jounin.net/tftpd32_download.html
  2. Ensure your TFTP server instance is running and pointed to a directory of your choice.
    In this tutorial, I will be using C:\TFTP-Root as my directory for hosting firmware.
    Tftpd32
  3. Ensure you have an inbound firewall created to allow incoming connections to your machine on UDP port 69 if you will be using the TFTP option.
    UDP 69 - TFTP - Windows Firewall with Advanced Security
  4. Copy the firmware you want to transfer to the WLC to the TFTP server's directory
    TFTP-Server Firmware Directory
  5. Login to your Cisco WLC and select the Commands tab
    Cisco WLC 5508 - Commands Tab
  6. Ensure the following settings are entered and then click the Download button
    1. File Type: Code
      Transfer Mode: TFTP
      IP Address: xxx.xxx.xxx.xxx (IP Address to your machine)
      File Path: / (Use a relative file path; for example, if your firmware was located at c:\tftp-server\cisco5508\AIR-CT5500-K9-7-6-110-0.aes, use /cisco5508/)
      File Name: AIR-CT5500-K9-7-6-110-0.aes (or whatever your firmware is called)
      TFTP File transfer is successful
  7. Click OK when prompted to transfer the firmware
    Please confirm that you want to initiated the Code download process
  8. Once the firmware has finished updating, click on the Click Here link to reboot the WLC.
    TFTP File transfer is successful
  9. On the System Reboot page, hit the Save and Reboot button.
    Cisco WLC 5508 - Commands - Save and Reboot
  10. Click OK on the Configuration will be saved and the controller will be rebooted prompt.
    Configuration will be saved and the controller will be rebooted - Click ok to confirm
  11. Once the wireless LAN controller reboots, you should now be on the firmware version you provided.  You can verify on the Monitor page.
    Latest WLC firmware with outdated FUS
  12. At this point, you can can be done with your upgrade, however, it is highly recommended you also upgrade to the latest (or compatibile), version of the Field Upgrade Software (FUS) in additional to the WLC firmware (provided Cisco has a new version). The same steps to upgrade the FUS are of steps 6-10.
    1. Additional note, the FUS takes a considerable amount of time to upgrade the WLC.  It is normal for the FUS to take 30-50 minutes to upgrade after applying the firmware.  If you are not busy or intersted, you can watch the FUS upgrade various components if you console into the WLC during boot to keep an eye on things.
  13. Once the WLC and FUS firmware versions have been upgraded to their compatbile versions, you should be good to go! 🙂

Pushing firmware through CLI

If you wish to push the firmware manually via TFTP or FTP, you can use the following commands below (order doesn't matter as long as transfer download start is entered last).  The process is the same for uploading the firmware to the WLC, you only need to swap out the filename for either the FUS firmware or WLC firmware.

(Cisco Controller) > transfer download datatype code
(Cisco Controller) > transfer download mode tftp (can use ftp as well)
(Cisco Controller) > transfer download username user (only needed if using ftp)
(Cisco Controller) > transfer download password password (only needed if using ftp)
(Cisco Controller) > transfer download filename AIR-CT5500-K9-1-9-0-0-FUS.aes
(Cisco Controller) > transfer download path /
(Cisco Controller) > 
transfer download start


As of 4/14/2014, here are the latest firmware versions:

Release 1.9.0.0 for the Field Upgrade Software

Release 7.6.110.0ED for the Wireless LAN Controller


Notes: While upgrading our WLC from stock firmware, I received a strange error stating % Error: Code file transfer failed – Error while writing output file.  Please see my other blog post in regards to upgrading really old firmware on this device to the latest version: http://jackstromberg.com/2014/04/cisco-wlc-firmware-upgrade-error-code-file-transfer-failed-error-while-writing-output-file/

[Tutorial] Upgrading from ADFS 2.0 (Server 2008 R2) to ADFS 3 (Server 2012 R2)

Scenario: You want to upgrade your ADFS 2.0 or 2.1 farm using WID (Windows Internal Database) from Server 2008 R2 to Server 2012 R2.  In this scenario, I have 2 ADFS servers (one as the primary and a second for failover purposes), and 2 ADFS Proxy servers (for load balancing/failover purposes).

NOTE: Prior to writing this article I had only found limited documentation provided by Microsoft on a proper upgrade path for this.  Since then, it apperas that tools had been included with the Server 2012 installation media which will greatly cutdown on the number of steps needed as well as provide as little downtime as possible.  I would highly recommend giving this article a read before proceeding with my article: http://blogs.technet.com/b/askpfeplat/archive/2014/03/31/how-to-build-your-adfs-lab-part4-upgrading-to-server-2012-r2.aspx

My article should still work, but it is definitely not the most efficient way to do an upgrade as pointed out in the technet article above.  My guide essentially goes over cutting over to a completely new ADFS deployment "an upgrade", side-by-side to your production environment. As pointed out below, you cannot add a Server 2012 R2 machine to a Server 2008 R2 ADFS farm as documented in their earlier help articles.

Tutorial

  1. Login to one of your slave ADFS nodes (secondary server) running Server 2008 R2
  2. Remove the node from your load balancer
  3. Stop the AD FS 2.0 Windows Service
  4. Click Start -> Administrative Tools -> Internet Information Services (IIS) Manager Server 2008 R2 - Start - Administrative Tools - Internet Information Services IIS Manager
  5. Select your server and double click on Server Certificates Internet Information Services IIS Manager - Server Home
  6. Right click on your certificate and select Export... Internet Information Services IIS Manager - Export Certificate
  7. Export the certificate to your desktop, type in a password to protect the exported certificate/private key, and select OK
    Export Certificate Properties
  8. Copy the pfx (exported certificate/private key) to your local machine; we will import this on our new server later.
  9. Disjoin the ADFS machine from the domain
  10. Turn the ADFS machine off and retire it
  11. Create a new Server 2012 R2 machine with the same name and IP as your Server 2008 R2 ADFS machine
  12. While the new ADFS machine is being created, login to one of your ADFS proxy servers
  13. Remove the proxy from your load balancer
  14. Stop the AD FS 2.0 Windows Service
  15. Turn the machine off and retire it
  16. Create a new Server 2012 R2 machine with the same name and IP as your Server 2008 R2 ADFS Proxy machine
  17. While the new ADFS proxy machine is being created, login to your new ADFS Server 2012 R2 machine.
  18. Open up Server Manage and select Manage -> Add Roles and Features Server 2012 - Manage - Add Roles and Features
  19. On the Before You Begin screen, click Next > Add Roles and Features Wizard - Before you begin
  20. Select Role-based or feature-based installation and click Next > Add Roles and Features Wizard - Select installation type
  21. Select your server and click Next > Add Roles and Features Wizard - Select destination server
  22. Check Active Directory Federation Services and click Next > Add Roles and Features Wizard - Server Roles - Active Directory Federation Services
  23. Click Next > on Features Add Roles and Features Wizard - Features - Default
  24. Click Next > on AD FS Add Roles and Features Wizard - AD FS
  25. Click Install Add Roles and Features Wizard - Confirmation - Active Directory Federation Services
  26. Click on the Configure the federation service on this server. link once the installation has completed successfully. Add Roles and Features Wizard - Results - Configure the federation service on this server
  27. Check Create the first federation server in a federation server farm on the Welcome screen for the Active Directory Federation Services Configuration Wizard and then click Next > Active Directory Federation Services Configuration Wizard - Welcome
    1. Please see my notes below on why we did not check Create the first federation server in a federation server farm.
  28. Click Next > on the Connect to AD DS step
    Active-Directory-Federation-Services-Configuration-Wizard-Connect-to-AD-DS
  29. Copy the .pfx file we exported from the ADFS server earlier to the new ADFS server
  30. On the Specify Service Properties screen, click on the Import... button Active Directory Federation Services Configuration Wizard - Specify Service Properties - Import
  31. Select your certificate and click Open Select Certificate
  32. Type in the password to the exported certificate and click OK Enter certificate password
  33. Type in a Federation Service Display Name that will be shown to your users when they login to the ADFS service (this can be anything), and click Next > Active Directory Federation Services Configuration Wizard - Specify Service Properties - Federation Service Display Name
  34. On the Specify Service Account screen, click the Select... button Active Directory Federation Services Configuration Wizard - Specify Service Properties - Use an existing domain user account or group Management Service Account
  35. Type in the name of your service account you wish to use for ADFS, click the Check Names button to verify you don't have any typos, and click OK Active Directory Federation Services Configuration Wizard - Specify Service Properties - Select User or Service Account
  36. Type in the password for the ADFS service account and click Next > Active Directory Federation Services Configuration Wizard - Specify Service Properties - Use an existing domain user account or group Management Service Account - Username password
  37. Click Next > on the Specify Configuration Database Active Directory Federation Services Configuration Wizard - Specify Database - Create a database on this server using Windows Internal Database
    1. Note: I choose to continue to use WID, you can switch to SQL if you would like now, however that is outside of the scope of this document.
  38. Click Next > on the Review Options screen Active Directory Federation Services Configuration Wizard - Review Options
  39. Click the Configure button once all the prerequsite checks have passed successfully Active Directory Federation Services Configuration Wizard - Pre-requisite Checks
  40. Click Close once the server has successfully been configured Active Directory Federation Services Configuration Wizard - Results
  41. Open up Internet Explorer on the new ADFS machine and navigate to https://localhost/adfs/ls/IdpInitiatedSignon.aspx to ensure the service is properly running AD FS 3 Test
    1. Note: you should receive an invalid ssl certificate error; that is OK, we will switch the DNS records over once we are ready to transition from our old farm to the new one.
  42. Next, login to your Server 2008 R2 primary ADFS server and recreate the federation trusts on the new Server 2012 R2 primary ADFS server
    1. Start -> Administrative Tools -> AD FS 2.0 Management; select Trust Relationships -> Relying Party Trusts
    2. Recreate all the rules/trusts from your original ADFS server on your new Server 2012 R2 ADFS machine
      1. Note: If you are recreating rules for Office 365, you will need to wait until you switch over our new Server 2012 R2 environment to production.  The reason is when you setup the new ADFS instance, some of the certificates will change causing a certificate mismatch/preventing your users from logging in.  You will need to make sure you follow the following steps when resetting up the Office 365 trust to ensure your users don't receive "Error 80041317": http://support.microsoft.com/kb/2647020/en-us
  43. Login to your new ADFS Proxy server
  44. Import your SSL cerficate from your old ADFS server (from step 8) onto the server's Local Machine certificate store
    1. Right click on Start and select Run
      Server 2012 - Start - Run
    2. Type MMC and click OK
      Server 2012 - Run - mmc
    3. Click File -> Add/Remove Snap-in...
      Server 2012 - mmc - Add Remove Snap-In
    4. Select Certificates and click Add > Add or Remote Snap-ins - Certificates
    5. Select Computer account and click Next > Certificates snap-in - Computer Account
    6. Select Finish Certificates snap-in - Select Computer
    7. Click OK on the Add or Remove Snap-ins screen Add or Remove Snap-ins - Certificates - Local Computer
    8. Expand Certificates (Local Computer), select Personal, and right click, select All Tasks -> Import... Server 2012 - Certificates (Local Computer) - Personal - Import
    9. Click Next on the Certificate Import Wizard Certificate Import Wizard - Welcome
    10. Click the Browse... button Certificate Import Wizard - Browse
    11. Select your certificate and click Open Select Certificate
      1. Note: You may need to click on the dropdown box in the bottom right and select All Files for your pfx file to show up.
    12. Click Next on the File to Import screen Certificate Import Wizard - File to Import
    13. Type in the password to the pfx file, check Mark this key as exportable, and click Next Certificate Import Wizard - Private key protection
    14. Ensure Place all certificates in the following store shows Personal and click Next Certificate Import Wizard - Certificate Store
    15. Click Finish Certificate Import Wizard - Completing the Certificate Import Wizard
    16. Click OK on the Certificate Import Wizard successful dialog boxCertificate Import Wizard - Successful
  45. Edit the hosts file to point your DNS record to your new ADFS server
    1. Open Notepad as an Administrator Server 2012 - Notepad - Administrator
    2. Open the following file: C:\Windows\System32\drivers\etc\hosts Server 2012 - Hosts file
    3. Add in your DNS entry and point to your new ADFS server hosts file - adfs manual entry
    4. Save the file
      1. Note: We will come back to this later and update it to point to our load balancer once we switch over everything.  For now, this lets us test our new deployment while switching things over.
  46. Open up Server Manager
    Server 2012 R2 - Server Manager
  47. Click Manage -> Add Roles and Features
    Server 2012 - Manage - Add Roles and Features
  48. Click Next > on the Before you begin screen Add Roles and Features Wizard - Before you begin
  49. Select Role-based or feature based installation and click Next > Add Roles and Features Wizard - Select installation type
  50. Select your server and click Next > Add Roles and Features Wizard - Select destination server
  51. Check Remote Access on the Server Roles screen Add Roles and Features Wizard - Remote Access
  52. Click Next > on the Features screen Add Roles and Features Wizard - Features - Default
  53. Click Next > on the Remote Access screen
  54. Check Web Application Proxy
  55. ClickAdd Features on the Add Roles and Features Wizard dialog boxAdd Roles and Features Wizard - Web Application Proxy
  56. Click Next > on the Roles Services screen Add Roles and Features Wizard - Role Services - Web Application Proxy
  57. Click Install on the Confirmation screen Add Roles and Features Wizard - Confirmation - Web Application Proxy
  58. Click on the Open the Web Application Proxy Wizard link once the installation succeeds Add Roles and Features Wizard - Confirmation - Web Application Proxy - Open the Web Application Proxy Wizard
  59. Click Next > on the Welcome screen Web Application Proxy Configuration Wizard - Welcome
  60. Type in the FQDN to your ADFS server, the credentials of an account with local admin privileges, and then click Next >Web-Application-Proxy-Configuration-Wizard-Federation-Server
  61. Select your certificate on the AD FS Proxy Certificate screen and click Next >
    Web-Application-Proxy-Configuration-Wizard-AD-FS-Proxy-Certificate
  62. Click Configure on the Confirmation screen Web Application Proxy Configuration Wizard - Confirmation
  63. Click Close once the Web Application Proxy has been successfully configured.Web-Application-Proxy-Configuration-Wizard-Results
  64. After you click close a new window should open.  On the Remote Access Management Console, select Publish
    1. Note: This step only needs to be done once.  It will replicate to all other proxy servers when you set those up at a later time.
      Remote Access Management Console - Publish
  65. Click Next > on the Welcome screen
    Publish New Application Wizard - Welcome
  66. Select Pass-through and click Next >
    Publish New Application Wizard - Preauthentication
  67. Enter in a name, external URL, and internal URL for your federated server (mine were both the same since I use split-dns).  Click Next >
    Publish New Application Wizard - Publishing Settings
  68. Click Close
    Publish New Application Wizard - Results
  69. Add the new Server 2012 R2 ADFS machine to your load balancer and remove your Server 2008 R2 machine.
  70. Add the new Server 2012 R2 ADFS Proxy machine to your load balancer and remove your Server 2008 R2 proxy machine.
  71. Update the hosts file on your Server 2012 R2 proxy machine to point to your load balanced Server 2012 R2 ADFS environment
  72. Retire your Server 2008 R2 ADFS environment
    1. Disjoin the ADFS proxy server from the domain and recycle the machine
    2. Open up PowerShell as an Administrator
      Elevated Powershell
    3. Execute the following commands:
      1. Add-PsSnapin Microsoft.Adfs.Powershell
        Get-AdfsProperties
        get-adfsproperties certificatesharingcontainer
    4. Stop the service on your Server 2008 R2 ADFS machine running the old ADFS farm
    5. Execute the following command to remove the ADFS Farm info from AD (substituting in the information from the Get-AdfsProperties command):
      1. $delme = New-Object System.DirectoryServices.DirectoryEntry("LDAP://CN=484e24a8-5726-4186-8e24-825b77920798,CN=ADFS,CN=Microsoft,CN=Program Data,DC=mydomain,DC=local")
        $delme.DeleteTree()
        PowerShell DeleteTree
    6. Disjoin the ADFS machine from the domain and recycle the machine
  73. Add a new Server 2012 R2 machine and WAP machine to your new ADFS environment for redudnancy (same steps as above, except in Step 27, you will select Add a federation server to federation server farm

Notes: Here is the upgrade compatibility matrix for upgrading ADFS from a specific version to Server 2012: http://technet.microsoft.com/en-us/library/jj647765.aspx

Why did I not check Add a federation server to a federation server farm on the Welcome screen for the Active Directory Federation Services Configuration Wizard?

The reason behind not checking this is I believe Microsoft has a bug in their discovery tool in adding another machine to a farm running ADFS 3.0.  When adding a Server 2012 R2 machine to a farm with only Server 2008 R2 machines running ADFS 2.0, you will receive the following error:

The primary federation server was contacted successfully, but the configuration data was not valid. Ensure that the primary federation server is running Windows Server 2012 R2 or later. Unable to retrieve configuration from the primary server. The primary federation server was contacted successfully, but the configuration data was not valid. Ensure that the primary federation server is running Windows Server 2012 R2 or later. Prerequisites Check Completed One or more prerequisites failed.  Please fix these issues and click "Rerun prerequisites check" The primary federation server was contacted successfully, but the configuration data was not valid. Ensure that the primary federation server is running Windows Server 2012 R2 or later

Symptom: You receive the following error while setting up the WAP (proxy) server:

An error occurred when attempting to establish a trust relationship with the federation service. Error: Not Found An error occurred when attempting to establish a trust relationship with the federation service Error Not Found

Resolution: Make sure you update the DNS records of your ADFS deployment to point to your new ADFS server.  Both the ADFS proxy and ADFS server must be running the same OS version (in this case, Server 2012 R2).

[Tutorial] Rooting and Installing Cyanogenmod 11 (Android 4.4 KitKat) w/ Google Apps on the Droid RAZR Maxx

Here are my notes on rooting and installing Cyanogenmod 11 (Android 4.4 KitKat) on my Motorola RAZR Maxx.  This guide follows almost the exact same steps as my previous guide found here: http://jackstromberg.com/2013/09/tutorial-rooting-and-installing-cyanogenmod-10-2-w-google-apps-on-the-droid-razr-maxx/

If you followed my previous tutorial and are trying to upgrade to Cyanogenmod 11, follow this guide starting at step 18.  If you receive Error Status 6 when installing new Cyanogenmod version, please see the notes at the bottom of this guide.

By reading this, you are agreeing that I take no responsibility for what you do with your phone, nor will send me angry emails saying I janked your phone.

  1. Enable USB debugging
    1. Settings->Developer Options->Enable Developer options at the top-> (Hit ok on the notification asking for Allow development settings)->Check USB debugging (Click OK on the Allow USB debugging? dialog).
  2. Download a copy of latest build of Cyanogenmod
    1. http://wiki.cyanogenmod.org/w/Spyder_Info
    2. I am going to live on the edge and install a nightly to get to 11.  If you don't want bugs, use a stable version (As of right now (12/21/2013), Cyanogenmod has not officially released a stable version of Cyanogenmod 11 for the Droid RAZR Maxx).
    3. Notes: I found a pretty sweet page that lists the nightly changes to the rom.  If you are curious, you can view the nightly changes here: http://www.cmxlog.com/11/spyder/
  3. Download a copy of Google Apps
    1. http://wiki.cyanogenmod.org/w/Gapps
    2. By default, Cyanogenmod cannot ship with Google Apps due to legality reasons, so these will need to be installed manually.  Without these, you will not have Google Play, Music, Maps, etc.  In this case, grab a copy of gApps for 11.  If you don't have a program to download torrent files, you will need to download the gApps package from the AFH link provided on the cyanogenmod page.
  4. Download a copy of RazrBlade, which we will use to exploit the phone and gain root access:
    1. For Windows: http://cmw.cmfs.me/razrblade/razr_blade_win.zip
    2. For Mac: http://cmw.cmfs.me/razrblade/razr_blade_mac.zip
    3. For Linux: http://cmw.cmfs.me/razrblade/razr_blade_linux.zip
  5. Extract the files of the razr_blade_XXX.zip archive.
  6. If you are running windows, download a copy of the Motorola drivers to connect your phone.
    1. Motorola x86 drivers: http://goo.im/devs/Hashcode/moto_root/Motorola_End_User_Driver_Installation_5.9.0_32bit.msi
      Motorola x64 drivers: http://www.adbtoolkit.com/drivers/applications/motorola/Motorola_End_User_Driver_Installation_5.9.0_64bit.msi
  7. Run through the Motorola driver installation if you are running windows.
  8. Plug your phone in to your machine
  9. Navigate back to the files you extracted, right click Run.bat, run as Administrator
    1. If you are on Linux, execute RootLinux.sh and if you are on Mac OS, execute RootMac.sh
  10. Press any key to continue
    Razr Blade - Phase 1
  11. Once your phone has completed phase one (which ends up with a reboot of the phone), complete the following tasks on your phone
    1. Click Apps->SmartActions->Get Started->Next->Battery Saver->Save->Home button
  12. Press any key to continue with "Phase two"
    Razr Blade - Phase 2

    1. Your phone will reboot again
    2. Phase four will start
    3. Your phone will reboot again
  13. After phase four completes, you should be notified the phone has been rooted.
    1. Phase 3 & 4
      Notes: I received some permission errors the first time I ran through this (as shown in the picture above).  I ended up rebooting the phone, making sure I had the latest version of SmartActions and then reran the batch file.  After that, I was able to successfully get the Superuser program (which we talk about next) to run.
  14. Next, grab a copy of Superuser.apk (included inside the razr_blade zip file) and copy it over to the SD card.
  15. At this time, copy over the cyanogenmod zipped file you downloaded earlier.  Throw it on the root of your SD card.
  16. Copy over the gApps zip file we downloaded earlier and throw that on the root of your SD card as well.
  17. Disconnect the phone from the computer and install the SuperUser application.  Apps->Files->SD Card->Superuser.apk, Install, Open.  If it asks to update, go ahead and allow it to update the binaries.
  18. Next, grab a copy of SafeStrap.  We will use this as the bootstrap to flash your phone to Cyanogenmod as well as provide an easy way to switch between different ROMs.
    1. https://goo.im/devs/Hashcode/spyder/safestrap/Safestrap-Spyder-3.73.apk
  19. Copy the file over to your phone
  20. Apps->Files->SD card->Safestrap-Spyder-3.73.apk->Package installer->Install->Open
  21. Hit Ok when prompted for superuser privileges, and then select Agree.
  22. Once inside the Safestrap application, click Install Recovery.
    1. Once installed, you should see the Recovery State say Installed
  23. Reboot your phone
  24. When you see the Safestrap splash screen, hit the Menu button on your phone.
  25. Once you have hit the Menu button, there will be a brief delay where you screen goes black and then redirects you to one with a couple of big buttons.  Push the button labeled Boot Options.
  26. Push the ROM-Slot-1 button.
  27. Select the size of your data store and then hit Activate.
    1. Note: This is the amount of space in the partition for Cyanogenmod operating system and associated apps. If you plan to only use the one slot, I would set the slot to 3GB. If you are going to be using multiple ROM slots and space was is an issue you might want to lower the allocation.
  28. Once it is done doing its shindig, hit the back button twice to get to the screen that shows Boot Options, Install, Backup, Restore, Mount, Wipe, Advanced, and Reboot.
  29. Push the Install button.
    1. Note, if the Install button is Red, you are going to override your stock ROM.  Make sure that you have activated ROM-Slot-1 before proceeding.
  30. Scroll down and select the Cyanogenmod zip file you copied to the SD card earlier.
  31. Swipe the "Swipe to Confirm Flash" area to begin flashing your phone with Cyanogenmod.
  32. Once done, it should say Successful in blue text.  Hit the Wipe cache/dalvik button.
    1. Swipe the Swipe to Wipe area (lol)
  33. Hit the Back button.
  34. Hit the Reboot System button.
  35. At this point, you should be greeted by the Cyanogenmod welcome screen upon boot.  I opted out of the Cyangenmod account and decided to continue on.
  36. Next, we need to install Google Apps on the phone.  To do this, reboot the phone and press the Menu button when you see the SafeStrap splash screen.
    1. Note: Google Apps are totally optional.  If you want to roll with Stock Cyanogenmod and manually install apps via their APK files for ultra security, that is totally cool.
    2. Note 2: If you receive an error saying "unable to mount '/osh' gapps", simply ignore the error and boot back into Cyanogenmod.  I received this error, but all the Google Apps seemed to have installed just fine.
  37. Hit the Install button.
  38. Select the gApps zip file from your SD card
  39. Swipe the Swipe to Confirm Flash area
  40. Once the apps have been successfully installed, hit the Wipe cache/dalvik button.
  41. Swipe the Swipe to Wipe area
  42. Hit the Back button
  43. Hit the Reboot System button
  44. Once you are greeted by a "Allow Google's location service to collect anonymous location data." prompt, you will know you have successfully installed the Google apps! 😛

That should do it!  Enjoy Cyanogenmod 11! 🙂

Notes:

If you receive the following error when trying to install the Cyanogenmod 11 package:

Finding update package...
Opening update package...
Installing update...
E: Error in /sdcard-ext/cm-11-2013-12-21-NIGHTLY-spyder.zip (Status 6)
Error flashing zip '/sdcard-ext/cm-11-2013-12-21-NIGHTLY-spyder.zip'

Please make sure you have upgraded to the latest version of SafeStrap.  SafeStrap v3.65 or higher must be installed for Cyanogenmod 11 to properly install.  As a heads up, you will need to open the SafeStrap app and press the Install Recovery button to actually get SafeStrap to upgrade to the latest version.  Simply upgrading the SafeStrap apk file will NOT complete the upgrade.

P.S. Here is the official Cyanogenmod info page for the Motorola Droid RAZR/RAZR MAXX (CDMA)
http://wiki.cyanogenmod.org/w/Spyder_Info

Migrating Domain Controllers From Server 2008 R2 to Server 2012 R2

In this article, I have documented the steps I took to update our two domain controllers to Server 2012 R2 from Server 2008 R2.  While this can be considered a tutorial, it is more a reflection of what I did during my migration process.  This guide assumes you have already made backups of your environment, all Windows Active Directory Domain Controllers in the forest are running Server 2003 or later, and we will be recycling (reusing) the same two servers you deployed.  Last, Microsoft strongly recommends we do a clean install and not directly upgrade each server, so we will decommission a DC, reinstall windows, and then redeploy the DC until the entire environment has been upgraded.

  1. Prepare the AD Schema for Server 2012 R2
    1. Mount the Server 2012 R2 installation disk on one of your Domain Controllers
      Windows Server 2012 R2 - Mounted DVD
    2. Open up a command prompt with Administrative Privileges and navigate to the /support/adprep folder on the installation media.
      1. Click Start, type cmd, right click select Run as administrator
        Administrative cmd prompt
      2. Execute the command: d:
      3. Execute the command: cd d:\support\adprep
      4. Windows Server 2012 R2 - support-adprep folder
    3. Execute the following command (don't close out of this until after we verify the schema version in an upcoming step):
      1. adprep /forestprep
      2. Type the letter C and press the enter key to begin the process
        adprep forestprep
        adprep forestprep success
    4. Execute the following command:
      1. adprep /domainprep
        adprep domainprep
        adprep domainprep success
    5. Verify the schema version has been updated
      1. Click Start and search for regedit
        regedit
    6. Open up regedit and navigate to Computer\HKEY_LOCAL_MACHINE\SYSTEM\CurrentControlSet\services\NTDS\Parameters
    7. Verify the Schema Version value matches the last entry shown in your upgrade results.  In my case, the Schema Version should be 69.
      adprep forestprep schema version
      regedit - schema version
  2. Demote and decommission secondary domain controller
    1. Click Start, Run...
      Start-Run
    2. Type dcpromo and click OK
      Run - dcpromo
    3. Click Next > on the Welcome page
      Active Directory Domain Services Installation Wizard - Welcome to the Active Directory Domain Services Installation Wizard
    4. If the domain controller has the global catalog service, make sure your primary DC also has the service enabled and click OK.  This can be done by opening up Active Directory Sites and Services and viewing the services for each domain controller.
      Active Directory Domain Services Installation Wizard - Active Directory domain controller is a global catalog server dialog
    5. Make sure the Delete this domain because this server is the last domain controller in the domain is UNCHECKED, and click Next >
      Active Directory Domain Services Installation Wizard - Delete the domain because this server is the last domain controller in the domain
    6. Type in a new password to be used for the Local Administrator account the machine will contain after it is demoted.
      Active Directory Domain Services Installation Wizard - Administrator Password
    7. Click Next > on the Summary page
      Active Directory Domain Services Installation Wizard - Summary
    8. Check the Reboot on completion box to restart the server after the service has been removed
      Active Directory Domain Services Installation Wizard - Reboot on completion
    9. Log back into the DC upon reboot and open up Server Manager
      Server Manager
    10. In Roles Summary, click Remove Roles
      Server Manager - Remove Role
    11. Click Next > on the Before You Begin page
      Remove Roles Wizard - Before You Begin
    12. Uncheck Active Directory Domain Services and DNS Server (if the role is installed) and click Next >
      Remove Roles Wizard - Remove Server Roles - Active Directory Domain Services - DNS
    13. Click Remove
      Remove Roles Wizard - Confirm Removal Selections
    14. Click Close
      Remove Roles Wizard - Removal Results
    15. Select Yes on the Do you want to restart now? dialog box
      Remove Roles Wizard - Restart Dialog
    16. Log back into the DC upon reboot and you should greeted by a Removal Results window.  Let the process finish and select Close upon removal success.
      Remove Roles Wizard - Resume Configuration Wizard
    17. Disjoin the machine from the domain
      1. Click Start, right click Computer, select Properties
        Start - Computer - Properties
      2. Click Change settings
        Control Panel - System and Security - System - Change settings
      3. Click Change... on the System Properties page
        System Properties
      4. Check Workgroup, type in a workgroup name, and click OK
        Computer Name - Domain Changes - Workgroup
      5. Click OK on the warning dialog
        Computer Name - Domain Changes - Leave domain dialog
      6. Click OK on the Welcome to the workgroup dialog
        Welcome to the workgroup dialog
      7. Click OK on the restart dialog
        You must restart your computer to apply these changes
      8. Click Close on the System Properties window
        (oops, forgot to make a screenshot!)
      9. Click Restart Later on the Microsoft Windows dialog box
      10. Shutdown the machine
        Start - Shut down
    18. Format the decommissioned machine, reinstall a clean copy of Server 2012 R2, and join the machine to the domain.
  3. Add first Server 2012 R2 Domain Controller
    1. At this point, you should have one Server 2008 R2 Domain Controller and a blank Server 2012 R2 machine joined to the domain ready for the Active Directory services.  If you are at this point, continue on, if not, you might want to read back a couple steps and see where things ventured off course.
    2. Start Server Manager on your new Server 2012 R2 machine.
      Server 2012 R2 - Server Manager
    3. Select Manage in the top right and select Add Roles and Features
      Server 2012 - Manage - Add Roles and Features
    4. Click Next > on the Before you begin screen
      Add Roles and Features Wizard - Before you begin
    5. Click Next > on the Select installation type screen
      Add Roles and Features Wizard - Select installation type
    6. Ensure your new server is selected and click Next >
      Add Roles and Features Wizard - Select destination server
    7. Check the box next to Active Directory Domain Services
      Add Roles and Features Wizard - Select server roles
    8. On the Add features that are required for Active Directory Domain Services? dialog, click the Add Features button
      Add Roles and Features Wizard - Add features that are required for Active Directory Domain Services Dialog
    9. Click Next >
      Add Roles and Features Wizard - Select server roles - Active Directory Domain Services Checked
    10. Click Next >
      Add Roles and Features Wizard - Active Directory Domain Services
    11. Check the box that says Restart the destination server automatically if required
      (Click Yes on the restart dialog if it pops up)
      Add Roles and Features Wizard - Confirm installation selections
    12. Click the Install button
      Add Roles and Features Wizard - Confirm installation selections - restart
    13. Once the install is done, click the Close button
      Add Roles and Features Wizard - Installation progress
    14. Next, head back to the Server Manager screen and select the warning icon with the flag; then select Promote this server to a domain controller.
      Server Manager - Promote this server to a domain controller
    15. On the Deployment Configuration page, make sure Add a domain controller to an existing domain is checked and hit Next >
      Active Directory Domain Services Configuration Wizard - Deployment Configuration
    16. Check Domain Name System (DNS) server, Check Global Catalog (GC), and uncheck Read only domain controller (RODC).  Enter a strong password to be used to access Directory Services Restore Mode and click Next >
      Active Directory Domain Services Configuration Wizard - Domain Controller Options
    17. Click Next > on the DNS Options page
      Active Directory Domain Services Configuration Wizard - DNS Options
    18. Click Next > on the Additional Options page, or if you would like, you can manually select a domain controller to replicate data from and then hit Next >.
      Active Directory Domain Services Configuration Wizard - Additional Options
    19. Click Next > on the Paths page
      Active Directory Domain Services Configuration Wizard - Paths
    20. Click Next > on the Review Options page
      Active Directory Domain Services Configuration Wizard - Review Options
    21. Click Install on the Prerequisites Check page
      Active Directory Domain Services Configuration Wizard - Prerequisites Check
    22. Once the domain controller reboots after installation, open up Server Manager and select Tools, Active Directory Users and Computers
      Server Manager - Active Directory Users and Computers
    23. Expand your Domain and select Domain Controllers; ensure your new machine shows up here.
      Active Directory Users and Computers - Domain Controllers
    24. Next, verify DNS works properly
      1. Go back to Server Manager, select Tools, DNS
        Server Manager - DNS
      2. Expand your server, Forward Lookup Zones, and right click on your domain name and select Properties
        DNS - Domain Name - Properties
      3. Select the Name Servers tab and ensure all DCs are listed
        DNS - Properties - Name Servers
  4. Next, we need to verify the FSMO (Flexible Single Master Operations) roles are stored on our other server 2008 DC
    1. On the new Server 2012 R2 DC we joined, open up a command prompt with administrative privileges.
      Server 2012 - Administrative Command Prompt
    2. Execute the following command to verify FSMO roles are on our 2008 DC:
      netdom query fsmo
      netdom query fsmo
  5. Next, we need to transfer the FSMO roles from our primary DC to our new one
    1. Execute the following command using the same command prompt in the previous steps: ntdsutil
      ntdsutil
    2. Type roles when prompted and hit enter
      ntdsutil - roles
    3. Type connections when prompted and hit enter
      ntdsutil - roles - connections
    4. Type connect to server server2012DC.mydomain.com, where server2012DC is the new DC we just deployed, when prompted and hit enter
      ntdsutil - roles - connections - connect to server
    5. Type quit and hit enter
      ntdsutil - roles - connections - connect to server - quit
    6. Type transfer schema master and hit enter
      ntdsutil - transfer schema master
    7. Click Yes on the Role Transfer Dialog for the Schema Master role
      Role Transfer Confirmation Dialog - Schema Master
    8. Type transfer naming master and hit enter
      ntdsutil - transfer naming master
    9. Click Yes on the Role Transfer Confirmation Dialog for the Naming Master role
      Role Transfer Confirmation Dialog - Naming Master
    10. Type transfer PDC and hit enter
      ntdsutil - transfer PDC
    11. Click Yes on the Role Transfer Configuration Dialog for the Primary Domain Controller role
      Role Transfer Confirmation Dialog - Primary Domain Controller
    12. Type transfer RID master and hit enter
      ntdsutil - transfer RID master
    13. Click Yes on the Role Transfer Configuration Dialog for the RID master role
      Role Transfer Confirmation Dialog - RID master
    14. Type transfer infrastructure master and hit enter
      ntdsutil - transfer infrastructure master
    15. Click Yes on the Role Transfer Configuration Dialog for the Infrastructure Master role
      Role Transfer Confirmation Dialog - Infrastructure Master
    16. Type quit and hit enter
      ntdsutil - fsmo maintenance - quit
    17. Type quit and hit enter
      ntdsutil - quit
    18. Execute the following command to ensure the FSMO services are on the new Server 2012 R2 machine: netdom query fsmo
      netdom query fsmo - moved dc
  6. At this point, you should have a Server 2012 R2 DC with the FSMO roles and a secondary 2008 R2 Domain Controller.  If not, please go back and complete the steps to get to this point.
  7. Optional Step: After upgrading the first DC, you may want to reconfigure the machine to keep its time in sync with an external source.  To do this, please follow my guide here: http://jackstromberg.com/2013/10/configuring-external-time-source-on-your-primary-domain-controller/
  8. Next, decommission the last Server 2008 R2 domain controller that used to function as the primary DC.
    1. Follow the same instructions in Step 2 above called Demote and decommission secondary domain controller
  9. Next, add the machine back to the domain
    1. Follow the same instructions in Step 3 above called Add first Server 2012 R2 Domain Controller
  10. At this point, your environment should be up and running with Windows Server 2012 R2!  You can optionally transfer the FSMO roles back to your "primary" DC that you had before, or continue on with the roles left on the current DC.

Notes

Official information on removing a domain controller from the domain can be found on Microsoft's website here: http://technet.microsoft.com/en-us/library/cc771844(v=ws.10).aspx

Removing last Lync 2010 Front End – Unassigned Number Error

Symptom:
You receive the following error when trying to publish your new Lync Topology, after removing the last Lync 2010 Front End Server.

Result: Call orbit depends on an application server that is being removed.
ServiceInUse: The new topology XML removes services that will create stale configuration settings.
ServiceInUseResolution: Consult your Lync Server documentation to learn how to to disassociate the service of the settings using it.

Error: Cannot publish topology changes. Unassigned number still exists on one or more deleted application servers.
▼ Details
└ Type: InvalidOperationException
└ ▼ Stack Trace
└ at Microsoft.Rtc.Management.Deployment.Tasks.PublishTopologyTask.CheckIfVacantNumberRangesInUse(DeletedServices deletedServices) at Microsoft.Rtc.Management.Deployment.Tasks.PublishTopologyTask.VerifyServiceDependentSettings(DeletedServices deleteServices) at Microsoft.Rtc.Management.Internal.Utilities.LogWriter.InvokeAndLog[T](Action`1 action, T arg)

Error: An error occurred: "System.InvalidOperationException" "Cannot publish topology changes. Unassigned number still exists on one or more deleted application servers."

Solution:
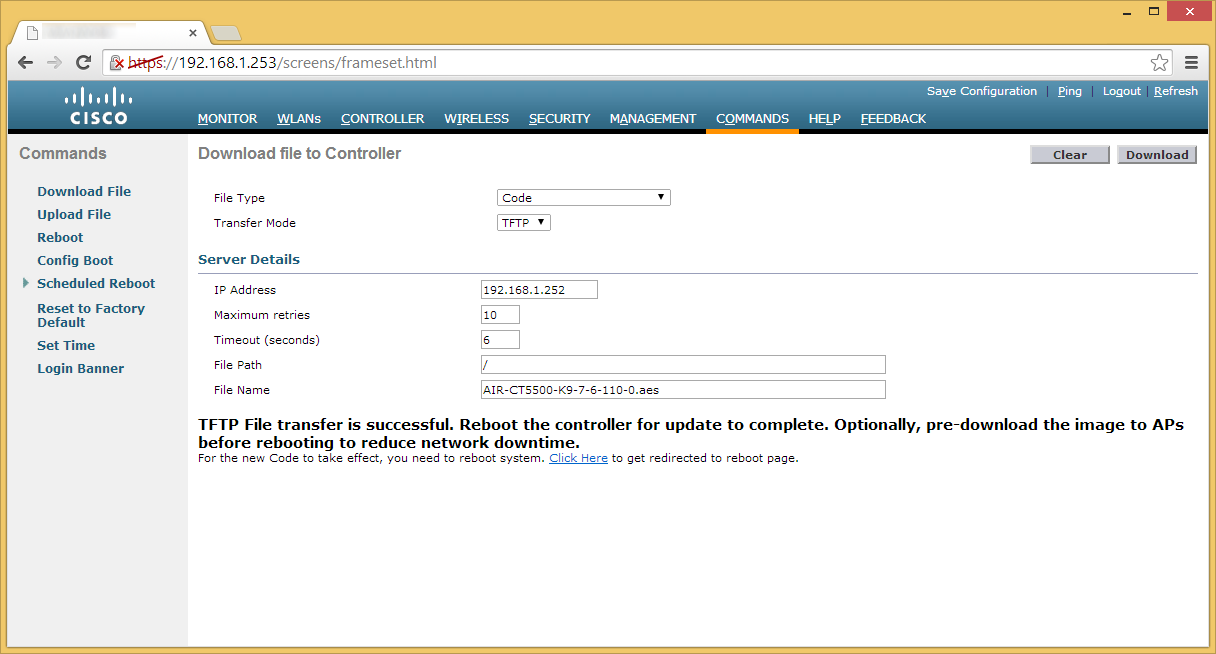
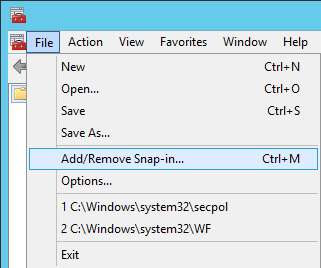
Open up the Lync Server Management Shell as an Administrator on a different Front End server that you aren't retiring and execute the following command:

Get-CsUnassignedNumber

For each of the returned results with the AnnouncementServerFqdn matching the server you are trying to retire, execute the following command:

Set-CsUnassignedNumber -Identity IdentityFromPreviousCommand -AnnouncementService newlyncpoolorfrontend.mydomain.local

Alternately, you can change the Front End server these numbers are on through the Lync Web GUI (Cscp).  To do so, navigate to the Lync Server 2013 Control Panel, click on Voice Features->Unassigned Number, and then double click every entry that has a destination with the old Front End.  When the Edit Unassigned Number Range dialog shows up, type in the FQDN to the new Front End Pool/Server and then click OK. Repeat for each number.

Lastly, if you want to cleanup your Lync server, you can remove all instances of the old Announcements using the following command:

Remove-CsAnnouncement -Identity "ApplicationServer:myoldfrontend.mydomain.local"

Alternately, if you published the topology, you may have to remove the Announcements individually by using entering the command below with the entire Identity value or via the old ApplicationServer's name (in my case it was 1-ApplicationServer-1 as shown below):

Remove-CsAnnouncement -Identity "ApplicationServer:probablysays1-ApplicationServer-1/1951f734-c80f-4fb2-965d-51807c792b90"

Once all Unassigned Numbers have been moved to the new Front End server or pool, you should be able to successfully publish your topology.

Removing last Lync 2010 Front End - Conference Error

Symptom:
You receive the following error when trying to publish your new Lync Topology, after removing the last Lync 2010 Front End Server.

ConferencingPoolInUse: The new topology XML removes services that will orphan existing conference directories.

Error: Cannot publish topology changes. Conference directories still exist on a pool that would be deleted. Remove the conference directories before continuing.
▼ Details
└ Type: InvalidOperationException
└ ▼ Stack Trace
└ at Microsoft.Rtc.Management.Deployment.Tasks.PublishTopologyTask.VerifyOrphanedDirectories()
at Microsoft.Rtc.Management.Internal.Utilities.LogWriter.InvokeAndLog(Action action)

Error: An error occurred: "System.InvalidOperationException" "Cannot publish topology changes. Conference directories still exist on a pool that would be deleted. Remove the conference directories before continuing."

Solution:
On one of your front end lync servers, open up the Lync Server Management Shell as an Administrator.  Once open, execute the following command:

Get-CsConferenceDirectory

For each of the items that have a ServiceID referencing the Front End server you are trying to retire, execute the following command (replacing the appropriate values with the output found from the previous command):

Move-CsConferenceDirectory -Identity X -TargetPool poolorfrontendserver.mydomain.local

After all conferences have been moved off of your Lync 2010 Front End server, you should be able to successfully publish the topology.

Upgrading SolarWinds 10.3 to 10.4 With NetFlow 3.9 to 3.10

Earlier this week I decided to update NetFlow and came across some weird stuff. I updated NetFlow first, all went all. Updated NPM to 10.4 and all heck broke loose. The following messaged started to popup when going to the Netflow tab of SolarWinds:
"Error: NetFlowService inaccessible. Verify that service is 'Started'. » More Information"

I had tried restarting the SolarWinds Netflow service, rebooting the whole machine, running the repair option of Netflow via the installer, and creating a whole new database; neither of which prevailed.

Finally I opened up a ticket with SolarWinds and it turned out to be database connectivity issues. After troubleshooting with a tech for a few hours, eventually I had this escalated to the dev. team. Turns out that the database configuration file has issues reading "s and they have you replace the passwords with 's.

So the fix:

  1. Open c:\Program Files (x86)\SolarWinds\Orion
  2. Edit the SWNetPerfMon.db file using Notepad
  3. Replace all double quotes (") with single quotes (') around your passwords.
  4. Restart all Solarwinds services using the Orion Service Manager.

Wait a few minutes and you should now start to see the fancy NetFlow charts in SolarWinds 🙂