Here are my notes on rooting and installing Cyanogenmod 11 (Android 4.4 KitKat) on my Motorola RAZR Maxx. This guide follows almost the exact same steps as my previous guide found here: http://jackstromberg.com/2013/09/tutorial-rooting-and-installing-cyanogenmod-10-2-w-google-apps-on-the-droid-razr-maxx/
If you followed my previous tutorial and are trying to upgrade to Cyanogenmod 11, follow this guide starting at step 18. If you receive Error Status 6 when installing new Cyanogenmod version, please see the notes at the bottom of this guide.
By reading this, you are agreeing that I take no responsibility for what you do with your phone, nor will send me angry emails saying I janked your phone.
- Enable USB debugging
- Settings->Developer Options->Enable Developer options at the top-> (Hit ok on the notification asking for Allow development settings)->Check USB debugging (Click OK on the Allow USB debugging? dialog).
- Download a copy of latest build of Cyanogenmod
- http://wiki.cyanogenmod.org/w/Spyder_Info
- I am going to live on the edge and install a nightly to get to 11. If you don’t want bugs, use a stable version (As of right now (12/21/2013), Cyanogenmod has not officially released a stable version of Cyanogenmod 11 for the Droid RAZR Maxx).
- Notes: I found a pretty sweet page that lists the nightly changes to the rom. If you are curious, you can view the nightly changes here: http://www.cmxlog.com/11/spyder/
- Download a copy of Google Apps
- http://wiki.cyanogenmod.org/w/Gapps
- By default, Cyanogenmod cannot ship with Google Apps due to legality reasons, so these will need to be installed manually. Without these, you will not have Google Play, Music, Maps, etc. In this case, grab a copy of gApps for 11. If you don’t have a program to download torrent files, you will need to download the gApps package from the AFH link provided on the cyanogenmod page.
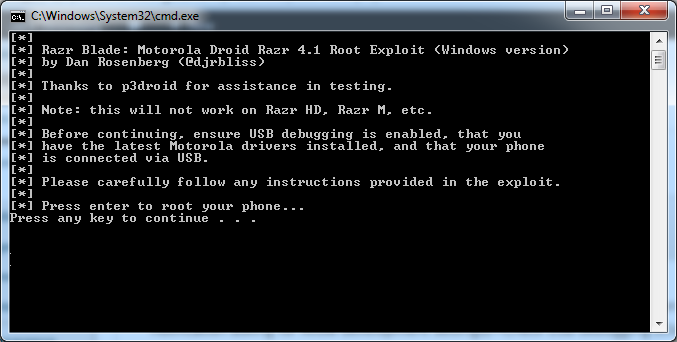
- Download a copy of RazrBlade, which we will use to exploit the phone and gain root access:
- Extract the files of the razr_blade_XXX.zip archive.
- If you are running windows, download a copy of the Motorola drivers to connect your phone.
- Run through the Motorola driver installation if you are running windows.
- Plug your phone in to your machine
- Navigate back to the files you extracted, right click Run.bat, run as Administrator
- If you are on Linux, execute RootLinux.sh and if you are on Mac OS, execute RootMac.sh
- Press any key to continue
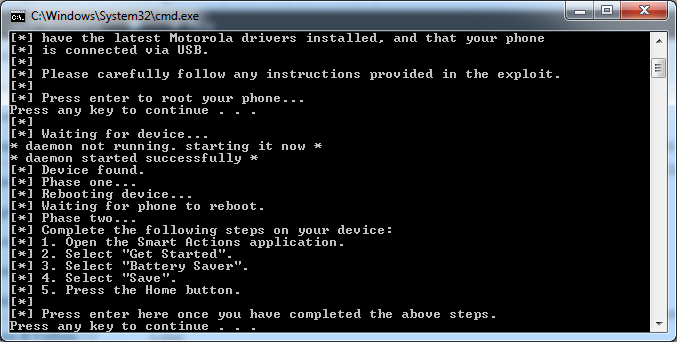
- Once your phone has completed phase one (which ends up with a reboot of the phone), complete the following tasks on your phone
- Click Apps->SmartActions->Get Started->Next->Battery Saver->Save->Home button
- Press any key to continue with “Phase two”
- Your phone will reboot again
- Phase four will start
- Your phone will reboot again
- After phase four completes, you should be notified the phone has been rooted.
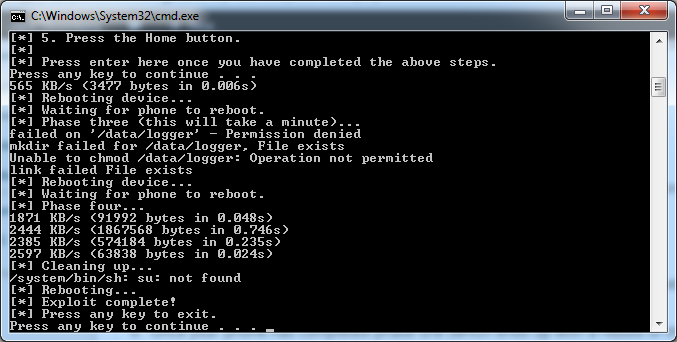
Notes: I received some permission errors the first time I ran through this (as shown in the picture above). I ended up rebooting the phone, making sure I had the latest version of SmartActions and then reran the batch file. After that, I was able to successfully get the Superuser program (which we talk about next) to run.
- Next, grab a copy of Superuser.apk (included inside the razr_blade zip file) and copy it over to the SD card.
- At this time, copy over the cyanogenmod zipped file you downloaded earlier. Throw it on the root of your SD card.
- Copy over the gApps zip file we downloaded earlier and throw that on the root of your SD card as well.
- Disconnect the phone from the computer and install the SuperUser application. Apps->Files->SD Card->Superuser.apk, Install, Open. If it asks to update, go ahead and allow it to update the binaries.
- Next, grab a copy of SafeStrap. We will use this as the bootstrap to flash your phone to Cyanogenmod as well as provide an easy way to switch between different ROMs.
- Copy the file over to your phone
- Apps->Files->SD card->Safestrap-Spyder-3.73.apk->Package installer->Install->Open
- Hit Ok when prompted for superuser privileges, and then select Agree.
- Once inside the Safestrap application, click Install Recovery.
- Once installed, you should see the Recovery State say Installed
- Reboot your phone
- When you see the Safestrap splash screen, hit the Menu button on your phone.
- Once you have hit the Menu button, there will be a brief delay where you screen goes black and then redirects you to one with a couple of big buttons. Push the button labeled Boot Options.
- Push the ROM-Slot-1 button.
- Select the size of your data store and then hit Activate.
- Note: This is the amount of space in the partition for Cyanogenmod operating system and associated apps. If you plan to only use the one slot, I would set the slot to 3GB. If you are going to be using multiple ROM slots and space was is an issue you might want to lower the allocation.
- Once it is done doing its shindig, hit the back button twice to get to the screen that shows Boot Options, Install, Backup, Restore, Mount, Wipe, Advanced, and Reboot.
- Push the Install button.
- Note, if the Install button is Red, you are going to override your stock ROM. Make sure that you have activated ROM-Slot-1 before proceeding.
- Scroll down and select the Cyanogenmod zip file you copied to the SD card earlier.
- Swipe the “Swipe to Confirm Flash” area to begin flashing your phone with Cyanogenmod.
- Once done, it should say Successful in blue text. Hit the Wipe cache/dalvik button.
- Swipe the Swipe to Wipe area (lol)
- Hit the Back button.
- Hit the Reboot System button.
- At this point, you should be greeted by the Cyanogenmod welcome screen upon boot. I opted out of the Cyangenmod account and decided to continue on.
- Next, we need to install Google Apps on the phone. To do this, reboot the phone and press the Menu button when you see the SafeStrap splash screen.
- Note: Google Apps are totally optional. If you want to roll with Stock Cyanogenmod and manually install apps via their APK files for ultra security, that is totally cool.
- Note 2: If you receive an error saying “unable to mount ‘/osh’ gapps”, simply ignore the error and boot back into Cyanogenmod. I received this error, but all the Google Apps seemed to have installed just fine.
- Hit the Install button.
- Select the gApps zip file from your SD card
- Swipe the Swipe to Confirm Flash area
- Once the apps have been successfully installed, hit the Wipe cache/dalvik button.
- Swipe the Swipe to Wipe area
- Hit the Back button
- Hit the Reboot System button
- Once you are greeted by a “Allow Google’s location service to collect anonymous location data.” prompt, you will know you have successfully installed the Google apps! 😛
That should do it! Enjoy Cyanogenmod 11! 🙂
Notes:
If you receive the following error when trying to install the Cyanogenmod 11 package:
Finding update package…
Opening update package…
Installing update…
E: Error in /sdcard-ext/cm-11-2013-12-21-NIGHTLY-spyder.zip (Status 6)
Error flashing zip ‘/sdcard-ext/cm-11-2013-12-21-NIGHTLY-spyder.zip’
Please make sure you have upgraded to the latest version of SafeStrap. SafeStrap v3.65 or higher must be installed for Cyanogenmod 11 to properly install. As a heads up, you will need to open the SafeStrap app and press the Install Recovery button to actually get SafeStrap to upgrade to the latest version. Simply upgrading the SafeStrap apk file will NOT complete the upgrade.
P.S. Here is the official Cyanogenmod info page for the Motorola Droid RAZR/RAZR MAXX (CDMA)
http://wiki.cyanogenmod.org/w/Spyder_Info