Tag Archives: vCenter

VMware vCenter Inventory Service Hang 5.1B

Today while installing VMware vCenter Inventory Service, I noticed that the installer would "hang" after I clicked the Next button on the page where you enter in the vCenter SSO service's URL (vCenter Signle Sign On Information page). First, I opened up the vminst.log file and noticed things were stopping on the following line:
VMware VirtualCenter-build-947673: 03/06/13 09:12:35 Attempting to launch ["C:\Users\ADMINI~1\AppData\Local\Temp\3\{946581B4-C0B9-4A86-9207-E64448CBA66B}\openssl.exe" x509 -noout -checkend 0 -in "C:\ProgramData\VMware\Infrastructure\Inventory Service\ssl\rui.crt" ]

Solution:
The reason I was receiving this issue was due to the way I had prestaged my SSL certificates. For whatever reason, I had missed setting up my VMware SSL directory (C:\ProgramData\VMware\SSL) and thus did not have the ca_certificates.crt and the whatever.0 hash file. Once I had placed those files inside of the C:\ProgramData\VMware\SSL directory, the installer was able to continue on.

Adding a host to vCenter - Datacenter.QueryConnectionInfo Error

Symptom: When adding a host to your vCenter Datacenter, you receive the following error:

Permission to perform this operation was denied. You do not hold privilege "System > View" on folder""

Error Stack
Call "Datacenter.QueryConnectionInfo" for object "DATACENTERNAME" on vCenter Server "myhost.mydomain" failed.
VMware - Error Datacenter.QueryConnectionInfo

Resolution: Make sure you have not enabled Lockdown mode on the host. To change the setting, use the direct console user interface (DCUI), and press F2. Login with your credentials and arrow down to Configure Lockdown Mode and hit enter. Make sure this option is disabled (unchecked) when the prompt opens. With Lockdown Mode disabled, try adding the host to vCenter.

Additionally, make sure that you can fully resolve the DNS name to the actual ESXi host.  If the DNS entry does not exist or points to an invalid ESXi host, the warning will be prompted as well.

If you still have issues, you can try restarting the Management Agents using the troubleshooting menu. Use the DCUI, press F2, login with your credentials, and arrow down to Troubleshooting Options and press Enter. Arrow down to Restart Management Agents and hit enter. This will restart some of the ESXi services on the host and should allow it to connect to vCenter.

vCenter 5.1 - vSphere Web Client - Log Browser - Unauthorized access ' faultDetail:'null' Error

Symptom: When you click on the Log Browser link from the vSphere Web Client, you receive the following error:

faultCode:Server.Processing faultString:'javax.servlet.ServletException : java.lang.Exception: https://MYVCENTER.MYDOMAIN.local:12443/vmwb/logbrowser: Unauthorized access ' faultDetail:'null'

Resolution: You need to replace the SSL certificate for the Log Browser service with a valid one. Assuming you have applied a valid certificate on your SSO instance, Web Client, and have done the necessary steps to generate the rui.pfx, rui.key, and rui.crt files, here are the steps to apply the certificate:

  1. Stop the VMware Log Browser service
  2. Navigate to C:\Program Files\VMware\Infrastructure\vSphereWebClient\logbrowser\conf via Windows Explorer
  3. Backup the rui.crt, rui.key, rui.pfx to your Desktop (or some other folder incase we have to roll-back)
  4. Replace the rui.crt, rui.key, rui.pfx files with the ones you have created.
  5. Next, we need to create a new java keystore with the chain trust for our certificate
    1. Open up an elevated command prompt
    2. Change directories to the VMware JRE
      1. cd /d C:\Program Files\VMware\Infrastructure\jre\bin
    3. Generate the new keystore (Do not change the testpassword or changeit password) (Change the Paths to point to your pfx certificate and the destination path to output the java Keystore)
      1. keytool -v -importkeystore -srckeystore C:\PATHTOYOURSSOCERTPFXFILE\rui.pfx -srcstoretype pkcs12 -srcstorepass testpassword -srcalias rui -destkeystore C:\OUTPUTPATHYOUKNOWMAYBEYOURDESKTOP\rui.jks -deststoretype JKS -deststorepass changeit -destkeypass changeit
    4. Copy the C:\OUTPUTPATHYOUKNOWMAYBEYOURDESKTOP\rui.jks to:
      1.  C:\Program Files\VMware\Infrastructure\SSOServer\Security\
    5. Login to your vSphere Web Client with the admin@System-domain account
    6. Navigate to Administration > Sign-On and Discovery > Configuration
    7. Click on the STS Certificate tab and the click Edit
    8. Select the rui.jks file from C:\Program Files\VMware\Infrastructure\SSOServer\Security\
    9. When prompted for a keystore password enter changeit
    10. Click on the rui line to highlight it, then click OK
    11. Enter changeit again for the password
    12. Acknowledge the dialog box that says you need to restart the server in order for the changes to take effect.
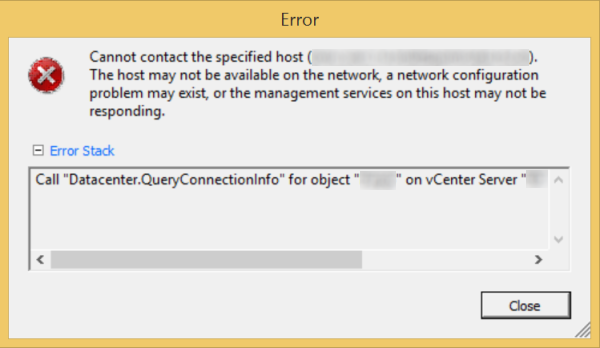
      1. Note, if you receive the following error below, that means you have not fully established a certificate trust.  If you have an intermediate certificate, you will need to put all of those certificates inside of your pfx file (see my notes at the end).
        1. The last operation failed for the entity with the following error message.An error ocurred while updating server configuration

    13. Reboot your server
  6. Log back into your vSphere Web Client
  7.  Click on the Log Browser link and verify the error has been resolved

----Notes for people with tiered PKI environments----
If you have intermediate certificates, when you generate the pfx file you HAVE to import the entire chain into the pfx, otherwise the certificate will not be imported when using the vSphere Web Client.  To include the chain in your pfx file, use the following command:

openssl.exe pkcs12 -export -in C:\PATHTOMYSSOCERT\rui.crt -inkey C:\PATHTOMYSSOPRIVATEKEY\rui.key -name "rui" -chain -CAfile C:\PATHTOCACHAIN\certs.pem -passout pass:testpassword -out C:\PATHTOOUTPUTPFXFILE\rui.pfx

Notice the certs.pem file I have created.  This includes the public keys from each intermediate cert, and then followed by the root certificate.  I.e. Your file will look something like this:

-----BEGIN CERTIFICATE-----
INTERMEDIATECERTIFICATEBASE64STUFFHERE.crt
-----END CERTIFICATE-----
-----BEGIN CERTIFICATE-----
ROOTCERTIFICATEBASE64STUFFHERE.crt
-----END CERTIFICATE-----

Where the first BEGIN CERTIFICATE would be your intermediate certificate, and the second certificate your root certificate.  If you have multiple intermediate certificates, always put them before the root.  The root certificate should be the last in the pem file.

The official VMware KB article on how to do this can be found here (note, it does not cover the pfx file creation for tiered PKI environments): http://kb.vmware.com/selfservice/microsites/search.do?language=en_US&cmd=displayKC&externalId=2037927

VMware vCenter 5.1 - Preappend domain name

After upgrading from vCenter 5.0 to 5.1 (and installing the new Single-sign On service), you may have noticed that you now have to use the DOMAIN\Username format when logging into your vCenter instance. Personally, I find this very agrevating; luckily, there is an easy way to have vCenter just figure out what domain you are on.

In order to get this job done, this guide assumes you have the vCenter Web Client installed (I don't believe this can be done from the vSphere Client for Windows -- if there is a way, please leave a comment below with the instructions, so I can add them here).

  1. Navigate to your vCenter Web Client
  2. Login using your admin@System-Domain account
  3. On the left side, click on Administration
  4. Underneath Sign-On and Discovery, click on Configuration
  5. Click on the Add Identity button underneath the identity sources tab (it looks like a green + sign).
  6. Enter in your domain info if it isn't already there, test the connection, and click OK.
  7. Select your domain from the Identity Sources list and click on the Add to default domains button (Looks like a globe with an arrow on it)
  8. Click the Save button in the Default Domains list below the Identity Sources list.

That should do it.  Try logging in without the domain appended and it should be good to go 🙂

How do I install vCenter 5.1

Check out Derek Seaman's multi-step blog post. It is the most up-to-date guide with tons of information to get you going. It also refer's to many of the installation issues that were found in previous versions of vCenter. As I write this, the blog has already begun making notes for 5.1a instead of 5.1 GA. At this time, 5.1B is out (which I would recommend you install), but you should be able to get through the installation just fine.

http://derek858.blogspot.com/2012/09/vmware-vcenter-51-installation-part-1.html

And as a reference, I would recommend looking over the release notes for 5.1  There is a plethora of info you may want to know as a heads up, prior to the installation.

https://www.vmware.com/support/vsphere5/doc/vsphere-vcenter-server-510b-release-notes.html

https://www.vmware.com/support/vsphere5/doc/vsphere-vcenter-server-510a-release-notes.html


Good luck!

VMware A general system error occurred: Timed waiting for vpxa to start

If you receive the error below while adding a host to your vCenter server:
A general system error occurred:Timed waiting for vpxa to start

All you need to do is update your vCenter instance. For example, if you are running vCenter Server 5.0, you cannot add an ESXi v5.1 host to your vCenter instance.

Preparing Server 2008 R2 for vCenter Server 5

If you are installing VMware vCenter5 and you notice that their are no connectors for connecting to a remote msSQL database, here is how to add a new ODBC connector to get things up and running.

  1. 1. Install .NET framework tools 3.5 (Can be done by adding a Feature and in the Server Manager of Server 2008 R2)
  2. Download and install the Microsoft SQL Server Native Client for Server 2008
    1. http://go.microsoft.com/fwlink/?LinkId=123718&clcid=0x409
  3. Create a new ODBC connection
    1. To do this, try installing the ODBC connection through the control panel by going to: Control Panel ->Administrative Tools -> Data Sources (ODBC)
      1. NOTE: If you notice later on that vServer doesn't find an ODBC source, try opening the configuration manager with an elevated command prompt and type in
        1. c:\Windows\SysWOW64\odbcad32.exe
  4. Click on the System DSN tab
  5. Click Add
  6. Click on SQL Server Native Client 10.0
  7. Click Finish
  8. Type in the name, description, and server to connect to.
  9. Click Next
  10. Fill out how you want to authenticate
  11. Click Next
  12. Change the default database to whateveryourdatabaseiscalled
  13. Click Next
  14. Click Next
  15. Finish
  16. Test Data Source...

--You should see "TESTS COMPLETED SUCCESSFULLY!"