Tag Archives: Linux

How to build a LEMP stack

Growing up it was always common to spin up a "LAMP" box to host a website.  The typical setup was:
Linux
Apache
MySQL
PHP

Over the past few years, this model has slightly changed due to new open source technologies bringing new ideas to solve performance and licensing issues at massive scale.  In this tutorial, we are going to look at setting up a LEMP box on Debian Stretch (9.1).
Linux
nginx [engine x]
MariaDB
PHP

Please note, MariaDB could easily be swapped out with MySQL in this tutorial, however many have opted to jump over to MariaDB as an open source alternative (actually designed by the original developers of MySQL) over fear Oracle may close source MySQL.

Installing Linux

This tutorial assumes you already have either a copy of Ubuntu 14+ or Debian 7+.  This probably works on earlier versions as well, but I haven't tested them.  On a side note, I typically don't install Linux builds with an interactive desktop environment, so grab yourself a copy of Putty and ssh in or open up Terminal if you have interactive access to the Desktop Environment.  Before continuing, go ahead and update apt-get repos and upgrade any packages currently installed:

apt-get update && apt-get upgrade

Installing nginx

Grab a copy of nginx

apt-get install nginx

Installing MariaDB

Grab a copy of MariaDB

apt-get install mariadb-server

Installing PHP

In this case, I want to roll with PHP7.  You can specify php5 or php7 depending on your application, but PHP7 has some great performance enhancements, so for new apps, I'd leverage it.  The biggest thing here is to make sure you use the FastCGI Process Manager package.  If you specify just php or php7, package manager will pull down apache2 as a dependency.  That is not what we want in our LEMP stack.

apt-get install php7.3-fpm

Once installed, fire up your favorite text editor (it's ok if it's vi :)) and edit the default site for nginx

vi /etc/nginx/sites-enabled/default

Search for the comment # Add index.php to the list if you are using PHP and add index.php to the line below it.  For example:

index index.html index.htm index.php index.nginx-debian.html;

Next, find the comment # pass PHP scripts to FastCGI server and change the block of code to the following to tell nginx to process .PHP files with FastCGI-PHP:

# pass PHP scripts to FastCGI server
#
location ~ \.php$ {
include snippets/fastcgi-php.conf;
#
# # With php-fpm (or other unix sockets):
fastcgi_pass unix:/var/run/php/php7.3-fpm.sock;
# # With php-cgi (or other tcp sockets):
# fastcgi_pass 127.0.0.1:9000;
}

Save the file.  If using vi, you can do that by executing :wq

Next, reload the nginx service to pickup the new changes to our configuration:

service nginx reload

Test

At this point, we can create a php file to validate things are working well. Go ahead and create a new file /var/www/html/info.php and add the following line:

<?php
phpinfo();

If you see a page listing the PHP version and the corresponding environment configuration, congratulations, you have finished setting up your new LEMP stack! 🙂

[Tutorial] How-to install VMTools on CentOS 6

Here is a quick tutorial on how to get VMware Tools up and running on a CentOS 6 Linux machine.  Although the instructions are shown with the GUI, we'll use terminal so the guide works with both gui and non-gui based installs.

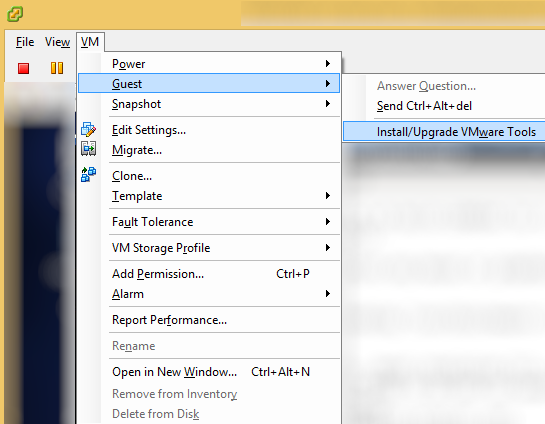
  1. Mount the VM tools installer to your VM
    Install-Upgrade VMware Tools
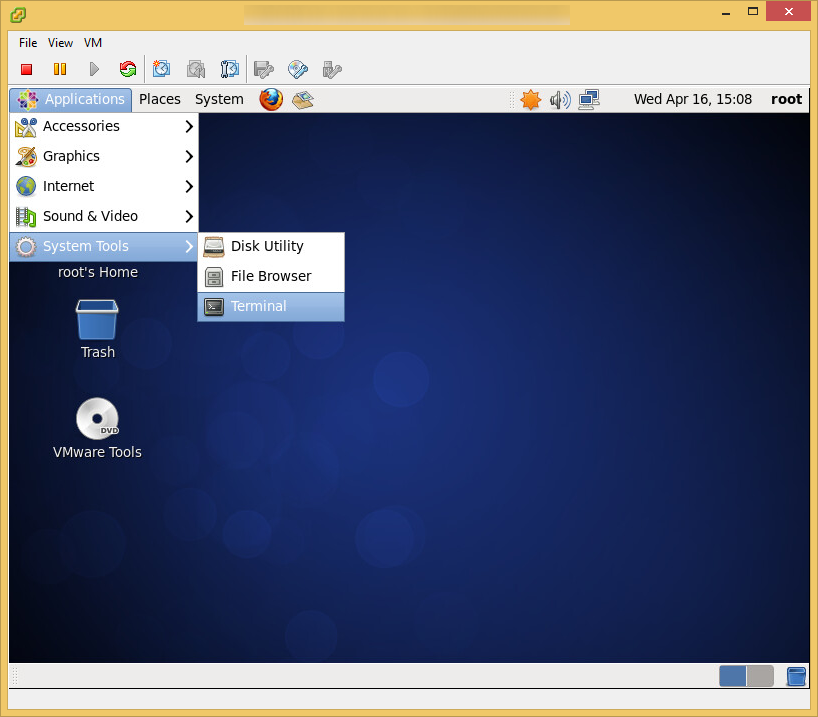
  2. Open up Terminal
    CentOS6 - Terminal
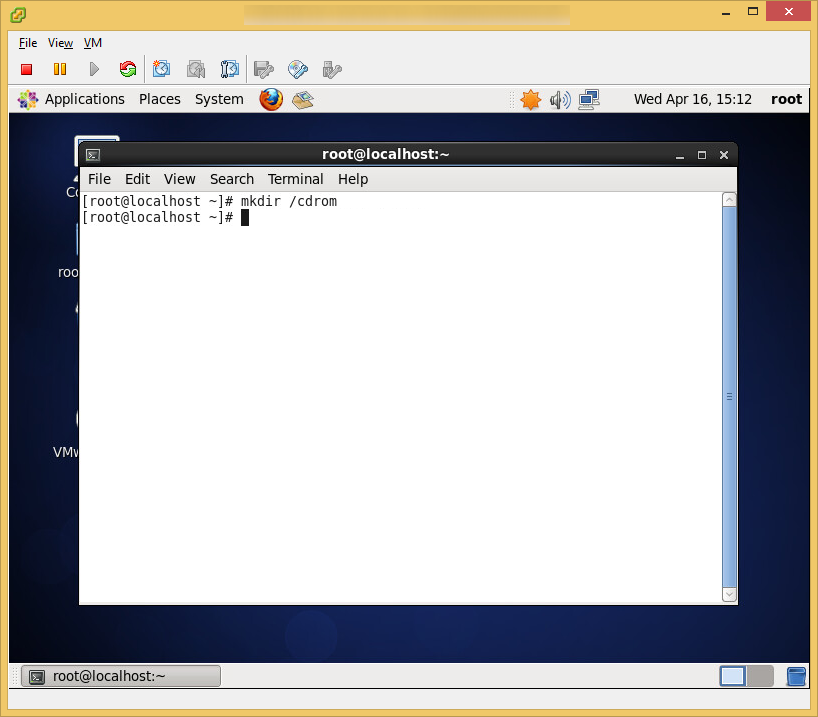
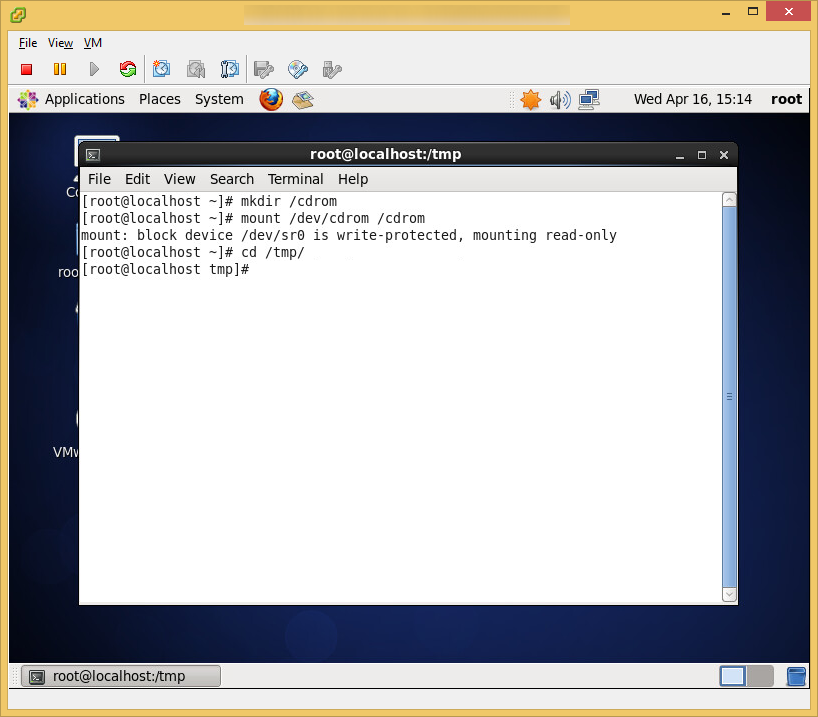
  3. Execute the following command (this will create a mount point for our CD drive)
    1. mkdir /cdrom
      CentOS6 - VMware Tools - New Mount Point
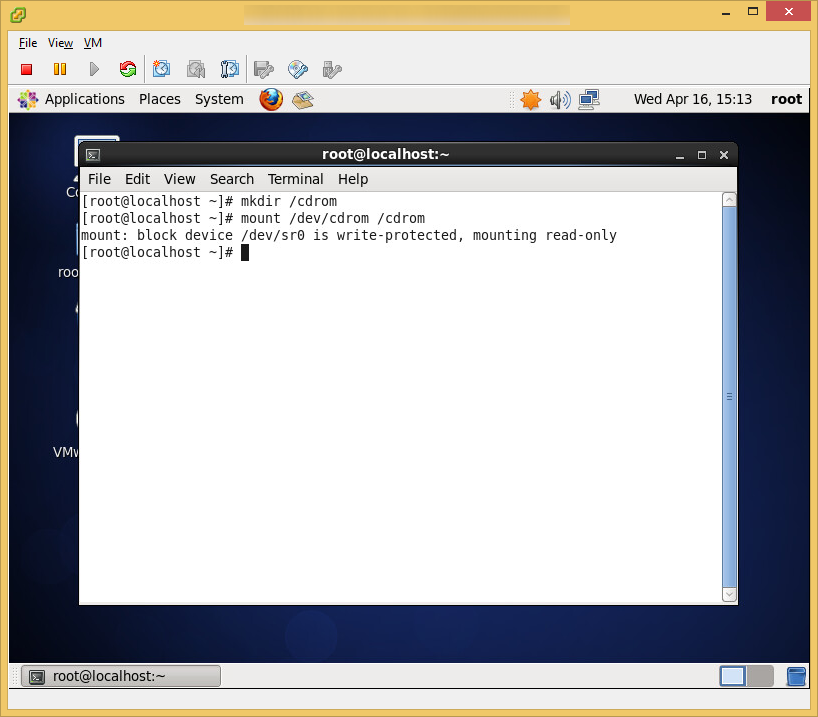
  4. Execute the following command (this will map the CD drive to our cdrom mount point)
    1. mount /dev/cdrom /cdrom
      CentOS6 - VMware Tools - Map Mount Point cdrom
  5. Execute the following command to move to your temporary files folder
    1. cd /tmp
      CentOS6 - VMware Tools - Temporary Files
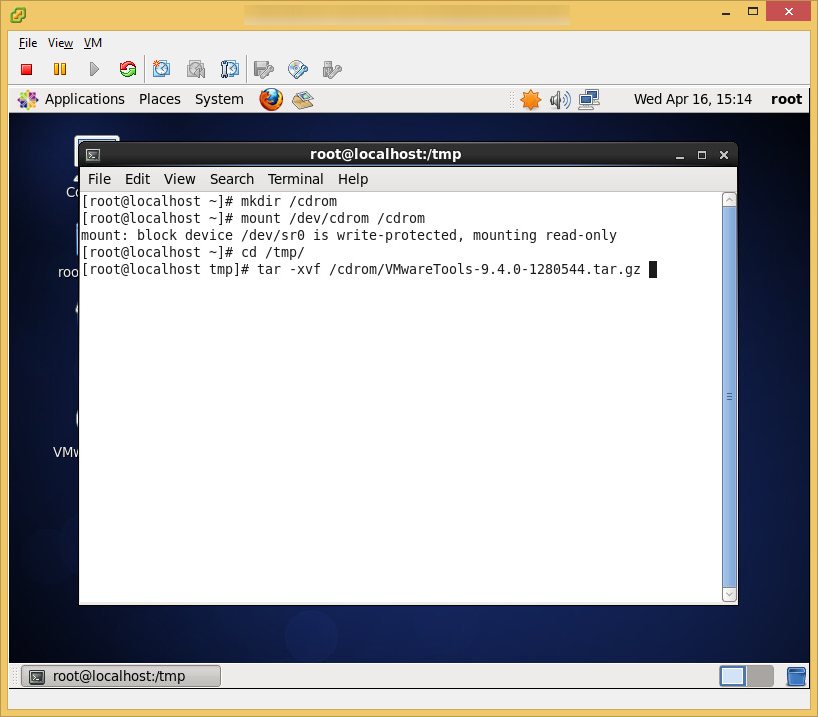
  6. Execute the following command to extract the VMware Tools tarball
    1. tar -xvf /cdrom/VMwareTools (tab to autofill the rest of the package)
      CentOS6 - VMware Tools - Extract VMware Tools
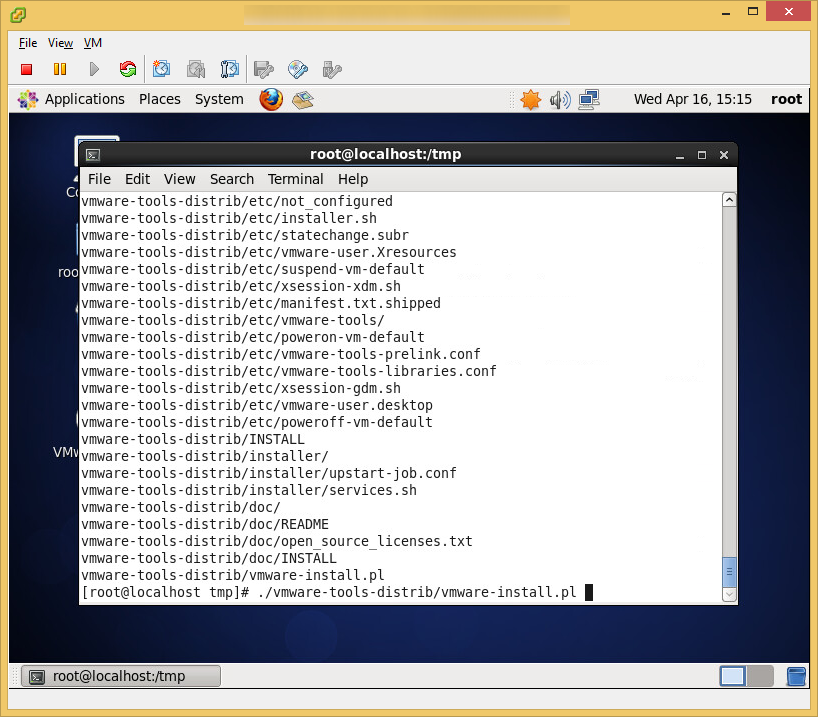
  7. Execute the following command to run the VMware Tools installer
    1.  ./vmware-tools-distrib/vmware-install.pl
      CentOS6 - VMware Tools - Install VMware Tools
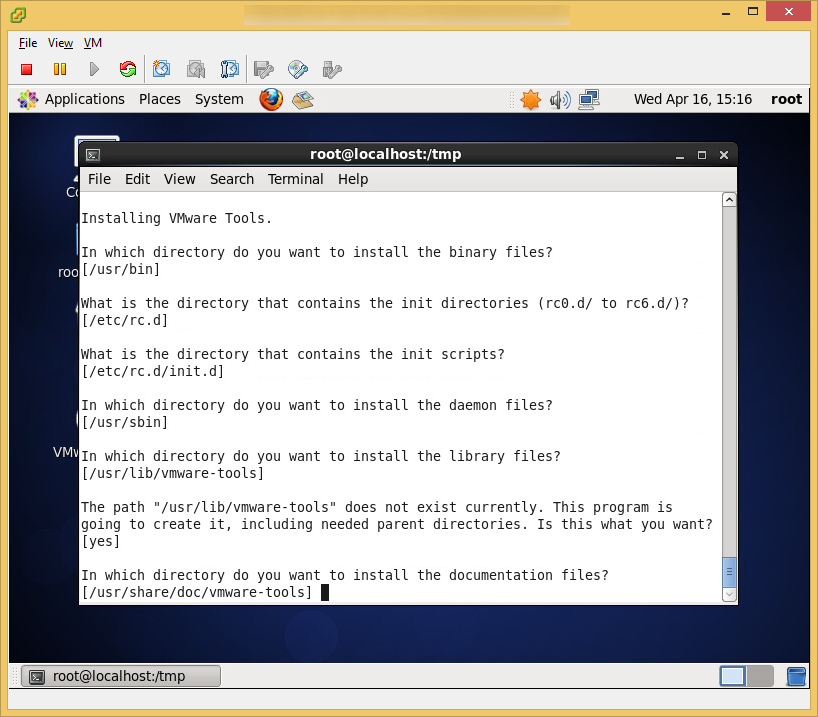
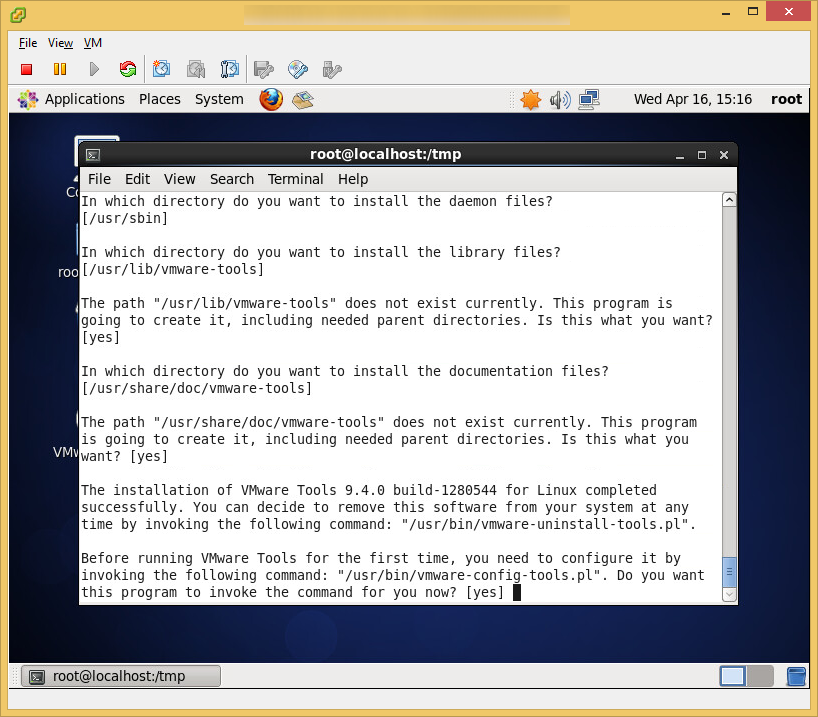
  8. Press Enter/Return through each of the questions, using their defaults
    CentOS6 - VMware Tools - Install Default Values
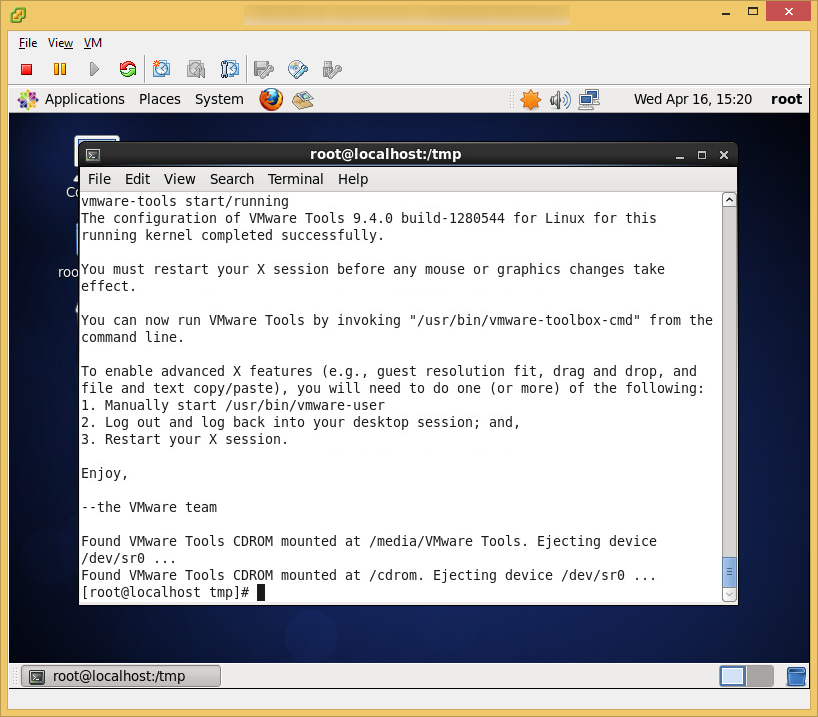
    CentOS6 - VMware Tools - Install Default Values Continued
    CentOS6 - VMware Tools - Install Default Values Continued Continued
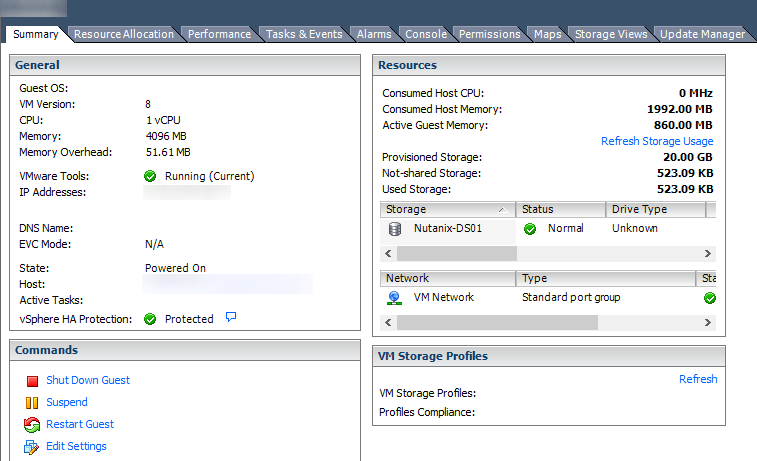
  9. Verify VMtools is running by looking at the client status in vSphere
    CentOS6 - VMware Tools - vSphere Status

sh: /usr/bin/vmware-config-tools.pl: Permission denied VMware Tools Linux

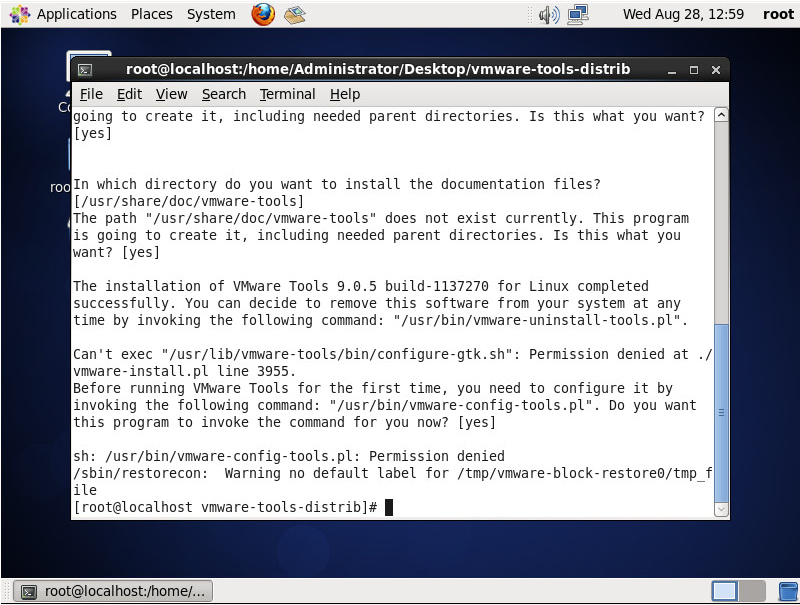
Symptom: You see the following permissions error when trying to install VMware Tools on a Linux OS regardless if you are running as su or root:

[root@localhost vmware-tools-distrib]# ./vmware-install.pl
Creating a new VMware Tools installer database using the tar4 format.

Installing VMware Tools.

In which directory do you want to install the binary files?
[/usr/bin]

What is the directory that contains the init directories (rc0.d/ to rc6.d/)?
[/etc/rc.d]

What is the directory that contains the init scripts?
[/etc/rc.d/init.d]

In which directory do you want to install the daemon files?
[/usr/sbin]

In which directory do you want to install the library files?
[/usr/lib/vmware-tools]

The path "/usr/lib/vmware-tools" does not exist currently. This program is
going to create it, including needed parent directories. Is this what you want?
[yes]

In which directory do you want to install the documentation files?
[/usr/share/doc/vmware-tools]
The path "/usr/share/doc/vmware-tools" does not exist currently. This program
is going to create it, including needed parent directories. Is this what you
want? [yes]

The installation of VMware Tools 9.0.5 build-1137270 for Linux completed
successfully. You can decide to remove this software from your system at any
time by invoking the following command: "/usr/bin/vmware-uninstall-tools.pl".

Can't exec "/usr/lib/vmware-tools/bin/configure-gtk.sh": Permission denied at ./vmware-install.pl line 3955.
Before running VMware Tools for the first time, you need to configure it by
invoking the following command: "/usr/bin/vmware-config-tools.pl". Do you want
this program to invoke the command for you now? [yes]

sh: /usr/bin/vmware-config-tools.pl: Permission denied
/sbin/restorecon:  Warning no default label for /tmp/vmware-block-restore0/tmp_file
[root@localhost vmware-tools-distrib]#

CentOS VMware Tools Permission Error

Solution: You need to extract the files from the tarball when installing the guest tools via the tar command rather than the build in Archive Manager installed with the OS.

  1. Mount the VMware Tools to the VM
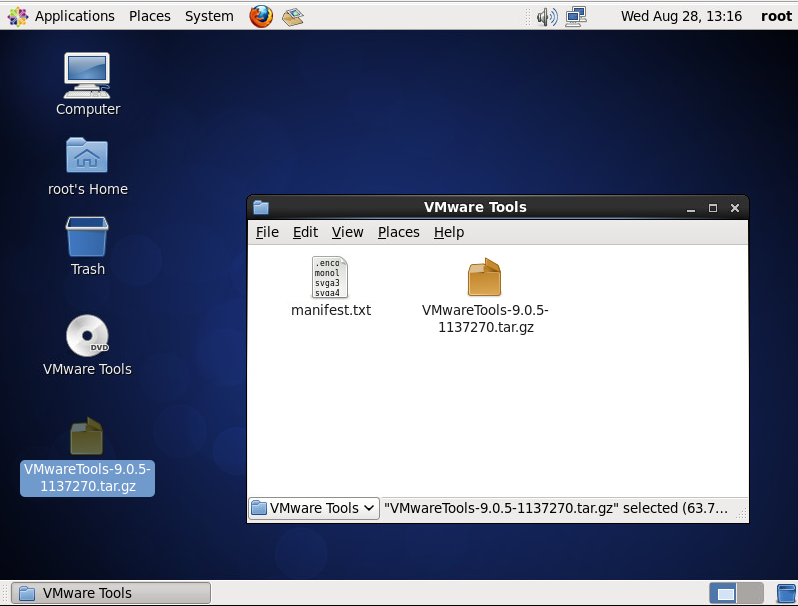
  2. Copy the VMware Tools tarball to the desktop of the Linux OS
    Copy VMwareTools
  3. Execute the following command to extract the tar's contents
    1. tar -zxvf VMwareTools-9.0.5-1137270.tar.gz
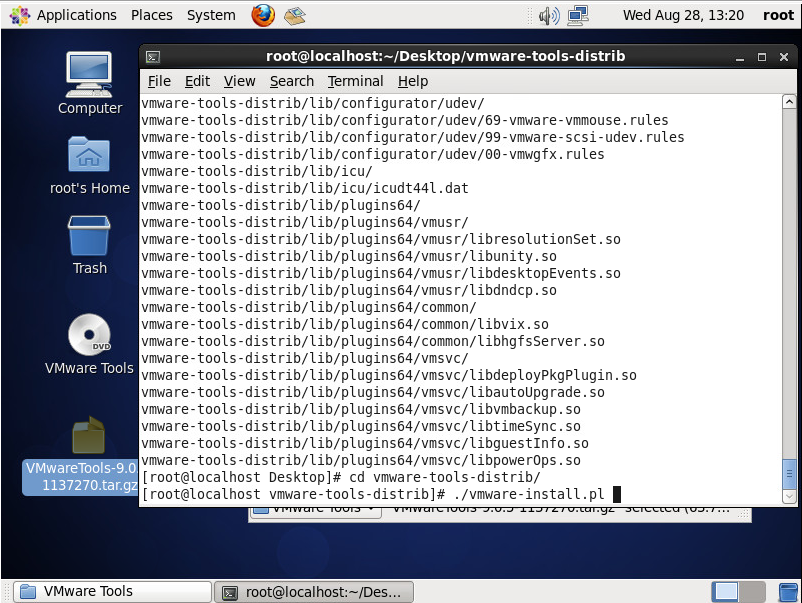
  4. Change directories to the vmware-tools-distrib that was just extracted from the tarball and execute the following commands to begin the installation
    1. cd vmware-tools-distrib
    2. ./vmware-install.pl
      vmware-install.pl

How to install Python via command line on Linux

At the time of writing this, Python 2.7.3 is the latest build of the 2.7 builds. You can simply replace the wget url with the Python 3.x build you wish to download if you want to use those releases instead.

  1. Download the tarball
    1. wget http://www.python.org/ftp/python/2.7.3/Python-2.7.3.tgz
  2. Extract the contents
    1. tar -xzf Python-2.7.3.tgz
  3. Navigate to the extracted folder
    1. cd Python-2.7.3
  4. Configure/Install Python
    1. ./configure
    2. make
    3. sudo make install

Install Self-Signed CA Certificates on Ubuntu 12.04 via Command Line

Copy your .crt files to /usr/share/ca-certificates

Run: sudo update-ca-certificates

Hit yes to trust the certificates in the wizard (text based for CLI), and away you go! 🙂

How to enable and disable apache2 modules in Linux

a2enmod modulename - this will enable a module

a2dismod modulename - this will disable a module


Once you have made the changes, execute the service apache2 restart command and away you go!

Show hard drive size in Linux via command line

If you have ever wanted to view how big your hard drive/partition sizes are in Linux, but only have access to the command line interface, here is the command to do it:
df
df -H (This will show the partition sizes in MB, GB, TB, etc.)
fdisk -l | grep Disk (This will show the physical disks and their corresponding sizes)

Setting Static IP in Linux

To setup a static IP in ubuntu, edit your networking settings file.

Here is an example of how to do it:

Open /etc/network/interfaces:

Use these configurations:


auto lo
iface lo inet loopback

auto eth0
iface eth0 inet static
address 192.168.0.10
network 192.168.0.0
netmask 255.255.255.0
broadcast 192.168.0.255
gateway 192.168.0.1

DHCP Address Configuration:


auto lo
iface lo inet loopback

auto eth0
iface eth0 inet dhcp

Then restart the service: /etc/init.d/networking restart (Make sure you are running with admin privileges when restarting 🙂 )

Errors From Package Manager in Ubuntu 11.10

Getting the following message from Package Manager in Ubuntu 11.10?

Requires installation of untrusted packages
The action would require the installation of packages from not authenticated sources.

And when you click on the Details dropdown it shows all of the packages that need to downloaded?

Run the following commands:

cd /var/lib/apt
sudo mv lists lists.old
sudo mkdir -p lists/partial
sudo apt-get update

These commands will save a backup of the old lists and then create a new lists folder.

More information can be found here.