Tag Archives: system center 2012 r2 configuration manager

System Center 2012 R2 Configuration Manager - CcmSetup failed with error code 0x87d00280

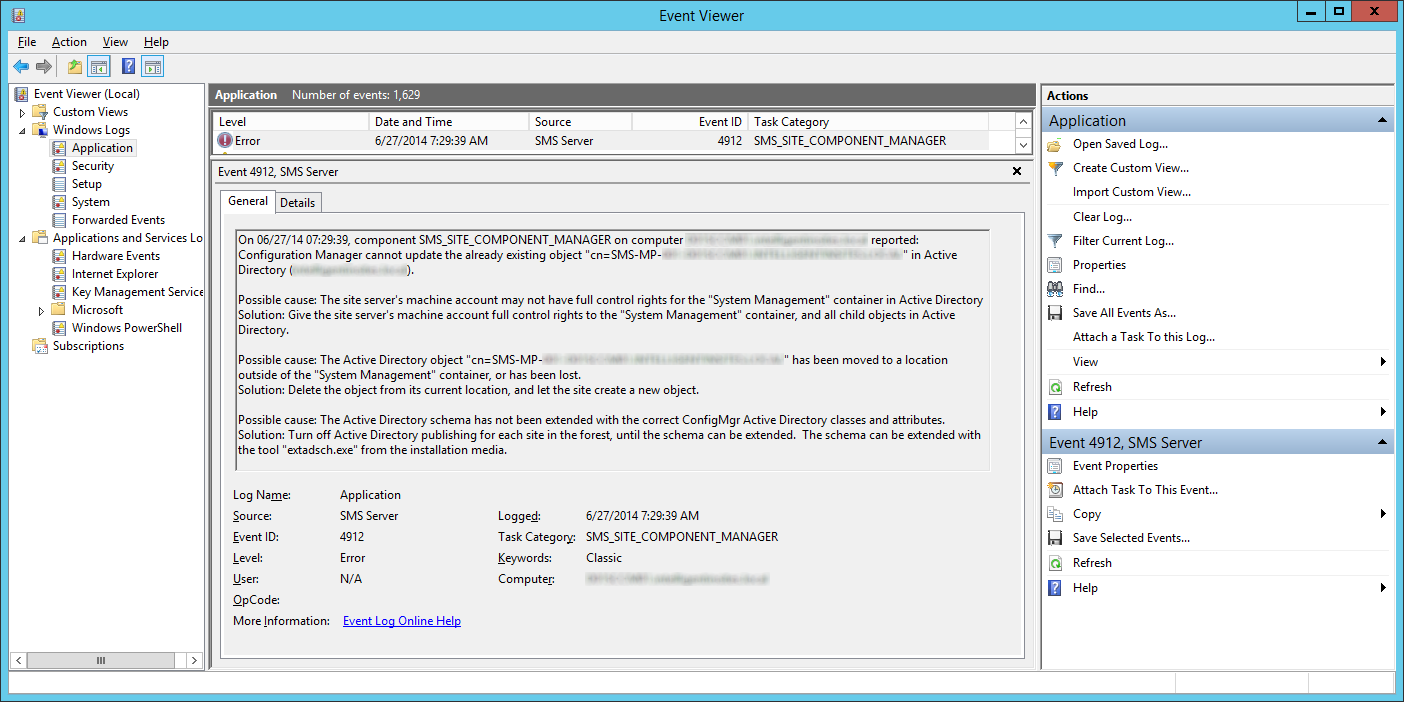
Symptom: When trying to install the System Center 2012 R2 Configuration Manager client manually, the client seems to never finish the install.  When opening the install log in C:\Windows\ccmsetup\Logs\ccmsetup.log, you will notice the following behavior, pointing mostly to client HTTPS/certificate errors.

<![LOG[==========[ ccmsetup started in process 2576 ]==========]LOG]!><time="16:00:01.707+300" date="09-19-2014" component="ccmsetup" context="" type="1" thread="2624" file="ccmsetup.cpp:9437">
<![LOG[Running on platform X64]LOG]!><time="16:00:01.817+300" date="09-19-2014" component="ccmsetup" context="" type="1" thread="2624" file="util.cpp:1837">
<![LOG[Launch from folder \\SCCM01\Manual Client Install\]LOG]!><time="16:00:01.817+300" date="09-19-2014" component="ccmsetup" context="" type="1" thread="2624" file="ccmsetup.cpp:721">
<![LOG[CcmSetup version: 5.0.7958.1000]LOG]!><time="16:00:01.817+300" date="09-19-2014" component="ccmsetup" context="" type="1" thread="2624" file="ccmsetup.cpp:727">
<![LOG[Running on 'Microsoft Windows 7 Professional ' (6.1.7601). Service Pack (1.0). SuiteMask = 272. Product Type = 18]LOG]!><time="16:00:01.895+300" date="09-19-2014" component="ccmsetup" context="" type="1" thread="2624" file="util.cpp:1919">
<![LOG[Ccmsetup command line: "\\SCCM01\Manual Client Install\ccmsetup.exe" ]LOG]!><time="16:00:01.895+300" date="09-19-2014" component="ccmsetup" context="" type="1" thread="2624" file="ccmsetup.cpp:3590">
<![LOG[Local Machine is joined to an AD domain]LOG]!><time="16:00:01.895+300" date="09-19-2014" component="ccmsetup" context="" type="0" thread="2624" file="lsad.cpp:714">
<![LOG[Current AD forest name is mydomain.local, domain name is mydomain.local]LOG]!><time="16:00:02.035+300" date="09-19-2014" component="ccmsetup" context="" type="1" thread="2624" file="lsad.cpp:842">
<![LOG[Domain joined client is in Intranet]LOG]!><time="16:00:02.035+300" date="09-19-2014" component="ccmsetup" context="" type="1" thread="2624" file="lsad.cpp:1047">
<![LOG[DhcpGetOriginalSubnetMask entry point is supported.]LOG]!><time="16:00:02.035+300" date="09-19-2014" component="ccmsetup" context="" type="0" thread="2624" file="ccmiputil.cpp:117">
<![LOG[Begin checking Alternate Network Configuration]LOG]!><time="16:00:02.035+300" date="09-19-2014" component="ccmsetup" context="" type="0" thread="2624" file="ccmiputil.cpp:1095">
<![LOG[Finished checking Alternate Network Configuration]LOG]!><time="16:00:02.035+300" date="09-19-2014" component="ccmsetup" context="" type="0" thread="2624" file="ccmiputil.cpp:1172">
<![LOG[Adapter {39CB0535-CE77-4ED9-9807-2DB558378C86} is DHCP enabled. Checking quarantine status.]LOG]!><time="16:00:02.051+300" date="09-19-2014" component="ccmsetup" context="" type="0" thread="2624" file="ccmiputil.cpp:436">
<![LOG[Current AD site of machine is SomewhereOverTheRainbow]LOG]!><time="16:00:02.066+300" date="09-19-2014" component="ccmsetup" context="" type="1" thread="2624" file="lsad.cpp:770">
<![LOG[Attempting to query AD for assigned site code]LOG]!><time="16:00:02.066+300" date="09-19-2014" component="ccmsetup" context="" type="0" thread="2624" file="lsad.cpp:2071">
<![LOG[Performing AD query: '(&(ObjectCategory=MSSMSRoamingBoundaryRange)(|(&(MSSMSRangedIPLow<=3232279113)(MSSMSRangedIPHigh>=3232279113))))']LOG]!><time="16:00:02.456+300" date="09-19-2014" component="ccmsetup" context="" type="0" thread="2624" file="lsad.cpp:656">
<![LOG[Performing AD query: '(&(ObjectCategory=mSSMSSite)(|(mSSMSRoamingBoundaries=192.168.1.0)(mSSMSRoamingBoundaries=SomewhereOverTheRainbox)(mSSMSSiteCode=001)))']LOG]!><time="16:00:02.924+300" date="09-19-2014" component="ccmsetup" context="" type="0" thread="2624" file="lsad.cpp:656">
<![LOG[LSIsSiteCompatible : Verifying Site Compatibility for <001>]LOG]!><time="16:00:02.924+300" date="09-19-2014" component="ccmsetup" context="" type="1" thread="2624" file="lsad.cpp:5419">
<![LOG[Current AD forest name is mydomain.local, domain name is mydomain.local]LOG]!><time="16:00:02.924+300" date="09-19-2014" component="ccmsetup" context="" type="1" thread="2624" file="lsad.cpp:842">
<![LOG[Domain joined client is in Intranet]LOG]!><time="16:00:02.924+300" date="09-19-2014" component="ccmsetup" context="" type="1" thread="2624" file="lsad.cpp:1047">
<![LOG[LSGetSiteVersionFromAD : Attempting to query AD for MPs for site '001']LOG]!><time="16:00:02.924+300" date="09-19-2014" component="ccmsetup" context="" type="0" thread="2624" file="lsad.cpp:5248">
<![LOG[Performing AD query: '(&(ObjectCategory=mSSMSManagementPoint)(mSSMSSiteCode=001))']LOG]!><time="16:00:02.924+300" date="09-19-2014" component="ccmsetup" context="" type="0" thread="2624" file="lsad.cpp:656">
<![LOG[LSGetSiteVersionFromAD : Successfully retrieved version '5.00.7958.1000' for site '001']LOG]!><time="16:00:02.940+300" date="09-19-2014" component="ccmsetup" context="" type="1" thread="2624" file="lsad.cpp:5317">
<![LOG[LSIsSiteCompatible : Site Version = '5.00.7958.1000' Site Capabilities = <Capabilities SchemaVersion="1.0"><Property Name="SSL" Version="1"/><Property Name="SSLState" Value="63"/></Capabilities>]LOG]!><time="16:00:02.940+300" date="09-19-2014" component="ccmsetup" context="" type="0" thread="2624" file="lsad.cpp:5474">
<![LOG[LSIsSiteVersionCompatible : Site Version '5.00.7958.1000' is compatible.]LOG]!><time="16:00:02.940+300" date="09-19-2014" component="ccmsetup" context="" type="1" thread="2624" file="lsad.cpp:5385">
<![LOG[LSIsSiteCompatible : Site <001> Version '5.00.7958.1000' is compatible.]LOG]!><time="16:00:02.940+300" date="09-19-2014" component="ccmsetup" context="" type="1" thread="2624" file="lsad.cpp:5486">
<![LOG[LSGetAssignedSiteFromAD : Trying to Assign to the Site <001>]LOG]!><time="16:00:02.940+300" date="09-19-2014" component="ccmsetup" context="" type="1" thread="2624" file="lsad.cpp:2192">
<![LOG[Got site code '001' from AD.]LOG]!><time="16:00:02.940+300" date="09-19-2014" component="ccmsetup" context="" type="1" thread="2624" file="ccmsetup.cpp:266">
<![LOG[Performing AD query: '(&(ObjectCategory=mSSMSManagementPoint)(mSSMSDefaultMP=TRUE)(mSSMSSiteCode=001))']LOG]!><time="16:00:02.940+300" date="09-19-2014" component="ccmsetup" context="" type="0" thread="2624" file="lsad.cpp:656">
<![LOG[OperationalXml '<ClientOperationalSettings><Version>5.00.7958.1000</Version><SecurityConfiguration><SecurityModeMask>63</SecurityModeMask><SecurityModeMaskEx>63</SecurityModeMaskEx><HTTPPort>80</HTTPPort><HTTPSPort>443</HTTPSPort><CertificateStoreName></CertificateStoreName><CertificateIssuers>CN=My Domain Root CA; OU=IT; O=My Domain; C=US</CertificateIssuers><CertificateSelectionCriteria></CertificateSelectionCriteria><CertificateSelectFirstFlag>1</CertificateSelectFirstFlag><SiteSigningCert>CertificateInfoRemoved</SiteSigningCert></SecurityConfiguration><RootSiteCode>001</RootSiteCode><CCM> <CommandLine>SMSSITECODE=001</CommandLine> </CCM><FSP> <FSPServer></FSPServer> </FSP><Capabilities SchemaVersion ="1.0"><Property Name="SSL" Version="1" /><Property Name="SSLState" Value="63" /></Capabilities><Domain Value="mydomain.local" /><Forest Value="mydomain.local" /></ClientOperationalSettings>']LOG]!><time="16:00:02.940+300" date="09-19-2014" component="ccmsetup" context="" type="0" thread="2624" file="lsadcache.cpp:236">
<![LOG[Unable to open Registry key Software\Microsoft\CCM. Return Code [80070002]. Client HTTPS state is Unknown.]LOG]!><time="16:00:02.940+300" date="09-19-2014" component="ccmsetup" context="" type="1" thread="2624" file="ccmutillib.cpp:373">
<![LOG[The MP name retrieved is 'SCCM01.mydomain.local' with version '7958' and capabilities '<Capabilities SchemaVersion="1.0"><Property Name="SSL" Version="1"/><Property Name="SSLState" Value="63"/></Capabilities>']LOG]!><time="16:00:02.940+300" date="09-19-2014" component="ccmsetup" context="" type="1" thread="2624" file="lsadcache.cpp:334">
<![LOG[MP 'SCCM01.mydomain.local' is compatible]LOG]!><time="16:00:02.940+300" date="09-19-2014" component="ccmsetup" context="" type="1" thread="2624" file="lsadcache.cpp:339">
<![LOG[Retrieved 1 MP records from AD for site '001']LOG]!><time="16:00:02.940+300" date="09-19-2014" component="ccmsetup" context="" type="0" thread="2624" file="lsadcache.cpp:287">
<![LOG[FromAD: command line = SMSSITECODE=001]LOG]!><time="16:00:02.940+300" date="09-19-2014" component="ccmsetup" context="" type="0" thread="2624" file="ccmsetup.cpp:288">
<![LOG[Current AD forest name is mydomain.local, domain name is mydomain.local]LOG]!><time="16:00:02.940+300" date="09-19-2014" component="ccmsetup" context="" type="1" thread="2624" file="lsad.cpp:842">
<![LOG[Domain joined client is in Intranet]LOG]!><time="16:00:02.940+300" date="09-19-2014" component="ccmsetup" context="" type="1" thread="2624" file="lsad.cpp:1047">
<![LOG[CMPInfoFromADCache requests are throttled for 01:07:09]LOG]!><time="16:00:02.940+300" date="09-19-2014" component="ccmsetup" context="" type="0" thread="2624" file="lsadcache.cpp:173">
<![LOG[Found MP https://SCCM01.mydomain.local from AD]LOG]!><time="16:00:02.940+300" date="09-19-2014" component="ccmsetup" context="" type="1" thread="2624" file="ccmsetup.cpp:6197">
<![LOG[SslState value: 255]LOG]!><time="16:00:02.940+300" date="09-19-2014" component="ccmsetup" context="" type="0" thread="2624" file="ccmsetup.cpp:4425">
<![LOG[Ccmsetup was run without any user parameters specified. Running without registering ccmsetup as a service.]LOG]!><time="16:00:02.940+300" date="09-19-2014" component="ccmsetup" context="" type="1" thread="2624" file="ccmsetup.cpp:4490">
<![LOG[Detected sitecode '001' from AD.]LOG]!><time="16:00:02.940+300" date="09-19-2014" component="ccmsetup" context="" type="1" thread="2624" file="ccmsetup.cpp:4500">
<![LOG[CCMHTTPPORT: 80]LOG]!><time="16:00:02.940+300" date="09-19-2014" component="ccmsetup" context="" type="1" thread="2624" file="ccmsetup.cpp:8617">
<![LOG[CCMHTTPSPORT: 443]LOG]!><time="16:00:02.940+300" date="09-19-2014" component="ccmsetup" context="" type="1" thread="2624" file="ccmsetup.cpp:8632">
<![LOG[CCMHTTPSSTATE: 255]LOG]!><time="16:00:02.940+300" date="09-19-2014" component="ccmsetup" context="" type="1" thread="2624" file="ccmsetup.cpp:8650">
<![LOG[CCMHTTPSCERTNAME: ]LOG]!><time="16:00:02.940+300" date="09-19-2014" component="ccmsetup" context="" type="1" thread="2624" file="ccmsetup.cpp:8668">
<![LOG[FSP: ]LOG]!><time="16:00:02.940+300" date="09-19-2014" component="ccmsetup" context="" type="1" thread="2624" file="ccmsetup.cpp:8720">
<![LOG[CCMCERTISSUERS: CN=My Domain Root CA; OU=IT; O=My Domain; C=US]LOG]!><time="16:00:02.940+300" date="09-19-2014" component="ccmsetup" context="" type="1" thread="2624" file="ccmsetup.cpp:8746">
<![LOG[CCMFIRSTCERT: 1]LOG]!><time="16:00:02.940+300" date="09-19-2014" component="ccmsetup" context="" type="1" thread="2624" file="ccmsetup.cpp:8778">
<![LOG[Config file: ]LOG]!><time="16:00:03.018+300" date="09-19-2014" component="ccmsetup" context="" type="1" thread="2624" file="ccmsetup.cpp:4539">
<![LOG[Retry time: 10 minute(s)]LOG]!><time="16:00:03.018+300" date="09-19-2014" component="ccmsetup" context="" type="1" thread="2624" file="ccmsetup.cpp:4540">
<![LOG[MSI log file: C:\Windows\ccmsetup\Logs\client.msi.log]LOG]!><time="16:00:03.018+300" date="09-19-2014" component="ccmsetup" context="" type="1" thread="2624" file="ccmsetup.cpp:4541">
<![LOG[MSI properties: SMSSITECODE="001" CCMHTTPPORT="80" CCMHTTPSPORT="443" CCMHTTPSSTATE="255" CCMCERTISSUERS="CN=My Domain Root CA; OU=IT; O=My Domain; C=US" CCMFIRSTCERT="1"]LOG]!><time="16:00:03.018+300" date="09-19-2014" component="ccmsetup" context="" type="1" thread="2624" file="ccmsetup.cpp:4542">
<![LOG[Source List:]LOG]!><time="16:00:03.018+300" date="09-19-2014" component="ccmsetup" context="" type="1" thread="2624" file="ccmsetup.cpp:4550">
<![LOG[MPs:]LOG]!><time="16:00:03.018+300" date="09-19-2014" component="ccmsetup" context="" type="1" thread="2624" file="ccmsetup.cpp:4569">
<![LOG[ https://SCCM01.mydomain.local]LOG]!><time="16:00:03.018+300" date="09-19-2014" component="ccmsetup" context="" type="1" thread="2624" file="ccmsetup.cpp:4584">
<![LOG[No version of the client is currently detected.]LOG]!><time="16:00:03.018+300" date="09-19-2014" component="ccmsetup" context="" type="1" thread="2624" file="ccmsetup.cpp:2748">
<![LOG[Folder 'Microsoft\Configuration Manager' not found. Task does not exist.]LOG]!><time="16:00:03.018+300" date="09-19-2014" component="ccmsetup" context="" type="0" thread="2624" file="wintask.cpp:622">
<![LOG[Updated security on object C:\Windows\ccmsetup\.]LOG]!><time="16:00:03.033+300" date="09-19-2014" component="ccmsetup" context="" type="0" thread="2624" file="ccmsetup.cpp:9281">
<![LOG[A Fallback Status Point has not been specified. Message with STATEID='100' will not be sent.]LOG]!><time="16:00:03.033+300" date="09-19-2014" component="ccmsetup" context="" type="1" thread="2624" file="ccmsetup.cpp:9763">
<![LOG[Downloading file \\SCCM01\Manual Client Install\ccmsetup.exe]LOG]!><time="16:00:04.048+300" date="09-19-2014" component="ccmsetup" context="" type="1" thread="2624" file="ccmsetup.cpp:5685">
<![LOG[Downloading \\SCCM01\Manual Client Install\ccmsetup.exe to C:\Windows\ccmsetup\ccmsetup.exe]LOG]!><time="16:00:04.048+300" date="09-19-2014" component="ccmsetup" context="" type="1" thread="2624" file="ccmsetup.cpp:5769">
<![LOG[File download 3% complete (61440 of 1614520 bytes).]LOG]!><time="16:00:04.079+300" date="09-19-2014" component="ccmsetup" context="" type="0" thread="2624" file="ccmsetup.cpp:9185">
<![LOG[File download 7% complete (122880 of 1614520 bytes).]LOG]!><time="16:00:04.079+300" date="09-19-2014" component="ccmsetup" context="" type="0" thread="2624" file="ccmsetup.cpp:9185">
<![LOG[File download 11% complete (184320 of 1614520 bytes).]LOG]!><time="16:00:04.079+300" date="09-19-2014" component="ccmsetup" context="" type="0" thread="2624" file="ccmsetup.cpp:9185">
<![LOG[File download 15% complete (245760 of 1614520 bytes).]LOG]!><time="16:00:04.126+300" date="09-19-2014" component="ccmsetup" context="" type="0" thread="2624" file="ccmsetup.cpp:9185">
<![LOG[File download 19% complete (307200 of 1614520 bytes).]LOG]!><time="16:00:04.126+300" date="09-19-2014" component="ccmsetup" context="" type="0" thread="2624" file="ccmsetup.cpp:9185">
<![LOG[File download 22% complete (368640 of 1614520 bytes).]LOG]!><time="16:00:04.126+300" date="09-19-2014" component="ccmsetup" context="" type="0" thread="2624" file="ccmsetup.cpp:9185">
<![LOG[File download 26% complete (430080 of 1614520 bytes).]LOG]!><time="16:00:04.126+300" date="09-19-2014" component="ccmsetup" context="" type="0" thread="2624" file="ccmsetup.cpp:9185">
<![LOG[File download 30% complete (491520 of 1614520 bytes).]LOG]!><time="16:00:04.172+300" date="09-19-2014" component="ccmsetup" context="" type="0" thread="2624" file="ccmsetup.cpp:9185">
<![LOG[File download 34% complete (552960 of 1614520 bytes).]LOG]!><time="16:00:04.172+300" date="09-19-2014" component="ccmsetup" context="" type="0" thread="2624" file="ccmsetup.cpp:9185">
<![LOG[File download 38% complete (614400 of 1614520 bytes).]LOG]!><time="16:00:04.172+300" date="09-19-2014" component="ccmsetup" context="" type="0" thread="2624" file="ccmsetup.cpp:9185">
<![LOG[File download 41% complete (675840 of 1614520 bytes).]LOG]!><time="16:00:04.172+300" date="09-19-2014" component="ccmsetup" context="" type="0" thread="2624" file="ccmsetup.cpp:9185">
<![LOG[File download 45% complete (737280 of 1614520 bytes).]LOG]!><time="16:00:04.219+300" date="09-19-2014" component="ccmsetup" context="" type="0" thread="2624" file="ccmsetup.cpp:9185">
<![LOG[File download 49% complete (798720 of 1614520 bytes).]LOG]!><time="16:00:04.219+300" date="09-19-2014" component="ccmsetup" context="" type="0" thread="2624" file="ccmsetup.cpp:9185">
<![LOG[File download 53% complete (860160 of 1614520 bytes).]LOG]!><time="16:00:04.219+300" date="09-19-2014" component="ccmsetup" context="" type="0" thread="2624" file="ccmsetup.cpp:9185">
<![LOG[File download 57% complete (921600 of 1614520 bytes).]LOG]!><time="16:00:04.219+300" date="09-19-2014" component="ccmsetup" context="" type="0" thread="2624" file="ccmsetup.cpp:9185">
<![LOG[File download 60% complete (983040 of 1614520 bytes).]LOG]!><time="16:00:04.250+300" date="09-19-2014" component="ccmsetup" context="" type="0" thread="2624" file="ccmsetup.cpp:9185">
<![LOG[File download 64% complete (1044480 of 1614520 bytes).]LOG]!><time="16:00:04.250+300" date="09-19-2014" component="ccmsetup" context="" type="0" thread="2624" file="ccmsetup.cpp:9185">
<![LOG[File download 68% complete (1105920 of 1614520 bytes).]LOG]!><time="16:00:04.266+300" date="09-19-2014" component="ccmsetup" context="" type="0" thread="2624" file="ccmsetup.cpp:9185">
<![LOG[File download 72% complete (1167360 of 1614520 bytes).]LOG]!><time="16:00:04.266+300" date="09-19-2014" component="ccmsetup" context="" type="0" thread="2624" file="ccmsetup.cpp:9185">
<![LOG[File download 76% complete (1228800 of 1614520 bytes).]LOG]!><time="16:00:04.313+300" date="09-19-2014" component="ccmsetup" context="" type="0" thread="2624" file="ccmsetup.cpp:9185">
<![LOG[File download 79% complete (1290240 of 1614520 bytes).]LOG]!><time="16:00:04.313+300" date="09-19-2014" component="ccmsetup" context="" type="0" thread="2624" file="ccmsetup.cpp:9185">
<![LOG[File download 83% complete (1351680 of 1614520 bytes).]LOG]!><time="16:00:04.313+300" date="09-19-2014" component="ccmsetup" context="" type="0" thread="2624" file="ccmsetup.cpp:9185">
<![LOG[File download 87% complete (1413120 of 1614520 bytes).]LOG]!><time="16:00:04.313+300" date="09-19-2014" component="ccmsetup" context="" type="0" thread="2624" file="ccmsetup.cpp:9185">
<![LOG[File download 91% complete (1474560 of 1614520 bytes).]LOG]!><time="16:00:04.344+300" date="09-19-2014" component="ccmsetup" context="" type="0" thread="2624" file="ccmsetup.cpp:9185">
<![LOG[File download 95% complete (1536000 of 1614520 bytes).]LOG]!><time="16:00:04.344+300" date="09-19-2014" component="ccmsetup" context="" type="0" thread="2624" file="ccmsetup.cpp:9185">
<![LOG[File download 98% complete (1597440 of 1614520 bytes).]LOG]!><time="16:00:04.344+300" date="09-19-2014" component="ccmsetup" context="" type="0" thread="2624" file="ccmsetup.cpp:9185">
<![LOG[File download 100% complete (1614520 of 1614520 bytes).]LOG]!><time="16:00:04.391+300" date="09-19-2014" component="ccmsetup" context="" type="0" thread="2624" file="ccmsetup.cpp:9185">
<![LOG[Download complete.]LOG]!><time="16:00:04.391+300" date="09-19-2014" component="ccmsetup" context="" type="1" thread="2624" file="ccmsetup.cpp:5867">
<![LOG[Running as user "ej.admin"]LOG]!><time="16:00:05.311+300" date="09-19-2014" component="ccmsetup" context="" type="1" thread="2624" file="ccmsetup.cpp:1995">
<![LOG[Detected 223212 MB free disk space on system drive.]LOG]!><time="16:00:05.327+300" date="09-19-2014" component="ccmsetup" context="" type="1" thread="2624" file="util.cpp:628">
<![LOG[Checking Write Filter Status.]LOG]!><time="16:00:05.327+300" date="09-19-2014" component="ccmsetup" context="" type="1" thread="2624" file="ccmsetup.cpp:2024">
<![LOG[This is not a supported write filter device. We are not in a write filter maintenance mode.]LOG]!><time="16:00:05.327+300" date="09-19-2014" component="ccmsetup" context="" type="1" thread="2624" file="ccmsetup.cpp:2051">
<![LOG[SiteCode: 001]LOG]!><time="16:00:05.327+300" date="09-19-2014" component="ccmsetup" context="" type="1" thread="2624" file="ccmsetup.cpp:2076">
<![LOG[SiteVersion: 5.00.7958.1000]LOG]!><time="16:00:05.327+300" date="09-19-2014" component="ccmsetup" context="" type="1" thread="2624" file="ccmsetup.cpp:2077">
<![LOG[Only one MP https://SCCM01.mydomain.local is specified. Use it.]LOG]!><time="16:00:05.327+300" date="09-19-2014" component="ccmsetup" context="" type="1" thread="2624" file="ccmsetup.cpp:10080">
<![LOG[Searching for DP locations from MP(s)...]LOG]!><time="16:00:05.327+300" date="09-19-2014" component="ccmsetup" context="" type="1" thread="2624" file="ccmsetup.cpp:11018">
<![LOG[Current AD forest name is mydomain.local, domain name is mydomain.local]LOG]!><time="16:00:05.327+300" date="09-19-2014" component="LocationServices" context="" type="1" thread="2624" file="lsad.cpp:842">
<![LOG[Domain joined client is in Intranet]LOG]!><time="16:00:05.327+300" date="09-19-2014" component="LocationServices" context="" type="1" thread="2624" file="lsad.cpp:1047">
<![LOG[Current AD site of machine is SomewhereOverTheRainbow]LOG]!><time="16:00:05.327+300" date="09-19-2014" component="LocationServices" context="" type="1" thread="2624" file="lsad.cpp:770">
<![LOG[DHCP entry points already initialized.]LOG]!><time="16:00:05.327+300" date="09-19-2014" component="LocationServices" context="" type="0" thread="2624" file="ccmiputil.cpp:75">
<![LOG[Begin checking Alternate Network Configuration]LOG]!><time="16:00:05.327+300" date="09-19-2014" component="LocationServices" context="" type="0" thread="2624" file="ccmiputil.cpp:1095">
<![LOG[Finished checking Alternate Network Configuration]LOG]!><time="16:00:05.327+300" date="09-19-2014" component="LocationServices" context="" type="0" thread="2624" file="ccmiputil.cpp:1172">
<![LOG[Adapter {39CB0535-CE77-4ED9-9807-2DB558378C86} is DHCP enabled. Checking quarantine status.]LOG]!><time="16:00:05.327+300" date="09-19-2014" component="LocationServices" context="" type="0" thread="2624" file="ccmiputil.cpp:436">
<![LOG[Sending message body '<ContentLocationRequest SchemaVersion="1.00">
<AssignedSite SiteCode="001"/>
<ClientPackage/>
<ClientLocationInfo LocationType="SMSPACKAGE" DistributeOnDemand="0" UseProtected="0" AllowCaching="0" BranchDPFlags="0" AllowHTTP="1" AllowSMB="0" AllowMulticast="0" UseInternetDP="0">
<ADSite Name="SomewhereOverTheRainbow"/>
<Forest Name="mydomain.local"/>
<Domain Name="mydomain.local"/>
<IPAddresses>
<IPAddress SubnetAddress="192.168.1.0" Address="192.168.1.73"/>
</IPAddresses>
</ClientLocationInfo>
</ContentLocationRequest>
']LOG]!><time="16:00:05.342+300" date="09-19-2014" component="ccmsetup" context="" type="0" thread="2624" file="siteinfo.cpp:96">
<![LOG[Sending message header '<Msg SchemaVersion="1.1"><ID>{F41949F6-9FCA-4C08-AB45-AD13397E03E4}</ID><SourceHost>MACHINENAME</SourceHost><TargetAddress>mp:[http]MP_LocationManager</TargetAddress><ReplyTo>direct:MACHINENAME:LS_ReplyLocations</ReplyTo><Priority>3</Priority><Timeout>600</Timeout><ReqVersion>5931</ReqVersion><TargetHost>https://SCCM01.mydomain.local</TargetHost><TargetEndpoint>MP_LocationManager</TargetEndpoint><ReplyMode>Sync</ReplyMode><Protocol>http</Protocol><SentTime>2014-09-19T21:00:05Z</SentTime><Body Type="ByteRange" Offset="0" Length="1146"/><Hooks><Hook3 Name="zlib-compress"/></Hooks><Payload Type="inline"/></Msg>']LOG]!><time="16:00:05.342+300" date="09-19-2014" component="ccmsetup" context="" type="0" thread="2624" file="siteinfo.cpp:177">
<![LOG[CCM_POST 'https://SCCM01.mydomain.local/ccm_system/request']LOG]!><time="16:00:05.342+300" date="09-19-2014" component="ccmsetup" context="" type="1" thread="2624" file="httphelper.cpp:807">
<![LOG[Begin searching client certificates based on Certificate Issuers]LOG]!><time="16:00:05.389+300" date="09-19-2014" component="ccmsetup" context="" type="1" thread="2624" file="ccmcert.cpp:4393">
<![LOG[Certificate Issuer 1 [CN=My Domain Root CA; OU=IT; O=My Domain; C=US]]LOG]!><time="16:00:05.389+300" date="09-19-2014" component="ccmsetup" context="" type="1" thread="2624" file="ccmcert.cpp:4409">
<![LOG[Finding certificate by issuer chain returned error 80092004]LOG]!><time="16:00:05.436+300" date="09-19-2014" component="ccmsetup" context="" type="2" thread="2624" file="ccmcert.cpp:4516">
<![LOG[Completed searching client certificates based on Certificate Issuers]LOG]!><time="16:00:05.436+300" date="09-19-2014" component="ccmsetup" context="" type="1" thread="2624" file="ccmcert.cpp:4550">
<![LOG[Unable to find any Certificate based on Certificate Issuers]LOG]!><time="16:00:05.436+300" date="09-19-2014" component="ccmsetup" context="" type="2" thread="2624" file="ccmcert.cpp:4702">
<![LOG[Locate client certificate bypassing Certificate Issuers restriction]LOG]!><time="16:00:05.436+300" date="09-19-2014" component="ccmsetup" context="" type="1" thread="2624" file="ccmsetup.cpp:6121">
<![LOG[Begin searching client certificates based on Certificate Issuers]LOG]!><time="16:00:05.436+300" date="09-19-2014" component="ccmsetup" context="" type="1" thread="2624" file="ccmcert.cpp:4393">
<![LOG[Completed searching client certificates based on Certificate Issuers]LOG]!><time="16:00:05.436+300" date="09-19-2014" component="ccmsetup" context="" type="1" thread="2624" file="ccmcert.cpp:4550">
<![LOG[Begin to select client certificate]LOG]!><time="16:00:05.436+300" date="09-19-2014" component="ccmsetup" context="" type="1" thread="2624" file="ccmcert.cpp:4706">
<![LOG[The 'Certificate Selection Criteria' was not specified, counting number of certificates present in 'MY' store of 'Local Computer'.]LOG]!><time="16:00:05.436+300" date="09-19-2014" component="ccmsetup" context="" type="0" thread="2624" file="ccmcert.cpp:4742">
<![LOG[There are no certificates in the 'MY' store.]LOG]!><time="16:00:05.436+300" date="09-19-2014" component="ccmsetup" context="" type="1" thread="2624" file="ccmcert.cpp:4764">
<![LOG[GetSSLCertificateContext failed with error 0x87d00280]LOG]!><time="16:00:05.436+300" date="09-19-2014" component="ccmsetup" context="" type="3" thread="2624" file="ccmsetup.cpp:6141">
<![LOG[A Fallback Status Point has not been specified. Message with STATEID='315' will not be sent.]LOG]!><time="16:00:05.436+300" date="09-19-2014" component="ccmsetup" context="" type="1" thread="2624" file="ccmsetup.cpp:9763">
<![LOG[GetHttpRequestObjects failed for verb: 'CCM_POST', url: 'https://SCCM01.mydomain.local/ccm_system/request']LOG]!><time="16:00:05.436+300" date="09-19-2014" component="ccmsetup" context="" type="3" thread="2624" file="httphelper.cpp:947">
<![LOG[GetDPLocations failed with error 0x87d00280]LOG]!><time="16:00:05.436+300" date="09-19-2014" component="ccmsetup" context="" type="3" thread="2624" file="siteinfo.cpp:532">
<![LOG[Failed to get DP locations as the expected version from MP 'https://SCCM01.mydomain.local'. Error 0x87d00280]LOG]!><time="16:00:05.436+300" date="09-19-2014" component="ccmsetup" context="" type="2" thread="2624" file="ccmsetup.cpp:11261">
<![LOG[A Fallback Status Point has not been specified. Message with STATEID='101' will not be sent.]LOG]!><time="16:00:05.436+300" date="09-19-2014" component="ccmsetup" context="" type="1" thread="2624" file="ccmsetup.cpp:9763">
<![LOG[Next retry in 10 minute(s)...]LOG]!><time="16:00:05.436+300" date="09-19-2014" component="ccmsetup" context="" type="0" thread="2624" file="ccmsetup.cpp:8835">
<![LOG[Current AD forest name is mydomain.local, domain name is mydomain.local]LOG]!><time="16:10:09.190+300" date="09-19-2014" component="LocationServices" context="" type="1" thread="2624" file="lsad.cpp:842">
<![LOG[Domain joined client is in Intranet]LOG]!><time="16:10:09.190+300" date="09-19-2014" component="LocationServices" context="" type="1" thread="2624" file="lsad.cpp:1047">
<![LOG[Current AD site of machine is SomewhereOverTheRainbow]LOG]!><time="16:10:09.299+300" date="09-19-2014" component="LocationServices" context="" type="1" thread="2624" file="lsad.cpp:770">
<![LOG[DHCP entry points already initialized.]LOG]!><time="16:10:09.299+300" date="09-19-2014" component="LocationServices" context="" type="0" thread="2624" file="ccmiputil.cpp:75">
<![LOG[Begin checking Alternate Network Configuration]LOG]!><time="16:10:09.299+300" date="09-19-2014" component="LocationServices" context="" type="0" thread="2624" file="ccmiputil.cpp:1095">
<![LOG[Finished checking Alternate Network Configuration]LOG]!><time="16:10:09.299+300" date="09-19-2014" component="LocationServices" context="" type="0" thread="2624" file="ccmiputil.cpp:1172">
<![LOG[Adapter {39CB0535-CE77-4ED9-9807-2DB558378C86} is DHCP enabled. Checking quarantine status.]LOG]!><time="16:10:09.299+300" date="09-19-2014" component="LocationServices" context="" type="0" thread="2624" file="ccmiputil.cpp:436">
<![LOG[Sending message body '<ContentLocationRequest SchemaVersion="1.00">
<AssignedSite SiteCode="001"/>
<ClientPackage/>
<ClientLocationInfo LocationType="SMSPACKAGE" DistributeOnDemand="0" UseProtected="0" AllowCaching="0" BranchDPFlags="0" AllowHTTP="1" AllowSMB="0" AllowMulticast="0" UseInternetDP="0">
<ADSite Name="SomewhereOverTheRainbow"/>
<Forest Name="mydomain.local"/>
<Domain Name="mydomain.local"/>
<IPAddresses>
<IPAddress SubnetAddress="192.168.1.0" Address="192.168.170.73"/>
</IPAddresses>
</ClientLocationInfo>
</ContentLocationRequest>
']LOG]!><time="16:10:09.315+300" date="09-19-2014" component="ccmsetup" context="" type="0" thread="2624" file="siteinfo.cpp:96">
<![LOG[Sending message header '<Msg SchemaVersion="1.1"><ID>{6DCC55BE-D180-41DC-ACF9-2B909F186F1A}</ID><SourceHost>MACHINENAME</SourceHost><TargetAddress>mp:[http]MP_LocationManager</TargetAddress><ReplyTo>direct:MACHINENAME:LS_ReplyLocations</ReplyTo><Priority>3</Priority><Timeout>600</Timeout><ReqVersion>5931</ReqVersion><TargetHost>https://SCCM01.mydomain.local</TargetHost><TargetEndpoint>MP_LocationManager</TargetEndpoint><ReplyMode>Sync</ReplyMode><Protocol>http</Protocol><SentTime>2014-09-19T21:10:09Z</SentTime><Body Type="ByteRange" Offset="0" Length="1146"/><Hooks><Hook3 Name="zlib-compress"/></Hooks><Payload Type="inline"/></Msg>']LOG]!><time="16:10:09.315+300" date="09-19-2014" component="ccmsetup" context="" type="0" thread="2624" file="siteinfo.cpp:177">
<![LOG[CCM_POST 'https://SCCM01.mydomain.local/ccm_system/request']LOG]!><time="16:10:09.315+300" date="09-19-2014" component="ccmsetup" context="" type="1" thread="2624" file="httphelper.cpp:807">
<![LOG[Begin searching client certificates based on Certificate Issuers]LOG]!><time="16:10:09.315+300" date="09-19-2014" component="ccmsetup" context="" type="1" thread="2624" file="ccmcert.cpp:4393">
<![LOG[Certificate Issuer 1 [CN=My Domain Root CA; OU=IT; O=My Domain; C=US]]LOG]!><time="16:10:09.315+300" date="09-19-2014" component="ccmsetup" context="" type="1" thread="2624" file="ccmcert.cpp:4409">
<![LOG[Finding certificate by issuer chain returned error 80092004]LOG]!><time="16:10:09.315+300" date="09-19-2014" component="ccmsetup" context="" type="2" thread="2624" file="ccmcert.cpp:4516">
<![LOG[Completed searching client certificates based on Certificate Issuers]LOG]!><time="16:10:09.315+300" date="09-19-2014" component="ccmsetup" context="" type="1" thread="2624" file="ccmcert.cpp:4550">
<![LOG[Unable to find any Certificate based on Certificate Issuers]LOG]!><time="16:10:09.315+300" date="09-19-2014" component="ccmsetup" context="" type="2" thread="2624" file="ccmcert.cpp:4702">
<![LOG[Locate client certificate bypassing Certificate Issuers restriction]LOG]!><time="16:10:09.315+300" date="09-19-2014" component="ccmsetup" context="" type="1" thread="2624" file="ccmsetup.cpp:6121">
<![LOG[Begin searching client certificates based on Certificate Issuers]LOG]!><time="16:10:09.315+300" date="09-19-2014" component="ccmsetup" context="" type="1" thread="2624" file="ccmcert.cpp:4393">
<![LOG[Completed searching client certificates based on Certificate Issuers]LOG]!><time="16:10:09.315+300" date="09-19-2014" component="ccmsetup" context="" type="1" thread="2624" file="ccmcert.cpp:4550">
<![LOG[Begin to select client certificate]LOG]!><time="16:10:09.315+300" date="09-19-2014" component="ccmsetup" context="" type="1" thread="2624" file="ccmcert.cpp:4706">
<![LOG[The 'Certificate Selection Criteria' was not specified, counting number of certificates present in 'MY' store of 'Local Computer'.]LOG]!><time="16:10:09.315+300" date="09-19-2014" component="ccmsetup" context="" type="0" thread="2624" file="ccmcert.cpp:4742">
<![LOG[There are no certificates in the 'MY' store.]LOG]!><time="16:10:09.315+300" date="09-19-2014" component="ccmsetup" context="" type="1" thread="2624" file="ccmcert.cpp:4764">
<![LOG[GetSSLCertificateContext failed with error 0x87d00280]LOG]!><time="16:10:09.315+300" date="09-19-2014" component="ccmsetup" context="" type="3" thread="2624" file="ccmsetup.cpp:6141">
<![LOG[GetHttpRequestObjects failed for verb: 'CCM_POST', url: 'https://SCCM01.mydomain.local/ccm_system/request']LOG]!><time="16:10:09.315+300" date="09-19-2014" component="ccmsetup" context="" type="3" thread="2624" file="httphelper.cpp:947">
<![LOG[GetDPLocations failed with error 0x87d00280]LOG]!><time="16:10:09.315+300" date="09-19-2014" component="ccmsetup" context="" type="3" thread="2624" file="siteinfo.cpp:532">
<![LOG[Failed to get DP locations as the expected version from MP 'https://SCCM01.mydomain.local'. Error 0x87d00280]LOG]!><time="16:10:09.315+300" date="09-19-2014" component="ccmsetup" context="" type="2" thread="2624" file="ccmsetup.cpp:11261">
<![LOG[Failed to find DP locations from MP 'https://SCCM01.mydomain.local' with error 0x87d00280, status code 200. Check next MP.]LOG]!><time="16:10:09.315+300" date="09-19-2014" component="ccmsetup" context="" type="2" thread="2624" file="ccmsetup.cpp:11117">
<![LOG[Only one MP https://SCCM01.mydomain.local is specified. Use it.]LOG]!><time="16:10:09.315+300" date="09-19-2014" component="ccmsetup" context="" type="1" thread="2624" file="ccmsetup.cpp:10080">
<![LOG[Have already tried all MPs. Couldn't find DP locations.]LOG]!><time="16:10:09.315+300" date="09-19-2014" component="ccmsetup" context="" type="3" thread="2624" file="ccmsetup.cpp:11146">
<![LOG[GET 'https://SCCM01.mydomain.local/CCM_Client/ccmsetup.cab']LOG]!><time="16:10:09.315+300" date="09-19-2014" component="ccmsetup" context="" type="1" thread="2624" file="httphelper.cpp:807">
<![LOG[Begin searching client certificates based on Certificate Issuers]LOG]!><time="16:10:09.315+300" date="09-19-2014" component="ccmsetup" context="" type="1" thread="2624" file="ccmcert.cpp:4393">
<![LOG[Certificate Issuer 1 [CN=My Domain Root CA; OU=IT; O=My Domain; C=US]]LOG]!><time="16:10:09.315+300" date="09-19-2014" component="ccmsetup" context="" type="1" thread="2624" file="ccmcert.cpp:4409">
<![LOG[Finding certificate by issuer chain returned error 80092004]LOG]!><time="16:10:09.315+300" date="09-19-2014" component="ccmsetup" context="" type="2" thread="2624" file="ccmcert.cpp:4516">
<![LOG[Completed searching client certificates based on Certificate Issuers]LOG]!><time="16:10:09.315+300" date="09-19-2014" component="ccmsetup" context="" type="1" thread="2624" file="ccmcert.cpp:4550">
<![LOG[Unable to find any Certificate based on Certificate Issuers]LOG]!><time="16:10:09.315+300" date="09-19-2014" component="ccmsetup" context="" type="2" thread="2624" file="ccmcert.cpp:4702">
<![LOG[Locate client certificate bypassing Certificate Issuers restriction]LOG]!><time="16:10:09.315+300" date="09-19-2014" component="ccmsetup" context="" type="1" thread="2624" file="ccmsetup.cpp:6121">
<![LOG[Begin searching client certificates based on Certificate Issuers]LOG]!><time="16:10:09.315+300" date="09-19-2014" component="ccmsetup" context="" type="1" thread="2624" file="ccmcert.cpp:4393">
<![LOG[Completed searching client certificates based on Certificate Issuers]LOG]!><time="16:10:09.315+300" date="09-19-2014" component="ccmsetup" context="" type="1" thread="2624" file="ccmcert.cpp:4550">
<![LOG[Begin to select client certificate]LOG]!><time="16:10:09.315+300" date="09-19-2014" component="ccmsetup" context="" type="1" thread="2624" file="ccmcert.cpp:4706">
<![LOG[The 'Certificate Selection Criteria' was not specified, counting number of certificates present in 'MY' store of 'Local Computer'.]LOG]!><time="16:10:09.315+300" date="09-19-2014" component="ccmsetup" context="" type="0" thread="2624" file="ccmcert.cpp:4742">
<![LOG[There are no certificates in the 'MY' store.]LOG]!><time="16:10:09.315+300" date="09-19-2014" component="ccmsetup" context="" type="1" thread="2624" file="ccmcert.cpp:4764">
<![LOG[GetSSLCertificateContext failed with error 0x87d00280]LOG]!><time="16:10:09.315+300" date="09-19-2014" component="ccmsetup" context="" type="3" thread="2624" file="ccmsetup.cpp:6141">
<![LOG[GetHttpRequestObjects failed for verb: 'GET', url: 'https://SCCM01.mydomain.local/CCM_Client/ccmsetup.cab']LOG]!><time="16:10:09.315+300" date="09-19-2014" component="ccmsetup" context="" type="3" thread="2624" file="httphelper.cpp:947">
<![LOG[DownloadFileByWinHTTP failed with error 0x87d00280]LOG]!><time="16:10:09.315+300" date="09-19-2014" component="ccmsetup" context="" type="3" thread="2624" file="httphelper.cpp:1081">
<![LOG[CcmSetup failed with error code 0x87d00280]LOG]!><time="16:10:09.331+300" date="09-19-2014" component="ccmsetup" context="" type="1" thread="2624" file="ccmsetup.cpp:10879">

Resolution: This behavior is 100% caused by an invalid configuration using HTTPS.  In this particular case, machines were not autoenrolling in machine based certificates, thus, System Center could not authenticate the client and would not allow setup to complete.

Here are some things to try to point you in the general direction of where something may have gone wrong in your deployment:

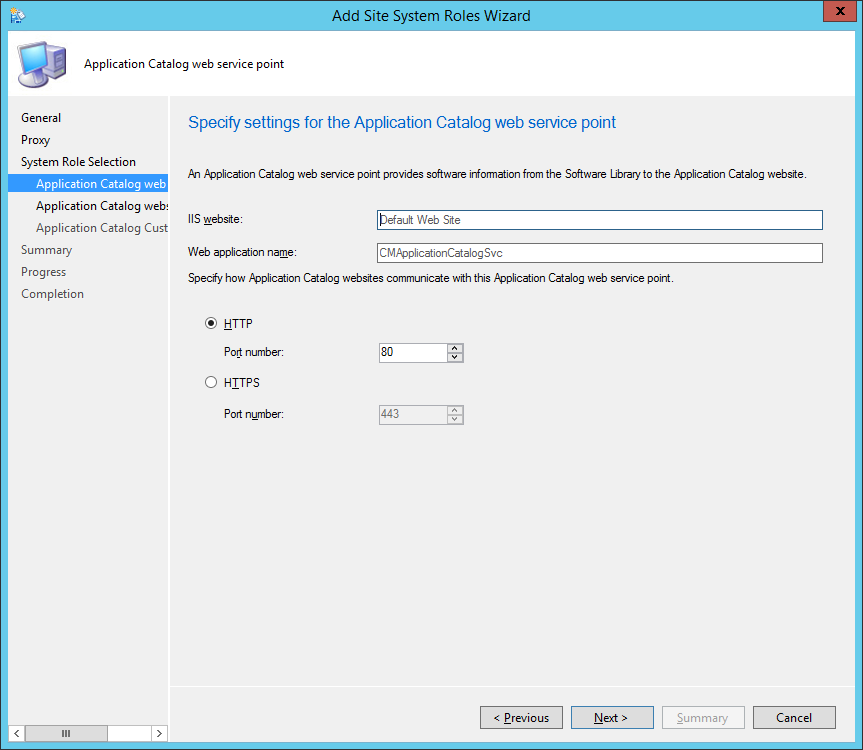
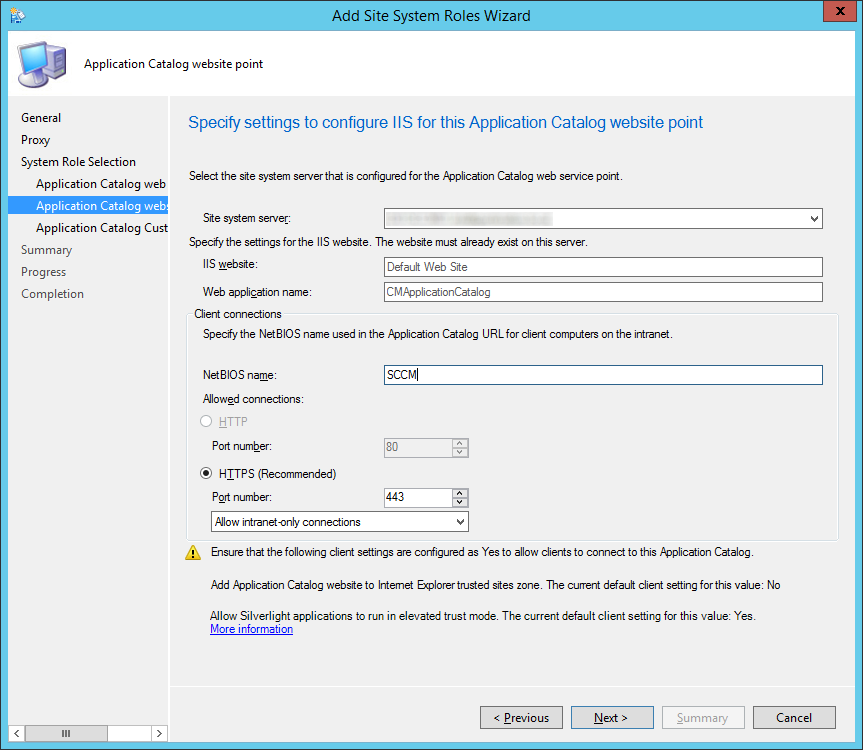
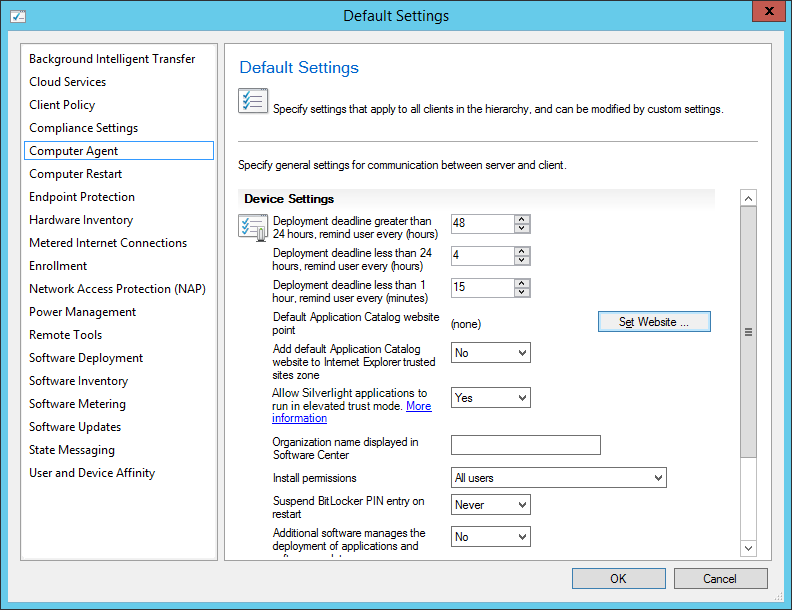
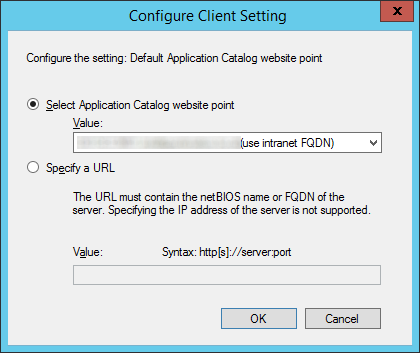
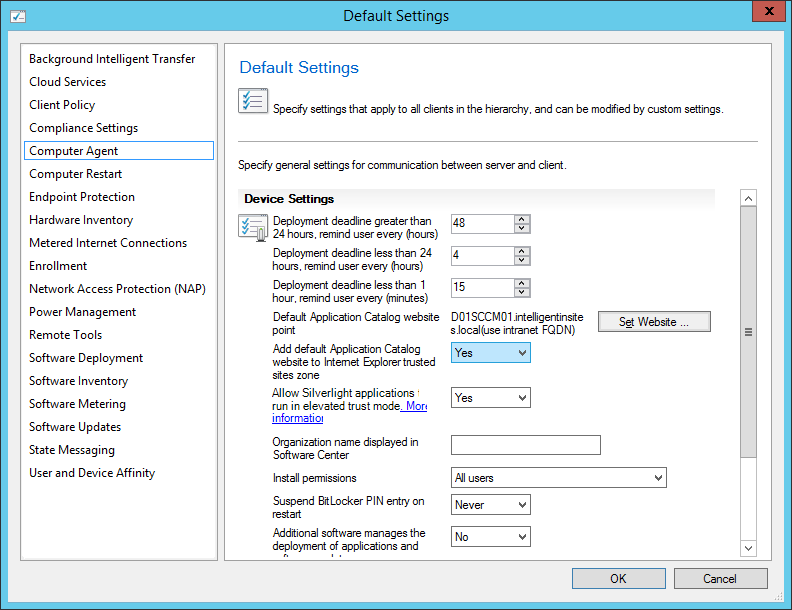
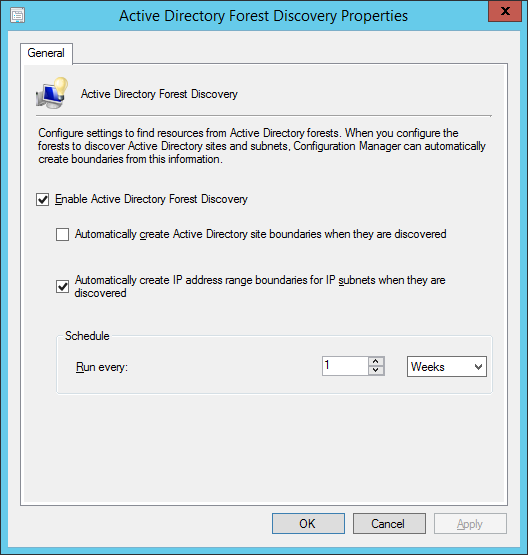
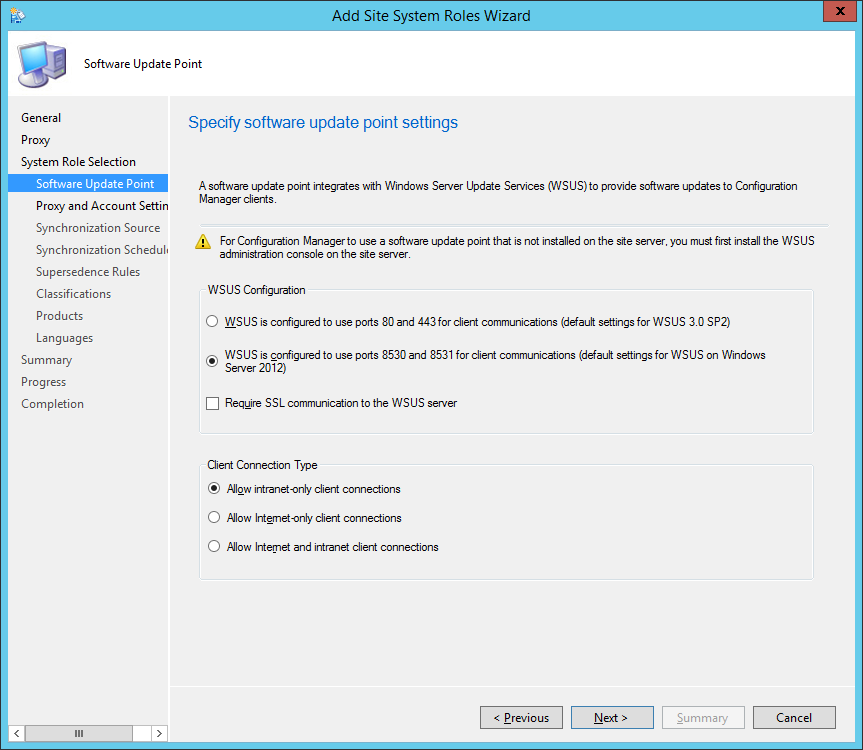
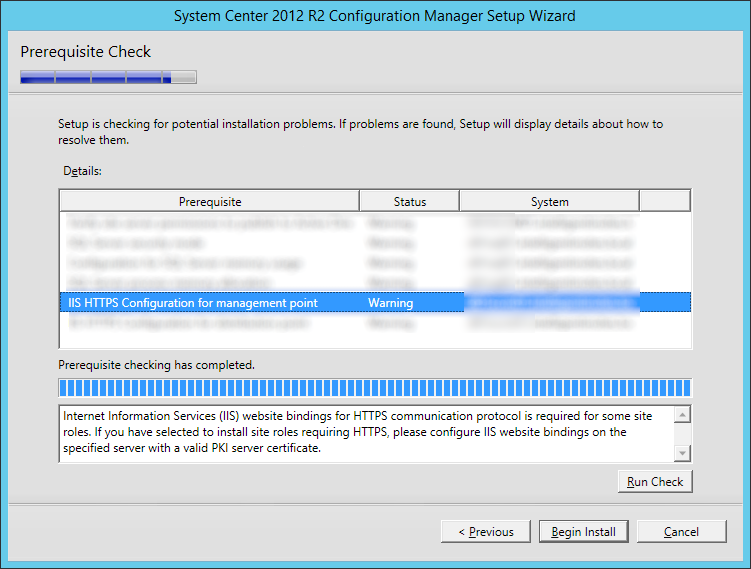
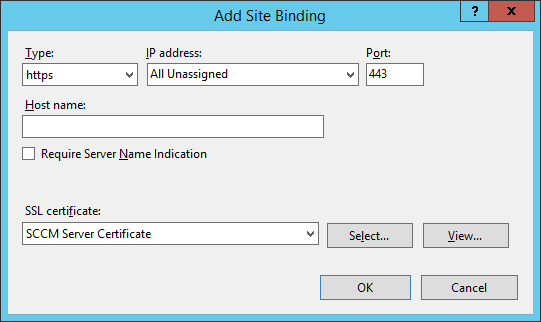
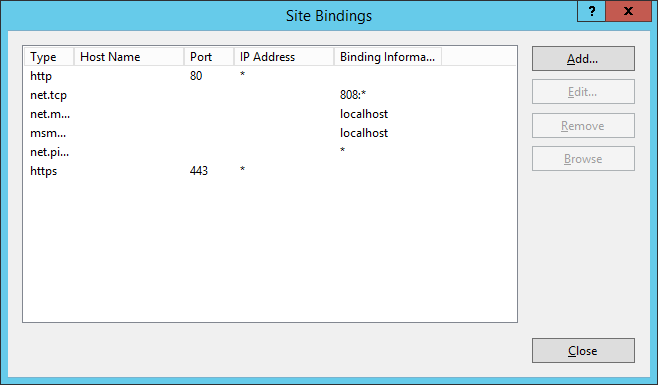
  1. If you are not using HTTPS (do not have a PKI environment), make sure you have turned off HTTPS configurations for your site.
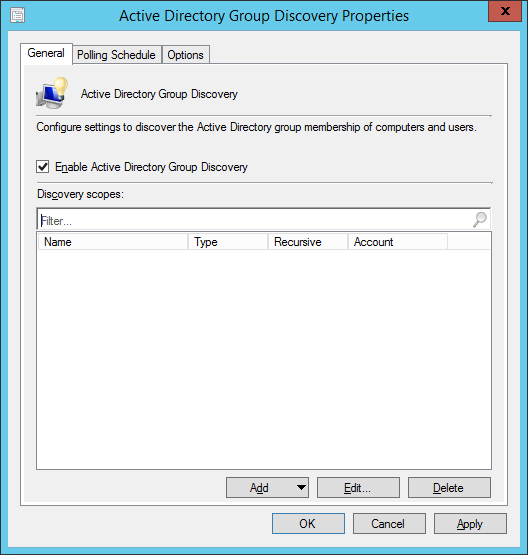
  2. Ensure your clients are properly configured for autoenrollment
  3. Ensure your clients are actually receiving a machine certificate from autoenrollment
  4. Ensure your certificate authority's certificate and CRL lists are not expired

System Center 2012 R2 Configuration Manager – Deploying Endpoint Protection

This guide is in continuation to my guide on deploying system center 2012 r2 configuration manager, as found here.

In this tutorial, we will cover basic deployment/configuration of Endpoint Protection to client workstations.  This tutorial is largly based off of user anyweb's guide on windows-noob.com  Make sure to give him some credit over on his forum 🙂 Adding the Endpoint Protection role, configure Alerts and custom Antimalware Policies

Definition

Per the following Technet article (http://technet.microsoft.com/en-us/library/hh508781.aspx) Endpoint Protection in System Center 2012 Configuration Manager provides security, antimalware, and Windows Firewall management for computers in your enterprise.

When you use Endpoint Protection with Configuration Manager, you have the following benefits:

  • You can configure antimalware policies and Windows Firewall settings to selected groups of computers, by using custom antimalware policies and client settings.
  • You can use Configuration Manager software updates to download the latest antimalware definition files to keep client computers up-to-date.
  • You can send email notifications, use in-console monitoring, and view reports to keep administrative users informed when malware is detected on client computers.

Creating Endpoint Protection Hierarchy via Folders

  1. Launch the System Center 2012 R2 Configuration Manager console
    System Center 2012 R2 Configuration Manager Console - Task Bar
  2. On the Assets and Compliance pane, select Device Collections, and then right click and select Create Folder
    System Center 2012 R2 Configuration Manager - Assets and Compliance - Device Collections - New Folder
  3. Enter Endpoint Protection for the folder name and click OK
    System Center 2012 R2 Configuration Manager - Assets and Compliance - Device Collections - New Folder - Endpoint Protection
  4. Select your Endpoint Protection folder under Device Collections and create two more folders called Endpoint Protection Managed Clients and Endpoint Protection Managed Servers
    System Center 2012 R2 Configuration Manager - Assets and Compliance - Device Collections - Endpoint Protection Managed Clients-Servers

Create Device Collections to categorize devices managed by SCCM

  1. Launch the System Center 2012 R2 Configuration Manager console
    System Center 2012 R2 Configuration Manager Console - Task Bar
  2. On the Assets and Compliance pane, select Device Collections, Endpoint Protection Managed Clients, and right click select Create Device Collection
    System Center 2012 R2 Configuration Manager - Assets and Compliance - Endpoint Protection Managed Clients - Create Device Collection
  3. Enter Endpoint Protection Managed Desktops for the name and then a comment describing what the group will hold (Desktops in this example), and then click Browse...
    System Center 2012 R2 Configuration Manager - Assets and Compliance - Create Device Collection - Managed Desktops
  4. Select All Systems and click OK
    System Center 2012 R2 Configuration Manager - Assets and Compliance - Create Device Collection - Managed Desktops - Select Collection
  5. Click Next >
    System Center 2012 R2 Configuration Manager - Assets and Compliance - Create Device Collection - Managed Desktops - All Systems
  6. Click Next >
    System Center 2012 R2 Configuration Manager - Assets and Compliance - Create Device Collection - Membership Rules
  7. Click OK on the dialog box explaining we have set no rules
    System Center 2012 R2 Configuration Manager - Assets and Compliance - Create Device Collection - Membership Rules - Dialog
  8. Click Next >
    System Center 2012 R2 Configuration Manager - Assets and Compliance - Create Device Collection - Summary
  9. Click Close
    System Center 2012 R2 Configuration Manager - Assets and Compliance - Create Device Collection - Completion
  10. Repeat steps 2-9 to create another group for Laptops
    System Center 2012 R2 Configuration Manager - Assets and Compliance - Endpoint Protection Managed Clients - Desktops and Laptops
  11. Select Endpoint Protection Managed Servers and repeat steps 2-9 to create the following groups
    1. Note: This step is optional, this i more for organization.  If you don't have all of these services/servers deployed in your environment, you don't have to create these Collections.
      1. Endpoint Protection Managed Servers - Configuration Manager
      2. Endpoint Protection Managed Servers - DHCP
      3. Endpoint Protection Managed Servers - Domain Controller
      4. Endpoint Protection Managed Servers - Exchange
      5. Endpoint Protection Managed Servers - File Server
      6. Endpoint Protection Managed Servers - Hyper-V
      7. Endpoint Protection Managed Servers - IIS
      8. Endpoint Protection Managed Servers - Operations Manager
      9. Endpoint Protection Managed Servers - SharePoint
      10. Endpoint Protection Managed Servers - SQL Server
        System Center 2012 R2 Configuration Manager - Assets and Compliance - Assets and Compliance - Endpoint Protection Managed Servers

Enable the Endpoint Protection Role

  1. Launch the System Center 2012 R2 Configuration Manager console
    System Center 2012 R2 Configuration Manager Console - Task Bar
  2. Select AdministrationSite ConfigurationServers and Site System Roles, and right click on your Primary site and select Add Site System Roles
    System Center 2012 R2 Configuration Manager - Administration - Servers and Site System Roles - Add Site System Roles
  3. Click Next >
    System Center 2012 R2 Configuration Manager - Add Site System Roles Wizard - General
  4. Click Next >
    System Center 2012 R2 Configuration Manager - Add Site System Roles Wizard - Proxy
  5. Check Endpoint Protection point
    System Center 2012 R2 Configuration Manager - Add Site System Roles Wizard - System Role Selection - Endpoint Protection point
  6. Click OK on the Configuration Manager dialog
    System Center 2012 R2 Configuration Manager - Add Site System Roles Wizard - System Role Selection - Endpoint Protection point - Confirm
  7. Click Next >
    System Center 2012 R2 Configuration Manager - Add Site System Roles Wizard - System Role Selection - Endpoint Protection point - Checked
  8. Check I accept the Endpoint Protection license terms and click Next >
    System Center 2012 R2 Configuration Manager - Add Site System Roles Wizard - System Role Selection - Endpoint Protection - Accept EULA
  9. Check Advanced membership and click Next >
    System Center 2012 R2 Configuration Manager - Add Site System Roles Wizard - System Role Selection - Microsoft Active Protection Service

    1. Note: MAPS can be joined with a basic or an advanced membership. Basic member reports contain the information described above. Advanced member reports are more comprehensive and may include additional details about the software Endpoint Protection detects, including the location of such software, file names, how the software operates, and how it has impacted your computer. These reports, along with reports from other Endpoint Protection users who are participating in MAPS, help Microsoft researchers discover new threats more rapidly. Malware definitions are then created for programs that meet the analysis criteria, and the updated definitions are made available to all users through Microsoft Update.  See http://technet.microsoft.com/library/hh508835.aspx for full details.
    2. My thoughts on this are to go with Advanced.  If you are using the AV product, may as well help contribute towards making the product detect anomalies more accurately (I'll turn my Microsoft fan-boyness off now :))
  10. Click Next >
    System Center 2012 R2 Configuration Manager - Add Site System Roles Wizard - Summary
  11. Click Close
    System Center 2012 R2 Configuration Manager - Add Site System Roles Wizard - Completion

 Configuring Endpoint Protection Alerting

  1. Email Alerting
  2. Device Collection Alerting

Configure SUP for Endpoint Protection

  1. Launch the System Center 2012 R2 Configuration Manager console
    System Center 2012 R2 Configuration Manager Console - Task Bar
  2. Select Administration, Overview, Site Configurion, Sites and select Settings, Configure Site Components, Software Update Point
    System Center 2012 R2 Configuration Manager - Administration - Site Configuration - Sites - Configure Site Components - SUP
  3. Select the Products tab and then check Forefront Endpoint Protection 2010 and click OK
    System Center 2012 R2 Configuration Manager - Software Update Point Components Properties - Forefront Endpoint Protection 2010
  4. Select Software Library, expand Software Updates and right click on All Software Updates and select Synchronize Software Updates
    System Center 2012 R2 Configuration Manager - Software Library - Software Updates - All Software Updates - Synchronize Software Updates
  5. Click Yes on the Run Synchronization dialog box
    System Center 2012 R2 Configuration Manager - Run Synchronization - check SMS_WSUS_SYNC_MANAGER for component status

Configure SUP to deliver Definition Updates using an Automatic Deployment Rule

  1. Create a new shared folder called EndpointProtection in your WSUS directory
    System Center 2012 R2 Configuration Manager - EndpointProtection Folder
  2. Share the folder with the Everyone group
    1. Right click on the folder and select Properties
      System Center 2012 R2 Configuration Manager - EndpointProtection Folder - Properties
    2. Select the Sharing tab and then click the Share... button
      System Center 2012 R2 Configuration Manager - EndpointProtection Folder - Properties - Sharing
    3. Type Everyone and then click Add.  Ensure the Permission level is Read and then click Share
      System Center 2012 R2 Configuration Manager - EndpointProtection Folder - Properties - Sharing - Everyone
  3. Launch the System Center 2012 R2 Configuration Manager console
    System Center 2012 R2 Configuration Manager Console - Task Bar
  4. Select Software Library, Expand Overview, Software Updates, and select Automatic Deployment Rules.  Right click and select Create Automatic Deployment Rule
    System Center 2012 R2 Configuration Manager - Software Library - Software Updates - Automatic Deployment Rules - Create
  5. Enter in a Name and Description for your Automatic Deployment Rule and then click on the Browse... button
    System Center 2012 R2 Configuration Manager - Create Automatic Deployment Rule Wizard - Endpoint Protection - General
  6. Select one of the Device Collections we made prior back and then click OK
    System Center 2012 R2 Configuration Manager - Create Automatic Deployment Rule Wizard - Endpoint Protection - General - Select Collection
  7. Click Next >
    System Center 2012 R2 Configuration Manager - Create Automatic Deployment Rule Wizard - Endpoint Protection - General - Collection
  8. Click Next >
    System Center 2012 R2 Configuration Manager - Create Automatic Deployment Rule Wizard - Endpoint Protection - Deployment Settings
  9. Check Date Released or Revised and and Product, set Date Released or Revised to Last 1 day and Product to Forefront Endpoint Protection 2010 and click Next >
    System Center 2012 R2 Configuration Manager - Create Automatic Deployment Rule Wizard - Endpoint Protection - Software Updates
  10. Check Run the rule on a schedule, click the Customize... button, and then select 1 days at 12:00AM, and click Next >
    System Center 2012 R2 Configuration Manager - Create Automatic Deployment Rule Wizard - Endpoint Protection - Software Updates - Custom Schedule
    System Center 2012 R2 Configuration Manager - Create Automatic Deployment Rule Wizard - Endpoint Protection - Evaluation Schedule
  11. Set Time based on UTC and set Installation deadline As soon as possible and click Next >
    System Center 2012 R2 Configuration Manager - Create Automatic Deployment Rule Wizard - Endpoint Protection - Deployment Schedule
  12. Check Servers on Device restart behavior (this will prevent a server from restarting from an update), and click Next >
    System Center 2012 R2 Configuration Manager - Create Automatic Deployment Rule Wizard - Endpoint Protection - User Experience
  13. Check Generate an alert when the following conditions are met and click Next >
    1. NOTE: This is an optional step.  If you would like to set an alert to be triggered when X% of your clients do not have the latest virus definitions, use this option.  If you do not wish to be alerted leave the box unchecked and click Next >  In this particular example, after 15% of the clients have virus definitions out of date will receive an alert.
      System Center 2012 R2 Configuration Manager - Create Automatic Deployment Rule Wizard - Endpoint Protection - Alerts
  14. Check Download software updates from distribution point and install, check Download and install software updates from the fallback content source location, and click Next >
    1. Optionally, you can check If software updates are not available on preferred sitribution point or remote distirbution point, download content from Microsoft Update, to always ensure your client has a source to download the latest virus defitions.
      System Center 2012 R2 Configuration Manager - Create Automatic Deployment Rule Wizard - Endpoint Protection - Download Settings
  15. Enter Endpoint Protection Definition Updates for the Name, the following DescriptionThis new deployment package will contain our Endpoint Protection defition updates.  We will run this automatic deployment rule only once and then retire it.  We do this in order to create the Deployment Package.  In the next automatic deployment rule we will select this package instead of creating a new deployment package., and type in the share path to your sccm folder (\\sccm\EndpointProtection).  Click Next >
    System Center 2012 R2 Configuration Manager - Create Automatic Deployment Rule Wizard - Endpoint Protection - Deployment Package
  16. Click Add, Distribution Point
    System Center 2012 R2 Configuration Manager - Create Automatic Deployment Rule Wizard - Endpoint Protection - Deployment Package - Distribution Points
  17. Check your site and click OK
    System Center 2012 R2 Configuration Manager - Create Automatic Deployment Rule Wizard - Endpoint Protection - Deployment Package - Distribution Points - Add
  18. Click Next >
    System Center 2012 R2 Configuration Manager - Create Automatic Deployment Rule Wizard - Endpoint Protection - Deployment Package - Distribution Points - Added
  19. Ensure Download software updates from the Internet is checked and click Next >
    System Center 2012 R2 Configuration Manager - Create Automatic Deployment Rule Wizard - Endpoint Protection - Download Location
  20. Check the languages you want to support and then click Next >
    System Center 2012 R2 Configuration Manager - Create Automatic Deployment Rule Wizard - Endpoint Protection - Language Selection
  21. Click Save As Template..., click Browse... and enter Endpoint Protection Managed Servers and click Save
    System Center 2012 R2 Configuration Manager - Create Automatic Deployment Rule Wizard - Endpoint Protection - Summary
    System Center 2012 R2 Configuration Manager - Create Automatic Deployment Rule Wizard - Endpoint Protection - Summary - Save as Template
  22. Click Next >
    System Center 2012 R2 Configuration Manager - Create Automatic Deployment Rule Wizard - Endpoint Protection - Summary - Next
  23. Click Close
    System Center 2012 R2 Configuration Manager - Create Automatic Deployment Rule Wizard - Endpoint Protection - Completion
  24. Right click on your Endpoint Protection rule and select Disable
    System Center 2012 R2 Configuration Manager - Software Library - Software Updates - Automatic Deployment Rules - Endpoint Protection - Disable
  25. Repeat steps 3-23, using Endpoint Protection Managed Servers as a template in Step 4 for each of the Device Collection groups we created.
    System Center 2012 R2 Configuration Manager - Software Library - Software Updates - Automatic Deployment Rules - Endpoint Protection Rules

Configure custom antimalware policies

In this section we will configure how Endpoint Protection will function on the client machines.

  1. Launch the System Center 2012 R2 Configuration Manager console
    System Center 2012 R2 Configuration Manager Console - Task Bar
  2. Select Assets and Compliances, Endpoint Protection, and then click the Create Antimalware Policy button
    System Center 2012 R2 Configuration Manager - Overview - Endpoint Protection - Antimalware Policies - Create
  3. Set a Name and Description for your Endpoint Protection Antimalware Policy, and then check each of the boxes for the options you wish to configure.  Go through each of the tabs and customize how you wish the agent to run.  Then click OK
    System Center 2012 R2 Configuration Manager - Overview - Endpoint Protection - Antimalware Policies - Create - General
    System Center 2012 R2 Configuration Manager - Overview - Endpoint Protection - Antimalware Policies - Create - Definition updates
  4. Right click on your custom policy and click Deploy
    System Center 2012 R2 Configuration Manager - Overview - Endpoint Protection - Antimalware Policies - Deploy
  5. Select the group you wish to target (in this case, configuration manager), and click OK
    System Center 2012 R2 Configuration Manager - Overview - Endpoint Protection - Antimalware Policies - Deploy - Select Collection

Configure Custom Device Settings

In this section we will configure the client policy to tell the machine it is managed by Endpoint Protection.

  1. Launch the System Center 2012 R2 Configuration Manager console
    System Center 2012 R2 Configuration Manager Console - Task Bar
  2. Select Administration, Client Settings, and then click on Create Custom Client Device SettingsSystem Center 2012 R2 Configuration Manager - Overview - Client Settings - Create Custom Client Device Settings
  3. Enter in a Name (Custom Client Device Settings - Endpoint Protection Managed Servers - Configuration Manager), Description (Custom client device settings for servers related to configuration manager), and check Endpoint Protection
    System Center 2012 R2 Configuration Manager - Overview - Client Settings - Create Custom Client Device Settings - General Tab
  4. On the Endpoint Protection tab use the following settings and then click OK
    1. Manage Endpoint Protection client on client computeres: Yes
      Allow Endpoint Protection client installation and restarts outside maintenance windows.  Maintenance windows must be at least 30 minutes long for client installation: Yes
      System Center 2012 R2 Configuration Manager - Overview - Client Settings - Create Custom Client Device Settings - Endpoint Protection Tab
  5. Right click on your new Custom Client Device Settings policy and select Deploy
    System Center 2012 R2 Configuration Manager - Administration - Client Settings - Deploy Custom Client Device Settings
  6. Select the group of machines you want to deploy the agents to and select OK
    System Center 2012 R2 Configuration Manager - Administration - Client Settings - Deploy Custom Client Device Settings - Select Collection

Verify the client shows the policy

  1. Open the Endpoint Protection agent and select About
    System Center Endpoint Protection Client - About
  2. Verify you see your custom antimalware policy
    System Center Endpoint Protection Client - About - Custom Antimalware Policy

System Center 2012 R2 Configuration Manager - Client Web Service Point and Deploying the SCCM Agent

This guide is in continuation to my guide on deploying system center 2012 r2 configuration manager, as found here.

This guide will go over installing the Application Catalog to allow users to choose software they may wish to download and install (that you have already approved), configuring the SCCM client options, deploying the client, and verifying the client has been installed.

Configuring Application Catalog

  1. Launch the System Center 2012 R2 Configuration Manager console
    System Center 2012 R2 Configuration Manager Console - Task Bar
  2. Click on Administration in the bottom left corner
    System Center 2012 R2 Configuration Manager - Administration
  3. Expand Site Configuration and select Sites and right click on your site and select Add Site System Roles
    System Center 2012 R2 Configuration Manager - Administration - Site Configuration - Sites - Add Site System Roles
  4. Click Next >
    System Center 2012 R2 Configuration Manager - Administration - Site Configuration - Sites - Add Site System Roles Wizard - General
  5. Click Next >
    System Center 2012 R2 Configuration Manager - Administration - Site Configuration - Sites - Add Site System Roles Wizard - Proxy
  6. Check Application Catalog Web Service Point, Application Catalog Website Point, and click Next >
    System Center 2012 R2 Configuration Manager - Administration - Site Configuration - Sites - Add Site System Roles Wizard - System Role Selection - ACWSP
  7. Click Next >
    System Center 2012 R2 Configuration Manager - Administration - Site Configuration - Sites - Add Site System Roles Wizard - System Role Selection - ACWSP - HTTP

    1. NOTE: If you have a PKI environment, go ahead and check HTTPS and hit Next > to encrypt your network traffic
  8. Click Next >
    System Center 2012 R2 Configuration Manager - Administration - Site Configuration - Sites - Add Site System Roles Wizard - System Role Selection - ACWSP IIS
  9. Enter your Organization name, select a Website theme, and click Next >
    System Center 2012 R2 Configuration Manager - Administration - Site Configuration - Sites - Add Site System Roles Wizard - System Role Selection - ACWP
  10. Click Next >
    System Center 2012 R2 Configuration Manager - Administration - Site Configuration - Sites - Add Site System Roles Wizard - System Role Selection - Summary
  11. Click Close
    System Center 2012 R2 Configuration Manager - Administration - Site Configuration - Sites - Add Site System Roles Wizard - Completion
  12. Verify you can access the website from a remote machine (you will need Silverlight in order to browse the page)
    1. https://sccm.mydomain.com/cmapplicationcatalog
      System Center 2012 R2 Configuration Manager - cmapplicationcatalog

 Configuring SCCM Agent Settings

  1. Launch the System Center 2012 R2 Configuration Manager console
    System Center 2012 R2 Configuration Manager Console - Task Bar
  2. Click on Administration in the bottom left corner
    System Center 2012 R2 Configuration Manager - Administration
  3. Click Client Settings, right click on Default Client Settings, select Properties
    System Center 2012 R2 Configuration Manager - Administration - Client Settings
  4. Select Computer Agent and then click on the Set Website... button near Default Application Catalog website point
    System Center 2012 R2 Configuration Manager - Administration - Client Settings - Default Settings - Computer Agent
  5. Select the value that matches your intranet FQDN and click OK
    System Center 2012 R2 Configuration Manager - Administration - Client Settings - Default Settings - Computer Agent - Configure Client Settings
  6. Select Yes under Add default Application Catalog website to Internet Explorer trusted site zone
    System Center 2012 R2 Configuration Manager - Administration - Client Settings - Default Settings - Computer Agent - IE Trusted sites
  7. Click on Software Updates and schedule software updates to happen every 1 days
    1. NOTE: We want software updates to scan every day to deploy Endpoint Protection (antivirus) defitions to all of our clients.  If you will not be using Endpoint Protection, you may want to leave this at 7 days or however frequently you wish to push updates.
      System Center 2012 R2 Configuration Manager - Administration - Client Settings - Default Settings - Software Updates - Daily
  8. Click on User and Device Affinity and set Allow user to define their primary devices to Yes
    1. NOTE: What is User Device Affinity?  User device affinity in Microsoft System Center 2012 Configuration Manager is a method of associating a user with one or more specified devices. User device affinity can eliminate the need to know the names of a user’s devices in order to deploy an application to that user. Instead of deploying the application to all of the user’s devices, you deploy the application to the user. Then, user device affinity automatically ensures that the application install on all devices that are associated with that user.  More info can be found here: http://technet.microsoft.com/en-us/library/gg699365.aspx
      System Center 2012 R2 Configuration Manager - Administration - Client Settings - Default Settings - User and Device Affinity - Yes
  9. Click OK

Preparing deployment credentials to install SCCM Agent to clients

  1. Launch the System Center 2012 R2 Configuration Manager console
    System Center 2012 R2 Configuration Manager Console - Task Bar
  2. Click on Administration in the bottom left corner
    System Center 2012 R2 Configuration Manager - Administration
  3. Select Site Configuration, Sites, and then click Settings->Client Installation Settings->Client Push Installation
  4. Check Enable automatic site-wide client push installation and check all options to under System types to cover all machines in your environment
    1. NOTE: This step is optional.  If you wish to manually deploy the SCCM client every time you add a machine to your environment, leave this option unchecked.
      System Center 2012 R2 Configuration Manager - Client Installation Settings - Client Push Installation Properties
  5. Select the Accounts tab and then click the yellow star and select New Account
    System Center 2012 R2 Configuration Manager - Client Installation Settings - Client Push Installation Properties - Accounts - New Account
  6. Enter in the SCCMCP user credentials (that have local admin privileges on the remote machines), click the Verify button, and type in the path to one of the shared folders on your machine.
    System Center 2012 R2 Configuration Manager - Client Installation Settings - Client Push Installation Properties - Accounts - New Account - Windows User Account
  7. Click Test Connection and hit OK on the Configuration Manager dialog
    1. NOTE: If this step failed, ensure your folders are being shared properly.  The sharing properties on this folder should have been configured automatically when WSUS was being installed.
      System Center 2012 R2 Configuration Manager - Client Installation Settings - Client Push Installation Properties - Accounts - New Account - Windows User Account - Verify
  8. Click OK

Deploy the SCCM Agent to clients

  1. Launch the System Center 2012 R2 Configuration Manager console
    System Center 2012 R2 Configuration Manager Console - Task Bar
  2. Select Devices, right click on the client you wish to deploy the agent to and select Install Client
    System Center 2012 R2 Configuration Manager - Assets and Compliance - Devices - Client - Install Client
  3. Click Next >
    System Center 2012 R2 Configuration Manager - Install Configuration Manager Client Wizard - Before You Begin
  4. Check Always install the client software optionally check the others and click Next >
    1. Note: Since we only have one site, the Install the client software from a specific site option will default to your only site and in this case, since we aren't installing the agent on a domain controller, the first checkbox won't be applicable during installation.
      System Center 2012 R2 Configuration Manager - Install Configuration Manager Client Wizard - Installation Options
  5. Click Next >
    System Center 2012 R2 Configuration Manager - Install Configuration Manager Client Wizard - Summary
  6. Click Close
    System Center 2012 R2 Configuration Manager - Install Configuration Manager Client Wizard - Completion

After about 5 minutes or so, you should see an entry in your start menu called Software Center.  If you see this, you have successfully deployed the SCCM client! 🙂

Windows 8 - Start Menu - System Center 2012 R2 - Software Center

System Center 2012 R2 Configuration Manager - Discovery Methods and Boundaries

This guide is the 3rd in our deployment of System Center 2012 R2 Configuration Manager, originally starting with this guide here.

Definitions

Discovery Methods - Discovery identifies computer and user resources that you can manage by using Configuration Manager. It can also discover the network infrastructure in your environment. Discovery creates a discovery data record (DDR) for each discovered object and stores this information in the Configuration Manager database.  These can be through Active Directory Forest, Active Directory Group Discovery, Active Directory System Discovery, Active Directory User Discovery, Heartbeat Discovery, and Network Discovery.  You can find more information from the official technet article here: http://technet.microsoft.com/en-us/library/gg712308.aspx

  • Active Directory Forest Discovery
    • Can discover Active Directory sites and subnets, and then create Configuration Manager boundaries for each site and subnet from the forests that you have configured for discovery. When Active Directory Forest Discovery identifies a supernet that is assigned to an Active Directory site, Configuration Manager converts the supernet into an IP address range boundary.
  • Active Directory Group Discvoery
    • Discovers local, global, and universal security groups, the membership within these groups, and the membership within distribution groups from the specified locations in Active directory Domain Services. Distribution groups are not discovered as group resources.
  • Active Directory System Discovery
    • Discovers computers from the specified locations in Active Directory Domain Services.
  • Active Directory User Discvoery
    • Discovers user accounts from the specified locations in Active Directory Domain Services.

Boundaries - A boundary is a network location on the intranet that can contain one or more devices that you want to manage. Boundaries can be an IP subnet, Active Directory site name, IPv6 Prefix, or an IP address range, and the hierarchy can include any combination of these boundary types. To use a boundary, you must add the boundary to one or more boundary groups. Boundary groups are collections of boundaries. By using boundary groups, clients on the intranet can find an assigned site and locate content when they have to install software, such as applications, software updates, and operating system images.  You can find more information from the official technet article here: http://technet.microsoft.com/en-us/library/gg712679.aspx

 Enabling Discovery

  1. Launch the System Center 2012 R2 Configuration Manager console
    System Center 2012 R2 Configuration Manager Console - Task Bar
  2. Click on Administration in the bottom left corner
    System Center 2012 R2 Configuration Manager - Administration
  3. Expand Hierarchy Configuration and select Discovery Methods
    System Center 2012 R2 Configuration Manager - Administration - Hierarchy Configuration - Discovery Methods
  4. Configure Active Directory Forest Discovery
    1. Right click on Active Directory Forest Discovery and select Properties
      System Center 2012 R2 Configuration Manager - Administration - Hierarchy Configuration - Discovery Methods - Active Directory Forest Discovery - Properties
    2. Check Enable Active Directory Forest Discovery and Automatically create IP address range boundaries for IP subnets when they are discovered
      System Center 2012 R2 Configuration Manager - Active Directory Forest Discveory Properties

      1. NOTE: Reasons on why we did not select Automatically create Active Directory site boundaries when they are discovered can be found in this blog post: IP Subnet Boundaries are EVIL
    3. Click Yes when prompted to run a full discvoery as soon as possible
      System Center 2012 R2 Configuration Manager - Do you want to run full discovery as soon as possible
  5. Configure Active Directory Group Discovery
    1. Right click on Active Directory Group Discovery and select Properties
      System Center 2012 R2 Configuration Manager - Administration - Hierarchy Configuration - Discovery Methods - Active Directory Group Discovery - Properties.png
    2. Check Enable Active Directory Group Discovery and then click the Add button and select Locations...
      System Center 2012 R2 Configuration Manager - Administration - Hierarchy Configuration - Discovery Methods - Active Directory Group Discovery - Properties - General Tab

      1. Add Location - This will recursively search a container (most often an Organizational Unit) in Active Directory for Groups
      2. Add Group - This will recursively search a group in Active Directory for additional Groups
    3. Enter in a Name to describe what we are searching and hit Browse... next to Location to select the container containing the groups you want.  Once done, click OK on the Add Active Directory Location screen
      System Center 2012 R2 Configuration Manager - Administration - Hierarchy Configuration - Discovery Methods - Active Directory Group Discovery - Add Active Directory Location
    4. Select the Options tab and check the options applicable to you
      System Center 2012 R2 Configuration Manager - Administration - Hierarchy Configuration - Discovery Methods - Active Directory Group Discovery - Properties - Options Tab
    5. Click OK on the Active Directory Group Discovery Properties window and select Yes if prompted to run a full discovery as soon as possible
      System Center 2012 R2 Configuration Manager - Do you want to run full discovery as soon as possible
  6. Configure Active Directory System Discovery
    1. Right click on Active Directory System Discovery and select Properties
      System Center 2012 R2 Configuration Manager - Administration - Hierarchy Configuration - Discovery Methods - Active Directory System Discovery - Properties
    2. Check Enable Active Directory System Discovery and click the Yellow star to add an Active Directory container
      System Center 2012 R2 Configuration Manager - Administration - Hierarchy Configuration - Discovery Methods - Active Directory System Discovery - Properties - General Tab
    3. Click the Browse button and select a container containing your machines
      System Center 2012 R2 Configuration Manager - Administration - Hierarchy Configuration - Discovery Methods - Active Directory System Discovery - Properties - Active Directory Container
      System Center 2012 R2 Configuration Manager - Administration - Hierarchy Configuration - Discovery Methods - Active Directory System Discovery - Properties - Select New Container

      1. Most production environments will probably have a custom OU defined to place their computer objects.  If in doubt, select the Computers container and click OK
    4. Click on the Options tab, check both options, and click OK
      System Center 2012 R2 Configuration Manager - Administration - Hierarchy Configuration - Discovery Methods - Active Directory System Discovery - Properties - Options Tab
    5. Click Yes to do a full discovery as soon as possible
      System Center 2012 R2 Configuration Manager - Do you want to run full discovery as soon as possible
  7. Configure Active Directory User Discovery
    1. Right click on Active Directory User Discovery and select Properties
      System Center 2012 R2 Configuration Manager - Administration - Hierarchy Configuration - Discovery Methods - Active Directory User Discovery - Properties
    2. Check Enable Active Directory User Discovery and click the Yellow star icon to add an Active Directory container
      System Center 2012 R2 Configuration Manager - Administration - Hierarchy Configuration - Discovery Methods - Active Directory User Discovery - General Tab
    3. Click on the Browse... button and select the container holding your users.  Click OK.
      System Center 2012 R2 Configuration Manager - Administration - Hierarchy Configuration - Discovery Methods - Active Directory User Discovery - Properties - Active Directory Container
    4. Click OK on the Active Directory User Discovery Properties window
      System Center 2012 R2 Configuration Manager - Administration - Hierarchy Configuration - Discovery Methods - Active Directory User Discovery - Properties - General Tab - LDAP Path
    5. Click Yes if prompted to run a full discovery as soon as possible
      System Center 2012 R2 Configuration Manager - Do you want to run full discovery as soon as possible

Enabling a Network Boundary/Group

  1. Click on Boundary Groups
    System Center 2012 R2 Configuration Manager - Administration - Hierarchy Configuration - Boundary Groups
  2. Right click and select Create Boundary Group
    System Center 2012 R2 Configuration Manager - Administration - Hierarchy Configuration - Boundary Groups - Create Boundary Group
  3. Enter a Name and Description of the Group
    System Center 2012 R2 Configuration Manager - Administration - Hierarchy Configuration - Boundary Groups - Create Boundary Group - Name-Description

    1. NOTE: This group should be used grouping related subnets in a geographic area that will receive patches/update/software from a specific server.
  4. Click the Add... button and select any networks you want to assign to this Boundary Group
    System Center 2012 R2 Configuration Manager - Administration - Hierarchy Configuration - Boundary Groups - Create Boundary Group - Add Boundaries

    1. By default, if you enabled the Active Directory Forest Discovery, you should have a network called Default-First-Site-Name in the list.  If you are in a larger enterprise, select the subnets relating to the boundary group.
  5. Click on the References tab, check Use this boundary group for site assignment, and click the Add... button
    System Center 2012 R2 Configuration Manager - Administration - Hierarchy Configuration - Boundary Groups - Create Boundary Group - References Tab
  6. Check your site and click OK
    System Center 2012 R2 Configuration Manager - Administration - Hierarchy Configuration - Boundary Groups - Create Boundary Group - References Tab - Add Site Systems
  7. Click OK
    System Center 2012 R2 Configuration Manager - Administration - Hierarchy Configuration - Boundary Groups - Create Boundary Group - References Tab - Site system servers

System Center 2012 R2 Configuration Manager - Adding a Software Update Point to a Standalone Server

This guide is in continuation to my guide on deploying system center 2012 r2 configuration manager, as found here.

Definition
SUP (Software Update Point) - The software update point interacts with the WSUS services to configure update settings, to request synchronization to the upstream update source, and on the central site, to synchronize software updates from the WSUS database to the site server database.  More details on this can be found from the following technet article: http://technet.microsoft.com/en-us/library/bb632674.aspx
WDS (Windows Deployment Services) - Will be used for Operating System deployment.

  1. Launch the System Center 2012 R2 Configuration Manager console
    System Center 2012 R2 Configuration Manager Console - Task Bar
  2. Click on Administration in the bottom left corner
    System Center 2012 R2 Configuration Manager - Administration
  3. Expand Site Configuration and select Servers and Site System Roles
    System Center 2012 R2 Configuration Manager - Administration - Servers and Site System Roles
  4. Right click on your SCCM server and select Add Site System Role
    System Center 2012 R2 Configuration Manager - Administration - Servers and Site System Roles - Add Site System Roles
  5. Click Next > on the General section of the wizard
    System Center 2012 R2 Configuration Manager - Add Site System Roles Wizard - General
  6. Click Next > on the Proxy section of the wizard
    System Center 2012 R2 Configuration Manager - Add Site System Roles Wizard - Proxy
  7. Check Software update point and click Next > on the System Role Selection section of the wizard
    System Center 2012 R2 Configuration Manager - Add Site System Roles Wizard - System Role Selection -Software update point
  8. Check WSUS is configured to use ports 8530 and 8531 for client communications and click Next > on the Software Update Point screen
    System Center 2012 R2 Configuration Manager - Add Site System Roles Wizard - System Role Selection - Software Update Point

      1. NOTE: If you have a PKI environment and want everything to be encapsulated by SSL, you can go ahead and check Require SSL communication to the WSUS server to ensure all traffic is encryptioned.
  9. Click Next > on the Proxy and Account Settings screen
    System Center 2012 R2 Configuration Manager - Add Site System Roles Wizard - System Role Selection - Proxy and Account Settings
  10. Click Next > on the Synchronization Source screen
    System Center 2012 R2 Configuration Manager - Add Site System Roles Wizard - System Role Selection - Synchronization Source
  11. Check Enable Synchronization on a schedule to set how often the check should run.  Click Next > on the Synchronization Schedule screen
    System Center 2012 R2 Configuration Manager - Add Site System Roles Wizard - System Role Selection - Synchronization Schedule

    1. Optionally, check Alert when synchronization fails on any site in the hierarchy to be notified if a synchronization with Microsoft fails.
  12. Click Next > on the Supersedence Rules screen
    System Center 2012 R2 Configuration Manager - Add Site System Roles Wizard - System Role Selection - Supersedence Rules
  13. If you will be deploying System Center Endpoint Protection (SCEP) (Microsoft's Antivirus Solution), check Definition Updates for WSUS to download those. If you wish to have more frequent updates, check Critical Updates to have those pulled down from Microsoft as well.  Click Next >
    System Center 2012 R2 Configuration Manager - Add Site System Roles Wizard - System Role Selection - Classifications
  14. Expand All Products, Microsoft, on the Products page and check the products you wish to download updates for.  Click Next > once done.
    System Center 2012 R2 Configuration Manager - Add Site System Roles Wizard - System Role Selection - Products
  15. On the languages page, select which languages you want to sync and then click Next >
    System Center 2012 R2 Configuration Manager - Add Site System Roles Wizard - System Role Selection - Languages
  16. Click Next > on the Summary page if everything looks correct
    System Center 2012 R2 Configuration Manager - Add Site System Roles Wizard - Summary
  17. Click Close if the settings have successfully applied
    System Center 2012 R2 Configuration Manager - Add Site System Roles Wizard - Completion

System Center 2012 R2 Configuration Manager - Error - Event ID 4912 - component SMS_SITE_COMPONENT_MANAGER on computer X cannot update the already existing object

Symptom: Inside of Event Viewer, you see the following Error entry.

On 06/27/14 07:29:39, component SMS_SITE_COMPONENT_MANAGER on computer sccm.mydomain.local reported: Configuration Manager cannot update the already existing object "cn=SMS-MP-LAX-sccm.mydomain.LOCAL" in Active Directory (mydomain.local).

Possible cause: The site server's machine account may not have full control rights for the "System Management" container in Active Directory
Solution: Give the site server's machine account full control rights to the "System Management" container, and all child objects in Active Directory.

Possible cause: The Active Directory object "cn=SMS-MP-LAX-sccm.mydomain.LOCAL" has been moved to a location outside of the "System Management" container, or has been lost.
Solution: Delete the object from its current location, and let the site create a new object.

Possible cause: The Active Directory schema has not been extended with the correct ConfigMgr Active Directory classes and attributes.
Solution: Turn off Active Directory publishing for each site in the forest, until the schema can be extended. The schema can be extended with the tool "extadsch.exe" from the installation media.

Event Viewer - Event ID 4912 - SMS Server - Error

Solution: Complete the steps below to ensure that the SCCM computer account has the ability to write to Active Directory.

  1. Add Permission to the System Management Container
    1. From the following technet article: http://technet.microsoft.com/en-us/library/bb633169.aspx
      After you have created the System Management container in Active Directory Domain Services, you must grant the site server’s computer account the permissions that are required to publish site information to the container.

      1. On your domain controller navigate to Server Manager -> Tools -> Active Directory Users and Computers
        Server Manager - Active Directory Users and Computers
      2. Click View and select Advanced Features
        Active Directory Users and Computers - View - Advanced Features
      3. Expand your site, SystemSystem Management and select Properties
        Active Directory Users and Computers - System - System Management - Properties
      4. On the System Management Properties dialog box select the Security Tab
        System Management Properties - General Tab
      5. Click Add.. on the Security Tab
        System Management Properties - Security Tab - Add
      6. Click the Object Types… button, check Computers, and click OK
        Select Active Directory Object - Object Types
      7. Type in the computer’s name and click OK
        Select Active Directory Object - SCCM
      8. Check Full Control on the Security Permissions for your SCCM machine
        System Management Properties - Security Tab - Full Control - SCCM
      9. Click the Advanced button, select the computer account, and click Edit
        Advanced Security Settings for System Management - SCCM
      10. Select This object and all descendant objects in the Applies to section and click OK
        Permission Entry for System Management - Advanced - SCCM
      11. Restart the SMS_SITE_COMPONENT_MANAGER and service
        Servers - SMS_SITE_COMPONENT_MANAGER


SCCM 2012 R2 - Warning - IIS HTTPS Configuration for management point

Symptom: When installing System Center 2012 R2 Configuration Manager and requiring all communications to be secure via HTTPS you receive the following Warning on the Prerequisite Check screen of the installation wizard.

Warning: IIS HTTPS Configuration for managment point
Warning: IIS HTTPS Configuration for distribution point

Internet Information Services (IIS) website bindings for HTTPS communication protocol is required for some site roles.  If you have selected to install site roles requiring HTTPS, please configure IIS website bindings on the specified server with a valid PKI server certificate.

System Center 2012 R2 Configuration Manager Setup Wizard - Prerequisite Check - Warning IIS HTTPS Configuration for managment point


Solution: You need to add bindings for HTTPS to the Default Website inside of IIS Manager.

  1. Open up Internet Information Services (IIS) Manager
    Server 2008 R2 - Start - Administrative Tools - Internet Information Services IIS Manager
  2. Expand your server and select Default Web Site
    IIS - Default Web Site
  3. Select Bindings... on the right side
    IIS - Bindings
  4. Click the Add... button
    IIS - Site Bindings
  5. Select https as the connection type and then select the SSL certificate you wish to use
    IIS - Site Bindings - Add Site Binding - SCCM
  6. Click OK
    IIS - Site Bindings - SCCM