Monthly Archives: October 2013

Configuring external time source on your Primary Domain Controller

Here we will configure your primary domain controller (PDC) to connect to an external source to keep your time synchronized up with the rest of the world.  By changing the primary DC's time source to an external source, the changes will be replicated from the PDC to other clients in your domain; limiting the amount of bandwidth needed to synchronize with an external source.  First, I am going to reference much of the information provided by .  I would highly recommend you check out his blog post as it contains a ton of valuable information on the subject as well as more information/best practicies in regards to keeping time in your organization's infrastrucutre: http://binarynature.blogspot.co.uk/2012/04/configure-active-directory.html

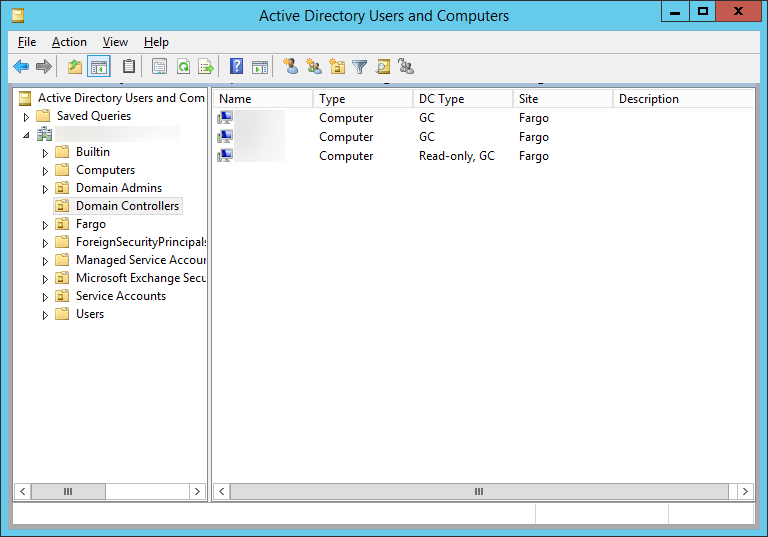
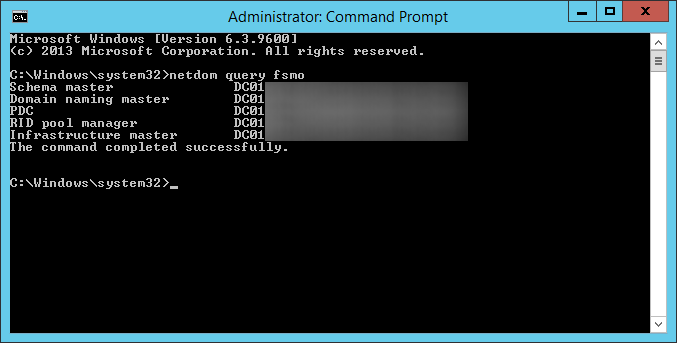
  1. Find out what your primary domain controller (PDC) is for your domain by executing the following powershell commands from any machine in the domain
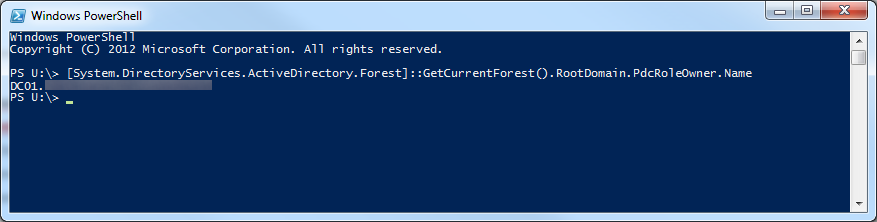
    1. [System.DirectoryServices.ActiveDirectory.Forest]::GetCurrentForest().RootDomain.PdcRoleOwner.Name
      PowerShell - PdcRoleOwner
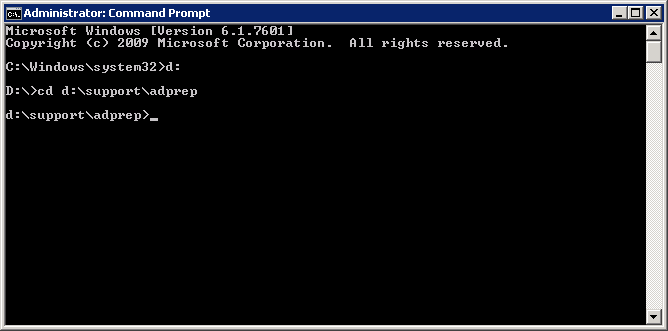
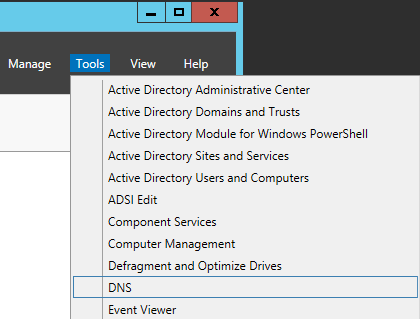
  2. Login to your primary domain controller
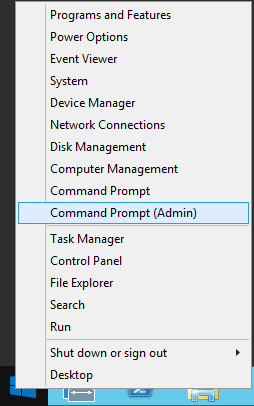
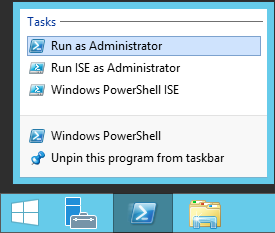
  3. Open up a command prompt/powershell window with administrative privilegesServer 2012 - PowerShell - Run as Administrator
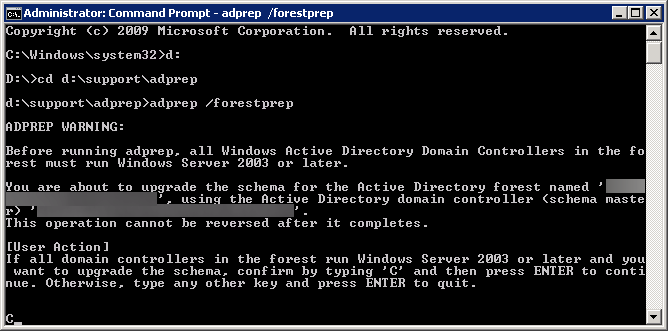
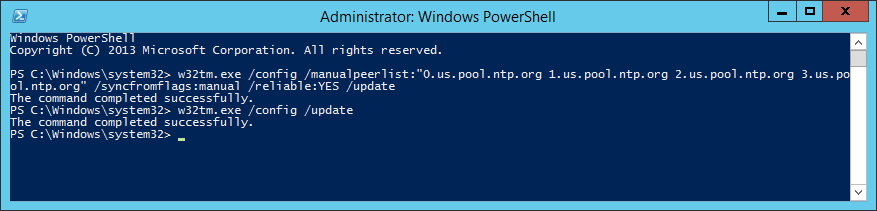
  4. Execute the following command to configure the domain controller to look at an external time source
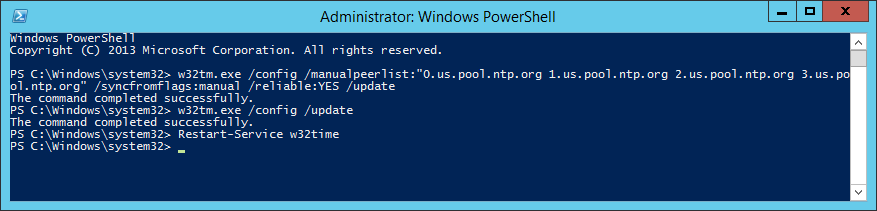
    1. w32tm.exe /config /manualpeerlist:"0.us.pool.ntp.org 1.us.pool.ntp.org 2.us.pool.ntp.org 3.us.pool.ntp.org" /syncfromflags:manual /reliable:YES /update
      w32tm config manualpeerlist syncfromflags manual ntp

      1. Notes: You can find the closest time server near you by browsing the following page and clicking on the nearest zone: http://www.pool.ntp.org/zone/@
  5. Execute the following command to actually perform a time synchronization with the external source
    1. w32tm.exe /config /update
      w32tm config update
  6. Execute the following command for the changes to take effect
    1. Restart-Service w32time
      Restart-Service w32time

That's all that is to it!

Configuring DHCP Failover for Server 2012 R2

In this tutorial, we will implement one of Server 2012's newest features, DHCP Failover.  Before Server 2012, DHCP failover was achieved through Windows Failover Cluster. Now, Server 2012 has native tools built into the DHCP role to support failover without the need to setup clustering services.  It is nice to note that DHCP failover is fully supported in all server editions of Windows Server 2012 (Foundation, Standard, Data Center), allowing everyone to provide this role in high availability.

Before beginning, this tutorial assumes the following prerequisites to this tutorial:

  • Two Server 2012 servers have been installed and joined to your domain as member servers
  • Both servers have installed the DHCP role
  • One of the servers has been configured with your desired DHCP scopes
  1. Login to your primary DHCP server that has been configured with the DHCP scopes
  2. Open up the DHCP program
    1. Launch Server Manager
      Server 2012 R2 - Server Manager
    2. Click Tools->DHCP
      Server Manager - Tools - DHCP
    3. Expand your DHCP server and right click on IPv4 and select Configure Failover...
      DHCP - IPv4 - Configure Failover
    4. On the Introduction to DHCP Failover page, click Next to allow failover of all DHCP scopes.
      Optionally, uncheck Select all and select the specific scopes you would like to allow to failover and then click Next.
      Configure Failover - Introduction to DHCP Failover
    5. Click on the Add Server button
      Configure Failover - Specify the partner server to use for failover - Add Server
    6. Check This authorized DHCP server, select the server you would like to use to allow failover, and then click OK
      Configure Failover - Specify the partner server to use for failover - Add Server - Authorized DHCP server
    7. Click Next
      Configure Failover - Specify the partner server to use for failover - Partner Server
    8. Enter in the settings you wish to use and then click Next.  I would recommend entering a Shared Secret and checking the State Switchover Interval to failover in the event a server fails unexpectedly.
      Notes:
      If you are failing over to another DHCP server on the same subnet, it is recommended to setup loadbalancing.  If you are failing over your DHCP server to another network, set the mode to Hot standby.  Additionally, here is a list with more indepth details on what each option does.

      • Relationship Name: Descriptive name to describe this DHCP Failover relationship.  This can be named anything to help you understand the server relationship.
      • Maximum Client Lead Time: Specifies the amount of time for which a DHCP lease may be renewed by either failover peer without contacting the other.  It also specifies the amount of time that either DHCP server will wait in a “partner down” state before assuming control of the entire IP address range within the scope.  ( default = 1 hour ).
      • Mode: Select Load Balance ( default – Active / Active ) or Hot Standby ( Active / Passive )
      • Load Balance Percentage: Specifies the percentage of the IP Address range to reserve for each server in the failover relationship.  Each server will use their assigned range of addresses prior to assuming control over the entire IP Address range of a scope when the other server transitions into a “partner down” state and the Maximum Client Lead Time ( specified above ) passes.
      • Auto State Switchover Interval: When selected, specifies the amount of time that elapses before a DHCP Server is automatically transitioned to a “partner down” state when network communication is interrupted to a DHCP Server.  If this option is unchecked, an administrator must manually transition the status of a DHCP Server into a “partner down” state using the DHCP Management console or PowerShell. ( when checked, the default = 60 minutes )
      • Enable Message Authentication: check this checkbox option to enable authentication of failover replication traffic between servers
      • Shared Secret:  Type a “Shared Secret” ( ie., a Password ) to be used to authenticate the failover connection between servers

      Configure Failover - Create a new failover relationship

    9. Click Finish
      Configure Failover - Summary
    10. Click Close on the results dialog, confirming the failover configuration was properly setup.
      Configure Failover - Progress of failover configuration
    11. Optionally, you can login to your secondary DHCP server to confirm failover has successfully been setup.
      1. On the secondary DHCP server, right click on one of your DHCP scopes and select Properties
        DHCP - IPv4 - Scope - Properties
      2. Select the Failover tab and you should see your failover settings in effect.
        DHCP - Scope Properties

That's all that's to it!  Hurray for high availability! 🙂

Notes:

Descriptions of each of the failover options were found on the following technet article: http://blogs.technet.com/b/keithmayer/archive/2012/10/28/step-by-step-scoping-out-the-new-dhcp-failover-in-windows-server-2012-31-days-of-favorite-features-part-28-of-31.aspx

An offial Microsoft KB article on configuring DHCP failover can be found here: http://technet.microsoft.com/en-us/library/hh831385.aspx

Migrate DHCP Role from Server 2008 R2 to Server 2012 R2

After doing a quick google search, it appears you can easily migrate your DHCP server as long as you have both your current DHCP server (running Server 2008 R2) and a new Windows Server 2012 server you are going to designate as a DHCP server.

  1. Login to your new Server 2012 R2 machine with the DHCP role installed
  2. Open up a Powershell shell
    Server 2012 - Powershell
  3. Execute the following command to export the configuration from the Server 2008 R2 DHCP Server
    1. Export-DhcpServer –ComputerName win2k8r2-dhcp.corp.contoso.com -Leases -File c:\users\yourusername\Desktop\dhcpexp.xml -verbose
      Export-DhcpServer Server 2012
  4. Execute the following command to import the configuration into your new Server 2012 R2 DHCP Server; must be an Administrator running this PowerShell command.
    1. Import-DhcpServer –ComputerName win2k12r2.corp.contoso.com -Leases –File C:\users\yourusername\Desktop\dhcpexp.xml -BackupPath C:\users\yourusername\Desktop\backup\ -Verbose

Notes: Credit goes to the following technet article for the powershell commands and a more in-depth explanation: http://blogs.technet.com/b/teamdhcp/archive/2012/09/11/migrating-existing-dhcp-server-deployment-to-windows-server-2012-dhcp-failover.aspx

Migrating Domain Controllers From Server 2008 R2 to Server 2012 R2

In this article, I have documented the steps I took to update our two domain controllers to Server 2012 R2 from Server 2008 R2.  While this can be considered a tutorial, it is more a reflection of what I did during my migration process.  This guide assumes you have already made backups of your environment, all Windows Active Directory Domain Controllers in the forest are running Server 2003 or later, and we will be recycling (reusing) the same two servers you deployed.  Last, Microsoft strongly recommends we do a clean install and not directly upgrade each server, so we will decommission a DC, reinstall windows, and then redeploy the DC until the entire environment has been upgraded.

  1. Prepare the AD Schema for Server 2012 R2
    1. Mount the Server 2012 R2 installation disk on one of your Domain Controllers
      Windows Server 2012 R2 - Mounted DVD
    2. Open up a command prompt with Administrative Privileges and navigate to the /support/adprep folder on the installation media.
      1. Click Start, type cmd, right click select Run as administrator
        Administrative cmd prompt
      2. Execute the command: d:
      3. Execute the command: cd d:\support\adprep
      4. Windows Server 2012 R2 - support-adprep folder
    3. Execute the following command (don't close out of this until after we verify the schema version in an upcoming step):
      1. adprep /forestprep
      2. Type the letter C and press the enter key to begin the process
        adprep forestprep
        adprep forestprep success
    4. Execute the following command:
      1. adprep /domainprep
        adprep domainprep
        adprep domainprep success
    5. Verify the schema version has been updated
      1. Click Start and search for regedit
        regedit
    6. Open up regedit and navigate to Computer\HKEY_LOCAL_MACHINE\SYSTEM\CurrentControlSet\services\NTDS\Parameters
    7. Verify the Schema Version value matches the last entry shown in your upgrade results.  In my case, the Schema Version should be 69.
      adprep forestprep schema version
      regedit - schema version
  2. Demote and decommission secondary domain controller
    1. Click Start, Run...
      Start-Run
    2. Type dcpromo and click OK
      Run - dcpromo
    3. Click Next > on the Welcome page
      Active Directory Domain Services Installation Wizard - Welcome to the Active Directory Domain Services Installation Wizard
    4. If the domain controller has the global catalog service, make sure your primary DC also has the service enabled and click OK.  This can be done by opening up Active Directory Sites and Services and viewing the services for each domain controller.
      Active Directory Domain Services Installation Wizard - Active Directory domain controller is a global catalog server dialog
    5. Make sure the Delete this domain because this server is the last domain controller in the domain is UNCHECKED, and click Next >
      Active Directory Domain Services Installation Wizard - Delete the domain because this server is the last domain controller in the domain
    6. Type in a new password to be used for the Local Administrator account the machine will contain after it is demoted.
      Active Directory Domain Services Installation Wizard - Administrator Password
    7. Click Next > on the Summary page
      Active Directory Domain Services Installation Wizard - Summary
    8. Check the Reboot on completion box to restart the server after the service has been removed
      Active Directory Domain Services Installation Wizard - Reboot on completion
    9. Log back into the DC upon reboot and open up Server Manager
      Server Manager
    10. In Roles Summary, click Remove Roles
      Server Manager - Remove Role
    11. Click Next > on the Before You Begin page
      Remove Roles Wizard - Before You Begin
    12. Uncheck Active Directory Domain Services and DNS Server (if the role is installed) and click Next >
      Remove Roles Wizard - Remove Server Roles - Active Directory Domain Services - DNS
    13. Click Remove
      Remove Roles Wizard - Confirm Removal Selections
    14. Click Close
      Remove Roles Wizard - Removal Results
    15. Select Yes on the Do you want to restart now? dialog box
      Remove Roles Wizard - Restart Dialog
    16. Log back into the DC upon reboot and you should greeted by a Removal Results window.  Let the process finish and select Close upon removal success.
      Remove Roles Wizard - Resume Configuration Wizard
    17. Disjoin the machine from the domain
      1. Click Start, right click Computer, select Properties
        Start - Computer - Properties
      2. Click Change settings
        Control Panel - System and Security - System - Change settings
      3. Click Change... on the System Properties page
        System Properties
      4. Check Workgroup, type in a workgroup name, and click OK
        Computer Name - Domain Changes - Workgroup
      5. Click OK on the warning dialog
        Computer Name - Domain Changes - Leave domain dialog
      6. Click OK on the Welcome to the workgroup dialog
        Welcome to the workgroup dialog
      7. Click OK on the restart dialog
        You must restart your computer to apply these changes
      8. Click Close on the System Properties window
        (oops, forgot to make a screenshot!)
      9. Click Restart Later on the Microsoft Windows dialog box
      10. Shutdown the machine
        Start - Shut down
    18. Format the decommissioned machine, reinstall a clean copy of Server 2012 R2, and join the machine to the domain.
  3. Add first Server 2012 R2 Domain Controller
    1. At this point, you should have one Server 2008 R2 Domain Controller and a blank Server 2012 R2 machine joined to the domain ready for the Active Directory services.  If you are at this point, continue on, if not, you might want to read back a couple steps and see where things ventured off course.
    2. Start Server Manager on your new Server 2012 R2 machine.
      Server 2012 R2 - Server Manager
    3. Select Manage in the top right and select Add Roles and Features
      Server 2012 - Manage - Add Roles and Features
    4. Click Next > on the Before you begin screen
      Add Roles and Features Wizard - Before you begin
    5. Click Next > on the Select installation type screen
      Add Roles and Features Wizard - Select installation type
    6. Ensure your new server is selected and click Next >
      Add Roles and Features Wizard - Select destination server
    7. Check the box next to Active Directory Domain Services
      Add Roles and Features Wizard - Select server roles
    8. On the Add features that are required for Active Directory Domain Services? dialog, click the Add Features button
      Add Roles and Features Wizard - Add features that are required for Active Directory Domain Services Dialog
    9. Click Next >
      Add Roles and Features Wizard - Select server roles - Active Directory Domain Services Checked
    10. Click Next >
      Add Roles and Features Wizard - Active Directory Domain Services
    11. Check the box that says Restart the destination server automatically if required
      (Click Yes on the restart dialog if it pops up)
      Add Roles and Features Wizard - Confirm installation selections
    12. Click the Install button
      Add Roles and Features Wizard - Confirm installation selections - restart
    13. Once the install is done, click the Close button
      Add Roles and Features Wizard - Installation progress
    14. Next, head back to the Server Manager screen and select the warning icon with the flag; then select Promote this server to a domain controller.
      Server Manager - Promote this server to a domain controller
    15. On the Deployment Configuration page, make sure Add a domain controller to an existing domain is checked and hit Next >
      Active Directory Domain Services Configuration Wizard - Deployment Configuration
    16. Check Domain Name System (DNS) server, Check Global Catalog (GC), and uncheck Read only domain controller (RODC).  Enter a strong password to be used to access Directory Services Restore Mode and click Next >
      Active Directory Domain Services Configuration Wizard - Domain Controller Options
    17. Click Next > on the DNS Options page
      Active Directory Domain Services Configuration Wizard - DNS Options
    18. Click Next > on the Additional Options page, or if you would like, you can manually select a domain controller to replicate data from and then hit Next >.
      Active Directory Domain Services Configuration Wizard - Additional Options
    19. Click Next > on the Paths page
      Active Directory Domain Services Configuration Wizard - Paths
    20. Click Next > on the Review Options page
      Active Directory Domain Services Configuration Wizard - Review Options
    21. Click Install on the Prerequisites Check page
      Active Directory Domain Services Configuration Wizard - Prerequisites Check
    22. Once the domain controller reboots after installation, open up Server Manager and select Tools, Active Directory Users and Computers
      Server Manager - Active Directory Users and Computers
    23. Expand your Domain and select Domain Controllers; ensure your new machine shows up here.
      Active Directory Users and Computers - Domain Controllers
    24. Next, verify DNS works properly
      1. Go back to Server Manager, select Tools, DNS
        Server Manager - DNS
      2. Expand your server, Forward Lookup Zones, and right click on your domain name and select Properties
        DNS - Domain Name - Properties
      3. Select the Name Servers tab and ensure all DCs are listed
        DNS - Properties - Name Servers
  4. Next, we need to verify the FSMO (Flexible Single Master Operations) roles are stored on our other server 2008 DC
    1. On the new Server 2012 R2 DC we joined, open up a command prompt with administrative privileges.
      Server 2012 - Administrative Command Prompt
    2. Execute the following command to verify FSMO roles are on our 2008 DC:
      netdom query fsmo
      netdom query fsmo
  5. Next, we need to transfer the FSMO roles from our primary DC to our new one
    1. Execute the following command using the same command prompt in the previous steps: ntdsutil
      ntdsutil
    2. Type roles when prompted and hit enter
      ntdsutil - roles
    3. Type connections when prompted and hit enter
      ntdsutil - roles - connections
    4. Type connect to server server2012DC.mydomain.com, where server2012DC is the new DC we just deployed, when prompted and hit enter
      ntdsutil - roles - connections - connect to server
    5. Type quit and hit enter
      ntdsutil - roles - connections - connect to server - quit
    6. Type transfer schema master and hit enter
      ntdsutil - transfer schema master
    7. Click Yes on the Role Transfer Dialog for the Schema Master role
      Role Transfer Confirmation Dialog - Schema Master
    8. Type transfer naming master and hit enter
      ntdsutil - transfer naming master
    9. Click Yes on the Role Transfer Confirmation Dialog for the Naming Master role
      Role Transfer Confirmation Dialog - Naming Master
    10. Type transfer PDC and hit enter
      ntdsutil - transfer PDC
    11. Click Yes on the Role Transfer Configuration Dialog for the Primary Domain Controller role
      Role Transfer Confirmation Dialog - Primary Domain Controller
    12. Type transfer RID master and hit enter
      ntdsutil - transfer RID master
    13. Click Yes on the Role Transfer Configuration Dialog for the RID master role
      Role Transfer Confirmation Dialog - RID master
    14. Type transfer infrastructure master and hit enter
      ntdsutil - transfer infrastructure master
    15. Click Yes on the Role Transfer Configuration Dialog for the Infrastructure Master role
      Role Transfer Confirmation Dialog - Infrastructure Master
    16. Type quit and hit enter
      ntdsutil - fsmo maintenance - quit
    17. Type quit and hit enter
      ntdsutil - quit
    18. Execute the following command to ensure the FSMO services are on the new Server 2012 R2 machine: netdom query fsmo
      netdom query fsmo - moved dc
  6. At this point, you should have a Server 2012 R2 DC with the FSMO roles and a secondary 2008 R2 Domain Controller.  If not, please go back and complete the steps to get to this point.
  7. Optional Step: After upgrading the first DC, you may want to reconfigure the machine to keep its time in sync with an external source.  To do this, please follow my guide here: http://jackstromberg.com/2013/10/configuring-external-time-source-on-your-primary-domain-controller/
  8. Next, decommission the last Server 2008 R2 domain controller that used to function as the primary DC.
    1. Follow the same instructions in Step 2 above called Demote and decommission secondary domain controller
  9. Next, add the machine back to the domain
    1. Follow the same instructions in Step 3 above called Add first Server 2012 R2 Domain Controller
  10. At this point, your environment should be up and running with Windows Server 2012 R2!  You can optionally transfer the FSMO roles back to your "primary" DC that you had before, or continue on with the roles left on the current DC.

Notes

Official information on removing a domain controller from the domain can be found on Microsoft's website here: http://technet.microsoft.com/en-us/library/cc771844(v=ws.10).aspx

Lync call - error ID 52063 (source ID 242)

Symptom: You receive the following error when trying to place a Lync call to someone.

Call was not completed or has ended.

When contacting your support team, reference error ID 52063 (source ID 242).

Troubleshooting information is available online, including best practices for using Lync.

Lync error ID 52063 source ID 242

Solution: This turned out to be an issue where the call was unable to be completed due to the following issues.

  1. The Lync client was unresponsive/could not answer an audio call
  2. The Lync user was not configured for the call to be transferred to voicemail

Please make sure that the Lync client can successfully answer calls or that the user has voicemail configured in the event the Lync client cannot answer a call.

Export a list of numbers used in Lync Server 2013

Today I was curious how many numbers we have used up on our DID block and wanted to pull a report specifying which numbers were allocated to which user, conference room, etc.  After a quick Google search, I came accross a powershell script by Lasse Nordvik Wedø.  Attached below is a copy of his powershell script with a few modifications by me to pull a couple of extra attributes about the user from Active Directory.  Please make sure to drop him a comment on his blog, located here: http://tech.rundtomrundt.com/2012/04/listing-all-deployed-numbers-in-lync.html

The following list of numbers will be generated to a .htm web report:

  • Users enabled in Lync without a number assigned
  • Users with a number assigned to them
  • Users with a private line
  • Analog devices
  • Common Area Phone Numbers
  • Response Group Numbers
  • Meeting (dialin) numbers
  • Meeting Room Objects
  • Exchange Objects
  • Application endpoints with a LineURI

The script can be downloaded here (make sure to remove the .txt extension once you have downloaded it): Assigned_numbers.ps1

Here is an image of executing the powershell script:
Assigned Numbers

Here is an image of the result (webpage):
Assigned Numbers Webpage

Here is an image of what the htm file looks like when you open it up:
Assigned Numbers Results

Additionally, if you are looking for a complete resource of different attributes you can pull from the Get-ADUser command, see the following technet article: http://social.technet.microsoft.com/wiki/contents/articles/12037.active-directory-get-aduser-default-and-extended-properties.aspx

Office 365 - Sorry, but we're having trouble signing you in: error 80041034

Symptom: After changing the samAccountName (User Principal Name (UPN)) of a user in your on-premise Active Directory environment, run the DirSync tool to update the user on Office 365 (or wait 3 hours) [and have verified the user's new UPN synchronized in the Office 365 admin portal], the user is presented with the following error when trying to sign into Outlook, SharePoint, CRM, etc. on Office 365.

Sorry, but we're having trouble signing you in  Please try again in a few minutes.  If this doesn't work, you might want to contact your admin and report the following error: 80041034.

Office 365 - Error 80041034


Solution: This turns out to be an issue with ADFS (Active Directory Federated Services), caching user account attributes, which prevents a successful login.  Here are a couple of solutions to solve this issue:

  1. Try reupdating/repairing party trust with Office 365.
    1. Login to one of your ADFS servers.
    2. Click Start, All Programs, Windows Azure Active Directory, and then select Windows Azure Active Directory Module for Windows PowerShell.
    3. Execute the following command to connect to Microsoft's online services (when prompted, type in your Office 365 Administrator credentials)
      1. Connect-MSOLService
    4. Execute the following command to update federated trust
    5. Update-MSOLFederatedDomain –DomainName:<Federated Domain Name>
  2. Try temporarily disabling Local Security Authority (LSA) credential caching on your AD FS servers (note this can increase the load on your ADFS and AD DS servers)
    1. Login to each of your ADFS servers and complete the following steps
      1. Click Start -> Run -> regedit to open up the registry editor
      2. run - regedit
      3. Navigate to the following registry key
        1. HKEY_LOCAL_MACHINE\SYSTEM\CurrentControlSet\Control\Lsa
          HKEY_LOCAL_MACHINE-SYSTEM-CurrentControlSet-Control-Lsa
      4. Right click on Lsa, select New -> DWORD (32-bit) Value
        HKEY_LOCAL_MACHINE-SYSTEM-CurrentControlSet-Control-Lsa - new DWORD
      5. Enter LsaLookupCacheMaxSize as the value name and press Enter
        LsaLookupCacheMaxSize
      6. Right click on LsaLookupCacheMaxSize and select Modify
        Modify LsaLookupCacheMaxSize
      7. Ensure the value data is set to 0 and select OK
        LsaLookupCacheMaxSize - Edit DWORD
    2. Verify the user can successfully login.  Once they can, continue on to delete the key we created
    3. Right click on the LsaLookupCacheMaxSize value we created and select Delete
      Delete LsaLookupCacheMaxSize
  3. Reboot all ADFS and ADFS proxy servers in your environment

Microsoft has released an official KB article referencing this issue, you can find it here: http://support.microsoft.com/kb/2535191

AD RMS (Rights Management Services) for Office 365

Note: This guide is deprecated.  AD RMS is now supersceeded by Azure Information Protection.  If you have previously used this guide, review the following guide on Migrating from AD RMS to Azure Information Protection.

https://docs.microsoft.com/en-us/azure/information-protection/migrate-from-ad-rms-to-azure-rms


Those that have the following tiers of Office 365 are entitled to use Microsoft's AD Rights Management Service to help secure their documents:

  • SharePoint Online Enterprise (E1),
  • SharePoint Online Enterprise (E3 & E4),
  • SharePoint Online Midsized Business

Here is a list of compiled questions I wanted to know when trying AD RMS for Office 365.

What is AD Rights Management Services?

Active Directory Rights Management Services (AD RMS) is an information protection technology that works with AD RMS-enabled applications to help safeguard digital information from unauthorized use. Content owners can define who can open, modify, print, forward, or take other actions with the information.
http://technet.microsoft.com/en-us/library/cc771234(v=ws.10).aspx

Are their any examples of using AD Rights Management Services?

Office 365 did a pretty good job covering the concept of using AD RMS as well as how to use AD RMS.  You can find the full tutorial here, however their official YouTube video covering this has been embedded below:

How do I deploy or enable AD Rights Management Services for Office 365?

  1. Login to your Office 365 Administration Portal
    1. https://portal.microsoftonline.com/
  2. Select service settings on the left side navigation
    Office 365 Admin Portal - Service Settings
  3. Select the rights management tab and click on the Manage link
    Office 365 Admin Portal - Service Settings - rights management
  4. The Manage link should redirect you over to activedirectory.windowsazure.com and present you a big activate button.  Click the activate button.
    Activate Office 365 RMS
  5. Click activate on the Do you want to activate Rights Management? prompt
    Do you want to activate Rights Management
  6. After clicking the activate button, you should now see Rights management is activated on the windowsazure.com page
    Rights management is activated

How do I create more policy templates for AD RMS using Office 365 or Windows Azure?

As pointed out in the following Office 365 forum article: http://community.office365.com/en-us/forums/148/t/177332.aspx

By default, in a pure Office 365 environment, we can get 3 RMS Templates in Windows Azure Rights Management. If we have an on-premises server running Active Directory Rights Management Services (AD RMS), we can get more via import a trusted publishing domain (TPD). So, without on premise server, we just can get default 3 Templates.

I enabled AD RMS for Office 365, but I don't see any options in Office 2010.  How do I get Office 2010 to use AD RMS?

Since you are more than likely on the E4 tier, I would highly recommend downloading Office 2013 from your Office 365 portal and installing that.  Office 2013 from the Office 365 portal comes preconfigured to work more fluidly with AD RMS.  However, if you need to use Office 2010, you can complete the following steps as documented on the following technet article: http://technet.microsoft.com/en-us/library/jj585031.aspx#sectionSection1

Can people outside my organization open protected documents with AD RMS (not apart of my domain)?

Short answer, Yes.  Long answer, they are required to create a Microsoft account using their email address (Gmail, AOL, Yahoo, etc) to authenticate themselves.  Below are some screenshots of the registration process; I have copied them from the following technet article for archival purposes: http://blogs.technet.com/b/rms/archive/2013/08/29/the-new-microsoft-rms-is-live-in-preview.aspx

RMS Login


RMS Login 2

RMS Login 3

How can an Office 365 customer purchase Microsoft Rights Management Services (RMS)?

Active Directory RMS is already included in the Office 365 Enterprise E3, and E4 plans and the Education A3 and A4 plans. RMS is also available as an add-on in the E1 and A2 plans. Consumption of rights-protected content is free. A license is required to protect content.

Windows Update Services - Multiple Errors in Event Viewer - Event ID 12052,12042, 12022, 12032, 12012, 12002,13042

Symptom: When browsing through the event viewer logs on your Windows Update Services server, you notice the following Event IDs with a Level of Error in the following order: 12052, 12042, 12022, 12032, 12012, 12002, 13042.

Event Viewer - WSUS Errors

Log Name: Application
Source: Windows Server Update Services
Event ID: 12052
Task Category: 9
Level: Error
Description: The DSS Authentication Web Service is not working.

Log Name: Application
Source: Windows Server Update Services
Date: 10/3/2013 4:53:26 AM
Event ID: 12042
Task Category: 9
Level: Error
Description: The SimpleAuth Web Service is not working.

Log Name: Application
Source: Windows Server Update Services
Date: 10/3/2013 4:53:26 AM
Event ID: 12022
Task Category: 9
Level: Error
Description: The Client Web Service is not working.

Log Name: Application
Source: Windows Server Update Services
Date: 10/3/2013 4:53:26 AM
Event ID: 12032
Task Category: 9
Level: Error
Description: The Server Synchronization Web Service is not working.

Log Name: Application
Source: Windows Server Update Services
Date: 10/3/2013 4:53:26 AM
Event ID: 12012
Task Category: 9
Level: Error
Description: The API Remoting Web Service is not working.

Log Name: Application
Source: Windows Server Update Services
Date: 10/3/2013 4:53:26 AM
Event ID: 12002
Task Category: 9
Level: Error
Description: The Reporting Web Service is not working.

Log Name: Application
Source: Windows Server Update Services
Date: 10/3/2013 4:53:26 AM
Event ID: 13042
Task Category: 6
Level: Error
Description: Self-update is not working.

Additionally, you can recreate these events by running the following command: wsusutil.exe checkhealth

Solution: Reconfigure the WSUS server via the wsusutil.exe command.

  1. Login to the WSUS server
  2. Open up a command prompt with Administrative rights
    cmd as Administrator
  3. Navigate to the Update Services\Tools directory.
    1. By default you can find it on your C drive by executing the following command
      1. cd "c:\Program Files\Update Services\Tools"
        cmd Update Services - Tools
  4. Execute one of the following commands
    1. If updates are configured for port 80 execute this command
      1. wsusutil.exe usecustomwebsite false
    2. If updates are configured for port 8530 execute this command
      1. wsusutil.exe usecustomwebsite true
    3. wsusutil usecustomwebsite
  5. Execute the following command to verify the WSUS service is running correctly
    1. wsusutil.exe checkhealth
      wsusutil checkhealth
  6. You should see Event ID 10000 in event viewer confirming all is wellWSUS is working correctly

How to federate with AOL via Lync

Since Microsoft announced they would be retiring their PIC (Public IM Connectivity) service, the ability to federate with AOL will soon cease to exist.  Interestingly though, AOL has made a public statement saying they will now support direct federation with Lync customers.

AOL is pleased to offer Microsoft Lync customers the opportunity to continue their current federation with AIM and establish new federations if needed. For the first time, we are enabling companies with the ability to establish a direct relationship with AOL to provision and manage their connectivity to the AIM network. This will also allow you to have direct and immediate access to AIM technical support engineers who can quickly identify and resolve any AIM-related issues, thus making the transition to AOL is seamless with no disruption to your company and users.

More details can be found on their website as well as an application to enable direct federation here: http://aimenterprise.aol.com/pic.php