Monthly Archives: November 2013

Yammer and Office 365 Enterprise

If you are on the enterprise plans of Office 365 (E4 for example), your users may be eligible to use Microsoft's enterprise social network called Yammer.  This article will cover a few questions I was curious about when rolling out Yammer as well as what to expect.

How do I tell if I am eligible?

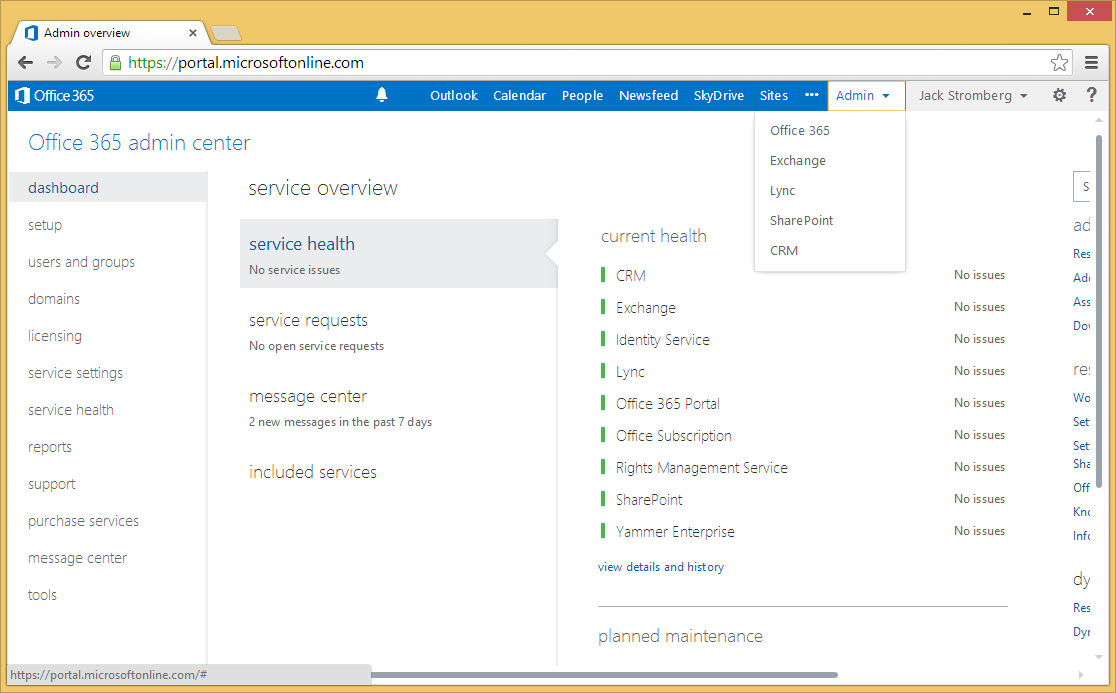
  1. Login to the Office 365 admin portal (https://portal.microsoftonline.com)
  2. Click on included services on the dashboard
    Office 365 Portal - Included Services

How do I activate Yammer?

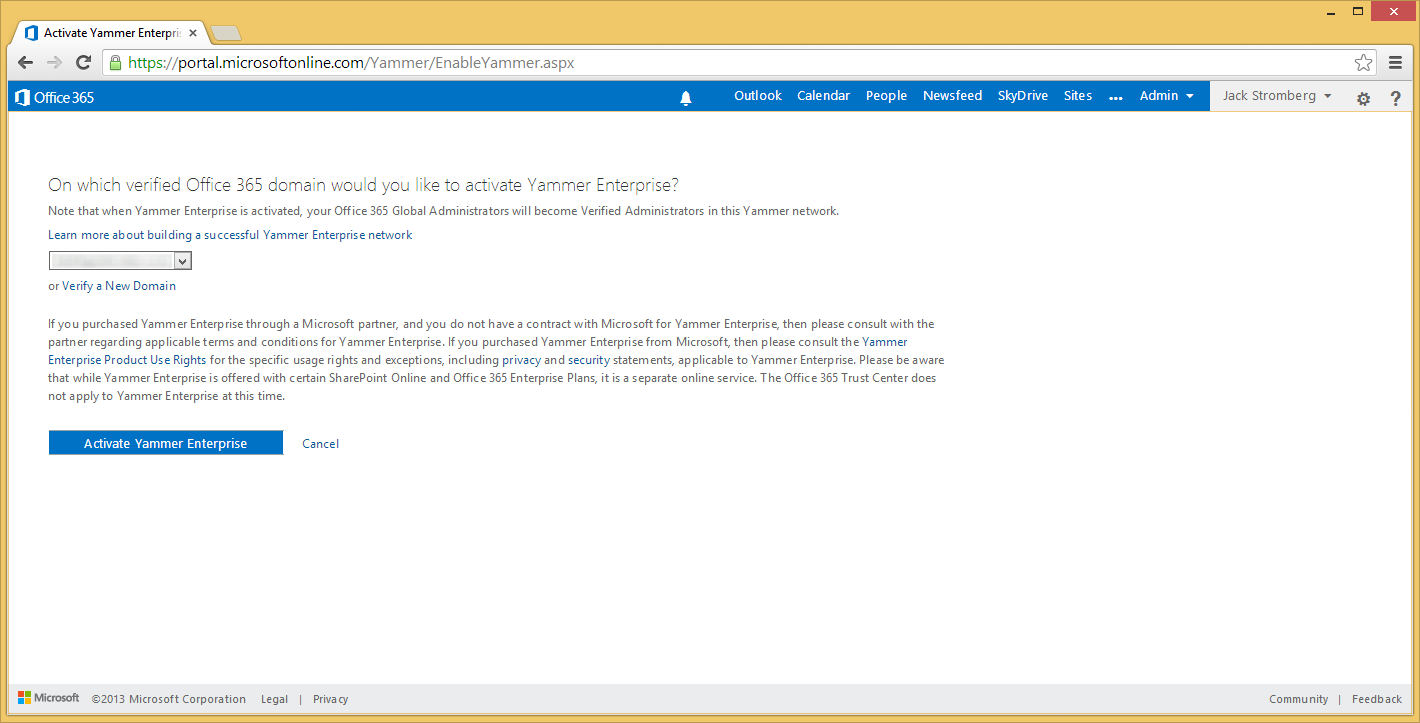
  1. If you are eligible for the Yammer service, click on the Yes, activate Yammer Enterprise for my network
    Office 365 Portal - Included Services
  2. Click on the Activate Yammer Enterprise button
    Office 365 - Activate Yammer Enterprise
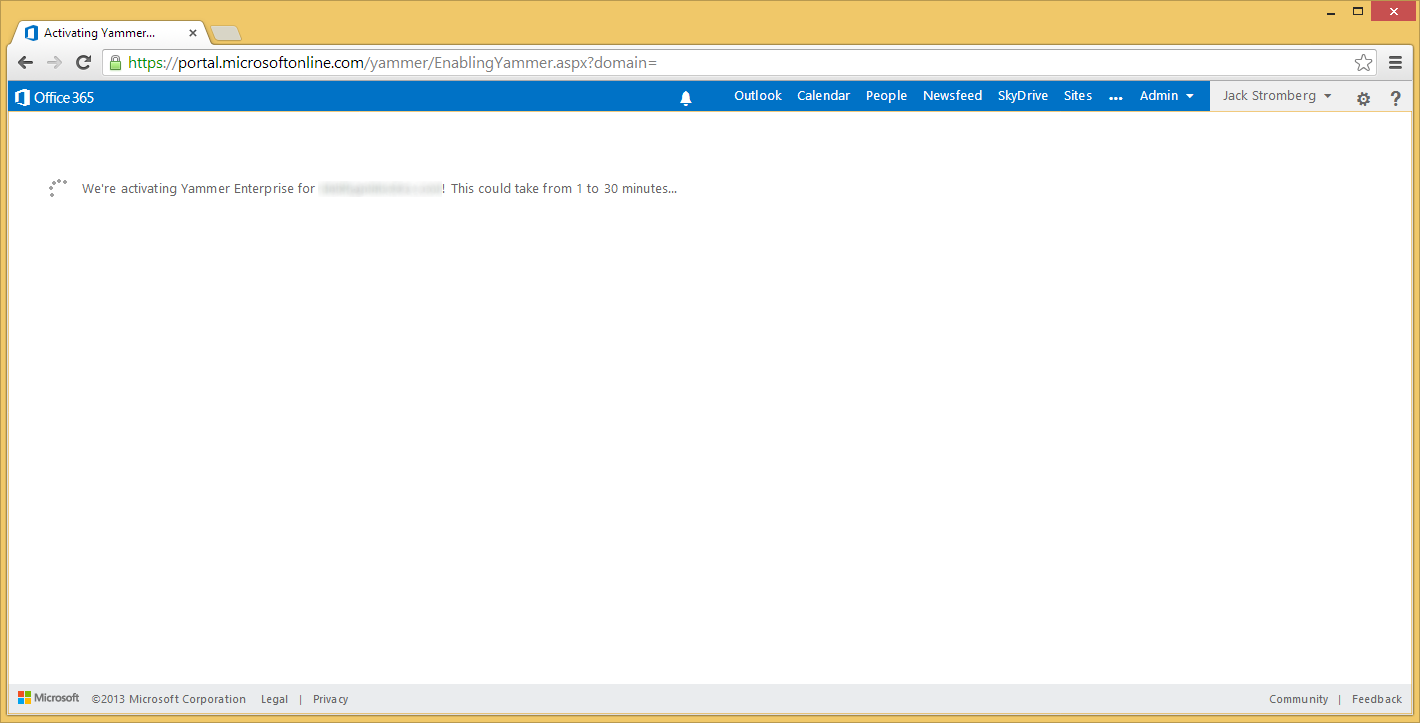
  3. You will be redirected to a screen where you see a loading bar.  Grab a can of pop/coffee/tea/water and come back.
    Office 365 - Were activating Yammer Enterprise
  4. Click on the Create Yammer Account link once Yammer Enterprise has been provisioned.
    Office 365 - Yammer Enterprise is now ready
  5. Type in the same email address you use for your Office 365 Admin credentials
    Sign Up for Yammer
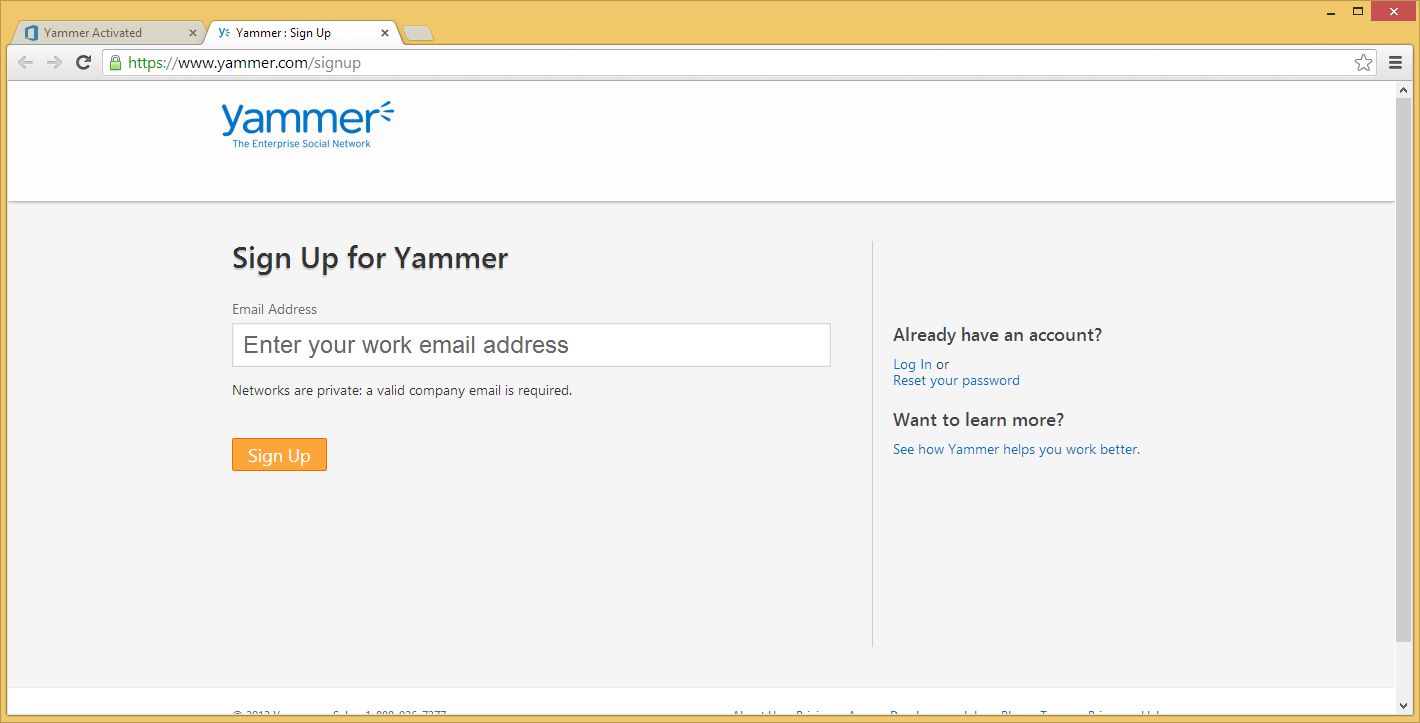
  6. If successful, you should see the screen below:
    Yammer - Thank you for signing up
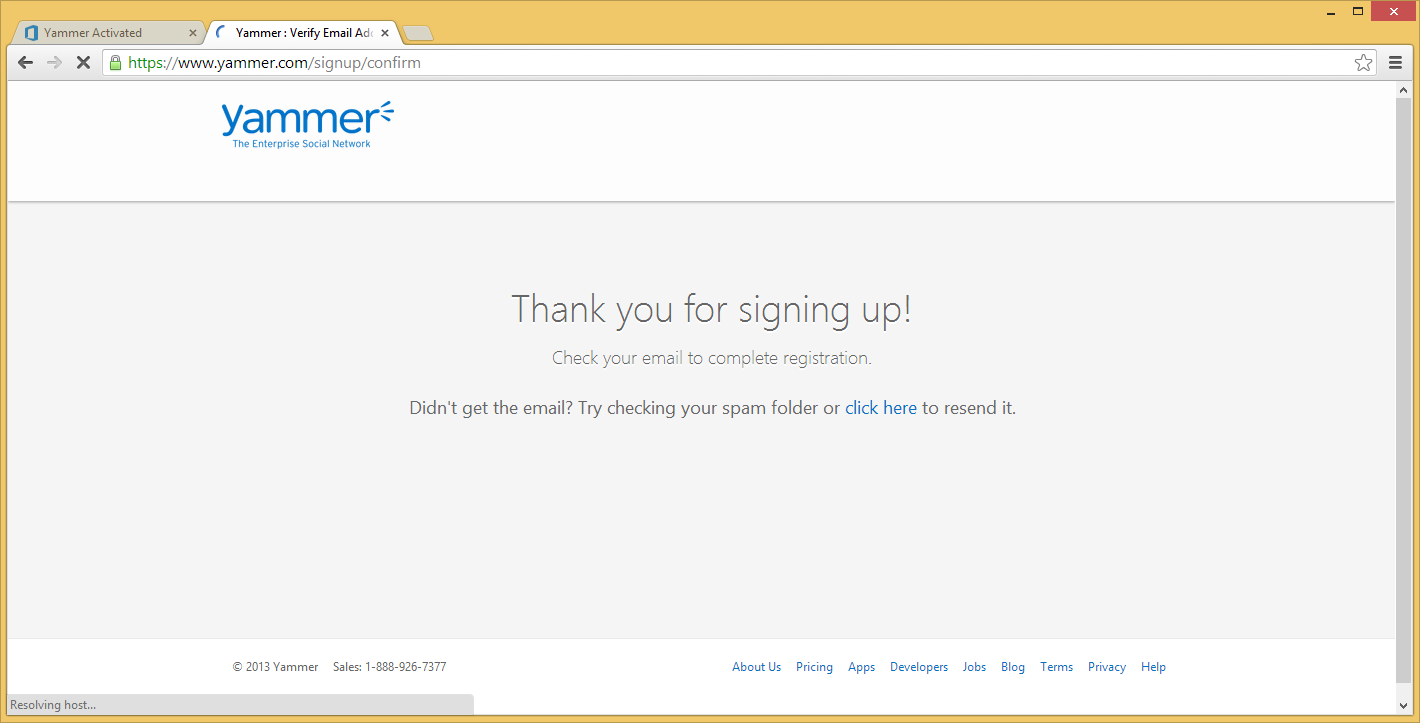
  7. Check your email and click on the Complete Signup button
    Yammer Activation Email
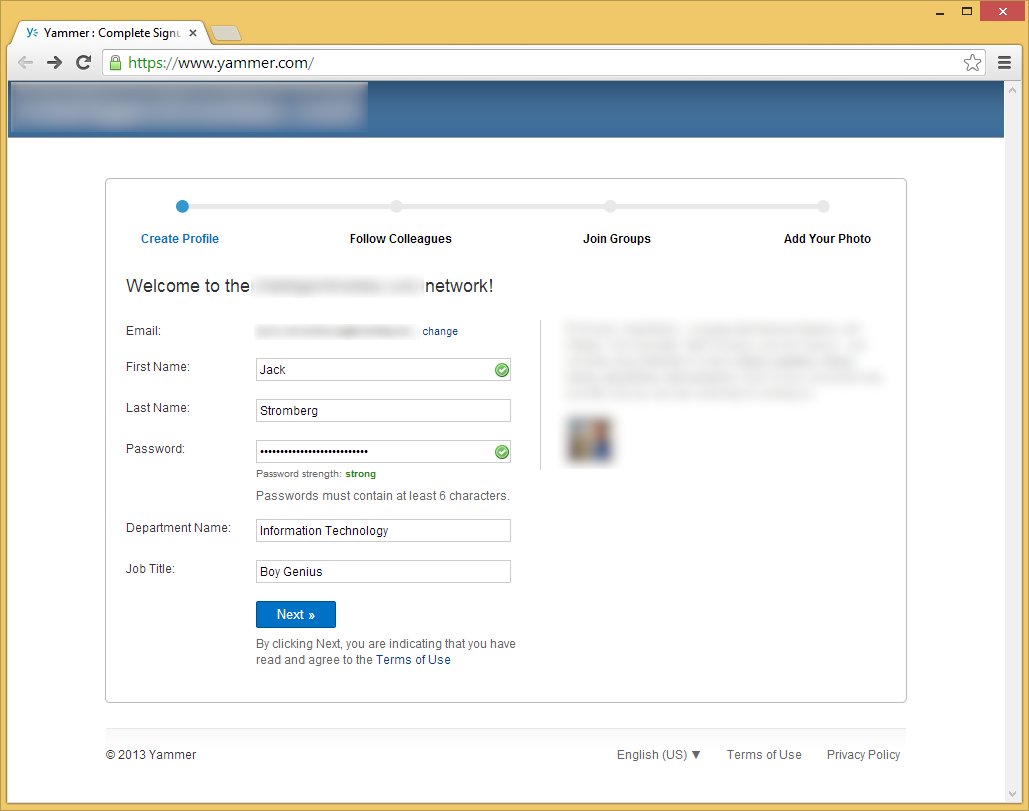
  8. Type in your information and click the Next button
    Yammer - Welcome to the network
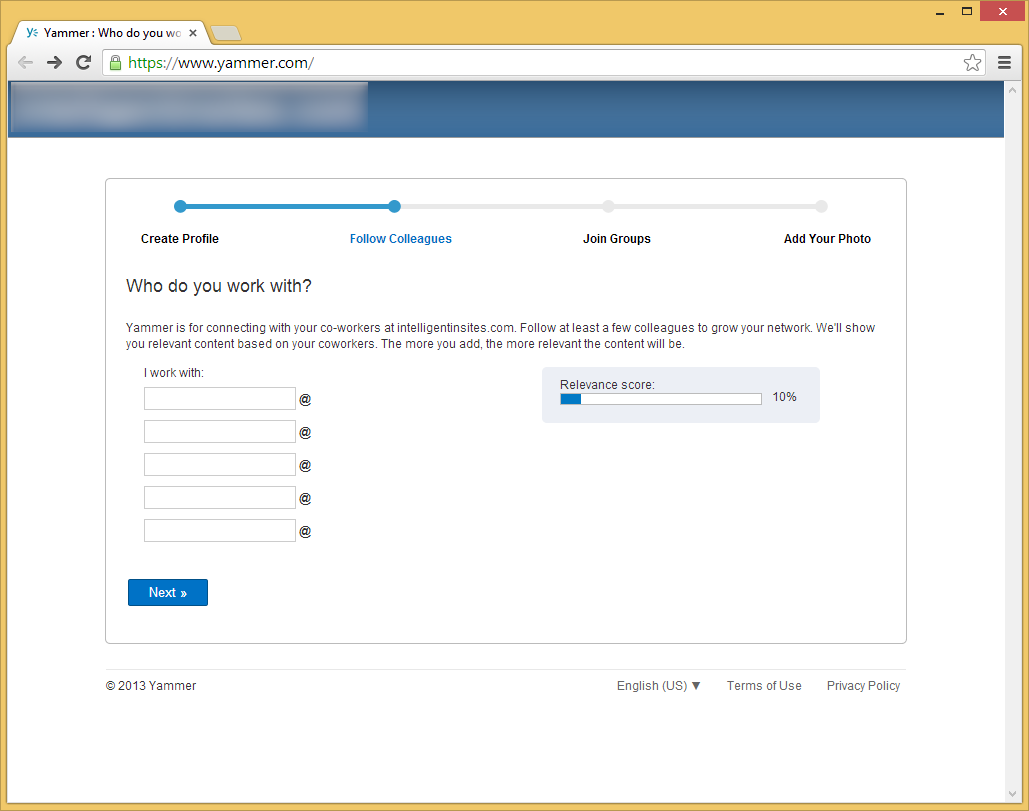
  9. Click Next on the who do you work with page, or spam your colleagues to sign up as well.
    Yammer - Who do you work with
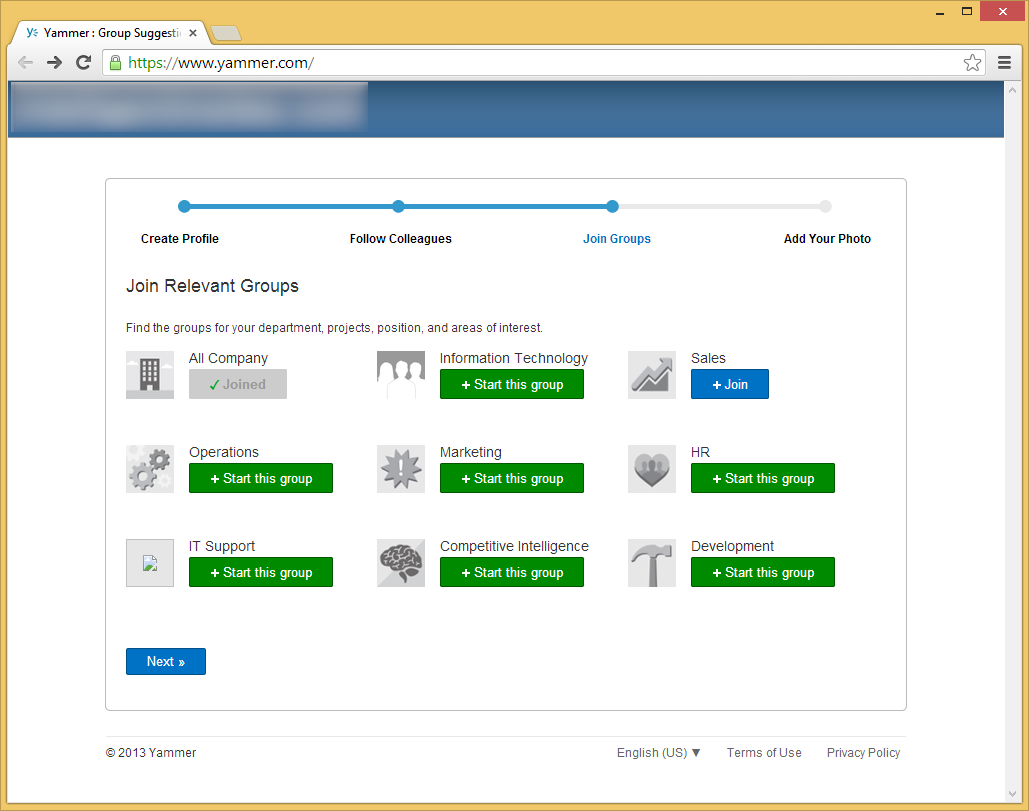
  10. Join or create any groups you would like and then click Next
    Yammer - Join Relevant Groups
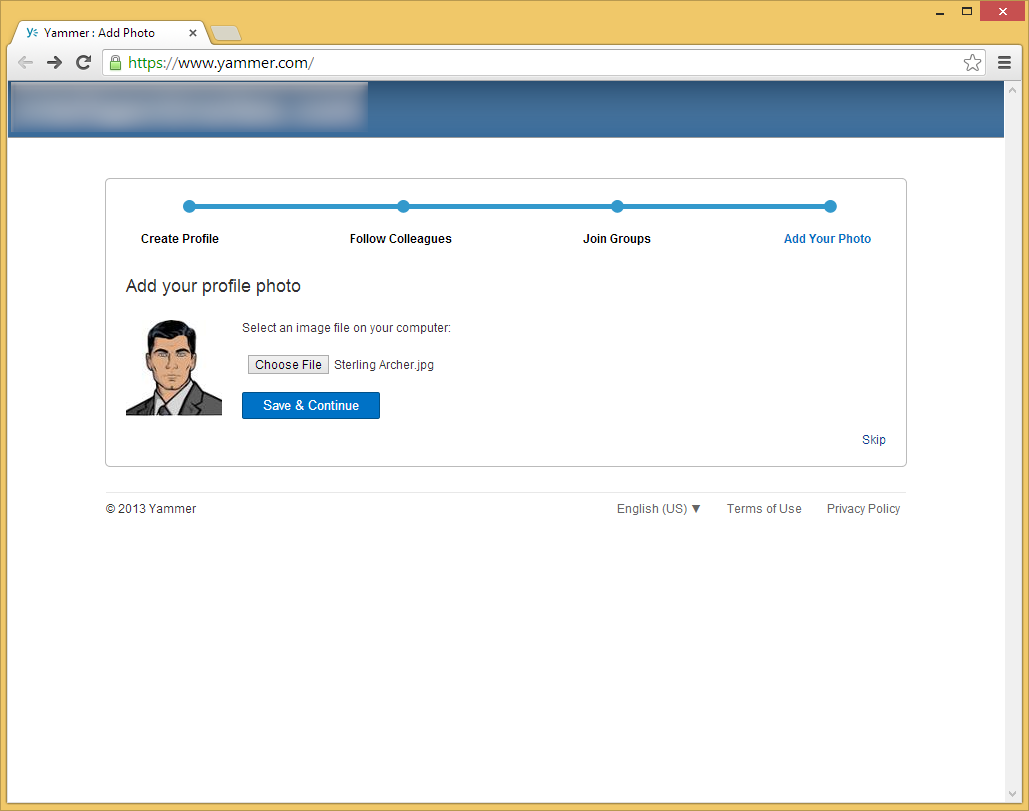
  11. Optionally, add a profile picture and click Save & Continue
    Yammer - Add your profile photo
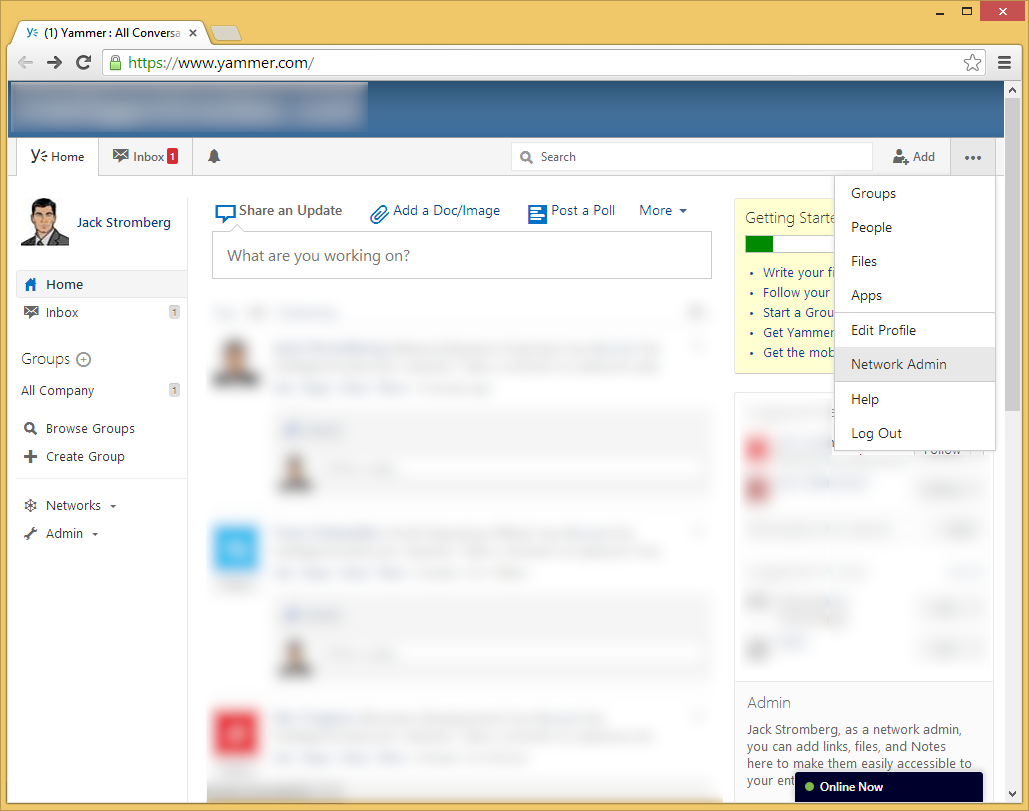
  12. Click on the 3 dots in the top right corner and select Network AdminYammer - Network Admin
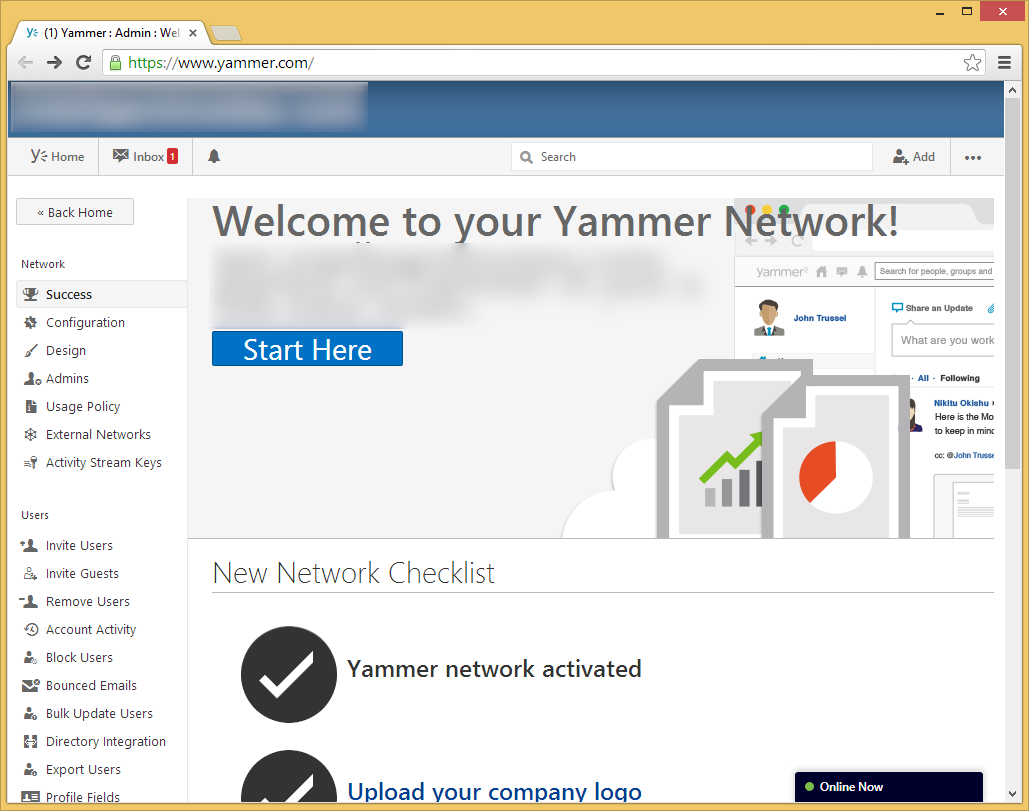
  13. Welcome to your Yammer Enterprise Admin portal!  Here you can manage all aspects of Yammer for your organization.
    Yammer - Network Admin - Dashboard
  14. Lastly, if you go back to your Office 365 Admin portal, you should see a link that will redirect you to the Yammer.com website.
    Office 365 - Admin - Yammer

FAQ

Does Yammer support single-sign on or ADFS?

Currently, Yammer does not support this integration at this time.

Will Yammer find users previously signed up with email addresses from @mydomain.com?

Yes

Does Microsoft have plans on continuing to integrate Yammer and Office 365?

Yes, Microsoft has announced they would like deeper integration with Office 365, more specifically with functionality in SharePoint.  Quarter 4 of this year (2013) was their deadline for the first integration, and we have seen they have started to deliver.  However, there are no specific dates yet of when users will be 100% synchronized between the two systems.

When I activate Yammer on Office 365 for my organization will it email all of my users to create profiles?

No, they will have to manually join or you will have to manually send them invites to create a separate Yammer account.

Error: DHCP: Credentials for DNS update should be configured if secure dynamic DNS update is enabled and the domain controller is on the same host as the DHCP server.

Symptom: In Windows Server 2008, Windows Server 2008 R2, Windows Server 2012, and Windows Server 2012 R2 you receive the following Warning when running the Microsoft Best Practices Analyzer.

Severity: Error
DHCP: Credentials for DNS update should be configured if secure dynamic DNS update is enabled and the domain controller is on the same host as the DHCP server.
BPA - Error DHCP Credentials for DNS update should be configured if secure dynamic DNS update is enabled and the domain controller is on the same host as the DHCP server

What does this mean?

If you have the DHCP service installed on your domain controller without a service account configured, by default, DNS registrations from DHCP clients will be prevented from being registered and will log event 1056 in event viewer.

Solution: Complete the following steps below to change the credentials of the service account used for DHCP.

  1. Before beginning, make sure you have a service account you can use to set the DHCP Server to run as.  This account should be a domain account (not a local account) and should not have any fancy privileges (standard user account, not an administrator).
  2. Open up Server Manager
    Server 2012 R2 - Server Manager
  3. Click Tools and select DHCP
    Server Manager - Tools - DHCP
  4. Expand your DHCP server and right click on the IPv4 service and select Properties
    DHCP - IPv4 - Properties
  5. Select the Advanced tab and then click the Credentials... button
    DHCP - IPv4 Properties - Advanced - Credentials...
  6. Enter in the User name, domain, password, and confirmation password to the user and click OK
    DNS dynamic update credentials
  7. Click OK on the IPv4 Properties screen
  8. Repeat this step on each of the DHCP servers in your domain.  It is recommended to use the same service account on each of the machines.

Notes: The official KB article from Microsoft on this subject can be found here: http://technet.microsoft.com/en-us/library/ee941181(v=ws.10).aspx
Another very good Technet article written by karammasri on this subject can be found here: http://blogs.technet.com/b/stdqry/archive/2012/04/03/dhcp-server-in-dcs-and-dns-registrations.aspx

Warning: Short file name creation should be disabled

Symptom: In Windows Server 2008, Windows Server 2008 R2, Windows Server 2012, and Windows Server 2012 R2 you receive the following Warning when running the Microsoft Best Practices Analyzer.

Severity: Warning
Short file name creation should be disabled

What is short file name creation?

Back in the good ol' days of windows, filenames were limited to a format of 8 characters for the name, a period, and then 3 characters for a file extension.  The filename was limited by FAT formatted partitions.  Unless running very old legacy applications, this can be safely turned off to help with performance.

Solution: Complete the following steps below to disable short file name creation.

  1. Open up an elevated powershell console
    Server 2012 - PowerShell - Run as Administrator
  2. Execute the following command
    1. Set-ItemProperty -Path "HKLM:\SYSTEM\CurrentControlSet\Control\FileSystem" -Name NtfsDisable8dot3NameCreation -Value 1
      Set-ItemProperty HKLM-SYSTEM-CurrentControlSet-Control-FileSystem
  3. Optionally, you can open up registry viewer and confirm the value has been changed.
    Registry Editor - HKLM-SYSTEM-CurrentControlSet-Control-FileSystem

Notes: An official KB article from Microsoft on this topic can be found here: http://technet.microsoft.com/en-us/library/ff633453(v=ws.10).aspx

Warning: Enable Receive Side Scaling (RSS) on a network adapter

Symptom: In Windows Server 2008, Windows Server 2008 R2, Windows Server 2012, and Windows Server 2012 R2 you receive the following Warning when running the Microsoft Best Practices Analyzer.

Severity: Warning
Enable Receive Side Scaling (RSS) on a network adapter
Server Manager - Best Practices Analyzer - Warning - Enable Receive Side Scaling RSS on a network adapter

What is Receive Side Scaling (RSS)?

Per Microsoft's website, Virtual Receive-side scaling (RSS) is a feature in Windows Server® 2012 R2 that allows the load from a virtual network adapter to be distributed across multiple virtual processors in a virtual machine.

Solution: Complete the following steps below to enable Receive-side scaling (RSS) on a network adapter.

  1. Open up an elevated command prompt
    Elevated Command Prompt
  2. Execute the following command
    1. netsh interface tcp set global rss=enabled
      command prompt - netsh interface tcp set global rss enabled
  3. At this point, Receive Side Scaling should be enabled.  Optionally, you can verify this in the Windows GUI.  Follow the steps below for verification.
    1. Execute the following command to open up device manager
      1. DEVMGMT.msc
        command prompt - devmgmt
    2. Expand Network adapters, right click on your adapter and select Properties
      device manager - network adapters - properties
    3. Select the Advanced tab and find Receive Side Scaling.  Set this to Enabled if it isn't already.
      Network Adapter Properties - Advanced - Receive Side Scaling

Notes:
An official KB article on this issue can be found here: http://technet.microsoft.com/en-us/library/gg162712(v=ws.10).aspx
An official KB article about Receive Side Scaling can be found here: http://technet.microsoft.com/en-us/library/dn383582.aspx

Warning: All OUs in this domain should be protected from accidental deletion

Symptom: When running the Microsoft Best Practices Analyzer on Server 2008 - Server 2012 R2, you receive the following warning:

Severity: Warning
All OUs in this domain should be protected from accidental deletion
Server Manager - Best Practices Analyzer - Warning - All OUs in this domain should be protected from accidental deletion

What is accidental deletion?

By protecting all OUs in the domain from accidental deletion, you will prevent yourself from being able to simply right click and delete an organizational unit in Active Directory Users and Groups.  By enabling accidental deletion on all OUs, you will have to take an extra step to delete the OU (which can be nice, as you don't want to accidentally delete an OU with important users or groups in it).

Solution:

Complete the steps below to enable protect all OUs in the domain from accidental deletion.

  1. Open up Server Manager
    Server 2012 R2 - Server Manager
  2. Click Tools and select Active Directory Module for Windows PowerShell
    Server Manager - Tools - Active Directory Module for Windows PowerShell
  3. Optional Step: Execute the following command to see which OUs are not currently protected from accidental deletion
    1. Get-ADOrganizationalUnit -filter * -Properties ProtectedFromAccidentalDeletion | where {$_.ProtectedFromAccidentalDeletion -eq $false} | ft DistinguishedNameList unprotected OUs from Accidental Deletion PowerShell
  4. Execute the following command to protect all OUs in the domain from accidental deletion
    1. Get-ADOrganizationalUnit -filter * -Properties ProtectedFromAccidentalDeletion | where {$_.ProtectedFromAccidentalDeletion -eq $false} | Set-ADOrganizationalUnit -ProtectedFromAccidentalDeletion $trueProtect OUs from Accidental Deletion PowerShell

Notes: An official KB article from Microsoft on this subject can be found here: http://technet.microsoft.com/en-us/library/dd723677(v=ws.10).aspx

Warning: DNS: The DNS server should have scavenging enabled

Symptom: When running the Microsoft Best Practice Analyzer on Windows Server 2008, Windows Server 2008 R2, Windows Server 2012, or Windows Server 2012 R2, you receive the following recommendation/warning:

Severity: Warning
DNS: The DNS server should have scavenging enabled.
Server 2012 - BPA - The DNS server should have scavenging enabled

What is DNS scavenging?

Per Microsoft: Scavenging automates the deletion of old records. When scavenging is disabled, these records must be deleted manually or the size of the DNS database can become large and have an adverse effect on performance.

Solution: Complete the following steps below to enable scavenging of DNS records.

  1. Click Start (right click Start if in Server 2012), and select Run
    Server 2012 - Run
  2. Type dnsmgmt.msc and click OK
    Run - dnsmgmt-msc
  3. Right click on your server and select Properties
    DNS Manager - Properties
  4. Click on the Advanced tab and check Enable automatic scavenging of stale records
    DNS Manager - Properties - Advanced - Enable automatic scavenging of stale records
  5.  Click OK

Notes: The official KB article from Microsoft can be found here: http://technet.microsoft.com/en-us/library/ff807390(v=ws.10).aspx

Enabling SSL on Windows Server Update Services (WSUS)

Here are the steps to configure SSL on your servers running the Windows Server Update Services.  This guide was written using Server 2012 R2, however it should be the same steps for Windows Server 2008 R2 as well.  This guide also assumes you have a working instance of WSUS installed and configured, using default ports.

  1. Login to your WSUS server
  2. Open up Server Manager
    Server 2012 R2 - Server Manager
  3. Select Tools -> Internet Information Services (IIS) Manager
    Server Manager - Tools - Internet Information Services IIS Manager
  4. Generate a SSL certificate
    1. Click on your Server and select Server Certificates
      Internet Information Services (IIS) Manager - Server Certificates
    2. If you have your own PKI environment, follow these steps, if not, jump to step three
      1. Click Create Domain Certificate on the right side
        Internet Information Services (IIS) Manager - Server Certificates - Create Domain Certificate
      2. Fill in the requested information on the Distinguished Name Properties page and click Next
        Internet Information Services (IIS) Manager - Server Certificates - Distinguished Name Properties
      3. Select your certificate authority and enter a friendly name (this can be anything), and then click Finish
      4. Internet Information Services (IIS) Manager - Server Certificates - Create Domain Certificate - Online Certification Authority
    3. If you need to submit a certificate request to an external certificate authority like Goaddy, Verisgn, Comodo; follow these steps
      1. Click Create Certificate Request on the right side
        Internet Information Services (IIS) Manager - Server Certificates - Create Certificate Request
      2. Fill out the Distinguished Name Properties and click Next
        Internet Information Services (IIS) Manager - Server Certificates - Request Certificate - Distinguished Name Properties
      3. Change the Bit length to 2048 and click Next
        Internet Information Services (IIS) Manager - Server Certificates - Request Certificate - Crytographic Service Provider Properties
      4. Select a location on where to place the CSR file that will be generated by the wizard and click Finish
        Internet Information Services (IIS) Manager - Server Certificates - Request Certificate - File Name
      5. At this point, send the request to your certificate authority (like GoDaddy, Verisign, or your own internal certificate authority). You should receive back a .cer file once the claim has been fulfilled.
      6. Click on Complete Certificate Request on the right side
        Internet Information Services (IIS) Manager - Server Certificates - Complete Certificate Request
      7. Select the .cer file that your public certificate authority provided you, type in a friendly name (this can be anything), select Web Hosting for the certificate store, and click OK
        Internet Information Services (IIS) Manager - Server Certificates - Request Certificate - Specify Certificate Authority Response
  5. Next, we need to bind the SSL certificate to your network adapter.
    1. Expand your server, expand Sites, and select WSUS Administration
      IIS - Sites - WSUS Administration
    2. Select Bindings... on the right side
      IIS - Bindings
    3. Select the https site and hit the Edit... button
      Site Bindings - Port 8531
    4. Select https for the type, select the SSL certificate you created above, and click OK
      IIS - Edit Site Binding - WSUS
    5. Click Close on the Site Bindings window
      IIS - Site Bindings - https
  6. Next, we need to enforce SSL encryption on the following virtual roots
    • ApiRemoting30
    • ClientWebService
    • DSSAuthWebService
    • ServerSyncWebService
    • SimpleAuthWebService

    1. Expand WSUS Administration and foreach of the directories above, complete the following steps
      1. Select the virtual site
        IIS - WSUS Administration
      2. Double click on SSL Settings
        IIS - WSUS Administration - SSL Settings
      3. Check Require SSL and leave client certificates to ignore
        IIS - WSUS Administration - SSL Settings - Require SSL
      4. Click Apply in the top right corner
        IIS - SSL Settings - Apply
  7. Next, we need to execute a command to tell WSUS to use ssl
    1. Open up an elevated command prompt
      Server 2012 - Administrative Command Prompt
    2. Navigate to your WSUS installation folder
      1. cd "c:\Program Files\Update Services\Tools"
        cmd - program files - update services - tools
    3. Execute the following command (replace your server with the correct FQDN)
      1. WSUSUtil.exe configuressl myserver.mydomain.local
        wsusutil configuressl
  8. Restart the WSUS server to make sure all changes take effect.  You should be able to bring up the WSUS management console if all went well.
  9. Configure your clients to connect via SSL to the WSUS server via Group Policy
    1. Login to your domain controller
    2. Open up Server Manager
      Server 2012 R2 - Server Manager
    3. Open up Group Policy Management
      Server Manager - Tools - Group Policy Management
    4. Right click on the policy you want to edit and select Edit
      Edit GPO
    5. Expand Computer Configuration -> Polices -> Administrative Templates -> Windows Components -> Windows Update
    6. Double click on Specify intranet Microsoft update service location
      Specify intranet Microsoft update service location
    7. Change the intranet update service url to https and specify port 8531 and then click Apply.
      Specify intranet Microsoft update service location - options

That should do it!  Try doing a gpupdate /force on your local machine and the check for windows updates.  If windows successfully completes checking for updates, you should be good to go! 🙂

Notes: Official documentation from Microsoft in regards to using SSL and WSUS can be found here: http://technet.microsoft.com/en-us/library/hh852346.aspx#consswsus