Edit in 2025: This guide was originally published in 2020 and works with Dovecot 2.3. Dovecot 2.4 introduces many new changes that prevent this guide from working as-is. While the premise is the same, the configuration file for Dovecot will need to be updated.
There's a few things in this journey that you should be aware of when running your own mailserver before we begin.
- Invest in a static public IP
- Don't open mail relay
- Leverage proper DNS records to help mitigate your email from being marked spam
- Leverage something to scrub your email
- Don't open mail relay
- Don't open mail relay
- Verify your domain or IP address hasn't been placed on a blacklist from a previous owner
In my career in doing IT, handling email is one of the most tedious tasks to setup/maintain due to so many moving pieces; many of which may be out of your control. Dealing with spam, blacklisting, having emails non-deliverable for several reasons, handling dns records, certificates, etc.... it's sometimes worth paying a few extra bucks to have someone else host your email and have peace of mind the message will be delivered. That being said, if you have the extra time on your hands and like the challenge of solving problems, here's a quick way to get started.
Preamble
This guide took me several hours to compile through trial and error. If you have any thoughts, notice any errors/typos, or have ideas on how to further secure/optimize, please leave feedback below to further improve this guide. Thank you and good luck on the deployment of your mail server!
Assumptions
- You have previously followed my guide on building a LEMP stack
- You are running Ubuntu or Debian as per the above guide (you can still follow this guide, you may have to slightly change which commands you use for your distribution -- configuration should remain the same though)
DNS
Let's first start at getting your DNS records configured properly. This guide will talk about configuring MX, SPF, and PTR records. We won't be covering Domain Keys in this article, maybe in a separate article if someone donates to my paypal on the right side of the website 😉
MX Record
Via your nameservers, add a new mx record for your domain name. Here's a list of tutorials for some of the major domain registrars:
SPF Record
Contrary to many websites that say you need to create a "SPF" record type, the SPF record type was never ratified by RFC standards. In this case, the proper way to create a SPF record is via a TXT record with the SPF value (as per RFC 7208).
You can leverage my SPF generator to create a new TXT record in the root of your domain.
PTR Record
To help decrease the odds of your emails being labeled as spam, I'd recommend creating a PTR record that will resolve your IP address to a DNS name (we call this a reverse lookup). For example, if my mail server's domain name was mail.mydomain.com and it resolved to 123.123.123.123, I would create a PTR record for 123.123.123.123 that points to mail.mydomain.com.
In many cases, you will need to either work with your ISP (Internet Service Provider) or domain registrar if you own your own IP block to make changes to the record for your IP address block.
When you are ready, you can leverage the nslookup command on Windows to validate the name from the IP address.
nslookup 123.123.123.123Or on linux you can leverage the host command to verify the reverse lookup as well:
host 123.123.123.123Get the OS ready
Download the latest packages and actually perform any updates.
sudo sh -c 'apt update && apt upgrade'Prepare MariaDB for virtual users/aliases
One of the primary reasons we need to configure a database is it is what will contain the information about all of our users and their corresponding email addresses (aliases). To do so, we need to create 3 new tables inside of a new database.
Login to the database
sudo mariadb -u root -pCreate the database, database user, and tables
Create a new database for our users (in this case, I'm calling the database mailserver). Note: This command must be run in the context of mariadb, this is not a bash command.
create database mailserver;Create a new user called mailuser, grant them access to the entire database, require the user to only create connections from 127.0.0.1 (localhost), and specify a password for the user.
GRANT SELECT ON mailserver.* TO 'mailuser'@'127.0.0.1' IDENTIFIED BY 'mysupersecretpassword';Execute the following command to apply the changes
FLUSH PRIVILEGES;Create a table for each of the domain names we will leverage for our email addresses.
CREATE TABLE `mailserver`.`virtual_domains` (
  `id` int(11) NOT NULL auto_increment,
  `name` varchar(50) NOT NULL,
  PRIMARY KEY (`id`)
) ENGINE=InnoDB DEFAULT CHARSET=utf8;
Create a table that will hold each of the users that will need mailboxes.
CREATE TABLE `mailserver`.`virtual_users` (
  `id` int(11) NOT NULL auto_increment,
  `domain_id` int(11) NOT NULL,
  `password` varchar(106) NOT NULL,
  `email` varchar(100) NOT NULL,
  PRIMARY KEY (`id`),
  UNIQUE KEY `email` (`email`),
  FOREIGN KEY (domain_id) REFERENCES virtual_domains(id) ON DELETE CASCADE
) ENGINE=InnoDB DEFAULT CHARSET=utf8;
Create a table that will hold aliases (additional email addresses) for a particular user.
CREATE TABLE `mailserver`.`virtual_aliases` (
  `id` int(11) NOT NULL auto_increment,
  `domain_id` int(11) NOT NULL,
  `source` varchar(100) NOT NULL,
  `destination` varchar(100) NOT NULL,
  PRIMARY KEY (`id`),
  FOREIGN KEY (domain_id) REFERENCES virtual_domains(id) ON DELETE CASCADE
) ENGINE=InnoDB DEFAULT CHARSET=utf8;
Insert a new user into the database
First, we need to add our first domain name into the domains table
INSERT INTO `mailserver`.`virtual_domains`
  (`name`)
VALUES
  ('mydomain.com');
Second, we need to create the user. Replace mysupersecretpassword with your password.
INSERT INTO `mailserver`.`virtual_users`
  (`domain_id`, `password` , `email`)
VALUES
  ('1', ENCRYPT('mysupersecretpassword', CONCAT('$6$', SUBSTRING(SHA(RAND()), -16))), '[email protected]');
Third, we can optionally specify an alias (secondary email address) for the user.
INSERT INTO `mailserver`.`virtual_aliases`
  (`domain_id`, `source`, `destination`)
VALUES
  ('1', '[email protected]', '[email protected]');
Type exit once you are done to leave the context of MariaDB.
Install Packages for Postfix and Dovecot
Postfix is what we call a Mail Transport Agent (MTA) and is responsible for actually sending/receive the messages from the internet. Later, we will talk about Dovecot which will be our MDA (Mail Delivery Agent) (what actually interacts with the mailbox).
The following command will install postfix, dovecot, and pull the packages to interact with MySQL. Although these are labeled MySQL, they should interact fine with MariaDB.
sudo apt-get install postfix postfix-mysql dovecot-core dovecot-imapd dovecot-lmtpd dovecot-mysqlDuring the installation of Postfix, you will be prompted to configure the connection type to the mail server. In this case, select Internet Site for the mail configuration.
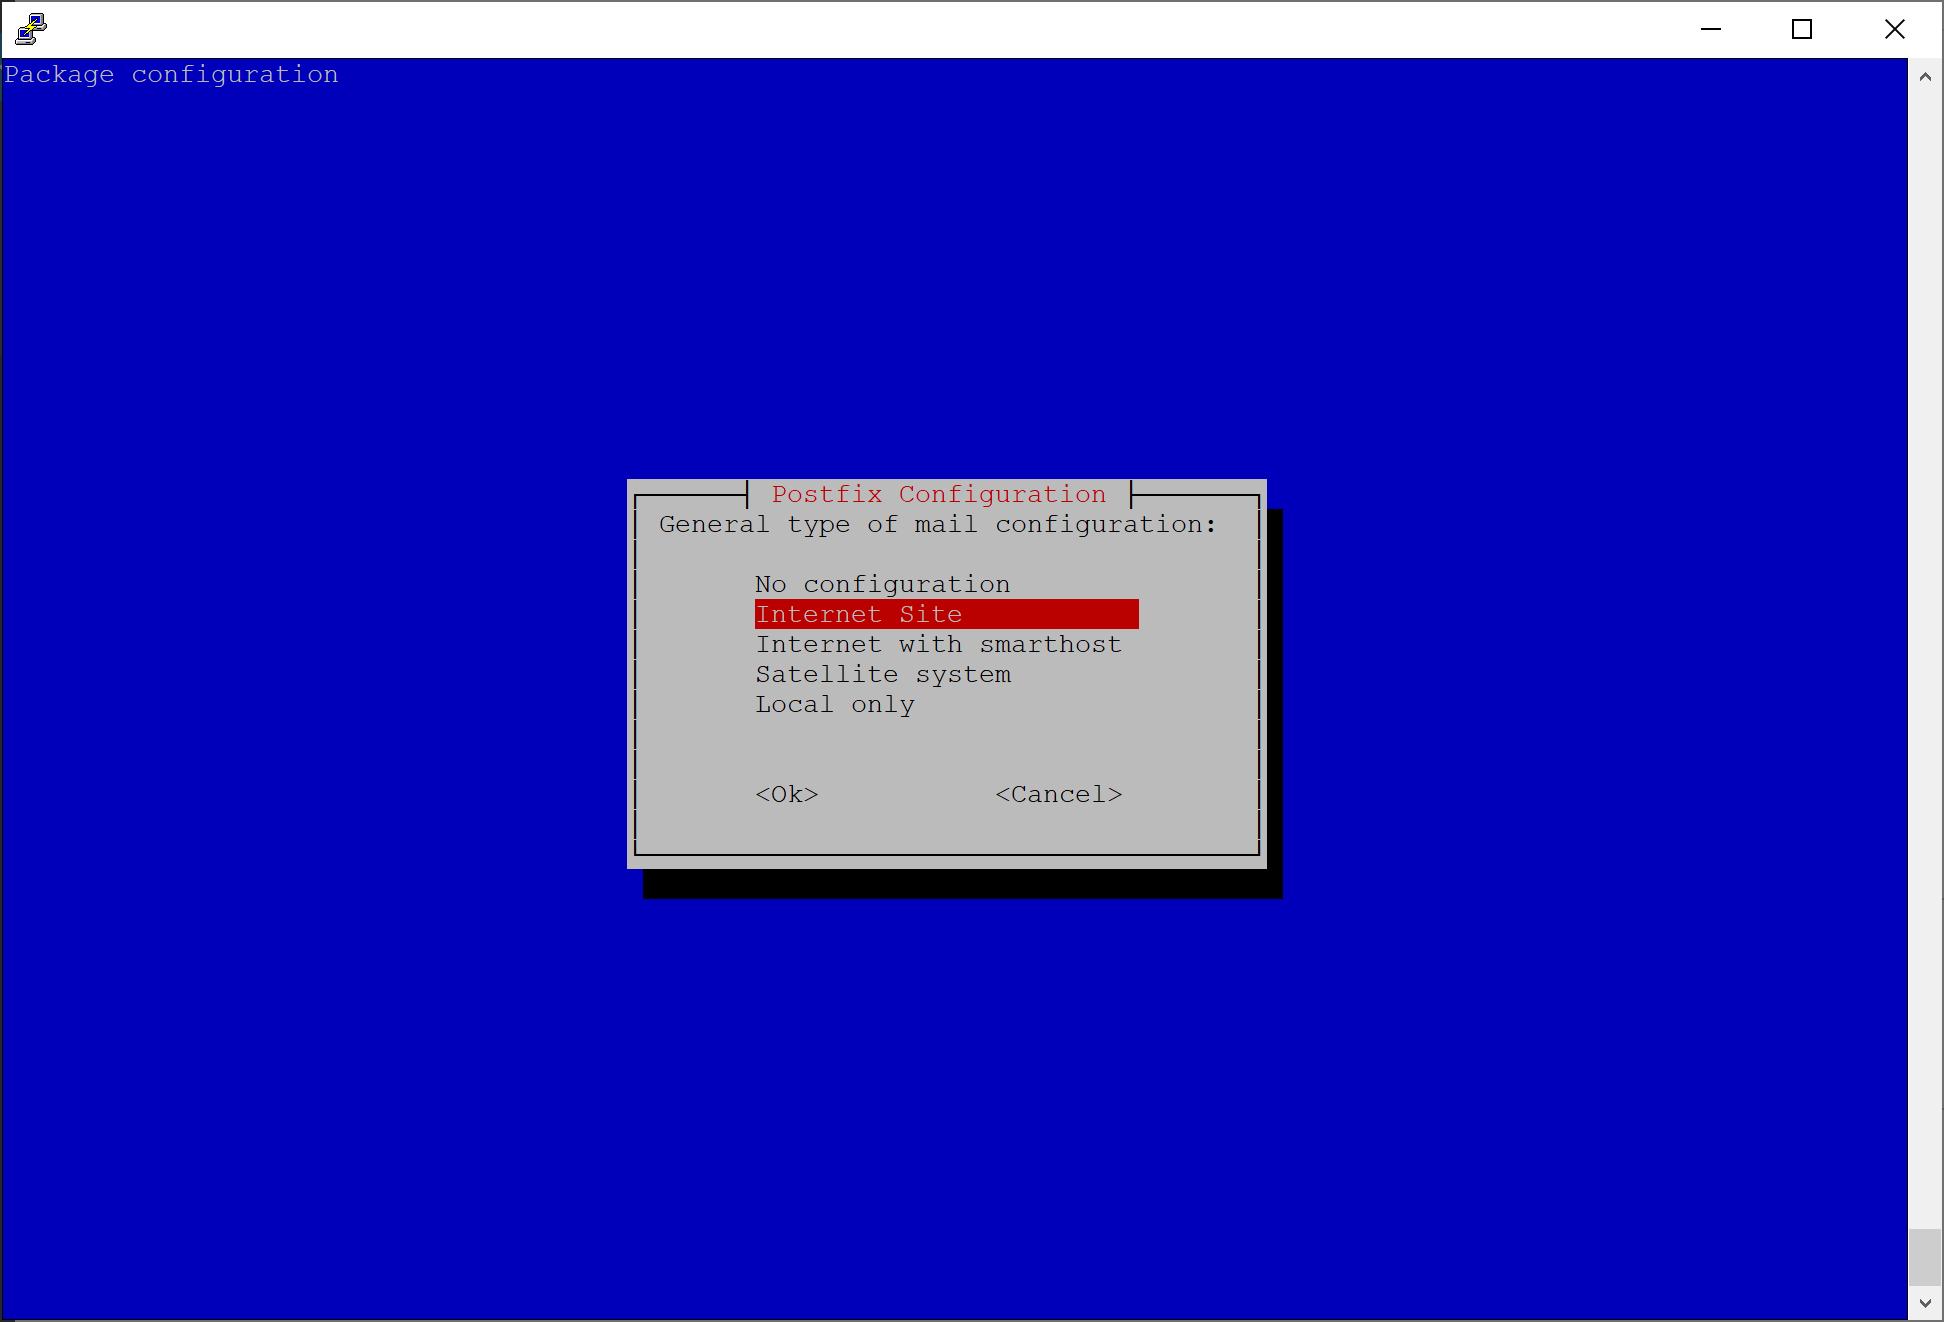
On the second installation prompt, it will ask for the domain name used in receiving email. In this prompt, specify one of the domain names you will be using for your users. For example, if your email addresses are going to be [email protected] you would specify mydomain.com for this prompt. Don't worry if you have multiple email addresses, we will cover that later on.
Configure Postfix to leverage MariaDB
First, let's create a backup of the Postfix configuration, so we have a baseline to refer back to.
sudo cp /etc/postfix/main.cf /etc/postfix/main.cf.bakCopy the following configuration and replace the domain name example.com with yours. Credit to linode for sharing their configuration as it not only defines integration into a database, but also hardens the Postfix deployment.
# See /usr/share/postfix/main.cf.dist for a commented, more complete version

# Debian specific:  Specifying a file name will cause the first
# line of that file to be used as the name.  The Debian default
# is /etc/mailname.
#myorigin = /etc/mailname

smtpd_banner = $myhostname ESMTP $mail_name
biff = no

# appending .domain is the MUA's job.
append_dot_mydomain = no

# Uncomment the next line to generate "delayed mail" warnings
#delay_warning_time = 4h

readme_directory = no

# TLS parameters
smtpd_tls_cert_file=/etc/letsencrypt/live/mydomain.com/fullchain.pem
smtpd_tls_key_file=/etc/letsencrypt/live/mydomain.com/privkey.pem
smtpd_use_tls=yes
smtpd_tls_auth_only = yes
smtp_tls_security_level = may
smtpd_tls_security_level = may
smtpd_sasl_security_options = noanonymous, noplaintext
smtpd_sasl_tls_security_options = noanonymous

# Authentication
smtpd_sasl_type = dovecot
smtpd_sasl_path = private/auth
smtpd_sasl_auth_enable = yes

# See /usr/share/doc/postfix/TLS_README.gz in the postfix-doc package for
# information on enabling SSL in the smtp client.

# Restrictions
smtpd_helo_restrictions =
        permit_mynetworks,
        permit_sasl_authenticated,
        reject_invalid_helo_hostname,
        reject_non_fqdn_helo_hostname
smtpd_recipient_restrictions =
        permit_mynetworks,
        permit_sasl_authenticated,
        reject_non_fqdn_recipient,
        reject_unknown_recipient_domain,
        reject_unlisted_recipient,
        reject_unauth_destination
smtpd_sender_restrictions =
        permit_mynetworks,
        permit_sasl_authenticated,
        reject_non_fqdn_sender,
        reject_unknown_sender_domain
smtpd_relay_restrictions =
        permit_mynetworks,
        permit_sasl_authenticated,
        defer_unauth_destination

# See /usr/share/doc/postfix/TLS_README.gz in the postfix-doc package for
# information on enabling SSL in the smtp client.

myhostname = example.com
alias_maps = hash:/etc/aliases
alias_database = hash:/etc/aliases
mydomain = mydomain.com
myorigin = $mydomain
mydestination = localhost
relayhost =
mynetworks = 127.0.0.0/8 [::ffff:127.0.0.0]/104 [::1]/128
mailbox_size_limit = 0
recipient_delimiter = +
inet_interfaces = all
inet_protocols = all

# Handing off local delivery to Dovecot's LMTP, and telling it where to store mail
virtual_transport = lmtp:unix:private/dovecot-lmtp

# Virtual domains, users, and aliases
virtual_mailbox_domains = mysql:/etc/postfix/mysql-virtual-mailbox-domains.cf
virtual_mailbox_maps = mysql:/etc/postfix/mysql-virtual-mailbox-users.cf
virtual_alias_maps = mysql:/etc/postfix/mysql-virtual-mailbox-aliases.cf,
        mysql:/etc/postfix/mysql-virtual-mailbox-users.cf

# Even more Restrictions and MTA params
disable_vrfy_command = yes
strict_rfc821_envelopes = yes
#smtpd_etrn_restrictions = reject
#smtpd_reject_unlisted_sender = yes
#smtpd_reject_unlisted_recipient = yes
smtpd_delay_reject = yes
smtpd_helo_required = yes
smtp_always_send_ehlo = yes
#smtpd_hard_error_limit = 1
smtpd_timeout = 30s
smtp_helo_timeout = 15s
smtp_rcpt_timeout = 15s
smtpd_recipient_limit = 40
minimal_backoff_time = 180s
maximal_backoff_time = 3h

# Reply Rejection Codes
invalid_hostname_reject_code = 550
non_fqdn_reject_code = 550
unknown_address_reject_code = 550
unknown_client_reject_code = 550
unknown_hostname_reject_code = 550
unverified_recipient_reject_code = 550
unverified_sender_reject_code = 550
Next, we need to create the mappings of domain names, users, and aliases. In the same directory as the main.cf (/etc/postfix) we need to first create a file that will tell postfix how to lookup what domain names exist. You can open the documents with your favorite text editor; I use vi since it's universally installed.
sudo vi /etc/postfix/mysql-virtual-mailbox-domains.cfPress i to get vi into insert mode and paste the following, replacing the password with the mailuser we specified earlier in this tutorial.
user = mailuser
password = mysupersecretpassword
hosts = 127.0.0.1
dbname = mailserver
query = SELECT 1 FROM virtual_domains WHERE name='%s'
Press : and then type wq and press enter to write the changes to the file and quit in vi.
Next, we will create another file that is used to lookup each user's mailbox.
sudo vi /etc/postfix/mysql-virtual-mailbox-users.cfPress i to get vi into insert mode and paste the following, replacing the password with the mailuser we specified earlier in this tutorial.
user = mailuser
password = mysupersecretpassword
hosts = 127.0.0.1
dbname = mailserver
query = SELECT email FROM virtual_users WHERE email='%s'
Press : and then type wq and press enter to write the changes to the file and quit in vi.
Last, we will create another file that is used to map an alias to a user's mailbox.
sudo vi /etc/postfix/mysql-virtual-mailbox-aliases.cfPress i to get vi into insert mode and paste the following, replacing the password with the mailuser we specified earlier in this tutorial.
user = mailuser
password = mysupersecretpassword
hosts = 127.0.0.1
dbname = mailserver
query = SELECT destination FROM virtual_aliases WHERE source='%s'
Press : and then type wq and press enter to write the changes to the file and quit in vi.
Restart the Postfix service for the changes to take effect
sudo service postfix restartNext, to enable port 587 and 465 to connect securely with email clients, we need to modify /etc/postfix/master.cf. First, let's create a backup of the master.cf file.
sudo cp /etc/postfix/master.cf /etc/postfix/master.cf.bakNext, we need to modify the master.cf file. Modify the document (mostly uncomment many of the lines) to look similar to the code below.
sudo vi /etc/postfix/master.cfsubmission inet n - y - - smtpd
-o syslog_name=postfix/submission
-o smtpd_tls_security_level=encrypt
-o smtpd_sasl_auth_enable=yes
-o smtpd_sasl_type=dovecot
-o smtpd_sasl_path=private/auth
-o smtpd_tls_auth_only=yes
-o smtpd_reject_unlisted_recipient=no
-o smtpd_recipient_restrictions=
-o smtpd_relay_restrictions=permit_sasl_authenticated,reject
-o milter_macro_daemon_name=ORIGINATING
smtps inet n - y - - smtpd
-o syslog_name=postfix/smtps
-o smtpd_tls_wrappermode=yes
-o smtpd_sasl_auth_enable=yes
-o smtpd_sasl_type=dovecot
-o smtpd_sasl_path=private/auth
-o smtpd_reject_unlisted_recipient=no
-o smtpd_recipient_restrictions=
-o smtpd_relay_restrictions=permit_sasl_authenticated,reject
-o milter_macro_daemon_name=ORIGINATINGPress : and then type wq and press enter to write the changes to the file and quit in vi.
Note: If you'd like to allow open relay locally, you can prefix permit_mynetworks to the smtpd_relay_restrictions list as well.
Restart the Postfix service for the changes to take effect
sudo service postfix restartConfigure Dovecot
Now that we have our MTA configured, we now need to configure our MDA. You can think of Postfix as a shipping center and Dovecot as the courier, who interfaces directly with your mailbox. Roundcube will be our MUA (mail user agent) that interfaces with Dovecot to display your mail. The goal for this section is to ensure Dovecot requires SSL.
First, we'll create backups of each of the Dovecot configuration files
sudo cp /etc/dovecot/dovecot.conf /etc/dovecot/dovecot.conf.orig
sudo cp /etc/dovecot/conf.d/10-mail.conf /etc/dovecot/conf.d/10-mail.conf.orig
sudo cp /etc/dovecot/conf.d/10-auth.conf /etc/dovecot/conf.d/10-auth.conf.orig
sudo cp /etc/dovecot/dovecot-sql.conf.ext /etc/dovecot/dovecot-sql.conf.ext.orig
sudo cp /etc/dovecot/conf.d/10-master.conf /etc/dovecot/conf.d/10-master.conf.orig
sudo cp /etc/dovecot/conf.d/10-ssl.conf /etc/dovecot/conf.d/10-ssl.conf.orig
Execute the following command to enable support for imap and lmtp (pop3 can be added, but ensure you install the dovecot-pop3d package).
sudo sed -i '/^\!include_try \/usr\/share\/dovecot\/protocols.d\/\*.protocol/a protocols=imap lmtp' /etc/dovecot/dovecot.confNext, we need to edit /etc/dovecot/conf.d/10-mail.conf to define where mailboxes are stored. Execute the following commands:
sudo sed -i 's/mail_location = mbox.*/mail_location = maildir:\/var\/mail\/vhosts\/%d\/%n\//g' /etc/dovecot/conf.d/10-mail.conf
sudo sed -i 's/^#mail_privileged_group = mail/mail_privileged_group = mail/g' /etc/dovecot/conf.d/10-mail.conf
Next, we need to make directories for each of your domain names. Execute the following command for each of your domain names.
sudo mkdir -p /var/mail/vhosts/example.comNow we need to create a user and group called vmail, assigned with an id of 5000, and set the directory with the owner of vmail
sudo groupadd -g 5000 vmail
sudo useradd -g vmail -u 5000 vmail -d /var/mail
sudo chown -R vmail:vmail /var/mail
Next we need to edit the user authentication file (/etc/dovecot/conf.d/10-auth.conf) to tell Dovecat to leverage MariaDB for our users. Execute the following commands:
sudo sed -i 's/^#disable_plaintext_auth = yes/disable_plaintext_auth = yes/g' /etc/dovecot/conf.d/10-auth.conf
sudo sed -i 's/^#auth_mechanisms = plain login/auth_mechanisms = plain login/g' /etc/dovecot/conf.d/10-auth.conf
sudo sed -i 's/^!include auth-system.conf.ext/#!include auth-system.conf.ext/g' /etc/dovecot/conf.d/10-auth.conf
sudo sed -i 's/^#!include auth-sql.conf.ext/!include auth-sql.conf.ext/g' /etc/dovecot/conf.d/10-auth.conf
Once we have the authentication file configured, we need to update the sql driver (/etc/dovecot/conf.d/auth-sql.conf.ext) to point to our mailboxes. You will need to uncomment the passdb section and uncomment the userdb driver that is static.
sudo vi /etc/dovecot/conf.d/auth-sql.conf.extPress i to get vi into insert mode and paste the following configuration
# Authentication for SQL users. Included from 10-auth.conf.
#
# <doc/wiki/AuthDatabase.SQL.txt>

passdb {
  driver = sql

  # Path for SQL configuration file, see example-config/dovecot-sql.conf.ext
  args = /etc/dovecot/dovecot-sql.conf.ext
}

# "prefetch" user database means that the passdb already provided the
# needed information and there's no need to do a separate userdb lookup.
# <doc/wiki/UserDatabase.Prefetch.txt>
#userdb {
#  driver = prefetch
#}

#userdb {
#  driver = sql
#  args = /etc/dovecot/dovecot-sql.conf.ext
#}

# If you don't have any user-specific settings, you can avoid the user_query
# by using userdb static instead of userdb sql, for example:
# <doc/wiki/UserDatabase.Static.txt>
userdb {
  driver = static
  args = uid=vmail gid=vmail home=/var/mail/vhosts/%d/%n
}
Press : and then type wq and press enter to write the changes to the file and quit in vi.
The final Dovecot file we need to modify will set our database settings (/etc/dovecot/dovecot-sql.conf.ext). Execute the following commands to uncomment the correct settings. Note: be sure to replace the password with the database password we configured earlier.
sudo sed -i 's/^#driver = /driver = mysql/g' /etc/dovecot/dovecot-sql.conf.ext
sudo sed -i 's/^#connect =/connect = host=127.0.0.1 dbname=mailserver user=mailuser password=mysupersecretpassword/g' /etc/dovecot/dovecot-sql.conf.ext
sudo sed -i 's/^#default_pass_scheme = MD5/default_pass_scheme = SHA512-CRYPT/g' /etc/dovecot/dovecot-sql.conf.ext
sudo sed -i '/^#password_query = \\/i password_query = SELECT email as user, password FROM virtual_users WHERE email=\x27%u\x27;' /etc/dovecot/dovecot-sql.conf.ext
After making the changes to the dovecot-sql.conf.ext file, next we need to change the owner and the group of the dovecot folder to the vmail user:
sudo chown -R vmail:dovecot /etc/dovecot
sudo chmod -R o-rwx /etc/dovecot
Next, we need to disable the unencrypted versions of IMAP and SMTP.
sudo vi /etc/dovecot/conf.d/10-master.confWe need to edit the /etc/dovecot/conf.d/10-master.conf file and set ports to 0 to disable non-encrypted imap/pop3. Find service imap-login { and make it look like the following.
service imap-login {
  inet_listener imap {
    port = 0
  }
  inet_listener imaps {
    port = 993
    ssl = yes
  }

  # Number of connections to handle before starting a new process. Typically
  # the only useful values are 0 (unlimited) or 1. 1 is more secure, but 0
  # is faster. <doc/wiki/LoginProcess.txt>
  #service_count = 1

  # Number of processes to always keep waiting for more connections.
  #process_min_avail = 0

  # If you set service_count=0, you probably need to grow this.
  #vsz_limit = $default_vsz_limit
}

service pop3-login {
  inet_listener pop3 {
    port = 0
  }
  inet_listener pop3s {
    port = 995
    ssl = yes
  }
}
In the same file, find service lmtp { and replace the whole block down to the third } with the following:
service lmtp {
  unix_listener /var/spool/postfix/private/dovecot-lmtp {
    mode = 0600
    user = postfix
    group = postfix
  }

  # Create inet listener only if you can't use the above UNIX socket
  #inet_listener lmtp {
    # Avoid making LMTP visible for the entire internet
    #address =
    #port =
  #}
}
In the same file, find service auth { and replace the whole block down to the third } with the following:
service auth {
  # auth_socket_path points to this userdb socket by default. It's typically
  # used by dovecot-lda, doveadm, possibly imap process, etc. Users that have
  # full permissions to this socket are able to get a list of all usernames and
  # get the results of everyone's userdb lookups.
  #
  # The default 0666 mode allows anyone to connect to the socket, but the
  # userdb lookups will succeed only if the userdb returns an "uid" field that
  # matches the caller process's UID. Also if caller's uid or gid matches the
  # socket's uid or gid the lookup succeeds. Anything else causes a failure.
  #
  # To give the caller full permissions to lookup all users, set the mode to
  # something else than 0666 and Dovecot lets the kernel enforce the
  # permissions (e.g. 0777 allows everyone full permissions).
  unix_listener auth-userdb {
    mode = 0600
    user = vmail
    #group =
  }

  # Postfix smtp-auth
  unix_listener /var/spool/postfix/private/auth {
    mode = 0600
    user = postfix
    group = postfix
  }

  # Auth process is run as this user.
  user = dovecot
}
In the same file, find service auth-worker { and replace the whole block down to the } with the following:
service auth-worker {
  # Auth worker process is run as root by default, so that it can access
  # /etc/shadow. If this isn't necessary, the user should be changed to
  # $default_internal_user.
  user = vmail
}
Press : and then type wq and press enter to write the changes to the file and quit in vi.
Last, we need to tell dovecot where our SSL certificate is for encryption. We will modify the /etc/dovecot/conf.d/10-ssl.conf file. Make sure to update the directory with the correct path for your certificates.
Execute the following commands, replacing
sudo sed -i 's/^ssl = yes/ssl = required/g' /etc/dovecot/conf.d/10-ssl.conf
sudo sed -i 's/^ssl_cert = .*/ssl_cert = <\/etc\/letsencrypt\/live\/mydomain.com\/fullchain.pem/g' /etc/dovecot/conf.d/10-ssl.conf
sudo sed -i 's/^ssl_key = .*/ssl_key = <\/etc\/letsencrypt\/live\/mydomain.com\/privkey.pem/g' /etc/dovecot/conf.d/10-ssl.conf
Last, restart devocot to enable all of our changes.
sudo service dovecot restartConfigure Roundcube
Install dependencies for Roundcube
Roundcube requires several PHP PEAR modules. To install the bare minimum featureset, execute the following command:
sudo apt-get install php7.3-mbstring php-pear php-net-idna2 php-net-smtp php-mail-mimeCreate a database for Roundcube
First, we need to create a new database and user for Roundcube. We can do this by logging into MariaDB and executing the create and grant commands.
sudo mariadb -u myusername -p
CREATE DATABASE roundcubemail CHARACTER SET utf8 COLLATE utf8_general_ci;
GRANT ALL PRIVILEGES ON roundcubemail.* TO roundcube@localhost IDENTIFIED BY 'myreallyreallysecretpassword';
FLUSH PRIVILEGES;
exit
Request SSL Certificates for Roundcube
We will want to ensure all traffic to and from the client is encrypted in transit when trying to access Roundcube. To do this, I leverage Let's Encrypt, which will allow you to request a free SSL certificate. If you have your own SSL certificate, go ahead and copy it to a location on the server so we can reference it later.
sudo apt-get install certbot
sudo certbot certonly --authenticator standalone -d webmail.mydomain.com --pre-hook "service nginx stop" --post-hook "service nginx start"
Create a directory for Roundcube
We will need to create a directory that will hold Roundcube's files to serve to the web. Let's create a new directory to serve these files and limit permissions to www-data.
sudo mkdir /var/www/webmail.mydomain.com
sudo chown -R www-data:www-data /var/www/webmail.mydomain.com
Copy Roundcube Files to the web directory
We will need to grab the latest copy of Roundcube's code to run the website. Note: please ensure you substitute the correct version for Roundcube when executing the commands below as the version listed in the guide will likely be out of date as time goes on:
cd /tmp
wget https://github.com/roundcube/roundcubemail/releases/download/1.4.1/roundcubemail-1.4.1.tar.gz
tar -xf roundcubemail-1.4.1.tar.gz
mv roundcubemail-1.4.1 /var/www/webmail.mydomain.com
Populate the SQL Database
You will need to execute the following SQL command to populate your Roundcube database with the tables needed to run Roundcube. To do so, execute the following commands.
sudo mariadb roundcubemail < /var/www/webmail.mydomain.com/SQL/mysql.initial.sqlInstall Roundcube dependencies
Roundcube doesn't ship with several javascript dependencies. To ensure the Roundcube pages load properly, you will need to execute the following command to pull down the javascript dependencies.
sudo php /var/www/webmail.mydomain.com/bin/install-jsdeps.shConfigure NGINX
Let's configure NGINX to point to our web directory for the website. When doing so, it is very important you protect your installation by preventing access to some sensitive files from the web.
First, create a virtual-host file within the nginx sites-available folder:
sudo vi /etc/nginx/sites-available/webmail.mydomain.comPress i to get vi into insert mode and paste the following. Note: Please replace the values with the path to your SSL Certificate we generated earlier.
##
# You should look at the following URL's in order to grasp a solid understanding
# of Nginx configuration files in order to fully unleash the power of Nginx.
# https://www.nginx.com/resources/wiki/start/
# https://www.nginx.com/resources/wiki/start/topics/tutorials/config_pitfalls/
# https://wiki.debian.org/Nginx/DirectoryStructure
#
# In most cases, administrators will remove this file from sites-enabled/ and
# leave it as reference inside of sites-available where it will continue to be
# updated by the nginx packaging team.
#
# This file will automatically load configuration files provided by other
# applications, such as Drupal or WordPress. These applications will be made
# available underneath a path with that package name, such as /drupal8.
#
# Please see /usr/share/doc/nginx-doc/examples/ for more detailed examples.
##

# Default server configuration
#

server {
        listen 443 ssl;
        listen [::]:443 ssl;
        server_name webmail.mydomain.com;

ssl_certificate /etc/letsencrypt/live/webmail.mydomain.com/fullchain.pem;
  ssl_certificate_key /etc/letsencrypt/live/webmail.mydomain.com/privkey.pem;
  ssl_session_timeout 1d;
  ssl_session_cache shared:SSL:50m;
  ssl_session_tickets off;
  ssl_protocols TLSv1.1 TLSv1.2;
  ssl_ciphers 'ECDHE-RSA-AES128-GCM-SHA256:ECDHE-ECDSA-AES128-GCM-SHA256:ECDHE-RSA-AES256-GCM-SHA384:ECDHE-ECDSA-AES256-GCM-SHA384:DHE-RSA-AES128-GCM-SHA256:DHE-DSS-AES128-GCM-SHA256:kEDH+AESGCM:ECDHE-RSA-AES128-SHA256:ECDHE-ECDSA-AES128-SHA256:ECDHE-RSA-AES128-SHA:ECDHE-ECDSA-AES128-SHA:ECDHE-RSA-AES256-SHA384:ECDHE-ECDSA-AES256-SHA384:ECDHE-RSA-AES256-SHA:ECDHE-ECDSA-AES256-SHA:DHE-RSA-AES128-SHA256:DHE-RSA-AES128-SHA:DHE-DSS-AES128-SHA256:DHE-RSA-AES256-SHA256:DHE-DSS-AES256-SHA:DHE-RSA-AES256-SHA:!aNULL:!eNULL:!EXPORT:!DES:!RC4:!3DES:!MD5:!PSK';
  ssl_prefer_server_ciphers on;
  ssl_stapling on;
  ssl_stapling_verify on;
  ssl_trusted_certificate /etc/letsencrypt/live/webmail.mydomain.com/chain.pem;


        # SSL configuration
        #
        # listen 443 ssl default_server;
        # listen [::]:443 ssl default_server;
        #
        # Note: You should disable gzip for SSL traffic.
        # See: https://bugs.debian.org/773332
        #
        # Read up on ssl_ciphers to ensure a secure configuration.
        # See: https://bugs.debian.org/765782
        #
        # Self signed certs generated by the ssl-cert package
        # Don't use them in a production server!
        #
        # include snippets/snakeoil.conf;

        root /var/www/webmail.mydomain.com;

        # Add index.php to the list if you are using PHP
        index index.php index.html index.htm;

       # Revoke access to sensitive files and directories
       location ~ ^/(README|INSTALL|LICENSE|CHANGELOG|UPGRADING)$ {
                deny all;
       }
       location ~ ^/(config|temp|bin|SQL|logs)/ {
                deny all;
       }

        # pass PHP scripts to FastCGI server
        #
        location ~ \.php$ {
                include snippets/fastcgi-php.conf;
        #
        #       # With php-fpm (or other unix sockets):
                fastcgi_pass unix:/run/php/php7.3-fpm.sock;
        #       # With php-cgi (or other tcp sockets):
        #       fastcgi_pass 127.0.0.1:9000;
        }

        # deny access to .htaccess files, if Apache's document root
        # concurs with nginx's one
        #
        location ~ /\. {
                deny all;
                access_log off;
                log_not_found off;
       }
}
Press : and then type wq and press enter to write the changes to the file and quit in vi.
Last, we need to create a link of the virtual host file to /etc/nginx/sites-enabled. You will need to execute the following commands to create the link as well as restart nginx to apply the changes.
sudo ln -s /etc/nginx/sites-available/webmail.mydomain.com /etc/nginx/sites-enabled/webmail.mydomain.com
sudo service nginx restart
Run the Roundcube installer
At this point, if you navigate to https://webmail.mydomain.com/installer, you should see the Roundcube Webmail Installer page. You should see a series of items show OK, NOT AVAILABLE, or NOT OK. You will need to remediate any items that show NOT OK for Roundcube to successfully run.
In this installer, I primarily focused on Step 1 (Checking the environment) and Step 2 (Checking the database). Once both show OK (don't worry about if email is successful or fails (likely it is failing still), move the installer directory to your home drive to secure the environment (IT IS VERY DANGEROUS TO LEAVE THIS PAGE!!! DON'T SKIP THIS STEP).
sudo mv /var/www/webmail.mydomain.com/installer ~Update Roundcube configuration
I couldn't get Roundcube to actually work during the installation with this setup until I manually specified a few items via the Roundcube configuration file. Within the /var/www/webmail.mydomain.com/config/config.inc.php file, ensure you have the following code snippets to allow Roundcube to properly authenticate to your mailserver.
sudo vi /var/www/webmail.mydomain.com/config/config.inc.phpEnsure you have the following code snippets (typically there is a section under // IMAP that has the config we can start with). To do so, press i to get vi into insert mode and paste the following.
$config['default_port'] = 993;
$config['default_host'] = 'imaps://localhost';
$config['mail_domain'] = '%d';
$config['imap_conn_options'] = array(
 'ssl'         => array(
     'verify_peer'       => true,
     'verify_peer_name' => false,
  ),
);

// SMTP
$config['smtp_server'] = 'ssl://localhost';
$config['smtp_port'] = 465;
$config['smtp_auth_type'] = 'LOGIN';
// Required if you're running PHP 5.6 or later
$config['smtp_conn_options'] = array(
    'ssl' => array(
        'verify_peer'      => true,
        'verify_peer_name' => false,
    ),
);
Press : and then type wq and press enter to write the changes to the file and quit in vi.
Verify
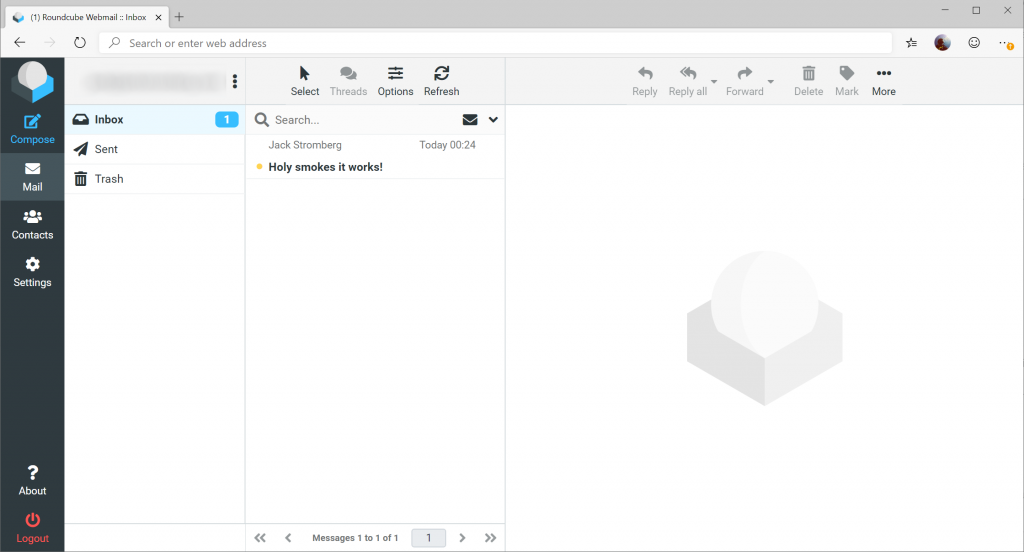
At this point, you should be able to login to https://webmail.mydomain.com and send/receive email!
As with all technology, ensure you keep up-to-date with all the latest security patches to keep your environment stable and secure.
If you made it to this point, were able to successfully send/receive mail via Roundcube, pat yourself on the back and grab a fine beverage!
Troubleshooting
Here are some useful commands to help troubleshoot your deployment.
sudo postqueue -p can be used to check if any pending emails are queued.
sudo postmap -q mydomain.com mysql:/etc/postfix/mysql-virtual-mailbox-domains.cf can be used to validate what domain names are accepted. You should receive the value of 1 if it exists.
sudo postmap -q [email protected] mysql:/etc/postfix/mysql-virtual-mailbox-users.cf will validate if a user account exists with the specified email address. You should receive the value of the email address of the user if it exists.
sudo postmap -q [email protected] mysql:/etc/postfix/mysql-virtual-mailbox-aliases.cf can be used to validate the alias of an email address. You should receive the email address of the user account if it does map back to another user.
tail -f /var/log/mail.log can be useful watching how emails are handled by postfix/dovecot to troubleshoot how messages are being handled
Roundcube installation instructions (documentation): https://github.com/roundcube/roundcubemail/wiki/Installation