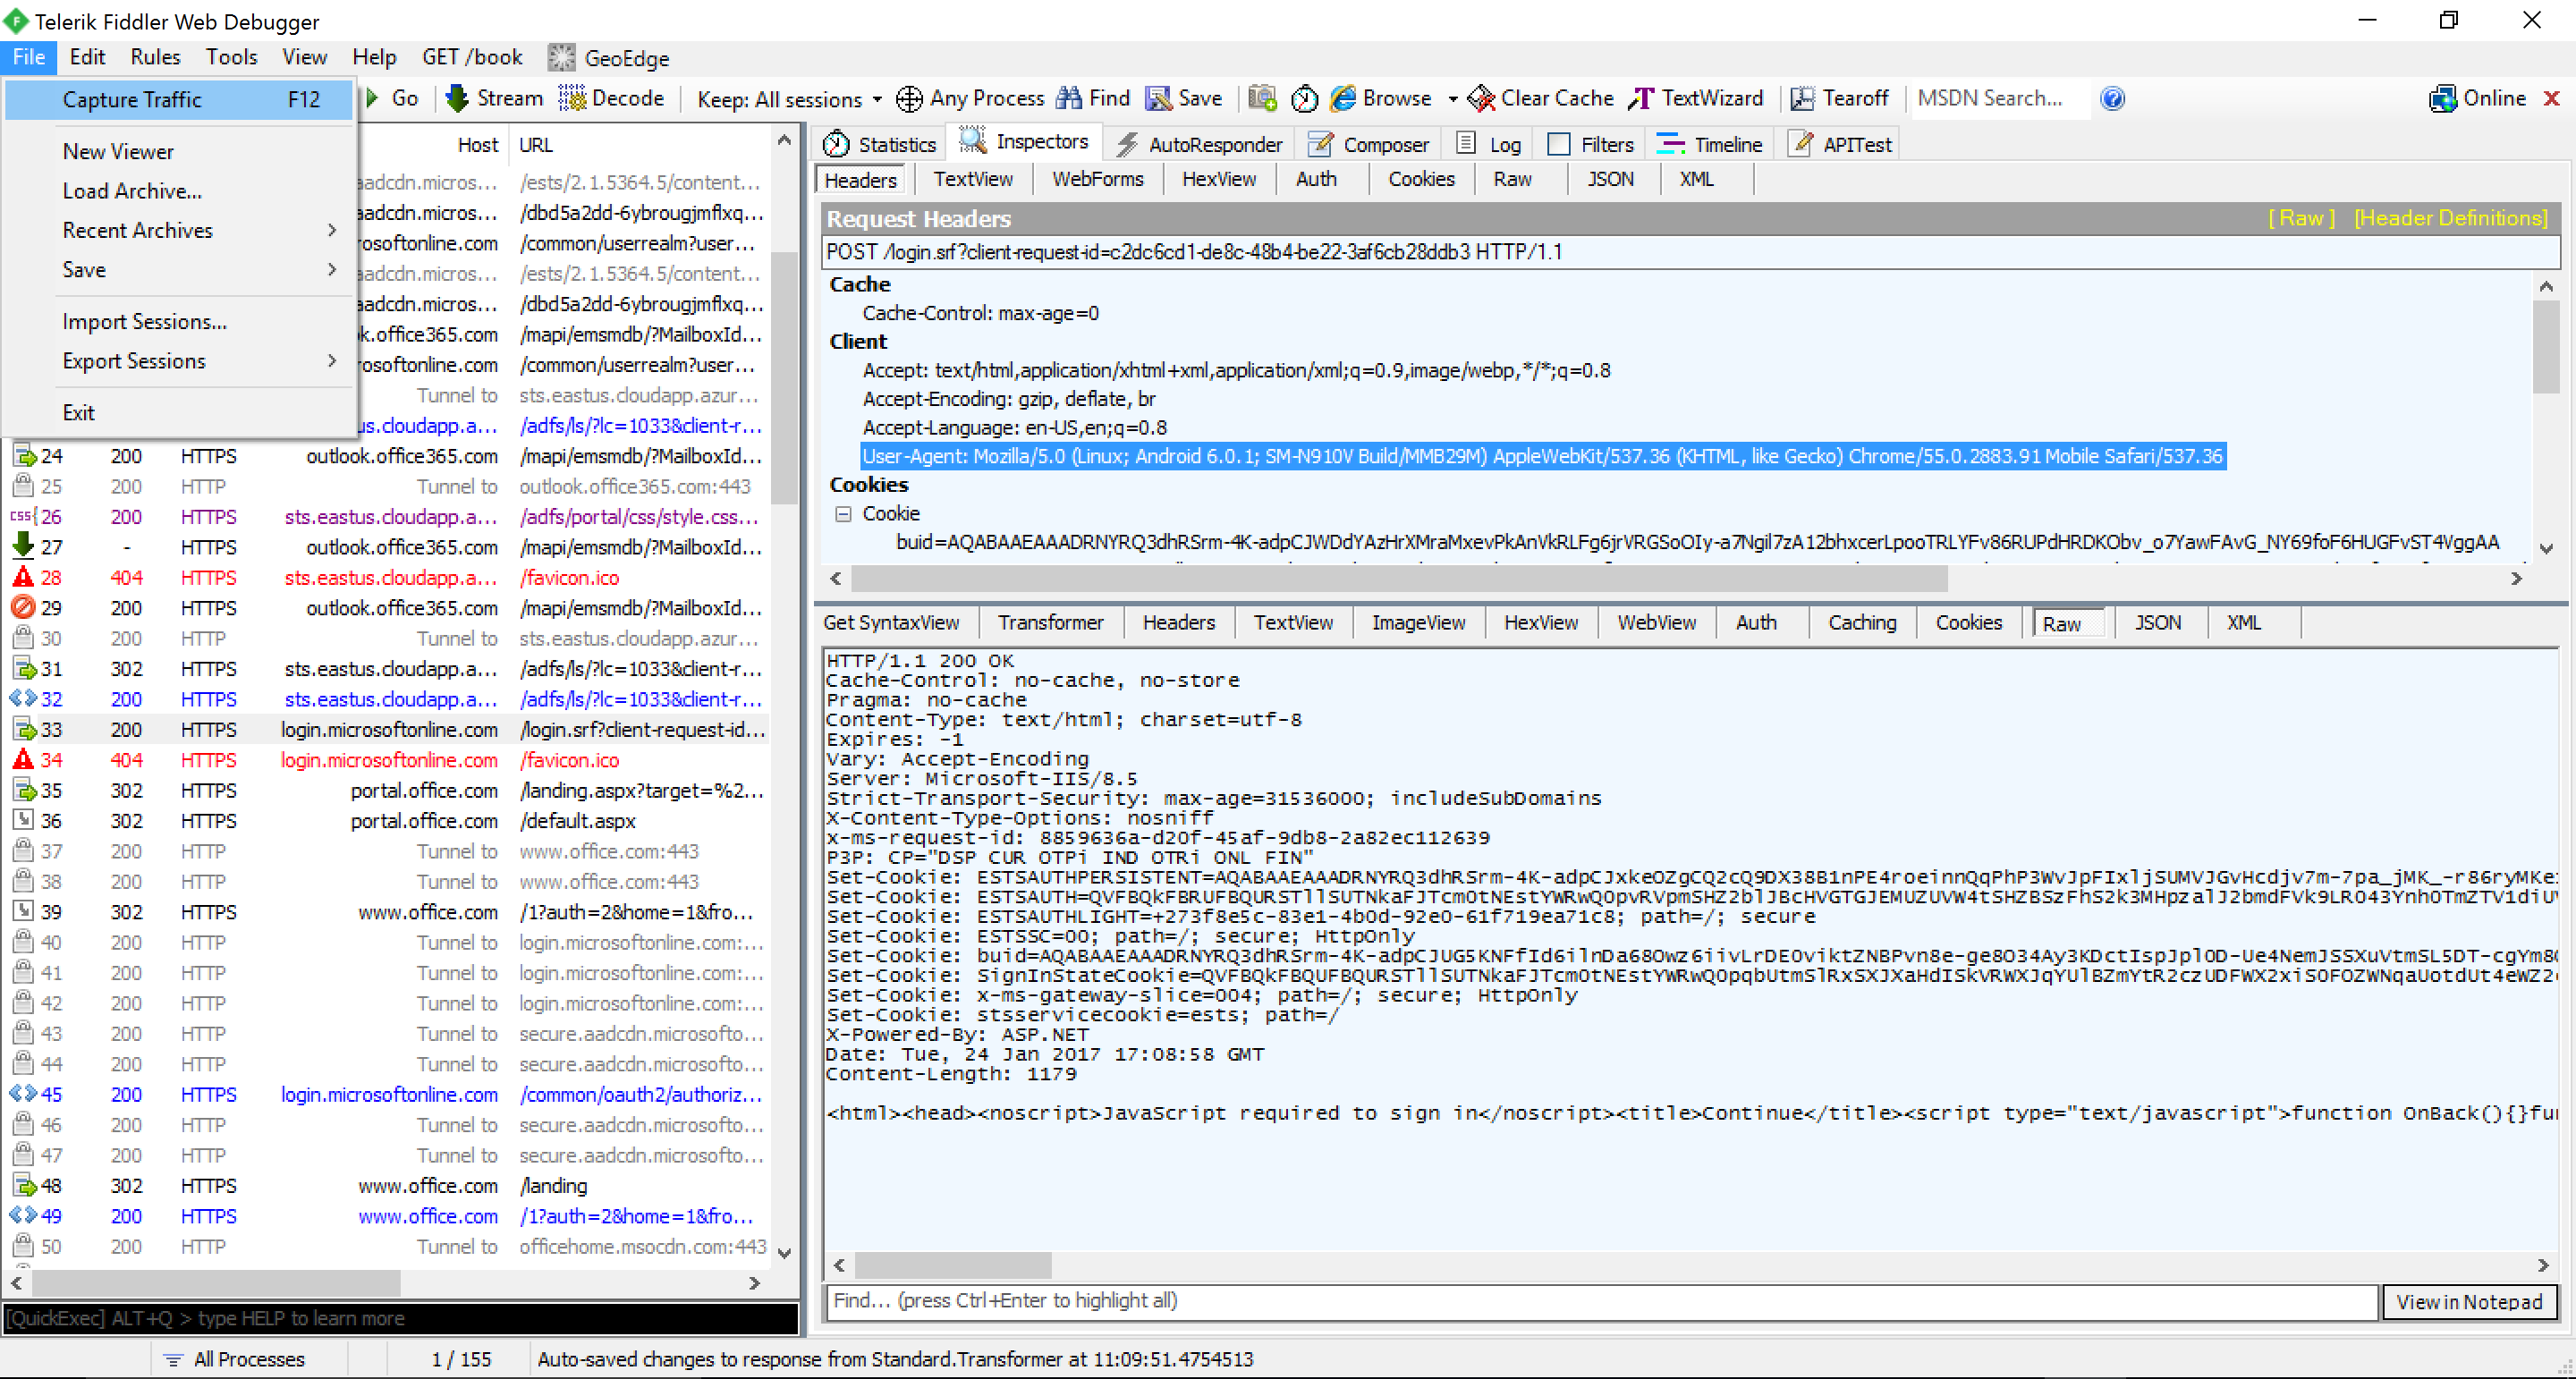
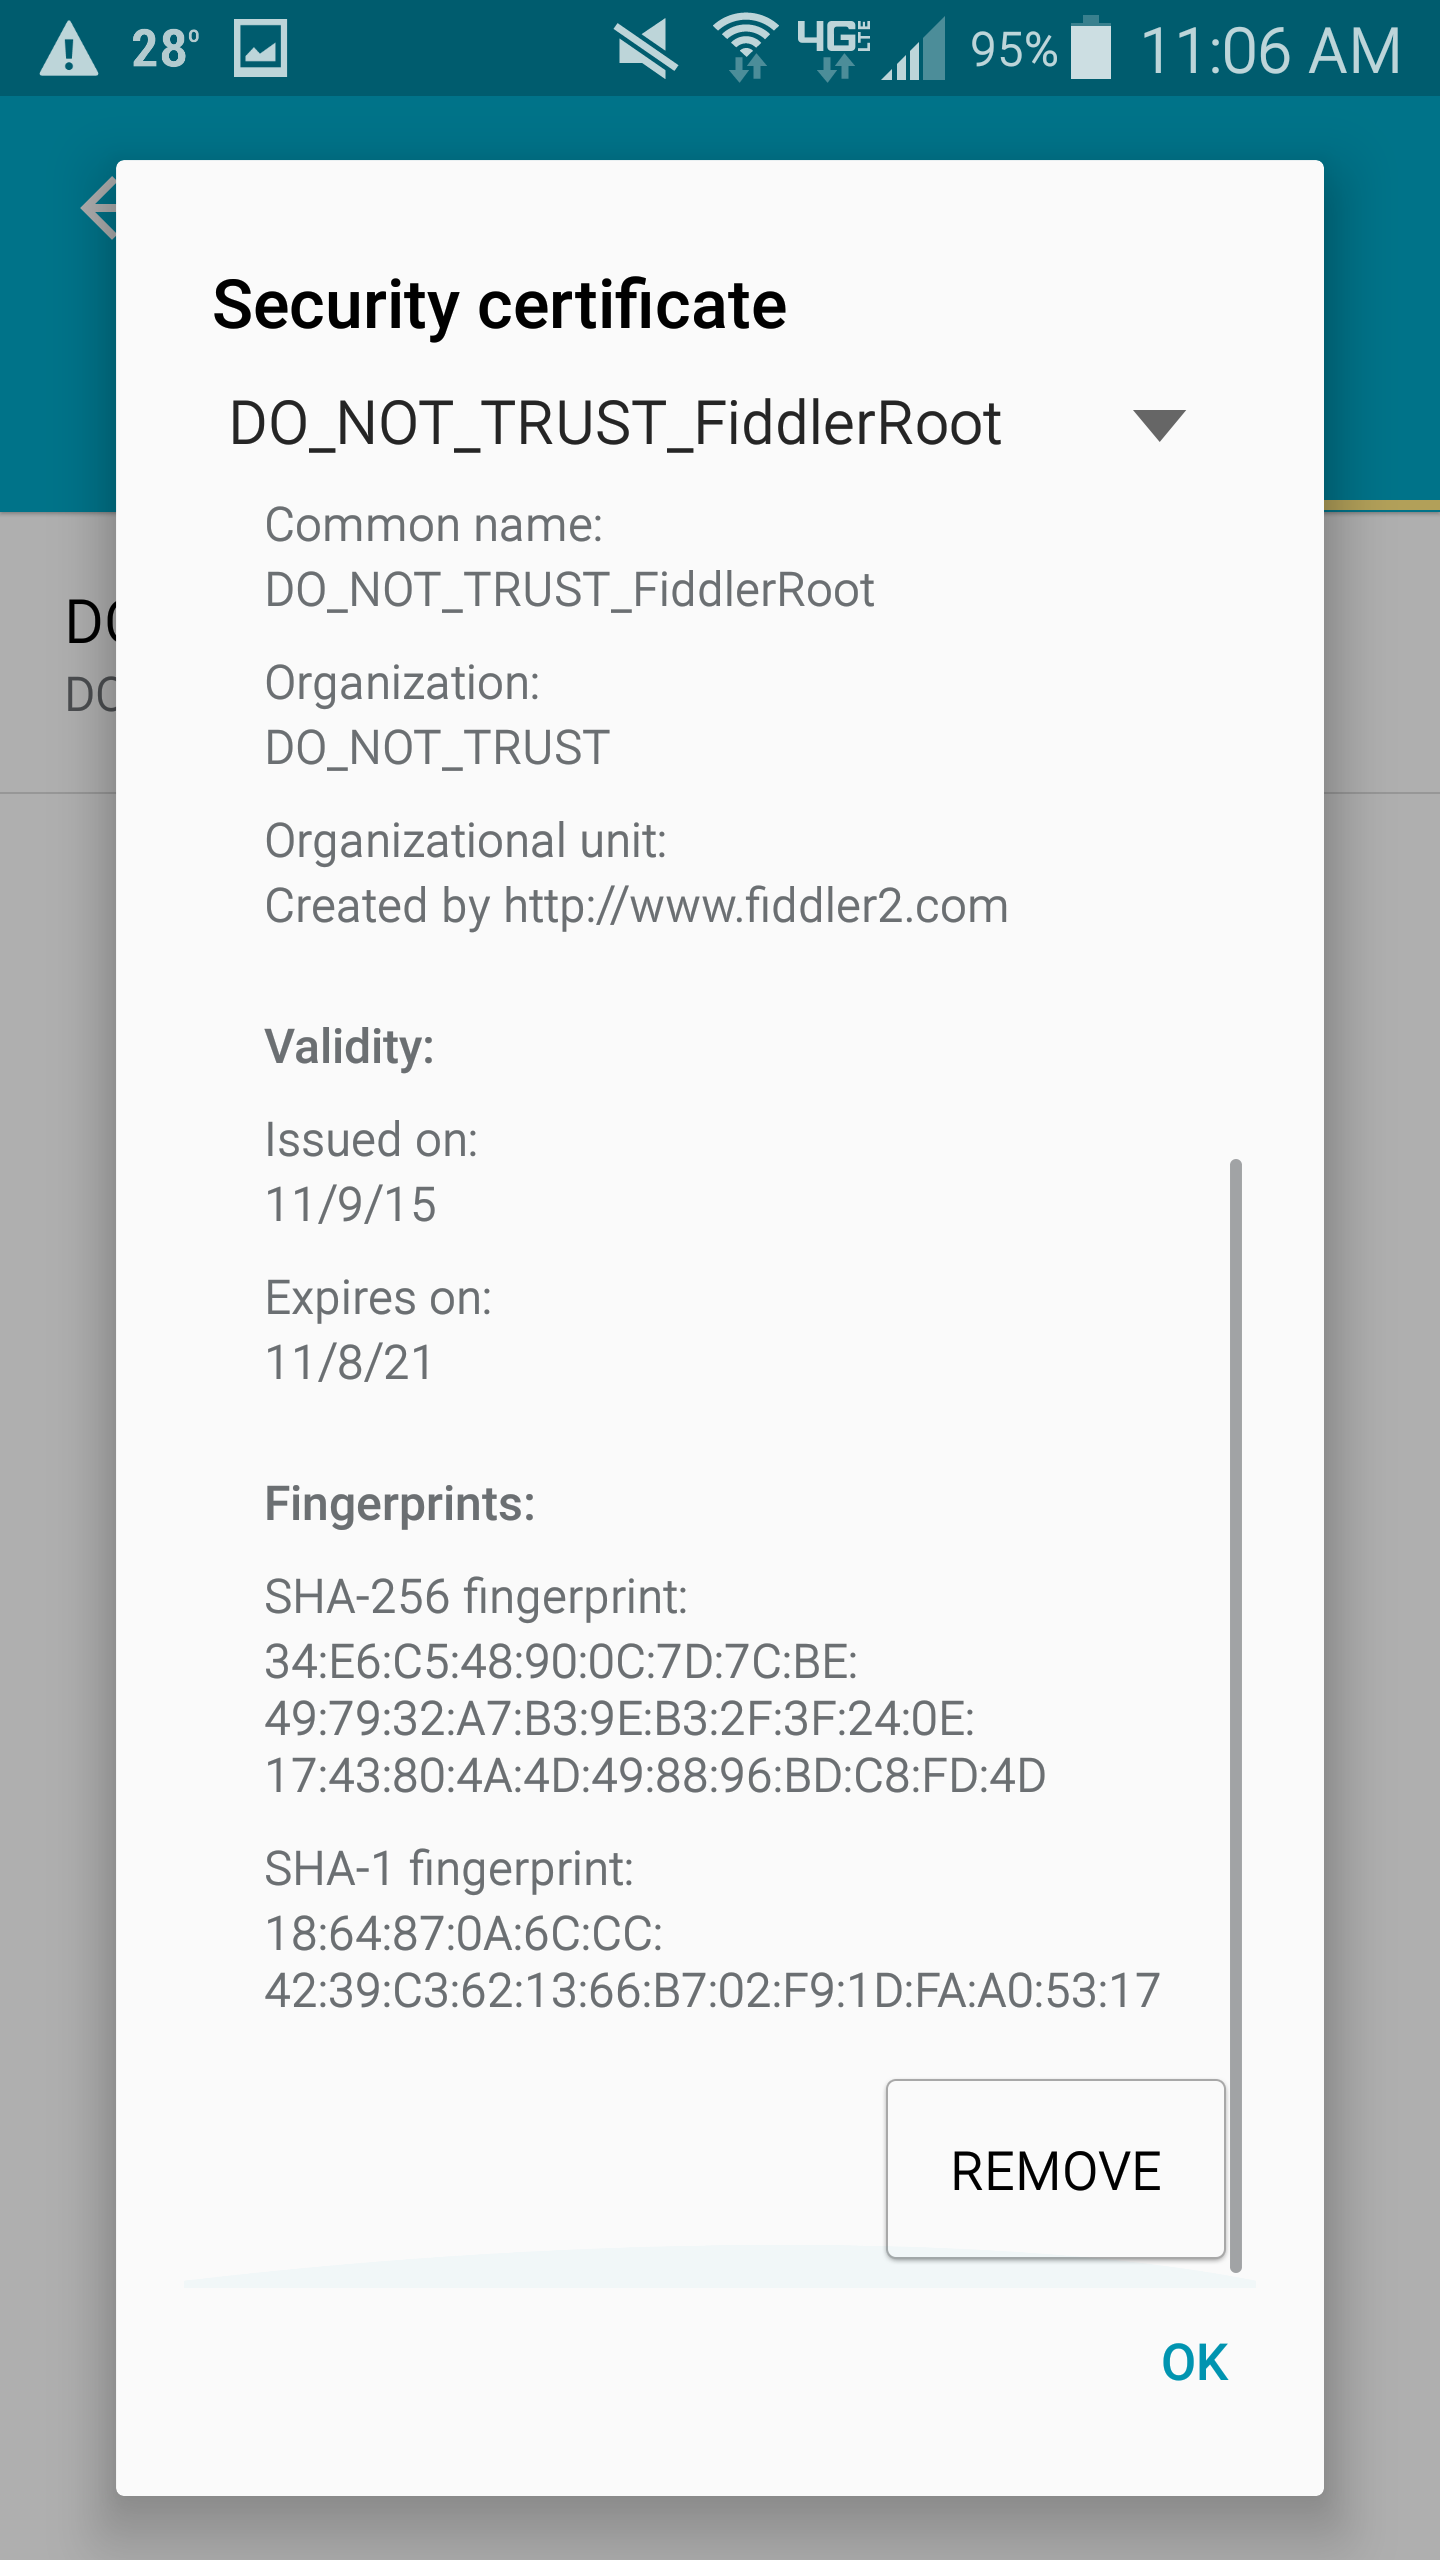
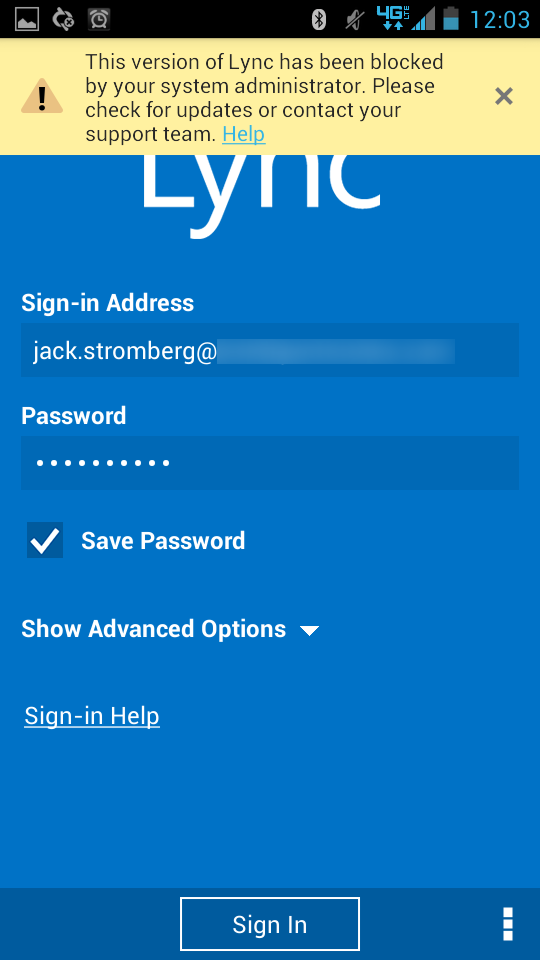
Shortly after upgrading our Lync deployment from Lync Server 2010 to 2013, I noticed that Lync clients on mobile devices were unable to login when using the company's internal network. However, interestly, once on an external network, the devices were able to sign-in just fine. After opening up the Lync 2013 clients on both an iOS device and Android device, I began to see some errors, which I ended up tracing back to DNS issues. As reference, I found another individual that looked to have very similar issues/symptoms I was expereincing as well, here: http://social.technet.microsoft.com/Forums/lync/en-US/97e311e8-3ce0-4d7e-bda7-53520ff0bc55/lync-2013-ios-internal-log-on-issue
To begin, here are the log files from both an Android and iOS client trying to connect to the Lync server via the internal network.
Android
--------- beginning of /dev/log/system
06-27 09:22:26.136 17576 18381 W ActivityThread: ClassLoader.getResources: The class loader returned by Thread.getContextClassLoader() may fail for processes that host multiple applications. you should explicitly specify a context class loader. For example: Thread.setContextClassLoader(getClass().getClassLoader());
--------- beginning of /dev/log/main
06-27 09:24:37.925 19044 19044 I Choreographer: Skipped 192 frames! The application may be doing too much work on its main thread06-27 09:25:01.909 19044 19046 D dalvikvm: GC_CONCURRENT freed 637K, 7% free 10337K/11107K, paused 31ms+6ms, total 197ms
06-27 09:25:05.979 19044 19044 I Choreographer: Skipped 1681 frames! The application may be doing too much work on its main thread06-27 09:25:06.503 19044 19336 D libc : Forward DNS query to netd(h=lyncpool.mydomain.local s=^06-27 09:25:08.456 19044 19044 I Choreographer: Skipped 117 frames! The application may be doing too much work on its main thread06-27 09:25:13.339 19044 19044 I Choreographer: Skipped 281 frames! The application may be doing too much work on its main thread06-27 09:25:15.167 19044 19044 I Choreographer: Skipped 36 frames! The application may be doing too much work on its main thread06-27 09:25:21.534 19044 19044 I Choreographer: Skipped 80 frames! The application may be doing too much work on its main thread06-27 09:25:57.534 19044 19044 I Choreographer: Skipped 91 frames! The application may be doing too much work on its main thread06-27 09:26:27.893 19044 19044 V BaseActivity: finish being called for com.microsoft.office.lync.ui.options.OptionsActivity06-27 09:26:28.292 19044 19044 V ActivityMonitor: Activity Start: com.microsoft.office.lync.ui.options.CredentialsActivity06-27 09:26:28.292 19044 19044 V FeedbackUtils: Shake Sensor has updated context: com.microsoft.office.lync.ui.options.CredentialsActivity06-27 09:26:28.979 19044 19044 I Choreographer: Skipped 40 frames! The application may be doing too much work on its main thread06-27 09:26:30.128 19044 19044 V ActivityMonitor: Activity Stop: com.microsoft.office.lync.ui.options.OptionsActivity06-27 09:26:30.143 19044 19044 V ActivityMonitor: Activity Destroy: com.microsoft.office.lync.ui.options.OptionsActivity06-27 09:26:31.221 19044 19044 I LyncPerformance: PerfBegin|2-12:Signin - Started|1372343191226
06-27 09:26:31.346 19044 19044 I LyNC : INFO APPLICATION .\capplication.cpp/1374:Initialized the sign in BRB logger
06-27 09:26:31.456 19044 19044 I LyNC : INFO APPLICATION .\cucwaappsession.cpp/410:SignIn. signInAsUserState=0, actualState=0
06-27 09:26:31.456 19044 19044 I LyNC : INFO APPLICATION .\cucwaappsession.cpp/952:CUcwaAppSession canceling all requests
06-27 09:26:31.643 19044 19044 I LyNC : INFO APPLICATION .\cucwaappsession.cpp/690:CUcwaAppSession::sendCreateApplicationRequest called
06-27 09:26:31.729 19044 19044 I LyNC : INFO APPLICATION .\cucwaappsession.cpp/1209:Updating URLs. For Ucwa: discoveredFqdn=https://lync.mydomain.com, applicationsRelativeUrl=/ucwa/v1/applications, configuredInternal=, configuredExternal=, loc=1, auto-discovery=1
06-27 09:26:32.284 19044 19044 I LyNC : INFO TRANSPORT .\cmetadatamanager.cpp/468:Received a request to get the meta data of type 0 for url https://lync.mydomain.com/ucwa/v1/applications
06-27 09:26:32.284 19044 19044 I LyNC : INFO TRANSPORT .\cmetadatamanager.cpp/518:Sending Unauthenticated get to get the web-ticket url
06-27 09:26:32.284 19044 19044 I LyNC : INFO TRANSPORT .\ccredentialmanager.cpp/164:getSpecificCredential for serviceId(4) returning: credType (1) signInName ([email protected]) domain () username ([email protected]) password.empty() (1) compatibleServiceIds(406-27 09:26:32.284 19044 19044 I HttpConnection: originalurl is https://lync.mydomain.com/ucwa/v1/applications
06-27 09:26:32.284 19044 19044 I HttpConnection: decodedurl is https://lync.mydomain.com/ucwa/v1/applications
06-27 09:26:32.393 19044 19044 I LyNC : INFO TRANSPORT .\transportutilityfunctions.cpp/638:<SentRequest>
06-27 09:26:32.393 19044 19044 I LyNC : GET https://lync.mydomain.com/ucwa/v1/applications
06-27 09:26:32.393 19044 19044 I LyNC : Request Id: 0x513f4770
06-27 09:26:32.393 19044 19044 I LyNC : HttpHeader:Accept
06-27 09:26:32.393 19044 19044 I LyNC : HttpHeader:X-MS-WebTicket xxxxxxxxxx
06-27 09:26:32.393 19044 19044 I LyNC :
06-27 09:26:32.393 19044 19044 I LyNC :
06-27 09:26:32.393 19044 19044 I LyNC : </SentRequest>
06-27 09:26:32.393 19044 19044 V HttpConnection: post request: https://lync.mydomain.com/ucwa/v1/applications
06-27 09:26:32.393 19044 19642 V HttpConnection: send request: https://lync.mydomain.com/ucwa/v1/applications
06-27 09:26:32.393 19044 19642 E HttpEngine: AutoRedirect true for https://lync.mydomain.com/ucwa/v1/applications and setting it to FALSE for manual handling
06-27 09:26:32.393 19044 19642 V HttpEngine: Executing request with https://lync.mydomain.com/ucwa/v1/applications Connection pool count is 2
06-27 09:26:32.503 19044 19044 I LyNC : INFO TRANSPORT .\cauthenticationresolver.cpp/418:Waiting on Meta Data from https://lync.mydomain.com/ucwa/v1/applications
06-27 09:26:32.503 19044 19044 I LyNC : INFO APPLICATION .\ctransportrequestretrialqueue.cpp/348:Submitting new req. POST-Application(0x515da3e0); Timeout timer started
06-27 09:26:32.503 19044 19044 I LyNC : INFO APPLICATION .\cucwaappsession.cpp/975:CUcwaAppSession::setNewActualState() state=2
06-27 09:26:33.081 19044 19642 D libc : Forward DNS query to netd(h=lync.mydomain.com s=^06-27 09:26:33.112 19044 19044 I LyNC : INFO UTILITIES .\cbasepersistablecomponent.cpp/230:Storing 4 out-of-sync components took 602ms
06-27 09:26:33.120 19044 19044 I LyNC : INFO APPLICATION .\capplication.cpp/1404:CUcwaAppSession::signIn() succeeded
06-27 09:26:33.120 19044 19044 I UcClientStateManager: New UI State: ActualState = IsSigningIn DesiredState = BeSignedIn DataAvailable = true
06-27 09:26:33.214 19044 19044 V BaseActivity: finish being called for com.microsoft.office.lync.ui.options.CredentialsActivity06-27 09:26:33.362 19044 19642 W DefaultRequestDirector: Authentication error: Unable to respond to any of these challenges: {}
06-27 09:26:33.362 19044 19642 V HttpConnection: got Response: https://lync.mydomain.com/ucwa/v1/applications
06-27 09:26:33.721 19044 19044 I LyNC : INFO TRANSPORT .\chttprequestprocessor.cpp/173:Received response of request() with status = 0x0
06-27 09:26:33.729 19044 19044 I LyNC : INFO TRANSPORT .\transportutilityfunctions.cpp/917:<ReceivedResponse>
06-27 09:26:33.729 19044 19044 I LyNC : GET https://lync.mydomain.com/ucwa/v1/applications
06-27 09:26:33.729 19044 19044 I LyNC : Request Id: 0x513f4770
06-27 09:26:33.729 19044 19044 I LyNC : HttpHeader:Content-Length 1293
06-27 09:26:33.729 19044 19044 I LyNC : HttpHeader:Content-Type text/html
06-27 09:26:33.729 19044 19044 I LyNC : HttpHeader:Date Thu, 27 Jun 2013 14:26:17 GMT
06-27 09:26:33.729 19044 19044 I LyNC : HttpHeader:Server Microsoft-IIS/8.0
06-27 09:26:33.729 19044 19044 I LyNC : HttpHeader:StatusCode 401
06-27 09:26:33.729 19044 19044 I LyNC : HttpHeader:X-MS-Server-Fqdn D01LyNCFE02.mydomain.local
06-27 09:26:33.729 19044 19044 I LyNC : HttpHeader:X-MS-WebTicketSupported cwt,saml
06-27 09:26:33.729 19044 19044 I LyNC : HttpHeader:X-MS-WebTicketURL https://lyncpool.mydomain.local/WebTicket/WebTicketService.svc
06-27 09:26:33.729 19044 19044 I LyNC : HttpHeader:X-Powered-By ASP.NET
06-27 09:26:33.729 19044 19044 I LyNC :
06-27 09:26:33.729 19044 19044 I LyNC : <!DOCTyPE html PUBLIC "-//W3C//DTD XHTML 1.0 Strict//EN" "http://www.w3.org/TR/xhtml1/DTD/xhtml1-strict.dtd">
06-27 09:26:33.729 19044 19044 I LyNC : <html xmlns="http://www.w3.org/1999/xhtml">
06-27 09:26:33.729 19044 19044 I LyNC : <head>
06-27 09:26:33.729 19044 19044 I LyNC : <meta http-equiv="Content-Type" content="text/html; charset=iso-8859-1"/>
06-27 09:26:33.729 19044 19044 I LyNC : <title>401 - Unauthorized: Access is denied due to invalid credentials.</title>
06-27 09:26:33.729 19044 19044 I LyNC : <style type="text/css">
06-27 09:26:33.729 19044 19044 I LyNC : <!--
06-27 09:26:33.729 19044 19044 I LyNC : body{margin:0;font-size:.7em;font-family:Verdana, Arial, Helvetica, sans-serif;background:#EEEEEE;}
06-27 09:26:33.729 19044 19044 I LyNC : fieldset{padding:0 15px 10px 15px;}
06-27 09:26:33.729 19044 19044 I LyNC : h1{font-size:2.4em;margin:0;color:#FFF;}
06-27 09:26:33.729 19044 19044 I LyNC : h2{font-size:1.7em;margin:0;color:#CC0000;}
06-27 09:26:33.729 19044 19044 I LyNC : h3{font-size:1.2em;margin:10px 0 0 0;color:#000000;}
06-27 09:26:33.729 19044 19044 I LyNC : #header{width:96%;margin:0 0 0 0;padding:6px 2% 6px 2%;font-family:"trebuchet MS", Verdana, sans-serif;color:#FFF;
06-27 09:26:33.729 19044 19044 I LyNC : background-color:#555555;}
06-27 09:26:33.729 19044 19044 I LyNC : #content{margin:0 0 0 2%;position:relative;}
06-27 09:26:33.729 19044 19044 I LyNC : .content-container{background:#FFF;width:96%;margin-top:8px;padding:10px;position:relative;}
06-27 09:26:33.729 19044 19044 I LyNC : -->
06-27 09:26:33.729 19044 19044 I LyNC : </style>
06-27 09:26:33.729 19044 19044 I LyNC : </head>
06-27 09:26:33.729 19044 19044 I LyNC : <body>
06-27 09:26:33.729 19044 19044 I LyNC : <div id="header"><h1>Server Error</h1></div>
06-27 09:26:33.729 19044 19044 I LyNC : <div id="content">
06-27 09:26:33.729 19044 19044 I LyNC : <div class="content-container"><fieldset>
06-27 09:26:33.729 19044 19044 I LyNC : <h2>401 - Unauthorized: Access is denied due to invalid credentials.</h2>
06-27 09:26:33.729 19044 19044 I LyNC : <h3>you do not have permission to view this directory or page using the credentials that you supplied.</h3>
06-27 09:26:33.729 19044 19044 I LyNC : </fieldset></div>
06-27 09:26:33.729 19044 19044 I LyNC : </div>
06-27 09:26:33.729 19044 19044 I LyNC : </body>
06-27 09:26:33.729 19044 19044 I LyNC : </html>
06-27 09:26:33.729 19044 19044 I LyNC :
06-27 09:26:33.729 19044 19044 I LyNC : </ReceivedResponse>
06-27 09:26:34.073 19044 19044 I LyNC : INFO TRANSPORT .\chttprequestprocessor.cpp/266:Sending event to main thread for request(0x513f477006-27 09:26:35.011 19044 19044 V ActivityMonitor: Activity Create: com.microsoft.office.lync.ui.RootTabActivity06-27 09:26:37.253 19044 19046 D dalvikvm: GC_CONCURRENT freed 1234K, 11% free 10860K/12195K, paused 238ms+27ms, total 305ms
06-27 09:26:38.557 19044 19044 I LyncPerformance: PerfEnd|1:RootTabs Created|1372343198566
06-27 09:26:38.721 19044 19044 V ActivityMonitor: Activity Start: com.microsoft.office.lync.ui.RootTabActivity06-27 09:26:38.721 19044 19044 V FeedbackUtils: Shake Sensor has updated context: com.microsoft.office.lync.ui.RootTabActivity06-27 09:26:38.831 19044 19044 V FeedbackUtils: Not credentialsactivity. Hence skipping
06-27 09:26:39.081 19044 19044 V RootTabActivity: presence state : AvailabilityOnline
06-27 09:26:39.096 19044 19044 I Choreographer: Skipped 321 frames! The application may be doing too much work on its main thread06-27 09:26:40.143 19044 19044 V ContactUtils: width and height is less than maxwidth/maxheight with data length 2430
06-27 09:26:40.721 19044 19044 V ContactUtils: width and height is less than maxwidth/maxheight with data length 2430
06-27 09:26:40.862 19044 19044 V MyStatusFragment: refreshPersonalNoteUI called with state Offline
06-27 09:26:40.862 19044 19044 V MyStatusFragment: Refreshing Presence State UI
06-27 09:26:42.456 19044 19044 V ConversationListFragment: Updating tabicon with unread count: 0
06-27 09:26:44.003 19044 19044 I LyNC : INFO TRANSPORT .\cmetadatamanager.cpp/631:Received response for meta data request of type 60 with status 0
06-27 09:26:44.143 19044 19044 I LyNC : INFO TRANSPORT .\cmetadatamanager.cpp/743:Base service url constructed from unauth-get-response is https://lync.mydomain.com/ucwa/v1/applications
06-27 09:26:44.143 19044 19044 I LyNC : INFO TRANSPORT .\cmetadatamanager.cpp/797:Added a binding based on the unauth-get response
06-27 09:26:44.143 19044 19044 I LyNC : INFO TRANSPORT .\cauthenticationresolver.cpp/525:MetaData retrieval for url https://lync.mydomain.com/ucwa/v1/applications completed with status 0
06-27 09:26:44.143 19044 19044 I LyNC : INFO TRANSPORT .\cauthenticationresolver.cpp/554:Deleting 1 pended Meta data requests for url https://lync.mydomain.com/ucwa/v1/applications
06-27 09:26:44.143 19044 19044 I LyNC : INFO TRANSPORT .\cauthenticationresolver.cpp/585:Executing request after meta data successfully retrieved
06-27 09:26:44.143 19044 19044 I LyNC : INFO TRANSPORT .\cmetadatamanager.cpp/468:Received a request to get the meta data of type 0 for url https://lync.mydomain.com/ucwa/v1/applications
06-27 09:26:44.143 19044 19044 I LyNC : INFO TRANSPORT .\ccredentialmanager.cpp/164:getSpecificCredential for serviceId(1) returning: credType (1) signInName ([email protected]) domain () username ([email protected]) password.empty() (0) compatibleServiceIds(106-27 09:26:44.143 19044 19044 I LyNC : INFO TRANSPORT .\cwebticketsession.cpp/349:No Cached web-ticket found06-27 09:26:44.143 19044 19044 I LyNC : INFO TRANSPORT .\cwebticketsession.cpp/393:Received request for a new token for https://lync.mydomain.com/ucwa/v1/applications
06-27 09:26:44.143 19044 19044 I LyNC : INFO TRANSPORT .\chttprequestprocessor.cpp/134:Clearing request processor for component WebTicketSession on sign-out06-27 09:26:44.143 19044 19044 I LyNC : INFO TRANSPORT .\cmetadatamanager.cpp/468:Received a request to get the meta data of type 2 for url https://lyncpool.mydomain.local/webticket/webticketservice.svc
06-27 09:26:44.143 19044 19044 I LyNC : INFO TRANSPORT .\cmetadatamanager.cpp/535:Sending Mex request get the meta data for the endpoint
06-27 09:26:44.143 19044 19044 I LyNC : INFO TRANSPORT .\ccredentialmanager.cpp/164:getSpecificCredential for serviceId(4) returning: credType (1) signInName ([email protected]) domain () username ([email protected]) password.empty() (1) compatibleServiceIds(406-27 09:26:44.143 19044 19044 I HttpConnection: originalurl is https://lyncpool.mydomain.local/webticket/webticketservice.svc/mex
06-27 09:26:44.143 19044 19044 I HttpConnection: decodedurl is https://lyncpool.mydomain.local/webticket/webticketservice.svc/mex
06-27 09:26:44.401 19044 19044 I LyNC : INFO TRANSPORT .\transportutilityfunctions.cpp/638:<SentRequest>
06-27 09:26:44.401 19044 19044 I LyNC : POST https://lyncpool.mydomain.local/webticket/webticketservice.svc/mex
06-27 09:26:44.401 19044 19044 I LyNC : Request Id: 0x51418a18
06-27 09:26:44.401 19044 19044 I LyNC : HttpHeader:Accept text/xml, application/soap+xml, application/octet-stream
06-27 09:26:44.401 19044 19044 I LyNC : HttpHeader:Content-Type application/soap+xml; charset=utf-8
06-27 09:26:44.401 19044 19044 I LyNC :
06-27 09:26:44.401 19044 19044 I LyNC : <soap12:Envelope xmlns:soap12="http://www.w3.org/2003/05/soap-envelope" xmlns:wsa="http://www.w3.org/2005/08/addressing"><soap12:Header><wsa:Action soap12:mustUnderstand="1">http://schemas.xmlsoap.org/ws/2004/09/transfer/Get</wsa:Action><wsa:ReplyTo><wsa:Address>http://www.w3.org/2005/08/addressing/anonymous</wsa:Address></wsa:ReplyTo><wsa:To soap12:mustUnderstand="1">https://lyncpool.mydomain.local/webticket/webticketservice.svc</wsa:To></soap12:Header><soap12:Body/></soap12:Envelope>
06-27 09:26:44.401 19044 19044 I LyNC : </SentRequest>
06-27 09:26:44.401 19044 19044 V HttpConnection: set body(POST)- length=500
06-27 09:26:44.401 19044 19044 V HttpConnection: post request: https://lyncpool.mydomain.local/webticket/webticketservice.svc/mex
06-27 09:26:44.534 19044 19044 I LyNC : INFO TRANSPORT .\cauthenticationresolver.cpp/418:Waiting on Meta Data from https://lyncpool.mydomain.local/webticket/webticketservice.svc
06-27 09:26:44.534 19044 19044 I LyNC : INFO TRANSPORT .\cauthenticationresolver.cpp/203:Waiting on the token
06-27 09:26:44.534 19044 19206 V HttpConnection: send request: https://lyncpool.mydomain.local/webticket/webticketservice.svc/mex
06-27 09:26:44.534 19044 19206 E HttpEngine: AutoRedirect true for https://lyncpool.mydomain.local/webticket/webticketservice.svc/mex and setting it to FALSE for manual handling
06-27 09:26:44.534 19044 19206 V HttpEngine: Executing request with https://lyncpool.mydomain.local/webticket/webticketservice.svc/mex Connection pool count is 2
06-27 09:26:44.542 19044 19044 I Choreographer: Skipped 325 frames! The application may be doing too much work on its main thread06-27 09:26:44.815 19044 19206 V HttpConnection: got Response: https://lyncpool.mydomain.local/webticket/webticketservice.svc/mex
06-27 09:26:45.409 19044 19044 I LyNC : INFO TRANSPORT .\chttprequestprocessor.cpp/173:Received response of request(MetaDataRequest) with status = 0x0
06-27 09:26:45.425 19044 19044 I LyNC : INFO TRANSPORT .\transportutilityfunctions.cpp/917:<ReceivedResponse>
06-27 09:26:45.425 19044 19044 I LyNC : POST https://lyncpool.mydomain.local/webticket/webticketservice.svc/mex
06-27 09:26:45.425 19044 19044 I LyNC : Request Id: 0x51418a18
06-27 09:26:45.425 19044 19044 I LyNC : HttpHeader:Cache-Control private
06-27 09:26:45.425 19044 19044 I LyNC : HttpHeader:Content-Length 20960
06-27 09:26:45.425 19044 19044 I LyNC : HttpHeader:Content-Type application/soap+xml; charset=utf-8
06-27 09:26:45.425 19044 19044 I LyNC : HttpHeader:Date Thu, 27 Jun 2013 14:26:29 GMT
06-27 09:26:45.425 19044 19044 I LyNC : HttpHeader:Server Microsoft-IIS/8.0
06-27 09:26:45.425 19044 19044 I LyNC : HttpHeader:StatusCode 200
06-27 09:26:45.425 19044 19044 I LyNC : HttpHeader:X-AspNet-Version 4.0.30319
06-27 09:26:45.425 19044 19044 I LyNC : HttpHeader:X-Content-Type-Options nosniff
06-27 09:26:45.425 19044 19044 I LyNC : HttpHeader:X-MS-Server-Fqdn D01LyNCFE02.mydomain.local
06-27 09:26:45.425 19044 19044 I LyNC : HttpHeader:X-Powered-By ASP.NET
06-27 09:26:45.425 19044 19044 I LyNC :
06-27 09:26:45.425 19044 19044 I LyNC : <s:Envelope xmlns:s="http://www.w3.org/2003/05/soap-envelope" xmlns:a="http://www.w3.org/2005/08/addressing"><s:Header><a:Action s:mustUnderstand="1">http://schemas.xmlsoap.org/ws/2004/09/transfer/GetResponse</a:Action></s:Header><s:Body><Metadata xmlns="http://schemas.xmlsoap.org/ws/2004/09/mex" xmlns:wsx="http://schemas.xmlsoap.org/ws/2004/09/mex"><wsx:MetadataSection Dialect="http://schemas.xmlsoap.org/wsdl/" Identifier="http://tempuri.org/" xmlns=""><wsdl:definitions name="WebTicketService" targetNamespace="http://tempuri.org/" xmlns:wsdl="http://schemas.xmlsoap.org/wsdl/" xmlns:wsu="http://docs.oasis-open.org/wss/2004/01/oasis-200401-wss-wssecurity-utility-1.0.xsd" xmlns:wsp="http://schemas.xmlsoap.org/ws/2004/09/policy" xmlns:wsap="http://schemas.xmlsoap.org/ws/2004/08/addressing/policy" xmlns:msc="http://schemas.microsoft.com/ws/2005/12/wsdl/contract" xmlns:soap12="http://schemas.xmlsoap.org/wsdl/soap12/" xmlns:wsa="http://schemas.xmlsoap.org/ws/2004/08/addressing" xmlns:wsam="http://www.w3.org/2007/05/addressing/metadata" xmlns:xsd="http://www.w3.org/2001/XMLSchema" xmlns:tns="http://tempuri.org/" xmlns:soap="http://schemas.xmlsoap.org/wsdl/soap/" xmlns:wsaw="http://www.w3.org/2006/05/addressing/wsdl" xmlns:soapenc="http://schemas.xmlsoap.org/soap/encoding/" xmlns:wsa10="http://www.w3.org/2005/08/addressing"><wsp:Policy wsu:Id="WebTicketServiceMachineCert_policy"><wsp:ExactlyOne><wsp:All><sp:TransportBinding xmlns:sp="http://schemas.xmlsoap.org/ws/2005/07/securitypolicy"><wsp:Policy><sp:TransportToken><wsp:Policy><sp:HttpsToken RequireClientCertificate="false"/></wsp:Policy></sp:TransportToken><sp:AlgorithmSuite><wsp:Policy><sp:Basic256/></wsp:Policy></sp:AlgorithmSuite><sp:Layout><wsp:Policy><sp:Strict/></wsp:Policy></sp:Layout><sp:IncludeTimestamp/></wsp:Policy></sp:TransportBinding><sp:EndorsingSupportingTokens xmlns:sp="http://schemas.xmlsoap.org/ws/2005/07/securitypolicy"><wsp:Policy><sp:X509Token sp:IncludeToken="http://schemas.xmlsoap.org/ws/2005/07/securitypolicy/IncludeToken/AlwaysToRecipient"><wsp:Policy><sp:RequireThumbprintReference/><sp:WssX509V3Token10/></wsp:Policy></sp:X509Token><sp:SignedParts><sp:Header Name="To" Namespace="http://www.w3.org/2005/08/addressing"/></sp:SignedParts></wsp:Policy></sp:EndorsingSupportingTokens><sp:Wss11 xmlns:sp="http://schemas.xmlsoap.org/ws/2005/07/securitypolicy"><wsp:Policy><sp:MustSupportRefThumbprint/></wsp:Policy></sp:Wss11><sp:Trust10 xmlns:sp="http://schemas.xmlsoap.org/ws/2005/07/securitypolicy"><wsp:Policy><sp:MustSupportIssuedTokens/><sp:RequireClientEntropy/><sp:RequireServerEntropy/></wsp:Policy></sp:Trust10><wsaw:UsingAddressing/></wsp:All></wsp:ExactlyOne></wsp:Policy><wsp:Policy wsu:Id="OAuth_policy"><wsp:ExactlyOne><wsp:All><http:OAuth xmlns:http="http://schemas.microsoft.com/ws/06/2004/policy/http"/><af:Binding xmlns:af="urn:component:Microsoft.Rtc.WebAuthentication.2010"/><sp:TransportBinding xmlns:sp="http://schemas.xmlsoap.org/ws/2005/07/securitypolicy"><wsp:Policy><sp:TransportToken><wsp:Policy><sp:HttpsToken RequireClientCertificate="false"/></wsp:Policy></sp:TransportToken><sp:AlgorithmSuite><wsp:Policy><sp:Basic256/></wsp:Policy></sp:AlgorithmSuite><sp:Layout><wsp:Policy><sp:Strict/></wsp:Policy></sp:Layout></wsp:Policy></sp:TransportBinding></wsp:All></wsp:ExactlyOne></wsp:Policy><wsp:Policy wsu:Id="WebTicketServiceAnon_policy"><wsp:ExactlyOne><wsp:All><af:AnonAuthenticat
06-27 09:26:45.425 19044 19044 I LyNC : ion xmlns:af="urn:component:Microsoft.Rtc.WebAuthentication.2010"/><af:Binding xmlns:af="urn:component:Microsoft.Rtc.WebAuthentication.2010"/><sp:TransportBinding xmlns:sp="http://schemas.xmlsoap.org/ws/2005/07/securitypolicy"><wsp:Policy><sp:TransportToken><wsp:Policy><sp:HttpsToken RequireClientCertificate="false"/></wsp:Policy></sp:TransportToken><sp:AlgorithmSuite><wsp:Policy><sp:Basic256/></wsp:Policy></sp:AlgorithmSuite><sp:Layout><wsp:Policy><sp:Lax/></wsp:Policy></sp:Layout></wsp:Policy></sp:TransportBinding><sp:SignedSupportingTokens xmlns:sp="http://schemas.xmlsoap.org/ws/2005/07/securitypolicy"><wsp:Policy><sp:UsernameToken sp:IncludeToken="http://schemas.xmlsoap.org/ws/2005/07/securitypolicy/IncludeToken/AlwaysToRecipient"><wsp:Policy><sp:WssUsernameToken10/></wsp:Policy></sp:UsernameToken></wsp:Policy></sp:SignedSupportingTokens><sp:Wss10 xmlns:sp="http://schemas.xmlsoap.org/ws/2005/07/securitypolicy"><wsp:Policy/></sp:Wss10></wsp:All></wsp:ExactlyOne></wsp:Policy><wsp:Policy wsu:Id="WebTicketServiceWinNegotiate_policy"><wsp:ExactlyOne><wsp:All><http:NegotiateAuthentication xmlns:http="http://schemas.microsoft.com/ws/06/2004/policy/http"/><af:Binding xmlns:af="urn:component:Microsoft.Rtc.WebAuthentication.2010"/><sp:TransportBinding xmlns:sp="http://schemas.xmlsoap.org/ws/2005/07/securitypolicy"><wsp:Policy><sp:TransportToken><wsp:Policy><sp:HttpsToken RequireClientCertificate="false"/></wsp:Policy></sp:TransportToken><sp:AlgorithmSuite><wsp:Policy><sp:Basic256/></wsp:Policy></sp:AlgorithmSuite><sp:Layout><wsp:Policy><sp:Strict/></wsp:Policy></sp:Layout></wsp:Policy></sp:TransportBinding></wsp:All></wsp:ExactlyOne></wsp:Policy><wsp:Policy wsu:Id="WebTicketServiceCert_policy"><wsp:ExactlyOne><wsp:All><af:Binding xmlns:af="urn:component:Microsoft.Rtc.WebAuthentication.2010"/><sp:TransportBinding xmlns:sp="http://schemas.xmlsoap.org/ws/2005/07/securitypolicy"><wsp:Policy><sp:TransportToken><wsp:Policy><sp:HttpsToken RequireClientCertificate="false"/></wsp:Policy></sp:TransportToken><sp:AlgorithmSuite><wsp:Policy><sp:Basic256/></wsp:Policy></sp:AlgorithmSuite><sp:Layout><wsp:Policy><sp:Strict/></wsp:Policy></sp:Layout><sp:IncludeTimestamp/></wsp:Policy></sp:TransportBinding><sp:EndorsingSupportingTokens xmlns:sp="http://schemas.xmlsoap.org/ws/2005/07/securitypolicy"><wsp:Policy><sp:X509Token sp:IncludeToken="http://schemas.xmlsoap.org/ws/2005/07/securitypolicy/IncludeToken/AlwaysToRecipient"><wsp:Policy><sp:RequireThumbprintReference/><sp:WssX509V3Token10/></wsp:Policy></sp:X509Token><sp:SignedParts><sp:Header Name="To" Namespace="http://www.w3.org/2005/08/addressing"/></sp:SignedParts></wsp:Policy></sp:EndorsingSupportingTokens><sp:Wss11 xmlns:sp="http://schemas.xmlsoap.org/ws/2005/07/securitypolicy"><wsp:Policy><sp:MustSupportRefThumbprint/></wsp:Policy></sp:Wss11><sp:Trust10 xmlns:sp="http://schemas.xmlsoap.org/ws/2005/07/securitypolicy"><wsp:Policy><sp:MustSupportIssuedTokens/><sp:RequireClientEntropy/><sp:RequireServerEntropy/></wsp:Policy></sp:Trust10><wsaw:UsingAddressing/></wsp:All></wsp:ExactlyOne></wsp:Policy><wsp:Policy wsu:Id="WebTicketServicePin_policy"><wsp:ExactlyOne><wsp:All><http:BasicAuthentication xmlns:http="http://schemas.microsoft.com/ws/06/2004/policy/http"/><af:PinAuthentication xmlns:af="urn:component:Microsoft.Rtc.WebAuthentication.2010"/><af:Binding xmlns:af="urn:component:Microsoft.Rtc.WebAuthentication.2010"/><sp:TransportBinding xmlns:sp="http://schemas.xmlsoap.org/ws/2005/07/securitypolicy"><wsp:Policy><sp:TransportToken><wsp:Policy><sp:HttpsToken RequireClientCertificate="false"/></wsp:Policy></sp:TransportToken><sp:AlgorithmSuite><wsp:Policy><sp:Basic256/></wsp:Policy></sp:AlgorithmSuite><sp:Layout><wsp:Policy><sp:Strict/></wsp:Policy></sp:Layout></wsp:Policy></sp:TransportBinding></wsp:All></wsp:ExactlyOne></wsp:Policy><wsp:Policy wsu:Id="WebTicketServiceAuth_policy"><wsp:ExactlyOne><wsp:All><af:FormsAuthentication xmlns:af="urn:component:Microsoft.Rtc.WebAuthentication.2010"/><af:Bin
06-27 09:26:45.425 19044 19044 I LyNC : ding xmlns:af="urn:component:Microsoft.Rtc.WebAuthentication.2010"/><sp:TransportBinding xmlns:sp="http://schemas.xmlsoap.org/ws/2005/07/securitypolicy"><wsp:Policy><sp:TransportToken><wsp:Policy><sp:HttpsToken RequireClientCertificate="false"/></wsp:Policy></sp:TransportToken><sp:AlgorithmSuite><wsp:Policy><sp:Basic256/></wsp:Policy></sp:AlgorithmSuite><sp:Layout><wsp:Policy><sp:Lax/></wsp:Policy></sp:Layout></wsp:Policy></sp:TransportBinding><sp:SignedSupportingTokens xmlns:sp="http://schemas.xmlsoap.org/ws/2005/07/securitypolicy"><wsp:Policy><sp:UsernameToken sp:IncludeToken="http://schemas.xmlsoap.org/ws/2005/07/securitypolicy/IncludeToken/AlwaysToRecipient"><wsp:Policy><sp:WssUsernameToken10/></wsp:Policy></sp:UsernameToken></wsp:Policy></sp:SignedSupportingTokens><sp:Wss10 xmlns:sp="http://schemas.xmlsoap.org/ws/2005/07/securitypolicy"><wsp:Policy/></sp:Wss10></wsp:All></wsp:ExactlyOne></wsp:Policy><wsdl:types><xsd:schema targetNamespace="http://tempuri.org/Imports"><xsd:import namespace="http://schemas.microsoft.com/Message"/><xsd:import namespace="urn:component:Microsoft.Rtc.WebAuthentication.2010"/><xsd:import namespace="http://schemas.microsoft.com/2003/10/Serialization/"/><xsd:import namespace="http://schemas.microsoft.com/2003/10/Serialization/Arrays"/></xsd:schema></wsdl:types><wsdl:message name="IWebTicketService_IssueToken_InputMessage"><wsdl:part name="rst" type="q1:MessageBody" xmlns:q1="http://schemas.microsoft.com/Message"/></wsdl:message><wsdl:message name="IWebTicketService_IssueToken_OutputMessage"><wsdl:part name="IssueTokenResult" type="q2:MessageBody" xmlns:q2="http://schemas.microsoft.com/Message"/></wsdl:message><wsdl:message name="IWebTicketService_IssueToken_OCSDiagnosticsFaultFault_FaultMessage"><wsdl:part name="detail" element="q3:OCSDiagnosticsFault" xmlns:q3="urn:component:Microsoft.Rtc.WebAuthentication.2010"/></wsdl:message><wsdl:portType name="IWebTicketService"><wsdl:operation name="IssueToken"><wsdl:input wsaw:Action="http://docs.oasis-open.org/ws-sx/ws-trust/200512/RST/Issue" message="tns:IWebTicketService_IssueToken_InputMessage"/><wsdl:output wsaw:Action="http://docs.oasis-open.org/ws-sx/ws-trust/200512/RSTRC/IssueFinal" message="tns:IWebTicketService_IssueToken_OutputMessage"/><wsdl:fault wsaw:Action="http://tempuri.org/IWebTicketService/IssueTokenOCSDiagnosticsFaultFault" name="OCSDiagnosticsFaultFault" message="tns:IWebTicketService_IssueToken_OCSDiagnosticsFaultFault_FaultMessage"/></wsdl:operation></wsdl:portType><wsdl:binding name="WebTicketServiceMachineCert" type="tns:IWebTicketService"><wsp:PolicyReference URI="#WebTicketServiceMachineCert_policy"/><soap:binding transport="http://schemas.xmlsoap.org/soap/http"/><wsdl:operation name="IssueToken"><soap:operation soapAction="http://docs.oasis-open.org/ws-sx/ws-trust/200512/RST/Issue" style="document"/><wsdl:input><soap:body use="literal"/></wsdl:input><wsdl:output><soap:body use="literal"/></wsdl:output><wsdl:fault name="OCSDiagnosticsFaultFault"><soap:fault name="OCSDiagnosticsFaultFault" use="literal"/></wsdl:fault></wsdl:operation></wsdl:binding><wsdl:binding name="OAuth" type="tns:IWebTicketService"><wsp:PolicyReference URI="#OAuth_policy"/><soap:binding transport="http://schemas.xmlsoap.org/soap/http"/><wsdl:operation name="IssueToken"><soap:operation soapAction="http://docs.oasis-open.org/ws-sx/ws-trust/200512/RST/Issue" style="document"/><wsdl:input><soap:body use="literal"/></wsdl:input><wsdl:output><soap:body use="literal"/></wsdl:output><wsdl:fault name="OCSDiagnosticsFaultFault"><soap:fault name="OCSDiagnosticsFaultFault" use="literal"/></wsdl:fault></wsdl:operation></wsdl:binding><wsdl:binding name="WebTicketServiceAnon" type="tns:IWebTicketService"><wsp:PolicyReference URI="#WebTicketServiceAnon_policy"/><soap:binding transport="http://schemas.xmlsoap.org/soap/http"/><wsdl:operation name="IssueToken"><soap:operation soapAction="http://docs.oasis-open.org/ws-sx/ws-trust/200512/RST/Issue" style="document"/><wsdl:input><
06-27 09:26:45.425 19044 19044 I LyNC : soap:body use="literal"/></wsdl:input><wsdl:output><soap:body use="literal"/></wsdl:output><wsdl:fault name="OCSDiagnosticsFaultFault"><soap:fault name="OCSDiagnosticsFaultFault" use="literal"/></wsdl:fault></wsdl:operation></wsdl:binding><wsdl:binding name="WebTicketServiceWinNegotiate" type="tns:IWebTicketService"><wsp:PolicyReference URI="#WebTicketServiceWinNegotiate_policy"/><soap:binding transport="http://schemas.xmlsoap.org/soap/http"/><wsdl:operation name="IssueToken"><soap:operation soapAction="http://docs.oasis-open.org/ws-sx/ws-trust/200512/RST/Issue" style="document"/><wsdl:input><soap:body use="literal"/></wsdl:input><wsdl:output><soap:body use="literal"/></wsdl:output><wsdl:fault name="OCSDiagnosticsFaultFault"><soap:fault name="OCSDiagnosticsFaultFault" use="literal"/></wsdl:fault></wsdl:operation></wsdl:binding><wsdl:binding name="WebTicketServiceCert" type="tns:IWebTicketService"><wsp:PolicyReference URI="#WebTicketServiceCert_policy"/><soap:binding transport="http://schemas.xmlsoap.org/soap/http"/><wsdl:operation name="IssueToken"><soap:operation soapAction="http://docs.oasis-open.org/ws-sx/ws-trust/200512/RST/Issue" style="document"/><wsdl:input><soap:body use="literal"/></wsdl:input><wsdl:output><soap:body use="literal"/></wsdl:output><wsdl:fault name="OCSDiagnosticsFaultFault"><soap:fault name="OCSDiagnosticsFaultFault" use="literal"/></wsdl:fault></wsdl:operation></wsdl:binding><wsdl:binding name="WebTicketServicePin" type="tns:IWebTicketService"><wsp:PolicyReference URI="#WebTicketServicePin_policy"/><soap:binding transport="http://schemas.xmlsoap.org/soap/http"/><wsdl:operation name="IssueToken"><soap:operation soapAction="http://docs.oasis-open.org/ws-sx/ws-trust/200512/RST/Issue" style="document"/><wsdl:input><soap:body use="literal"/></wsdl:input><wsdl:output><soap:body use="literal"/></wsdl:output><wsdl:fault name="OCSDiagnosticsFaultFault"><soap:fault name="OCSDiagnosticsFaultFault" use="literal"/></wsdl:fault></wsdl:operation></wsdl:binding><wsdl:binding name="WebTicketServiceAuth" type="tns:IWebTicketService"><wsp:PolicyReference URI="#WebTicketServiceAuth_policy"/><soap:binding transport="http://schemas.xmlsoap.org/soap/http"/><wsdl:operation name="IssueToken"><soap:operation soapAction="http://docs.oasis-open.org/ws-sx/ws-trust/200512/RST/Issue" style="document"/><wsdl:input><soap:body use="literal"/></wsdl:input><wsdl:output><soap:body use="literal"/></wsdl:output><wsdl:fault name="OCSDiagnosticsFaultFault"><soap:fault name="OCSDiagnosticsFaultFault" use="literal"/></wsdl:fault></wsdl:operation></wsdl:binding><wsdl:service name="WebTicketService"><wsdl:port name="WebTicketServiceMachineCert" binding="tns:WebTicketServiceMachineCert"><soap:address location="https://lyncpool.mydomain.local/WebTicket/WebTicketService.svc/MachineCert"/><wsa10:EndpointReference><wsa10:Address>https://lyncpool.mydomain.local/WebTicket/WebTicketService.svc/MachineCert</wsa10:Address></wsa10:EndpointReference></wsdl:port><wsdl:port name="OAuth" binding="tns:OAuth"><soap:address location="https://lyncpool.mydomain.local/WebTicket/WebTicketService.svc/OAuth"/></wsdl:port><wsdl:port name="WebTicketServiceAnon" binding="tns:WebTicketServiceAnon"><soap:address location="https://lyncpool.mydomain.local/WebTicket/WebTicketService.svc/Anon"/></wsdl:port><wsdl:port name="WebTicketServiceWinNegotiate" binding="tns:WebTicketServiceWinNegotiate"><soap:address location="https://lyncpool.mydomain.local/WebTicket/WebTicketService.svc"/></wsdl:port><wsdl:port name="WebTicketServiceCert" binding="tns:WebTicketServiceCert"><soap:address location="https://lyncpool.mydomain.local/WebTicket/WebTicketService.svc/cert"/><wsa10:EndpointReference><wsa10:Address>https://lyncpool.mydomain.local/WebTicket/WebTicketService.svc/cert</wsa10:Address></wsa10:EndpointReference></wsdl:port><wsdl:port name="WebTicketServicePin" binding="tns:WebTicketServicePin"><soap:address location=
06-27 09:26:45.432 19044 19044 I LyNC : "https://lyncpool.mydomain.local/WebTicket/WebTicketService.svc/pin"/></wsdl:port><wsdl:port name="WebTicketServiceAuth" binding="tns:WebTicketServiceAuth"><soap:address location="https://lyncpool.mydomain.local/WebTicket/WebTicketService.svc/Auth"/></wsdl:port></wsdl:service></wsdl:definitions></wsx:MetadataSection><wsx:MetadataSection Dialect="http://www.w3.org/2001/XMLSchema" Identifier="http://schemas.microsoft.com/Message" xmlns=""><xs:schema elementFormDefault="qualified" targetNamespace="http://schemas.microsoft.com/Message" xmlns:xs="http://www.w3.org/2001/XMLSchema" xmlns:tns="http://schemas.microsoft.com/Message"><xs:complexType name="MessageBody"><xs:sequence><xs:any minOccurs="0" maxOccurs="unbounded" namespace="##any"/></xs:sequence></xs:complexType></xs:schema></wsx:MetadataSection><wsx:MetadataSection Dialect="http://www.w3.org/2001/XMLSchema" Identifier="http://schemas.microsoft.com/2003/10/Serialization/" xmlns=""><xs:schema attributeFormDefault="qualified" elementFormDefault="qualified" targetNamespace="http://schemas.microsoft.com/2003/10/Serialization/" xmlns:xs="http://www.w3.org/2001/XMLSchema" xmlns:tns="http://schemas.microsoft.com/2003/10/Serialization/"><xs:element name="anyType" nillable="true" type="xs:anyType"/><xs:element name="anyURI" nillable="true" type="xs:anyURI"/><xs:element name="base64Binary" nillable="true" type="xs:base64Binary"/><xs:element name="boolean" nillable="true" type="xs:boolean"/><xs:element name="byte" nillable="true" type="xs:byte"/><xs:element name="dateTime" nillable="true" type="xs:dateTime"/><xs:element name="decimal" nillable="true" type="xs:decimal"/><xs:element name="double" nillable="true" type="xs:double"/><xs:element name="float" nillable="true" type="xs:float"/><xs:element name="int" nillable="true" type="xs:int"/><xs:element name="long" nillable="true" type="xs:long"/><xs:element name="QName" nillable="true" type="xs:QName"/><xs:element name="short" nillable="true" type="xs:short"/><xs:element name="string" nillable="true" type="xs:string"/><xs:element name="unsignedByte" nillable="true" type="xs:unsignedByte"/><xs:element name="unsignedInt" nillable="true" type="xs:unsignedInt"/><xs:element name="unsignedLong" nillable="true" type="xs:unsignedLong"/><xs:element name="unsignedShort" nillable="true" type="xs:unsignedShort"/><xs:element name="char" nillable="true" type="tns:char"/><xs:simpleType name="char"><xs:restriction base="xs:int"/></xs:simpleType><xs:element name="duration" nillable="true" type="tns:duration"/><xs:simpleType name="duration"><xs:restriction base="xs:duration"><xs:pattern value="\-?P(\d*D)?(T(\d*H)?(\d*M)?(\d*(\.\d*)?S)?)?"/><xs:minInclusive value="-P10675199DT2H48M5.4775808S"/><xs:maxInclusive value="P10675199DT2H48M5.4775807S"/></xs:restriction></xs:simpleType><xs:element name="guid" nillable="true" type="tns:guid"/><xs:simpleType name="guid"><xs:restriction base="xs:string"><xs:pattern value="[\da-fA-F]{8}-[\da-fA-F]{4}-[\da-fA-F]{4}-[\da-fA-F]{4}-[\da-fA-F]{12}"/></xs:restriction></xs:simpleType><xs:attribute name="FactoryType" type="xs:QName"/><xs:attribute name="Id" type="xs:ID"/><xs:attribute name="Ref" type="xs:IDREF"/></xs:schema></wsx:MetadataSection><wsx:MetadataSection Dialect="http://www.w3.org/2001/XMLSchema" Identifier="urn:component:Microsoft.Rtc.WebAuthentication.2010" xmlns=""><xs:schema elementFormDefault="qualified" targetNamespace="urn:component:Microsoft.Rtc.WebAuthentication.2010" xmlns:xs="http://www.w3.org/2001/XMLSchema" xmlns:tns="urn:component:Microsoft.Rtc.WebAuthentication.2010"><xs:import namespace="http://schemas.microsoft.com/2003/10/Serialization/Arrays"/><xs:complexType name="OCSDiagnosticsFault"><xs:sequence><xs:element minOccurs="0" name="Ms-Diagnostics-Fault" nillable="true" type="tns:FaultMsDiagnosticsMetaData"/><xs:element minOccurs="0" name="NameValuePairs" nillable="true" type="q1:ArrayOfKeyValueOfstringstring" xmlns:q1="http://schemas.microsoft.com/2003/10/Serialization/Arrays"/></
06-27 09:26:45.432 19044 19044 I LyNC : xs:sequence></xs:complexType><xs:element name="OCSDiagnosticsFault" nillable="true" type="tns:OCSDiagnosticsFault"/><xs:complexType name="FaultMsDiagnosticsMetaData"><xs:sequence><xs:element minOccurs="0" name="ErrorId" type="xs:unsignedInt"/><xs:element minOccurs="0" name="Reason" nillable="true" type="xs:string"/></xs:sequence></xs:complexType><xs:element name="FaultMsDiagnosticsMetaData" nillable="true" type="tns:FaultMsDiagnosticsMetaData"/></xs:schema></wsx:MetadataSection><wsx:MetadataSection Dialect="http://www.w3.org/2001/XMLSchema" Identifier="http://schemas.microsoft.com/2003/10/Serialization/Arrays" xmlns=""><xs:schema elementFormDefault="qualified" targetNamespace="http://schemas.microsoft.com/2003/10/Serialization/Arrays" xmlns:xs="http://www.w3.org/2001/XMLSchema" xmlns:tns="http://schemas.microsoft.com/2003/10/Serialization/Arrays"><xs:complexType name="ArrayOfKeyValueOfstringstring"><xs:annotation><xs:appinfo><IsDictionary xmlns="http://schemas.microsoft.com/2003/10/Serialization/">true</IsDictionary></xs:appinfo></xs:annotation><xs:sequence><xs:element minOccurs="0" maxOccurs="unbounded" name="KeyValueOfstringstring"><xs:complexType><xs:sequence><xs:element name="Key" nillable="true" type="xs:string"/><xs:element name="Value" nillable="true" type="xs:string"/></xs:sequence></xs:complexType></xs:element></xs:sequence></xs:complexType><xs:element name="ArrayOfKeyValueOfstringstring" nillable="true" type="tns:ArrayOfKeyValueOfstringstring"/></xs:schema></wsx:MetadataSection></Metadata></s:Body></s:Envelope>
06-27 09:26:45.432 19044 19044 I LyNC : </ReceivedResponse>
06-27 09:26:45.432 19044 19044 I LyNC : INFO TRANSPORT .\cmetadatarequest.cpp/90:MEX response received06-27 09:26:45.550 19044 19044 I LyNC : INFO TRANSPORT .\chttprequestprocessor.cpp/266:Sending event to main thread for request(0x51418a1806-27 09:26:45.550 19044 19044 V ActivityMonitor: Activity Stop: com.microsoft.office.lync.ui.options.CredentialsActivity06-27 09:26:45.550 19044 19044 V ActivityMonitor: Activity Destroy: com.microsoft.office.lync.ui.options.CredentialsActivity06-27 09:26:45.636 19044 19044 I LyNC : INFO TRANSPORT .\cmetadatamanager.cpp/631:Received response for meta data request of type 30 with status 0
06-27 09:26:45.636 19044 19044 I LyNC : INFO TRANSPORT .\cauthenticationresolver.cpp/525:MetaData retrieval for url https://lyncpool.mydomain.local/webticket/webticketservice.svc completed with status 0
06-27 09:26:45.636 19044 19044 I LyNC : INFO TRANSPORT .\cauthenticationresolver.cpp/554:Deleting 1 pended Meta data requests for url https://lyncpool.mydomain.local/webticket/webticketservice.svc
06-27 09:26:45.636 19044 19044 I LyNC : INFO TRANSPORT .\cauthenticationresolver.cpp/585:Executing request after meta data successfully retrieved
06-27 09:26:45.636 19044 19044 I LyNC : INFO TRANSPORT .\cmetadatamanager.cpp/468:Received a request to get the meta data of type 2 for url https://lyncpool.mydomain.local/webticket/webticketservice.svc
06-27 09:26:45.636 19044 19044 I LyNC : INFO TRANSPORT .\ccredentialmanager.cpp/164:getSpecificCredential for serviceId(1) returning: credType (1) signInName ([email protected]) domain () username ([email protected]) password.empty() (0) compatibleServiceIds(106-27 09:26:45.636 19044 19044 I LyNC : INFO TRANSPORT .\ccredentialmanager.cpp/164:getSpecificCredential for serviceId(4) returning: credType (1) signInName ([email protected]) domain () username ([email protected]) password.empty() (1) compatibleServiceIds(406-27 09:26:45.651 19044 19044 I HttpConnection: originalurl is https://lyncpool.mydomain.local/webticket/webticketservice.svc/auth
06-27 09:26:45.651 19044 19044 I HttpConnection: decodedurl is https://lyncpool.mydomain.local/webticket/webticketservice.svc/auth
06-27 09:26:45.667 19044 19044 V RandomUtils: Generated randombytes of length: 256
06-27 09:26:45.682 19044 19044 I LyNC : INFO TRANSPORT .\transportutilityfunctions.cpp/638:<SentRequest>
06-27 09:26:45.682 19044 19044 I LyNC : POST https://lyncpool.mydomain.local/webticket/webticketservice.svc/auth
06-27 09:26:45.682 19044 19044 I LyNC : Request Id: 0x50e7d058
06-27 09:26:45.682 19044 19044 I LyNC : HttpHeader:Accept text/xml, application/soap+xml, application/octet-stream
06-27 09:26:45.682 19044 19044 I LyNC : HttpHeader:Content-Type text/xml; charset=utf-8
06-27 09:26:45.682 19044 19044 I LyNC : HttpHeader:SOAPAction http://docs.oasis-open.org/ws-sx/ws-trust/200512/RST/Issue
06-27 09:26:45.682 19044 19044 I LyNC :
06-27 09:26:45.682 19044 19044 I LyNC : <s:Envelope xmlns:s="http://schemas.xmlsoap.org/soap/envelope/"><s:Header><Security>XXXXXXXXXX</Security></s:Header><s:Body><RequestSecurityToken xmlns:xsi="http://www.w3.org/2001/XMLSchema-instance" xmlns:xsd="http://www.w3.org/2001/XMLSchema" Context="f7dfa5ea-009e-48f9-8336-3bd194af0055" xmlns="http://docs.oasis-open.org/ws-sx/ws-trust/200512"><TokenType>urn:component:Microsoft.Rtc.WebAuthentication.2010:user-cwt-1</TokenType><RequestType>http://schemas.xmlsoap.org/ws/2005/02/trust/Issue</RequestType><AppliesTo xmlns="http://schemas.xmlsoap.org/ws/2004/09/policy"><EndpointReference xmlns="http://www.w3.org/2005/08/addressing"><Address>https://lync.mydomain.com/ucwa/v1/applications</Address></EndpointReference></AppliesTo><Entropy><BinarySecret>XXXXXXXXXX</BinarySecret></Entropy><KeyType>http://docs.oasis-open.org/ws-sx/ws-trust/200512/SymmetricKey</KeyType></RequestSecurityToken></s:Body></s:Envelope>
06-27 09:26:45.682 19044 19044 I LyNC : </SentRequest>
06-27 09:26:45.682 19044 19044 V HttpConnection: set body(POST)- length=1443
06-27 09:26:45.682 19044 19044 V HttpConnection: post request: https://lyncpool.mydomain.local/webticket/webticketservice.svc/auth
06-27 09:26:45.682 19044 19336 V HttpConnection: send request: https://lyncpool.mydomain.local/webticket/webticketservice.svc/auth
06-27 09:26:45.682 19044 19336 E HttpEngine: AutoRedirect true for https://lyncpool.mydomain.local/webticket/webticketservice.svc/auth and setting it to FALSE for manual handling
06-27 09:26:45.682 19044 19336 V HttpEngine: Executing request with https://lyncpool.mydomain.local/webticket/webticketservice.svc/auth Connection pool count is 2
06-27 09:26:45.964 19044 19336 V HttpConnection: got Response: https://lyncpool.mydomain.local/webticket/webticketservice.svc/auth
06-27 09:26:45.964 19044 19044 I LyNC : INFO TRANSPORT .\chttprequestprocessor.cpp/173:Received response of request(WebTicketRequest) with status = 0x0
06-27 09:26:45.995 19044 19044 I LyNC : INFO TRANSPORT .\transportutilityfunctions.cpp/917:<ReceivedResponse>
06-27 09:26:45.995 19044 19044 I LyNC : POST https://lyncpool.mydomain.local/webticket/webticketservice.svc/auth
06-27 09:26:45.995 19044 19044 I LyNC : Request Id: 0x50e7d058
06-27 09:26:45.995 19044 19044 I LyNC : HttpHeader:Cache-Control private
06-27 09:26:45.995 19044 19044 I LyNC : HttpHeader:Content-Length 765
06-27 09:26:45.995 19044 19044 I LyNC : HttpHeader:Content-Type text/xml; charset=utf-8
06-27 09:26:45.995 19044 19044 I LyNC : HttpHeader:Date Thu, 27 Jun 2013 14:26:30 GMT
06-27 09:26:45.995 19044 19044 I LyNC : HttpHeader:Server Microsoft-IIS/8.0
06-27 09:26:45.995 19044 19044 I LyNC : HttpHeader:StatusCode 500
06-27 09:26:45.995 19044 19044 I LyNC : HttpHeader:X-AspNet-Version 4.0.30319
06-27 09:26:45.995 19044 19044 I LyNC : HttpHeader:X-Content-Type-Options nosniff
06-27 09:26:45.995 19044 19044 I LyNC : HttpHeader:X-MS-Server-Fqdn D01LyNCFE02.mydomain.local
06-27 09:26:45.995 19044 19044 I LyNC : HttpHeader:X-Powered-By ASP.NET
06-27 09:26:45.995 19044 19044 I LyNC :
06-27 09:26:45.995 19044 19044 I LyNC : <s:Envelope xmlns:s="http://schemas.xmlsoap.org/soap/envelope/"><s:Body><s:Fault><faultcode xmlns:a="http://docs.oasis-open.org/ws-sx/ws-trust/200512">a:InvalidScope</faultcode><faultstring xml:lang="en-US">The AppliesTo element of web ticket request points to a different web server or site.</faultstring><detail><OCSDiagnosticsFault xmlns="urn:component:Microsoft.Rtc.WebAuthentication.2010" xmlns:i="http://www.w3.org/2001/XMLSchema-instance"><Ms-Diagnostics-Fault><ErrorId>28037</ErrorId><Reason>The AppliesTo element of web ticket request points to a different web server or site.</Reason></Ms-Diagnostics-Fault><NameValuePairs xmlns:a="http://schemas.microsoft.com/2003/10/Serialization/Arrays"/></OCSDiagnosticsFault></detail></s:Fault></s:Body></s:Envelope>
06-27 09:26:45.995 19044 19044 I LyNC : </ReceivedResponse>
06-27 09:26:46.011 19044 19044 I LyNC : INFO TRANSPORT .\chttprequestprocessor.cpp/266:Sending event to main thread for request(0x50e7d05806-27 09:26:46.011 19044 19044 I LyNC : INFO TRANSPORT .\cwebticketsession.cpp/441:Received webticket resposne with status E_GenericFailure (E0-0-106-27 09:26:46.011 19044 19044 I LyNC : INFO TRANSPORT .\cwebticketsession.cpp/1206:Raising WebTicketEvent for https://lync.mydomain.com/ucwa/v1/applications and https://lyncpool.mydomain.local/webticket/webticketservice.svc with status E_GenericFailure (E0-0-106-27 09:26:46.011 19044 19044 I LyNC : INFO TRANSPORT .\cauthenticationresolver.cpp/640:Web-Ticket retrieval for url https://lync.mydomain.com/ucwa/v1/applications completed with status E_GenericFailure (E0-0-106-27 09:26:46.011 19044 19044 E LyNC : ERROR TRANSPORT .\cauthenticationresolver.cpp/704:Failing the original request as we weren't able to get thewebticket
06-27 09:26:46.011 19044 19044 I LyNC : INFO TRANSPORT .\crequestmanager.cpp/119:Failing secure request with status E_GenericFailure (E0-0-106-27 09:26:46.011 19044 19044 I LyNC : INFO APPLICATION .\ctransportrequestretrialqueue.cpp/768:Req. completed, Stopping timer06-27 09:26:46.011 19044 19044 E LyNC : ERROR APPLICATION .\cucwaappsession.cpp/1783:Init-Session request failed with error E_GenericFailure (E0-0-106-27 09:26:46.011 19044 19044 I LyNC : INFO APPLICATION .\cucwaappsession.cpp/975:CUcwaAppSession::setNewActualState() state=0
06-27 09:26:46.011 19044 19044 I LyNC : INFO TRANSPORT .\chttprequestprocessor.cpp/134:Clearing request processor for component WebTicketSession on sign-out06-27 09:26:46.011 19044 19044 I AndroidOperationQueue: CancelSync Started
06-27 09:26:46.011 19044 19044 I AndroidOperationQueue: No operations pending
06-27 09:26:46.011 19044 19044 I LyNC : INFO TRANSPORT .\chttprequestprocessor.cpp/134:Clearing request processor for component MetaDataManager on sign-out06-27 09:26:46.011 19044 19044 I LyNC : INFO APPLICATION .\calertreporter.cpp/64:Alert received! Category 2, Type 300, level 0, error E_GenericFailure (E0-0-1), context 'handleUcwaAppSessionRequestError', hasAction=false
06-27 09:26:46.042 19044 19044 I LyNC : INFO APPLICATION .\calertreporter.cpp/117:Alert cleared of Category 2, Type 300, cleared 1 alerts
06-27 09:26:46.042 19044 19044 I LyNC : INFO APPLICATION .\ctransportrequestretrialqueue.cpp/683:Response received for req. POST-Application(0x515da3e0): E_GenericFailure (E0-0-1) (RemoteNetworkPermanentError); Done with req.; Stopping resend timer
06-27 09:26:46.050 19044 19044 V RootTabActivity: presence state : AvailabilityOnline
06-27 09:26:46.057 19044 19044 I UcClientStateManager: New UI State: ActualState = IsSignedOut DesiredState = BeSignedIn DataAvailable = true
06-27 09:26:46.120 19044 19044 V BaseActivity: finish being called for com.microsoft.office.lync.ui.RootTabActivity06-27 09:26:46.128 19044 19044 I LyncPerformance: PerfEnd|4-10|1372343206131
06-27 09:26:46.175 19044 19044 V FeedbackUtils: Not credentialsactivity. Hence skipping
06-27 09:26:46.182 19044 19044 I LyNC : INFO APPLICATION .\cucwadatasynchronizer.cpp/996:Mode 1 scheduled to timeout in 120sec
06-27 09:26:46.315 19044 19044 V ActivityMonitor: Activity Create: com.microsoft.office.lync.ui.options.CredentialsActivity06-27 09:26:46.511 19044 19044 I LyncPerformance: PerfEnd|1:Signin Page Loaded|1372343206515
06-27 09:26:46.511 19044 19044 V ActivityMonitor: Activity Start: com.microsoft.office.lync.ui.options.CredentialsActivity06-27 09:26:46.511 19044 19044 V FeedbackUtils: Shake Sensor has updated context: com.microsoft.office.lync.ui.options.CredentialsActivity06-27 09:26:47.198 19044 19044 V ActivityMonitor: Activity Stop: com.microsoft.office.lync.ui.RootTabActivity06-27 09:26:47.206 19044 19044 V ActivityMonitor: Activity Destroy: com.microsoft.office.lync.ui.RootTabActivity06-27 09:27:17.792 19044 19044 I LyncPerformance: PerfBegin|2-12:Signin - Started|1372343237797
06-27 09:27:18.268 19044 19044 I LyNC : INFO APPLICATION .\capplication.cpp/1374:Initialized the sign in BRB logger
06-27 09:27:18.417 19044 19044 I LyNC : INFO APPLICATION .\cucwaappsession.cpp/410:SignIn. signInAsUserState=0, actualState=0
06-27 09:27:18.417 19044 19044 I LyNC : INFO APPLICATION .\cucwaappsession.cpp/952:CUcwaAppSession canceling all requests
06-27 09:27:18.659 19044 19044 I LyNC : INFO APPLICATION .\cucwaappsession.cpp/690:CUcwaAppSession::sendCreateApplicationRequest called
06-27 09:27:18.784 19044 19044 I LyNC : INFO APPLICATION .\cucwaappsession.cpp/1209:Updating URLs. For Ucwa: discoveredFqdn=https://lync.mydomain.com, applicationsRelativeUrl=/ucwa/v1/applications, configuredInternal=, configuredExternal=, loc=1, auto-discovery=1
06-27 09:27:19.057 19044 19044 I LyNC : INFO TRANSPORT .\cmetadatamanager.cpp/468:Received a request to get the meta data of type 0 for url https://lync.mydomain.com/ucwa/v1/applications
06-27 09:27:19.057 19044 19044 I LyNC : INFO TRANSPORT .\cmetadatamanager.cpp/518:Sending Unauthenticated get to get the web-ticket url
06-27 09:27:19.096 19044 19044 I LyNC : INFO TRANSPORT .\ccredentialmanager.cpp/164:getSpecificCredential for serviceId(4) returning: credType (1) signInName ([email protected]) domain () username ([email protected]) password.empty() (1) compatibleServiceIds(406-27 09:27:19.136 19044 19044 I HttpConnection: originalurl is https://lync.mydomain.com/ucwa/v1/applications
06-27 09:27:19.136 19044 19044 I HttpConnection: decodedurl is https://lync.mydomain.com/ucwa/v1/applications
06-27 09:27:19.276 19044 19044 I LyNC : INFO TRANSPORT .\transportutilityfunctions.cpp/638:<SentRequest>
06-27 09:27:19.276 19044 19044 I LyNC : GET https://lync.mydomain.com/ucwa/v1/applications
06-27 09:27:19.276 19044 19044 I LyNC : Request Id: 0x4f551198
06-27 09:27:19.276 19044 19044 I LyNC : HttpHeader:Accept
06-27 09:27:19.276 19044 19044 I LyNC : HttpHeader:X-MS-WebTicket xxxxxxxxxx
06-27 09:27:19.276 19044 19044 I LyNC :
06-27 09:27:19.276 19044 19044 I LyNC :
06-27 09:27:19.276 19044 19044 I LyNC : </SentRequest>
06-27 09:27:19.307 19044 19044 V HttpConnection: post request: https://lync.mydomain.com/ucwa/v1/applications
06-27 09:27:19.307 19044 19352 V HttpConnection: send request: https://lync.mydomain.com/ucwa/v1/applications
06-27 09:27:19.339 19044 19044 I LyNC : INFO TRANSPORT .\cauthenticationresolver.cpp/418:Waiting on Meta Data from https://lync.mydomain.com/ucwa/v1/applications
06-27 09:27:19.378 19044 19352 E HttpEngine: AutoRedirect true for https://lync.mydomain.com/ucwa/v1/applications and setting it to FALSE for manual handling
06-27 09:27:19.378 19044 19352 V HttpEngine: Executing request with https://lync.mydomain.com/ucwa/v1/applications Connection pool count is 2
06-27 09:27:19.487 19044 19044 I LyNC : INFO APPLICATION .\ctransportrequestretrialqueue.cpp/348:Submitting new req. POST-Application(0x4ef2d088); Timeout timer started
06-27 09:27:19.495 19044 19044 I LyNC : INFO APPLICATION .\cucwaappsession.cpp/975:CUcwaAppSession::setNewActualState() state=2
06-27 09:27:19.925 19044 19352 W DefaultRequestDirector: Authentication error: Unable to respond to any of these challenges: {}
06-27 09:27:19.925 19044 19352 V HttpConnection: got Response: https://lync.mydomain.com/ucwa/v1/applications
06-27 09:27:20.050 19044 19046 D dalvikvm: GC_CONCURRENT freed 2073K, 18% free 10583K/12771K, paused 154ms+86ms, total 475ms
06-27 09:27:20.542 19044 19044 I LyNC : INFO UTILITIES .\cbasepersistablecomponent.cpp/230:Storing 4 out-of-sync components took 1048ms
06-27 09:27:20.604 19044 19044 I LyNC : INFO APPLICATION .\capplication.cpp/1404:CUcwaAppSession::signIn() succeeded
06-27 09:27:20.612 19044 19044 I LyNC : INFO TRANSPORT .\chttprequestprocessor.cpp/173:Received response of request() with status = 0x0
06-27 09:27:20.612 19044 19044 I LyNC : INFO TRANSPORT .\transportutilityfunctions.cpp/917:<ReceivedResponse>
06-27 09:27:20.612 19044 19044 I LyNC : GET https://lync.mydomain.com/ucwa/v1/applications
06-27 09:27:20.612 19044 19044 I LyNC : Request Id: 0x4f551198
06-27 09:27:20.612 19044 19044 I LyNC : HttpHeader:Content-Length 1293
06-27 09:27:20.612 19044 19044 I LyNC : HttpHeader:Content-Type text/html
06-27 09:27:20.612 19044 19044 I LyNC : HttpHeader:Date Thu, 27 Jun 2013 14:27:04 GMT
06-27 09:27:20.612 19044 19044 I LyNC : HttpHeader:Server Microsoft-IIS/8.0
06-27 09:27:20.612 19044 19044 I LyNC : HttpHeader:StatusCode 401
06-27 09:27:20.612 19044 19044 I LyNC : HttpHeader:X-MS-Server-Fqdn D01LyNCFE02.mydomain.local
06-27 09:27:20.612 19044 19044 I LyNC : HttpHeader:X-MS-WebTicketSupported cwt,saml
06-27 09:27:20.612 19044 19044 I LyNC : HttpHeader:X-MS-WebTicketURL https://lyncpool.mydomain.local/WebTicket/WebTicketService.svc
06-27 09:27:20.612 19044 19044 I LyNC : HttpHeader:X-Powered-By ASP.NET
06-27 09:27:20.612 19044 19044 I LyNC :
06-27 09:27:20.612 19044 19044 I LyNC : <!DOCTyPE html PUBLIC "-//W3C//DTD XHTML 1.0 Strict//EN" "http://www.w3.org/TR/xhtml1/DTD/xhtml1-strict.dtd">
06-27 09:27:20.612 19044 19044 I LyNC : <html xmlns="http://www.w3.org/1999/xhtml">
06-27 09:27:20.612 19044 19044 I LyNC : <head>
06-27 09:27:20.612 19044 19044 I LyNC : <meta http-equiv="Content-Type" content="text/html; charset=iso-8859-1"/>
06-27 09:27:20.612 19044 19044 I LyNC : <title>401 - Unauthorized: Access is denied due to invalid credentials.</title>
06-27 09:27:20.612 19044 19044 I LyNC : <style type="text/css">
06-27 09:27:20.612 19044 19044 I LyNC : <!--
06-27 09:27:20.612 19044 19044 I LyNC : body{margin:0;font-size:.7em;font-family:Verdana, Arial, Helvetica, sans-serif;background:#EEEEEE;}
06-27 09:27:20.612 19044 19044 I LyNC : fieldset{padding:0 15px 10px 15px;}
06-27 09:27:20.612 19044 19044 I LyNC : h1{font-size:2.4em;margin:0;color:#FFF;}
06-27 09:27:20.612 19044 19044 I LyNC : h2{font-size:1.7em;margin:0;color:#CC0000;}
06-27 09:27:20.612 19044 19044 I LyNC : h3{font-size:1.2em;margin:10px 0 0 0;color:#000000;}
06-27 09:27:20.612 19044 19044 I LyNC : #header{width:96%;margin:0 0 0 0;padding:6px 2% 6px 2%;font-family:"trebuchet MS", Verdana, sans-serif;color:#FFF;
06-27 09:27:20.612 19044 19044 I LyNC : background-color:#555555;}
06-27 09:27:20.612 19044 19044 I LyNC : #content{margin:0 0 0 2%;position:relative;}
06-27 09:27:20.612 19044 19044 I LyNC : .content-container{background:#FFF;width:96%;margin-top:8px;padding:10px;position:relative;}
06-27 09:27:20.612 19044 19044 I LyNC : -->
06-27 09:27:20.612 19044 19044 I LyNC : </style>
06-27 09:27:20.612 19044 19044 I LyNC : </head>
06-27 09:27:20.612 19044 19044 I LyNC : <body>
06-27 09:27:20.612 19044 19044 I LyNC : <div id="header"><h1>Server Error</h1></div>
06-27 09:27:20.612 19044 19044 I LyNC : <div id="content">
06-27 09:27:20.612 19044 19044 I LyNC : <div class="content-container"><fieldset>
06-27 09:27:20.612 19044 19044 I LyNC : <h2>401 - Unauthorized: Access is denied due to invalid credentials.</h2>
06-27 09:27:20.612 19044 19044 I LyNC : <h3>you do not have permission to view this directory or page using the credentials that you supplied.</h3>
06-27 09:27:20.612 19044 19044 I LyNC : </fieldset></div>
06-27 09:27:20.612 19044 19044 I LyNC : </div>
06-27 09:27:20.612 19044 19044 I LyNC : </body>
06-27 09:27:20.612 19044 19044 I LyNC : </html>
06-27 09:27:20.612 19044 19044 I LyNC :
06-27 09:27:20.612 19044 19044 I LyNC : </ReceivedResponse>
06-27 09:27:20.721 19044 19044 I LyNC : INFO TRANSPORT .\chttprequestprocessor.cpp/266:Sending event to main thread for request(0x4f55119806-27 09:27:21.300 19044 19044 I UcClientStateManager: New UI State: ActualState = IsSigningIn DesiredState = BeSignedIn DataAvailable = true
06-27 09:27:21.800 19044 19044 V BaseActivity: finish being called for com.microsoft.office.lync.ui.options.CredentialsActivity06-27 09:27:21.839 19044 19044 I Choreographer: Skipped 72 frames! The application may be doing too much work on its main thread06-27 09:27:21.846 19044 19044 I LyNC : INFO TRANSPORT .\cmetadatamanager.cpp/631:Received response for meta data request of type 60 with status 0
06-27 09:27:21.893 19044 19044 I LyNC : INFO TRANSPORT .\cmetadatamanager.cpp/743:Base service url constructed from unauth-get-response is https://lync.mydomain.com/ucwa/v1/applications
06-27 09:27:21.893 19044 19044 I LyNC : INFO TRANSPORT .\cmetadatamanager.cpp/797:Added a binding based on the unauth-get response
06-27 09:27:21.893 19044 19044 I LyNC : INFO TRANSPORT .\cauthenticationresolver.cpp/525:MetaData retrieval for url https://lync.mydomain.com/ucwa/v1/applications completed with status 0
06-27 09:27:21.893 19044 19044 I LyNC : INFO TRANSPORT .\cauthenticationresolver.cpp/554:Deleting 1 pended Meta data requests for url https://lync.mydomain.com/ucwa/v1/applications
06-27 09:27:21.893 19044 19044 I LyNC : INFO TRANSPORT .\cauthenticationresolver.cpp/585:Executing request after meta data successfully retrieved
06-27 09:27:21.893 19044 19044 I LyNC : INFO TRANSPORT .\cmetadatamanager.cpp/468:Received a request to get the meta data of type 0 for url https://lync.mydomain.com/ucwa/v1/applications
06-27 09:27:21.893 19044 19044 I LyNC : INFO TRANSPORT .\ccredentialmanager.cpp/164:getSpecificCredential for serviceId(1) returning: credType (1) signInName ([email protected]) domain () username ([email protected]) password.empty() (0) compatibleServiceIds(106-27 09:27:21.893 19044 19044 I LyNC : INFO TRANSPORT .\cwebticketsession.cpp/349:No Cached web-ticket found06-27 09:27:21.893 19044 19044 I LyNC : INFO TRANSPORT .\cwebticketsession.cpp/393:Received request for a new token for https://lync.mydomain.com/ucwa/v1/applications
06-27 09:27:21.893 19044 19044 I LyNC : INFO TRANSPORT .\chttprequestprocessor.cpp/134:Clearing request processor for component WebTicketSession on sign-out06-27 09:27:21.901 19044 19044 I LyNC : INFO TRANSPORT .\cmetadatamanager.cpp/468:Received a request to get the meta data of type 2 for url https://lyncpool.mydomain.local/webticket/webticketservice.svc
06-27 09:27:21.901 19044 19044 I LyNC : INFO TRANSPORT .\cmetadatamanager.cpp/535:Sending Mex request get the meta data for the endpoint
06-27 09:27:21.901 19044 19044 I LyNC : INFO TRANSPORT .\ccredentialmanager.cpp/164:getSpecificCredential for serviceId(4) returning: credType (1) signInName ([email protected]) domain () username ([email protected]) password.empty() (1) compatibleServiceIds(406-27 09:27:22.034 19044 19044 I HttpConnection: originalurl is https://lyncpool.mydomain.local/webticket/webticketservice.svc/mex
06-27 09:27:22.034 19044 19044 I HttpConnection: decodedurl is https://lyncpool.mydomain.local/webticket/webticketservice.svc/mex
06-27 09:27:22.120 19044 19044 I LyNC : INFO TRANSPORT .\transportutilityfunctions.cpp/638:<SentRequest>
06-27 09:27:22.120 19044 19044 I LyNC : POST https://lyncpool.mydomain.local/webticket/webticketservice.svc/mex
06-27 09:27:22.120 19044 19044 I LyNC : Request Id: 0x5130aa08
06-27 09:27:22.120 19044 19044 I LyNC : HttpHeader:Accept text/xml, application/soap+xml, application/octet-stream
06-27 09:27:22.120 19044 19044 I LyNC : HttpHeader:Content-Type application/soap+xml; charset=utf-8
06-27 09:27:22.120 19044 19044 I LyNC :
06-27 09:27:22.120 19044 19044 I LyNC : <soap12:Envelope xmlns:soap12="http://www.w3.org/2003/05/soap-envelope" xmlns:wsa="http://www.w3.org/2005/08/addressing"><soap12:Header><wsa:Action soap12:mustUnderstand="1">http://schemas.xmlsoap.org/ws/2004/09/transfer/Get</wsa:Action><wsa:ReplyTo><wsa:Address>http://www.w3.org/2005/08/addressing/anonymous</wsa:Address></wsa:ReplyTo><wsa:To soap12:mustUnderstand="1">https://lyncpool.mydomain.local/webticket/webticketservice.svc</wsa:To></soap12:Header><soap12:Body/></soap12:Envelope>
06-27 09:27:22.120 19044 19044 I LyNC : </SentRequest>
06-27 09:27:22.120 19044 19044 V HttpConnection: set body(POST)- length=500
06-27 09:27:22.120 19044 19044 V HttpConnection: post request: https://lyncpool.mydomain.local/webticket/webticketservice.svc/mex
06-27 09:27:22.120 19044 19044 I LyNC : INFO TRANSPORT .\cauthenticationresolver.cpp/418:Waiting on Meta Data from https://lyncpool.mydomain.local/webticket/webticketservice.svc
06-27 09:27:22.120 19044 19044 I LyNC : INFO TRANSPORT .\cauthenticationresolver.cpp/203:Waiting on the token
06-27 09:27:22.120 19044 19642 V HttpConnection: send request: https://lyncpool.mydomain.local/webticket/webticketservice.svc/mex
06-27 09:27:22.120 19044 19642 E HttpEngine: AutoRedirect true for https://lyncpool.mydomain.local/webticket/webticketservice.svc/mex and setting it to FALSE for manual handling
06-27 09:27:22.120 19044 19642 V HttpEngine: Executing request with https://lyncpool.mydomain.local/webticket/webticketservice.svc/mex Connection pool count is 2
06-27 09:27:22.167 19044 19642 V HttpConnection: got Response: https://lyncpool.mydomain.local/webticket/webticketservice.svc/mex
06-27 09:27:22.206 19044 19044 I LyNC : INFO TRANSPORT .\chttprequestprocessor.cpp/173:Received response of request(MetaDataRequest) with status = 0x0
06-27 09:27:22.214 19044 19044 I LyNC : INFO TRANSPORT .\transportutilityfunctions.cpp/917:<ReceivedResponse>
06-27 09:27:22.214 19044 19044 I LyNC : POST https://lyncpool.mydomain.local/webticket/webticketservice.svc/mex
06-27 09:27:22.214 19044 19044 I LyNC : Request Id: 0x5130aa08
06-27 09:27:22.214 19044 19044 I LyNC : HttpHeader:Cache-Control private
06-27 09:27:22.214 19044 19044 I LyNC : HttpHeader:Content-Length 20960
06-27 09:27:22.214 19044 19044 I LyNC : HttpHeader:Content-Type application/soap+xml; charset=utf-8
06-27 09:27:22.214 19044 19044 I LyNC : HttpHeader:Date Thu, 27 Jun 2013 14:27:06 GMT
06-27 09:27:22.214 19044 19044 I LyNC : HttpHeader:Server Microsoft-IIS/8.0
06-27 09:27:22.214 19044 19044 I LyNC : HttpHeader:StatusCode 200
06-27 09:27:22.214 19044 19044 I LyNC : HttpHeader:X-AspNet-Version 4.0.30319
06-27 09:27:22.214 19044 19044 I LyNC : HttpHeader:X-Content-Type-Options nosniff
06-27 09:27:22.214 19044 19044 I LyNC : HttpHeader:X-MS-Server-Fqdn D01LyNCFE02.mydomain.local
06-27 09:27:22.214 19044 19044 I LyNC : HttpHeader:X-Powered-By ASP.NET
06-27 09:27:22.214 19044 19044 I LyNC :
06-27 09:27:22.214 19044 19044 I LyNC : <s:Envelope xmlns:s="http://www.w3.org/2003/05/soap-envelope" xmlns:a="http://www.w3.org/2005/08/addressing"><s:Header><a:Action s:mustUnderstand="1">http://schemas.xmlsoap.org/ws/2004/09/transfer/GetResponse</a:Action></s:Header><s:Body><Metadata xmlns="http://schemas.xmlsoap.org/ws/2004/09/mex" xmlns:wsx="http://schemas.xmlsoap.org/ws/2004/09/mex"><wsx:MetadataSection Dialect="http://schemas.xmlsoap.org/wsdl/" Identifier="http://tempuri.org/" xmlns=""><wsdl:definitions name="WebTicketService" targetNamespace="http://tempuri.org/" xmlns:wsdl="http://schemas.xmlsoap.org/wsdl/" xmlns:wsu="http://docs.oasis-open.org/wss/2004/01/oasis-200401-wss-wssecurity-utility-1.0.xsd" xmlns:wsp="http://schemas.xmlsoap.org/ws/2004/09/policy" xmlns:wsap="http://schemas.xmlsoap.org/ws/2004/08/addressing/policy" xmlns:msc="http://schemas.microsoft.com/ws/2005/12/wsdl/contract" xmlns:soap12="http://schemas.xmlsoap.org/wsdl/soap12/" xmlns:wsa="http://schemas.xmlsoap.org/ws/2004/08/addressing" xmlns:wsam="http://www.w3.org/2007/05/addressing/metadata" xmlns:xsd="http://www.w3.org/2001/XMLSchema" xmlns:tns="http://tempuri.org/" xmlns:soap="http://schemas.xmlsoap.org/wsdl/soap/" xmlns:wsaw="http://www.w3.org/2006/05/addressing/wsdl" xmlns:soapenc="http://schemas.xmlsoap.org/soap/encoding/" xmlns:wsa10="http://www.w3.org/2005/08/addressing"><wsp:Policy wsu:Id="WebTicketServiceMachineCert_policy"><wsp:ExactlyOne><wsp:All><sp:TransportBinding xmlns:sp="http://schemas.xmlsoap.org/ws/2005/07/securitypolicy"><wsp:Policy><sp:TransportToken><wsp:Policy><sp:HttpsToken RequireClientCertificate="false"/></wsp:Policy></sp:TransportToken><sp:AlgorithmSuite><wsp:Policy><sp:Basic256/></wsp:Policy></sp:AlgorithmSuite><sp:Layout><wsp:Policy><sp:Strict/></wsp:Policy></sp:Layout><sp:IncludeTimestamp/></wsp:Policy></sp:TransportBinding><sp:EndorsingSupportingTokens xmlns:sp="http://schemas.xmlsoap.org/ws/2005/07/securitypolicy"><wsp:Policy><sp:X509Token sp:IncludeToken="http://schemas.xmlsoap.org/ws/2005/07/securitypolicy/IncludeToken/AlwaysToRecipient"><wsp:Policy><sp:RequireThumbprintReference/><sp:WssX509V3Token10/></wsp:Policy></sp:X509Token><sp:SignedParts><sp:Header Name="To" Namespace="http://www.w3.org/2005/08/addressing"/></sp:SignedParts></wsp:Policy></sp:EndorsingSupportingTokens><sp:Wss11 xmlns:sp="http://schemas.xmlsoap.org/ws/2005/07/securitypolicy"><wsp:Policy><sp:MustSupportRefThumbprint/></wsp:Policy></sp:Wss11><sp:Trust10 xmlns:sp="http://schemas.xmlsoap.org/ws/2005/07/securitypolicy"><wsp:Policy><sp:MustSupportIssuedTokens/><sp:RequireClientEntropy/><sp:RequireServerEntropy/></wsp:Policy></sp:Trust10><wsaw:UsingAddressing/></wsp:All></wsp:ExactlyOne></wsp:Policy><wsp:Policy wsu:Id="OAuth_policy"><wsp:ExactlyOne><wsp:All><http:OAuth xmlns:http="http://schemas.microsoft.com/ws/06/2004/policy/http"/><af:Binding xmlns:af="urn:component:Microsoft.Rtc.WebAuthentication.2010"/><sp:TransportBinding xmlns:sp="http://schemas.xmlsoap.org/ws/2005/07/securitypolicy"><wsp:Policy><sp:TransportToken><wsp:Policy><sp:HttpsToken RequireClientCertificate="false"/></wsp:Policy></sp:TransportToken><sp:AlgorithmSuite><wsp:Policy><sp:Basic256/></wsp:Policy></sp:AlgorithmSuite><sp:Layout><wsp:Policy><sp:Strict/></wsp:Policy></sp:Layout></wsp:Policy></sp:TransportBinding></wsp:All></wsp:ExactlyOne></wsp:Policy><wsp:Policy wsu:Id="WebTicketServiceAnon_policy"><wsp:ExactlyOne><wsp:All><af:AnonAuthenticat
06-27 09:27:22.214 19044 19044 I LyNC : ion xmlns:af="urn:component:Microsoft.Rtc.WebAuthentication.2010"/><af:Binding xmlns:af="urn:component:Microsoft.Rtc.WebAuthentication.2010"/><sp:TransportBinding xmlns:sp="http://schemas.xmlsoap.org/ws/2005/07/securitypolicy"><wsp:Policy><sp:TransportToken><wsp:Policy><sp:HttpsToken RequireClientCertificate="false"/></wsp:Policy></sp:TransportToken><sp:AlgorithmSuite><wsp:Policy><sp:Basic256/></wsp:Policy></sp:AlgorithmSuite><sp:Layout><wsp:Policy><sp:Lax/></wsp:Policy></sp:Layout></wsp:Policy></sp:TransportBinding><sp:SignedSupportingTokens xmlns:sp="http://schemas.xmlsoap.org/ws/2005/07/securitypolicy"><wsp:Policy><sp:UsernameToken sp:IncludeToken="http://schemas.xmlsoap.org/ws/2005/07/securitypolicy/IncludeToken/AlwaysToRecipient"><wsp:Policy><sp:WssUsernameToken10/></wsp:Policy></sp:UsernameToken></wsp:Policy></sp:SignedSupportingTokens><sp:Wss10 xmlns:sp="http://schemas.xmlsoap.org/ws/2005/07/securitypolicy"><wsp:Policy/></sp:Wss10></wsp:All></wsp:ExactlyOne></wsp:Policy><wsp:Policy wsu:Id="WebTicketServiceWinNegotiate_policy"><wsp:ExactlyOne><wsp:All><http:NegotiateAuthentication xmlns:http="http://schemas.microsoft.com/ws/06/2004/policy/http"/><af:Binding xmlns:af="urn:component:Microsoft.Rtc.WebAuthentication.2010"/><sp:TransportBinding xmlns:sp="http://schemas.xmlsoap.org/ws/2005/07/securitypolicy"><wsp:Policy><sp:TransportToken><wsp:Policy><sp:HttpsToken RequireClientCertificate="false"/></wsp:Policy></sp:TransportToken><sp:AlgorithmSuite><wsp:Policy><sp:Basic256/></wsp:Policy></sp:AlgorithmSuite><sp:Layout><wsp:Policy><sp:Strict/></wsp:Policy></sp:Layout></wsp:Policy></sp:TransportBinding></wsp:All></wsp:ExactlyOne></wsp:Policy><wsp:Policy wsu:Id="WebTicketServiceCert_policy"><wsp:ExactlyOne><wsp:All><af:Binding xmlns:af="urn:component:Microsoft.Rtc.WebAuthentication.2010"/><sp:TransportBinding xmlns:sp="http://schemas.xmlsoap.org/ws/2005/07/securitypolicy"><wsp:Policy><sp:TransportToken><wsp:Policy><sp:HttpsToken RequireClientCertificate="false"/></wsp:Policy></sp:TransportToken><sp:AlgorithmSuite><wsp:Policy><sp:Basic256/></wsp:Policy></sp:AlgorithmSuite><sp:Layout><wsp:Policy><sp:Strict/></wsp:Policy></sp:Layout><sp:IncludeTimestamp/></wsp:Policy></sp:TransportBinding><sp:EndorsingSupportingTokens xmlns:sp="http://schemas.xmlsoap.org/ws/2005/07/securitypolicy"><wsp:Policy><sp:X509Token sp:IncludeToken="http://schemas.xmlsoap.org/ws/2005/07/securitypolicy/IncludeToken/AlwaysToRecipient"><wsp:Policy><sp:RequireThumbprintReference/><sp:WssX509V3Token10/></wsp:Policy></sp:X509Token><sp:SignedParts><sp:Header Name="To" Namespace="http://www.w3.org/2005/08/addressing"/></sp:SignedParts></wsp:Policy></sp:EndorsingSupportingTokens><sp:Wss11 xmlns:sp="http://schemas.xmlsoap.org/ws/2005/07/securitypolicy"><wsp:Policy><sp:MustSupportRefThumbprint/></wsp:Policy></sp:Wss11><sp:Trust10 xmlns:sp="http://schemas.xmlsoap.org/ws/2005/07/securitypolicy"><wsp:Policy><sp:MustSupportIssuedTokens/><sp:RequireClientEntropy/><sp:RequireServerEntropy/></wsp:Policy></sp:Trust10><wsaw:UsingAddressing/></wsp:All></wsp:ExactlyOne></wsp:Policy><wsp:Policy wsu:Id="WebTicketServicePin_policy"><wsp:ExactlyOne><wsp:All><http:BasicAuthentication xmlns:http="http://schemas.microsoft.com/ws/06/2004/policy/http"/><af:PinAuthentication xmlns:af="urn:component:Microsoft.Rtc.WebAuthentication.2010"/><af:Binding xmlns:af="urn:component:Microsoft.Rtc.WebAuthentication.2010"/><sp:TransportBinding xmlns:sp="http://schemas.xmlsoap.org/ws/2005/07/securitypolicy"><wsp:Policy><sp:TransportToken><wsp:Policy><sp:HttpsToken RequireClientCertificate="false"/></wsp:Policy></sp:TransportToken><sp:AlgorithmSuite><wsp:Policy><sp:Basic256/></wsp:Policy></sp:AlgorithmSuite><sp:Layout><wsp:Policy><sp:Strict/></wsp:Policy></sp:Layout></wsp:Policy></sp:TransportBinding></wsp:All></wsp:ExactlyOne></wsp:Policy><wsp:Policy wsu:Id="WebTicketServiceAuth_policy"><wsp:ExactlyOne><wsp:All><af:FormsAuthentication xmlns:af="urn:component:Microsoft.Rtc.WebAuthentication.2010"/><af:Bin
06-27 09:27:22.214 19044 19044 I LyNC : ding xmlns:af="urn:component:Microsoft.Rtc.WebAuthentication.2010"/><sp:TransportBinding xmlns:sp="http://schemas.xmlsoap.org/ws/2005/07/securitypolicy"><wsp:Policy><sp:TransportToken><wsp:Policy><sp:HttpsToken RequireClientCertificate="false"/></wsp:Policy></sp:TransportToken><sp:AlgorithmSuite><wsp:Policy><sp:Basic256/></wsp:Policy></sp:AlgorithmSuite><sp:Layout><wsp:Policy><sp:Lax/></wsp:Policy></sp:Layout></wsp:Policy></sp:TransportBinding><sp:SignedSupportingTokens xmlns:sp="http://schemas.xmlsoap.org/ws/2005/07/securitypolicy"><wsp:Policy><sp:UsernameToken sp:IncludeToken="http://schemas.xmlsoap.org/ws/2005/07/securitypolicy/IncludeToken/AlwaysToRecipient"><wsp:Policy><sp:WssUsernameToken10/></wsp:Policy></sp:UsernameToken></wsp:Policy></sp:SignedSupportingTokens><sp:Wss10 xmlns:sp="http://schemas.xmlsoap.org/ws/2005/07/securitypolicy"><wsp:Policy/></sp:Wss10></wsp:All></wsp:ExactlyOne></wsp:Policy><wsdl:types><xsd:schema targetNamespace="http://tempuri.org/Imports"><xsd:import namespace="http://schemas.microsoft.com/Message"/><xsd:import namespace="urn:component:Microsoft.Rtc.WebAuthentication.2010"/><xsd:import namespace="http://schemas.microsoft.com/2003/10/Serialization/"/><xsd:import namespace="http://schemas.microsoft.com/2003/10/Serialization/Arrays"/></xsd:schema></wsdl:types><wsdl:message name="IWebTicketService_IssueToken_InputMessage"><wsdl:part name="rst" type="q1:MessageBody" xmlns:q1="http://schemas.microsoft.com/Message"/></wsdl:message><wsdl:message name="IWebTicketService_IssueToken_OutputMessage"><wsdl:part name="IssueTokenResult" type="q2:MessageBody" xmlns:q2="http://schemas.microsoft.com/Message"/></wsdl:message><wsdl:message name="IWebTicketService_IssueToken_OCSDiagnosticsFaultFault_FaultMessage"><wsdl:part name="detail" element="q3:OCSDiagnosticsFault" xmlns:q3="urn:component:Microsoft.Rtc.WebAuthentication.2010"/></wsdl:message><wsdl:portType name="IWebTicketService"><wsdl:operation name="IssueToken"><wsdl:input wsaw:Action="http://docs.oasis-open.org/ws-sx/ws-trust/200512/RST/Issue" message="tns:IWebTicketService_IssueToken_InputMessage"/><wsdl:output wsaw:Action="http://docs.oasis-open.org/ws-sx/ws-trust/200512/RSTRC/IssueFinal" message="tns:IWebTicketService_IssueToken_OutputMessage"/><wsdl:fault wsaw:Action="http://tempuri.org/IWebTicketService/IssueTokenOCSDiagnosticsFaultFault" name="OCSDiagnosticsFaultFault" message="tns:IWebTicketService_IssueToken_OCSDiagnosticsFaultFault_FaultMessage"/></wsdl:operation></wsdl:portType><wsdl:binding name="WebTicketServiceMachineCert" type="tns:IWebTicketService"><wsp:PolicyReference URI="#WebTicketServiceMachineCert_policy"/><soap:binding transport="http://schemas.xmlsoap.org/soap/http"/><wsdl:operation name="IssueToken"><soap:operation soapAction="http://docs.oasis-open.org/ws-sx/ws-trust/200512/RST/Issue" style="document"/><wsdl:input><soap:body use="literal"/></wsdl:input><wsdl:output><soap:body use="literal"/></wsdl:output><wsdl:fault name="OCSDiagnosticsFaultFault"><soap:fault name="OCSDiagnosticsFaultFault" use="literal"/></wsdl:fault></wsdl:operation></wsdl:binding><wsdl:binding name="OAuth" type="tns:IWebTicketService"><wsp:PolicyReference URI="#OAuth_policy"/><soap:binding transport="http://schemas.xmlsoap.org/soap/http"/><wsdl:operation name="IssueToken"><soap:operation soapAction="http://docs.oasis-open.org/ws-sx/ws-trust/200512/RST/Issue" style="document"/><wsdl:input><soap:body use="literal"/></wsdl:input><wsdl:output><soap:body use="literal"/></wsdl:output><wsdl:fault name="OCSDiagnosticsFaultFault"><soap:fault name="OCSDiagnosticsFaultFault" use="literal"/></wsdl:fault></wsdl:operation></wsdl:binding><wsdl:binding name="WebTicketServiceAnon" type="tns:IWebTicketService"><wsp:PolicyReference URI="#WebTicketServiceAnon_policy"/><soap:binding transport="http://schemas.xmlsoap.org/soap/http"/><wsdl:operation name="IssueToken"><soap:operation soapAction="http://docs.oasis-open.org/ws-sx/ws-trust/200512/RST/Issue" style="document"/><wsdl:input><
06-27 09:27:22.214 19044 19044 I LyNC : soap:body use="literal"/></wsdl:input><wsdl:output><soap:body use="literal"/></wsdl:output><wsdl:fault name="OCSDiagnosticsFaultFault"><soap:fault name="OCSDiagnosticsFaultFault" use="literal"/></wsdl:fault></wsdl:operation></wsdl:binding><wsdl:binding name="WebTicketServiceWinNegotiate" type="tns:IWebTicketService"><wsp:PolicyReference URI="#WebTicketServiceWinNegotiate_policy"/><soap:binding transport="http://schemas.xmlsoap.org/soap/http"/><wsdl:operation name="IssueToken"><soap:operation soapAction="http://docs.oasis-open.org/ws-sx/ws-trust/200512/RST/Issue" style="document"/><wsdl:input><soap:body use="literal"/></wsdl:input><wsdl:output><soap:body use="literal"/></wsdl:output><wsdl:fault name="OCSDiagnosticsFaultFault"><soap:fault name="OCSDiagnosticsFaultFault" use="literal"/></wsdl:fault></wsdl:operation></wsdl:binding><wsdl:binding name="WebTicketServiceCert" type="tns:IWebTicketService"><wsp:PolicyReference URI="#WebTicketServiceCert_policy"/><soap:binding transport="http://schemas.xmlsoap.org/soap/http"/><wsdl:operation name="IssueToken"><soap:operation soapAction="http://docs.oasis-open.org/ws-sx/ws-trust/200512/RST/Issue" style="document"/><wsdl:input><soap:body use="literal"/></wsdl:input><wsdl:output><soap:body use="literal"/></wsdl:output><wsdl:fault name="OCSDiagnosticsFaultFault"><soap:fault name="OCSDiagnosticsFaultFault" use="literal"/></wsdl:fault></wsdl:operation></wsdl:binding><wsdl:binding name="WebTicketServicePin" type="tns:IWebTicketService"><wsp:PolicyReference URI="#WebTicketServicePin_policy"/><soap:binding transport="http://schemas.xmlsoap.org/soap/http"/><wsdl:operation name="IssueToken"><soap:operation soapAction="http://docs.oasis-open.org/ws-sx/ws-trust/200512/RST/Issue" style="document"/><wsdl:input><soap:body use="literal"/></wsdl:input><wsdl:output><soap:body use="literal"/></wsdl:output><wsdl:fault name="OCSDiagnosticsFaultFault"><soap:fault name="OCSDiagnosticsFaultFault" use="literal"/></wsdl:fault></wsdl:operation></wsdl:binding><wsdl:binding name="WebTicketServiceAuth" type="tns:IWebTicketService"><wsp:PolicyReference URI="#WebTicketServiceAuth_policy"/><soap:binding transport="http://schemas.xmlsoap.org/soap/http"/><wsdl:operation name="IssueToken"><soap:operation soapAction="http://docs.oasis-open.org/ws-sx/ws-trust/200512/RST/Issue" style="document"/><wsdl:input><soap:body use="literal"/></wsdl:input><wsdl:output><soap:body use="literal"/></wsdl:output><wsdl:fault name="OCSDiagnosticsFaultFault"><soap:fault name="OCSDiagnosticsFaultFault" use="literal"/></wsdl:fault></wsdl:operation></wsdl:binding><wsdl:service name="WebTicketService"><wsdl:port name="WebTicketServiceMachineCert" binding="tns:WebTicketServiceMachineCert"><soap:address location="https://lyncpool.mydomain.local/WebTicket/WebTicketService.svc/MachineCert"/><wsa10:EndpointReference><wsa10:Address>https://lyncpool.mydomain.local/WebTicket/WebTicketService.svc/MachineCert</wsa10:Address></wsa10:EndpointReference></wsdl:port><wsdl:port name="OAuth" binding="tns:OAuth"><soap:address location="https://lyncpool.mydomain.local/WebTicket/WebTicketService.svc/OAuth"/></wsdl:port><wsdl:port name="WebTicketServiceAnon" binding="tns:WebTicketServiceAnon"><soap:address location="https://lyncpool.mydomain.local/WebTicket/WebTicketService.svc/Anon"/></wsdl:port><wsdl:port name="WebTicketServiceWinNegotiate" binding="tns:WebTicketServiceWinNegotiate"><soap:address location="https://lyncpool.mydomain.local/WebTicket/WebTicketService.svc"/></wsdl:port><wsdl:port name="WebTicketServiceCert" binding="tns:WebTicketServiceCert"><soap:address location="https://lyncpool.mydomain.local/WebTicket/WebTicketService.svc/cert"/><wsa10:EndpointReference><wsa10:Address>https://lyncpool.mydomain.local/WebTicket/WebTicketService.svc/cert</wsa10:Address></wsa10:EndpointReference></wsdl:port><wsdl:port name="WebTicketServicePin" binding="tns:WebTicketServicePin"><soap:address location=
06-27 09:27:22.214 19044 19044 I LyNC : "https://lyncpool.mydomain.local/WebTicket/WebTicketService.svc/pin"/></wsdl:port><wsdl:port name="WebTicketServiceAuth" binding="tns:WebTicketServiceAuth"><soap:address location="https://lyncpool.mydomain.local/WebTicket/WebTicketService.svc/Auth"/></wsdl:port></wsdl:service></wsdl:definitions></wsx:MetadataSection><wsx:MetadataSection Dialect="http://www.w3.org/2001/XMLSchema" Identifier="http://schemas.microsoft.com/Message" xmlns=""><xs:schema elementFormDefault="qualified" targetNamespace="http://schemas.microsoft.com/Message" xmlns:xs="http://www.w3.org/2001/XMLSchema" xmlns:tns="http://schemas.microsoft.com/Message"><xs:complexType name="MessageBody"><xs:sequence><xs:any minOccurs="0" maxOccurs="unbounded" namespace="##any"/></xs:sequence></xs:complexType></xs:schema></wsx:MetadataSection><wsx:MetadataSection Dialect="http://www.w3.org/2001/XMLSchema" Identifier="http://schemas.microsoft.com/2003/10/Serialization/" xmlns=""><xs:schema attributeFormDefault="qualified" elementFormDefault="qualified" targetNamespace="http://schemas.microsoft.com/2003/10/Serialization/" xmlns:xs="http://www.w3.org/2001/XMLSchema" xmlns:tns="http://schemas.microsoft.com/2003/10/Serialization/"><xs:element name="anyType" nillable="true" type="xs:anyType"/><xs:element name="anyURI" nillable="true" type="xs:anyURI"/><xs:element name="base64Binary" nillable="true" type="xs:base64Binary"/><xs:element name="boolean" nillable="true" type="xs:boolean"/><xs:element name="byte" nillable="true" type="xs:byte"/><xs:element name="dateTime" nillable="true" type="xs:dateTime"/><xs:element name="decimal" nillable="true" type="xs:decimal"/><xs:element name="double" nillable="true" type="xs:double"/><xs:element name="float" nillable="true" type="xs:float"/><xs:element name="int" nillable="true" type="xs:int"/><xs:element name="long" nillable="true" type="xs:long"/><xs:element name="QName" nillable="true" type="xs:QName"/><xs:element name="short" nillable="true" type="xs:short"/><xs:element name="string" nillable="true" type="xs:string"/><xs:element name="unsignedByte" nillable="true" type="xs:unsignedByte"/><xs:element name="unsignedInt" nillable="true" type="xs:unsignedInt"/><xs:element name="unsignedLong" nillable="true" type="xs:unsignedLong"/><xs:element name="unsignedShort" nillable="true" type="xs:unsignedShort"/><xs:element name="char" nillable="true" type="tns:char"/><xs:simpleType name="char"><xs:restriction base="xs:int"/></xs:simpleType><xs:element name="duration" nillable="true" type="tns:duration"/><xs:simpleType name="duration"><xs:restriction base="xs:duration"><xs:pattern value="\-?P(\d*D)?(T(\d*H)?(\d*M)?(\d*(\.\d*)?S)?)?"/><xs:minInclusive value="-P10675199DT2H48M5.4775808S"/><xs:maxInclusive value="P10675199DT2H48M5.4775807S"/></xs:restriction></xs:simpleType><xs:element name="guid" nillable="true" type="tns:guid"/><xs:simpleType name="guid"><xs:restriction base="xs:string"><xs:pattern value="[\da-fA-F]{8}-[\da-fA-F]{4}-[\da-fA-F]{4}-[\da-fA-F]{4}-[\da-fA-F]{12}"/></xs:restriction></xs:simpleType><xs:attribute name="FactoryType" type="xs:QName"/><xs:attribute name="Id" type="xs:ID"/><xs:attribute name="Ref" type="xs:IDREF"/></xs:schema></wsx:MetadataSection><wsx:MetadataSection Dialect="http://www.w3.org/2001/XMLSchema" Identifier="urn:component:Microsoft.Rtc.WebAuthentication.2010" xmlns=""><xs:schema elementFormDefault="qualified" targetNamespace="urn:component:Microsoft.Rtc.WebAuthentication.2010" xmlns:xs="http://www.w3.org/2001/XMLSchema" xmlns:tns="urn:component:Microsoft.Rtc.WebAuthentication.2010"><xs:import namespace="http://schemas.microsoft.com/2003/10/Serialization/Arrays"/><xs:complexType name="OCSDiagnosticsFault"><xs:sequence><xs:element minOccurs="0" name="Ms-Diagnostics-Fault" nillable="true" type="tns:FaultMsDiagnosticsMetaData"/><xs:element minOccurs="0" name="NameValuePairs" nillable="true" type="q1:ArrayOfKeyValueOfstringstring" xmlns:q1="http://schemas.microsoft.com/2003/10/Serialization/Arrays"/></
06-27 09:27:22.214 19044 19044 I LyNC : xs:sequence></xs:complexType><xs:element name="OCSDiagnosticsFault" nillable="true" type="tns:OCSDiagnosticsFault"/><xs:complexType name="FaultMsDiagnosticsMetaData"><xs:sequence><xs:element minOccurs="0" name="ErrorId" type="xs:unsignedInt"/><xs:element minOccurs="0" name="Reason" nillable="true" type="xs:string"/></xs:sequence></xs:complexType><xs:element name="FaultMsDiagnosticsMetaData" nillable="true" type="tns:FaultMsDiagnosticsMetaData"/></xs:schema></wsx:MetadataSection><wsx:MetadataSection Dialect="http://www.w3.org/2001/XMLSchema" Identifier="http://schemas.microsoft.com/2003/10/Serialization/Arrays" xmlns=""><xs:schema elementFormDefault="qualified" targetNamespace="http://schemas.microsoft.com/2003/10/Serialization/Arrays" xmlns:xs="http://www.w3.org/2001/XMLSchema" xmlns:tns="http://schemas.microsoft.com/2003/10/Serialization/Arrays"><xs:complexType name="ArrayOfKeyValueOfstringstring"><xs:annotation><xs:appinfo><IsDictionary xmlns="http://schemas.microsoft.com/2003/10/Serialization/">true</IsDictionary></xs:appinfo></xs:annotation><xs:sequence><xs:element minOccurs="0" maxOccurs="unbounded" name="KeyValueOfstringstring"><xs:complexType><xs:sequence><xs:element name="Key" nillable="true" type="xs:string"/><xs:element name="Value" nillable="true" type="xs:string"/></xs:sequence></xs:complexType></xs:element></xs:sequence></xs:complexType><xs:element name="ArrayOfKeyValueOfstringstring" nillable="true" type="tns:ArrayOfKeyValueOfstringstring"/></xs:schema></wsx:MetadataSection></Metadata></s:Body></s:Envelope>
06-27 09:27:22.214 19044 19044 I LyNC : </ReceivedResponse>
06-27 09:27:22.214 19044 19044 I LyNC : INFO TRANSPORT .\cmetadatarequest.cpp/90:MEX response received06-27 09:27:22.518 19044 19044 I LyNC : INFO TRANSPORT .\chttprequestprocessor.cpp/266:Sending event to main thread for request(0x5130aa0806-27 09:27:22.518 19044 19044 V ActivityMonitor: Activity Create: com.microsoft.office.lync.ui.RootTabActivity06-27 09:27:23.698 19044 19044 I LyncPerformance: PerfEnd|1:RootTabs Created|1372343243701
06-27 09:27:23.698 19044 19044 V ActivityMonitor: Activity Start: com.microsoft.office.lync.ui.RootTabActivity06-27 09:27:23.698 19044 19044 V FeedbackUtils: Shake Sensor has updated context: com.microsoft.office.lync.ui.RootTabActivity06-27 09:27:23.706 19044 19044 V FeedbackUtils: Not credentialsactivity. Hence skipping
06-27 09:27:23.839 19044 19044 V RootTabActivity: presence state : AvailabilityOnline
06-27 09:27:23.878 19044 19044 I Choreographer: Skipped 99 frames! The application may be doing too much work on its main thread06-27 09:27:24.386 19044 19044 D dalvikvm: GC_FOR_ALLOC freed 1530K, 21% free 10145K/12771K, paused 45ms, total 47ms
06-27 09:27:24.854 19044 19044 V ContactUtils: width and height is less than maxwidth/maxheight with data length 2430
06-27 09:27:25.557 19044 19044 V ContactUtils: width and height is less than maxwidth/maxheight with data length 2430
06-27 09:27:25.807 19044 19044 V MyStatusFragment: refreshPersonalNoteUI called with state Offline
06-27 09:27:25.807 19044 19044 V MyStatusFragment: Refreshing Presence State UI
06-27 09:27:27.964 19044 19044 V ConversationListFragment: Updating tabicon with unread count: 0
06-27 09:27:31.448 19044 19044 I LyNC : INFO TRANSPORT .\cmetadatamanager.cpp/631:Received response for meta data request of type 30 with status 0
06-27 09:27:31.448 19044 19044 I LyNC : INFO TRANSPORT .\cauthenticationresolver.cpp/525:MetaData retrieval for url https://lyncpool.mydomain.local/webticket/webticketservice.svc completed with status 0
06-27 09:27:31.448 19044 19044 I LyNC : INFO TRANSPORT .\cauthenticationresolver.cpp/554:Deleting 1 pended Meta data requests for url https://lyncpool.mydomain.local/webticket/webticketservice.svc
06-27 09:27:31.448 19044 19044 I LyNC : INFO TRANSPORT .\cauthenticationresolver.cpp/585:Executing request after meta data successfully retrieved
06-27 09:27:31.448 19044 19044 I LyNC : INFO TRANSPORT .\cmetadatamanager.cpp/468:Received a request to get the meta data of type 2 for url https://lyncpool.mydomain.local/webticket/webticketservice.svc
06-27 09:27:31.448 19044 19044 I LyNC : INFO TRANSPORT .\ccredentialmanager.cpp/164:getSpecificCredential for serviceId(1) returning: credType (1) signInName ([email protected]) domain () username ([email protected]) password.empty() (0) compatibleServiceIds(106-27 09:27:31.550 19044 19044 I LyNC : INFO TRANSPORT .\ccredentialmanager.cpp/164:getSpecificCredential for serviceId(4) returning: credType (1) signInName ([email protected]) domain () username ([email protected]) password.empty() (1) compatibleServiceIds(406-27 09:27:31.565 19044 19044 I HttpConnection: originalurl is https://lyncpool.mydomain.local/webticket/webticketservice.svc/auth
06-27 09:27:31.565 19044 19044 I HttpConnection: decodedurl is https://lyncpool.mydomain.local/webticket/webticketservice.svc/auth
06-27 09:27:31.893 19044 19044 V RandomUtils: Generated randombytes of length: 256
06-27 09:27:32.151 19044 19044 I LyNC : INFO TRANSPORT .\transportutilityfunctions.cpp/638:<SentRequest>06-27 09:27:32.151 19044 19044 I LyNC : POST https://lyncpool.mydomain.local/webticket/webticketservice.svc/auth
06-27 09:27:32.151 19044 19044 I LyNC : Request Id: 0x5112808806-27 09:27:32.151 19044 19044 I LyNC : HttpHeader:Accept text/xml, application/soap+xml, application/octet-stream06-27 09:27:32.151 19044 19044 I LyNC : HttpHeader:Content-Type text/xml; charset=utf-806-27 09:27:32.151 19044 19044 I LyNC : HttpHeader:SOAPAction http://docs.oasis-open.org/ws-sx/ws-trust/200512/RST/Issue06-27 09:27:32.151 19044 19044 I LyNC :06-27 09:27:32.151 19044 19044 I LyNC : <s:Envelope xmlns:s="http://schemas.xmlsoap.org/soap/envelope/"><s:Header><Security>XXXXXXXXXX</Security></s:Header><s:Body><RequestSecurityToken xmlns:xsi="http://www.w3.org/2001/XMLSchema-instance" xmlns:xsd="http://www.w3.org/2001/XMLSchema" Context="66d55a26-16df-468e-b93e-5b4116c1d5b3" xmlns="http://docs.oasis-open.org/ws-sx/ws-trust/200512"><TokenType>urn:component:Microsoft.Rtc.WebAuthentication.2010:user-cwt-1</TokenType><RequestType>http://schemas.xmlsoap.org/ws/2005/02/trust/Issue</RequestType><AppliesTo xmlns="http://schemas.xmlsoap.org/ws/2004/09/policy"><EndpointReference xmlns="http://www.w3.org/2005/08/addressing"><Address>https://lync.mydomain.com/ucwa/v1/applications</Address></EndpointReference></AppliesTo><Entropy><BinarySecret>XXXXXXXXXX</BinarySecret></Entropy><KeyType>http://docs.oasis-open.org/ws-sx/ws-trust/200512/SymmetricKey</KeyType></RequestSecurityToken></s:Body></s:Envelope>06-27 09:27:32.151 19044 19044 I LyNC : </SentRequest>06-27 09:27:32.151 19044 19044 V HttpConnection: set body(POST)- length=144306-27 09:27:32.151 19044 19044 V HttpConnection: post request: https://lyncpool.mydomain.local/webticket/webticketservice.svc/auth06-27 09:27:32.151 19044 19206 V HttpConnection: send request: https://lyncpool.mydomain.local/webticket/webticketservice.svc/auth06-27 09:27:32.151 19044 19206 E HttpEngine: AutoRedirect true for https://lyncpool.mydomain.local/webticket/webticketservice.svc/auth and setting it to FALSE for manual handling06-27 09:27:32.159 19044 19206 V HttpEngine: Executing request with https://lyncpool.mydomain.local/webticket/webticketservice.svc/auth Connection pool count is 206-27 09:27:32.276 19044 19044 I Choreographer: Skipped 502 frames! The application may be doing too much work on its main thread06-27 09:27:32.487 19044 19206 V HttpConnection: got Response: https://lyncpool.mydomain.local/webticket/webticketservice.svc/auth06-27 09:27:33.112 19044 19044 I LyNC : INFO TRANSPORT .\chttprequestprocessor.cpp/173:Received response of request(WebTicketRequest) with status = 0x006-27 09:27:33.221 19044 19044 I LyNC : INFO TRANSPORT .\transportutilityfunctions.cpp/917:<ReceivedResponse>06-27 09:27:33.221 19044 19044 I LyNC : POST https://lyncpool.mydomain.local/webticket/webticketservice.svc/auth06-27 09:27:33.221 19044 19044 I LyNC : Request Id: 0x5112808806-27 09:27:33.221 19044 19044 I LyNC : HttpHeader:Cache-Control private06-27 09:27:33.221 19044 19044 I LyNC : HttpHeader:Content-Length 76506-27 09:27:33.221 19044 19044 I LyNC : HttpHeader:Content-Type text/xml; charset=utf-806-27 09:27:33.221 19044 19044 I LyNC : HttpHeader:Date Thu, 27 Jun 2013 14:27:17 GMT06-27 09:27:33.221 19044 19044 I LyNC : HttpHeader:Server Microsoft-IIS/8.006-27 09:27:33.221 19044 19044 I LyNC : HttpHeader:StatusCode 50006-27 09:27:33.221 19044 19044 I LyNC : HttpHeader:X-AspNet-Version 4.0.3031906-27 09:27:33.221 19044 19044 I LyNC : HttpHeader:X-Content-Type-Options nosniff06-27 09:27:33.221 19044 19044 I LyNC : HttpHeader:X-MS-Server-Fqdn D01LyNCFE02.mydomain.local06-27 09:27:33.221 19044 19044 I LyNC : HttpHeader:X-Powered-By ASP.NET06-27 09:27:33.221 19044 19044 I LyNC : 06-27 09:27:33.221 19044 19044 I LyNC : <s:Envelope xmlns:s="http://schemas.xmlsoap.org/soap/envelope/"><s:Body><s:Fault><faultcode xmlns:a="http://docs.oasis-open.org/ws-sx/ws-trust/200512">a:InvalidScope</faultcode><faultstring xml:lang="en-US">The AppliesTo element of web ticket request points to a different web server or site.</faultstring><detail><OCSDiagnosticsFault xmlns="urn:component:Microsoft.Rtc.WebAuthentication.2010" xmlns:i="http://www.w3.org/2001/XMLSchema-instance"><Ms-Diagnostics-Fault><ErrorId>28037</ErrorId><Reason>The AppliesTo element of web ticket request points to a different web server or site.</Reason></Ms-Diagnostics-Fault><NameValuePairs xmlns:a="http://schemas.microsoft.com/2003/10/Serialization/Arrays"/></OCSDiagnosticsFault></detail></s:Fault></s:Body></s:Envelope>
06-27 09:27:33.221 19044 19044 I LyNC : </ReceivedResponse>
06-27 09:27:33.417 19044 19044 I LyNC : INFO TRANSPORT .\chttprequestprocessor.cpp/266:Sending event to main thread for request(0x5112808806-27 09:27:33.659 19044 19044 V ActivityMonitor: Activity Stop: com.microsoft.office.lync.ui.options.CredentialsActivity06-27 09:27:33.659 19044 19044 V ActivityMonitor: Activity Destroy: com.microsoft.office.lync.ui.options.CredentialsActivity06-27 09:27:33.800 19044 19044 I LyNC : INFO TRANSPORT .\cwebticketsession.cpp/441:Received webticket resposne with status E_GenericFailure (E0-0-106-27 09:27:33.800 19044 19044 I LyNC : INFO TRANSPORT .\cwebticketsession.cpp/1206:Raising WebTicketEvent for https://lync.mydomain.com/ucwa/v1/applications and https://lyncpool.mydomain.local/webticket/webticketservice.svc with status E_GenericFailure (E0-0-106-27 09:27:33.917 19044 19044 I LyNC : INFO TRANSPORT .\cauthenticationresolver.cpp/640:Web-Ticket retrieval for url https://lync.mydomain.com/ucwa/v1/applications completed with status E_GenericFailure (E0-0-106-27 09:27:33.917 19044 19044 E LyNC : ERROR TRANSPORT .\cauthenticationresolver.cpp/704:Failing the original request as we weren't able to get thewebticket
06-27 09:27:34.089 19044 19044 I LyNC : INFO TRANSPORT .\crequestmanager.cpp/119:Failing secure request with status E_GenericFailure (E0-0-106-27 09:27:34.089 19044 19044 I LyNC : INFO APPLICATION .\ctransportrequestretrialqueue.cpp/768:Req. completed, Stopping timer06-27 09:27:34.089 19044 19044 E LyNC : ERROR APPLICATION .\cucwaappsession.cpp/1783:Init-Session request failed with error E_GenericFailure (E0-0-106-27 09:27:34.089 19044 19044 I LyNC : INFO APPLICATION .\cucwaappsession.cpp/975:CUcwaAppSession::setNewActualState() state=0
06-27 09:27:34.089 19044 19044 I LyNC : INFO TRANSPORT .\chttprequestprocessor.cpp/134:Clearing request processor for component WebTicketSession on sign-out06-27 09:27:34.089 19044 19044 I AndroidOperationQueue: CancelSync Started
06-27 09:27:34.089 19044 19044 I AndroidOperationQueue: No operations pending
06-27 09:27:34.089 19044 19044 I LyNC : INFO TRANSPORT .\chttprequestprocessor.cpp/134:Clearing request processor for component MetaDataManager on sign-out06-27 09:27:34.089 19044 19044 I LyNC : INFO APPLICATION .\calertreporter.cpp/64:Alert received! Category 2, Type 300, level 0, error E_GenericFailure (E0-0-1), context 'handleUcwaAppSessionRequestError', hasAction=false
06-27 09:27:34.190 19044 19044 I LyNC : INFO APPLICATION .\calertreporter.cpp/117:Alert cleared of Category 2, Type 300, cleared 1 alerts
06-27 09:27:34.190 19044 19044 I LyNC : INFO APPLICATION .\ctransportrequestretrialqueue.cpp/683:Response received for req. POST-Application(0x4ef2d088): E_GenericFailure (E0-0-1) (RemoteNetworkPermanentError); Done with req.; Stopping resend timer
06-27 09:27:34.190 19044 19044 I Choreographer: Skipped 35 frames! The application may be doing too much work on its main thread06-27 09:27:34.354 19044 19044 V RootTabActivity: presence state : AvailabilityOnline
06-27 09:27:34.354 19044 19044 I UcClientStateManager: New UI State: ActualState = IsSignedOut DesiredState = BeSignedIn DataAvailable = true
06-27 09:27:34.456 19044 19044 V BaseActivity: finish being called for com.microsoft.office.lync.ui.RootTabActivity06-27 09:27:34.456 19044 19044 I LyncPerformance: PerfEnd|4-10|1372343254462
06-27 09:27:34.471 19044 19044 V FeedbackUtils: Not credentialsactivity. Hence skipping
06-27 09:27:34.479 19044 19044 I LyNC : INFO APPLICATION .\cucwadatasynchronizer.cpp/996:Mode 1 scheduled to timeout in 120sec
06-27 09:27:34.518 19044 19044 V ActivityMonitor: Activity Create: com.microsoft.office.lync.ui.options.CredentialsActivity06-27 09:27:34.737 19044 19044 I LyncPerformance: PerfEnd|1:Signin Page Loaded|1372343254743
06-27 09:27:34.737 19044 19044 V ActivityMonitor: Activity Start: com.microsoft.office.lync.ui.options.CredentialsActivity06-27 09:27:34.745 19044 19044 V FeedbackUtils: Shake Sensor has updated context: com.microsoft.office.lync.ui.options.CredentialsActivity06-27 09:27:35.214 19044 19044 V ActivityMonitor: Activity Stop: com.microsoft.office.lync.ui.RootTabActivity06-27 09:27:35.214 19044 19044 V ActivityMonitor: Activity Destroy: com.microsoft.office.lync.ui.RootTabActivity06-27 09:27:36.120 19044 19050 I dalvikvm: Jit: resizing JitTable from 4096 to 8192
06-27 09:28:39.315 19044 19044 V ActivityMonitor: Activity Stop: com.microsoft.office.lync.ui.options.CredentialsActivity06-27 09:28:39.495 19044 19044 V ActivityMonitor: AComo is in background now06-27 09:28:40.261 19044 19044 V LyNC : VERBOSE APPLICATION .\ccredentialstore.cpp/134:storing credentials for service:1
06-27 09:28:42.409 19044 19044 I LyNC : INFO APPLICATION .\cbasepersistableentity.cpp/177:Storing 2 out-of-sync Object Models took 2461ms
06-27 09:28:42.690 19044 19044 I LyNC : INFO UTILITIES .\cbasepersistablecomponent.cpp/230:Storing 4 out-of-sync components took 276ms
06-27 09:28:42.690 19044 19044 I PreferencesManager: commit is called on PreferencesManager06-27 09:28:43.604 19044 19044 V ActivityMonitor: Activity Start: com.microsoft.office.lync.ui.options.CredentialsActivity06-27 09:28:43.604 19044 19044 V FeedbackUtils: Shake Sensor has updated context: com.microsoft.office.lync.ui.options.CredentialsActivity06-27 09:28:43.604 19044 19044 V ActivityMonitor: AComo is in foreground now06-27 09:28:43.604 19044 19044 I LyncPerformance: PerfBegin|1:Relaunch of App|1372343323612
06-27 09:28:43.612 19044 19044 I LyncPerformance: PerfEnd|1|1372343323615
06-27 09:28:43.737 19044 19044 I LyNC : INFO APPLICATION .\cucwadatasynchronizer.cpp/996:Mode 1 scheduled to timeout in 120sec
06-27 09:28:44.346 19044 19044 I Choreographer: Skipped 55 frames! The application may be doing too much work on its main thread06-27 09:28:44.784 19044 19044 W IInputConnectionWrapper: clearMetaKeyStates on inactive InputConnection
06-27 09:28:44.917 19044 19044 W IInputConnectionWrapper: clearMetaKeyStates on inactive InputConnection
06-27 09:28:44.925 19044 19044 W IInputConnectionWrapper: clearMetaKeyStates on inactive InputConnection
06-27 09:28:46.956 19044 19044 V ActivityMonitor: Activity Create: com.microsoft.office.lync.ui.options.OptionsActivity06-27 09:28:47.214 19044 19044 V ActivityMonitor: Activity Start: com.microsoft.office.lync.ui.options.OptionsActivity06-27 09:28:47.214 19044 19044 V FeedbackUtils: Shake Sensor has updated context: com.microsoft.office.lync.ui.options.OptionsActivity06-27 09:28:47.221 19044 19044 V FeedbackUtils: Not credentialsactivity. Hence skipping
06-27 09:28:47.768 19044 19044 V ActivityMonitor: Activity Stop: com.microsoft.office.lync.ui.options.CredentialsActivity06-27 09:28:50.159 19044 19647 V LogAttachmentTask: Creating attachment in background task
iOS
2013-06-26 12:22:08.244 Lync[35457:907] INFO UTILITIES /Users/comobuildadmin/icomo/main/src/dev/lyncMobile/iOs/build/../../platform/tracing/privateIos/CMTrace.mm/170:Version Information 5.0.8736
date 2013-02-11 17:04:26 +0000
2013-06-26 12:22:08.246 Lync[35457:3c7e7b78] INFO TESTPERF CMTestTrace.mm/36:CMTestTrace::initialize - LogFileName /var/mobile/Applications/62DFE9C1-8872-4639-B21E-D25AE13D7D54/Documents/cmScenarioMarkers.log
2013-06-26 12:22:08.247 Lync[35457:3c7e7b78] INFO TESTPERF CMTestTrace.mm/47:CurrentSize 0
2013-06-26 12:22:09.259 Lync[35457:907] is not a valid email address.
2013-06-26 12:22:10.898 Lync[35457:6045000] INFO APPLICATION CiPhoneAddressbookProvider.mm/406:Index update operation for 354 entities took 100ms
2013-06-26 12:22:10.931 Lync[35457:6045000] INFO APPLICATION CBaseDeviceContactProvider.cpp/112:Merge DB update operation took 20ms
2013-06-26 12:22:11.847 Lync[35457:3c7e7b78] INFO APPLICATION CTransportRequestRetrialQueue.cpp/540:Resubmitting req. POST-Application
2013-06-26 12:22:11.847 Lync[35457:3c7e7b78] INFO TRANSPORT CMetaDataManager.cpp/468:Received a request to get the meta data of type 0 for url https://lync.mydomain.com/ucwa/v1/applications
2013-06-26 12:22:11.847 Lync[35457:3c7e7b78] INFO TRANSPORT CCredentialManager.cpp/164:getSpecificCredential for serviceId(1) returning: credType (1) signInName ([email protected]) domain () username ([email protected]) password.empty() (0) compatibleServiceIds(1)
2013-06-26 12:22:11.848 Lync[35457:3c7e7b78] INFO TRANSPORT CWebTicketSession.cpp/349:No Cached web-ticket found.
2013-06-26 12:22:11.848 Lync[35457:3c7e7b78] INFO TRANSPORT CWebTicketSession.cpp/393:Received request for a new token for https://lync.mydomain.com/ucwa/v1/applications
2013-06-26 12:22:11.848 Lync[35457:3c7e7b78] INFO TRANSPORT CMetaDataManager.cpp/468:Received a request to get the meta data of type 2 for url https://lyncpool.mydomain.local/webticket/webticketservice.svc
2013-06-26 12:22:11.849 Lync[35457:9334000] INFO TRANSPORT CHttpRequestProcessor.cpp/134:Clearing request processor for component WebTicketSession on sign-out.
2013-06-26 12:22:11.849 Lync[35457:3c7e7b78] INFO TRANSPORT CCredentialManager.cpp/164:getSpecificCredential for serviceId(1) returning: credType (1) signInName ([email protected]) domain () username ([email protected]) password.empty() (0) compatibleServiceIds(1)
2013-06-26 12:22:11.849 Lync[35457:9334000] INFO UTILITIES CHttpStreamPool.cpp/609:Releasing stream 0x19db4c0.
2013-06-26 12:22:11.850 Lync[35457:3c7e7b78] INFO TRANSPORT CTransportThread.cpp/129:Added Request(WebTicketRequest) to Request Processor queue
2013-06-26 12:22:11.850 Lync[35457:3c7e7b78] INFO TRANSPORT CAuthenticationResolver.cpp/202:Waiting on the token
2013-06-26 12:22:11.850 Lync[35457:3c7e7b78] INFO APPLICATION CAlertReporter.cpp/64:Alert received! Category 2, Type 300, level 2, error W_Retrying (W0-0-4), context '', hasAction=false
2013-06-26 12:22:11.851 Lync[35457:3c7e7b78] INFO APPLICATION CAlertReporter.cpp/117:Alert cleared of Category 2, Type 300, cleared 0 alerts
2013-06-26 12:22:11.851 Lync[35457:3c7e7b78] INFO UI CMAlertViewController.mm/93:ObservableListItem Added event received
2013-06-26 12:22:11.851 Lync[35457:3c7e7b78] INFO UI CMAlertViewController.mm/103:showalert is 1
2013-06-26 12:22:11.851 Lync[35457:3c7e7b78] INFO UI CMConversationCommon.mm/43:not signed in
2013-06-26 12:22:11.851 Lync[35457:3c7e7b78] INFO UI CMConversationCommon.mm/43:not signed in
2013-06-26 12:22:11.851 Lync[35457:3c7e7b78] INFO UI CMConversationCommon.mm/43:not signed in
2013-06-26 12:22:11.851 Lync[35457:3c7e7b78] INFO UI CMNotificationManager.mm/612:desired view is alert, size 1
2013-06-26 12:22:11.852 Lync[35457:3c7e7b78] INFO UI CMNotificationManager.mm/652:adding the desired view
2013-06-26 12:22:11.852 Lync[35457:3c7e7b78] INFO UI CMNotificationManager.mm/405:reposition floating views
2013-06-26 12:22:11.853 Lync[35457:9334000] INFO TRANSPORT CTransportThread.cpp/341:Sent Request(WebTicketRequest) to Request Processor
2013-06-26 12:22:11.854 Lync[35457:3c7e7b78] INFO UI CMAlertViewController.mm/110:showalert is 1
2013-06-26 12:22:11.854 Lync[35457:9334000] INFO TRANSPORT CCredentialManager.cpp/164:getSpecificCredential for serviceId(4) returning: credType (1) signInName ([email protected]) domain () username ([email protected]) password.empty() (1) compatibleServiceIds(4)
2013-06-26 12:22:11.854 Lync[35457:3c7e7b78] INFO UI CMAlertViewController.mm/114:showalert is 0
2013-06-26 12:22:11.854 Lync[35457:3c7e7b78] INFO UI CMUIUtil.mm/394:Mapping error code = 0x10000004, context = , type = 300
2013-06-26 12:22:11.854 Lync[35457:3c7e7b78] INFO UI CMUIUtil.mm/1598:Mapped error message is 'Can’t reach server, retrying...
2013-06-26 12:22:11.854 Lync[35457:9334000] INFO TRANSPORT TransportUtilityFunctions.cpp/638:<SentRequest>
POST https://lyncpool.mydomain.local/webticket/webticketservice.svc
Request Id: 0x190feb8
HttpHeader:Accept text/xml, application/soap+xml, application/octet-stream
HttpHeader:Content-Type text/xml; charset=utf-8
HttpHeader:SOAPAction http://docs.oasis-open.org/ws-sx/ws-trust/200512/RST/Issue
<soap:Envelope xmlns:soap="http://schemas.xmlsoap.org/soap/envelope/"><soap:Body><wst:RequestSecurityToken xmlns:wst="http://docs.oasis-open.org/ws-sx/ws-trust/200512" Context="3654d62f-2874-40f5-9f84-bb06bf2bff66"><wst:TokenType>urn:component:Microsoft.Rtc.WebAuthentication.2010:user-cwt-1</wst:TokenType><wst:RequestType>http://docs.oasis-open.org/ws-sx/ws-trust/200512/Issue</wst:RequestType><wsp:AppliesTo xmlns:wsp="http://schemas.xmlsoap.org/ws/2004/09/policy"><wsa:EndpointReference xmlns:wsa="http://www.w3.org/2005/08/addressing"><wsa:Address>https://lync.mydomain.com/ucwa/v1/applications</wsa:Address></wsa:EndpointReference></wsp:AppliesTo><wst:Entropy><wst:BinarySecret>XXXXXXXXXX</wst:BinarySecret></wst:Entropy><wst:KeyType>http://docs.oasis-open.org/ws-sx/ws-trust/200512/SymmetricKey</wst:KeyType></wst:RequestSecurityToken></soap:Body></soap:Envelope>
</SentRequest>
2013-06-26 12:22:11.854 Lync[35457:3c7e7b78] ERROR UI CMDismissButtonBaseViewController.mm/89:before: view height 45.000000, width 320.000000, x 0.000000, y 64.000000
2013-06-26 12:22:11.855 Lync[35457:3c7e7b78] INFO UI CMNotificationManager.mm/993:viewFrame: origin x 0.000000, origin y 64.000000, height 45.000000, width 320.000000
2013-06-26 12:22:11.855 Lync[35457:9334000] INFO UTILITIES CHttpStreamPool.cpp/409:Allocating stream 0x19b9ae0 for url - https://lyncpool.mydomain.local/webticket/webticketservice.svc with persistent id as 0
2013-06-26 12:22:11.855 Lync[35457:3c7e7b78] INFO UI CMNotificationManager.mm/1099:resize alert label, origin x 44.000000, origin y 2.000000, height 41.000000, width 232.000000
2013-06-26 12:22:11.855 Lync[35457:9334000] VERBOSE TRANSPORT CHttpProxyHelper.cpp/450:CHttpProxyHelper::discoverProxy : No proxy found for url https://lyncpool.mydomain.local/webticket/webticketservice.svc. Sending over direct connection.
2013-06-26 12:22:11.855 Lync[35457:3c7e7b78] ERROR UI CMDismissButtonBaseViewController.mm/104:after: self.label.frame height 41.000000, width 232.000000, x 44.000000, y 2.000000
2013-06-26 12:22:11.896 Lync[35457:9334000] INFO UTILITIES CHttpConnection.cpp/548:Received kCFStreamEventEndEncountered (WebTicketRequest)isHeadersAvailable = true responseHeadersHandle = 7450a00
2013-06-26 12:22:11.897 Lync[35457:9334000] INFO UTILITIES CHttpConnection.cpp/599:Response status = 401 for request WebTicketRequest
2013-06-26 12:22:11.898 Lync[35457:9334000] INFO UTILITIES CHttpStreamPool.cpp/455:Scheduling stream 0x19b9ae0 for release.
2013-06-26 12:22:11.898 Lync[35457:9334000] INFO UTILITIES CHttpStreamPool.cpp/409:Allocating stream 0x7433410 for url - https://lyncpool.mydomain.local/webticket/webticketservice.svc with persistent id as 0
2013-06-26 12:22:11.898 Lync[35457:9334000] VERBOSE TRANSPORT CHttpProxyHelper.cpp/450:CHttpProxyHelper::discoverProxy : No proxy found for url https://lyncpool.mydomain.local/webticket/webticketservice.svc. Sending over direct connection.
2013-06-26 12:22:11.899 Lync[35457:9334000] INFO UTILITIES CHttpStreamPool.cpp/609:Releasing stream 0x19b9ae0.
2013-06-26 12:22:11.930 Lync[35457:9334000] INFO UTILITIES CHttpConnection.cpp/548:Received kCFStreamEventEndEncountered (WebTicketRequest)isHeadersAvailable = true responseHeadersHandle = 1945330
2013-06-26 12:22:11.932 Lync[35457:9334000] INFO UTILITIES CHttpConnection.cpp/599:Response status = 401 for request WebTicketRequest
2013-06-26 12:22:11.932 Lync[35457:9334000] INFO UTILITIES CHttpStreamPool.cpp/455:Scheduling stream 0x7433410 for release.
2013-06-26 12:22:11.932 Lync[35457:9334000] INFO UTILITIES CHttpStreamPool.cpp/409:Allocating stream 0x7432b90 for url - https://lyncpool.mydomain.local/webticket/webticketservice.svc with persistent id as 0
2013-06-26 12:22:11.932 Lync[35457:9334000] VERBOSE TRANSPORT CHttpProxyHelper.cpp/450:CHttpProxyHelper::discoverProxy : No proxy found for url https://lyncpool.mydomain.local/webticket/webticketservice.svc. Sending over direct connection.
2013-06-26 12:22:11.933 Lync[35457:9334000] INFO UTILITIES CHttpStreamPool.cpp/609:Releasing stream 0x7433410.
2013-06-26 12:22:11.962 Lync[35457:9334000] INFO UTILITIES CHttpConnection.cpp/548:Received kCFStreamEventEndEncountered (WebTicketRequest)isHeadersAvailable = true responseHeadersHandle = 742e970
2013-06-26 12:22:11.963 Lync[35457:9334000] INFO UTILITIES CHttpConnection.cpp/599:Response status = 500 for request WebTicketRequest
2013-06-26 12:22:11.963 Lync[35457:9334000] INFO UTILITIES CHttpStreamPool.cpp/455:Scheduling stream 0x7432b90 for release.
2013-06-26 12:22:11.964 Lync[35457:9334000] INFO TRANSPORT CHttpRequestProcessor.cpp/173:Received response of request(WebTicketRequest) with status = 0x0
2013-06-26 12:22:11.964 Lync[35457:9334000] INFO TRANSPORT TransportUtilityFunctions.cpp/907:<ReceivedResponse>
POST https://lyncpool.mydomain.local/webticket/webticketservice.svc
Request Id: 0x190feb8
HttpHeader:Cache-Control private
HttpHeader:Content-Length 765
HttpHeader:Content-Type text/xml; charset=utf-8
HttpHeader:Date Wed, 26 Jun 2013 17:22:13 GMT
HttpHeader:Persistent-Auth true
HttpHeader:Server Microsoft-IIS/8.0
HttpHeader:StatusCode 500
HttpHeader:X-AspNet-Version 4.0.30319
HttpHeader:X-Content-Type-Options nosniff
HttpHeader:X-MS-Server-Fqdn D01LYNCFE02.mydomain.local
HttpHeader:X-Powered-By ASP.NET
<s:Envelope xmlns:s="http://schemas.xmlsoap.org/soap/envelope/"><s:Body><s:Fault><faultcode xmlns:a="http://docs.oasis-open.org/ws-sx/ws-trust/200512">a:InvalidScope</faultcode><faultstring xml:lang="en-US">The AppliesTo element of web ticket request points to a different web server or site.</faultstring><detail><OCSDiagnosticsFault xmlns="urn:component:Microsoft.Rtc.WebAuthentication.2010" xmlns:i="http://www.w3.org/2001/XMLSchema-instance"><Ms-Diagnostics-Fault><ErrorId>28037</ErrorId><Reason>The AppliesTo element of web ticket request points to a different web server or site.</Reason></Ms-Diagnostics-Fault><NameValuePairs xmlns:a="http://schemas.microsoft.com/2003/10/Serialization/Arrays"/></OCSDiagnosticsFault></detail></s:Fault></s:Body></s:Envelope>
</ReceivedResponse>
2013-06-26 12:22:11.965 Lync[35457:9334000] INFO TRANSPORT CHttpRequestProcessor.cpp/266:Sending event to main thread for request(0x190feb8)
2013-06-26 12:22:11.965 Lync[35457:3c7e7b78] INFO TRANSPORT CWebTicketSession.cpp/441:Received webticket resposne with status E_InternalServerError (E2-3-13)
2013-06-26 12:22:11.966 Lync[35457:3c7e7b78] INFO TRANSPORT CWebTicketSession.cpp/1206:Raising WebTicketEvent for https://lync.mydomain.com/ucwa/v1/applications and https://lyncpool.mydomain.local/webticket/webticketservice.svc with status E_InternalServerError (E2-3-13)
2013-06-26 12:22:11.966 Lync[35457:3c7e7b78] INFO TRANSPORT CAuthenticationResolver.cpp/639:Web-Ticket retrieval for url https://lync.mydomain.com/ucwa/v1/applications completed with status E_InternalServerError (E2-3-13)
2013-06-26 12:22:11.966 Lync[35457:3c7e7b78] ERROR TRANSPORT CAuthenticationResolver.cpp/703:Failing the original request as we weren't able to get thewebticket
2013-06-26 12:22:11.966 Lync[35457:3c7e7b78] INFO TRANSPORT CRequestManager.cpp/119:Failing secure request with status E_InternalServerError (E2-3-13)
2013-06-26 12:22:11.966 Lync[35457:3c7e7b78] INFO APPLICATION CAlertReporter.cpp/64:Alert received! Category 2, Type 300, level 2, error E_InternalServerError (E2-3-13), context '', hasAction=false
2013-06-26 12:22:11.966 Lync[35457:3c7e7b78] INFO APPLICATION CAlertReporter.cpp/117:Alert cleared of Category 2, Type 300, cleared 1 alerts
2013-06-26 12:22:11.967 Lync[35457:3c7e7b78] INFO APPLICATION CTransportRequestRetrialQueue.cpp/683:Response received for req. POST-Application(0x19e2478): E_InternalServerError (E2-3-13) (RemoteNetworkTemporaryError); (Re-)Queuing req.; Schedule retrial in 30sec.
2013-06-26 12:22:11.967 Lync[35457:3c7e7b78] INFO UI CMAlertViewController.mm/99:ObservableListItem Removed event received
2013-06-26 12:22:11.967 Lync[35457:3c7e7b78] INFO UI CMAlertViewController.mm/103:showalert is 1
2013-06-26 12:22:11.967 Lync[35457:3c7e7b78] INFO UI CMConversationCommon.mm/43:not signed in
2013-06-26 12:22:11.967 Lync[35457:3c7e7b78] INFO UI CMConversationCommon.mm/43:not signed in
2013-06-26 12:22:11.967 Lync[35457:3c7e7b78] INFO UI CMConversationCommon.mm/43:not signed in
2013-06-26 12:22:11.967 Lync[35457:3c7e7b78] INFO UI CMNotificationManager.mm/612:desired view is alert, size 1
2013-06-26 12:22:11.967 Lync[35457:3c7e7b78] INFO UI CMNotificationManager.mm/625:desired view is same as the current view
2013-06-26 12:22:11.968 Lync[35457:3c7e7b78] INFO UI CMNotificationManager.mm/405:reposition floating views
2013-06-26 12:22:11.968 Lync[35457:3c7e7b78] INFO UI CMAlertViewController.mm/110:showalert is 1
2013-06-26 12:22:11.968 Lync[35457:3c7e7b78] INFO UI CMAlertViewController.mm/114:showalert is 0
2013-06-26 12:22:11.968 Lync[35457:3c7e7b78] INFO UI CMUIUtil.mm/394:Mapping error code = 0x2203000d, context = , type = 300
2013-06-26 12:22:11.968 Lync[35457:3c7e7b78] INFO UI CMUIUtil.mm/1598:Mapped error message is 'Can’t connect to the server. It may be busy or temporarily unavailable. Please try again.
2013-06-26 12:22:11.968 Lync[35457:3c7e7b78] ERROR UI CMDismissButtonBaseViewController.mm/89:before: view height 45.000000, width 320.000000, x 0.000000, y 64.000000
2013-06-26 12:22:11.968 Lync[35457:3c7e7b78] INFO UI CMNotificationManager.mm/993:viewFrame: origin x 0.000000, origin y 64.000000, height 45.000000, width 320.000000
2013-06-26 12:22:11.969 Lync[35457:3c7e7b78] INFO UI CMNotificationManager.mm/1099:resize alert label, origin x 44.000000, origin y 2.000000, height 41.000000, width 232.000000
2013-06-26 12:22:11.969 Lync[35457:3c7e7b78] ERROR UI CMDismissButtonBaseViewController.mm/104:after: self.label.frame height 41.000000, width 232.000000, x 44.000000, y 2.000000
2013-06-26 12:22:11.969 Lync[35457:3c7e7b78] INFO UI CMAlertViewController.mm/93:ObservableListItem Added event received
2013-06-26 12:22:11.969 Lync[35457:3c7e7b78] INFO UI CMAlertViewController.mm/103:showalert is 1
2013-06-26 12:22:11.969 Lync[35457:3c7e7b78] INFO UI CMConversationCommon.mm/43:not signed in
2013-06-26 12:22:11.969 Lync[35457:3c7e7b78] INFO UI CMConversationCommon.mm/43:not signed in
2013-06-26 12:22:11.969 Lync[35457:3c7e7b78] INFO UI CMConversationCommon.mm/43:not signed in
2013-06-26 12:22:11.969 Lync[35457:3c7e7b78] INFO UI CMNotificationManager.mm/612:desired view is alert, size 1
2013-06-26 12:22:11.969 Lync[35457:3c7e7b78] INFO UI CMNotificationManager.mm/625:desired view is same as the current view
2013-06-26 12:22:11.970 Lync[35457:3c7e7b78] INFO UI CMNotificationManager.mm/405:reposition floating views
2013-06-26 12:22:11.970 Lync[35457:3c7e7b78] INFO UI CMAlertViewController.mm/110:showalert is 1
2013-06-26 12:22:11.970 Lync[35457:3c7e7b78] INFO UI CMAlertViewController.mm/114:showalert is 0
2013-06-26 12:22:11.970 Lync[35457:3c7e7b78] INFO UI CMUIUtil.mm/394:Mapping error code = 0x2203000d, context = , type = 300
2013-06-26 12:22:11.970 Lync[35457:3c7e7b78] INFO UI CMUIUtil.mm/1598:Mapped error message is 'Can’t connect to the server. It may be busy or temporarily unavailable. Please try again.
2013-06-26 12:22:11.970 Lync[35457:3c7e7b78] ERROR UI CMDismissButtonBaseViewController.mm/89:before: view height 45.000000, width 320.000000, x 0.000000, y 64.000000
2013-06-26 12:22:11.970 Lync[35457:3c7e7b78] INFO UI CMNotificationManager.mm/993:viewFrame: origin x 0.000000, origin y 64.000000, height 45.000000, width 320.000000
2013-06-26 12:22:11.970 Lync[35457:3c7e7b78] INFO UI CMNotificationManager.mm/1099:resize alert label, origin x 44.000000, origin y 2.000000, height 41.000000, width 232.000000
2013-06-26 12:22:11.971 Lync[35457:3c7e7b78] ERROR UI CMDismissButtonBaseViewController.mm/104:after: self.label.frame height 41.000000, width 232.000000, x 44.000000, y 2.000000
2013-06-26 12:22:13.182 Lync[35457:3c7e7b78] INFO UI CMConversationCommon.mm/43:not signed in
2013-06-26 12:22:13.182 Lync[35457:3c7e7b78] INFO UI CMConversationCommon.mm/43:not signed in
2013-06-26 12:22:13.182 Lync[35457:3c7e7b78] INFO UI CMConversationCommon.mm/43:not signed in
2013-06-26 12:22:13.183 Lync[35457:3c7e7b78] INFO UI CMNotificationManager.mm/612:desired view is alert, size 1
2013-06-26 12:22:13.183 Lync[35457:3c7e7b78] INFO UI CMNotificationManager.mm/625:desired view is same as the current view
2013-06-26 12:22:13.183 Lync[35457:3c7e7b78] INFO UI CMNotificationManager.mm/405:reposition floating views
2013-06-26 12:22:13.183 Lync[35457:3c7e7b78] INFO UI CMAlertViewController.mm/110:showalert is 0
2013-06-26 12:22:13.184 Lync[35457:3c7e7b78] ERROR UI CMDismissButtonBaseViewController.mm/89:before: view height 45.000000, width 320.000000, x 0.000000, y 64.000000
2013-06-26 12:22:13.184 Lync[35457:3c7e7b78] INFO UI CMNotificationManager.mm/993:viewFrame: origin x 0.000000, origin y 64.000000, height 45.000000, width 320.000000
2013-06-26 12:22:13.184 Lync[35457:3c7e7b78] INFO UI CMNotificationManager.mm/1099:resize alert label, origin x 44.000000, origin y 2.000000, height 41.000000, width 232.000000
2013-06-26 12:22:13.184 Lync[35457:3c7e7b78] ERROR UI CMDismissButtonBaseViewController.mm/104:after: self.label.frame height 41.000000, width 232.000000, x 44.000000, y 2.000000
2013-06-26 12:22:13.184 Lync[35457:3c7e7b78] INFO UI CMConversationCommon.mm/43:not signed in
2013-06-26 12:22:13.184 Lync[35457:3c7e7b78] INFO UI CMConversationCommon.mm/43:not signed in
2013-06-26 12:22:13.184 Lync[35457:3c7e7b78] INFO UI CMConversationCommon.mm/43:not signed in
2013-06-26 12:22:13.185 Lync[35457:3c7e7b78] INFO UI CMNotificationManager.mm/612:desired view is alert, size 1
2013-06-26 12:22:13.185 Lync[35457:3c7e7b78] INFO UI CMNotificationManager.mm/625:desired view is same as the current view
2013-06-26 12:22:13.185 Lync[35457:3c7e7b78] INFO UI CMNotificationManager.mm/405:reposition floating views
2013-06-26 12:22:13.185 Lync[35457:3c7e7b78] INFO UI CMAlertViewController.mm/110:showalert is 0
2013-06-26 12:22:13.185 Lync[35457:3c7e7b78] ERROR UI CMDismissButtonBaseViewController.mm/89:before: view height 45.000000, width 320.000000, x 0.000000, y 64.000000
2013-06-26 12:22:13.185 Lync[35457:3c7e7b78] INFO UI CMNotificationManager.mm/993:viewFrame: origin x 0.000000, origin y 64.000000, height 45.000000, width 320.000000
2013-06-26 12:22:13.185 Lync[35457:3c7e7b78] INFO UI CMNotificationManager.mm/1099:resize alert label, origin x 44.000000, origin y 2.000000, height 41.000000, width 232.000000
2013-06-26 12:22:13.185 Lync[35457:3c7e7b78] ERROR UI CMDismissButtonBaseViewController.mm/104:after: self.label.frame height 41.000000, width 232.000000, x 44.000000, y 2.000000
2013-06-26 12:22:14.103 Lync[35457:3c7e7b78] INFO UI CMConversationCommon.mm/43:not signed in
2013-06-26 12:22:14.103 Lync[35457:3c7e7b78] INFO UI CMConversationCommon.mm/43:not signed in
2013-06-26 12:22:14.103 Lync[35457:3c7e7b78] INFO UI CMConversationCommon.mm/43:not signed in
2013-06-26 12:22:14.103 Lync[35457:3c7e7b78] INFO UI CMNotificationManager.mm/612:desired view is alert, size 1
2013-06-26 12:22:14.104 Lync[35457:3c7e7b78] INFO UI CMNotificationManager.mm/625:desired view is same as the current view
2013-06-26 12:22:14.104 Lync[35457:3c7e7b78] INFO UI CMNotificationManager.mm/405:reposition floating views
2013-06-26 12:22:14.104 Lync[35457:3c7e7b78] INFO UI CMAlertViewController.mm/110:showalert is 0
2013-06-26 12:22:14.104 Lync[35457:3c7e7b78] ERROR UI CMDismissButtonBaseViewController.mm/89:before: view height 45.000000, width 320.000000, x 0.000000, y 64.000000
2013-06-26 12:22:14.104 Lync[35457:3c7e7b78] INFO UI CMNotificationManager.mm/993:viewFrame: origin x 0.000000, origin y 64.000000, height 45.000000, width 320.000000
2013-06-26 12:22:14.105 Lync[35457:3c7e7b78] INFO UI CMNotificationManager.mm/1099:resize alert label, origin x 44.000000, origin y 2.000000, height 41.000000, width 232.000000
2013-06-26 12:22:14.105 Lync[35457:3c7e7b78] ERROR UI CMDismissButtonBaseViewController.mm/104:after: self.label.frame height 41.000000, width 232.000000, x 44.000000, y 2.000000
2013-06-26 12:22:14.660 Lync[35457:3c7e7b78] INFO UI CMMySelfViewController.mm/498:viewWillAppear event in CMMySelfViewController.
2013-06-26 12:22:14.661 Lync[35457:3c7e7b78] INFO UI CMPresenceUtil.mm/654:ActualState = 1 DesiredState = 1 DataAvailable = 1
2013-06-26 12:22:14.662 Lync[35457:3c7e7b78] INFO UI CMPresenceUtil.mm/654:ActualState = 1 DesiredState = 1 DataAvailable = 1
2013-06-26 12:22:15.022 Lync[35457:3c7e7b78] INFO UI CMConversationCommon.mm/43:not signed in
2013-06-26 12:22:15.022 Lync[35457:3c7e7b78] INFO UI CMConversationCommon.mm/43:not signed in
2013-06-26 12:22:15.022 Lync[35457:3c7e7b78] INFO UI CMConversationCommon.mm/43:not signed in
2013-06-26 12:22:15.022 Lync[35457:3c7e7b78] INFO UI CMNotificationManager.mm/612:desired view is alert, size 1
2013-06-26 12:22:15.022 Lync[35457:3c7e7b78] INFO UI CMNotificationManager.mm/625:desired view is same as the current view
2013-06-26 12:22:15.023 Lync[35457:3c7e7b78] INFO UI CMNotificationManager.mm/405:reposition floating views
2013-06-26 12:22:15.023 Lync[35457:3c7e7b78] INFO UI CMAlertViewController.mm/110:showalert is 0
2013-06-26 12:22:15.023 Lync[35457:3c7e7b78] ERROR UI CMDismissButtonBaseViewController.mm/89:before: view height 45.000000, width 320.000000, x 0.000000, y 64.000000
2013-06-26 12:22:15.023 Lync[35457:3c7e7b78] INFO UI CMNotificationManager.mm/993:viewFrame: origin x 0.000000, origin y 64.000000, height 45.000000, width 320.000000
2013-06-26 12:22:15.023 Lync[35457:3c7e7b78] INFO UI CMNotificationManager.mm/1099:resize alert label, origin x 44.000000, origin y 2.000000, height 41.000000, width 232.000000
2013-06-26 12:22:15.023 Lync[35457:3c7e7b78] ERROR UI CMDismissButtonBaseViewController.mm/104:after: self.label.frame height 41.000000, width 232.000000, x 44.000000, y 2.000000
2013-06-26 12:22:17.024 Lync[35457:3c7e7b78] INFO UI CMMySelfViewController.mm/565:viewWillDisappear event.
2013-06-26 12:22:17.395 Lync[35457:3c7e7b78] INFO UI CMConversationCommon.mm/43:not signed in
2013-06-26 12:22:17.395 Lync[35457:3c7e7b78] INFO UI CMConversationCommon.mm/43:not signed in
2013-06-26 12:22:17.395 Lync[35457:3c7e7b78] INFO UI CMConversationCommon.mm/43:not signed in
2013-06-26 12:22:17.395 Lync[35457:3c7e7b78] INFO UI CMNotificationManager.mm/612:desired view is alert, size 1
2013-06-26 12:22:17.395 Lync[35457:3c7e7b78] INFO UI CMNotificationManager.mm/625:desired view is same as the current view
2013-06-26 12:22:17.395 Lync[35457:3c7e7b78] INFO UI CMNotificationManager.mm/405:reposition floating views
2013-06-26 12:22:17.395 Lync[35457:3c7e7b78] INFO UI CMAlertViewController.mm/110:showalert is 0
2013-06-26 12:22:17.395 Lync[35457:3c7e7b78] ERROR UI CMDismissButtonBaseViewController.mm/89:before: view height 45.000000, width 320.000000, x 0.000000, y 64.000000
2013-06-26 12:22:17.396 Lync[35457:3c7e7b78] INFO UI CMNotificationManager.mm/993:viewFrame: origin x 0.000000, origin y 64.000000, height 45.000000, width 320.000000
2013-06-26 12:22:17.396 Lync[35457:3c7e7b78] INFO UI CMNotificationManager.mm/1099:resize alert label, origin x 44.000000, origin y 2.000000, height 41.000000, width 232.000000
2013-06-26 12:22:17.396 Lync[35457:3c7e7b78] ERROR UI CMDismissButtonBaseViewController.mm/104:after: self.label.frame height 41.000000, width 232.000000, x 44.000000, y 2.000000
2013-06-26 12:22:20.037 Lync[35457:3c7e7b78] INFO UI CMConversationCommon.mm/43:not signed in
2013-06-26 12:22:20.037 Lync[35457:3c7e7b78] INFO UI CMConversationCommon.mm/43:not signed in
2013-06-26 12:22:20.037 Lync[35457:3c7e7b78] INFO UI CMConversationCommon.mm/43:not signed in
2013-06-26 12:22:20.038 Lync[35457:3c7e7b78] INFO UI CMNotificationManager.mm/612:desired view is alert, size 1
2013-06-26 12:22:20.038 Lync[35457:3c7e7b78] INFO UI CMNotificationManager.mm/625:desired view is same as the current view
2013-06-26 12:22:20.038 Lync[35457:3c7e7b78] INFO UI CMNotificationManager.mm/405:reposition floating views
2013-06-26 12:22:20.038 Lync[35457:3c7e7b78] INFO UI CMAlertViewController.mm/110:showalert is 0
2013-06-26 12:22:20.038 Lync[35457:3c7e7b78] ERROR UI CMDismissButtonBaseViewController.mm/89:before: view height 45.000000, width 320.000000, x 0.000000, y 64.000000
2013-06-26 12:22:20.038 Lync[35457:3c7e7b78] INFO UI CMNotificationManager.mm/993:viewFrame: origin x 0.000000, origin y 64.000000, height 45.000000, width 320.000000
2013-06-26 12:22:20.038 Lync[35457:3c7e7b78] INFO UI CMNotificationManager.mm/1099:resize alert label, origin x 44.000000, origin y 2.000000, height 41.000000, width 232.000000
2013-06-26 12:22:20.038 Lync[35457:3c7e7b78] ERROR UI CMDismissButtonBaseViewController.mm/104:after: self.label.frame height 41.000000, width 232.000000, x 44.000000, y 2.000000
2013-06-26 12:22:20.565 Lync[35457:907] is not a valid email address.
Resolution:
This issue turned out to be an issue with one of the DNS records published on the internal network. In the above logs, you can see the domain lync.mydomain.com. This record specifically, was pointed to the lync reverse proxy rather than a front end server. Once configuring the DNS records correctly, the clients were able to sign in properly.
You can find a list of DNS records I have used in deploying Lync 2013 here: http://jackstromberg.com/2013/06/lync-2013-dns-settings/