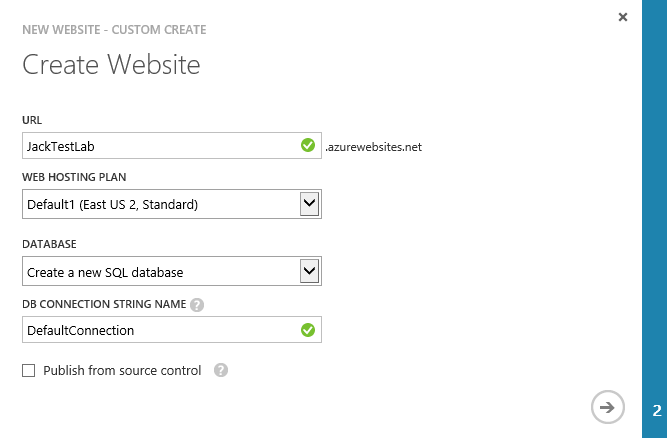
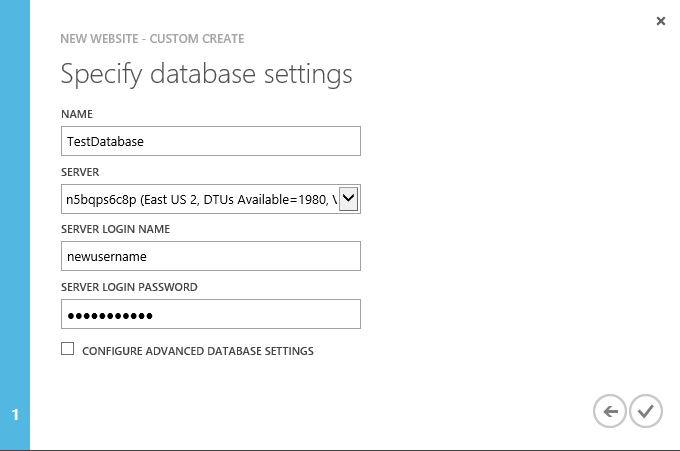
In this guide, we will go over setting up a Point-to-Site VPN connection that will allow an on-premise virtual machine talk to a resource/VM that is hosted in Microsoft Azure. In this guide, we will take advantage of the new Preview Portal for this guide.
- Login to the Microsoft Azure Preview Portal
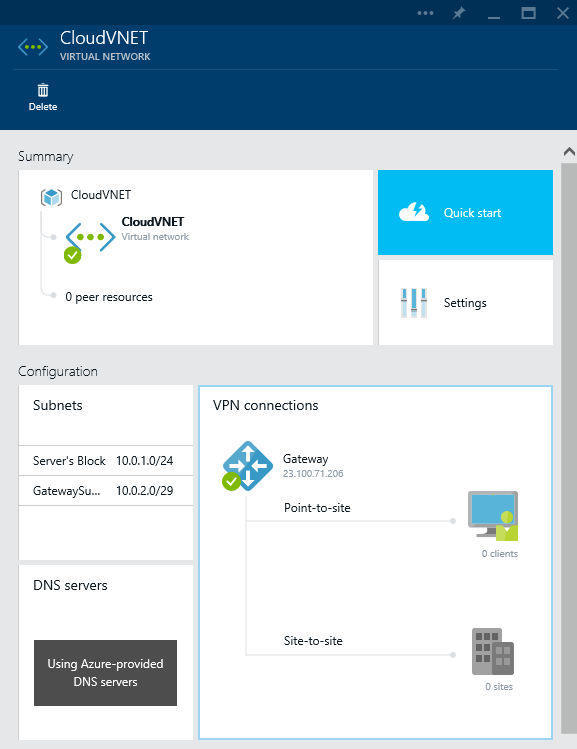
- Create a VNET
- Click on the + New button

- Select Networking, Virtual Network

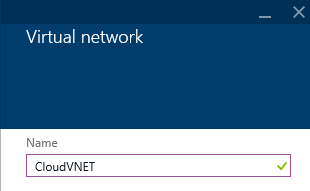
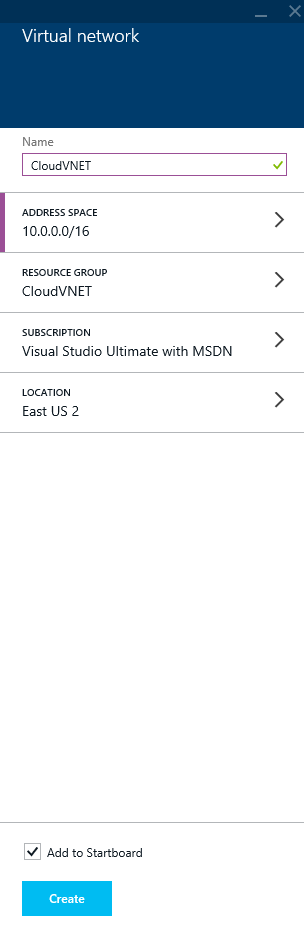
- Type in a Name for your VNET
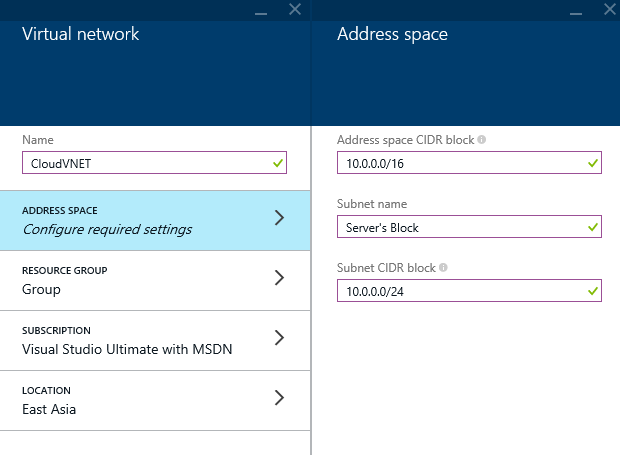
- Select Address Space, configure the parameters of your cloud based virtual network, and click OK
- Select Resource Group, Create a new resource group, enter a name for the group and click OK

- Click Location and select the location closest to you
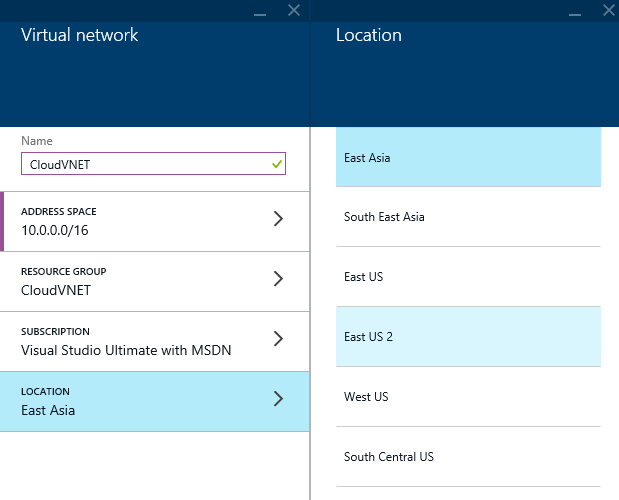
- Click Create
- Click on the + New button
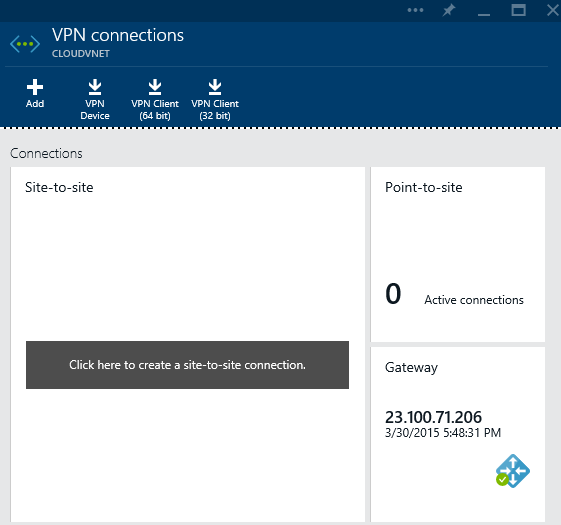
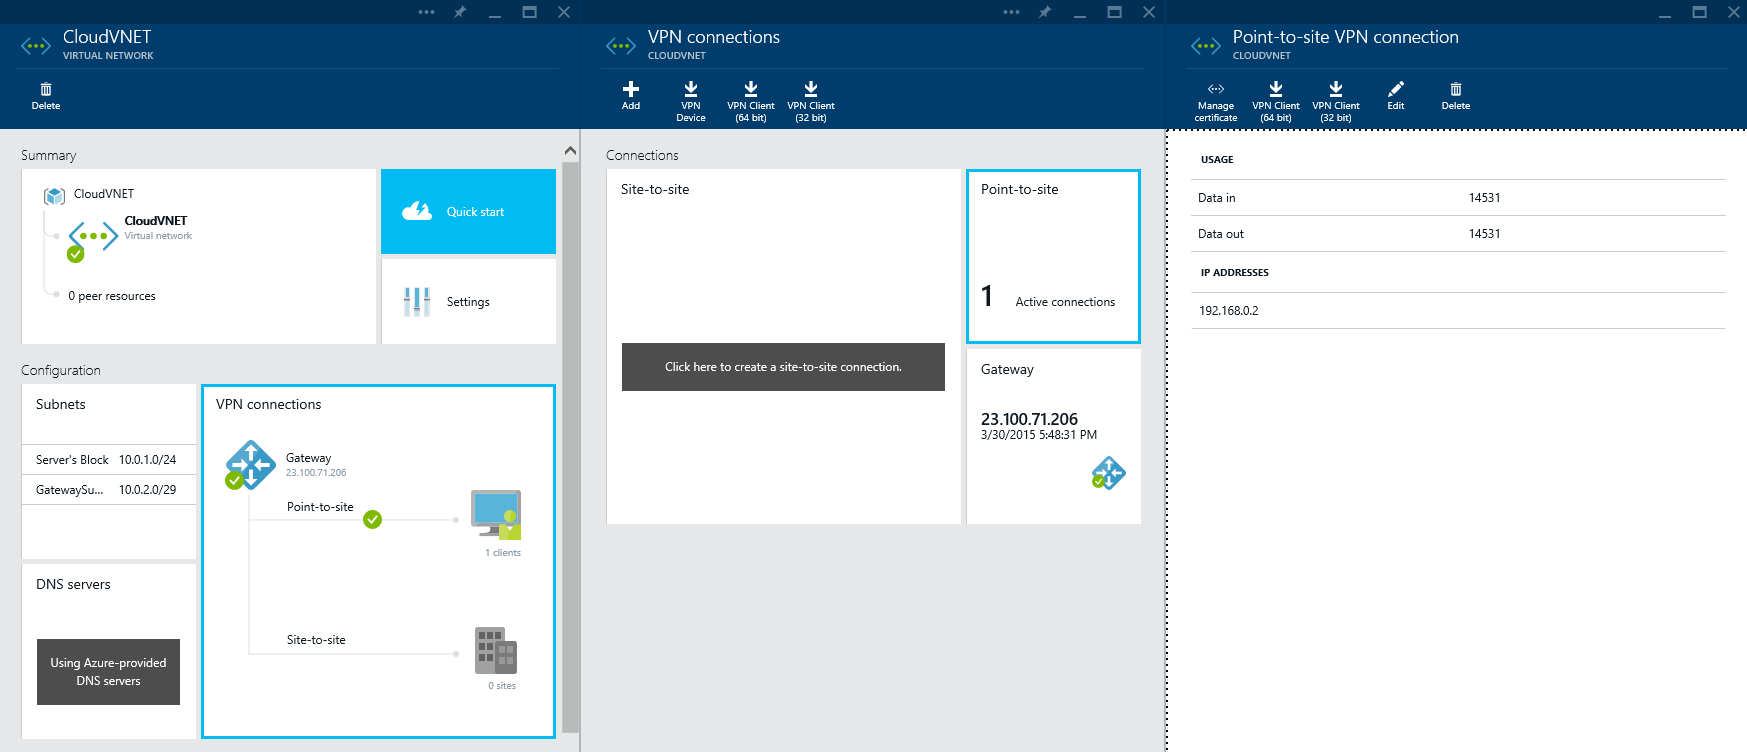
- With the Virtual Network blade still open, select VPN connections

- On the New VPN Connection blade, select Point-to-site, in the Address Spaces prompts, enter in each of your subnets, ensure Create gateway immediately is checked and then click on Subnet, size and routing type
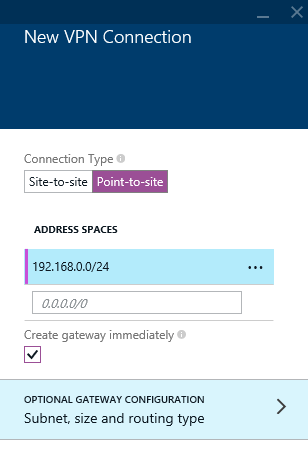
- Select Subnet on the Gateway configuration blade
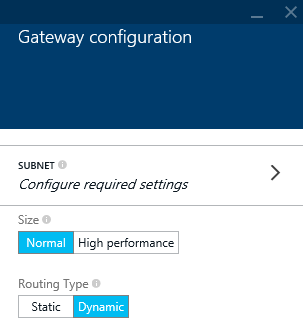
- Enter in a new subnet that will be used for clients connecting through the VPN tunnel and then click OK
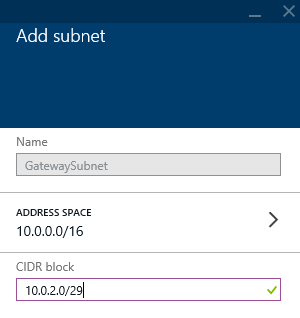
- Click OK on the Gateway configuration blade
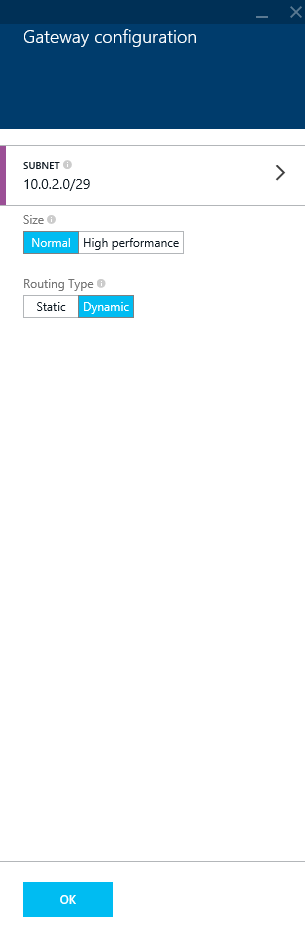
- Click OK on the New VPN Connection blade
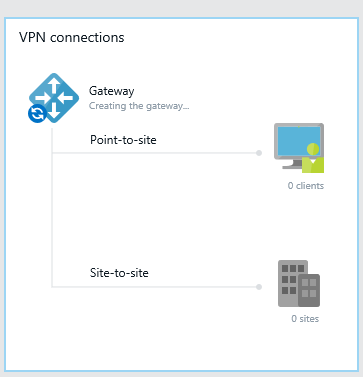
- If you refresh the Azure portal, you should now see on the VPN connections section that it is trying to create the gateway. Based on my experience, this process can take awhile to setup (10-15 minutes), so this is something you will want to provision and then get up and grab a cup of coffee
- In the process of provisioning
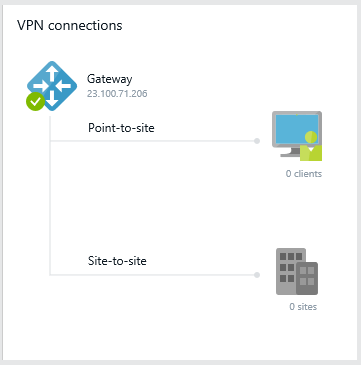
- Provisioned gateway
- In the process of provisioning
- Generate and upload certificates
- Generate a self-signed SSL certificate via command prompt
- You can use whatever utility you are most comfortable with; I'd recommend using makecert if you have Visual Studio installed (can be found here: C:\Program Files (x86)\Microsoft SDKs\Windows\v7.1A\Bin\x64). If you don't have Visual Studio, you can use openSSL
- Using Visual Studio's command prompt
- Execute the following command to generate a root certificate
- makecert -sky exchange -r -n "CN=AzureVLANRootCertificate" -pe -a sha1 -len 2048 -ss My "AzureVLANRootCertificate.cer"
- makecert -sky exchange -r -n "CN=AzureVLANRootCertificate" -pe -a sha1 -len 2048 -ss My "AzureVLANRootCertificate.cer"
- Execute the following command to generate a client certificate
- makecert.exe -n "CN=AzureVLANClientCertificate" -pe -sky exchange -m 96 -ss My -in "AzureVLANRootCertificate" -is my -a sha1
- Notes: The root certificate and client certificate can have whatever name you wish, just ensure that in the client certificate, the root certificate's name matches the root certificate you just generated
- Execute the following command to generate a root certificate
- Generate a self-signed SSL certificate via command prompt
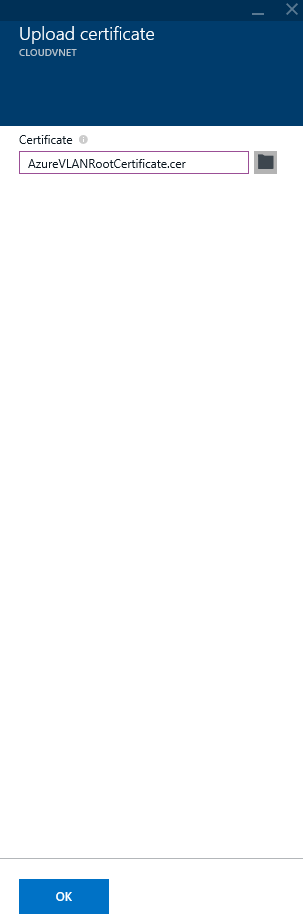
- Upload your root certificate
- On the Virtual Network blade, click on VPN Connections
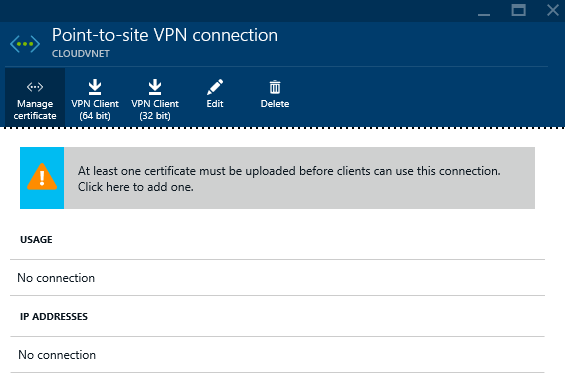
- Click on Point-to-site
- Click on Manage Certificate
- Click on Upload
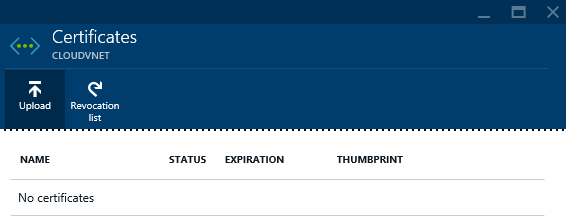
- Select your certificate and click OK
- On the Virtual Network blade, click on VPN Connections
- Establish a connection
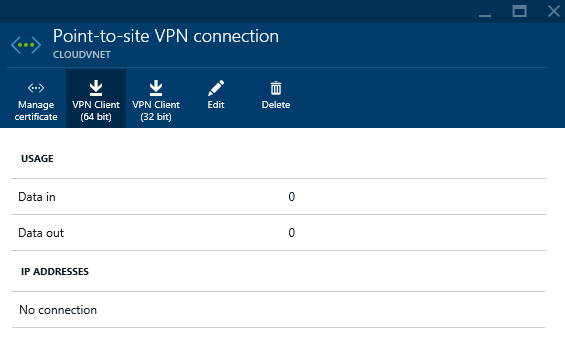
- Go back to the Point-to-site connection blade and select the VPN Client for your supported OS
- Save and Run the VPN installer

- Install the VPN Client by clicking on Yes

- Connect to Azure via the VPN connection
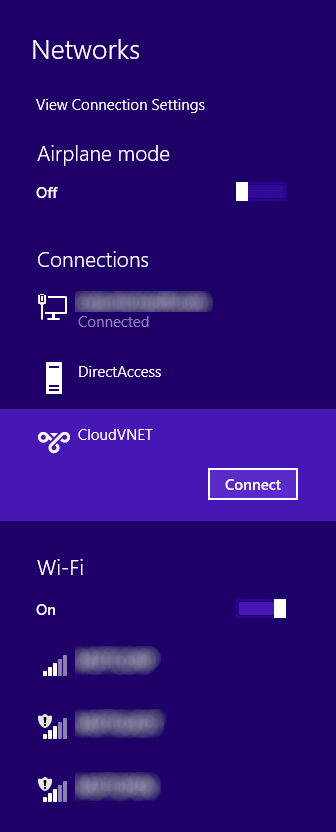
- Click Connect on the VPN dialog

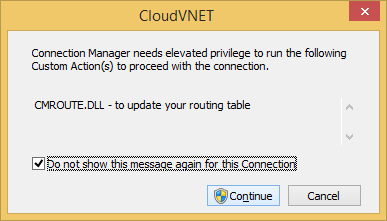
- Click Continue to temporarily add routes to Azure while the VPN connection is established
- Go back to the Point-to-site connection blade and select the VPN Client for your supported OS
- Verify you are connected via the Point-to-site connections blade
At this point, this specific client that is connected to Azure should have access to all internal devices on the Server's subnet we created in step 2-4! 🙂
Notes:
Official MSDN information can be found here: https://msdn.microsoft.com/en-us/library/azure/dn133792.aspx