Tag Archives: Active Directory

List of schema versions for Windows Server Active Directory

Here's the current list of Schema Versions for Active Directory on Windows Server.

OS Schema Version
Windows 2000 Server 13
Windows Server 2003 30
Windows Server 2003 R2 31
Windows Server 2008 44
Windows Server 2008 R2 47
Windows Server 2012 56
Windows Server 2012 R2 69
Windows Server 2016 87


You can validate the current schema version you have in your environment via PowerShell or Registry Editor.

Validate schema version via PowerShell:

Get-ADObject (Get-ADRootDSE).schemaNamingContext -Property objectVersion

In this screenshot, I have ObjectVersion equal to 69, denoting the schema has been extended for AD on Windows Server 2012 R2.

Validate schema version via Registry Editor:

  1. Click Start and search for
  2. regedit
    regedit
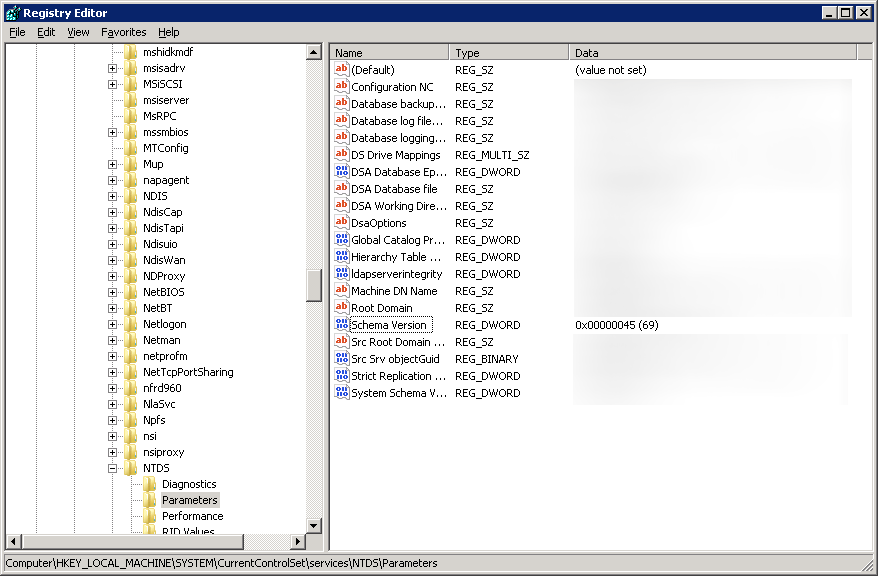
  3. Open up regedit and navigate to Computer\HKEY_LOCAL_MACHINE\SYSTEM\CurrentControlSet\services\NTDS\Parameters
  4. In this screenshot, I have Schema Version equal to 69, denoting the schema has been extended for AD on Windows Server 2012 R2.
    regedit - schema version

Configuring time for Azure IaaS Domain Joined Machines

Synopsis: When placing a Virtual Machine on the Azure Platform, by default it inherits time controls from the underlying hypervisor: Hyper-V.  The default behavior for these VMs is to synchronize the system clock with the host via the Hyper-V TimeSync service (VMIC) for Hyper-V hosts and guests running prior operating systems to Windows Server 2016.

Windows 2016 guests will find the most accurate clock, rather than defaulting to the host. It was for this reason that we advised to manually disable Hyper-V Time Provider setting for machines participating in a domain in Windows 2012R2 and below.  More information on Windows Server 2016 time can be found here: https://docs.microsoft.com/en-us/windows-server/identity/ad-ds/get-started/windows-time-service/windows-2016-accurate-time

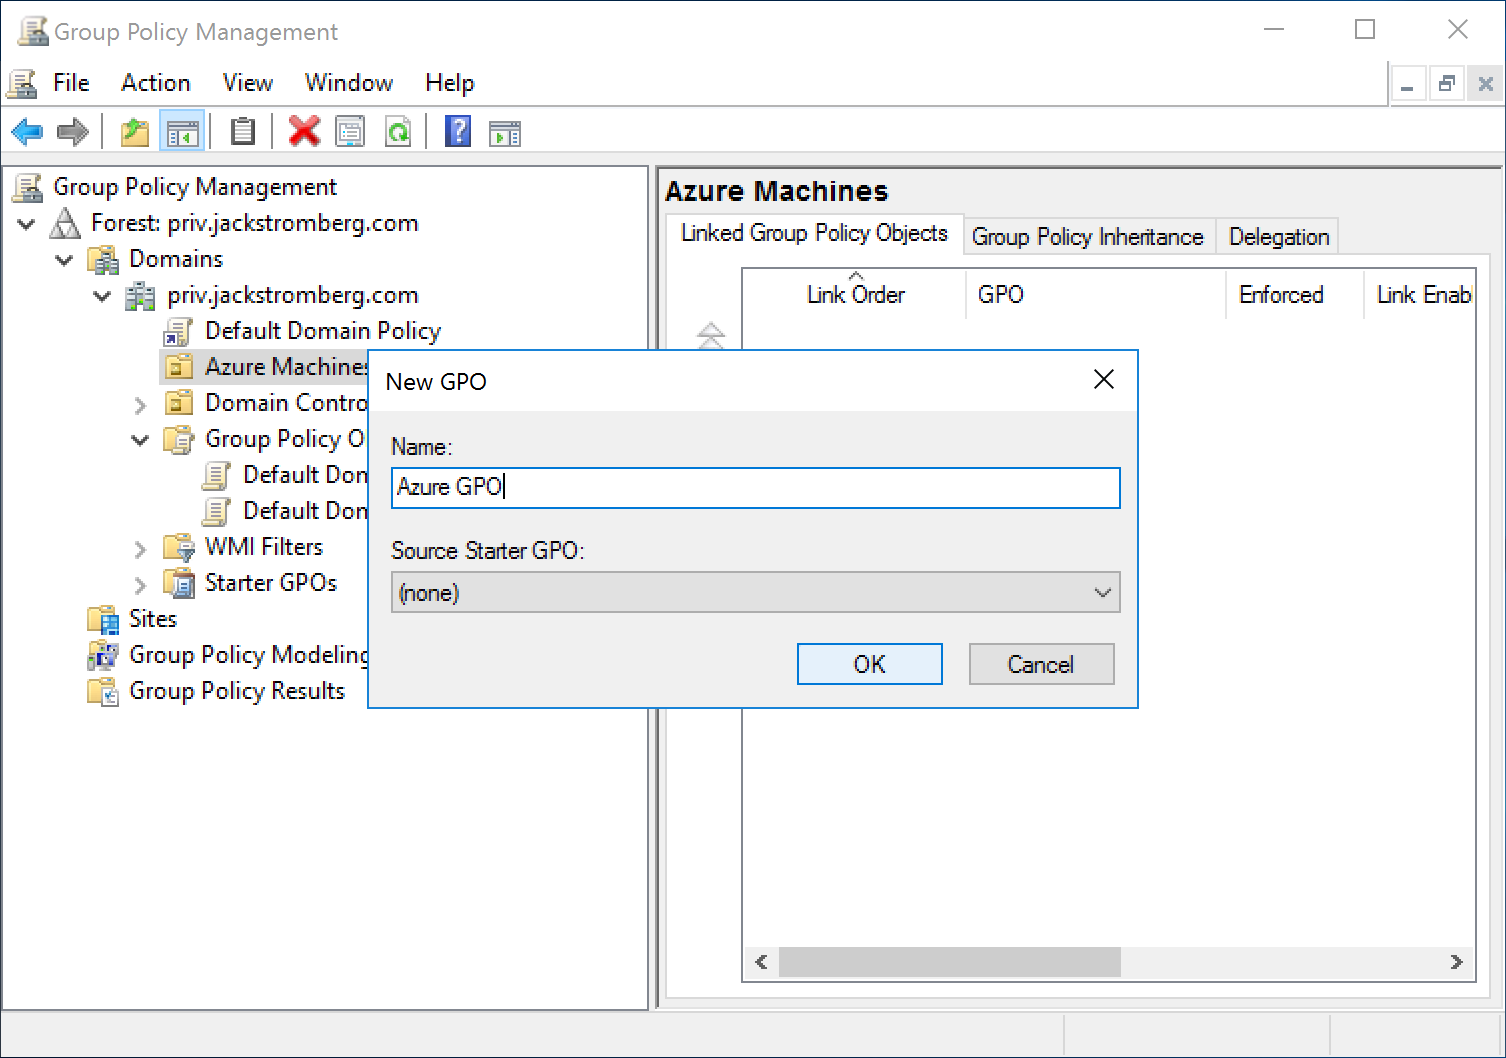
To disable the Hyper-V Time Provider, we recommend creating a new Group Policy template and targeting your Azure VMs.

Validate that your machine is synchronized to the Hyper-V Time Provider

Open command prompt and execute the following command: w32tm /query /status

If you see VM IC Time Synchronization Provider, the Guest OS is synchronized to the VM Host

Create a new group policy to disable the Hyper-V Time Provider (VM IC Time Synchronization)

  1. Create a new Group Policy and target it to an OU that contains the machines synchronized to the Hyper-V Time Provider
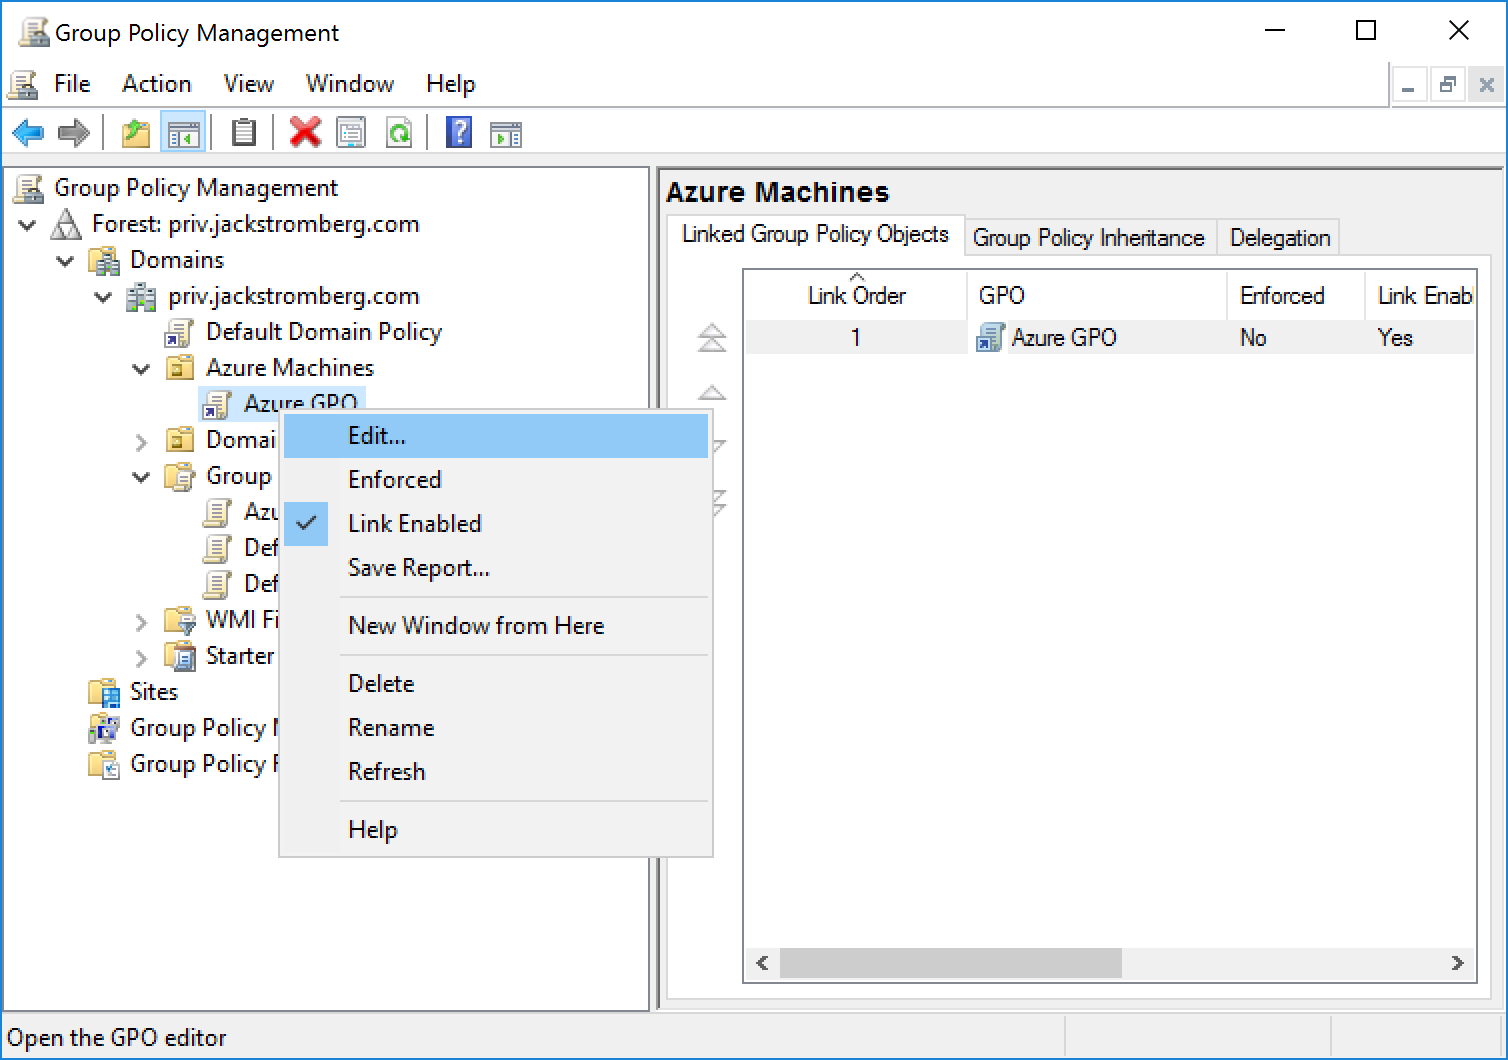
  2. Edit the new Group Policy Object
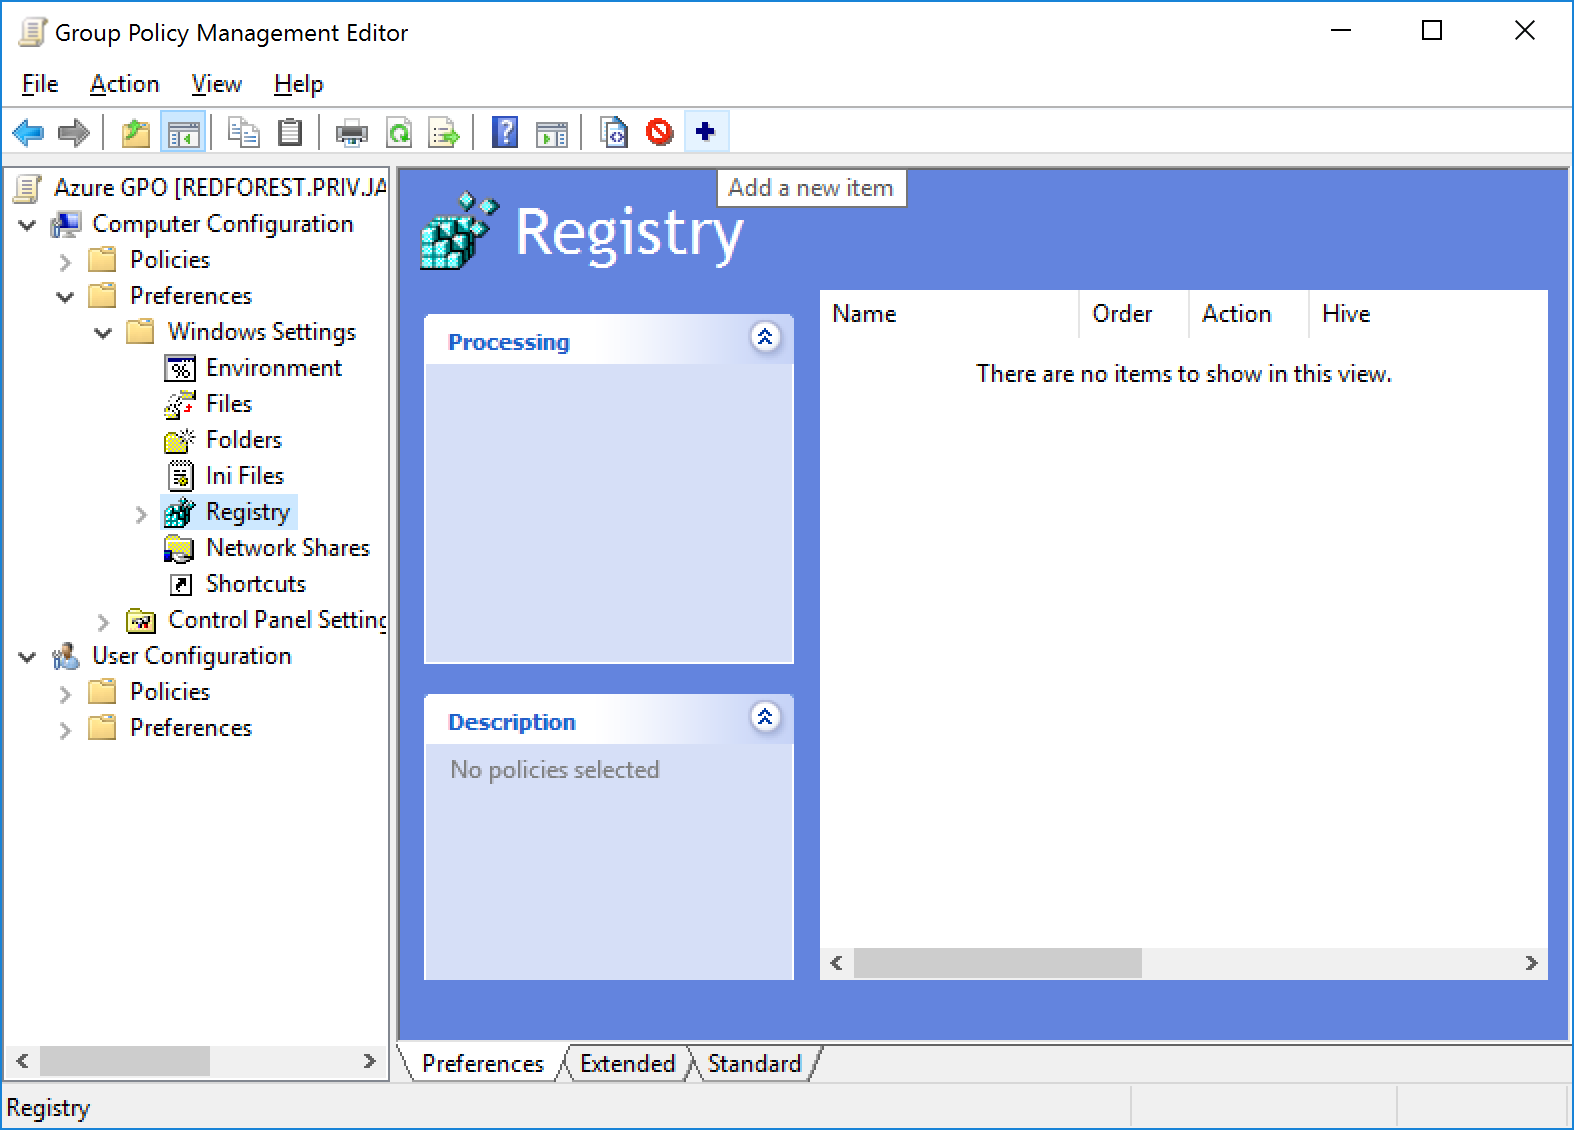
  3. Navigate to Computer configuration -> Preferences -> Windows Settings -> Registry and Add a new item

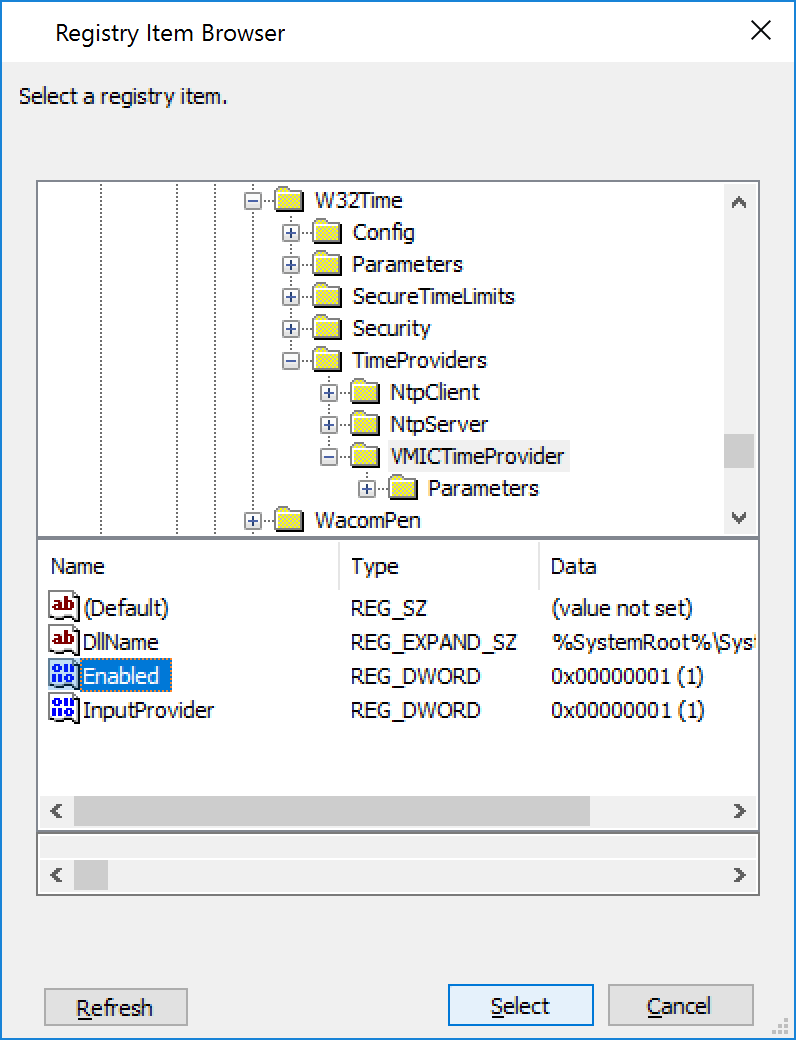
  4. Navigate to the following Key HKLM:SYSTEM\CurrentControlSet\Services\W32Time\TimeProviders\VMICTimeProvider and select the Enabled Value
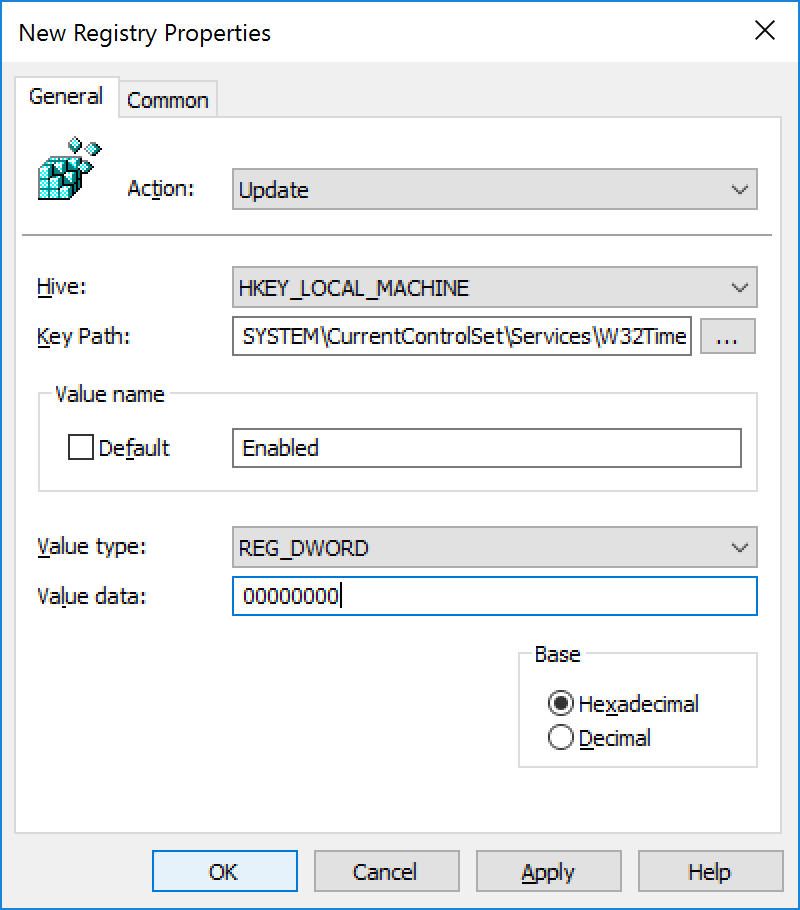
  5. Change the Value data to 00000000 and click OK

  6. Restart each of the Azure Virtual Machines or login to each machine and execute the following command to restart the Windows Time service: net stop w32time && net start w32time

  7. Validate that the Source is now pointing to your NTP server/domain by running the following command: w32tm /query /status

[Tutorial] Configuring BitLocker to store recovery keys in Active Directory

This guide is more of a reflection on the steps I took to publish the BitLocker recovery keys of machines deployed on an Active Directory domain.  Microsoft has gobs and gobs of information on this subject which can be a tad overwhelming, so I have tried to consolidate this article down as much as possible, citing Microsoft sources where found.  If you have any questions, comments, feedback, please feel free to leave a message below.

Prerequisites

  • Domain Controllers are running Windows Server 2003 SP1 or greater
  • Schema Admin or an Enterprise Admin user account privileges

Step 1: Verify your schema is ready (and extend it if applicable)

Based on what I have read, if your DCs were introduced with Server 2008 Beta 3 or later, your schema will be ready, if you started with anything older, your AD environment will more than likely will not have the schema objects/attributes.

Verify you have the schema changes if running Server 2003 R2 or older:

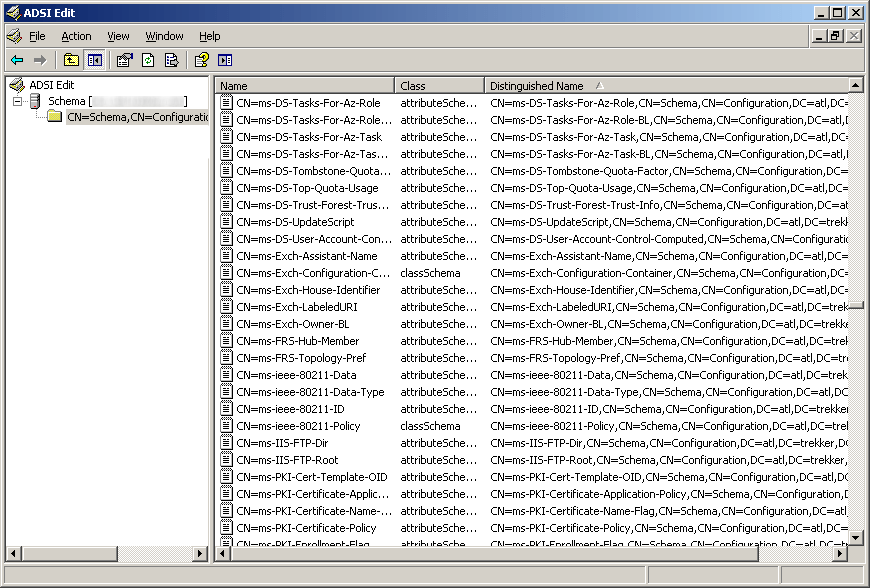
If you are on Server 2003 you will need to open up ADSI edit and verify you have the schema changes (here you can see we are missing the five schema changes for BitLocker)

ADSI Edit - Server 2003 R2 - BitLocker

Verify you have the schema changes if running Server 2008 or newer:

If you are on Server 2008 or greater and have powershell, you can execute the following command (here you can see we have the necessary schema changes to proceed, if you receive 0 results, you will need to extend your schema):

Get-ADObject -SearchBase ((GET-ADRootDSE).SchemaNamingContext) -Filter {Name -like "ms-FVE-*"}

AD-Schema objects for BitLocker

Extending your schema if you don't have the schema changes above

If you need the schema update (you are missing the five schema objects listed in the above powershell command), you can execute the following command via Command Prompt on your Domain Controller:

Note: If you are on Server 2008 r2, it is recommended you extend your schema to Server 2012 or if you just want the BitLocker attributes, use these two ldf files: https://technet.microsoft.com/en-us/library/jj635854.aspx

ldifde -i -v -f BitLockerTPMSchemaExtension.ldf -c "DC=X" "DC=mydomain,DC=local" -k -j .

Yes, you do want the trailing period (.) at the end of the command.  It is literally apart of the command, so ensure you execute the command exactly like above (changing your domain of course).   You can see the official technet article here for more information on the command: https://technet.microsoft.com/en-us/library/cc766015(v=ws.10).aspx

If you would like to verify everything went well, Microsoft has posted some output on what the command should write: https://technet.microsoft.com/en-us/library/cc722060(v=ws.10).aspx

Step 2: Set the required permissions for backing up TPM password information

Next, we need to add an access control entry (ACE) so that backing up TPM recovery information is possible.

Head over to the following Microsoft document and download each of the VBS scripts they have displayed: Save the following VBS scripts from the following website: https://technet.microsoft.com/en-us/library/dn466534.aspx#Sample scripts

  1. Ensure you are on one of your domain controllers
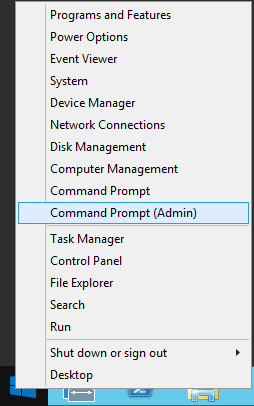
  2. Open up a command prompt as an administrator
    Server 2012 - Administrative Command Prompt
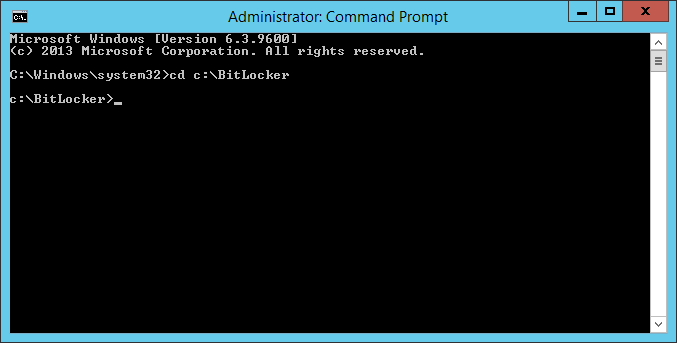
  3. Navigate to your BitLocker folder
    BitLocker Folder C Drive
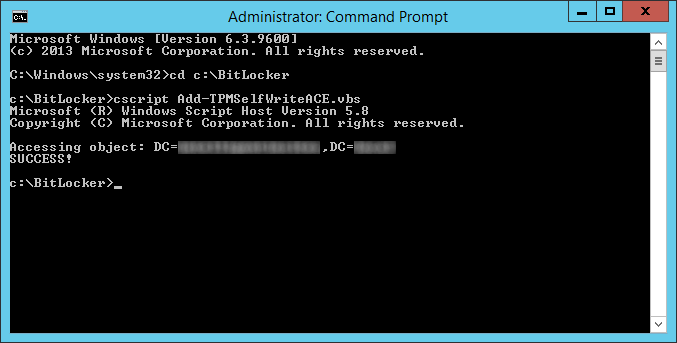
  4. Execute the following command on your domain controller
    1. cscript Add-TPMSelfWriteACE.vbs
      cscript add-tpmselfwriteace for bitlocker
  5. Delegate msTPM-OwnerInformation
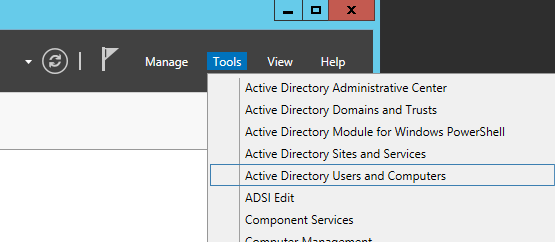
    1. Open up Active Directory Users and Computers
      Server Manager - Active Directory Users and Computers
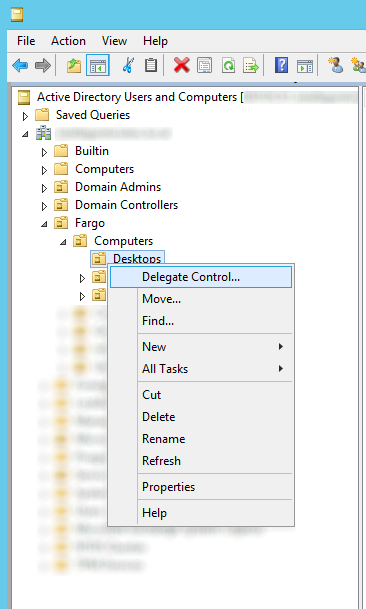
    2. Navigate to the OU that stores your computers, right click, and select Delegate Control...
      Active Directory Users and Computers - Computers - Delegate Control
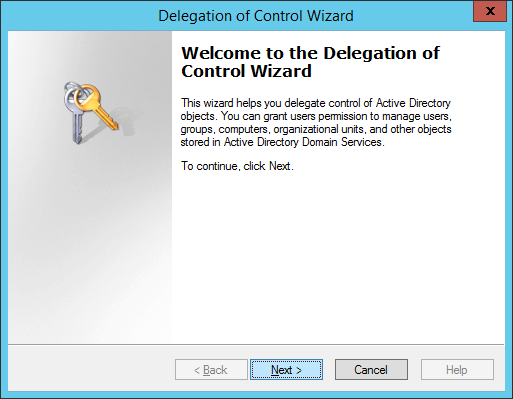
    3. Click Next > button on the welcome screen
      Delegation of Control Wizard - Welcome
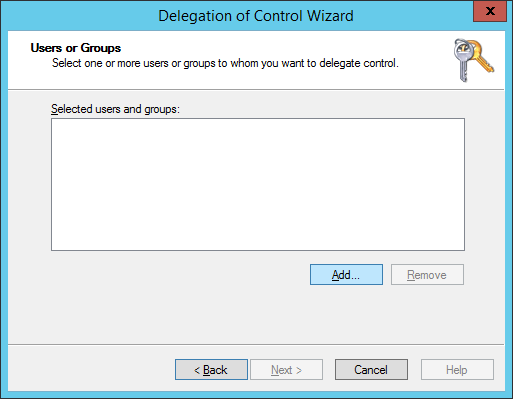
    4. Click the Add... button
      Delegation of Control Wizard - Users or Groups - Add
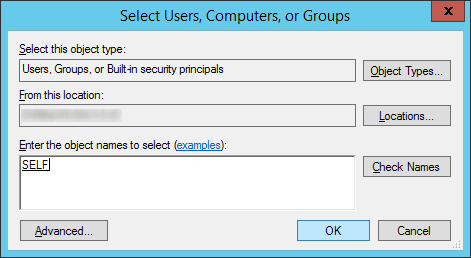
    5. Type in SELF, hit the Check Names button, and click OK
      Delegation of Control Wizard - Users or Groups - Add - SELF
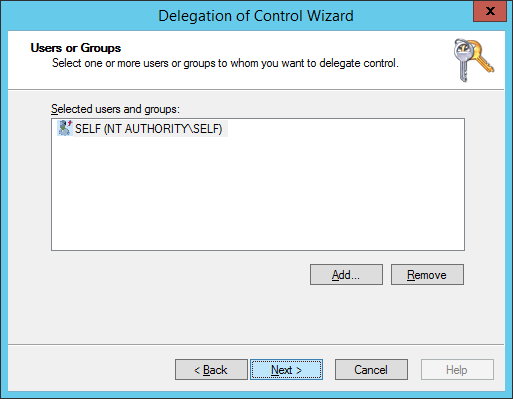
    6. Click Next >
      Delegation of Control Wizard - Users or Groups - Add - SELF - Next
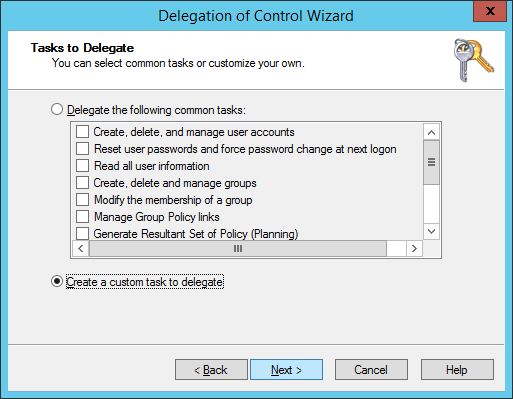
    7. Select Create a custom task to delegate and click Next >
      Delegation of Control Wizard - Tasks to Delegate - Create a custom task to delegate
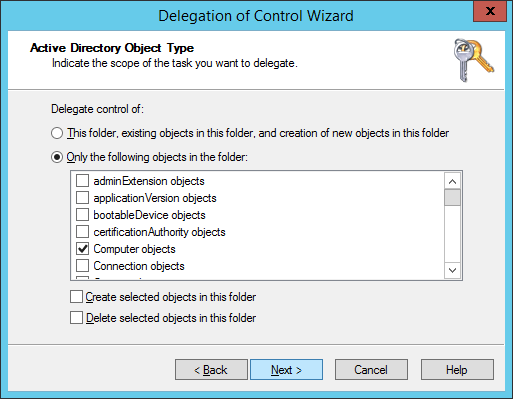
    8. Check Only the following objects in the folder, check Computer objects, click Next >
      Delegation of Control Wizard - Active Directory Object Type - Only the following objects in the folder - Computer Objects
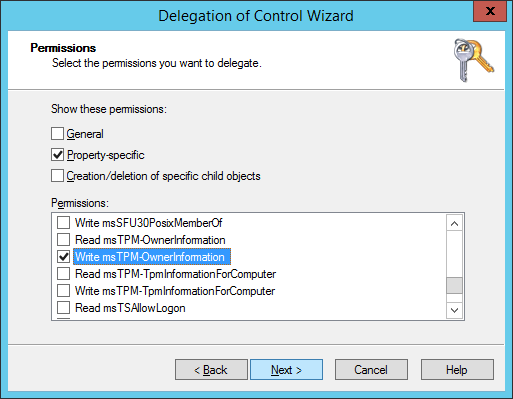
    9. Check Property-specific, scroll down and find Write msTPM-OwnerInformation and click Next >
      Delegation of Control Wizard - Permissions - Property-specific - Write msTPM-OwnerInformation
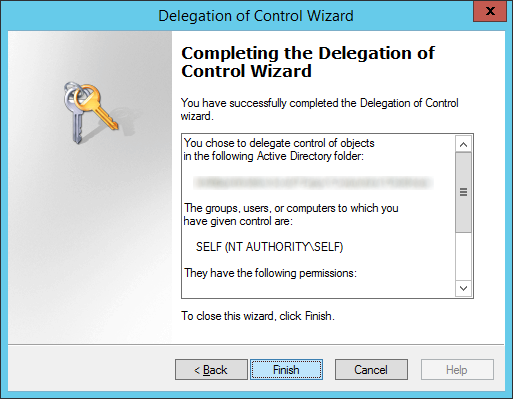
    10. Click Finish
      Delegation of Control Wizard - SELF - Finish

Step 3: Configure group policy to back up BitLocker and TPM recovery information to Active Directory

In this step, we will push out the actual policy that tells the machine to push BitLocker and TPM recovery info to Active Directory.  We will try to follow some of Microsoft's best practices on deploying the group policy here: https://technet.microsoft.com/en-us/library/dd875532(WS.10).aspx

  1. Login to your domain controller
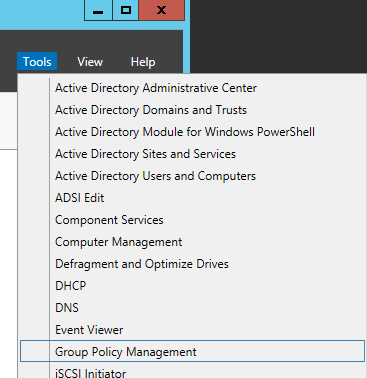
  2. In Server Manager, open up Group Policy Management
    Server Manager - Tools - Group Policy Management
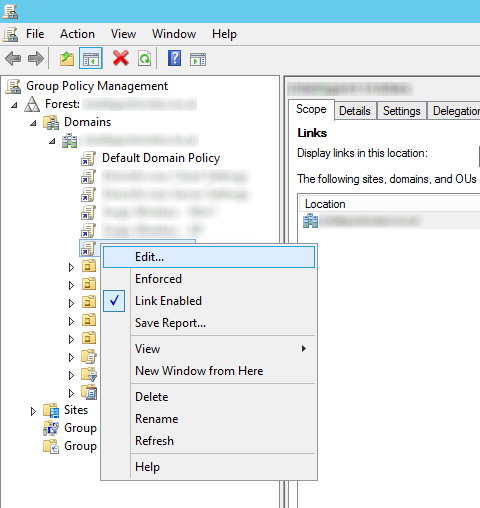
  3. Select the policy you want to edit/deploy for this and hit Edit...
    Group Policy Management - Edit
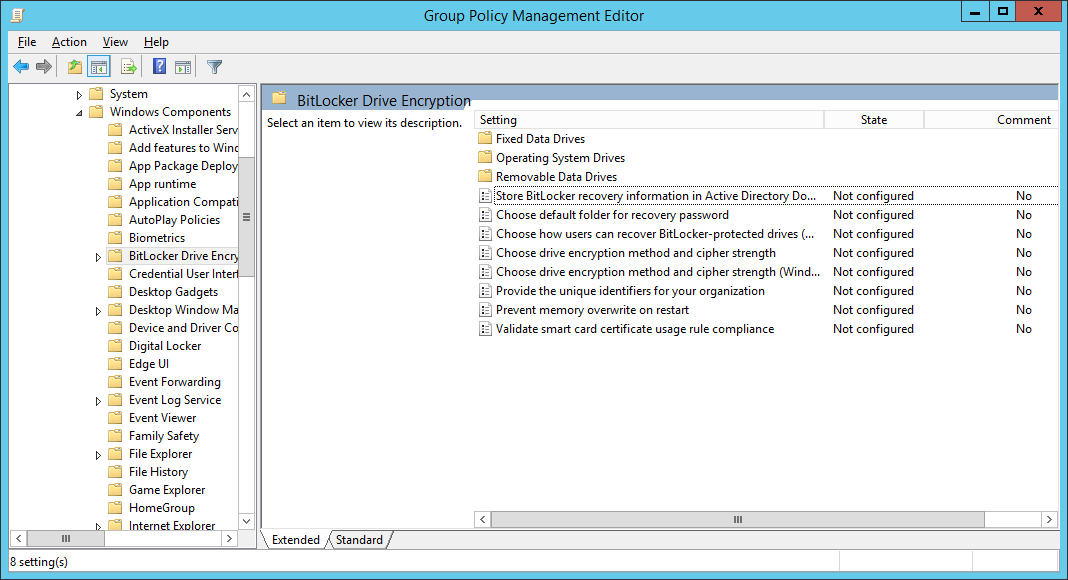
  4. Expand Computer Configuration, expand Policies, expand Administrative Templates, open Windows Components, and then select BitLocker Drive Encryption
    Group Policy Management Editor - Computer - Configuration - Administrative Templates - Windows Components - BitLocker Drive Encryption
  5. Follow the below configuration for each policy (most of these are Microsoft's best practices with a few notes I have made in the Settings)
    CATEGORY SETTING NAME SETTING
    Global Store BitLocker recovery information in Active Directory Domain Services  Set to enabled, check Require BitLocker backup to AD DS, ensure Recovery passwords and key packages is selected
    Global Choose drive encryption method and cipher strength Set to not configured.
    Global Prevent memory overwrite on restart Set to not configured.
    Global Provide the unique identifiers for your organization Set to enabled, and enter an identifier in the BitLocker identification field (based on what I can tell, you can enter your organization name here).
    Operating system drives Choose how BitLocker-protected operating system drives can be recovered Set to enabled, Allow 48-digit recovery password, Allow 256-bit recovery key, omit recovery options from the BitLocker setup wizard, Store recovery passwords and key packages, Do not enable BitLocker until recovery information is stored to AD DS for operating system drives.For more information about storing BitLocker recovery information in AD DS, see Backing Up BitLocker and TPM Recovery Information to AD DS.
    Operating system drives Configure minimum PIN length for startup Set to enabled, and require a personal identification number (PIN) of at least seven numerals.
    Operating system drives Require additional authentication at startup Set to enabled, and require the use of a startup PIN with a Trusted Platform Module (TPM).
    Fixed data drives Choose how BitLocker-protected fixed drives can be recovered Set to enabled, Allow 48-digit recovery password, Allow 256-bit recovery key, omit recovery options from the BitLocker setup wizard, Store recovery passwords and key packages, Do not enable BitLocker until recovery information is stored to AD DS for operating system drives.
    Fixed data drives Configure use of passwords for fixed data drives If your organization does not have a public key infrastructure (PKI), set to enabled, require password complexity, and set a minimum password length of at least 12 characters.
    Fixed data drives Configure use of smart cards on fixed data drives If your organization has a PKI, set to enabled, and require the use of smart cards with fixed data drives.
    Removable data drives Choose how BitLocker-protected removable drives can be recovered Set to enabled, Allow 48-digit recovery password, Allow 256-bit recovery key, omit recovery options from the BitLocker setup wizard, Store recovery passwords and key packages, Do not enable BitLocker until recovery information is stored to AD DS for operating system drives.
    Removable data drives Configure use of passwords for removable data drives Set to enabled, set a minimum password length of at least 12 characters, and require password complexity if your organization does not have a PKI or if there is a need to access BitLocker-protected drives from computers running Windows XP or Windows Vista.
    Removable data drives Configure use of smart cards on removable data drives Set to enabled, and require the use of smart cards with removable data drives if your organization has a PKI.
    Removable data drives Control use of BitLocker on removable drives Set to enabled, Allow users to apply BitLocker protection on removable data drives, and uncheck Allow users to suspend and decrypt BitLocker protection on removable data drives.
    Removable data drives Deny write access to removable data drives not protected by BitLocker Set to enabled, and Do not allow write access to devices configured in another organization.

    noteNOTE
    This policy cannot be enabled if your organization uses recovery keys or startup keys. Recovery keys and startup keys must be stored on unencrypted USB drives.
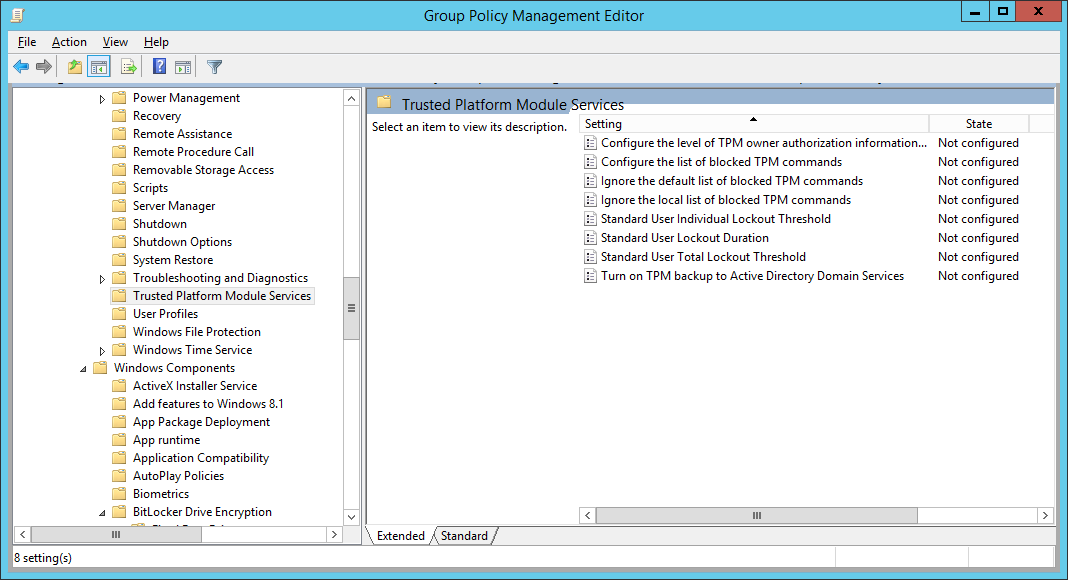
  6. Next, configure Group Policy to backup the TPM owner information; open Computer Configuration, open Administrative Templates, open System, and then open Trusted Platform Module Services
    Group Policy Management Editor - Computer - Configuration - Administrative Templates - System - Trusted Platform Module Services
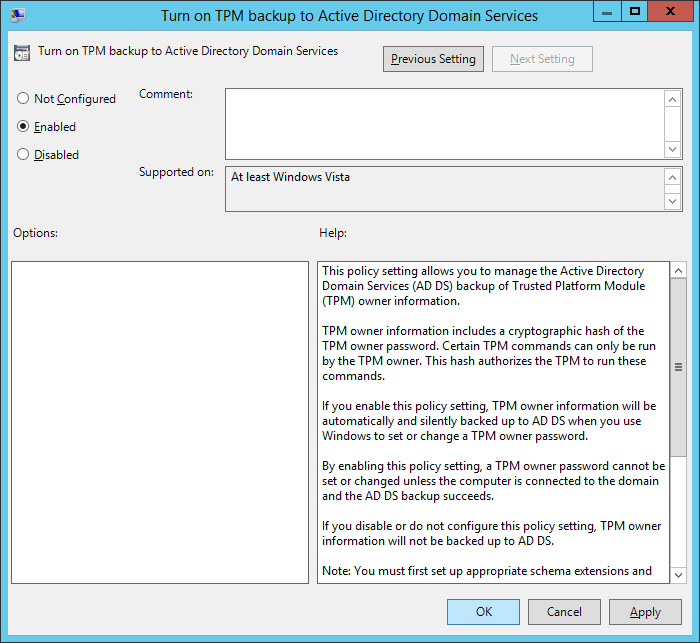
  7. Double-click Turn on TPM backup to Active Directory, check Enabled, and click OK
    Group Policy Management Editor - Computer - Configuration - Administrative Templates - System - Trusted Platform Module Services - Turn on TPM backup to ADDS - Enabled

    1. Note: If you are on Server 2008 R2, make sure you select Require TPM backup to AD DS.  Based on what I can find, if you are on Server 2012 R2, this option has been removed.
  8. Define a BitLocker Drive Encryption Data Recovery Agent
    1. Open Computer Configuration, open Policies, open Windows Settings, open Security Settings, open Public Key Policies, and right click on BitLocker Drive Encryption and select Add Data Recovery Agent...
    2. Click Next > on the Add Recovery Agent Wizard
    3. Select a Recovery agent and click Next >
      1. If you are using PKI, select the Browse Directory... button and select a user that has been configured with an EFS certificate.  I found this guide the most helpful on setting this process up (if anyone has a guide to an official Microsoft document explaining the best practices on configuring this, please drop a comment below: http://technetlibrary.com/use-data-recovery-agent-dra-decrypt-encrypted-files-domain/163)
        1. Here is the only official Microsoft article that I could find that explains the configuration of the Data Recovery Agent: https://technet.microsoft.com/en-us/library/dd875560%28v=ws.10%29.aspx#BKMK_proc_dra
      2. If you don't have a PKI environment setup, you can use a self signed certificate by opening up a command prompt and executing the following command: cipher /r:administrator
        1. Copied from the cipher command: This command generates an EFS recovery key and certificate, then writes them to a .PFX file (containing certificate and private key) and a .CER file (containing only the certificate). An administrator may add the contents of the .CER to the EFS recovery policy to create the recovery key for users, and import the .PFX to recover individual files. If SMARTCARD is specified, then writes the recovery key and certificate to a smart card. A .CER file is generated (containing only the certificate). No .PFX file is generated.
    4. Click Finish on the Add Recovery Agent Wizard

Step 4: Install the BitLocker Password Recovery Viewer

  1. On your domain controller, open up Server Manager
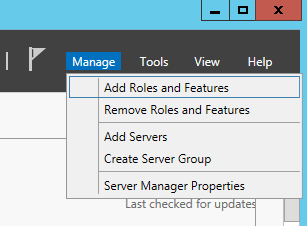
  2. Select Manage, Add Roles and Features
    Server 2012 - Manage - Add Roles and Features
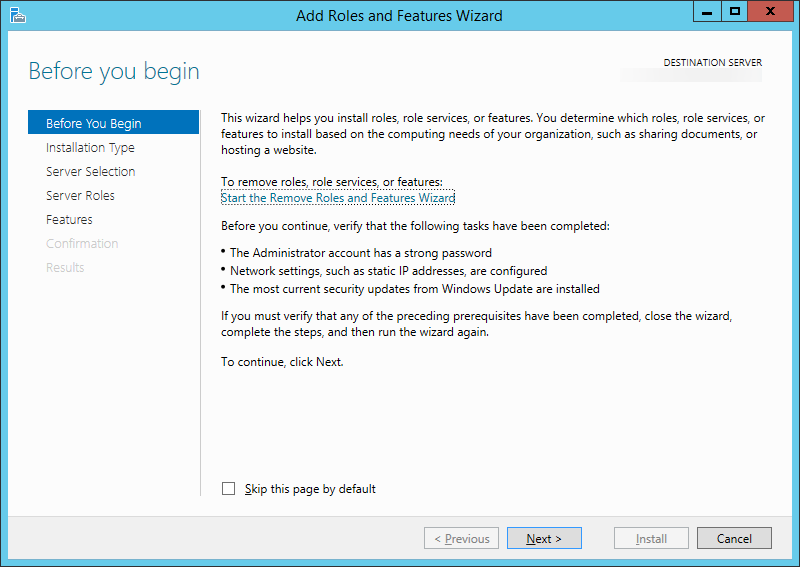
  3. Click Next >
    Add Roles and Features Wizard - Before you begin
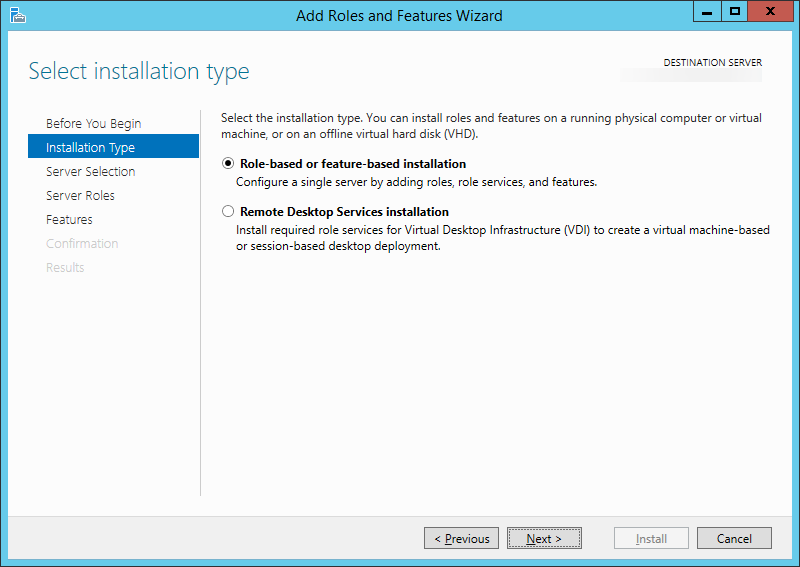
  4. Click Next >
    Add Roles and Features Wizard - Select installation type
  5. Click Next >
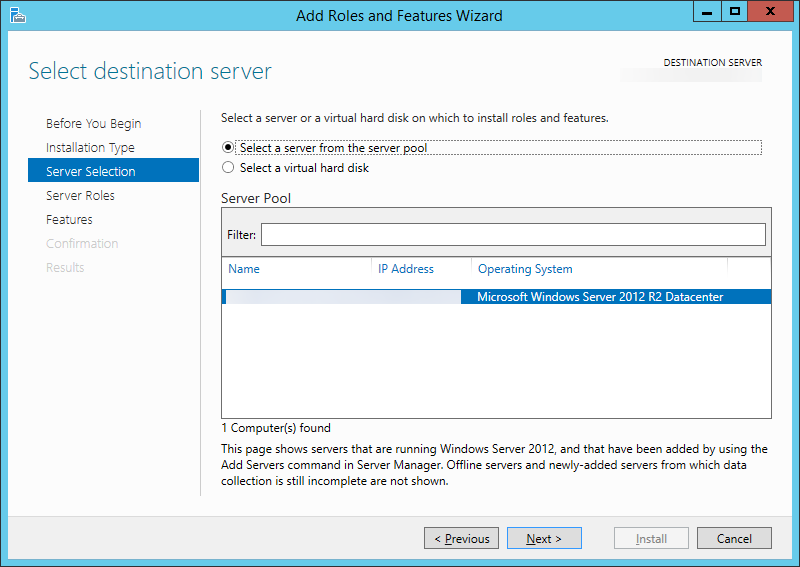
    Add Roles and Features Wizard - Select destination server
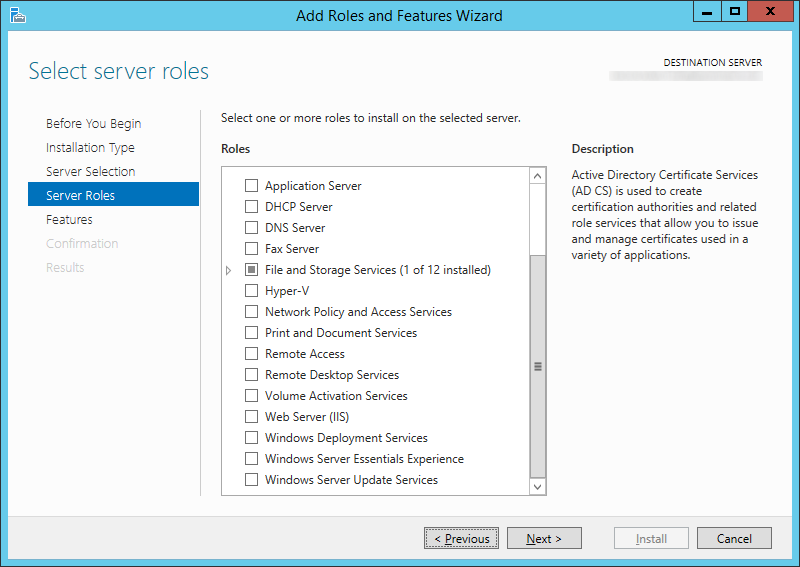
  6. Click Next > (You don't need to add any additional roles)
    Add Roles and Features Wizard - Server Roles - Default
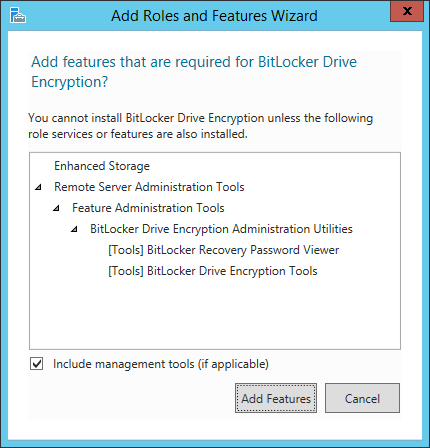
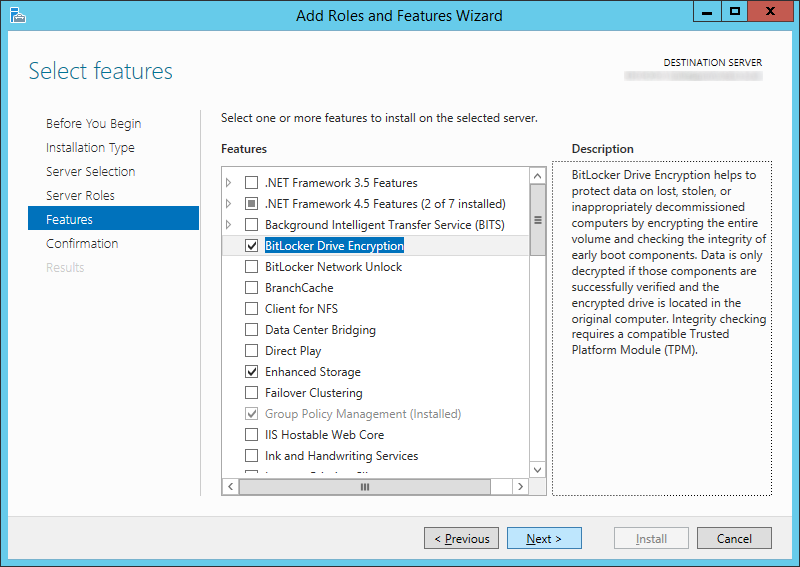
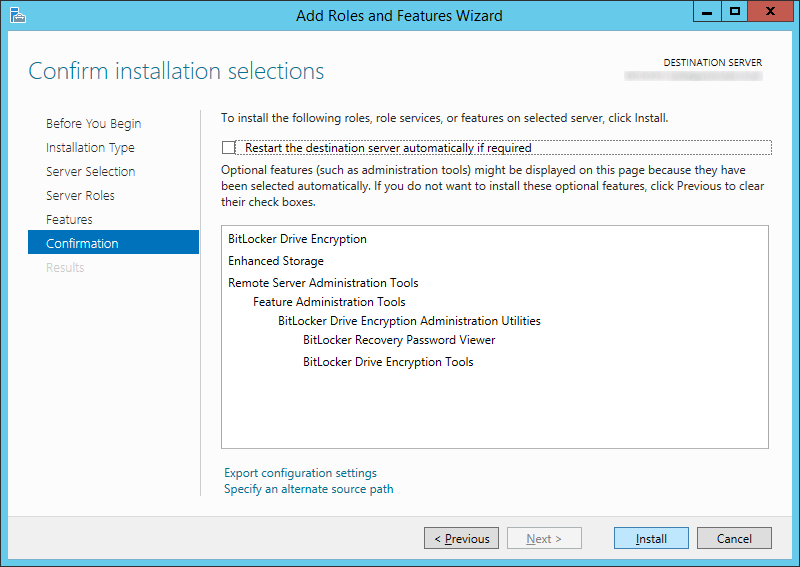
  7. Check BitLocker Drive Encryption (click Add Features when prompted) and click Next >
    Add Roles and Features Wizard - Features - BitLocker Drive Encryption - Add features dialog
    Add Roles and Features Wizard - Features - BitLocker Drive Encryption
  8. Click Install
    Add Roles and Features Wizard - Features - BitLocker Drive Encryption - Install
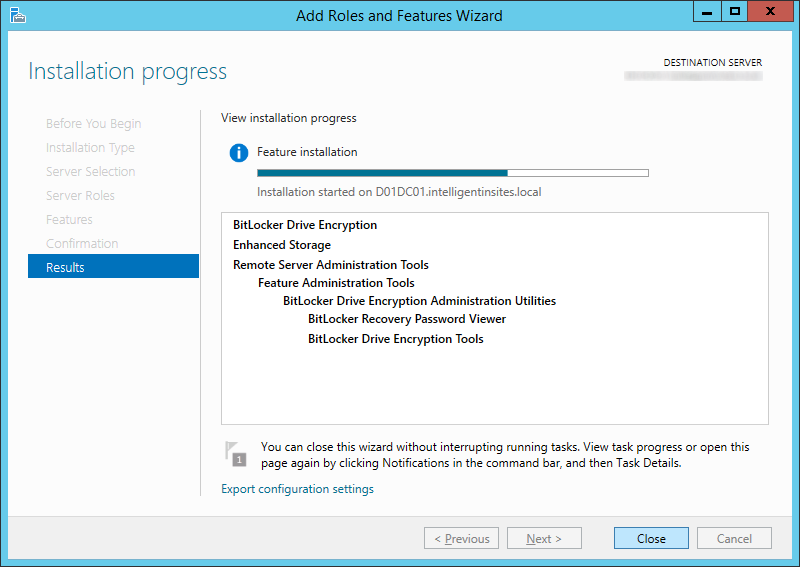
  9. Click Close
    Add Roles and Features Wizard - Features - BitLocker Drive Encryption - Install - Close
  10. Repeat these steps for each domain controller you want to manage BitLocker on

Step 5: Push existing BitLocker protected machines to Active Directory (optional step)

  1. Open an Administrative Command prompt on the client machine that has a BitLocker enabled drive
    Server 2012 - Administrative Command Prompt
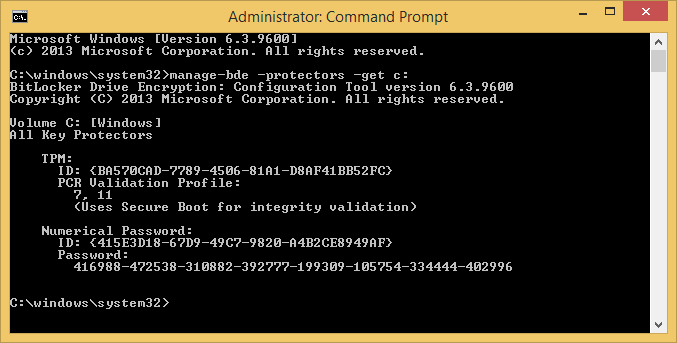
  2. Execute the following command to get your current BitLocker information
    manage-bde -protectors -get c:
    command prompt - manage-bde -protectors -get c
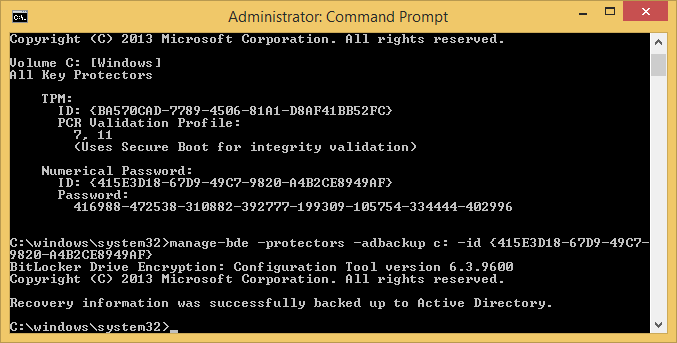
  3. Execute the following command to publish this information to AD
    manage-bde -protectors -adbackup c: -id {yourNumericalPasswordID}
    command prompt - manage-bde -protectors -adbackup c-id
  4. Login to one of the domain controllers you installed the BitLocker Recovery Viewer feature and open up Active Directory Users and Computers
    Server Manager - Active Directory Users and Computers
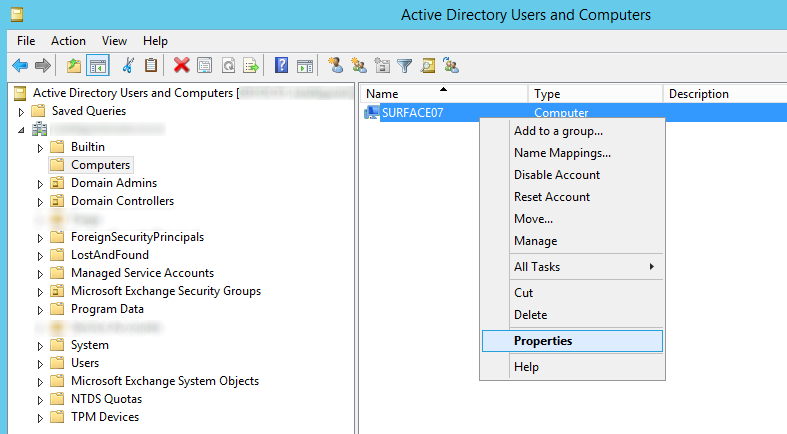
  5. Find your computer object and right click Properties on it
    Active Directory Users and Computers - Computers - Computer - Properties
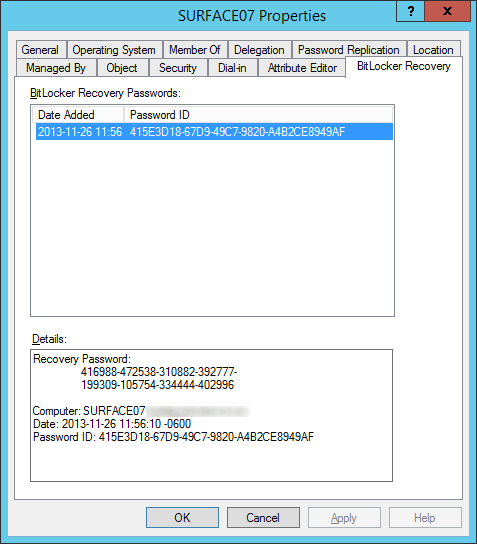
  6. Select the BitLocker Recovery tab and verify the recovery passwords have been published
    Active Directory Users and Computers - Computers - Computer - Properties - BitLocker Recovery Tab


Notes: By default, Windows Vista and greater clients running BitLocker will backup the owner the owner password to the msTPM-OwnerInformation attribute.  If you notice this field is <Not Set> for your Windows 8 and greater machines, ensure you check the TPM Devices container in Active Directory Users and Computers for the recovery information.

To automate the process of looking up the Bitlocker Recovery Password and Owner TPM Recovery Key, I have written a powershell script which can be found here: http://jackstromberg.com/2015/02/exporting-tpm-owner-key-and-bitlocker-recovery-password-from-active-directory-via-powershell/

DirSync (Directory Synchronization) (Windows Azure Active Directory Sync Tool) attributes federated to Office 365

Here is a complete listing of the attributes that are federated to Office 365 by your on-premise Active Directory environment.

An official listing of these attributes can be found on the following technet article: http://social.technet.microsoft.com/wiki/contents/articles/19901.dirsync-list-of-attributes-that-are-synced-by-the-windows-azure-active-directory-sync-tool.aspx

Synced Object Attribute User Group Contact (Src) Description
assistant Read - Read The name of the assistant for an account.
authOrig Read Read Read Relationship that indicates that the mailbox for the target object is authorized to send mail to the source object.
C - - Read Two-letter ISO 3166 [ISO3166] country code.
cn Read Read Read The common name of the object.
co Read - Read The country/region in which the person (user or contact) or company is located.
company Read - Read The person's (user or contact) company name.
countryCode Read - Read The country code for person's (user or contact) language of choice.
department Read - Read The name of the person's (user or contact) department.
description Read Read Read Human-readable descriptive phrases about the object.
displayName Read Read Read The display name for an object, usually the combination of the person's first name, middle initial, and last name.
dLMemRejectPerms Read Read Read Relationship that indicates that members of the target object are not authorized to send mail to the source object.
dLMemSubmitPerms Read Read Read Relationship that indicates that members of the target object are authorized to send mail to the source object.
ExtensionAttribute1 Read Read Read Custom attribute that is defined in the customer on-premises directory.
ExtensionAttribute10 Read Read Read Custom attribute that is defined in the customer on-premises directory.
ExtensionAttribute11 Read Read Read Custom attribute that is defined in the customer on-premises directory.
ExtensionAttribute12 Read Read Read Custom attribute that is defined in the customer on-premises directory.
ExtensionAttribute13 Read Read Read Custom attribute that is defined in the customer on-premises directory.
ExtensionAttribute14 Read Read Read Custom attribute that is defined in the customer on-premises directory.
ExtensionAttribute15 Read Read Read Custom attribute that is defined in the customer on-premises directory.
ExtensionAttribute2 Read Read Read Custom attribute that is defined in the customer on-premises directory.
ExtensionAttribute3 Read Read Read Custom attribute that is defined in the customer on-premises directory.
ExtensionAttribute4 Read Read Read Custom attribute that is defined in the customer on-premises directory.
ExtensionAttribute5 Read Read Read Custom attribute that is defined in the customer on-premises directory.
ExtensionAttribute6 Read Read Read Custom attribute that is defined in the customer on-premises directory.
ExtensionAttribute7 Read Read Read Custom attribute that is defined in the customer on-premises directory.
ExtensionAttribute8 Read Read Read Custom attribute that is defined in the customer on-premises directory.
ExtensionAttribute9 Read Read Read Custom attribute that is defined in the customer on-premises directory.
facsimiletelephonenumber Read - Read Telephone numbers (and, optionally, the parameters) for facsimile terminals.
givenName Read - Read Name strings that are the part of a person's (user or contact) name that is not their surname.
GroupType - Read - Flag attribute indicating the type of group (security, global, etc.)
hideDLMembership - Read - Hide the membership list on a distribution list from senders.
homephone Read - Read The person's (user or contact) main home telephone number.
info Read Read Read "Notes" field on "Telephone" tab of ADUC.
Initials Read - Read Strings of initials of some or all of an individual's names, except the surname(s).
ipPhone Read - Read The TCP/IP address for the telephone.
l Read - Read Names of a locality or place, such as a city, county, or other geographic region.
legacyExchangeDN Read Read Read
mail Read Read Read The list of email addresses for a person (user or contact).
mailnickname Read Read Read
managedBy - Read - Resource/owner relationship, where the source object (a group) is the resource, and the target object is the owner.
manager Read - Read Manager/direct report relationship between two individuals, where the source object is the direct report, and the target object is the manager.
member - Read - Membership of the target object (of class User, Contact, or Group) in the group that is identified as the source object.
middleName Read - Read Additional names for a person (user or contact), for example, middle name, patronymic, matronymic, or other names.
mobile Read - Read The primary mobile phone number for a person (user or contact).
msDS-HABSeniorityIndex Read Read Read
msDS-PhoneticDisplayName Read Read Read
MsExchArchiveGUID Read - -
MsExchArchiveName Read - -
msExchArchiveStatus Read/Write - - Created in the Exchange cloud for "write back" to on-premises when the customer has a cloud archive.
msExchAssistantName Read - Read The name of the assistant for an account.
msExchAuditAdmin Read - -
msExchAuditDelegate Read - -
msExchAuditDelegateAdmin Read - -
msExchAuditOwner Read - -
MsExchBlockedSendersHash Read/Write - Read Populated through an upgrade from Business Productivity Online Standard Suite. Not synced from on-premises.
msExchBypassAudit Read - -
MsExchBypassModerationFromDLMembersLink Read Read Read
MsExchBypassModerationLink Read Read Read
msExchCoManagedByLink - Read -
msExchDelegateListLink Read - -
msExchELCExpirySuspensionEnd Read - -
msExchELCExpirySuspensionStart Read - -
msExchELCMailboxFlags Read - -
MsExchEnableModeration Read Read -
msExchExtensionCustomAttribute1 Read Read Read
msExchExtensionCustomAttribute2 Read Read Read
msExchExtensionCustomAttribute3 Read Read Read
msExchExtensionCustomAttribute4 Read Read Read
msExchExtensionCustomAttribute5 Read Read Read
MsExchGroupDepartRestriction - Read -
MsExchGroupJoinRestriction - Read -
msExchHideFromAddressLists Read Read Read Indicator to control the visibility of a mail recipient for name resolution.
MsExchImmutableID Read - -
msExchLitigationHoldDate Read Read Read
msExchLitigationHoldOwner Read Read Read
MsExchMailboxGuid Read - - The GUID of the user’s mailbox.
msExchMailboxAuditEnable Read - -
msExchMailboxAuditLogAgeLimit Read - -
MsExchModeratedByLink Read Read Read
MsExchModerationFlags Read Read Read
MsExchRecipientDisplayType Read Read Read
msExchRecipientTypeDetails Read Read Read
MsExchRemoteRecipientType Read - -
msExchRequireAuthToSendTo Read Read Read When enabled for a distribution list (DL), unauthenticated users are rejected.
MsExchResourceCapacity Read - -
MsExchResourceDisplay Read - -
MsExchResourceMetaData Read - -
MsExchResourceSearchProperties Read - -
msExchRetentionComment Read Read Read
msExchRetentionURL Read Read Read
MsExchSafeRecipientsHash Read/Write - Read Populated through an upgrade from Business Productivity Online Standard Suite. Not synced from on-premises.
MsExchSafeSendersHash Read/Write - Read Populated through an upgrade from Business Productivity Online Standard Suite. Not synced from on premises.
MsExchSenderHintTranslations Read Read Read
msExchTeamMailboxExpiration Read - -
msExchTeamMailboxOwners Read - -
msExchTeamMailboxSharePointLinkedBy Read - -
msExchTeamMailboxSharePointUrl Read - -
msExchUCVoiceMailSettings Read/Write - -
msExchUsageLocation Read - -
msExchUserHoldPolicies Read/Write - - Litigation Hold allows cloud services to determine which users are under Litigation Hold
msOrg-IsOrganizational - Read -
msRTCSIP-ApplicationOptions Read - -
msRTCSIP-DeploymentLocator Read - Read Fully qualified DNS name of the Microsoft Lync Server 2010 deployment, as specified in the authoritative (customer, on-premises) directory.
msRTCSIP-Line Read - Read The device ID (either the Session Initiation Protocol (SIP) uniform resource identifier (URI) or the TEL URI) of the telephone that the user controls.
msRTCSIP-OwnerUrn Read - -
msRTCSIP-PrimaryUserAddress Read - Read SIP URI for instant messaging, as specified in the authoritative (customer, on-premise) directory.
msRTCSIP-UserEnabled Read - Read Indicates whether the user is currently enabled for SIP instant messaging, as specified in the authoritative (customer, on-premises) directory.
msRTCSIP-OptionFlags Read - Read
objectGUID Read Read Read Key for the object: this key is immutable, even if the object moves from one context to another, for example, as a result of a company merge or split.
oOFReplyToOriginator - Read - Governs whether out-of-office notifications should be sent to a sender of a message to this distribution list (DL).
otherFacsimileTelephone Read - Read A list of alternative facsimile numbers.
otherHomePhone Read - Read A list of alternative home telephone numbers.
otherIpPhone Read - Read A list of alternative TCP/IP addresses for the telephone.
otherMobile Read - Read A list of alternative mobile phone numbers.
otherPager Read - Read A list of alternative pager numbers.
otherTelephone Read - Read A list of alternative office telephone numbers.
pager Read - Read The primary pager number.
photo Read - -
physicalDeliveryOfficeName Read - Read Names that a postal service uses to identify a post office.
postalCode Read - Read Codes that a postal service uses to identify postal service zones.
postOfficeBox Read - Read Postal box identifiers that a postal service uses when a customer arranges to receive mail at a box on the premises of the postal service.
PreferredLanguage Read - - The preferred written or spoken language for a user.
proxyAddresses Read/Write Read/Write Read/Write The address by which a Microsoft Exchange Server recipient object is recognized in a foreign mail system.
PublicDelegates Read/Write Read Read Cross-premises public delegation: allows users to specify delegates for their mailbox.
reportToOriginator - Read - Governs whether to send delivery reports to the message originator when a message that is sent to a group is not delivered. The delivery report lets the group owner know that the message was not delivered.
ReportToOwner - Read -
samAccountName Read - -
sn Read - Read Name strings for the family names of a person (user or contact).
st Read - Read The full names of states or provinces.
streetAddress Read - Read The person's (user or contact) address.
targetAddress Read - Read The destination address for the person (user or contact).
TelephoneAssistant Read - Read
telephoneNumber Read - Read Telephone numbers that comply with the ITU Recommendation E.123.
thumbnailphoto Read - Read Persons Photo - 10kb maximum size limit
title Read - Read The title of a person (user or contact) in the person's organizational context.
unauthOrig Read Read Read Relationship that indicates that the mailbox for the target object is not authorized to send mail to the source object.
url Read - Read The list of alternative web pages.
userAccountControl Read - - Flag attribute to indicate settings.
userCertificate Read Read - Contains certificates used as part of the Exchange SMIME feature set.
UserPrincipalName Read - - The user principal name (UPN) that is an Internet-style logon name for a user, as specified in RFC 822.
userSMIMECertificate Read Read - Contains certificates used as part of the Exchange SMIME feature set.
wWWHomePage Read - Read The primary web page.

PowerShell command to find all disabled users in Active Directory

Here is a quick powershell command to find all users inside of your Active Directory domain that have been marked as disabled (this will exclude disabled computers):

Get-ADUser -Filter {Enabled -eq $false} | FT samAccountName

Additionally, you can specify which additional options you would like to show by change the filter table command we are piping the results to.  For example, this command will show the samAccountName, first name, and last name of the disabled users.

Get-ADUser -Filter {Enabled -eq $false} | FT samAccountName, GivenName, Surname

If you want no formatting whatsoever and have AD spit a bunch of information back at you, try running just the Get-ADUser part with the filter applied.

Get-ADUser -Filter {Enabled -eq $false

The following command below can be used to pull a list of disabled users and computers:

Search-ADAccount -AccountDisabled


Migrating Domain Controllers From Server 2008 R2 to Server 2012 R2

In this article, I have documented the steps I took to update our two domain controllers to Server 2012 R2 from Server 2008 R2.  While this can be considered a tutorial, it is more a reflection of what I did during my migration process.  This guide assumes you have already made backups of your environment, all Windows Active Directory Domain Controllers in the forest are running Server 2003 or later, and we will be recycling (reusing) the same two servers you deployed.  Last, Microsoft strongly recommends we do a clean install and not directly upgrade each server, so we will decommission a DC, reinstall windows, and then redeploy the DC until the entire environment has been upgraded.

  1. Prepare the AD Schema for Server 2012 R2
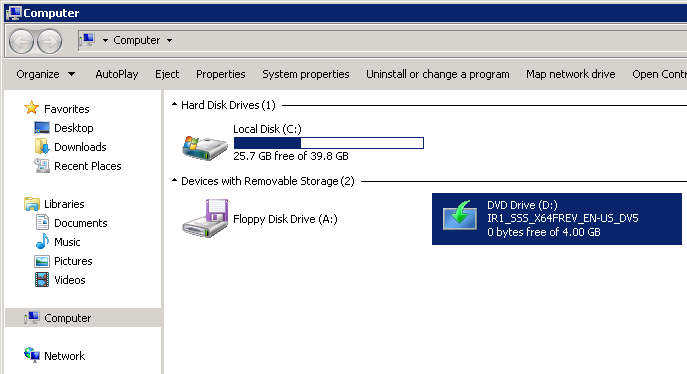
    1. Mount the Server 2012 R2 installation disk on one of your Domain Controllers
      Windows Server 2012 R2 - Mounted DVD
    2. Open up a command prompt with Administrative Privileges and navigate to the /support/adprep folder on the installation media.
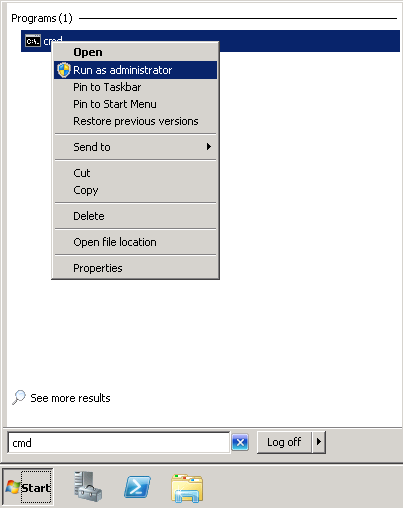
      1. Click Start, type cmd, right click select Run as administrator
        Administrative cmd prompt
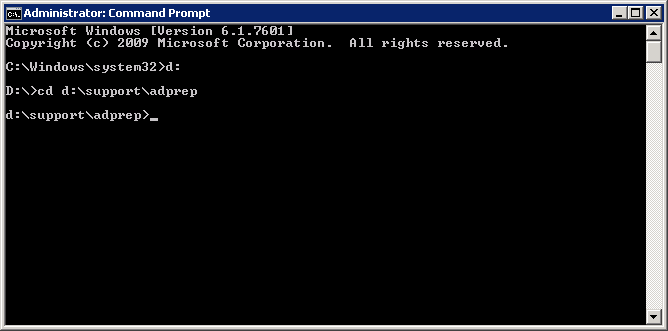
      2. Execute the command: d:
      3. Execute the command: cd d:\support\adprep
      4. Windows Server 2012 R2 - support-adprep folder
    3. Execute the following command (don't close out of this until after we verify the schema version in an upcoming step):
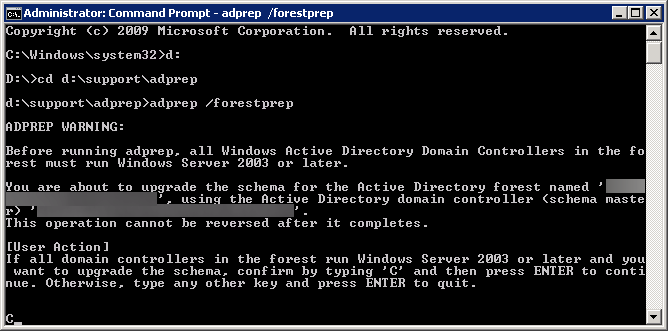
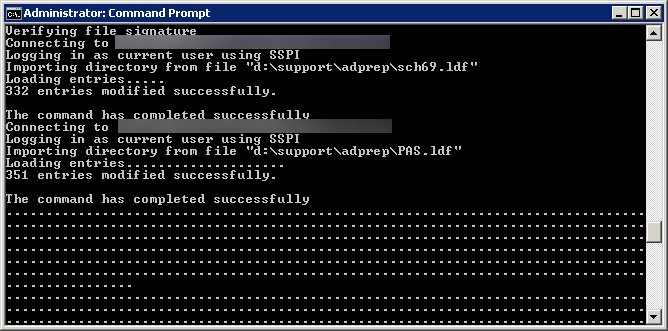
      1. adprep /forestprep
      2. Type the letter C and press the enter key to begin the process
        adprep forestprep
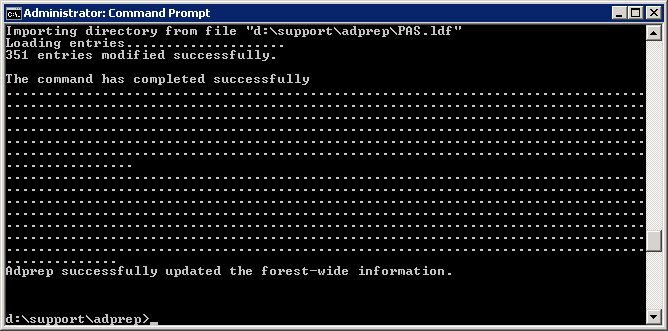
        adprep forestprep success
    4. Execute the following command:
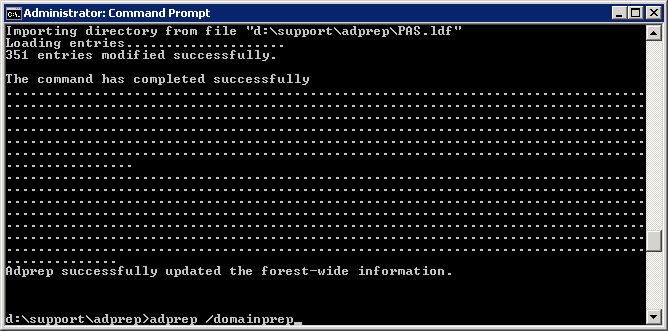
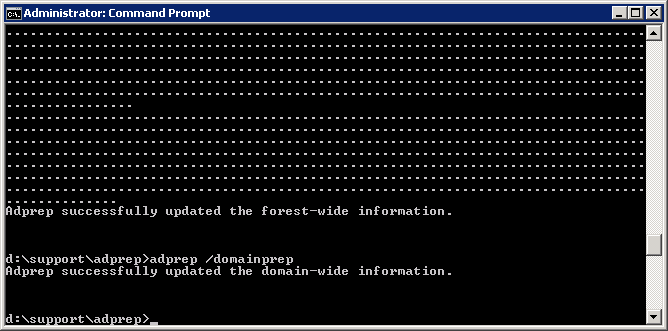
      1. adprep /domainprep
        adprep domainprep
        adprep domainprep success
    5. Verify the schema version has been updated
      1. Click Start and search for regedit
        regedit
    6. Open up regedit and navigate to Computer\HKEY_LOCAL_MACHINE\SYSTEM\CurrentControlSet\services\NTDS\Parameters
    7. Verify the Schema Version value matches the last entry shown in your upgrade results.  In my case, the Schema Version should be 69.
      adprep forestprep schema version
      regedit - schema version
  2. Demote and decommission secondary domain controller
    1. Click Start, Run...
      Start-Run
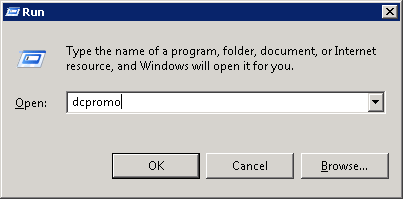
    2. Type dcpromo and click OK
      Run - dcpromo
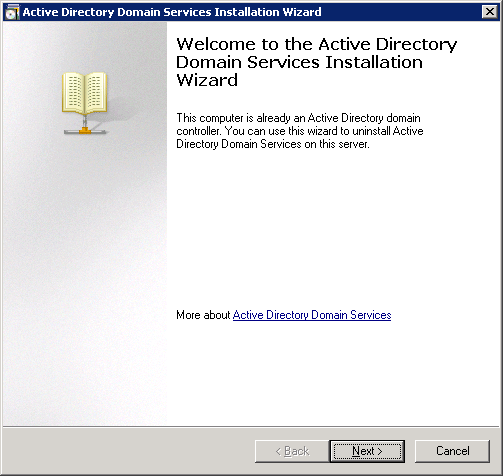
    3. Click Next > on the Welcome page
      Active Directory Domain Services Installation Wizard - Welcome to the Active Directory Domain Services Installation Wizard
    4. If the domain controller has the global catalog service, make sure your primary DC also has the service enabled and click OK.  This can be done by opening up Active Directory Sites and Services and viewing the services for each domain controller.
      Active Directory Domain Services Installation Wizard - Active Directory domain controller is a global catalog server dialog
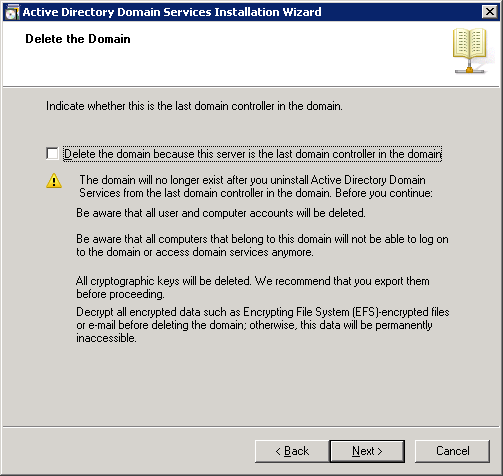
    5. Make sure the Delete this domain because this server is the last domain controller in the domain is UNCHECKED, and click Next >
      Active Directory Domain Services Installation Wizard - Delete the domain because this server is the last domain controller in the domain
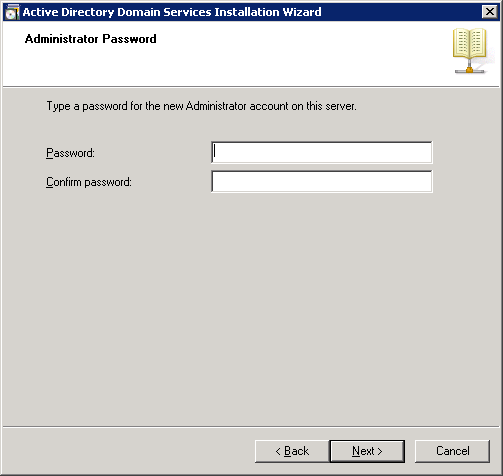
    6. Type in a new password to be used for the Local Administrator account the machine will contain after it is demoted.
      Active Directory Domain Services Installation Wizard - Administrator Password
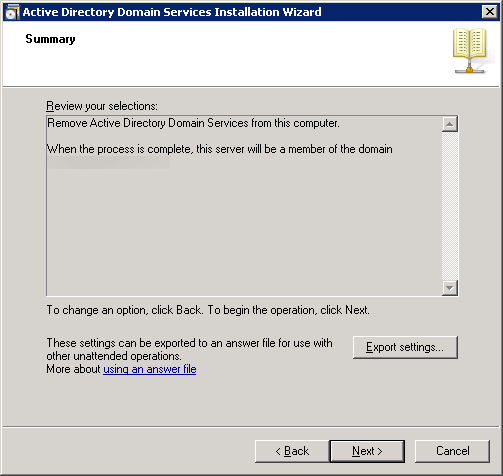
    7. Click Next > on the Summary page
      Active Directory Domain Services Installation Wizard - Summary
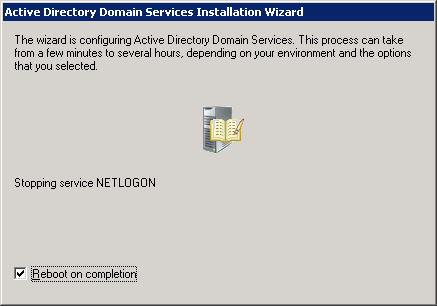
    8. Check the Reboot on completion box to restart the server after the service has been removed
      Active Directory Domain Services Installation Wizard - Reboot on completion
    9. Log back into the DC upon reboot and open up Server Manager
      Server Manager
    10. In Roles Summary, click Remove Roles
      Server Manager - Remove Role
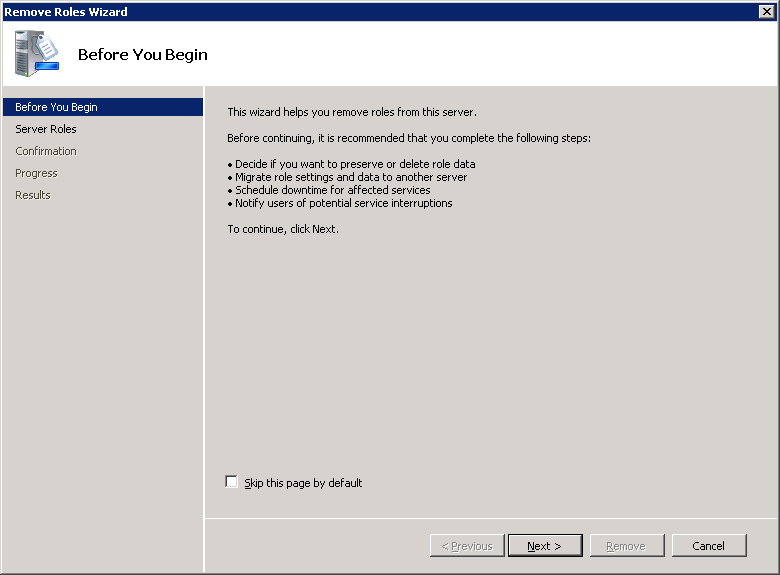
    11. Click Next > on the Before You Begin page
      Remove Roles Wizard - Before You Begin
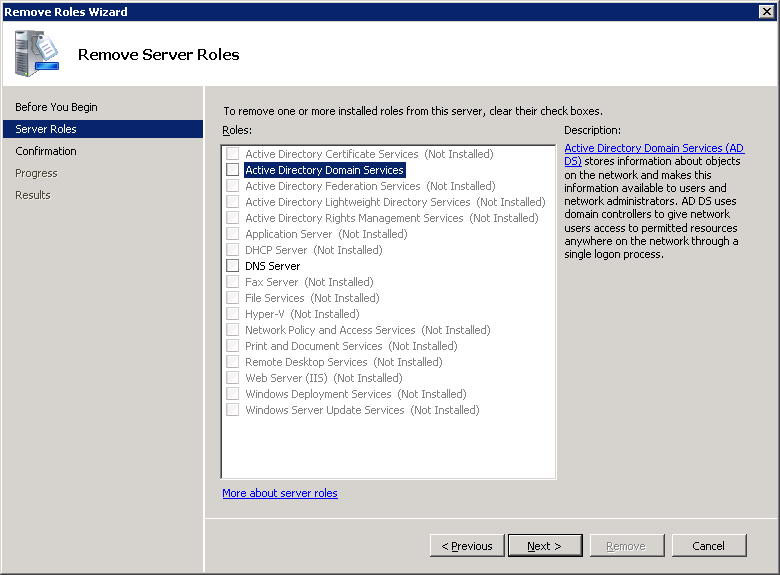
    12. Uncheck Active Directory Domain Services and DNS Server (if the role is installed) and click Next >
      Remove Roles Wizard - Remove Server Roles - Active Directory Domain Services - DNS
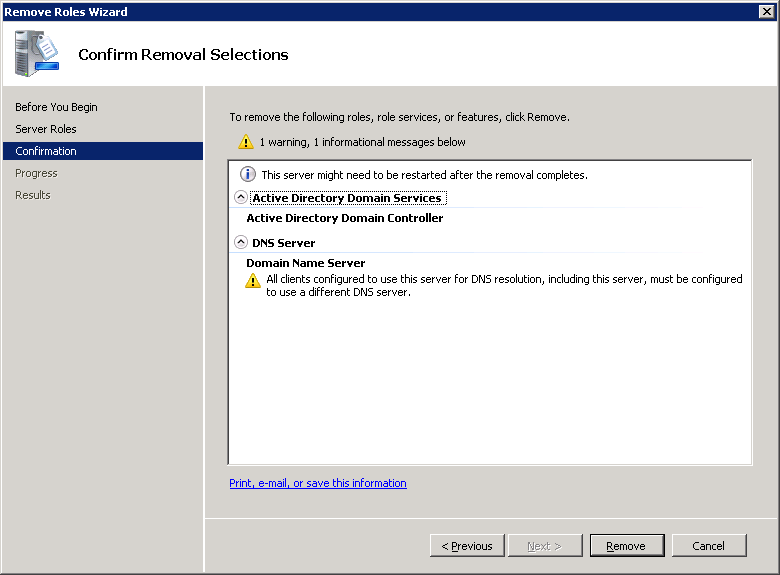
    13. Click Remove
      Remove Roles Wizard - Confirm Removal Selections
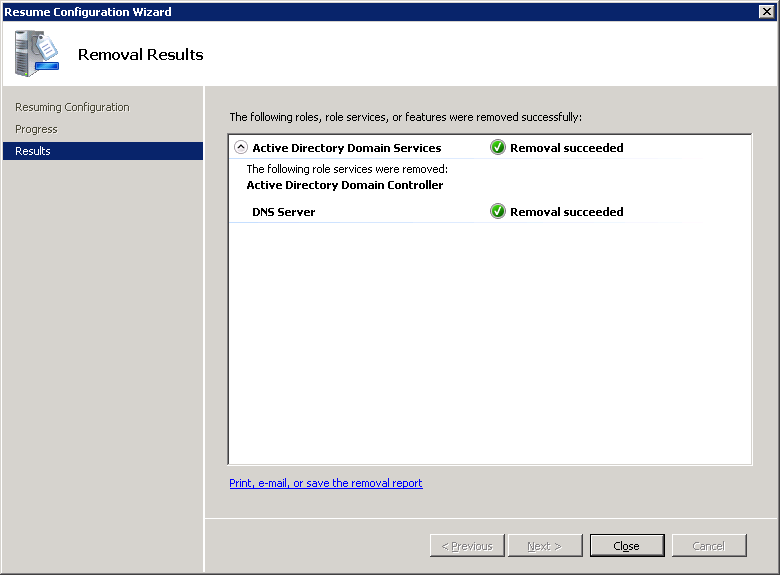
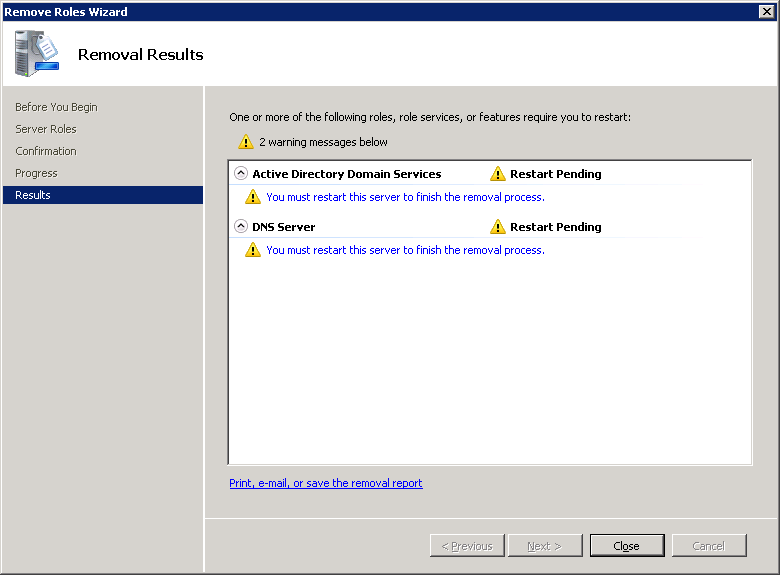
    14. Click Close
      Remove Roles Wizard - Removal Results
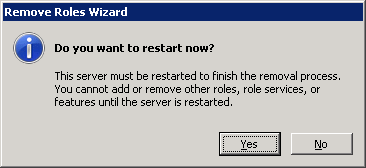
    15. Select Yes on the Do you want to restart now? dialog box
      Remove Roles Wizard - Restart Dialog
    16. Log back into the DC upon reboot and you should greeted by a Removal Results window.  Let the process finish and select Close upon removal success.
      Remove Roles Wizard - Resume Configuration Wizard
    17. Disjoin the machine from the domain
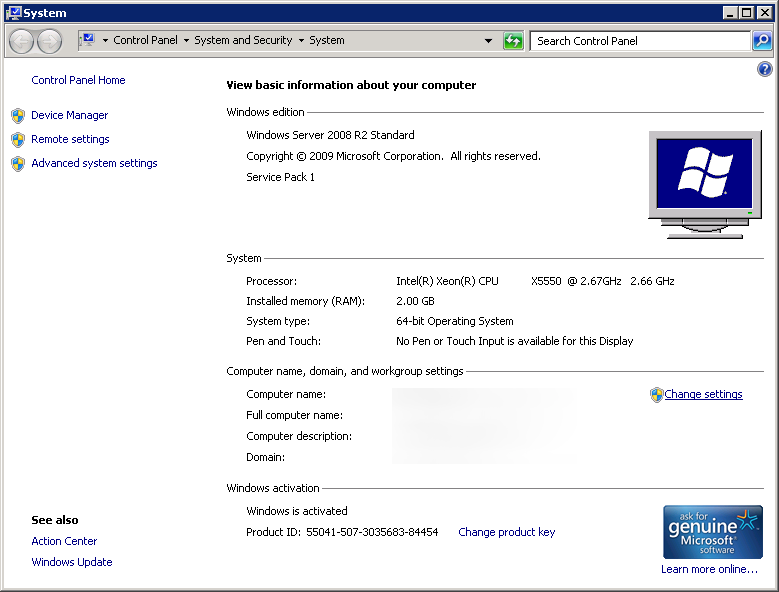
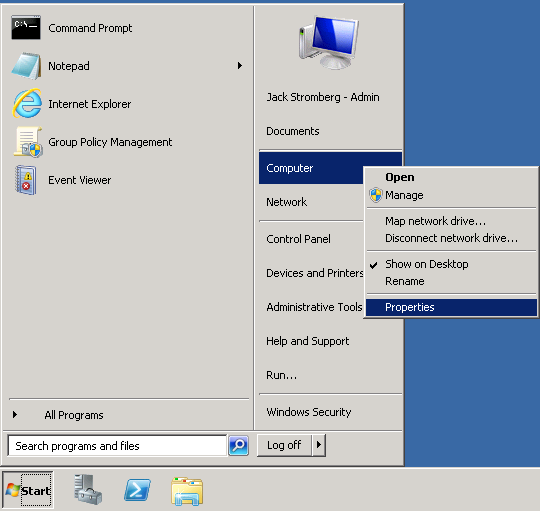
      1. Click Start, right click Computer, select Properties
        Start - Computer - Properties
      2. Click Change settings
        Control Panel - System and Security - System - Change settings
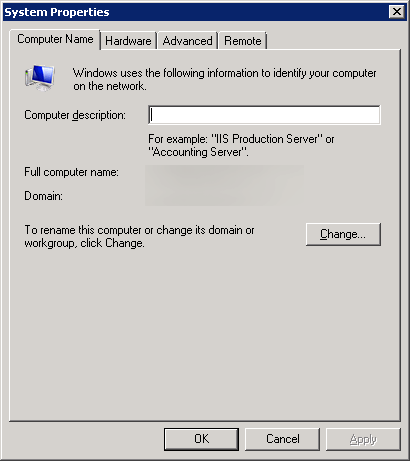
      3. Click Change... on the System Properties page
        System Properties
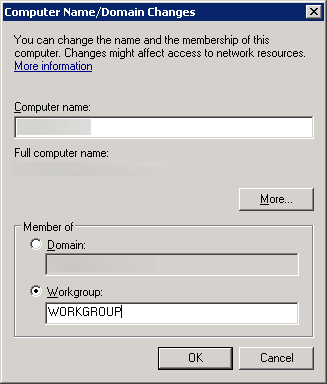
      4. Check Workgroup, type in a workgroup name, and click OK
        Computer Name - Domain Changes - Workgroup
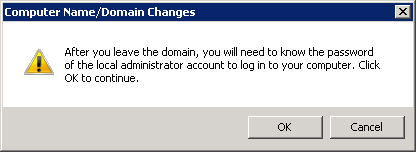
      5. Click OK on the warning dialog
        Computer Name - Domain Changes - Leave domain dialog
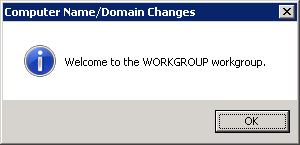
      6. Click OK on the Welcome to the workgroup dialog
        Welcome to the workgroup dialog
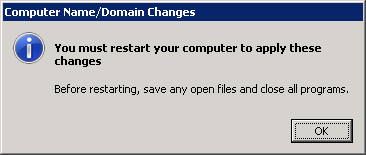
      7. Click OK on the restart dialog
        You must restart your computer to apply these changes
      8. Click Close on the System Properties window
        (oops, forgot to make a screenshot!)
      9. Click Restart Later on the Microsoft Windows dialog box
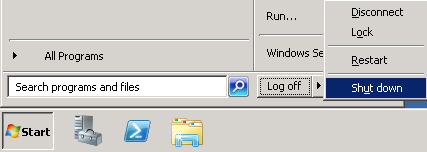
      10. Shutdown the machine
        Start - Shut down
    18. Format the decommissioned machine, reinstall a clean copy of Server 2012 R2, and join the machine to the domain.
  3. Add first Server 2012 R2 Domain Controller
    1. At this point, you should have one Server 2008 R2 Domain Controller and a blank Server 2012 R2 machine joined to the domain ready for the Active Directory services.  If you are at this point, continue on, if not, you might want to read back a couple steps and see where things ventured off course.
    2. Start Server Manager on your new Server 2012 R2 machine.
      Server 2012 R2 - Server Manager
    3. Select Manage in the top right and select Add Roles and Features
      Server 2012 - Manage - Add Roles and Features
    4. Click Next > on the Before you begin screen
      Add Roles and Features Wizard - Before you begin
    5. Click Next > on the Select installation type screen
      Add Roles and Features Wizard - Select installation type
    6. Ensure your new server is selected and click Next >
      Add Roles and Features Wizard - Select destination server
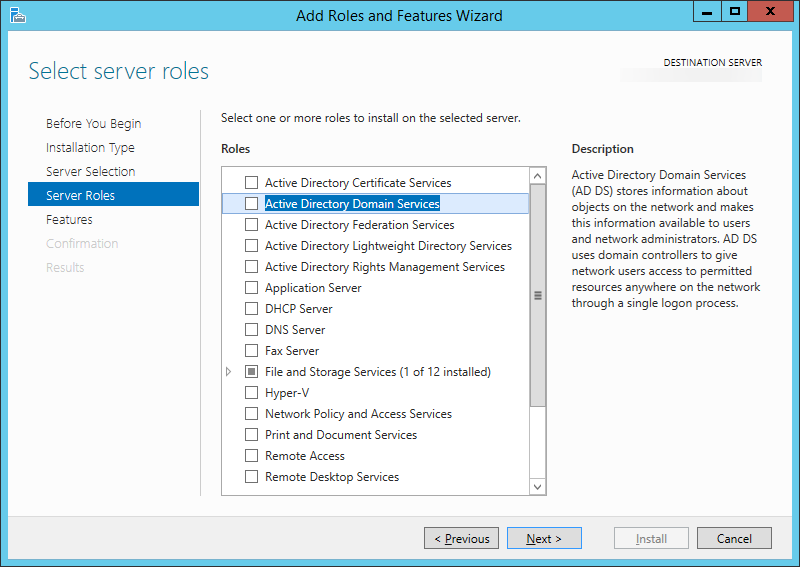
    7. Check the box next to Active Directory Domain Services
      Add Roles and Features Wizard - Select server roles
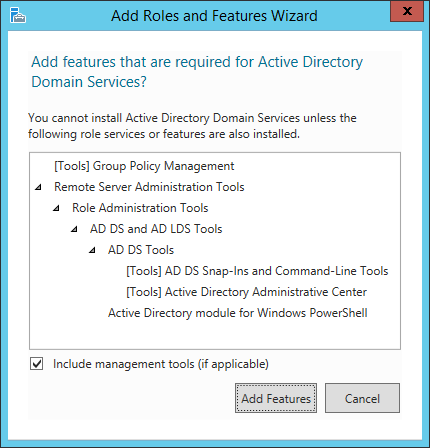
    8. On the Add features that are required for Active Directory Domain Services? dialog, click the Add Features button
      Add Roles and Features Wizard - Add features that are required for Active Directory Domain Services Dialog
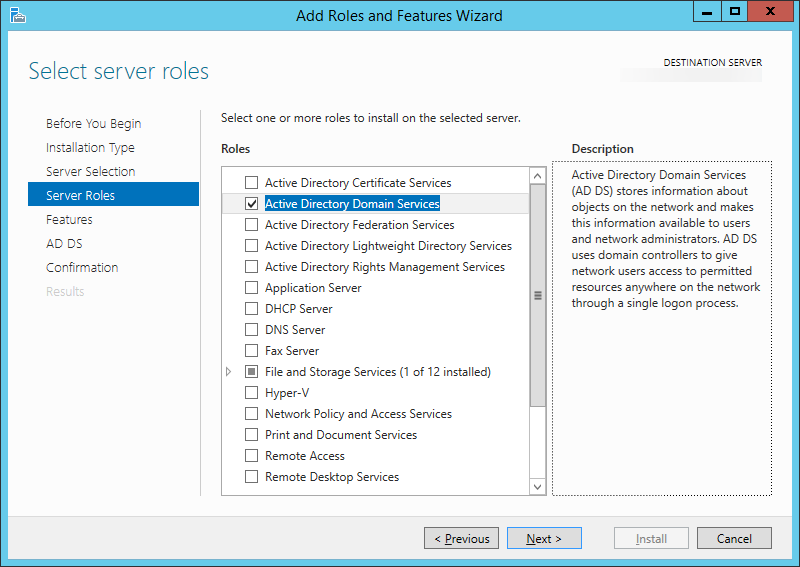
    9. Click Next >
      Add Roles and Features Wizard - Select server roles - Active Directory Domain Services Checked
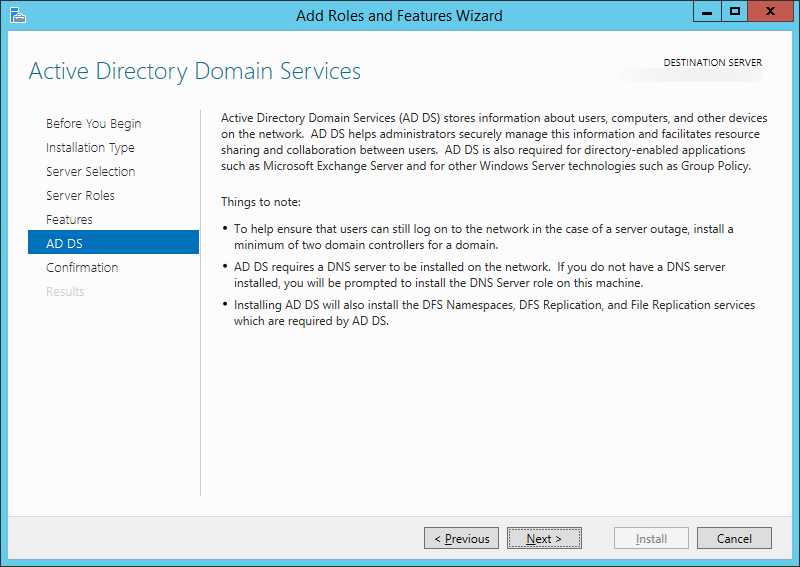
    10. Click Next >
      Add Roles and Features Wizard - Active Directory Domain Services
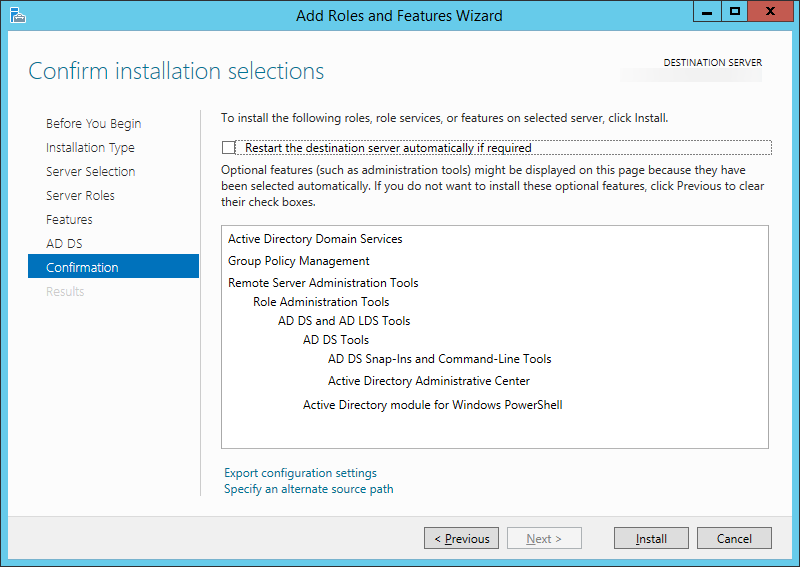
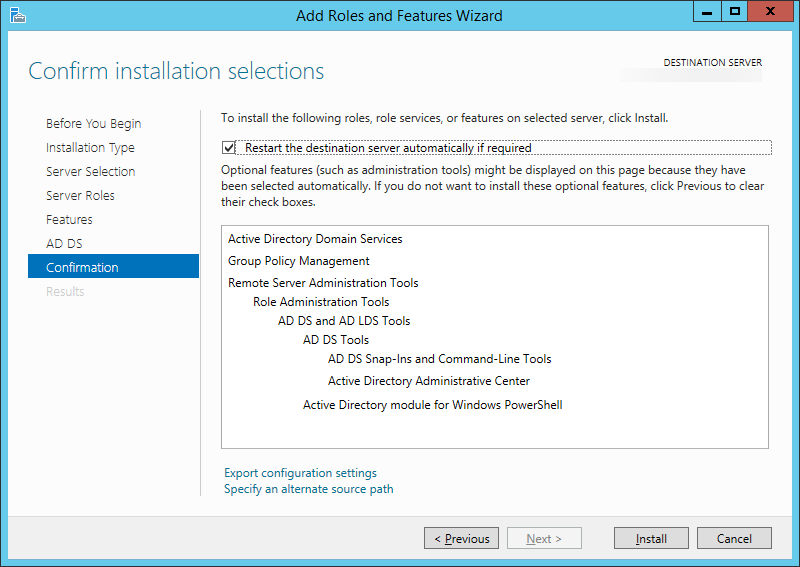
    11. Check the box that says Restart the destination server automatically if required
      (Click Yes on the restart dialog if it pops up)
      Add Roles and Features Wizard - Confirm installation selections
    12. Click the Install button
      Add Roles and Features Wizard - Confirm installation selections - restart
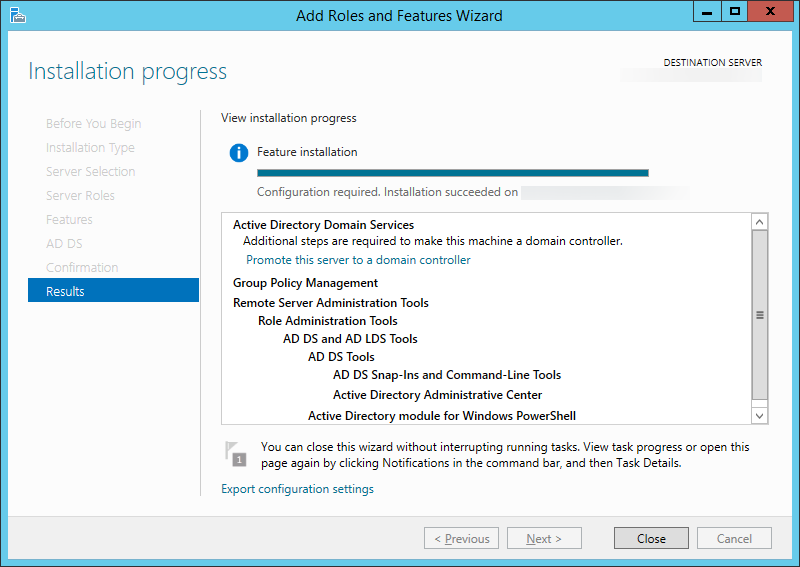
    13. Once the install is done, click the Close button
      Add Roles and Features Wizard - Installation progress
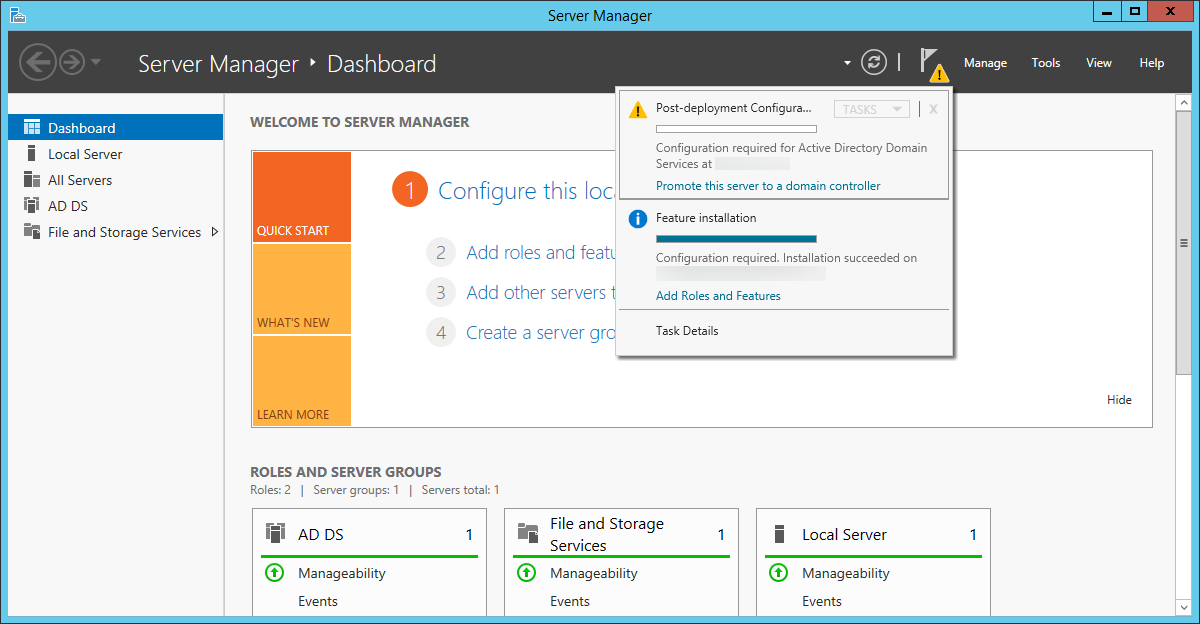
    14. Next, head back to the Server Manager screen and select the warning icon with the flag; then select Promote this server to a domain controller.
      Server Manager - Promote this server to a domain controller
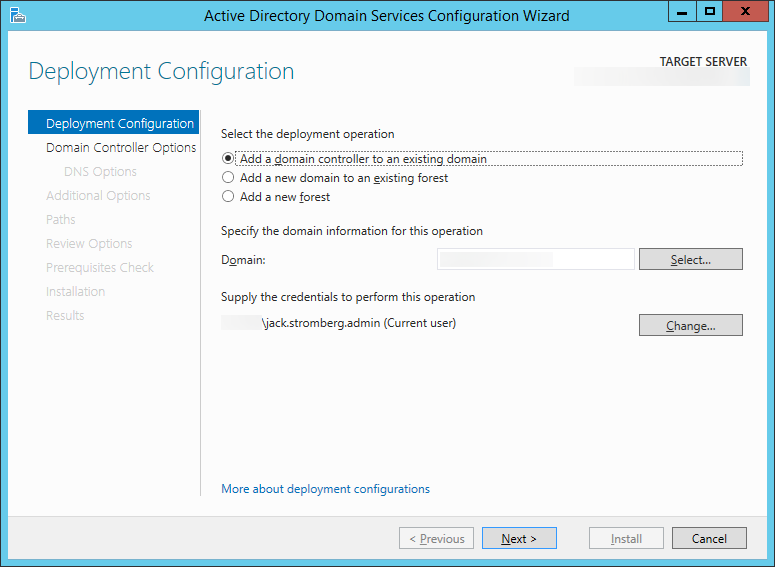
    15. On the Deployment Configuration page, make sure Add a domain controller to an existing domain is checked and hit Next >
      Active Directory Domain Services Configuration Wizard - Deployment Configuration
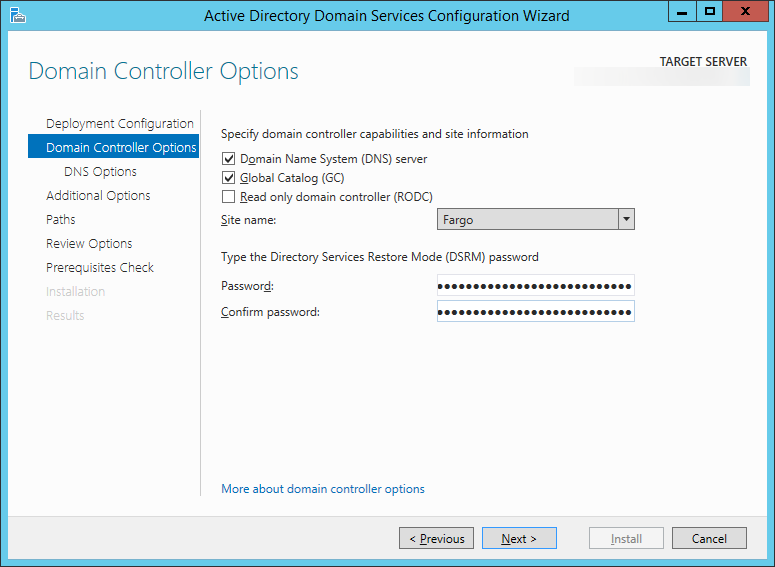
    16. Check Domain Name System (DNS) server, Check Global Catalog (GC), and uncheck Read only domain controller (RODC).  Enter a strong password to be used to access Directory Services Restore Mode and click Next >
      Active Directory Domain Services Configuration Wizard - Domain Controller Options
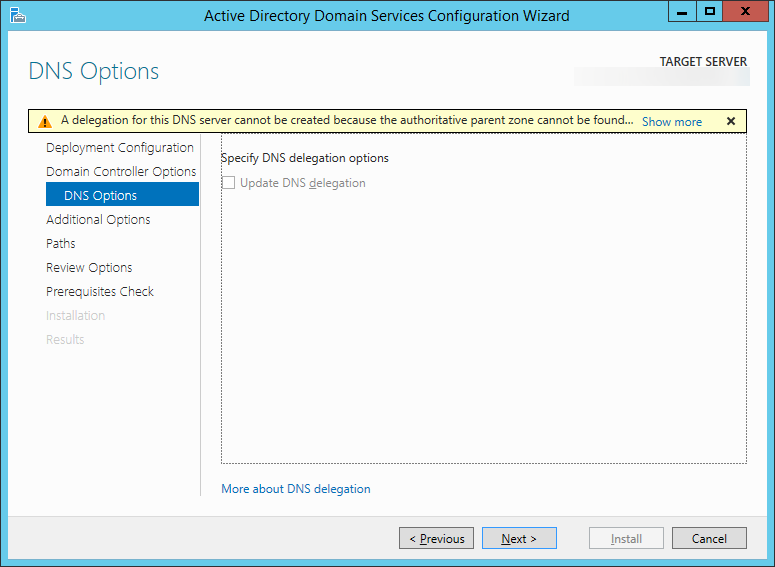
    17. Click Next > on the DNS Options page
      Active Directory Domain Services Configuration Wizard - DNS Options
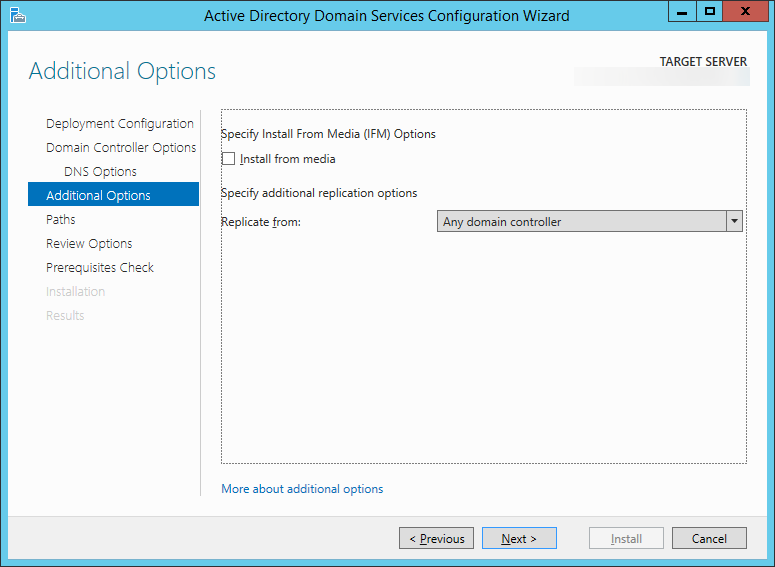
    18. Click Next > on the Additional Options page, or if you would like, you can manually select a domain controller to replicate data from and then hit Next >.
      Active Directory Domain Services Configuration Wizard - Additional Options
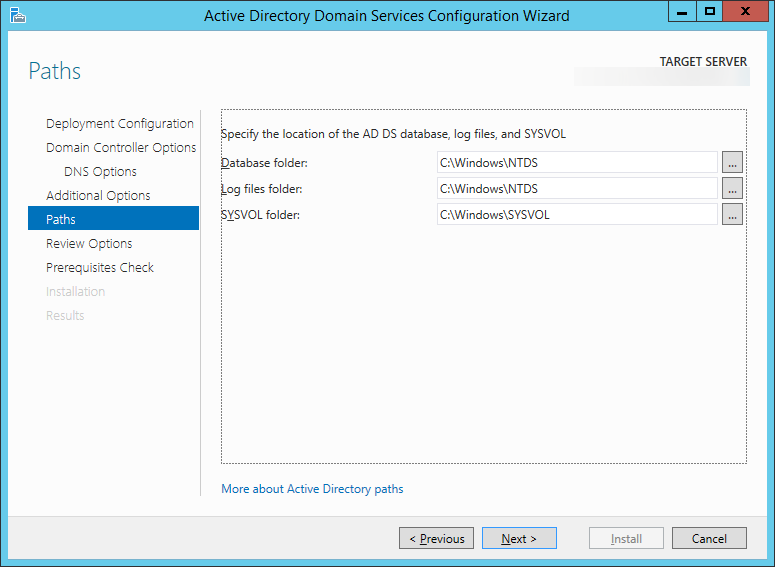
    19. Click Next > on the Paths page
      Active Directory Domain Services Configuration Wizard - Paths
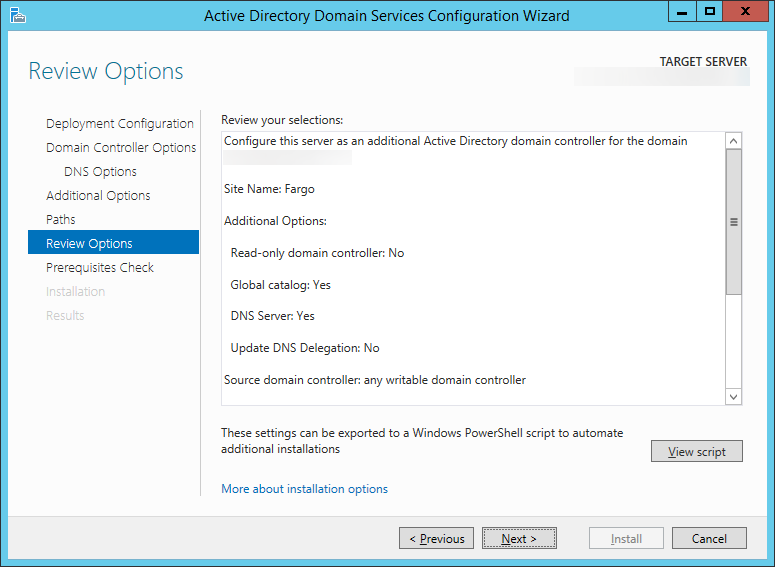
    20. Click Next > on the Review Options page
      Active Directory Domain Services Configuration Wizard - Review Options
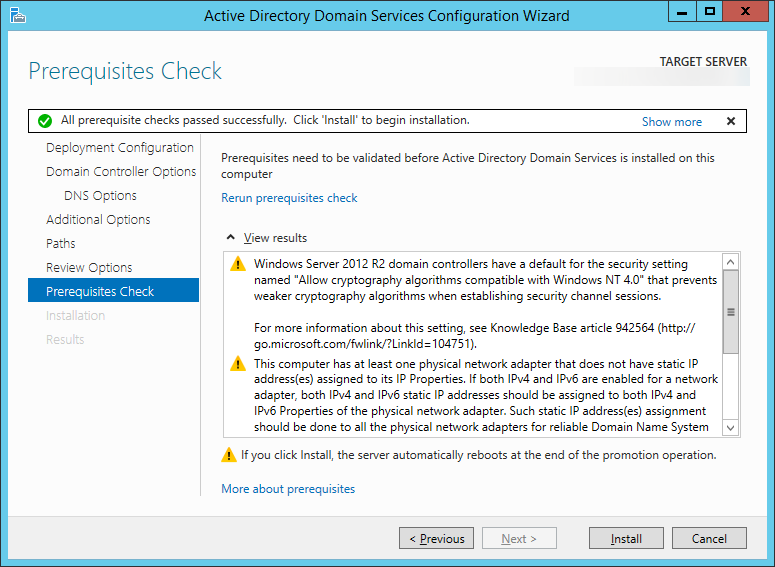
    21. Click Install on the Prerequisites Check page
      Active Directory Domain Services Configuration Wizard - Prerequisites Check
    22. Once the domain controller reboots after installation, open up Server Manager and select Tools, Active Directory Users and Computers
      Server Manager - Active Directory Users and Computers
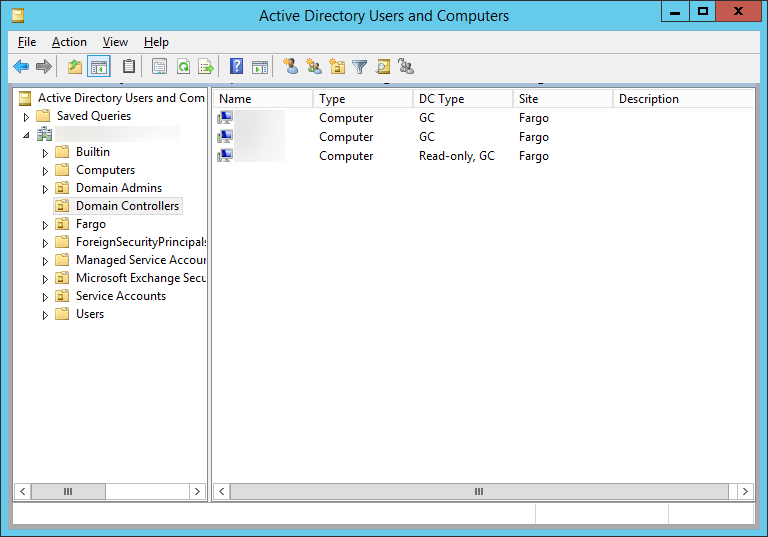
    23. Expand your Domain and select Domain Controllers; ensure your new machine shows up here.
      Active Directory Users and Computers - Domain Controllers
    24. Next, verify DNS works properly
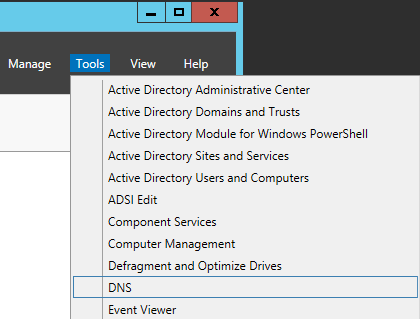
      1. Go back to Server Manager, select Tools, DNS
        Server Manager - DNS
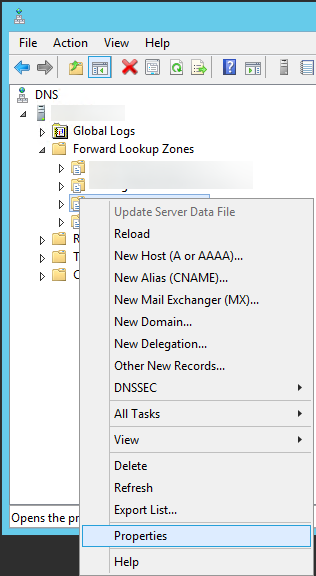
      2. Expand your server, Forward Lookup Zones, and right click on your domain name and select Properties
        DNS - Domain Name - Properties
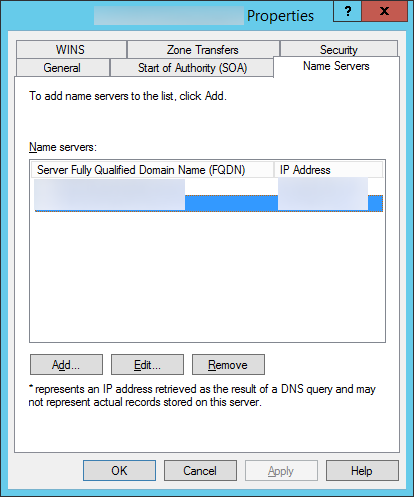
      3. Select the Name Servers tab and ensure all DCs are listed
        DNS - Properties - Name Servers
  4. Next, we need to verify the FSMO (Flexible Single Master Operations) roles are stored on our other server 2008 DC
    1. On the new Server 2012 R2 DC we joined, open up a command prompt with administrative privileges.
      Server 2012 - Administrative Command Prompt
    2. Execute the following command to verify FSMO roles are on our 2008 DC:
      netdom query fsmo
      netdom query fsmo
  5. Next, we need to transfer the FSMO roles from our primary DC to our new one
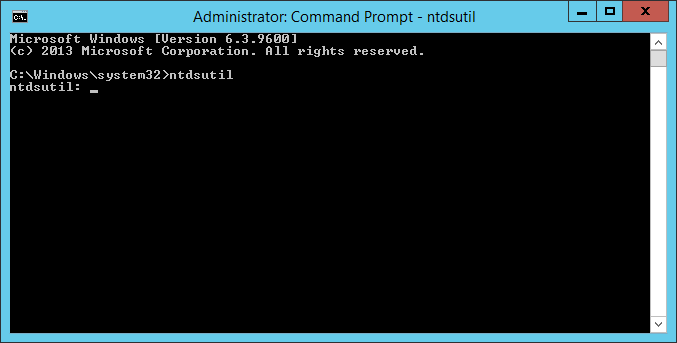
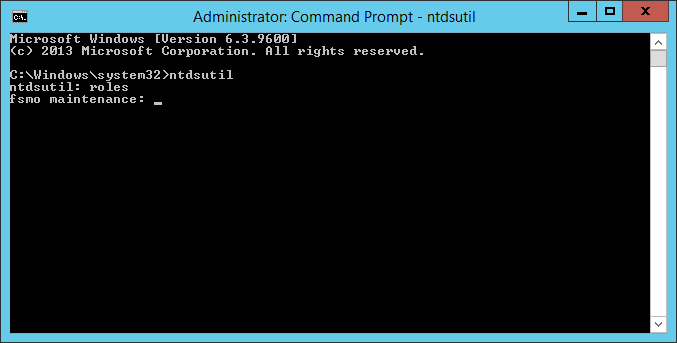
    1. Execute the following command using the same command prompt in the previous steps: ntdsutil
      ntdsutil
    2. Type roles when prompted and hit enter
      ntdsutil - roles
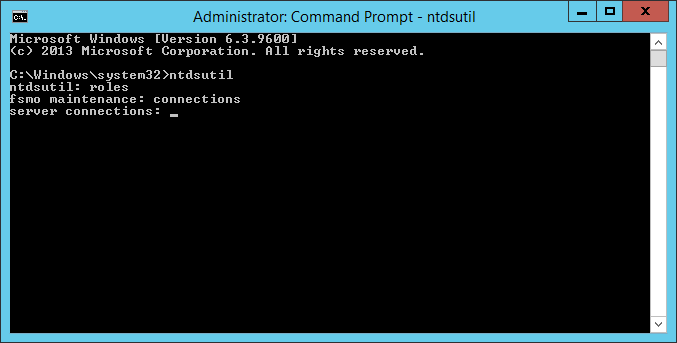
    3. Type connections when prompted and hit enter
      ntdsutil - roles - connections
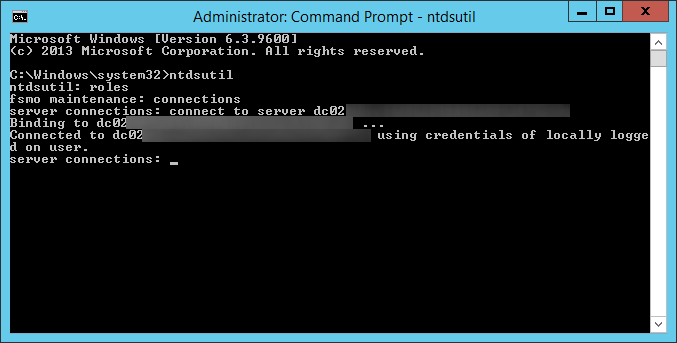
    4. Type connect to server server2012DC.mydomain.com, where server2012DC is the new DC we just deployed, when prompted and hit enter
      ntdsutil - roles - connections - connect to server
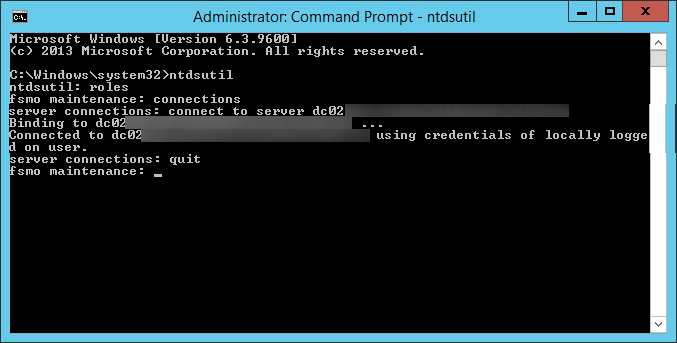
    5. Type quit and hit enter
      ntdsutil - roles - connections - connect to server - quit
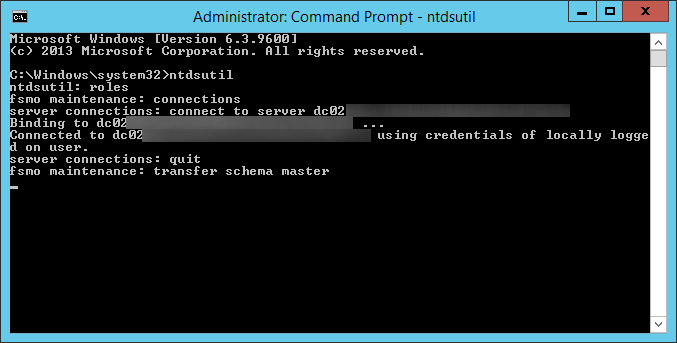
    6. Type transfer schema master and hit enter
      ntdsutil - transfer schema master
    7. Click Yes on the Role Transfer Dialog for the Schema Master role
      Role Transfer Confirmation Dialog - Schema Master
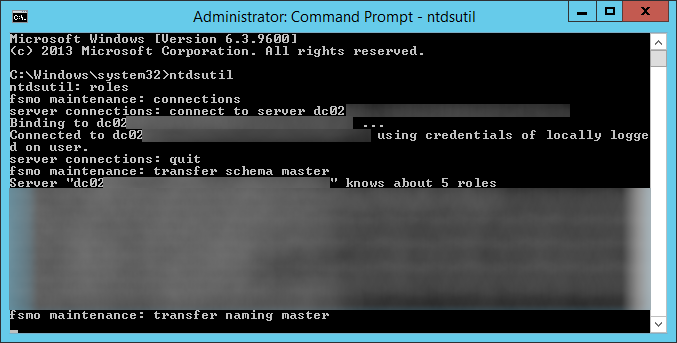
    8. Type transfer naming master and hit enter
      ntdsutil - transfer naming master
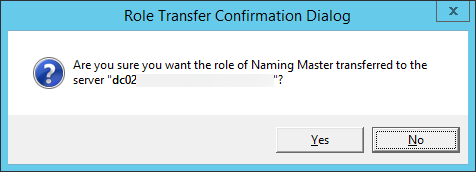
    9. Click Yes on the Role Transfer Confirmation Dialog for the Naming Master role
      Role Transfer Confirmation Dialog - Naming Master
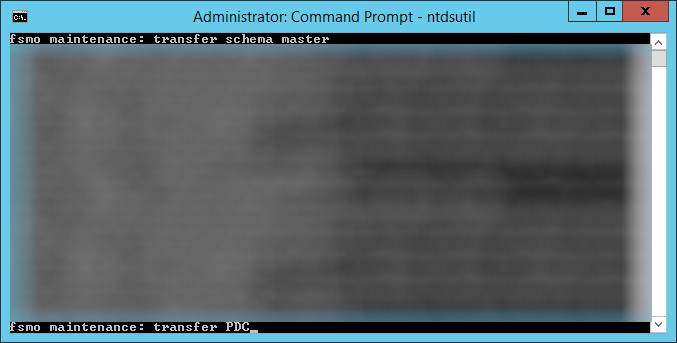
    10. Type transfer PDC and hit enter
      ntdsutil - transfer PDC
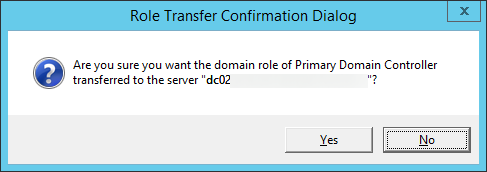
    11. Click Yes on the Role Transfer Configuration Dialog for the Primary Domain Controller role
      Role Transfer Confirmation Dialog - Primary Domain Controller
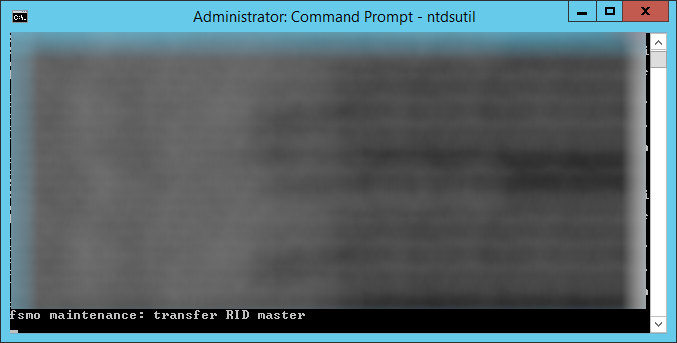
    12. Type transfer RID master and hit enter
      ntdsutil - transfer RID master
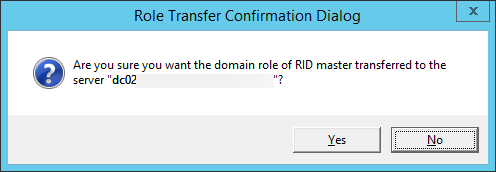
    13. Click Yes on the Role Transfer Configuration Dialog for the RID master role
      Role Transfer Confirmation Dialog - RID master
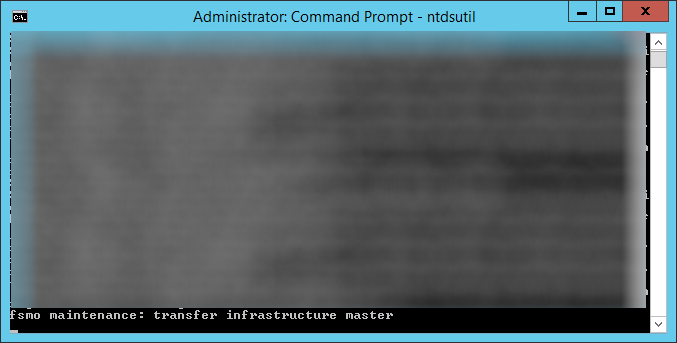
    14. Type transfer infrastructure master and hit enter
      ntdsutil - transfer infrastructure master
    15. Click Yes on the Role Transfer Configuration Dialog for the Infrastructure Master role
      Role Transfer Confirmation Dialog - Infrastructure Master
    16. Type quit and hit enter
      ntdsutil - fsmo maintenance - quit
    17. Type quit and hit enter
      ntdsutil - quit
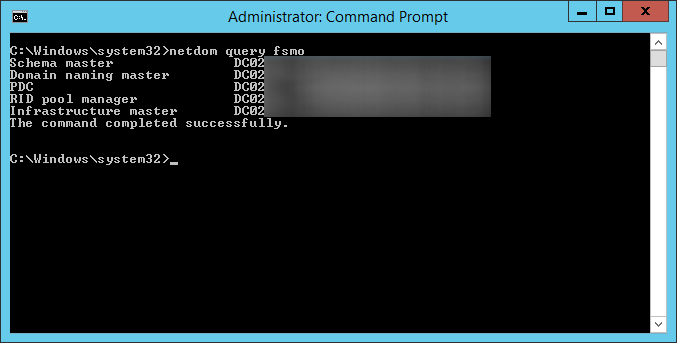
    18. Execute the following command to ensure the FSMO services are on the new Server 2012 R2 machine: netdom query fsmo
      netdom query fsmo - moved dc
  6. At this point, you should have a Server 2012 R2 DC with the FSMO roles and a secondary 2008 R2 Domain Controller.  If not, please go back and complete the steps to get to this point.
  7. Optional Step: After upgrading the first DC, you may want to reconfigure the machine to keep its time in sync with an external source.  To do this, please follow my guide here: http://jackstromberg.com/2013/10/configuring-external-time-source-on-your-primary-domain-controller/
  8. Next, decommission the last Server 2008 R2 domain controller that used to function as the primary DC.
    1. Follow the same instructions in Step 2 above called Demote and decommission secondary domain controller
  9. Next, add the machine back to the domain
    1. Follow the same instructions in Step 3 above called Add first Server 2012 R2 Domain Controller
  10. At this point, your environment should be up and running with Windows Server 2012 R2!  You can optionally transfer the FSMO roles back to your "primary" DC that you had before, or continue on with the roles left on the current DC.

Notes

Official information on removing a domain controller from the domain can be found on Microsoft's website here: http://technet.microsoft.com/en-us/library/cc771844(v=ws.10).aspx

Configuring Google Chrome via Group Policy

Synopsis: As more companies shift from Internet Explorer to Google Chrome, the ability to administer certain controls over the web browser from a centralized place becomes increasingly difficult.  As such, one of the most sought featured in administering the web browser is the ability to deploy shortcuts to the end users to frequently accessed resources on both the intranet and internet.  Luckily, Google has acknowledged the need to be centrally administered in corporate environments using Active Directory and Group Policy to easily complete this task.

Tutorial:

  1. Grab a copy of the Google Chrome ADM/ADMX templates from here: http://dl.google.com/dl/edgedl/chrome/policy/policy_templates.zip
  2. Extract the contents of the policy_templates.zip file once you have downloaded it to your local machine.
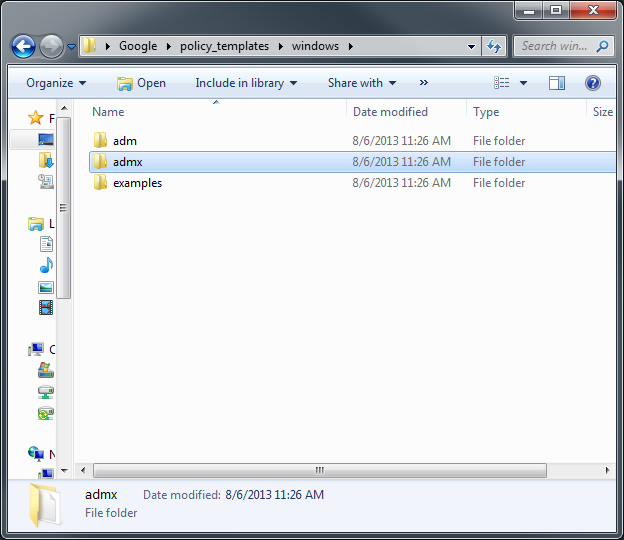
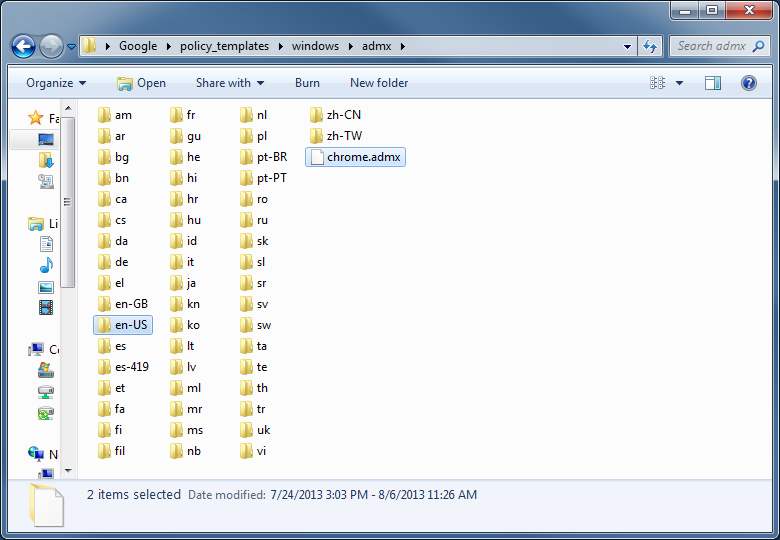
  3. Navigate to the windows folder and then navigate into the folder with the template you want to use (in this case, I will be deploying ADMX; read below on which one you should use)
    Chrome Policy Templates

    1. If you are using computers with an operating system newer than Windows Server 2003 or XP, select the ADMX folder
    2. If you are using computers with an operating system older than Windows Server 2008 and Vista, select the ADM folder
  4. If you are using Server 2003, you will use the adm file and follow step 2 below.  If you are using Server 2008 and newer, you will use the admx and adml files mentioned in step 1 below.
    Chrome ADMX and ADML

    1. If you are running Server 2008 or newer, enter the admx folde rand copy the .adml file from the language folder (en-US for example) to %systemroot%\sysvol\yourdomain\policies\PolicyDefinitions\<ll-cc> (ll-cc being the language specific folder, such as en-US) and copy the .admx file from the root of the admx folder to %systemroot%\sysvol\yourdomain\policies\PolicyDefinitions
      1. If you are from another region, copy the file to the correct language folder (if it doesn't exist, go ahead and create it).
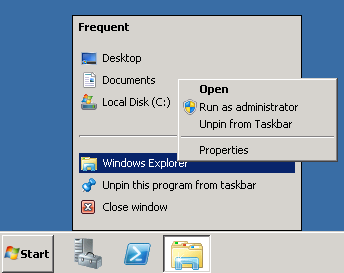
      2. If you get an Access Denied prompt, try running Windows Explorer as an Administrator
        Run explorer as administrator
    2. If you are running Server 2003 or older, copy the .adm file to your domain controller from the Google\Policy_Templates\adm\<ll-cc> Google folder and complete the following steps to import it:
      1. Open the Group Policy Object that you want to edit inside of Group Policy Management.
      2. In the console tree, navigate to Group Policy object/Computer Configuration (or User Configuration)/Administrative Templates and right click on Administrative Templates
      3. Click Add/Remove Templates.
      4. Click the Add button and navigate to the .adm file
      5. More details on this process can be found here: http://technet.microsoft.com/en-us/library/cc739134(v=ws.10).aspx
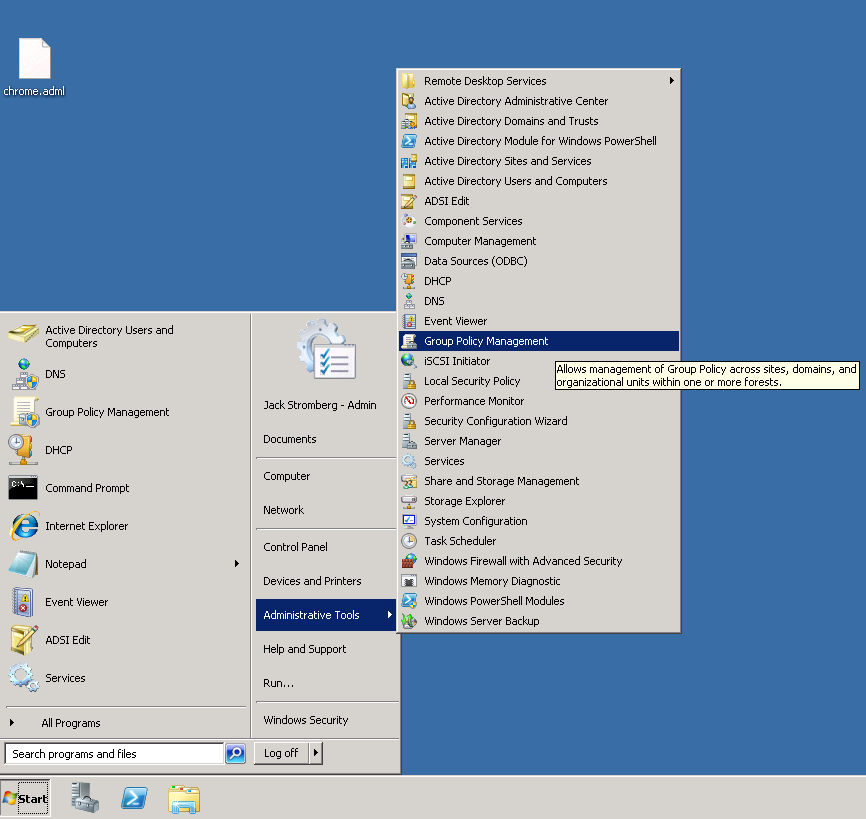
  5. Open up Group Policy Management (Start->Administrative Tools->Group Policy Management)
    Group Policy Management
  6. Right click the Group Policy Object you want, and select Edit...
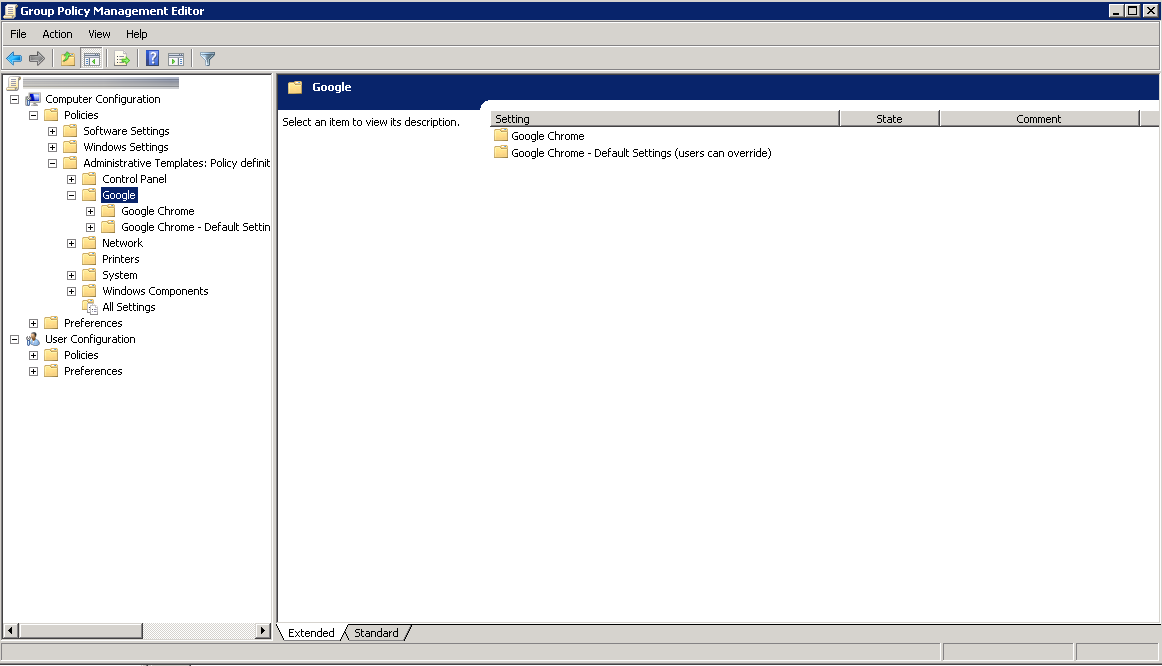
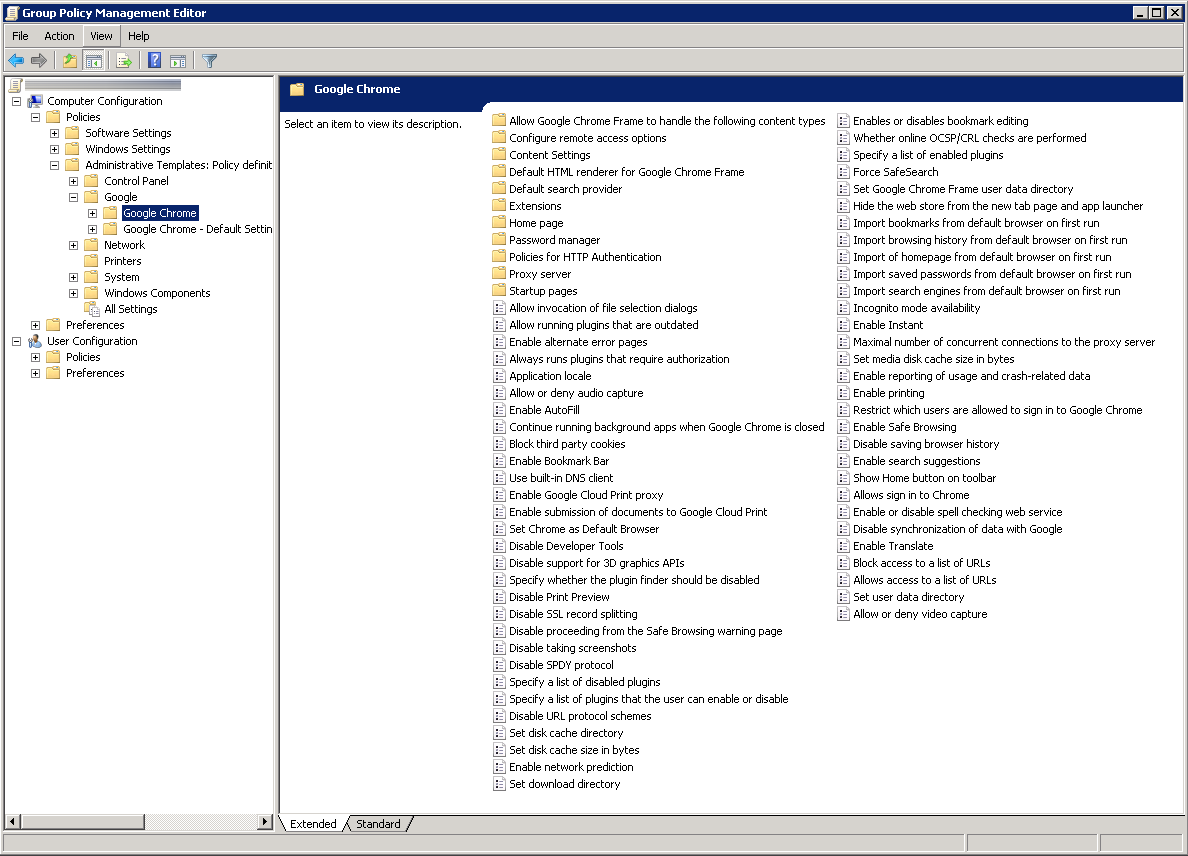
  7. Under Computer Configuration->Policies->Administrative Templates, you should now see a Google object.  Expand that to find the policies you can deploy.
    Editting Group Policy Object

Here is a screenshot of a few of the policies Google offers (more policies can be found in each of the folders as shown in the screenshot below).

Google Policies

Happy web browsing!

Side notes: The only thing I haven't figured out how to do is successfully deploy bookmarks/favorites to Google Chrome.  It appears at this time, it is not possible to do so via Group Policy.  If anyone has any ideas on how to achieve this, please leave a comment below; it would be greatly appreciated! 🙂

[Office 365] - Forwarding email from one mailbox to another with ADFS turned on

Synopsis: Employee leaves on personal matters for a month and their department lead requests for mail to be forwarded to their manager.  Typically, mail forwarding would be setup inside of the Exchange console, however, in this case, Exchange is managed by Office 365 (not a hybrid exchange deployment) and the users are being federated to Office 365 via ADFS.  When trying to enable mail forwarding, as outlined in the this help document by the Office 365 team http://community.office365.com/en-us/wikis/exchange/how-to-forward-email-in-office-365.aspx, I would receive an error message.

Symptom: When enabling mail forwarding for the user inside of the Office 365 Exchange portal, I received the following error message:

The action 'Set-Mailbox', 'EmailAddresses', can't be performed on the object 'Firstname Lastname' because the object is being synchronized from your on-premises organization. This action should be performed on the object in your on-premises organization.

Solution:

Personally, I think this is a bug in Office 365, but they say it is because we are on premise (if all of exchange is managed by them, how can they not enable mail forwarding?).  Any who, the work around is to manage the user's mailbox and set forwarding up as if they would.  See the steps below to achieve the same result:

  1. Login to your Office 365 admin portal.
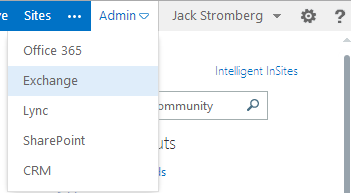
  2. Click on the Admin dropdown and select Exchange
    Exchange
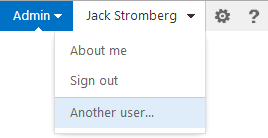
  3. Once in the Exchange portal, click on your username and select Another user...
    Exchange - Another User
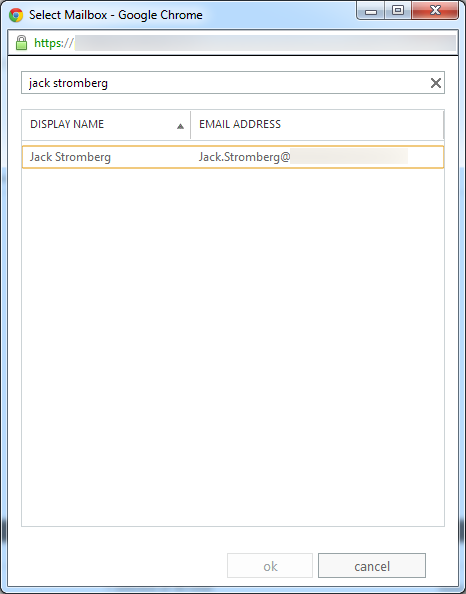
  4. Type in the mailbox you want to edit and click ok
    Select Mailbox
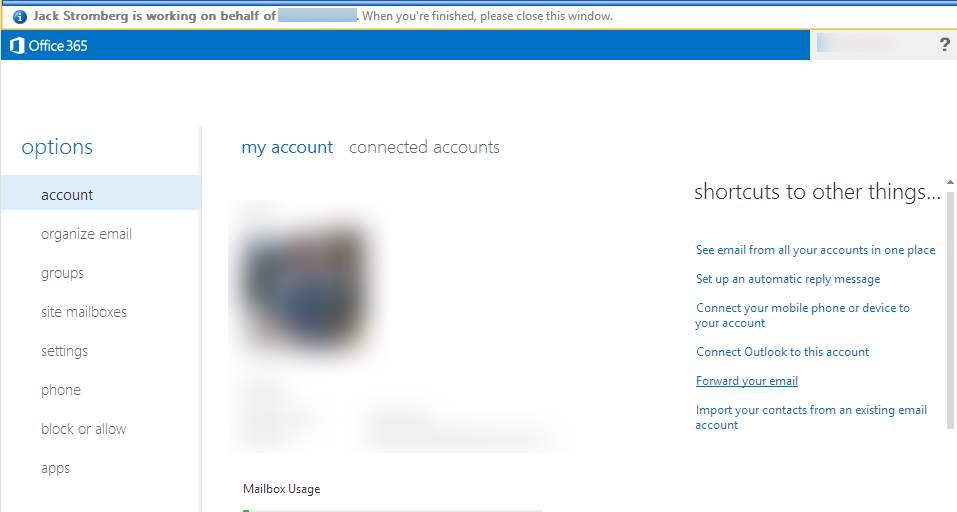
  5. On the "Managing on behalf of" screen, select Forward your email
    Exchange - Forward Your Email
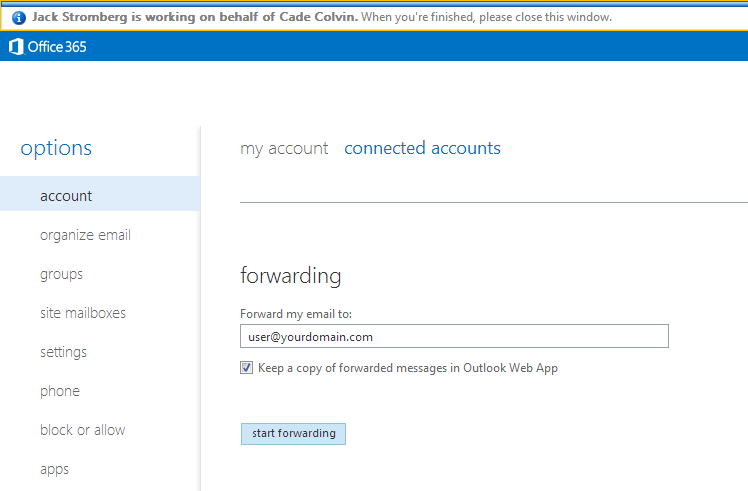
  6. Scroll down to forwarding and type in the email address of the user you want all emails to go to and click start forwarding.  You can optionally select if you want to leave a copy for the user's mailbox or have them silently forwarded.
    Exchange - Start Forwarding
  7. That's it! 🙂

How to list users inside a domain group

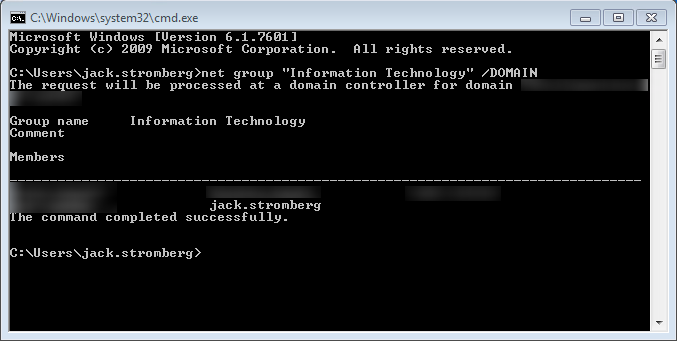
Open up a command prompt on any machine in the domain and execute the following command:

NET GROUP "GROUP NAME" /DOMAIN

At this point, you should see the list of users in correspond group.

NET GROUP Domain

Tutorial: 802.1X Authentication via WiFi - Active Directory + Network Policy Server + Cisco WLAN + Group Policy

Here is how to implement 802.1X authentication in a Windows Server 2008 R2 domain environment using Protected-EAP authentication.  I have designed the tutorial to be worked on in the specific order to prevent downtime if deployed during the day.  By creating the Network Policy server first, once we switch the authentication type from whatever to 802.1X via RADIUS, our Network Policy Server will immediately start processing requests and allowing machines on the domain.  By configuring the Cisco Wireless LAN Controller or Group Policy first, clients will try connecting to a RADIUS server that doesn't exist or present invalid credentials.  If you have any suggestions on how to better the implementation I demonstrate here, please drop a comment below to improve security/stability of these types of deployments. 🙂

Active Directory

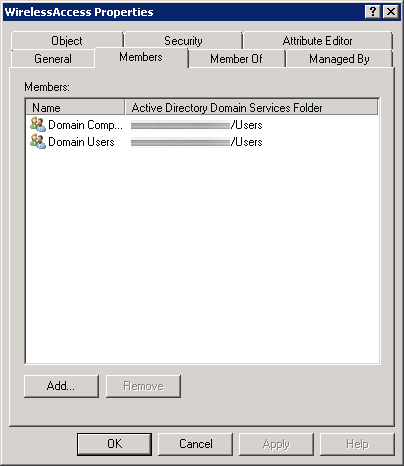
First, we need to create a security group in Active Directory to allow a list of specific users and computers to login to the domain.  In this example, we will allow any authenticated user or machine on the domain to authenticate successfully to the RADIUS sever.  In the screenshot below, we can see I have added both Domain Users and Domain Computers to a security group called WirelessAccess. Here is a screenshot with the above settings.

802.1X - AD Security Group

Network Policy Server

  1. Create a new Windows Server 2008 R2 or Windows Server 2012 machine
  2. Add the machine to the domain
  3. Give the machine a static IP: (I'll use 10.10.10.15 throughout this document as a reference to this server)
  4. Open up Server Manager, click Add Roles, click Next on the Before You Begin screen, check Network Policy and Access Services and click Next, click Next on the Introduction screen, check Network Policy Server (leave the rest unchecked) and click Next, click Install.
  5. Once Network Policy Server is installed, launch the Network Policy Server snap-in (via MMC or Administrative Tools)
  6. Inside of Network Policy Server, on NPC (Local), select RADIUS server for 802.1X Wireless or Wired Connections from the dropdown and click Configure 802.1X
    1. On the Select 802.1X Connections Type page, select Secure Wireless Connections, and enter My Company's Wireless.  Click Next.
    2. Click on the Add... button.  Enter the following settings:
      1. Friendly name: Cisco WLAN Controller
      2. Address: 10.10.10.10 (Enter your WLAN Controller's IP address)
      3. Select Generate, click the Genereate button, and then copy down the Shared Secret the wizard generated (we will use this later to get the WLAN Controller to talk to the RADIUS server).  Click OK.
    3. Click Next.
    4. On the Configure an Authentication Method, select Microsoft: Protected EAP (PEAP). Click Next.
    5. Click Next on the Specify User Groups (we will come back to this).
    6. Click Next on the Configure Traffic Controls page.
    7. Click Finish
  7. Click on NPS (Local) -> Policies -> Network Policies. Right click Secure Wireless Connections and click Properties.
  8. Click on the Conditions tab, select NAS Port Type, and click Remove.
  9. Still on the Conditions tab, click Add..., select Windows Groups and click Add..., click Add Groups..., search for WirelessAccess and click OK.  Click OK on the Windows Groups dialog box, click Apply on the Secure Wireless Connections Properties box.  You should now have something like the image below:
    802.1X - Secure Wireless Connections Conditions
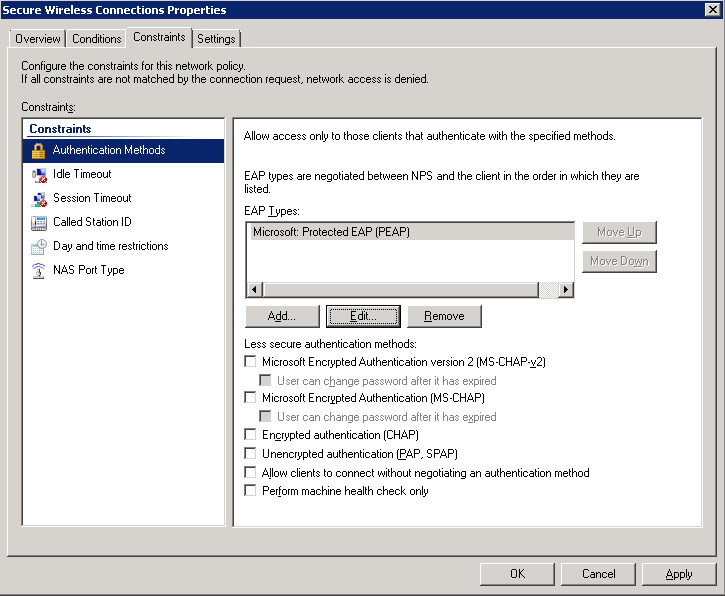
  10. Click on the Constraints tab.
    1. Uncheck all options under Less secure authentication methods like the image below:
      802.1X - Secure Wireless Connections Constraints
    2. Click Apply

Cisco WLAN

  1. Login to your Cisco Wireless Lan Controller
  2. Add a RADIUS server to your controller
    1. Click on the Security tab
    2. Select AAA -> Radius -> Authentication on the left side
    3. Click the New... button in the top right
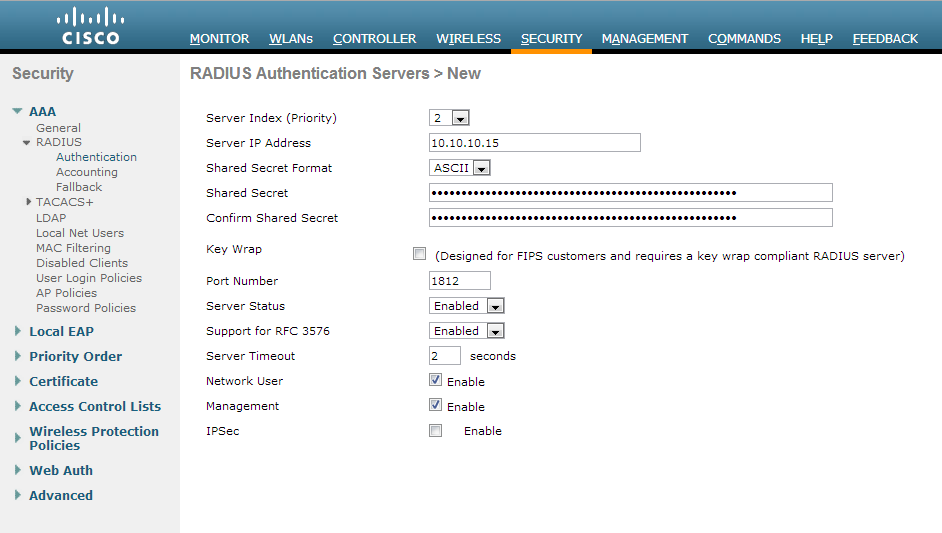
      1. Server IP Address: 10.10.10.15 (The IP address of your NPS server we setup earlier)
      2. Shared Secret Format: ASCII
      3. Shared Secret: The long generated password you wrote down when setting up the Network Policy Server
      4. Confirm Shared Secret: Same password in previous step
      5. Key Wrap: unchecked
      6. Port Number: 1812
      7. Server Status: Enabled
      8. Support for RFC 3576: Enabled
      9. Server Timeout: 2
      10. Network User: Checked
      11. Management: Checked
      12. IP Sec: Unchecked
      13. Here is a screenshot with the above settings
        802.1X - Cisco WLAN - RADIUS
  3. Create or modify a wireless network to use 802.1X
    1. Click on the WLANs tab
    2. Create a new wireless network or select an existing WLAN ID to edit
    3. On the "WLANs > Add/Edit 'My SSID'" page, use the following settings
      1. Security Tab
        1. Layer 2 Tab
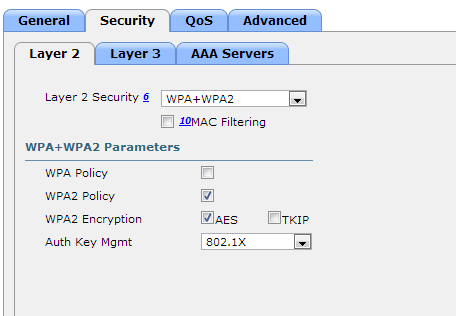
          1. Layer 2 Security: WPA+WPA2
          2. MAC Filtering: Unchecked
          3. WPA+WPA2 Parameters
            1. WPA Policy: Unchecked
            2. WPA2 Policy: Checked
            3. WPA2 Encryption: AES checked, TKIP unchecked
            4. Auth Key Mgmt: 802.1X
          1. Here is a screenshot of the above settings
            802.1X - Cisco WLAN - Security
        2. Layer 3 Tab
          1. Layer 3 Security: none
          2. Web Policy: unchecked
        3. AAA Servers Tab
          1. Authentication Servers: checked Enabled
          2. Server 1: Select your RADIUS server from the dropdown
          3. Local EAP Authentication: Unchecked
          4. Authentication priority order for web-auth user: Move RADIUS over to the right
          5. Here is a screenshot of the above settings802.1X - Cisco WLAN - AAA Servers
        4. Click Apply

Group Policy

  1. Go to your domain controller and open up the Group Policy Management console.
  2. Right click the Organizational Unit you want to apply to policy to and select Create a GPO in this domain, and Link it here...
    1. Note, the policy must be linked to the OU containing a group of machines you want to have WiFi access to or a parent of the OU.
  3. Enter in 802.1X WiFi Policy for the Name and click OK
  4. Right click your new GPO and click Edit
  5. Navigate to Computer Configuration->Policies->Windows Settings->Security Settings->Wireless Network (IEEE 802.11) Policies
  6. Right click and select Create A New Wireless Network Policy for Windows Vista and Later Releases
  7. Ensure the following settings are set for your Windows Vista and Later Releases policy
    1. General Tab
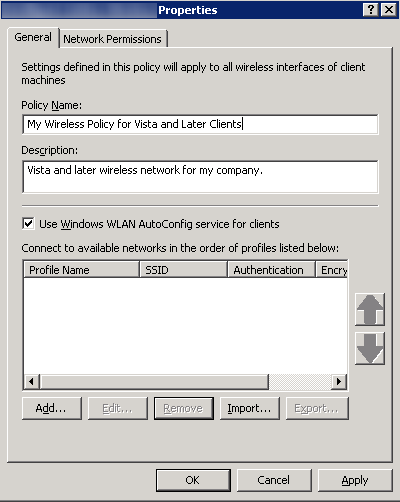
      1. Policy Name: My Wireless Policy for Vista and Later Clients
      2. Description: Vista and later wireless network for my company.
      3. Check Use Windows WLAN AutoConfig service for clients
      4. Here is a screenshot with the above settings802.1X - General
      5. Click the Add... button and select Infrastructure
        1. Connection Tab
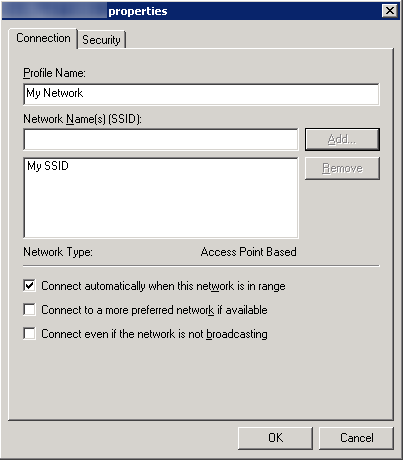
          1. Profile Name: My Network
          2. Enter in your SSID (Wireless network name that gets broadcasted) and click the Add... button
          3. Check Connect Automatically when this network is in range
          4. Here is a screenshot of the above settings802.1X - Properties
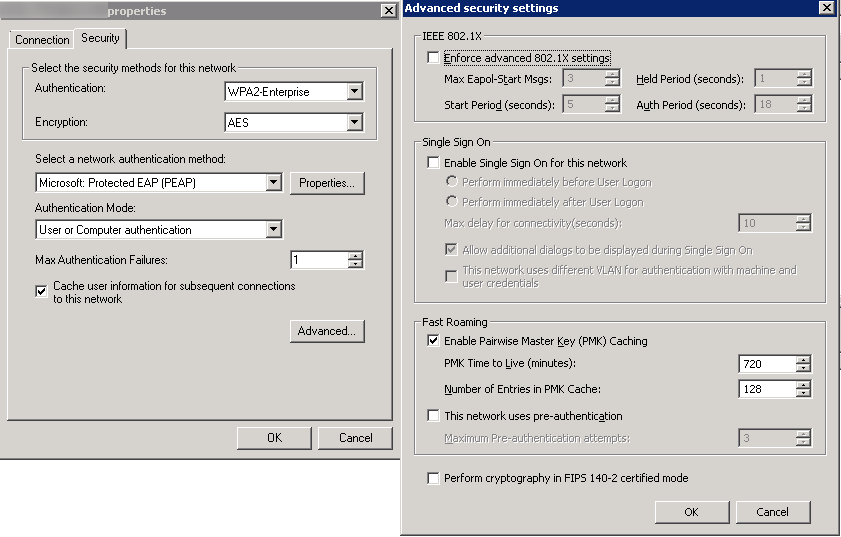
        2. Security Tab
          1. Authentication: WPA2-Enterprise
          2. Encryption: AES
          3. Select a network authentication method: Microsoft Protected EAP (PEAP)
          4. Authentication Mode: User or Computer authentication
          5. Max Authentication Failures: 1
          6. Check Cache user information for subsequent connections to this network
          7. Here is a screenshot of the above settings with the Advanced tab open as well802.1X - Security Settings
        3. Click OK
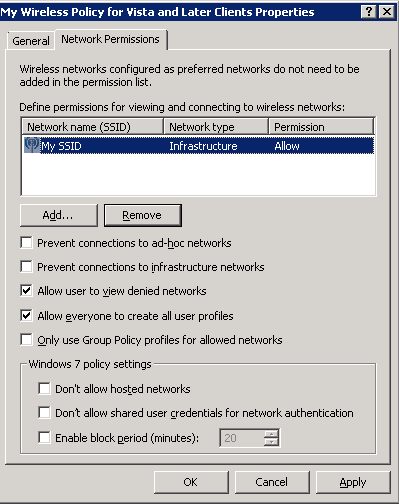
    2. Network Permissions Tab
      1. Enter your network into Define permissions for viewing and connection to wireless networks if it hasn't been added already.
      2. Uncheck Prevent connections to ad-hoc networks
      3. Uncheck Prevent connections to infrastructure networks
      4. Check Allow user to view denied networks
      5. Check Allow everyone to create all user profiles
      6. Uncheck Only use Group Policy profiles for allowed networks
      7. Leave all Windows 7 policy settings unchecked
      8. Here is a screenshot with the above settings (note, you may change the settings above to be in accordance to your policy.  Just ensure you don't check Prevent connections to infrastructure networks).
        802.1x - Network Permissions
      9. Click OK
  8. Right click and select Create A New Windows XP Policy
  9. Ensure the following settings are set for your Windows XP Policy
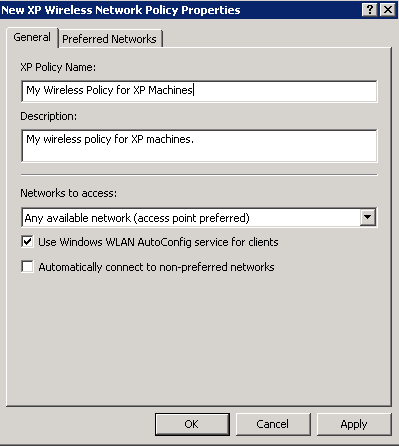
    1. General Tab
      1. XP Policy Name: My Wireless Policy for XP Machines
      2. Description: My wireless policy for XP machines.
      3. Networks to access: Any available network (access point preferred)
      4. Check Use Windows WLAN AutoConfig service for clients
      5. Uncheck Automatically connect to non-preferred networks
      6. Here is a screenshot of the above settings.
        802.1X - XP General
    2. Preferred Networks Tab
      1. Click the Add... button and select Infrastructure
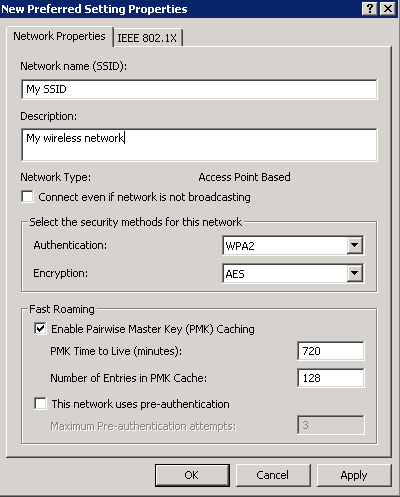
        1. Network Properties Tab
          1. Network name (SSID): My SSID
          2. Description: My wireless network
          3. Uncheck Connect even if network is not broadcasting
          4. Authentication: WPA2
          5. Encryption: AES
          6. Check Enable Pairwise Master Key (PMK) Caching
          7. Uncheck This network uses pre-authentication
          8. Here is a picture of the above settings
            802.1X - XP Network Properties
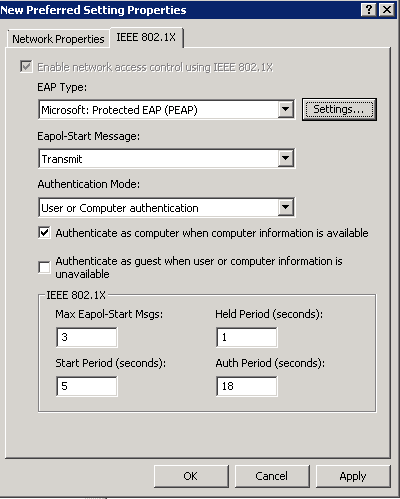
        2. IEEE 802.1X Tab
          1. EAP Type: Microsoft: Protected EAP (PEAP)
          2. Eapol-Start Message: Transmit
          3. Authentication Mode: User or Computer Authentication
          4. Check Authenticate as computer when computer information is available
          5. Uncheck Authente as guest when user or computer information is unavailable
          6. Screenshot of above settings
            802.1X - XP IEEE
        3. Click OK
    3. Click OK