Monthly Archives: June 2018

How to install NodeJS on a Raspberry Pi

Installing NodeJS on a Raspberry Pi can be a bit tricky.  Over the years, the ARM based processor has gone through several versions (ARMv6, ARMv7, and ARMv8), in which there are different flavors of NodeJS to each of these architectures.

Depending on the version you have, you will need to manually install NodeJS vs grabbing the packages via a traditional apt-get install nodejs.

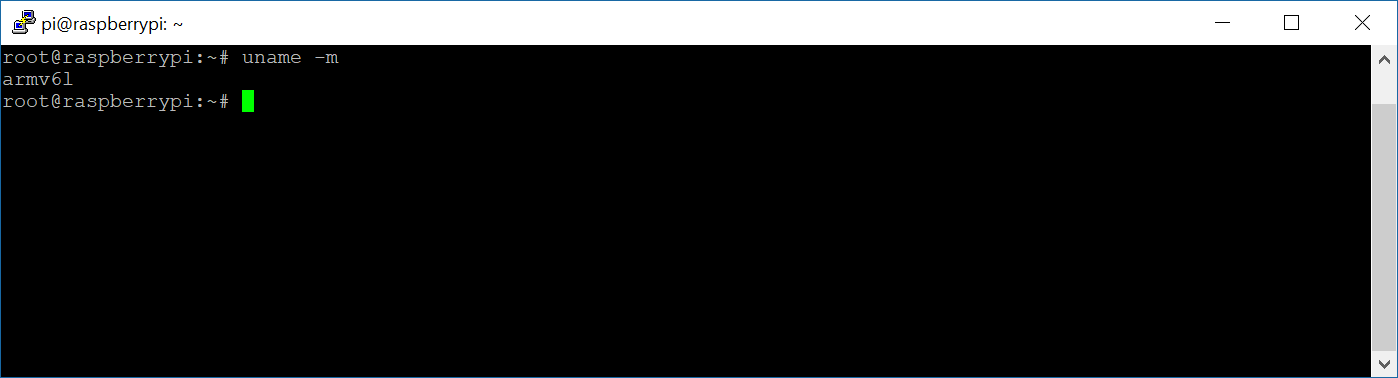
Step 1: Validate what version of the ARM chipset you have

First let's find out what ARM version you have for your Raspberry Pi.  To do that, execute the following command:

uname -m

You should receive something like: armv61

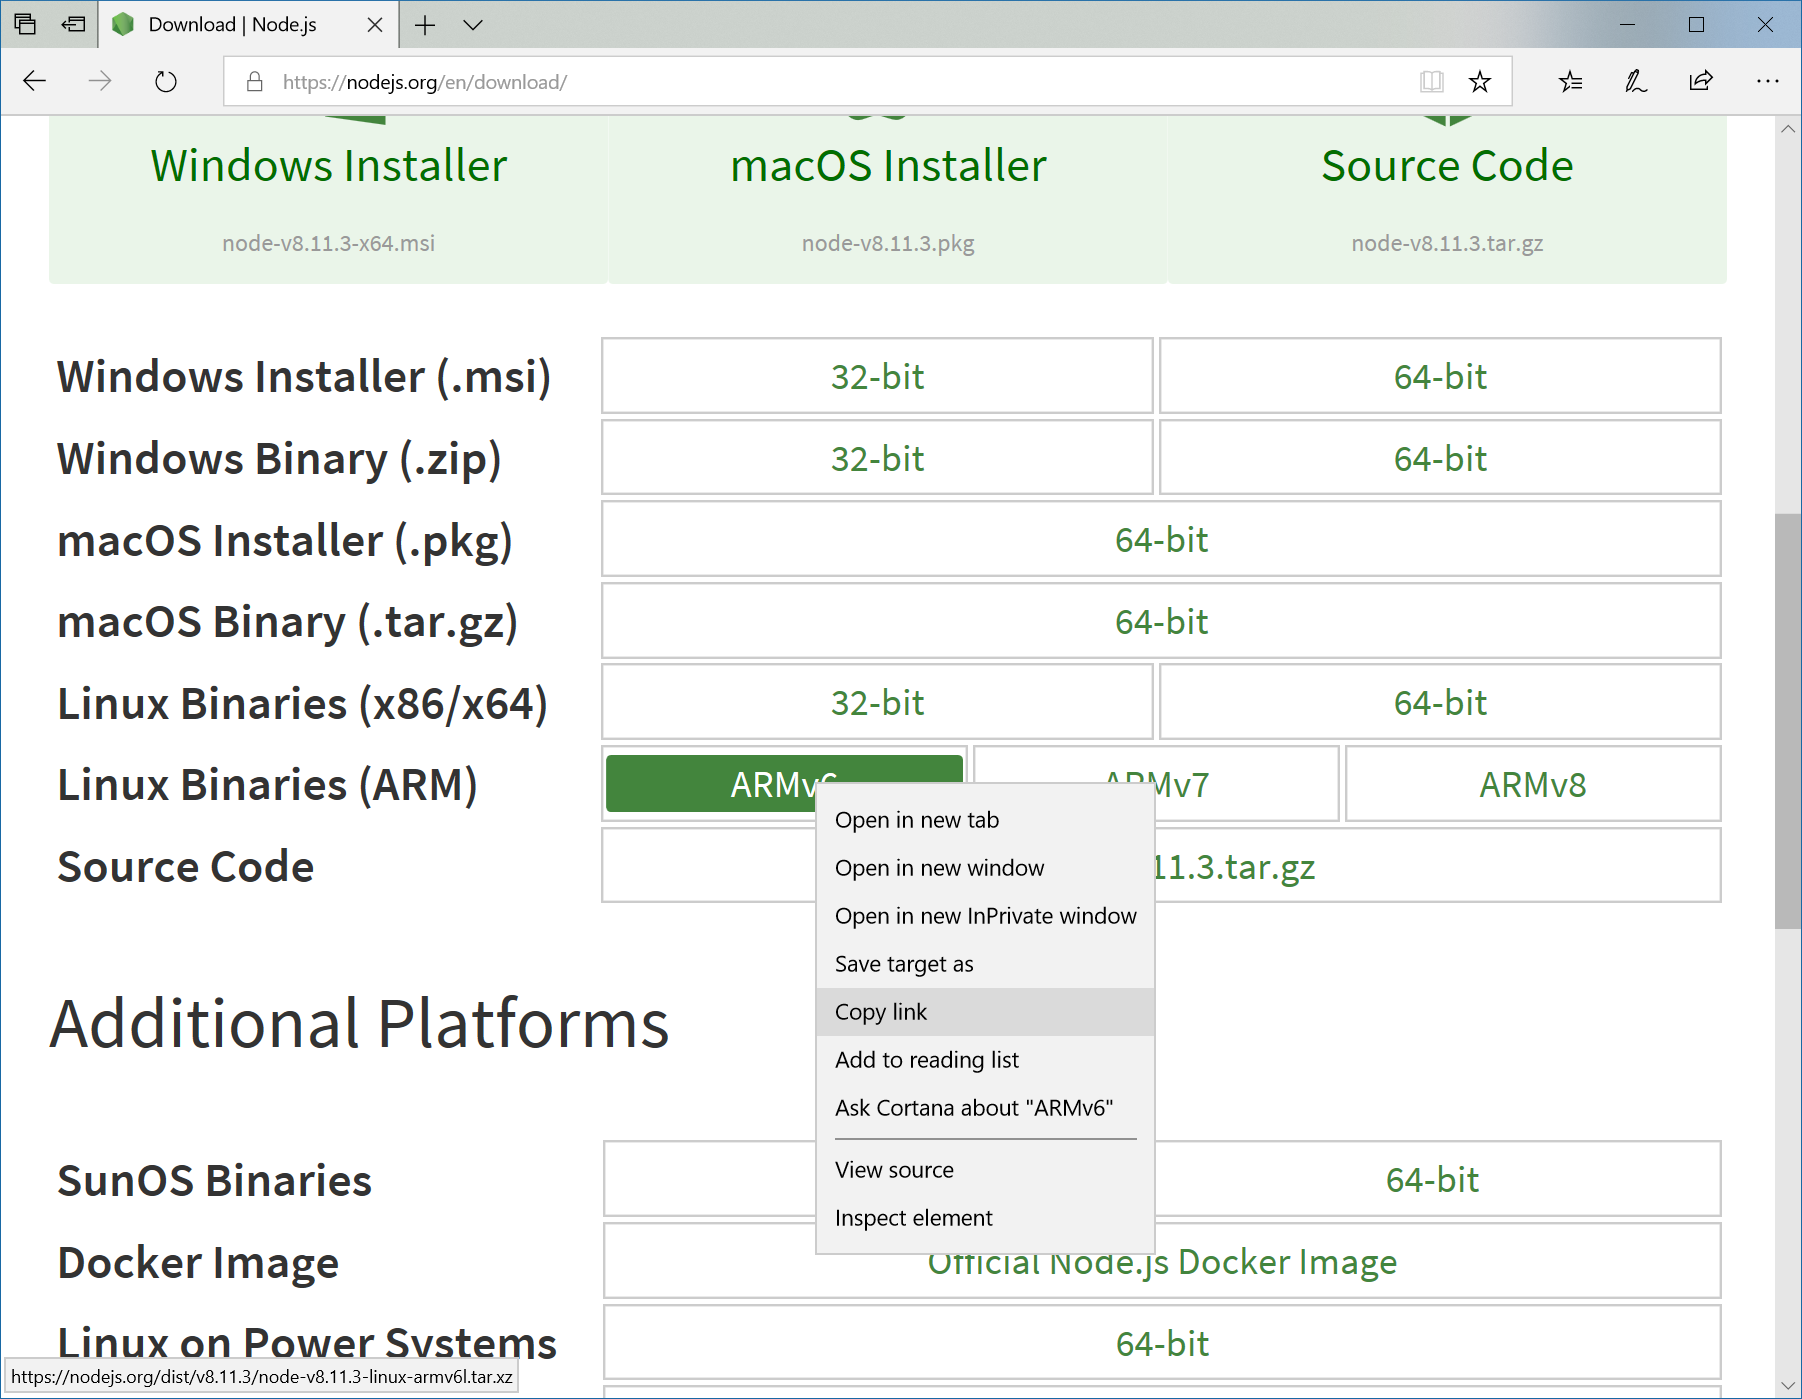
Step 2: Find the latest package to download from nodeJS's website

Navigate to https://nodejs.org/en/download/ and scroll down to the latest Linux Binaries for ARM that match your instance.  Right click and copy the address to the instance that matches your processor's architecture.  For example, if you saw armv61, you'd copy the download for ARMv6

Step 3: Download and install nodeJS

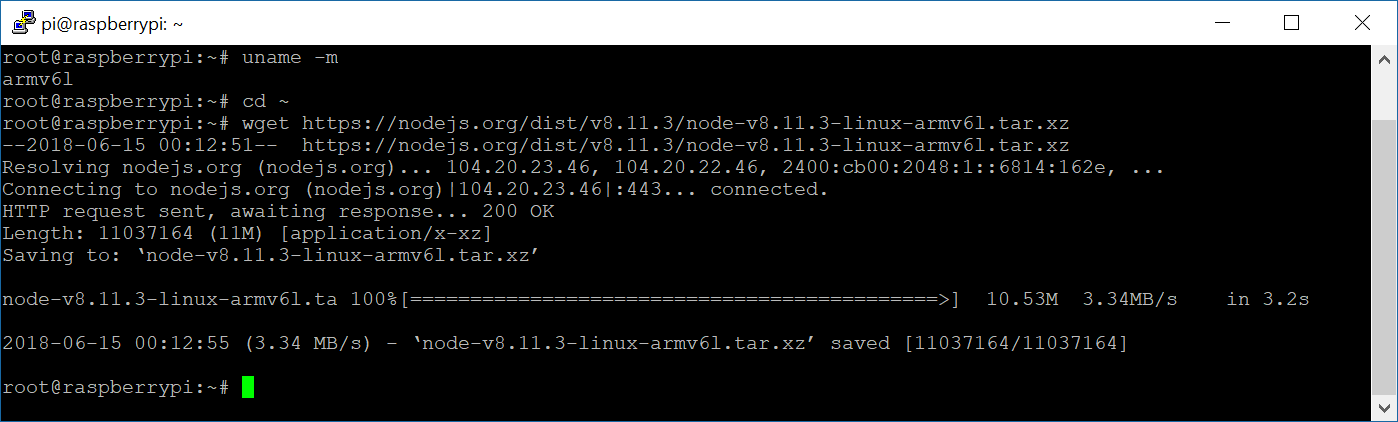
Within your SSH/console session on the Raspberry Pi, change to your local home directory and execute the following command (substituting in the URL you copied in the previous step in what's outlined in red below).  For example:

cd ~
wget https://nodejs.org/dist/v8.11.3/node-v8.11.3-linux-armv6l.tar.xz

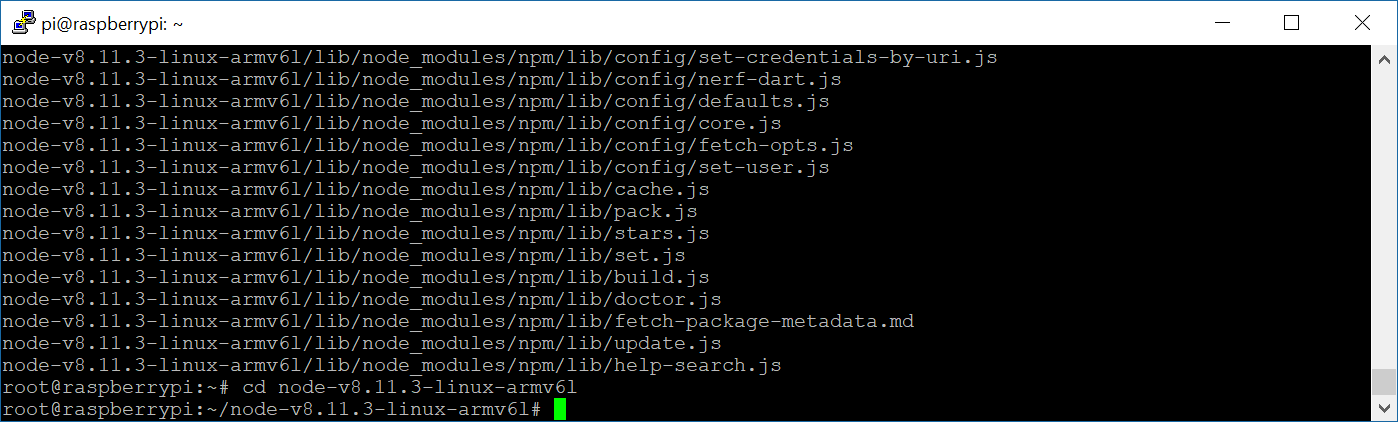
Next, extract the tarball (substituting in the name of the tarball you downloaded in the previous step) and change the directory to the extracted files

tar -xvf node-v8.11.3-linux-armv6l.tar.xz
cd node-v8.11.3-linux-armv6l

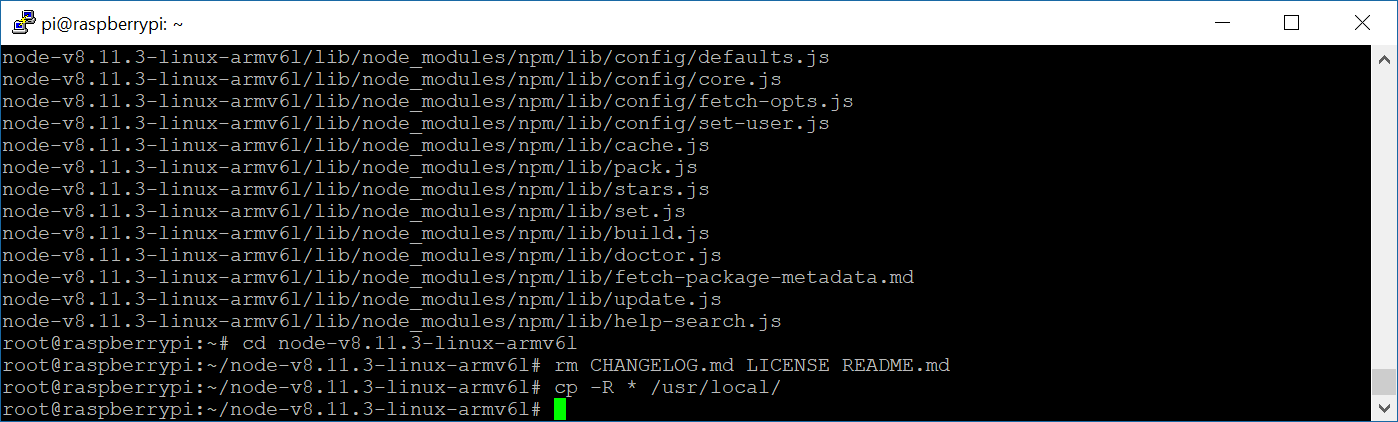
Next, remove a few files that aren't used and copy the files to /usr/local

rm CHANGELOG.md LICENSE README.md
cp -R * /usr/local/

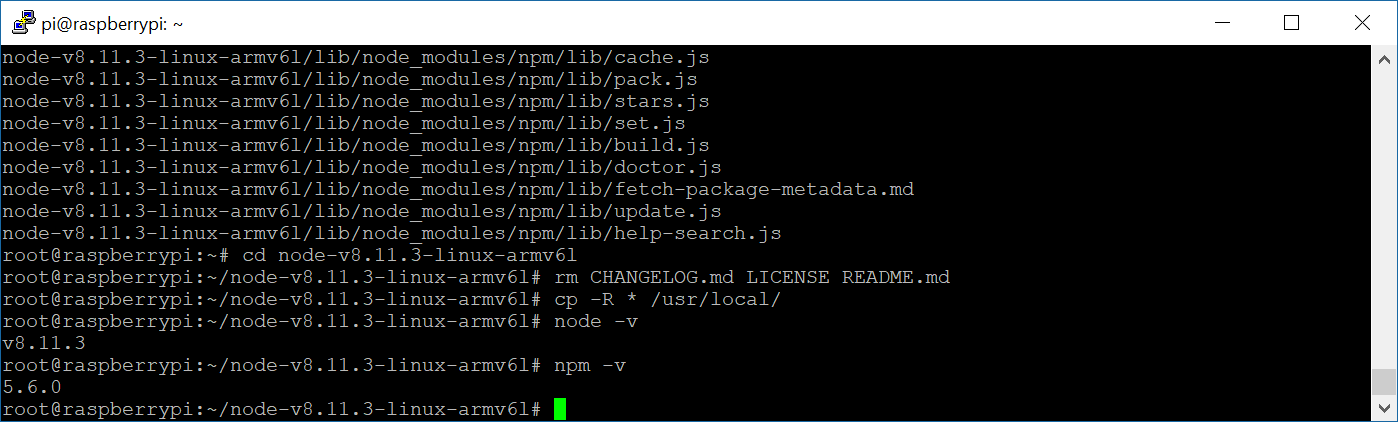
Step 4: Validate the installation

You can validate that you have successfully installed NodeJS by running the following commands to return the version numbers for NodeJS and npm

node -v
npm -v

That's it!  Have fun!


How to build a LEMP stack

Growing up it was always common to spin up a "LAMP" box to host a website.  The typical setup was:
Linux
Apache
MySQL
PHP

Over the past few years, this model has slightly changed due to new open source technologies bringing new ideas to solve performance and licensing issues at massive scale.  In this tutorial, we are going to look at setting up a LEMP box on Debian Stretch (9.1).
Linux
nginx [engine x]
MariaDB
PHP

Please note, MariaDB could easily be swapped out with MySQL in this tutorial, however many have opted to jump over to MariaDB as an open source alternative (actually designed by the original developers of MySQL) over fear Oracle may close source MySQL.

Installing Linux

This tutorial assumes you already have either a copy of Ubuntu 14+ or Debian 7+.  This probably works on earlier versions as well, but I haven't tested them.  On a side note, I typically don't install Linux builds with an interactive desktop environment, so grab yourself a copy of Putty and ssh in or open up Terminal if you have interactive access to the Desktop Environment.  Before continuing, go ahead and update apt-get repos and upgrade any packages currently installed:

apt-get update && apt-get upgrade

Installing nginx

Grab a copy of nginx

apt-get install nginx

Installing MariaDB

Grab a copy of MariaDB

apt-get install mariadb-server

Installing PHP

In this case, I want to roll with PHP7.  You can specify php5 or php7 depending on your application, but PHP7 has some great performance enhancements, so for new apps, I'd leverage it.  The biggest thing here is to make sure you use the FastCGI Process Manager package.  If you specify just php or php7, package manager will pull down apache2 as a dependency.  That is not what we want in our LEMP stack.

apt-get install php7.3-fpm

Once installed, fire up your favorite text editor (it's ok if it's vi :)) and edit the default site for nginx

vi /etc/nginx/sites-enabled/default

Search for the comment # Add index.php to the list if you are using PHP and add index.php to the line below it.  For example:

index index.html index.htm index.php index.nginx-debian.html;

Next, find the comment # pass PHP scripts to FastCGI server and change the block of code to the following to tell nginx to process .PHP files with FastCGI-PHP:

# pass PHP scripts to FastCGI server
#
location ~ \.php$ {
include snippets/fastcgi-php.conf;
#
# # With php-fpm (or other unix sockets):
fastcgi_pass unix:/var/run/php/php7.3-fpm.sock;
# # With php-cgi (or other tcp sockets):
# fastcgi_pass 127.0.0.1:9000;
}

Save the file.  If using vi, you can do that by executing :wq

Next, reload the nginx service to pickup the new changes to our configuration:

service nginx reload

Test

At this point, we can create a php file to validate things are working well. Go ahead and create a new file /var/www/html/info.php and add the following line:

<?php
phpinfo();

If you see a page listing the PHP version and the corresponding environment configuration, congratulations, you have finished setting up your new LEMP stack! 🙂

Setting up WeeWX with a Raspberry PI

This is a quick setup guide on how to configure the open source software WeeWX for a Personal Weather Station (PWS).  I highly recommend you check out the WeeWX User Guide as this information is very well documented.  Here is a reflection of how I was able to get WeeWX installed on a Raspberry PI with a brand new weather station.

  1. Setup your Raspberry PI
    1. How to setup your Raspberry PI: http://jackstromberg.com/2018/03/setting-up-a-new-raspberry-pi-via-ssh/
      1. Note: Raspbian is a distribution based upon Debian.  In this case, we will follow the Debian instructions for setting up WeeWX.
        1. http://weewx.com/docs/debian.htm
  2. (Optional) Configure the Raspberry PI to be localized to your environment
    1. sudo raspi-config
      1. Here you can arrow down to Localization Options and configure the timezone to match that of your console/weather sensor.  Keeping time is critical, so if possible, try to keep the date/time between your weather station and the Raspberry PI as close as possible.
  3. Configure Apt-Get to look for the WeeWX packages
    wget -qO - http://weewx.com/keys.html | sudo apt-key add -
    sudo wget -qO - https://weewx.com/apt/weewx-python3.list | sudo tee /etc/apt/sources.list.d/weewx.list

    Note: Use https://weewx.com/apt/weewx-python3.list for Debian 10.X (latest version of raspbian as of 2021-07-23 will use this); otherwise use https://weewx.com/apt/weewx-python2.list for Debian 9.X.

  4. Update your Raspberry-PI to use the latest packages
    sudo apt-get update
    sudo apt-get upgrade
  5. Before installation, ensure you have your console or device setup and connected to your Raspberry PI for WeeWX to pull the data
  6. Determine the interface the console is connected to (if using a directly attached data loggerm skip if using an IP based source)
    1. Execute the command dmesg and look for what interface the data logger is connected to
      1. In my example, you can see the data logger is connected to ttyUSB0
  7. Launch the installation wizard for weewx
    1. sudo apt-get install weewx
      1. Note: You will likely be prompted to install a few dependencies, type Y for yes to install them
  8. Installation
    1. Enter the location of your weather station: Santa's Workshop, North Pole
    2. Enter in the latitude, longitude of your weather station
      1. Note: If you don't have GPS, you can easily find this by using Bing Maps or Google Maps, navigating to your location, and right clicking.
        1. For Bing, it will just show you the lat/long values when you right click
        2. For Google, click on "What's Here" and it will list these values
      2. Note: You can be more specific than 3 digits behind the decimal, so if you want to use a more specific set of coordinates like 40.689167, -74.044444, that is acceptable.
    3. Enter in your Altitude of where the weather station is
      1. You can use Google Earth to find the altitude or this tool here: https://www.freemaptools.com/elevation-finder.htm
    4. Set your preferred unit of measurement
      1. US (Imperial) or Metric
    5. Select your weather station type
      1. I.e. AcuRite, Vantage (if using Davis), etc.
    6. Select the interface the device is listening on
    7. For those using serial port, select the interface that the data logger is connected to.  You should have found this in step 4 above; if using ethernet, go ahead and type in the IP, Port, etc. of the data logger.
  9. At this point WeeWX is technically installed, however many individuals will want to present the WeeWX reports via webpage.  In this case, we'll install nginx, which is a lightweight webserver
    1. sudo apt-get install nginx
      1. More details on this can be found here: http://www.weewx.com/docs/usersguide.htm#integrating_with_webserver
  10. Configure WeeWX to minimize disk IO
    1. Why do we need to do this?  Since Raspberry PI's leverage SD cards, there is typically a finite number of reads/writes to the SD Card.  In this case, it is recommended to either leverage an external database/fileserver for WeeWX to write its reports.  Alternatively, we can also configure WeeWX to leverage ram to host the reports, which will prevent IO to the SD card (in this case, theoretically increasing the life of the drive)
      1. Three approaches are outlined here--in this guide I'll reflect the GitHub page in saving reports to a temporary file system using tmpfs
        1. Add an entry to fstab
          1. echo "weewx_reports /var/weewx/reports tmpfs size=20M,noexec,nosuid,nodev 0 0" | sudo tee -a /etc/fstab
        2. Mount the new file system
          1. sudo mkdir -p /var/weewx/reports
          2. sudo mount -a
        3. Update weewx.config file to point to new directory
          1. sudo sed -i -e 's%HTML_ROOT =.*%HTML_ROOT = /var/weewx/reports%' /etc/weewx/weewx.conf
        4. Restart WeeWX service
          1. sudo service weewx restart
        5. Create symbolic link to point webserver to the reports
          1. sudo ln -s /var/weewx/reports /var/www/html/weewx
        6. Give the web server the ability to read from the directory
          1. sudo chmod -R 755 /var/www/html/weewx

At this point, go ahead and browse out to http://youripaddress/weewx/ to see your weather.

Notes:

WeeWX updates the webpage every 30 minutes (1800 seconds) out of the box.  You can force a report update by executing wee_reports weewx.conf or you can modify the /etc/weewx/weewx.conf file by changing the archive_interval variable (in seconds) under the [StdArchive] section.

You can modify the Weewx configuration by editing: /etc/weewx/weewx.conf

You can validate if WeeWX is running by executing: service weewx status

You can look at diagnostics logs by following the guide here: http://www.weewx.com/docs/usersguide.htm#monitoring

Best practices guide on using WeeWX + Raspberry PI: https://github.com/weewx/weewx/wiki/Raspberry%20Pi