Tag Archives: polycom

How do I analyze log files off Polycom phones?

We have a boatload of Polycom CX600 phones for our Lync deployment and recently came across one device that would not connect up to the network.  In doing so, I tried to pull the log files off the device, but as you have probably found, there is no web management gui for the phones at all.  Additionally, if you have figured out how to pull the files off the phone, you are probably wondering how you analyze the files as the log files are in a weird format.

  1. Find the IP address of the phone
    1. Press the middle button on the phone, select System Information, and you should see the IP address.
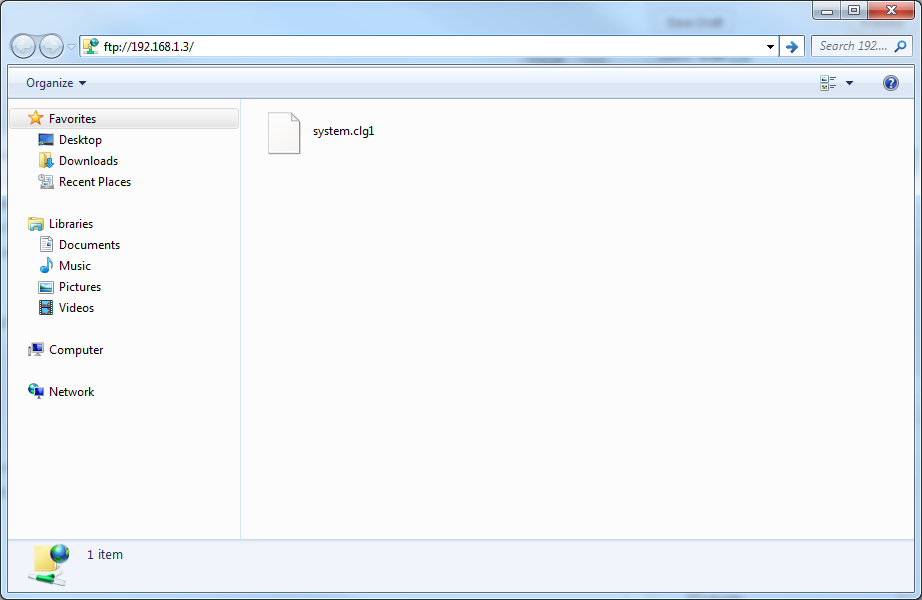
  2. Navigate to ftp://xxx.xxx.xxx.xxx where the x's is the IP address of the phone
    ftp clg file
  3. Copy the clg* files from the phone over to your desktop
  4. Download a copy of readlog.zip (contains readlog.exe)

    1. Please thank user NeedsCoffee over on the technet forum for providing this! 🙂
      http://social.technet.microsoft.com/Forums/lync/en-US/762fd63a-0813-4474-aa2f-8e633d669362/download-readlogexe-to-review-log-files-from-lync-phone-edition-devices#bd3c9cd0-aff5-4473-b616-07fc751a12fe
    2. Please thank John from my comments below for providing another copy
    3. Note: I scanned the version of readfile John provided in the comments below with http://virustotal.com and uploaded it to my site so we don't have to worry about the free upload sites expiring the download.  If you are the original author of this file and do not wish for it to be distributed, please let me know and I will remove the link.  Here are the virustotal results: https://www.virustotal.com/en/file/2a081b552f0d5678122f00ed796e1aeff376d7feb5033adf99149403a0296d61/analysis/1391885100/
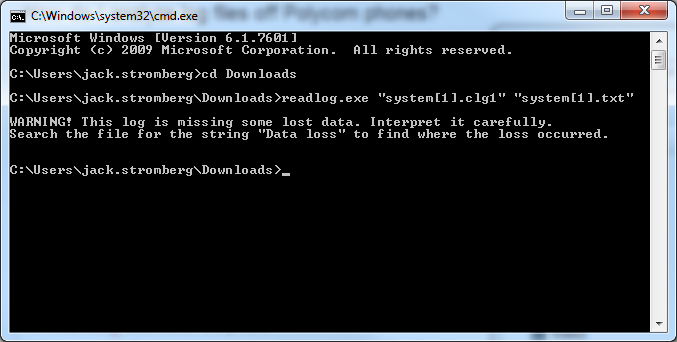
  5. Execute the following command to covert the clg file to text
    1. readlog.exe "system[1].clg1" "system[1].txt"
      readlog clg to txt
  6. Open up the text file in notepad
    1. Here you can see some info about the phone trying to pull the certificate from the lync provisioning service.
      clg txt log

That should do it!  The log file contains a lot of debugging information that Polycom can use to figure out what is going on, or every once in awhile you will luck out and see if the phone is having a tough time finding the certificate server, time server, etc.

Configuring Lync Server to push out latest Microsoft Lync Phone Edition firmware

I noticed today that a large shipment of Polycom phones we were going to deploy were using the RTM version of Lync Phone Edition and were outdated compared to Microsoft's latest version.  That being said, here is a guide on how to update the firmware for your phones.

At the time of this writing, it appears there are only a few different manufacturers that distribute the Microsoft Lync Phone Edition phones.  For reference, here are the Microsoft URLs for each of those phone types:

Deploying latest firmware for the Microsoft Lync Phone Edition

  1. Download the latest firmware for the Lync Phone Edition device.
    1. In my case, I want to push out the latest firmware for the Polycom CX600s, which can be found here (links to the firmware of other phones can be found above in this same article): http://www.microsoft.com/en-us/download/details.aspx?id=23866
  2. Double click on the downloaded file (UCUpdates.exe), and run through the wizard.
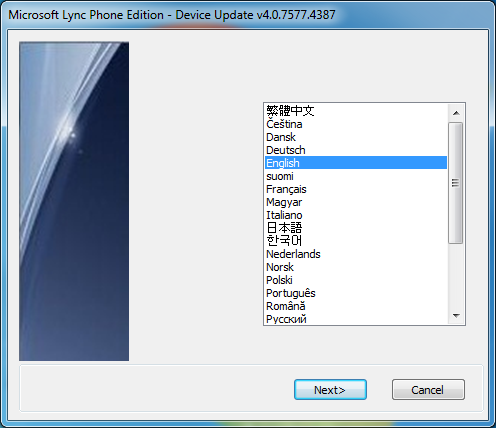
    1. Select your language:
      Microsoft Lync Phone Edition Wizard - Select Language
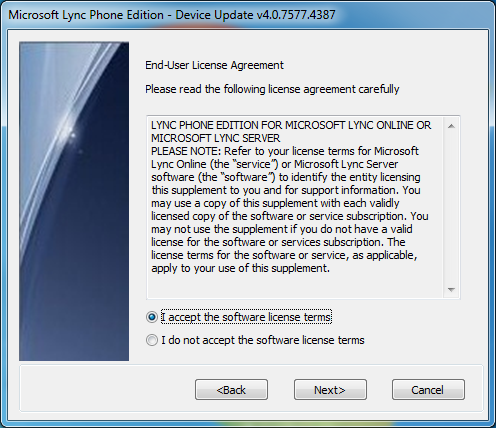
    2. Accept the EULA
      Microsoft Lync Phone Edition Wizard - Accept EULA
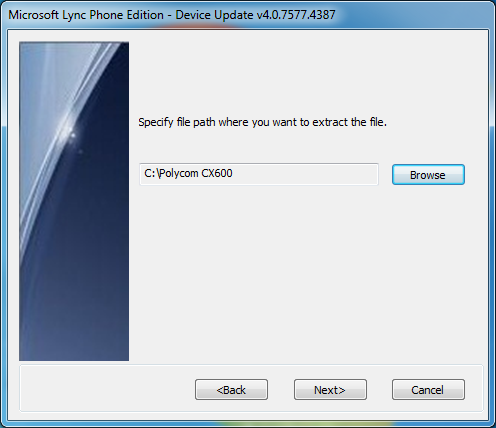
    3. On this step, extract the files to a folder you can recognize.  All firmware downloads are called UCUpdates.exe and ucupdates.cab, so I highly recommend you sort out each firmware to a corresponding folder.
      Microsoft Lync Phone Edition Wizard - Extract To 
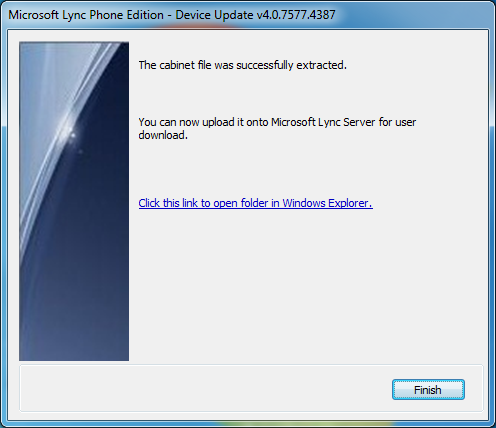
    4. Click the "Click this link to open folder in Windows Explorer." and verify you see the ucupdates.cab file.
      Microsoft Lync Phone Edition Wizard - Open Extracted Contents
    5. Here we see the ucupdates.cab file.
      ucupdates - Extracted files
  3. Copy the ucupdates.cab file over to your Lync Front End Server if you didn't in the first step.
  4. Execute the following powershell command (where the WebServer is the Front End Pool or Front End Server in a standalone instance):
    1. Import-CsDeviceUpdate -Identity service:WebServer:lync.mydomain.local -FileName "C:\Polycom CX600\ucupdates.cab" -Verbose
      1. Note: I added the optional -Verbose parameter to show the output of what the PowerShell command is doing behind the scenes.  Some people have mentioned this step taking awhile to complete, this will at least give you some comfort if things are moving forward or not.
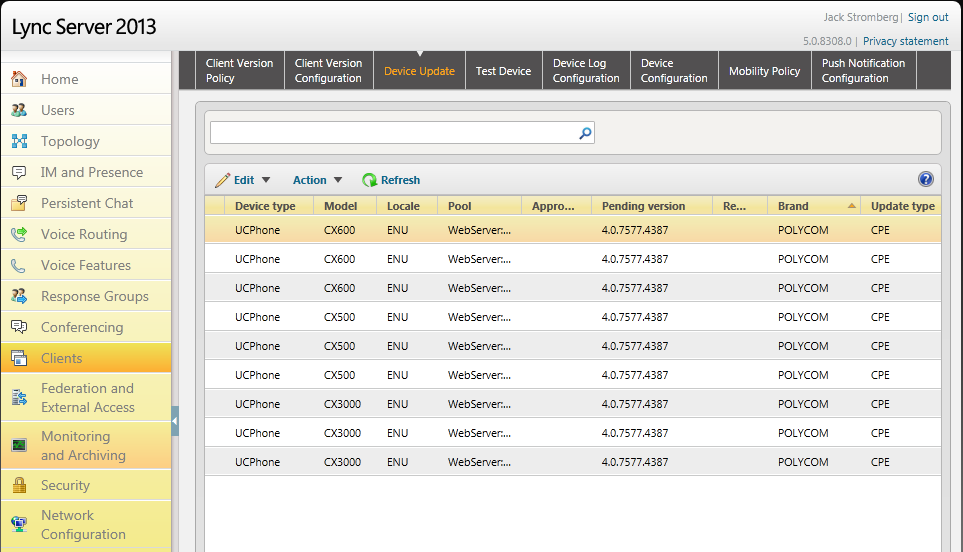
  5. Once the command has completed successfully, head over to the Lync Server Control Panel (LSCP) (Web GUI), and navigate to Clients > Device Update.  Here you should see the firmware for your device and you should notice that the version shows up under the "Pending Version" column.  This means that the firmware will NOT be pushed until we manually approve it.
    LSCP - Clients - Device Update - Polycom
  6. Now we will push out the firmware to one device to ensure the firmware actually works.  Inside of the Lync Server Control Panel, click on the Test Device tab.
    1. Click the New... button and then select Global test device
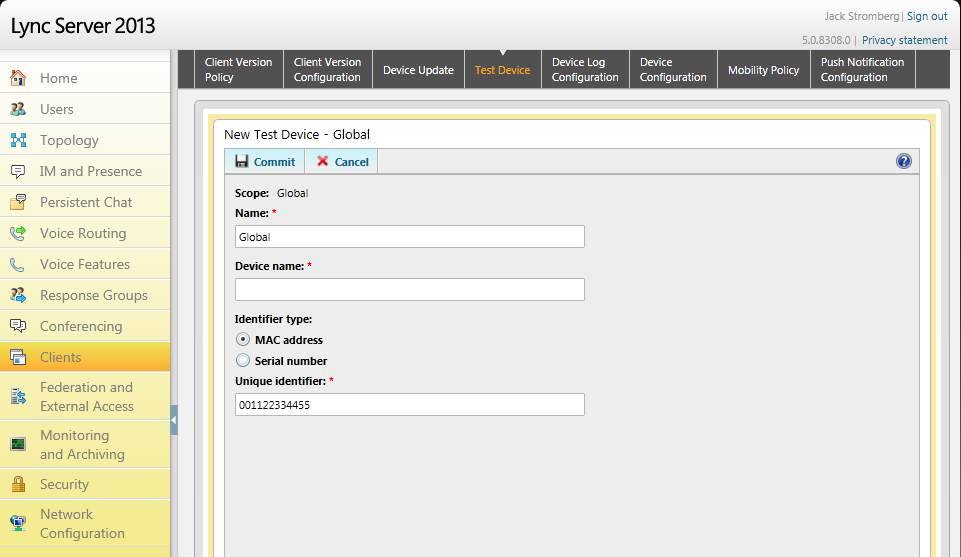
    2. For Device Name, type in something like Polycom CX600 to identify what will be pushed to it, and then enter in the MAC address of the phone in the Unique identifier field.
      1. Note: if you use the MAC address as the Unique identifier, make sure you leave out any special characters, it should be only the hex address.
    3. Here is a screenshot below of my test device:
      LSCP - Clients - Test Device
  7. At this point, all you need to do is wait until the phone reboots and applies the update automatically (you don't need to approve the firmware or anything like that, it just starts to deploy to the test device).
    1. If you want to check what is going on, if you login to your front end server and navigate to C:\inetpub\logs\LogFiles\<randomID>, you can see the process of the phone trying to pull the update files and then reconnecting with the updates.  In my case, I could see the phone boot, pull the new firmware files, and then reboot and make new requests with the latest version in the headers.
    2. 2013-05-16 15:43:13 192.168.1.21 POST /locationinformation/liservice.svc/mex - 443 - 192.168.2.2 OCPhone/4.0.7577.4066+(Microsoft+Lync+2010+Phone+Edition) - 200 0 0 114
      2013-05-16 15:43:13 192.168.1.21 POST /RequestHandler/ucdevice.upx - 443 - 192.168.2.2 Microsoft+UCPhone+Device+(lcs_se_w14_main:1077577:2012/02/18:16:44:15) - 200 0 0 219
      2013-05-16 15:43:13 192.168.1.21 GET /RequestHandler/Files/UCPhone/POLYCOM/CX600/Rev-5/ENU/4.0.7577.4387/CPE/CPE.nbt - 80 - 192.168.2.2 Microsoft+UCPhone+Device+(lcs_se_w14_main:1077577:2012/02/18:16:44:15) - 200 0 995 240
      2013-05-16 15:43:13 192.168.1.21 POST /groupexpansion/service.svc/mex - 443 - 192.168.2.2 OCPhone/4.0.7577.4066+(Microsoft+Lync+2010+Phone+Edition) - 200 0 0 30
      2013-05-16 15:43:15 192.168.1.21 POST /WebTicket/WebTicketService.svc/mex - 443 - 192.168.2.2 OCPhone/4.0.7577.4066+(Microsoft+Lync+2010+Phone+Edition) - 200 0 0 129
      2013-05-16 15:43:17 192.168.1.21 POST /WebTicket/WebTicketService.svc/cert - 443 - 192.168.2.2 OCPhone/4.0.7577.4066+(Microsoft+Lync+2010+Phone+Edition) - 200 0 0 68
      2013-05-16 15:43:17 192.168.1.21 POST /locationinformation/liservice.svc/WebTicket_Bearer - 443 - 192.168.2.2 OCPhone/4.0.7577.4066+(Microsoft+Lync+2010+Phone+Edition) - 200 0 0 197
      ..........Some random logs here..........
      2013-05-16 15:44:16 192.168.1.21 GET /RequestHandler/Files/UCPhone/POLYCOM/CX600/Rev-5/ENU/4.0.7577.4387/CPE/CPE.nbt - 80 - 192.168.2.2 Microsoft+UCPhone+Device+(lcs_se_w14_main:1077577:2012/02/18:16:44:15) - 200 0 0 61951
      2013-05-16 15:44:16 192.168.1.21 GET /RequestHandler/Files/UCPhone/POLYCOM/CX600/Rev-5/ENU/4.0.7577.4387/CPE/CPE.cat - 80 - 192.168.2.2 Microsoft+UCPhone+Device+(lcs_se_w14_main:1077577:2012/02/18:16:44:15) - 200 0 0 44
      2013-05-16 15:44:16 192.168.1.21 GET /RequestHandler/Files/UCPhone/POLYCOM/CX600/Rev-5/ENU/4.0.7577.4387/CPE/CPE.cat - 80 - 192.168.2.2 Microsoft+UCPhone+Device+(lcs_se_w14_main:1077577:2012/02/18:16:44:15) - 200 0 0 10
      ..........Some random logs here..........
      2013-05-16 15:51:55 192.168.1.21 POST /groupexpansion/service.svc/mex - 443 - 192.168.2.2 OCPhone/4.0.7577.4387+(Microsoft+Lync+Phone+Edition) - 200 0 0 11
      2013-05-16 15:51:55 192.168.1.21 POST /locationinformation/liservice.svc/mex - 443 - 192.168.2.2 OCPhone/4.0.7577.4387+(Microsoft+Lync+Phone+Edition) - 200 0 0 8
      2013-05-16 15:51:56 192.168.1.21 POST /WebTicket/WebTicketService.svc/mex - 443 - 192.168.2.2 OCPhone/4.0.7577.4387+(Microsoft+Lync+Phone+Edition) - 200 0 0 10
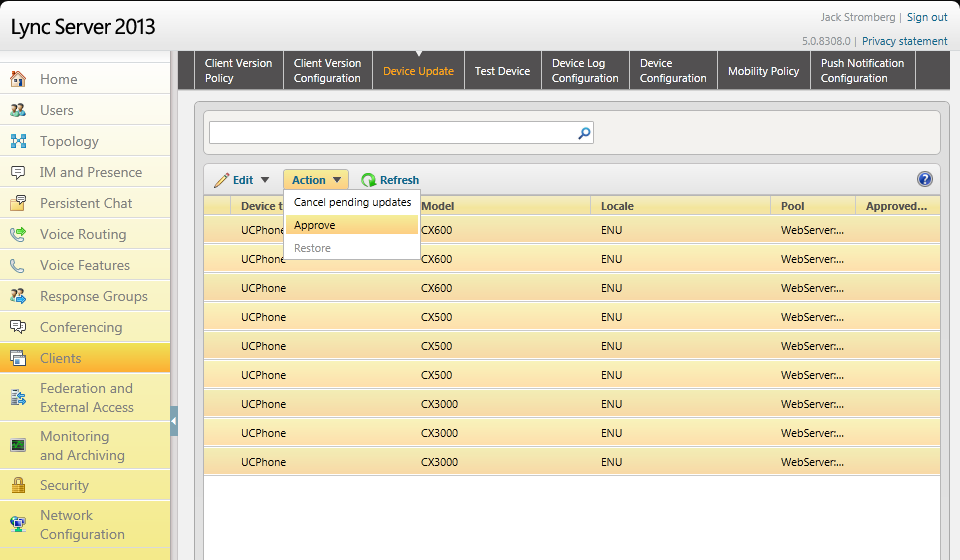
  8. Once the firmware has been applied to your test device and all is well, we need to approve the firmware for all phones in the organization.  To do so, follow the steps below.
    1. Navigate to Clients -> Device Update
    2. Click Edit, Select all
    3. Click Action, Approve
      LSCP - Clients - Device Update - Approve

Polycom Lync Phone - An account matching this phone number cannot be found

Symptom:

When you try to sign in to a Polycom Lync Enabled phone (CX600, CX3000, etc.), you receive the following error:

An account matching this phone number cannot be found. Please contact your support team.

Solution:

I found out that this appeared to be caused from a change made to the Lync front-end server.  There are two things that need to happen.

  1. Make sure the ports for 80 and 443 have been opened on the server's firewall.
  2. Try running the following command in the Lync Management Shell on the front-end server.
    1. Test-CsPhoneBootstrap -PhoneOrExt 15555551234 -PIN 5678 -verbose
    2. The verbose command should output all information needed to figure out where things are going wrong.  In my case, I had an issue with the phone being able to pull-down a certificate (The verbose command revealed the following: "Could not download certificate chain from web service.").  After restarting IIS, I was able to authenticate via the phone to Lync.
    3. Just as an FYI, once you see Result: Success, you will be able to login to the phone.  Prior to seeing that, I was seeing a Result: Failed when the phone could not connect.

Configuring Common Area Phones for Lync 2010-2013

This guide will go over configuring phones for Lync 2010/2013.  Particularly, this is going to go over configuring phones for conference rooms or any other public area that you would like a phone, but the same steps can be used to force users to login/authenticate to a phone with their number/extension and pin.  That being said, purchasing some Polycom CX3000 phones prompted me to write this guide, so if all goes well, your Polycom phones should work like a charm (Aastra phones should follow this guide as well) 😛

Making sure DHCP and DNS can dish out configurations to phones

The first thing to do is make sure you have your DHCP server setup to get your phones working (we will push settings out to the clients/phones so they can find your Lync server, pull down certificates, etc).  In order to do this, you will have to complete the following tasks on your DHCP, DNS, and Lync Front End servers.

  1. Create a DNS record to point to your NTP servers (if you haven't already)
      • Service: _ntp
      • Protocol: _udp
      • Port Number: 123
      • Host: xxx.xxx.xxx (your time server (probably your DC))
  2. Copy the DHCPUtil.exe and DHCPConfigScript.bat from the paths below to the Desktop on your DHCP Server
    1. %ProgramFiles%\Common Files\Microsoft Lync Server 2010 or 
      1. %ProgramFiles%\Common Files\Microsoft Lync Server 2013
  3. Open up a command prompt as Administrator on your DHCP server
  4. Execute the following commands on your DHCP Server
    1. DHCPUtil.exe -SipServer mylyncpoolorserver.mydomain.local –RunConfigScript
      1. If you receive the following
        1. The program can't start because MSVCR110.dll is missing from your computer. Try reinstalling the program to fix this problem.
      2. You can find MSVCR110.dll in the Lync 2013 media (D:\Setup\amd64 for example)
  5. To see if everything ran smoothly, open up the DHCP role and verify the entries were made in the IPv4 section
    1. Phone DHCP
  6. Execute the following from your Lync Server to verify the DHCP settings are correct (Note, if you run this from your DHCP server, it will always come back with a failed result).
    1. DHCPUtil.exe -EmulateClient
  7. Next, you will need to set a PIN policy for any users who will want to login.  Open the Lync Control Panel and click on Security.  Select the PIN Policy tab and double click on the Global policy.  Change the PIN Length to at least 4 you want.  Now click on Commit.

Creating the Common Area Phones Lync Policies

First, create a policy that will Enable Hotdesking.  This will log out a user that may have signed in to the phone and revert the phone back to a Common Area phone after 10 minutes of timeout.

New-CsClientPolicy -Identity CommonAreaClient -EnableHotdesking $True -HotdeskingTimeout 00:10:00

Next, we create a new voice policy to lockdown what the phone can do.  This will prevent users from  setting the phone to do call forwarding, delegation, call transfer, etc.  Alternatively, if you don't want to run the PowerShell command, you can browse use the Lync Server Control Panel web GUI to create a new Voice Policy.  Go to the Lync Control Panel, click on Voice Routing, and then the Voice Policy tab.  The command below will add the Internal policy, you can add others if you desire.

New-CsVoicePolicy -Identity CommonAreaVoice -PstnUsages @{add="Internal"} -AllowSimulRing $FALSE -AllowCallForwarding $FALSE -Name CommonAreaVoice -EnableDelegation $FALSE -EnableTeamCall $FALSE -EnableCallTransfer $FALSE -AllowPSTNReRouting $FALSE -Description "Feature-Restricted Common Area Phone Policy"

Next, we create a policy to restrict what the Common Area phone can do in conferences.  Execute the following command to create a new Conferencing Policy.  Alternatively, we could create this using the Lync Server Control Panel web GUI by clicking on Conferencing and then selecting the Conferencing Policy tab.

New-CsConferencingPolicy -Identity CommonAreaConf -AllowIPAudio $FALSE -AllowIPVideo $FALSE -EnableFileTransfer $FALSE -EnableP2PFileTransfer $FALSE -EnableDataCollaboration $FALSE

Last, we need to create a PIN policy for these guys to login.  I suppose you could use the global one for this step, but we could set this rule to be stricter for just these phones.  This will require all CommonArea phones to use a 4 digit pin to login.

New-CsPINPolicy -Identity CommonAreaPIN -Description "Common Area Phone 
Authentication PIN Policy" -MinPasswordLength 6 -AllowCommonPatterns $TRUE

Creating the Common Area Phones With Our policies

Next, create the commonarea phone:

New-CsCommonAreaPhone -LineUri "tel:+15555555555" -RegistrarPool "lync.mydomain.local" -OU "OU=CommonAreaPhones,DC=mydomain,DC=local" -Description "Batline 1" -DisplayName "Conference Room Batline" -DisplayNumber "1 (555) 555-5555"

Next, we need to set the new account we created with a PIN policy.  To do so, execute the following command (keeping in mind you need this to be at least 4 digits or longer depending on your policy you created earlier).

Set-CsClientPin –Identity “Batline 1” -Pin 123123

Lastly, we need to assign all of the polices we created earlier to this Common Area Phone account. To do so, execute the following commands:

Grant-CsClientPolicy -PolicyName CommonAreaClient -Identity "Batline 1
Grant-CsConferencingPolicy -PolicyName CommonAreaConf -Identity "Batline 1
Grant-CsPINPolicy -PolicyName CommonAreaPIN -Identity "Batline 1

Grant-CsVoicePolicy -PolicyName CommonAreaVoice -Identity "Batline 1

Last, you can execute the following powershell command on your Lync Front End server to try and emulate logging in to the phone.  This is great for debugging where the Lync Phone login would fail:

Test-CsPhoneBootstrap -PhoneOrExt 5555 -Pin 12345 -Verbose


Notes: If you have a polycom phone and you receive the following error "Certificate web service cannot be found. Please contact your support team." -- You need to configure the DHCP options as noted above in the "Making sure DHCP and DNS can dish out configurations to phones" section.

When executing the New-CsCommonAreaPhone command above, you receive the following powershell error "New-CsCommonAreaPhone : Management object not found for identity." I saw this error being an issue with your distinguishedName attribute.  Make sure you spelled your OU correctly, and that you are not using an OU that is built into AD like Users.

Good resources that explain exactly what is going on in greater detail.

http://blog.schertz.name/2010/12/configuring-lync-server-for-phone-edition-devices/

http://blog.schertz.name/2011/04/common-area-phone-configuration-in-lync/

http://www.graham-walsh.com/blog/?p=593