In this tutorial, we will implement one of Server 2012’s newest features, DHCP Failover. Before Server 2012, DHCP failover was achieved through Windows Failover Cluster. Now, Server 2012 has native tools built into the DHCP role to support failover without the need to setup clustering services. It is nice to note that DHCP failover is fully supported in all server editions of Windows Server 2012 (Foundation, Standard, Data Center), allowing everyone to provide this role in high availability.
Before beginning, this tutorial assumes the following prerequisites to this tutorial:
- Two Server 2012 servers have been installed and joined to your domain as member servers
- Both servers have installed the DHCP role
- One of the servers has been configured with your desired DHCP scopes
- Login to your primary DHCP server that has been configured with the DHCP scopes
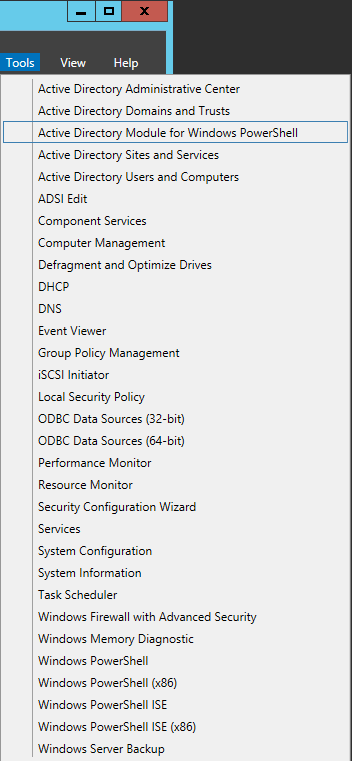
- Open up the DHCP program
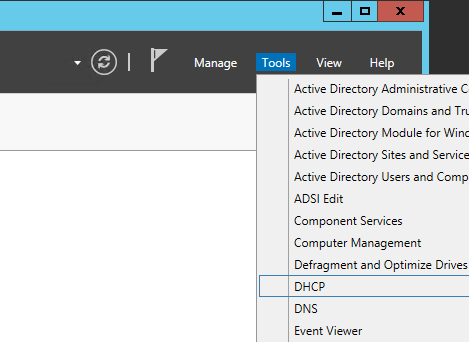
- Launch Server Manager

- Click Tools->DHCP
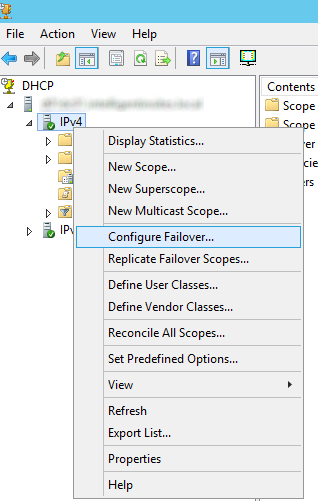
- Expand your DHCP server and right click on IPv4 and select Configure Failover…
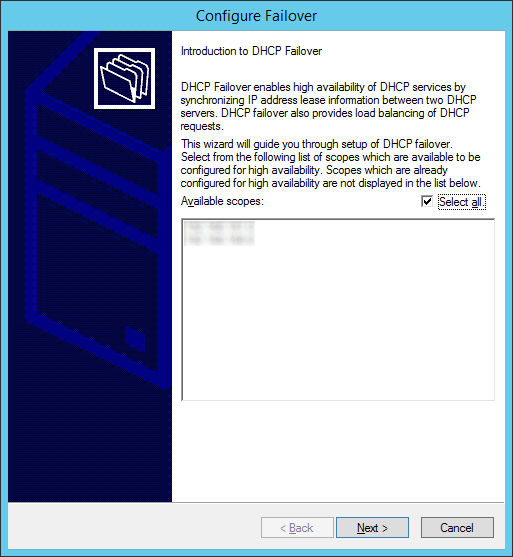
- On the Introduction to DHCP Failover page, click Next to allow failover of all DHCP scopes.
Optionally, uncheck Select all and select the specific scopes you would like to allow to failover and then click Next.
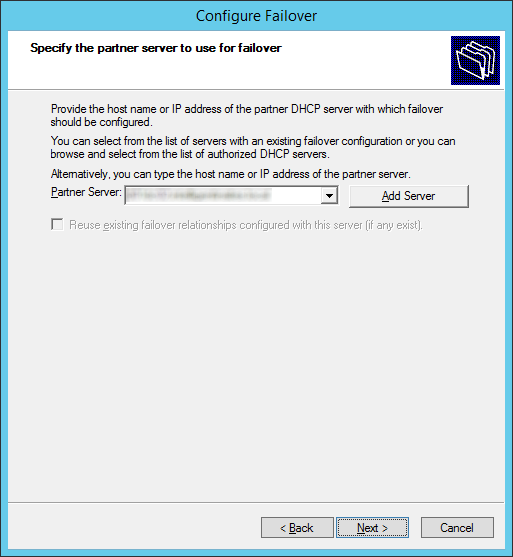
- Click on the Add Server button
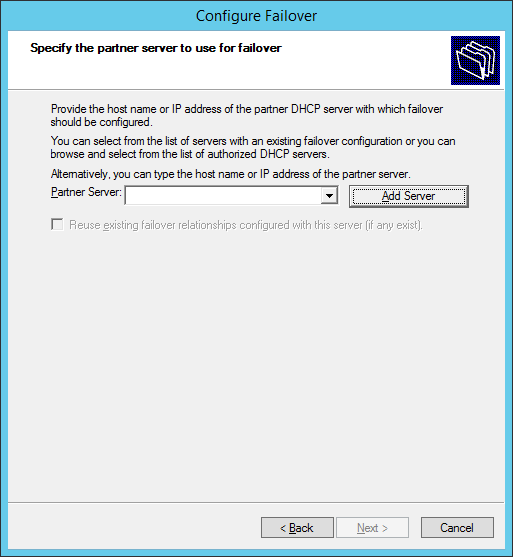
- Check This authorized DHCP server, select the server you would like to use to allow failover, and then click OK

- Click Next
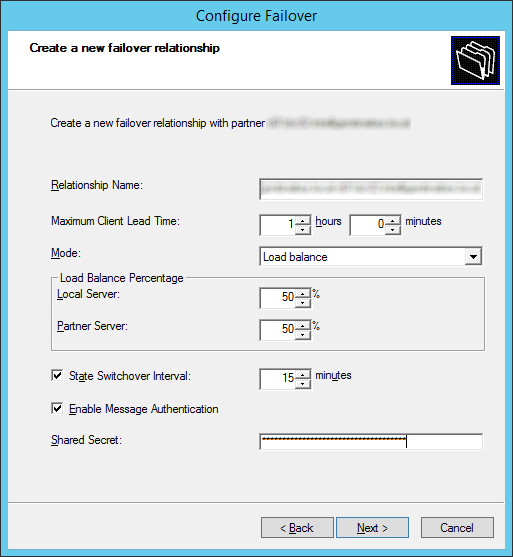
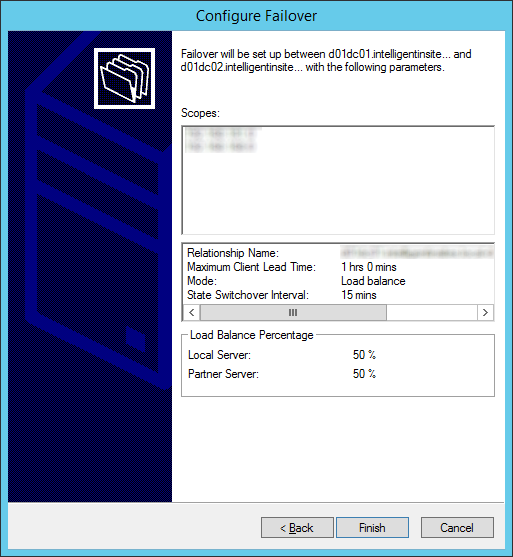
- Enter in the settings you wish to use and then click Next. I would recommend entering a Shared Secret and checking the State Switchover Interval to failover in the event a server fails unexpectedly.
Notes:
If you are failing over to another DHCP server on the same subnet, it is recommended to setup loadbalancing. If you are failing over your DHCP server to another network, set the mode to Hot standby. Additionally, here is a list with more indepth details on what each option does.
- Relationship Name: Descriptive name to describe this DHCP Failover relationship. This can be named anything to help you understand the server relationship.
- Maximum Client Lead Time: Specifies the amount of time for which a DHCP lease may be renewed by either failover peer without contacting the other. It also specifies the amount of time that either DHCP server will wait in a “partner down” state before assuming control of the entire IP address range within the scope. ( default = 1 hour ).
- Mode: Select Load Balance ( default – Active / Active ) or Hot Standby ( Active / Passive )
- Load Balance Percentage: Specifies the percentage of the IP Address range to reserve for each server in the failover relationship. Each server will use their assigned range of addresses prior to assuming control over the entire IP Address range of a scope when the other server transitions into a “partner down” state and the Maximum Client Lead Time ( specified above ) passes.
- Auto State Switchover Interval: When selected, specifies the amount of time that elapses before a DHCP Server is automatically transitioned to a “partner down” state when network communication is interrupted to a DHCP Server. If this option is unchecked, an administrator must manually transition the status of a DHCP Server into a “partner down” state using the DHCP Management console or PowerShell. ( when checked, the default = 60 minutes )
- Enable Message Authentication: check this checkbox option to enable authentication of failover replication traffic between servers
- Shared Secret: Type a “Shared Secret” ( ie., a Password ) to be used to authenticate the failover connection between servers
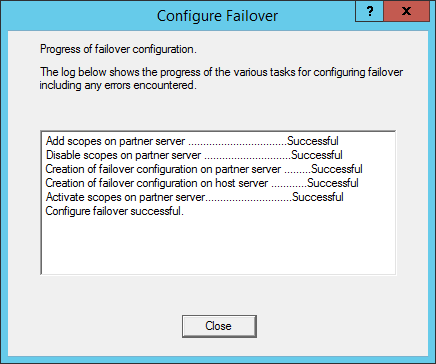
- Click Finish
- Click Close on the results dialog, confirming the failover configuration was properly setup.
- Optionally, you can login to your secondary DHCP server to confirm failover has successfully been setup.
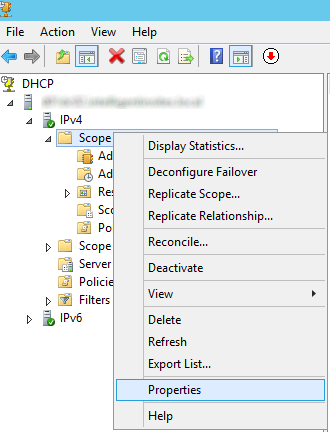
- On the secondary DHCP server, right click on one of your DHCP scopes and select Properties
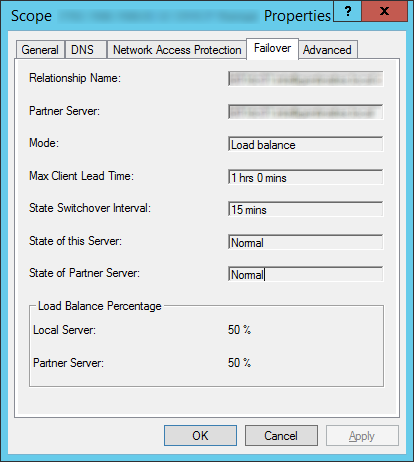
- Select the Failover tab and you should see your failover settings in effect.
That’s all that’s to it! Hurray for high availability! 🙂
Notes:
Descriptions of each of the failover options were found on the following technet article: http://blogs.technet.com/b/keithmayer/archive/2012/10/28/step-by-step-scoping-out-the-new-dhcp-failover-in-windows-server-2012-31-days-of-favorite-features-part-28-of-31.aspx
An offial Microsoft KB article on configuring DHCP failover can be found here: http://technet.microsoft.com/en-us/library/hh831385.aspx