Category Archives: Uncategorized

Creating self-signed certificates with makecert

If you are even in a bind and need a quick self-signed SSL cert and have the Windows SDK installed on your machine, there's a chance you may have the makecert utility and can generate a quick self-signed SSL cert.

The command is as follows:

makecert -r -pe -n "CN=SelfSigned SSL" -a sha1 -ss My -len 2048 -sy 24 -b 01/01/2015 -e 01/01/2050

A complete list of each of the switches can be found here:
https://msdn.microsoft.com/library/windows/desktop/aa386968.aspx

Additionally, a nice MSDN article has been posted on this subject as well: https://msdn.microsoft.com/en-us/library/ff699202.aspx

MakeCert is available as part of the Windows SDK, which you can download from http://go.microsoft.com/fwlink/p/?linkid=84091

[Tutorial] How to install IIS on Server 2012 and Server 2012 R2

Here is a tutorial on how to install IIS on Server 2012 and Server 2012 R2.  The installation process for this is very straight forward and does not differ much from Server 2008 R2.  This guide will only go over the basic install, additional configuration of IIS is outside the scope of this tutorial.  Before beginning, you can choose to install IIS via PowerShell or the GUI.  Either option will result with the exact same configuration.

PowerShell

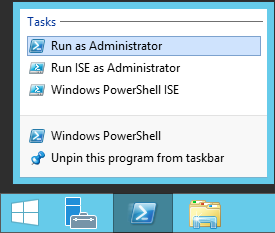
  1. Open an elevated PowerShell console
    Server 2012 - PowerShell - Run as Administrator
  2. Execute the following command
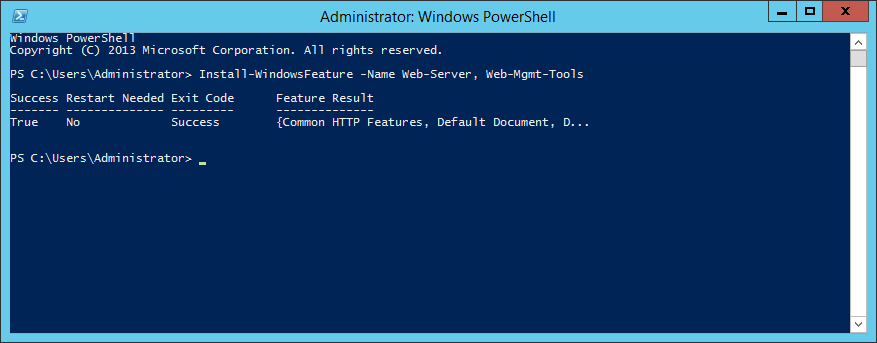
    1. Install-WindowsFeature -Name Web-Server, Web-Mgmt-Tools
      PowerShell - Install-WindowsFeature -Name Web-Server Web-Mgmt-Tools

      1. Note: Web-Mgmt-Tools is optional, but in most instances added to get the Internet Information Services (IIS) Manager GUI snap-in to manage IIS
GUI

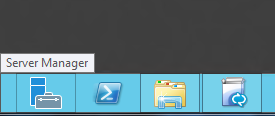
  1. Open Server Manager
    Server Manager
  2. Click on Manage - Add Roles and Features
    Server 2012 - Manage - Add Roles and Features
  3. Click Next > on the Before You Begin screen
    Add Roles and Features Wizard - Before you begin
  4. Click Next > on the Installation Type screen
    Add Roles and Features Wizard - Select installation type
  5. Click Next > on the Server Selection screen
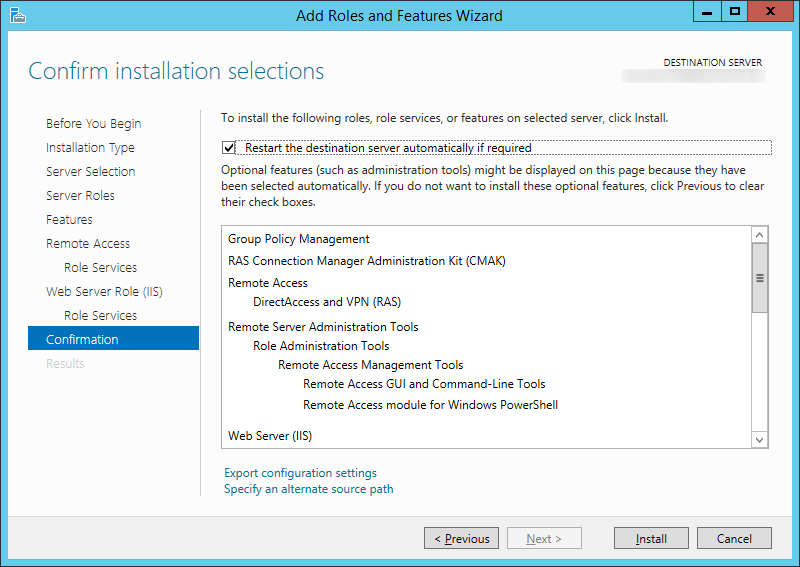
    Add Roles and Features Wizard - Confirm installation selections - Restart the destination server automatically if required
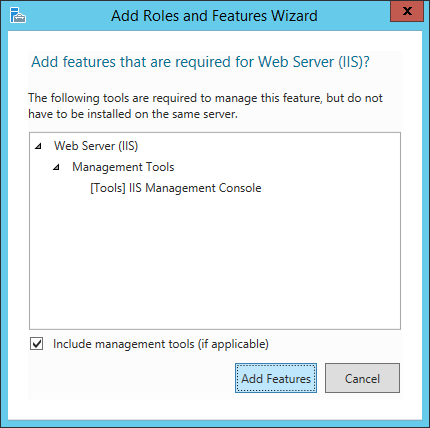
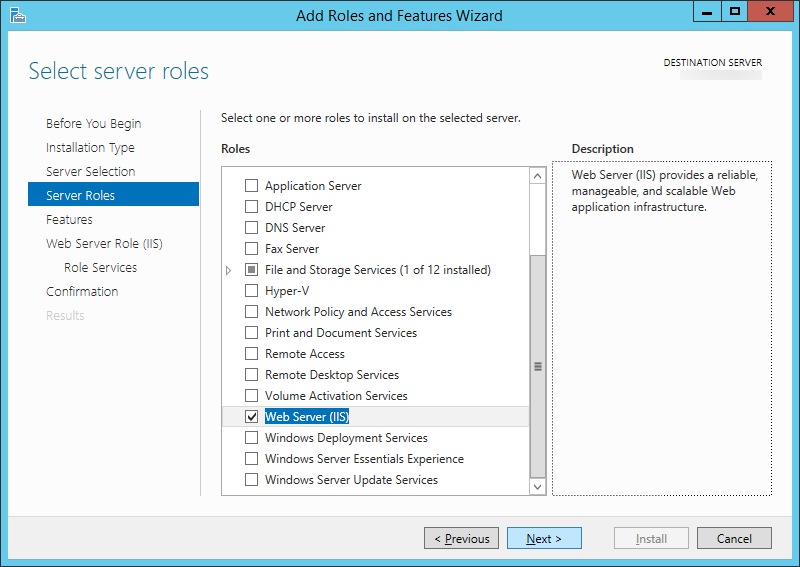
  6. Select Web Server (IIS) from the list on Server Roles and click on the Add Features button once prompted.  Click Next >
    Add Roles and Features Wizard - Add features that are required for web server iis
    Add Roles and Features Wizard - Server Roles - Web Server IIS
  7. Click Next > on the Features screen
    Add Roles and Features Wizard - Features - Default
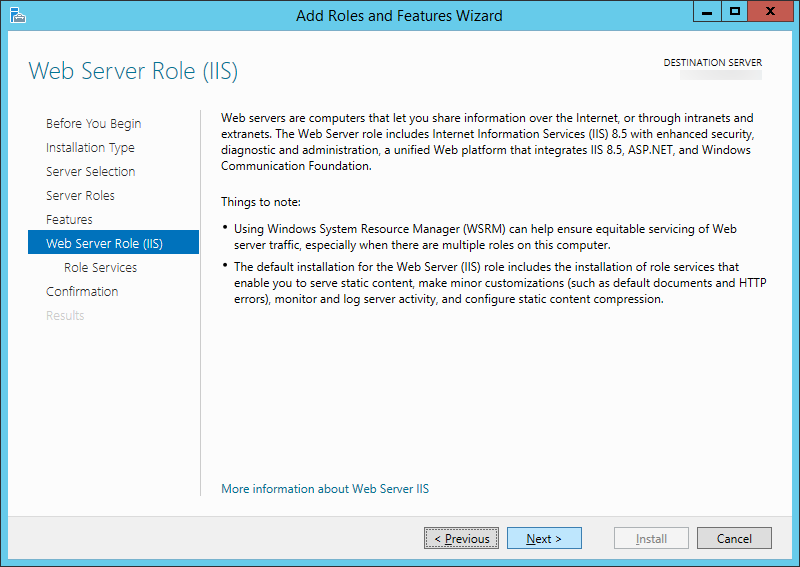
  8. Click Next > on the Web Server Role (IIS) screen
    Add Roles and Features Wizard - Web Server Role IIS
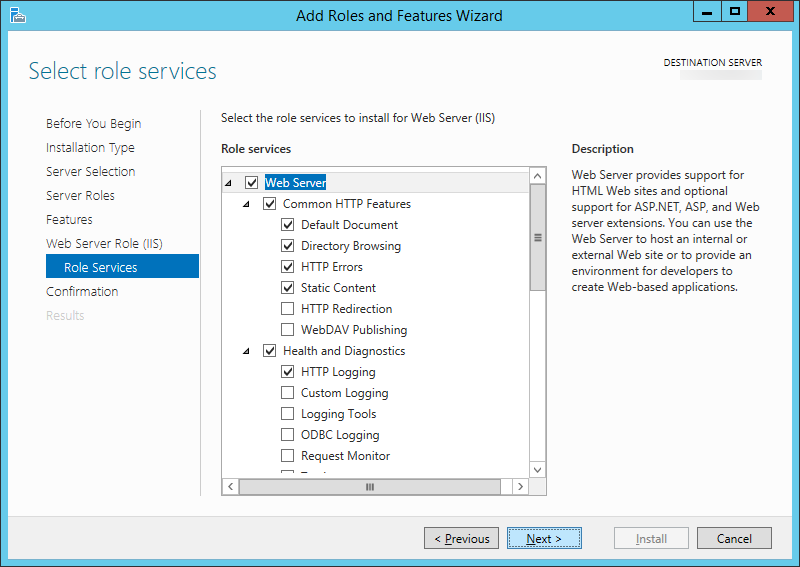
  9. Click Next > on the Role Services screen
    Add Roles and Features Wizard - Web Server Role IIS - Role Services
  10. Click Install on the Confirmation screen
    Add Roles and Features Wizard - Web Sever Role - Confirmation

[Tutorial] How to change the asset tag on a Surface Pro 3

Scenario: When logging into the UEFI BIOS, you can see the asset tag's current value set as 0, but are unable to change it.

Solution: To change the asset tag on a Surface Pro 3, you must download a utility by Microsoft.

Note: Before beginning, please ensure you are using UEFI firmware version 3.9.150.0 or later

  1. Download a copy of the Surface Pro 3 Asset Tag CLI Utility from here (Surface Asset Tag.zip):
    https://www.microsoft.com/en-us/download/details.aspx?id=46703
  2. Extract the files from the zipped folder
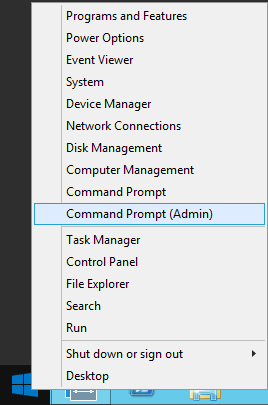
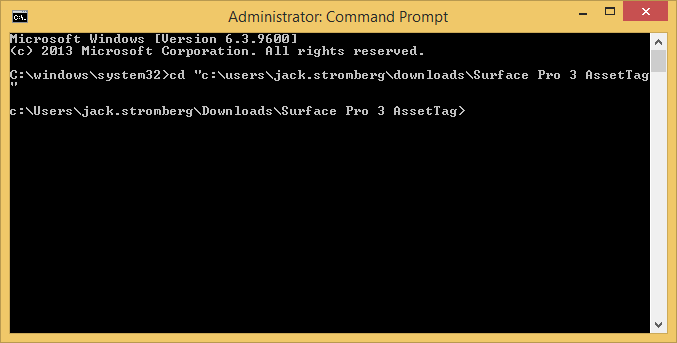
  3. Open up an elevated command prompt
    Elevated Command Prompt
  4. Navigate to the folder you extracted the Surface Pro 3 Asset Tag CLI utility to
    Surface pro 3 AssetTag Directory
  5. Execute the following command
    1. AssetTag.exe -s ENTERYOURASSETTAGHERE
      AssetTag set Surface Pro 3


      1. Note: The asset tag can be up to 36 characters long. Valid characters include A-Z, a-z, 0-9, period and hyphen.
  6. Reboot the machine for the changes to take effect


About the tool

The utility comes with a readme on additional functionality.  This is copied directly from the Surface Pro 3 Asset Tag README.txt file for convience:

This tool gets or sets the proposed Asset Tag, which will be applied on next reboot.

The current Asset Tag is an SMBIOS setting which can be queried via WMI:
(Get-WmiObject -query "Select * from Win32_SystemEnclosure").SMBiosAssetTag

Get proposed asset tag:
AssetTag -g

Clear proposed asset tag:
AssetTag -s

Set proposed asset tag:
AssetTag -s ABc-45.67

Valid values:
The asset tag can be up to 36 characters long.
Valid characters include A-Z, a-z, 0-9, period and hyphen.

PowerShell script demonstrating way to get proposed value and interpret errors.
Note that stout contains the Asset Tag and stderr contains error messages.

AssetTag -g > $asset_tag 2> $error_message
$asset_tag_return_code = $LASTEXITCODE
$asset_tag = $asset_tag.Trim("`r`n")

if ($asset_tag_return_code -eq 0) {
Write-Output ("Good Tag = " + $asset_tag)
} else {
Write-Output (
"Failure: Code = " + $asset_tag_return_code +
"Tag = " + $asset_tag +
"Message = " + $error_message)
}

Update: Microsoft has posted official documentation on these steps here: https://docs.microsoft.com/en-us/surface/assettag

Cisco AnyConnect - Windows 8 - The VPN client driver encountered an error. Please restart your computer or device, then try again error

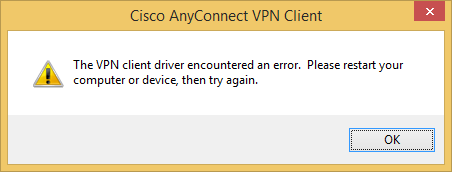
Symptom: You receive the following error when trying to establish a connection with the Cisco AnyConnect client on Windows 8 x64.

Cisco AnyConnect VPN Client - The VPN client driver encountered an error.  Please restart your computer or device then try again error

Solution:

Option 1: PowerShell Method

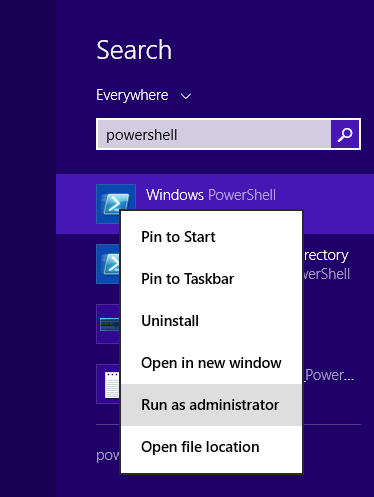
  1. Go to the Windows 8 Start screen, search for PowerShell, Run as an Administrator
    Windows 8 - Search - powershell - run as administrator
  2. Execute the following powershell command
    1. Set-ItemProperty -Path HKLM:\SYSTEM\CurrentControlSet\Services\vpnva -Name DisplayName -Value ‘Cisco AnyConnect VPN Virtual Miniport Adapter for Windows x64‘
      PowerShell-Set-vpnva-DisplayName-Cisco-AnyConnect-VPN
  3. Exit and reopen the Cisco AnyConnect Program

Option 2: Registry Editor GUI Method

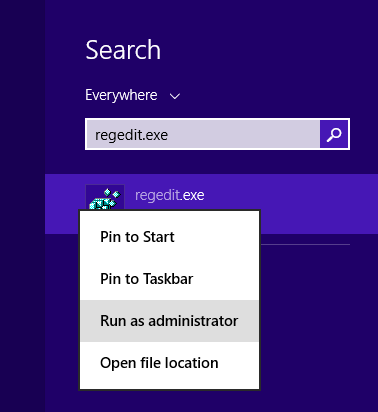
  1. Go to the Windows 8 Start screen, search for regedit, right click Run as administrator
    Windows 8 - Search - regedit - Run as administrator
  2. Navigate to the following registry key
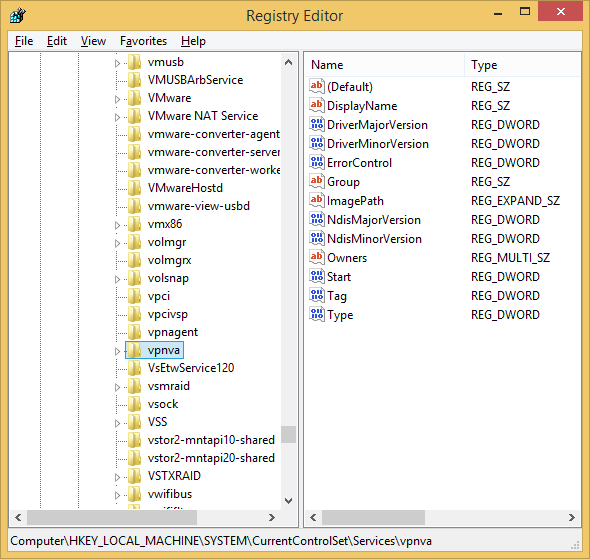
    HKEY_LOCAL_MACHINE\SYSTEM\CurrentControlSet\Services\vpnva
    HKEY_LOCAL_MACHINE-System-CurrentControlSet-Services-vpnva
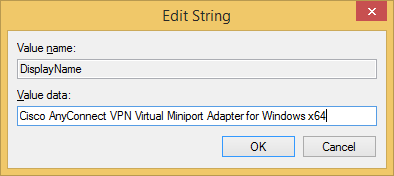
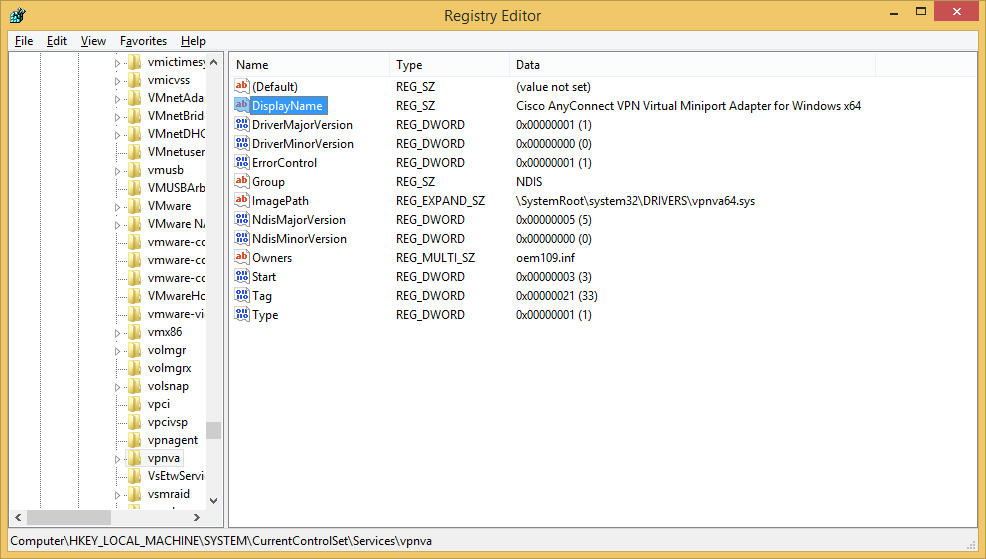
  3. Double cick on the DisplayName value and replace the value with Cisco AnyConnect VPN Virtual Miniport Adapter for Windows x64
    HKEY_LOCAL_MACHINE-System-CurrentControlSet-Services-vpnva - DisplayName - Cisco AnyConnect VPN Virtual Miniport Adapter for Windows x64
    HKEY_LOCAL_MACHINE-System-CurrentControlSet-Services-vpnva - DisplayName - Cisco AnyConnect VPN Virtual Miniport Adapter for Windows x64 - regedit
  4. Exit and reopen the Cisco AnyConnect VPN client

System Center 2012 R2 Configuration Manager - CcmSetup failed with error code 0x87d00280

Symptom: When trying to install the System Center 2012 R2 Configuration Manager client manually, the client seems to never finish the install.  When opening the install log in C:\Windows\ccmsetup\Logs\ccmsetup.log, you will notice the following behavior, pointing mostly to client HTTPS/certificate errors.

<![LOG[==========[ ccmsetup started in process 2576 ]==========]LOG]!><time="16:00:01.707+300" date="09-19-2014" component="ccmsetup" context="" type="1" thread="2624" file="ccmsetup.cpp:9437">
<![LOG[Running on platform X64]LOG]!><time="16:00:01.817+300" date="09-19-2014" component="ccmsetup" context="" type="1" thread="2624" file="util.cpp:1837">
<![LOG[Launch from folder \\SCCM01\Manual Client Install\]LOG]!><time="16:00:01.817+300" date="09-19-2014" component="ccmsetup" context="" type="1" thread="2624" file="ccmsetup.cpp:721">
<![LOG[CcmSetup version: 5.0.7958.1000]LOG]!><time="16:00:01.817+300" date="09-19-2014" component="ccmsetup" context="" type="1" thread="2624" file="ccmsetup.cpp:727">
<![LOG[Running on 'Microsoft Windows 7 Professional ' (6.1.7601). Service Pack (1.0). SuiteMask = 272. Product Type = 18]LOG]!><time="16:00:01.895+300" date="09-19-2014" component="ccmsetup" context="" type="1" thread="2624" file="util.cpp:1919">
<![LOG[Ccmsetup command line: "\\SCCM01\Manual Client Install\ccmsetup.exe" ]LOG]!><time="16:00:01.895+300" date="09-19-2014" component="ccmsetup" context="" type="1" thread="2624" file="ccmsetup.cpp:3590">
<![LOG[Local Machine is joined to an AD domain]LOG]!><time="16:00:01.895+300" date="09-19-2014" component="ccmsetup" context="" type="0" thread="2624" file="lsad.cpp:714">
<![LOG[Current AD forest name is mydomain.local, domain name is mydomain.local]LOG]!><time="16:00:02.035+300" date="09-19-2014" component="ccmsetup" context="" type="1" thread="2624" file="lsad.cpp:842">
<![LOG[Domain joined client is in Intranet]LOG]!><time="16:00:02.035+300" date="09-19-2014" component="ccmsetup" context="" type="1" thread="2624" file="lsad.cpp:1047">
<![LOG[DhcpGetOriginalSubnetMask entry point is supported.]LOG]!><time="16:00:02.035+300" date="09-19-2014" component="ccmsetup" context="" type="0" thread="2624" file="ccmiputil.cpp:117">
<![LOG[Begin checking Alternate Network Configuration]LOG]!><time="16:00:02.035+300" date="09-19-2014" component="ccmsetup" context="" type="0" thread="2624" file="ccmiputil.cpp:1095">
<![LOG[Finished checking Alternate Network Configuration]LOG]!><time="16:00:02.035+300" date="09-19-2014" component="ccmsetup" context="" type="0" thread="2624" file="ccmiputil.cpp:1172">
<![LOG[Adapter {39CB0535-CE77-4ED9-9807-2DB558378C86} is DHCP enabled. Checking quarantine status.]LOG]!><time="16:00:02.051+300" date="09-19-2014" component="ccmsetup" context="" type="0" thread="2624" file="ccmiputil.cpp:436">
<![LOG[Current AD site of machine is SomewhereOverTheRainbow]LOG]!><time="16:00:02.066+300" date="09-19-2014" component="ccmsetup" context="" type="1" thread="2624" file="lsad.cpp:770">
<![LOG[Attempting to query AD for assigned site code]LOG]!><time="16:00:02.066+300" date="09-19-2014" component="ccmsetup" context="" type="0" thread="2624" file="lsad.cpp:2071">
<![LOG[Performing AD query: '(&(ObjectCategory=MSSMSRoamingBoundaryRange)(|(&(MSSMSRangedIPLow<=3232279113)(MSSMSRangedIPHigh>=3232279113))))']LOG]!><time="16:00:02.456+300" date="09-19-2014" component="ccmsetup" context="" type="0" thread="2624" file="lsad.cpp:656">
<![LOG[Performing AD query: '(&(ObjectCategory=mSSMSSite)(|(mSSMSRoamingBoundaries=192.168.1.0)(mSSMSRoamingBoundaries=SomewhereOverTheRainbox)(mSSMSSiteCode=001)))']LOG]!><time="16:00:02.924+300" date="09-19-2014" component="ccmsetup" context="" type="0" thread="2624" file="lsad.cpp:656">
<![LOG[LSIsSiteCompatible : Verifying Site Compatibility for <001>]LOG]!><time="16:00:02.924+300" date="09-19-2014" component="ccmsetup" context="" type="1" thread="2624" file="lsad.cpp:5419">
<![LOG[Current AD forest name is mydomain.local, domain name is mydomain.local]LOG]!><time="16:00:02.924+300" date="09-19-2014" component="ccmsetup" context="" type="1" thread="2624" file="lsad.cpp:842">
<![LOG[Domain joined client is in Intranet]LOG]!><time="16:00:02.924+300" date="09-19-2014" component="ccmsetup" context="" type="1" thread="2624" file="lsad.cpp:1047">
<![LOG[LSGetSiteVersionFromAD : Attempting to query AD for MPs for site '001']LOG]!><time="16:00:02.924+300" date="09-19-2014" component="ccmsetup" context="" type="0" thread="2624" file="lsad.cpp:5248">
<![LOG[Performing AD query: '(&(ObjectCategory=mSSMSManagementPoint)(mSSMSSiteCode=001))']LOG]!><time="16:00:02.924+300" date="09-19-2014" component="ccmsetup" context="" type="0" thread="2624" file="lsad.cpp:656">
<![LOG[LSGetSiteVersionFromAD : Successfully retrieved version '5.00.7958.1000' for site '001']LOG]!><time="16:00:02.940+300" date="09-19-2014" component="ccmsetup" context="" type="1" thread="2624" file="lsad.cpp:5317">
<![LOG[LSIsSiteCompatible : Site Version = '5.00.7958.1000' Site Capabilities = <Capabilities SchemaVersion="1.0"><Property Name="SSL" Version="1"/><Property Name="SSLState" Value="63"/></Capabilities>]LOG]!><time="16:00:02.940+300" date="09-19-2014" component="ccmsetup" context="" type="0" thread="2624" file="lsad.cpp:5474">
<![LOG[LSIsSiteVersionCompatible : Site Version '5.00.7958.1000' is compatible.]LOG]!><time="16:00:02.940+300" date="09-19-2014" component="ccmsetup" context="" type="1" thread="2624" file="lsad.cpp:5385">
<![LOG[LSIsSiteCompatible : Site <001> Version '5.00.7958.1000' is compatible.]LOG]!><time="16:00:02.940+300" date="09-19-2014" component="ccmsetup" context="" type="1" thread="2624" file="lsad.cpp:5486">
<![LOG[LSGetAssignedSiteFromAD : Trying to Assign to the Site <001>]LOG]!><time="16:00:02.940+300" date="09-19-2014" component="ccmsetup" context="" type="1" thread="2624" file="lsad.cpp:2192">
<![LOG[Got site code '001' from AD.]LOG]!><time="16:00:02.940+300" date="09-19-2014" component="ccmsetup" context="" type="1" thread="2624" file="ccmsetup.cpp:266">
<![LOG[Performing AD query: '(&(ObjectCategory=mSSMSManagementPoint)(mSSMSDefaultMP=TRUE)(mSSMSSiteCode=001))']LOG]!><time="16:00:02.940+300" date="09-19-2014" component="ccmsetup" context="" type="0" thread="2624" file="lsad.cpp:656">
<![LOG[OperationalXml '<ClientOperationalSettings><Version>5.00.7958.1000</Version><SecurityConfiguration><SecurityModeMask>63</SecurityModeMask><SecurityModeMaskEx>63</SecurityModeMaskEx><HTTPPort>80</HTTPPort><HTTPSPort>443</HTTPSPort><CertificateStoreName></CertificateStoreName><CertificateIssuers>CN=My Domain Root CA; OU=IT; O=My Domain; C=US</CertificateIssuers><CertificateSelectionCriteria></CertificateSelectionCriteria><CertificateSelectFirstFlag>1</CertificateSelectFirstFlag><SiteSigningCert>CertificateInfoRemoved</SiteSigningCert></SecurityConfiguration><RootSiteCode>001</RootSiteCode><CCM> <CommandLine>SMSSITECODE=001</CommandLine> </CCM><FSP> <FSPServer></FSPServer> </FSP><Capabilities SchemaVersion ="1.0"><Property Name="SSL" Version="1" /><Property Name="SSLState" Value="63" /></Capabilities><Domain Value="mydomain.local" /><Forest Value="mydomain.local" /></ClientOperationalSettings>']LOG]!><time="16:00:02.940+300" date="09-19-2014" component="ccmsetup" context="" type="0" thread="2624" file="lsadcache.cpp:236">
<![LOG[Unable to open Registry key Software\Microsoft\CCM. Return Code [80070002]. Client HTTPS state is Unknown.]LOG]!><time="16:00:02.940+300" date="09-19-2014" component="ccmsetup" context="" type="1" thread="2624" file="ccmutillib.cpp:373">
<![LOG[The MP name retrieved is 'SCCM01.mydomain.local' with version '7958' and capabilities '<Capabilities SchemaVersion="1.0"><Property Name="SSL" Version="1"/><Property Name="SSLState" Value="63"/></Capabilities>']LOG]!><time="16:00:02.940+300" date="09-19-2014" component="ccmsetup" context="" type="1" thread="2624" file="lsadcache.cpp:334">
<![LOG[MP 'SCCM01.mydomain.local' is compatible]LOG]!><time="16:00:02.940+300" date="09-19-2014" component="ccmsetup" context="" type="1" thread="2624" file="lsadcache.cpp:339">
<![LOG[Retrieved 1 MP records from AD for site '001']LOG]!><time="16:00:02.940+300" date="09-19-2014" component="ccmsetup" context="" type="0" thread="2624" file="lsadcache.cpp:287">
<![LOG[FromAD: command line = SMSSITECODE=001]LOG]!><time="16:00:02.940+300" date="09-19-2014" component="ccmsetup" context="" type="0" thread="2624" file="ccmsetup.cpp:288">
<![LOG[Current AD forest name is mydomain.local, domain name is mydomain.local]LOG]!><time="16:00:02.940+300" date="09-19-2014" component="ccmsetup" context="" type="1" thread="2624" file="lsad.cpp:842">
<![LOG[Domain joined client is in Intranet]LOG]!><time="16:00:02.940+300" date="09-19-2014" component="ccmsetup" context="" type="1" thread="2624" file="lsad.cpp:1047">
<![LOG[CMPInfoFromADCache requests are throttled for 01:07:09]LOG]!><time="16:00:02.940+300" date="09-19-2014" component="ccmsetup" context="" type="0" thread="2624" file="lsadcache.cpp:173">
<![LOG[Found MP https://SCCM01.mydomain.local from AD]LOG]!><time="16:00:02.940+300" date="09-19-2014" component="ccmsetup" context="" type="1" thread="2624" file="ccmsetup.cpp:6197">
<![LOG[SslState value: 255]LOG]!><time="16:00:02.940+300" date="09-19-2014" component="ccmsetup" context="" type="0" thread="2624" file="ccmsetup.cpp:4425">
<![LOG[Ccmsetup was run without any user parameters specified. Running without registering ccmsetup as a service.]LOG]!><time="16:00:02.940+300" date="09-19-2014" component="ccmsetup" context="" type="1" thread="2624" file="ccmsetup.cpp:4490">
<![LOG[Detected sitecode '001' from AD.]LOG]!><time="16:00:02.940+300" date="09-19-2014" component="ccmsetup" context="" type="1" thread="2624" file="ccmsetup.cpp:4500">
<![LOG[CCMHTTPPORT: 80]LOG]!><time="16:00:02.940+300" date="09-19-2014" component="ccmsetup" context="" type="1" thread="2624" file="ccmsetup.cpp:8617">
<![LOG[CCMHTTPSPORT: 443]LOG]!><time="16:00:02.940+300" date="09-19-2014" component="ccmsetup" context="" type="1" thread="2624" file="ccmsetup.cpp:8632">
<![LOG[CCMHTTPSSTATE: 255]LOG]!><time="16:00:02.940+300" date="09-19-2014" component="ccmsetup" context="" type="1" thread="2624" file="ccmsetup.cpp:8650">
<![LOG[CCMHTTPSCERTNAME: ]LOG]!><time="16:00:02.940+300" date="09-19-2014" component="ccmsetup" context="" type="1" thread="2624" file="ccmsetup.cpp:8668">
<![LOG[FSP: ]LOG]!><time="16:00:02.940+300" date="09-19-2014" component="ccmsetup" context="" type="1" thread="2624" file="ccmsetup.cpp:8720">
<![LOG[CCMCERTISSUERS: CN=My Domain Root CA; OU=IT; O=My Domain; C=US]LOG]!><time="16:00:02.940+300" date="09-19-2014" component="ccmsetup" context="" type="1" thread="2624" file="ccmsetup.cpp:8746">
<![LOG[CCMFIRSTCERT: 1]LOG]!><time="16:00:02.940+300" date="09-19-2014" component="ccmsetup" context="" type="1" thread="2624" file="ccmsetup.cpp:8778">
<![LOG[Config file: ]LOG]!><time="16:00:03.018+300" date="09-19-2014" component="ccmsetup" context="" type="1" thread="2624" file="ccmsetup.cpp:4539">
<![LOG[Retry time: 10 minute(s)]LOG]!><time="16:00:03.018+300" date="09-19-2014" component="ccmsetup" context="" type="1" thread="2624" file="ccmsetup.cpp:4540">
<![LOG[MSI log file: C:\Windows\ccmsetup\Logs\client.msi.log]LOG]!><time="16:00:03.018+300" date="09-19-2014" component="ccmsetup" context="" type="1" thread="2624" file="ccmsetup.cpp:4541">
<![LOG[MSI properties: SMSSITECODE="001" CCMHTTPPORT="80" CCMHTTPSPORT="443" CCMHTTPSSTATE="255" CCMCERTISSUERS="CN=My Domain Root CA; OU=IT; O=My Domain; C=US" CCMFIRSTCERT="1"]LOG]!><time="16:00:03.018+300" date="09-19-2014" component="ccmsetup" context="" type="1" thread="2624" file="ccmsetup.cpp:4542">
<![LOG[Source List:]LOG]!><time="16:00:03.018+300" date="09-19-2014" component="ccmsetup" context="" type="1" thread="2624" file="ccmsetup.cpp:4550">
<![LOG[MPs:]LOG]!><time="16:00:03.018+300" date="09-19-2014" component="ccmsetup" context="" type="1" thread="2624" file="ccmsetup.cpp:4569">
<![LOG[ https://SCCM01.mydomain.local]LOG]!><time="16:00:03.018+300" date="09-19-2014" component="ccmsetup" context="" type="1" thread="2624" file="ccmsetup.cpp:4584">
<![LOG[No version of the client is currently detected.]LOG]!><time="16:00:03.018+300" date="09-19-2014" component="ccmsetup" context="" type="1" thread="2624" file="ccmsetup.cpp:2748">
<![LOG[Folder 'Microsoft\Configuration Manager' not found. Task does not exist.]LOG]!><time="16:00:03.018+300" date="09-19-2014" component="ccmsetup" context="" type="0" thread="2624" file="wintask.cpp:622">
<![LOG[Updated security on object C:\Windows\ccmsetup\.]LOG]!><time="16:00:03.033+300" date="09-19-2014" component="ccmsetup" context="" type="0" thread="2624" file="ccmsetup.cpp:9281">
<![LOG[A Fallback Status Point has not been specified. Message with STATEID='100' will not be sent.]LOG]!><time="16:00:03.033+300" date="09-19-2014" component="ccmsetup" context="" type="1" thread="2624" file="ccmsetup.cpp:9763">
<![LOG[Downloading file \\SCCM01\Manual Client Install\ccmsetup.exe]LOG]!><time="16:00:04.048+300" date="09-19-2014" component="ccmsetup" context="" type="1" thread="2624" file="ccmsetup.cpp:5685">
<![LOG[Downloading \\SCCM01\Manual Client Install\ccmsetup.exe to C:\Windows\ccmsetup\ccmsetup.exe]LOG]!><time="16:00:04.048+300" date="09-19-2014" component="ccmsetup" context="" type="1" thread="2624" file="ccmsetup.cpp:5769">
<![LOG[File download 3% complete (61440 of 1614520 bytes).]LOG]!><time="16:00:04.079+300" date="09-19-2014" component="ccmsetup" context="" type="0" thread="2624" file="ccmsetup.cpp:9185">
<![LOG[File download 7% complete (122880 of 1614520 bytes).]LOG]!><time="16:00:04.079+300" date="09-19-2014" component="ccmsetup" context="" type="0" thread="2624" file="ccmsetup.cpp:9185">
<![LOG[File download 11% complete (184320 of 1614520 bytes).]LOG]!><time="16:00:04.079+300" date="09-19-2014" component="ccmsetup" context="" type="0" thread="2624" file="ccmsetup.cpp:9185">
<![LOG[File download 15% complete (245760 of 1614520 bytes).]LOG]!><time="16:00:04.126+300" date="09-19-2014" component="ccmsetup" context="" type="0" thread="2624" file="ccmsetup.cpp:9185">
<![LOG[File download 19% complete (307200 of 1614520 bytes).]LOG]!><time="16:00:04.126+300" date="09-19-2014" component="ccmsetup" context="" type="0" thread="2624" file="ccmsetup.cpp:9185">
<![LOG[File download 22% complete (368640 of 1614520 bytes).]LOG]!><time="16:00:04.126+300" date="09-19-2014" component="ccmsetup" context="" type="0" thread="2624" file="ccmsetup.cpp:9185">
<![LOG[File download 26% complete (430080 of 1614520 bytes).]LOG]!><time="16:00:04.126+300" date="09-19-2014" component="ccmsetup" context="" type="0" thread="2624" file="ccmsetup.cpp:9185">
<![LOG[File download 30% complete (491520 of 1614520 bytes).]LOG]!><time="16:00:04.172+300" date="09-19-2014" component="ccmsetup" context="" type="0" thread="2624" file="ccmsetup.cpp:9185">
<![LOG[File download 34% complete (552960 of 1614520 bytes).]LOG]!><time="16:00:04.172+300" date="09-19-2014" component="ccmsetup" context="" type="0" thread="2624" file="ccmsetup.cpp:9185">
<![LOG[File download 38% complete (614400 of 1614520 bytes).]LOG]!><time="16:00:04.172+300" date="09-19-2014" component="ccmsetup" context="" type="0" thread="2624" file="ccmsetup.cpp:9185">
<![LOG[File download 41% complete (675840 of 1614520 bytes).]LOG]!><time="16:00:04.172+300" date="09-19-2014" component="ccmsetup" context="" type="0" thread="2624" file="ccmsetup.cpp:9185">
<![LOG[File download 45% complete (737280 of 1614520 bytes).]LOG]!><time="16:00:04.219+300" date="09-19-2014" component="ccmsetup" context="" type="0" thread="2624" file="ccmsetup.cpp:9185">
<![LOG[File download 49% complete (798720 of 1614520 bytes).]LOG]!><time="16:00:04.219+300" date="09-19-2014" component="ccmsetup" context="" type="0" thread="2624" file="ccmsetup.cpp:9185">
<![LOG[File download 53% complete (860160 of 1614520 bytes).]LOG]!><time="16:00:04.219+300" date="09-19-2014" component="ccmsetup" context="" type="0" thread="2624" file="ccmsetup.cpp:9185">
<![LOG[File download 57% complete (921600 of 1614520 bytes).]LOG]!><time="16:00:04.219+300" date="09-19-2014" component="ccmsetup" context="" type="0" thread="2624" file="ccmsetup.cpp:9185">
<![LOG[File download 60% complete (983040 of 1614520 bytes).]LOG]!><time="16:00:04.250+300" date="09-19-2014" component="ccmsetup" context="" type="0" thread="2624" file="ccmsetup.cpp:9185">
<![LOG[File download 64% complete (1044480 of 1614520 bytes).]LOG]!><time="16:00:04.250+300" date="09-19-2014" component="ccmsetup" context="" type="0" thread="2624" file="ccmsetup.cpp:9185">
<![LOG[File download 68% complete (1105920 of 1614520 bytes).]LOG]!><time="16:00:04.266+300" date="09-19-2014" component="ccmsetup" context="" type="0" thread="2624" file="ccmsetup.cpp:9185">
<![LOG[File download 72% complete (1167360 of 1614520 bytes).]LOG]!><time="16:00:04.266+300" date="09-19-2014" component="ccmsetup" context="" type="0" thread="2624" file="ccmsetup.cpp:9185">
<![LOG[File download 76% complete (1228800 of 1614520 bytes).]LOG]!><time="16:00:04.313+300" date="09-19-2014" component="ccmsetup" context="" type="0" thread="2624" file="ccmsetup.cpp:9185">
<![LOG[File download 79% complete (1290240 of 1614520 bytes).]LOG]!><time="16:00:04.313+300" date="09-19-2014" component="ccmsetup" context="" type="0" thread="2624" file="ccmsetup.cpp:9185">
<![LOG[File download 83% complete (1351680 of 1614520 bytes).]LOG]!><time="16:00:04.313+300" date="09-19-2014" component="ccmsetup" context="" type="0" thread="2624" file="ccmsetup.cpp:9185">
<![LOG[File download 87% complete (1413120 of 1614520 bytes).]LOG]!><time="16:00:04.313+300" date="09-19-2014" component="ccmsetup" context="" type="0" thread="2624" file="ccmsetup.cpp:9185">
<![LOG[File download 91% complete (1474560 of 1614520 bytes).]LOG]!><time="16:00:04.344+300" date="09-19-2014" component="ccmsetup" context="" type="0" thread="2624" file="ccmsetup.cpp:9185">
<![LOG[File download 95% complete (1536000 of 1614520 bytes).]LOG]!><time="16:00:04.344+300" date="09-19-2014" component="ccmsetup" context="" type="0" thread="2624" file="ccmsetup.cpp:9185">
<![LOG[File download 98% complete (1597440 of 1614520 bytes).]LOG]!><time="16:00:04.344+300" date="09-19-2014" component="ccmsetup" context="" type="0" thread="2624" file="ccmsetup.cpp:9185">
<![LOG[File download 100% complete (1614520 of 1614520 bytes).]LOG]!><time="16:00:04.391+300" date="09-19-2014" component="ccmsetup" context="" type="0" thread="2624" file="ccmsetup.cpp:9185">
<![LOG[Download complete.]LOG]!><time="16:00:04.391+300" date="09-19-2014" component="ccmsetup" context="" type="1" thread="2624" file="ccmsetup.cpp:5867">
<![LOG[Running as user "ej.admin"]LOG]!><time="16:00:05.311+300" date="09-19-2014" component="ccmsetup" context="" type="1" thread="2624" file="ccmsetup.cpp:1995">
<![LOG[Detected 223212 MB free disk space on system drive.]LOG]!><time="16:00:05.327+300" date="09-19-2014" component="ccmsetup" context="" type="1" thread="2624" file="util.cpp:628">
<![LOG[Checking Write Filter Status.]LOG]!><time="16:00:05.327+300" date="09-19-2014" component="ccmsetup" context="" type="1" thread="2624" file="ccmsetup.cpp:2024">
<![LOG[This is not a supported write filter device. We are not in a write filter maintenance mode.]LOG]!><time="16:00:05.327+300" date="09-19-2014" component="ccmsetup" context="" type="1" thread="2624" file="ccmsetup.cpp:2051">
<![LOG[SiteCode: 001]LOG]!><time="16:00:05.327+300" date="09-19-2014" component="ccmsetup" context="" type="1" thread="2624" file="ccmsetup.cpp:2076">
<![LOG[SiteVersion: 5.00.7958.1000]LOG]!><time="16:00:05.327+300" date="09-19-2014" component="ccmsetup" context="" type="1" thread="2624" file="ccmsetup.cpp:2077">
<![LOG[Only one MP https://SCCM01.mydomain.local is specified. Use it.]LOG]!><time="16:00:05.327+300" date="09-19-2014" component="ccmsetup" context="" type="1" thread="2624" file="ccmsetup.cpp:10080">
<![LOG[Searching for DP locations from MP(s)...]LOG]!><time="16:00:05.327+300" date="09-19-2014" component="ccmsetup" context="" type="1" thread="2624" file="ccmsetup.cpp:11018">
<![LOG[Current AD forest name is mydomain.local, domain name is mydomain.local]LOG]!><time="16:00:05.327+300" date="09-19-2014" component="LocationServices" context="" type="1" thread="2624" file="lsad.cpp:842">
<![LOG[Domain joined client is in Intranet]LOG]!><time="16:00:05.327+300" date="09-19-2014" component="LocationServices" context="" type="1" thread="2624" file="lsad.cpp:1047">
<![LOG[Current AD site of machine is SomewhereOverTheRainbow]LOG]!><time="16:00:05.327+300" date="09-19-2014" component="LocationServices" context="" type="1" thread="2624" file="lsad.cpp:770">
<![LOG[DHCP entry points already initialized.]LOG]!><time="16:00:05.327+300" date="09-19-2014" component="LocationServices" context="" type="0" thread="2624" file="ccmiputil.cpp:75">
<![LOG[Begin checking Alternate Network Configuration]LOG]!><time="16:00:05.327+300" date="09-19-2014" component="LocationServices" context="" type="0" thread="2624" file="ccmiputil.cpp:1095">
<![LOG[Finished checking Alternate Network Configuration]LOG]!><time="16:00:05.327+300" date="09-19-2014" component="LocationServices" context="" type="0" thread="2624" file="ccmiputil.cpp:1172">
<![LOG[Adapter {39CB0535-CE77-4ED9-9807-2DB558378C86} is DHCP enabled. Checking quarantine status.]LOG]!><time="16:00:05.327+300" date="09-19-2014" component="LocationServices" context="" type="0" thread="2624" file="ccmiputil.cpp:436">
<![LOG[Sending message body '<ContentLocationRequest SchemaVersion="1.00">
<AssignedSite SiteCode="001"/>
<ClientPackage/>
<ClientLocationInfo LocationType="SMSPACKAGE" DistributeOnDemand="0" UseProtected="0" AllowCaching="0" BranchDPFlags="0" AllowHTTP="1" AllowSMB="0" AllowMulticast="0" UseInternetDP="0">
<ADSite Name="SomewhereOverTheRainbow"/>
<Forest Name="mydomain.local"/>
<Domain Name="mydomain.local"/>
<IPAddresses>
<IPAddress SubnetAddress="192.168.1.0" Address="192.168.1.73"/>
</IPAddresses>
</ClientLocationInfo>
</ContentLocationRequest>
']LOG]!><time="16:00:05.342+300" date="09-19-2014" component="ccmsetup" context="" type="0" thread="2624" file="siteinfo.cpp:96">
<![LOG[Sending message header '<Msg SchemaVersion="1.1"><ID>{F41949F6-9FCA-4C08-AB45-AD13397E03E4}</ID><SourceHost>MACHINENAME</SourceHost><TargetAddress>mp:[http]MP_LocationManager</TargetAddress><ReplyTo>direct:MACHINENAME:LS_ReplyLocations</ReplyTo><Priority>3</Priority><Timeout>600</Timeout><ReqVersion>5931</ReqVersion><TargetHost>https://SCCM01.mydomain.local</TargetHost><TargetEndpoint>MP_LocationManager</TargetEndpoint><ReplyMode>Sync</ReplyMode><Protocol>http</Protocol><SentTime>2014-09-19T21:00:05Z</SentTime><Body Type="ByteRange" Offset="0" Length="1146"/><Hooks><Hook3 Name="zlib-compress"/></Hooks><Payload Type="inline"/></Msg>']LOG]!><time="16:00:05.342+300" date="09-19-2014" component="ccmsetup" context="" type="0" thread="2624" file="siteinfo.cpp:177">
<![LOG[CCM_POST 'https://SCCM01.mydomain.local/ccm_system/request']LOG]!><time="16:00:05.342+300" date="09-19-2014" component="ccmsetup" context="" type="1" thread="2624" file="httphelper.cpp:807">
<![LOG[Begin searching client certificates based on Certificate Issuers]LOG]!><time="16:00:05.389+300" date="09-19-2014" component="ccmsetup" context="" type="1" thread="2624" file="ccmcert.cpp:4393">
<![LOG[Certificate Issuer 1 [CN=My Domain Root CA; OU=IT; O=My Domain; C=US]]LOG]!><time="16:00:05.389+300" date="09-19-2014" component="ccmsetup" context="" type="1" thread="2624" file="ccmcert.cpp:4409">
<![LOG[Finding certificate by issuer chain returned error 80092004]LOG]!><time="16:00:05.436+300" date="09-19-2014" component="ccmsetup" context="" type="2" thread="2624" file="ccmcert.cpp:4516">
<![LOG[Completed searching client certificates based on Certificate Issuers]LOG]!><time="16:00:05.436+300" date="09-19-2014" component="ccmsetup" context="" type="1" thread="2624" file="ccmcert.cpp:4550">
<![LOG[Unable to find any Certificate based on Certificate Issuers]LOG]!><time="16:00:05.436+300" date="09-19-2014" component="ccmsetup" context="" type="2" thread="2624" file="ccmcert.cpp:4702">
<![LOG[Locate client certificate bypassing Certificate Issuers restriction]LOG]!><time="16:00:05.436+300" date="09-19-2014" component="ccmsetup" context="" type="1" thread="2624" file="ccmsetup.cpp:6121">
<![LOG[Begin searching client certificates based on Certificate Issuers]LOG]!><time="16:00:05.436+300" date="09-19-2014" component="ccmsetup" context="" type="1" thread="2624" file="ccmcert.cpp:4393">
<![LOG[Completed searching client certificates based on Certificate Issuers]LOG]!><time="16:00:05.436+300" date="09-19-2014" component="ccmsetup" context="" type="1" thread="2624" file="ccmcert.cpp:4550">
<![LOG[Begin to select client certificate]LOG]!><time="16:00:05.436+300" date="09-19-2014" component="ccmsetup" context="" type="1" thread="2624" file="ccmcert.cpp:4706">
<![LOG[The 'Certificate Selection Criteria' was not specified, counting number of certificates present in 'MY' store of 'Local Computer'.]LOG]!><time="16:00:05.436+300" date="09-19-2014" component="ccmsetup" context="" type="0" thread="2624" file="ccmcert.cpp:4742">
<![LOG[There are no certificates in the 'MY' store.]LOG]!><time="16:00:05.436+300" date="09-19-2014" component="ccmsetup" context="" type="1" thread="2624" file="ccmcert.cpp:4764">
<![LOG[GetSSLCertificateContext failed with error 0x87d00280]LOG]!><time="16:00:05.436+300" date="09-19-2014" component="ccmsetup" context="" type="3" thread="2624" file="ccmsetup.cpp:6141">
<![LOG[A Fallback Status Point has not been specified. Message with STATEID='315' will not be sent.]LOG]!><time="16:00:05.436+300" date="09-19-2014" component="ccmsetup" context="" type="1" thread="2624" file="ccmsetup.cpp:9763">
<![LOG[GetHttpRequestObjects failed for verb: 'CCM_POST', url: 'https://SCCM01.mydomain.local/ccm_system/request']LOG]!><time="16:00:05.436+300" date="09-19-2014" component="ccmsetup" context="" type="3" thread="2624" file="httphelper.cpp:947">
<![LOG[GetDPLocations failed with error 0x87d00280]LOG]!><time="16:00:05.436+300" date="09-19-2014" component="ccmsetup" context="" type="3" thread="2624" file="siteinfo.cpp:532">
<![LOG[Failed to get DP locations as the expected version from MP 'https://SCCM01.mydomain.local'. Error 0x87d00280]LOG]!><time="16:00:05.436+300" date="09-19-2014" component="ccmsetup" context="" type="2" thread="2624" file="ccmsetup.cpp:11261">
<![LOG[A Fallback Status Point has not been specified. Message with STATEID='101' will not be sent.]LOG]!><time="16:00:05.436+300" date="09-19-2014" component="ccmsetup" context="" type="1" thread="2624" file="ccmsetup.cpp:9763">
<![LOG[Next retry in 10 minute(s)...]LOG]!><time="16:00:05.436+300" date="09-19-2014" component="ccmsetup" context="" type="0" thread="2624" file="ccmsetup.cpp:8835">
<![LOG[Current AD forest name is mydomain.local, domain name is mydomain.local]LOG]!><time="16:10:09.190+300" date="09-19-2014" component="LocationServices" context="" type="1" thread="2624" file="lsad.cpp:842">
<![LOG[Domain joined client is in Intranet]LOG]!><time="16:10:09.190+300" date="09-19-2014" component="LocationServices" context="" type="1" thread="2624" file="lsad.cpp:1047">
<![LOG[Current AD site of machine is SomewhereOverTheRainbow]LOG]!><time="16:10:09.299+300" date="09-19-2014" component="LocationServices" context="" type="1" thread="2624" file="lsad.cpp:770">
<![LOG[DHCP entry points already initialized.]LOG]!><time="16:10:09.299+300" date="09-19-2014" component="LocationServices" context="" type="0" thread="2624" file="ccmiputil.cpp:75">
<![LOG[Begin checking Alternate Network Configuration]LOG]!><time="16:10:09.299+300" date="09-19-2014" component="LocationServices" context="" type="0" thread="2624" file="ccmiputil.cpp:1095">
<![LOG[Finished checking Alternate Network Configuration]LOG]!><time="16:10:09.299+300" date="09-19-2014" component="LocationServices" context="" type="0" thread="2624" file="ccmiputil.cpp:1172">
<![LOG[Adapter {39CB0535-CE77-4ED9-9807-2DB558378C86} is DHCP enabled. Checking quarantine status.]LOG]!><time="16:10:09.299+300" date="09-19-2014" component="LocationServices" context="" type="0" thread="2624" file="ccmiputil.cpp:436">
<![LOG[Sending message body '<ContentLocationRequest SchemaVersion="1.00">
<AssignedSite SiteCode="001"/>
<ClientPackage/>
<ClientLocationInfo LocationType="SMSPACKAGE" DistributeOnDemand="0" UseProtected="0" AllowCaching="0" BranchDPFlags="0" AllowHTTP="1" AllowSMB="0" AllowMulticast="0" UseInternetDP="0">
<ADSite Name="SomewhereOverTheRainbow"/>
<Forest Name="mydomain.local"/>
<Domain Name="mydomain.local"/>
<IPAddresses>
<IPAddress SubnetAddress="192.168.1.0" Address="192.168.170.73"/>
</IPAddresses>
</ClientLocationInfo>
</ContentLocationRequest>
']LOG]!><time="16:10:09.315+300" date="09-19-2014" component="ccmsetup" context="" type="0" thread="2624" file="siteinfo.cpp:96">
<![LOG[Sending message header '<Msg SchemaVersion="1.1"><ID>{6DCC55BE-D180-41DC-ACF9-2B909F186F1A}</ID><SourceHost>MACHINENAME</SourceHost><TargetAddress>mp:[http]MP_LocationManager</TargetAddress><ReplyTo>direct:MACHINENAME:LS_ReplyLocations</ReplyTo><Priority>3</Priority><Timeout>600</Timeout><ReqVersion>5931</ReqVersion><TargetHost>https://SCCM01.mydomain.local</TargetHost><TargetEndpoint>MP_LocationManager</TargetEndpoint><ReplyMode>Sync</ReplyMode><Protocol>http</Protocol><SentTime>2014-09-19T21:10:09Z</SentTime><Body Type="ByteRange" Offset="0" Length="1146"/><Hooks><Hook3 Name="zlib-compress"/></Hooks><Payload Type="inline"/></Msg>']LOG]!><time="16:10:09.315+300" date="09-19-2014" component="ccmsetup" context="" type="0" thread="2624" file="siteinfo.cpp:177">
<![LOG[CCM_POST 'https://SCCM01.mydomain.local/ccm_system/request']LOG]!><time="16:10:09.315+300" date="09-19-2014" component="ccmsetup" context="" type="1" thread="2624" file="httphelper.cpp:807">
<![LOG[Begin searching client certificates based on Certificate Issuers]LOG]!><time="16:10:09.315+300" date="09-19-2014" component="ccmsetup" context="" type="1" thread="2624" file="ccmcert.cpp:4393">
<![LOG[Certificate Issuer 1 [CN=My Domain Root CA; OU=IT; O=My Domain; C=US]]LOG]!><time="16:10:09.315+300" date="09-19-2014" component="ccmsetup" context="" type="1" thread="2624" file="ccmcert.cpp:4409">
<![LOG[Finding certificate by issuer chain returned error 80092004]LOG]!><time="16:10:09.315+300" date="09-19-2014" component="ccmsetup" context="" type="2" thread="2624" file="ccmcert.cpp:4516">
<![LOG[Completed searching client certificates based on Certificate Issuers]LOG]!><time="16:10:09.315+300" date="09-19-2014" component="ccmsetup" context="" type="1" thread="2624" file="ccmcert.cpp:4550">
<![LOG[Unable to find any Certificate based on Certificate Issuers]LOG]!><time="16:10:09.315+300" date="09-19-2014" component="ccmsetup" context="" type="2" thread="2624" file="ccmcert.cpp:4702">
<![LOG[Locate client certificate bypassing Certificate Issuers restriction]LOG]!><time="16:10:09.315+300" date="09-19-2014" component="ccmsetup" context="" type="1" thread="2624" file="ccmsetup.cpp:6121">
<![LOG[Begin searching client certificates based on Certificate Issuers]LOG]!><time="16:10:09.315+300" date="09-19-2014" component="ccmsetup" context="" type="1" thread="2624" file="ccmcert.cpp:4393">
<![LOG[Completed searching client certificates based on Certificate Issuers]LOG]!><time="16:10:09.315+300" date="09-19-2014" component="ccmsetup" context="" type="1" thread="2624" file="ccmcert.cpp:4550">
<![LOG[Begin to select client certificate]LOG]!><time="16:10:09.315+300" date="09-19-2014" component="ccmsetup" context="" type="1" thread="2624" file="ccmcert.cpp:4706">
<![LOG[The 'Certificate Selection Criteria' was not specified, counting number of certificates present in 'MY' store of 'Local Computer'.]LOG]!><time="16:10:09.315+300" date="09-19-2014" component="ccmsetup" context="" type="0" thread="2624" file="ccmcert.cpp:4742">
<![LOG[There are no certificates in the 'MY' store.]LOG]!><time="16:10:09.315+300" date="09-19-2014" component="ccmsetup" context="" type="1" thread="2624" file="ccmcert.cpp:4764">
<![LOG[GetSSLCertificateContext failed with error 0x87d00280]LOG]!><time="16:10:09.315+300" date="09-19-2014" component="ccmsetup" context="" type="3" thread="2624" file="ccmsetup.cpp:6141">
<![LOG[GetHttpRequestObjects failed for verb: 'CCM_POST', url: 'https://SCCM01.mydomain.local/ccm_system/request']LOG]!><time="16:10:09.315+300" date="09-19-2014" component="ccmsetup" context="" type="3" thread="2624" file="httphelper.cpp:947">
<![LOG[GetDPLocations failed with error 0x87d00280]LOG]!><time="16:10:09.315+300" date="09-19-2014" component="ccmsetup" context="" type="3" thread="2624" file="siteinfo.cpp:532">
<![LOG[Failed to get DP locations as the expected version from MP 'https://SCCM01.mydomain.local'. Error 0x87d00280]LOG]!><time="16:10:09.315+300" date="09-19-2014" component="ccmsetup" context="" type="2" thread="2624" file="ccmsetup.cpp:11261">
<![LOG[Failed to find DP locations from MP 'https://SCCM01.mydomain.local' with error 0x87d00280, status code 200. Check next MP.]LOG]!><time="16:10:09.315+300" date="09-19-2014" component="ccmsetup" context="" type="2" thread="2624" file="ccmsetup.cpp:11117">
<![LOG[Only one MP https://SCCM01.mydomain.local is specified. Use it.]LOG]!><time="16:10:09.315+300" date="09-19-2014" component="ccmsetup" context="" type="1" thread="2624" file="ccmsetup.cpp:10080">
<![LOG[Have already tried all MPs. Couldn't find DP locations.]LOG]!><time="16:10:09.315+300" date="09-19-2014" component="ccmsetup" context="" type="3" thread="2624" file="ccmsetup.cpp:11146">
<![LOG[GET 'https://SCCM01.mydomain.local/CCM_Client/ccmsetup.cab']LOG]!><time="16:10:09.315+300" date="09-19-2014" component="ccmsetup" context="" type="1" thread="2624" file="httphelper.cpp:807">
<![LOG[Begin searching client certificates based on Certificate Issuers]LOG]!><time="16:10:09.315+300" date="09-19-2014" component="ccmsetup" context="" type="1" thread="2624" file="ccmcert.cpp:4393">
<![LOG[Certificate Issuer 1 [CN=My Domain Root CA; OU=IT; O=My Domain; C=US]]LOG]!><time="16:10:09.315+300" date="09-19-2014" component="ccmsetup" context="" type="1" thread="2624" file="ccmcert.cpp:4409">
<![LOG[Finding certificate by issuer chain returned error 80092004]LOG]!><time="16:10:09.315+300" date="09-19-2014" component="ccmsetup" context="" type="2" thread="2624" file="ccmcert.cpp:4516">
<![LOG[Completed searching client certificates based on Certificate Issuers]LOG]!><time="16:10:09.315+300" date="09-19-2014" component="ccmsetup" context="" type="1" thread="2624" file="ccmcert.cpp:4550">
<![LOG[Unable to find any Certificate based on Certificate Issuers]LOG]!><time="16:10:09.315+300" date="09-19-2014" component="ccmsetup" context="" type="2" thread="2624" file="ccmcert.cpp:4702">
<![LOG[Locate client certificate bypassing Certificate Issuers restriction]LOG]!><time="16:10:09.315+300" date="09-19-2014" component="ccmsetup" context="" type="1" thread="2624" file="ccmsetup.cpp:6121">
<![LOG[Begin searching client certificates based on Certificate Issuers]LOG]!><time="16:10:09.315+300" date="09-19-2014" component="ccmsetup" context="" type="1" thread="2624" file="ccmcert.cpp:4393">
<![LOG[Completed searching client certificates based on Certificate Issuers]LOG]!><time="16:10:09.315+300" date="09-19-2014" component="ccmsetup" context="" type="1" thread="2624" file="ccmcert.cpp:4550">
<![LOG[Begin to select client certificate]LOG]!><time="16:10:09.315+300" date="09-19-2014" component="ccmsetup" context="" type="1" thread="2624" file="ccmcert.cpp:4706">
<![LOG[The 'Certificate Selection Criteria' was not specified, counting number of certificates present in 'MY' store of 'Local Computer'.]LOG]!><time="16:10:09.315+300" date="09-19-2014" component="ccmsetup" context="" type="0" thread="2624" file="ccmcert.cpp:4742">
<![LOG[There are no certificates in the 'MY' store.]LOG]!><time="16:10:09.315+300" date="09-19-2014" component="ccmsetup" context="" type="1" thread="2624" file="ccmcert.cpp:4764">
<![LOG[GetSSLCertificateContext failed with error 0x87d00280]LOG]!><time="16:10:09.315+300" date="09-19-2014" component="ccmsetup" context="" type="3" thread="2624" file="ccmsetup.cpp:6141">
<![LOG[GetHttpRequestObjects failed for verb: 'GET', url: 'https://SCCM01.mydomain.local/CCM_Client/ccmsetup.cab']LOG]!><time="16:10:09.315+300" date="09-19-2014" component="ccmsetup" context="" type="3" thread="2624" file="httphelper.cpp:947">
<![LOG[DownloadFileByWinHTTP failed with error 0x87d00280]LOG]!><time="16:10:09.315+300" date="09-19-2014" component="ccmsetup" context="" type="3" thread="2624" file="httphelper.cpp:1081">
<![LOG[CcmSetup failed with error code 0x87d00280]LOG]!><time="16:10:09.331+300" date="09-19-2014" component="ccmsetup" context="" type="1" thread="2624" file="ccmsetup.cpp:10879">

Resolution: This behavior is 100% caused by an invalid configuration using HTTPS.  In this particular case, machines were not autoenrolling in machine based certificates, thus, System Center could not authenticate the client and would not allow setup to complete.

Here are some things to try to point you in the general direction of where something may have gone wrong in your deployment:

  1. If you are not using HTTPS (do not have a PKI environment), make sure you have turned off HTTPS configurations for your site.
  2. Ensure your clients are properly configured for autoenrollment
  3. Ensure your clients are actually receiving a machine certificate from autoenrollment
  4. Ensure your certificate authority's certificate and CRL lists are not expired

System Center 2012 R2 - The user account running the Configuration Manager console has insufficient permissions to read information from the Configuration Manager site database

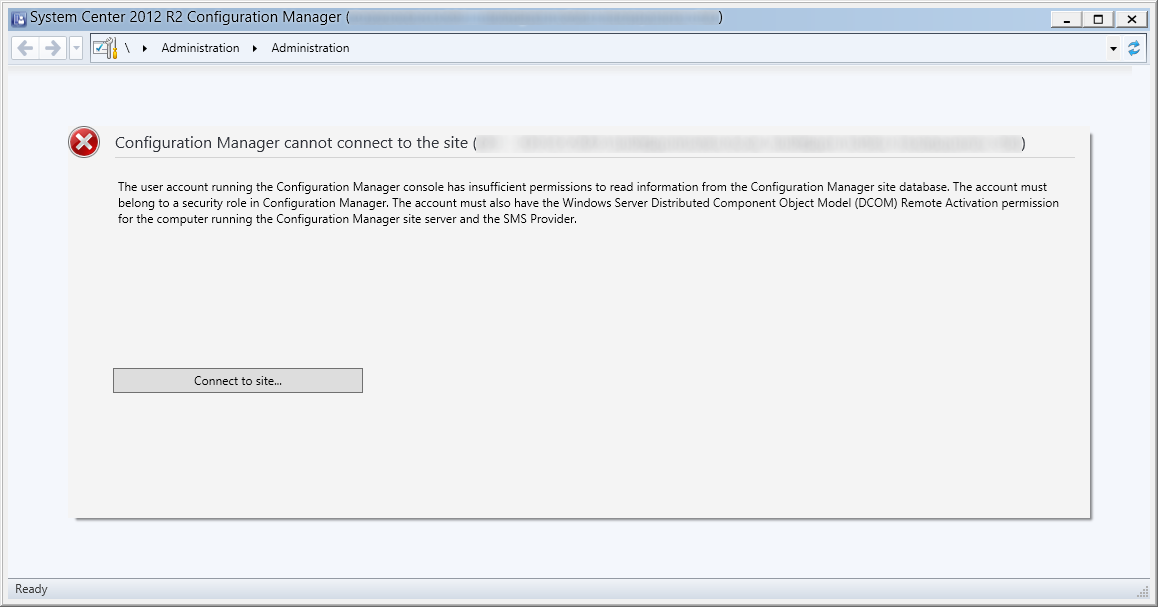
Symptom: When any user account, other than the individual who originally configured SCCM, tries to manage System Center Configuration Manager (SCCM), they are presented with the following error:

The user account running the Configuration Manager console has insufficient permissions to read information from the Configuration Manager site database.  The account must belong to a security role in Configuration Manager.  The account must also have the Windows Server Distributed Componenet Object Model (DCOM) Remote Activation permission for the computer running the Configuration Manager site server and the SMS Provider. Configuration Manager cannot connect to the site - System Center 2012 R2 Configuration Manager

Solution: We need to provide a list of users/groups to have access to System Center through the configuration console.  Follow the steps below on how to grant access.

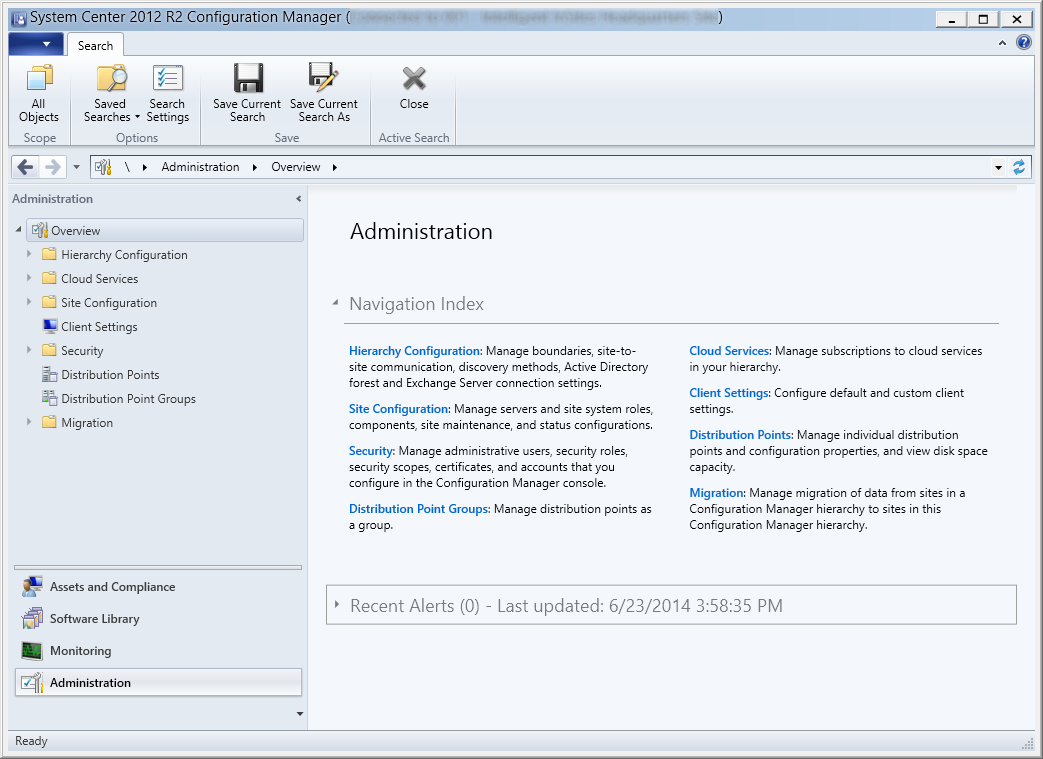
  1.  Open up the System Center Configuration Manager Console System Center 2012 R2 Configuration Manager Console - Task Bar
  2. Select Administration
    System Center 2012 R2 Configuration Manager - Administration
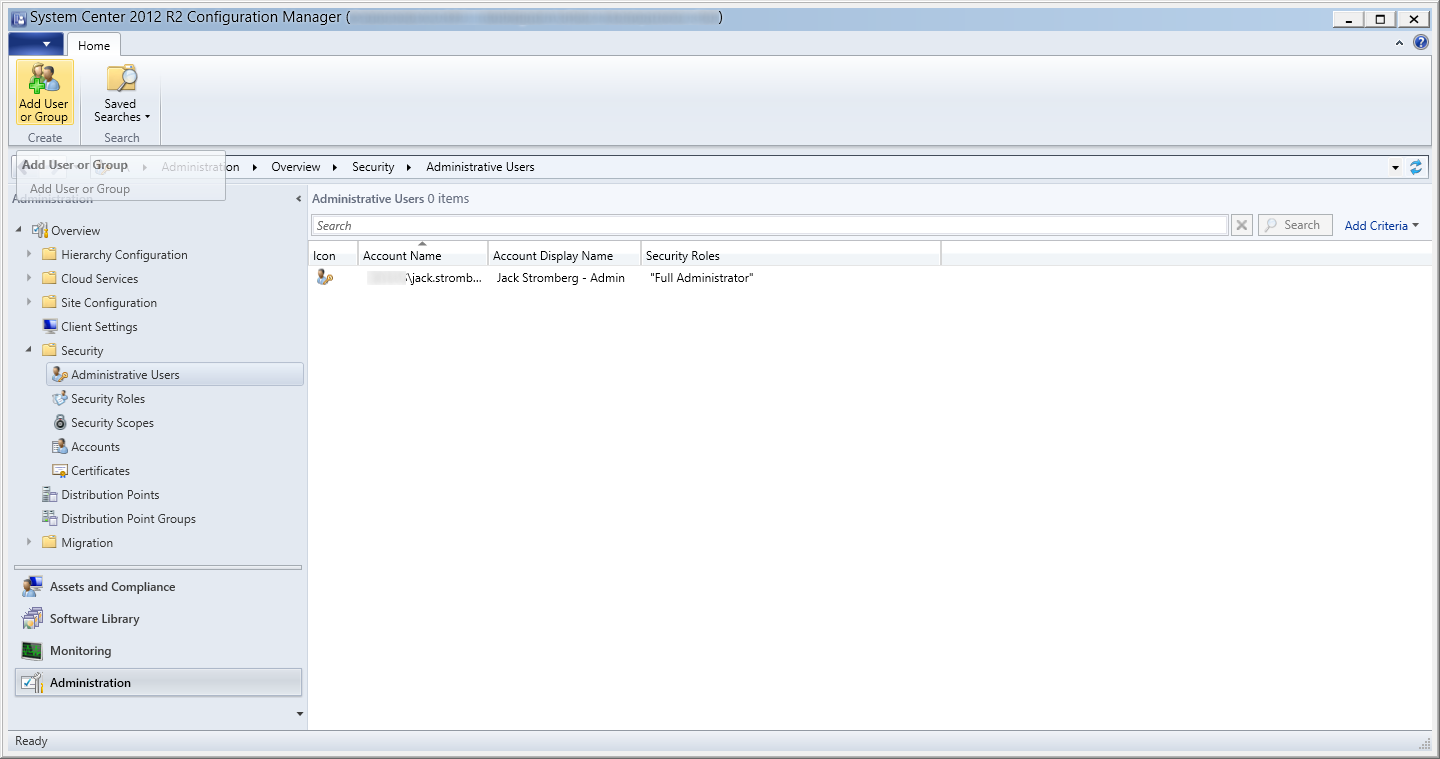
  3. Expand Security, select Administrative Users, and select Add User or Group at the top
    System Center 2012 R2 - Administration - Security - Administrative Users - Add User or Group
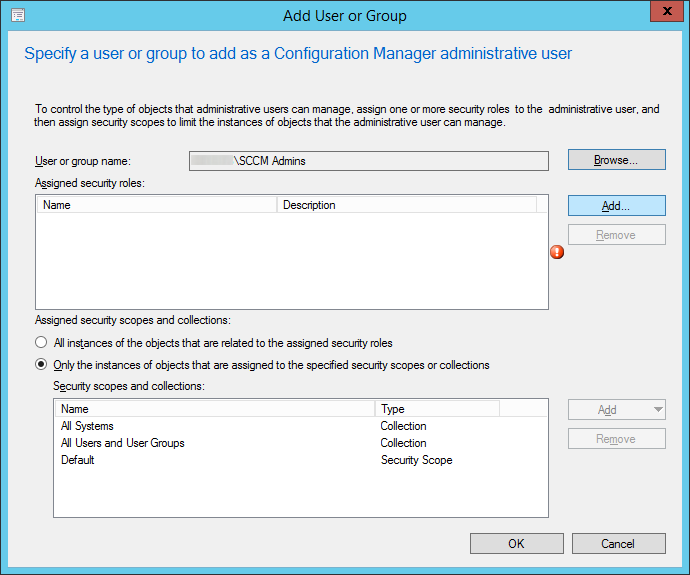
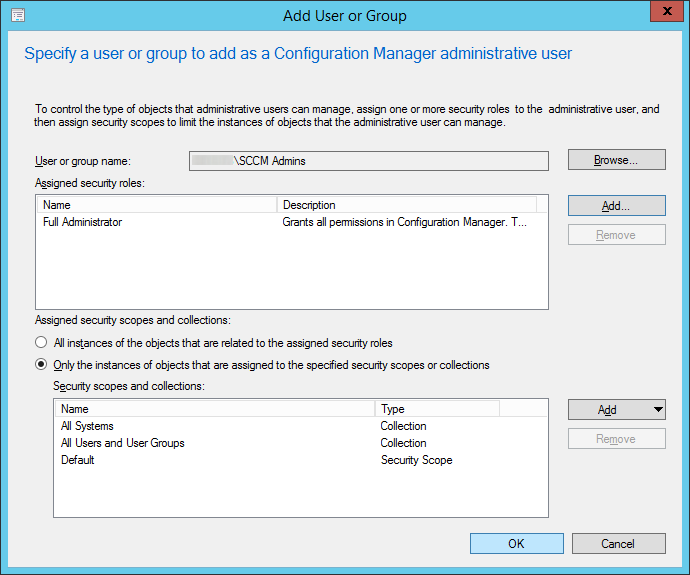
  4. Click the Browse button to add security group or user you wish to add for the User or group name
    1. Note about Domain Admins: the first group you might try to add is Domain Admins, however if you add that group you will notice that users in this group will still be unable to open the console.  This is due to the behavior of user context logged in.  If UAC is enabled on the machine, you won't have access to the SCCM you login to the machine with a domain admin account, unless you right click on the console and run it is Administrator.  If you want this to work as intended, you will need to create a new security group in Active Directory, add Domain Admins to it, and then specify that group in SCCM.
  5. Click the Add... button
    System Center 2012 R2 - Administration - Security - Administrative Users - Add User or Group - Add
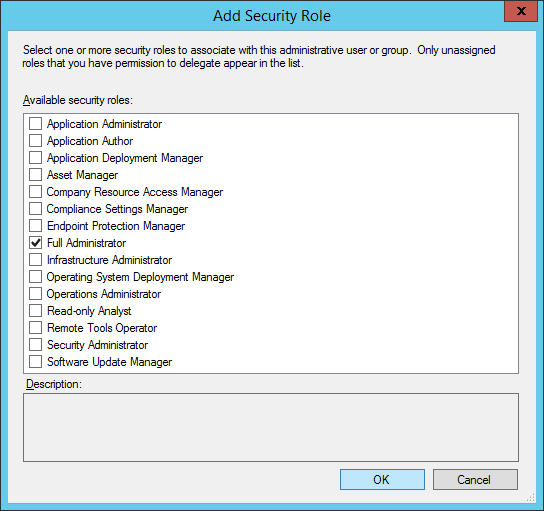
  6. Check Full Administrator, and click OK
    System Center 2012 R2 - Administration - Security - Administrative Users - Add User or Group - Add - Add Security Role
  7. Click OK
    System Center 2012 R2 - Administration - Security - Administrative Users - Add User or Group - Group and Security Roles assigned
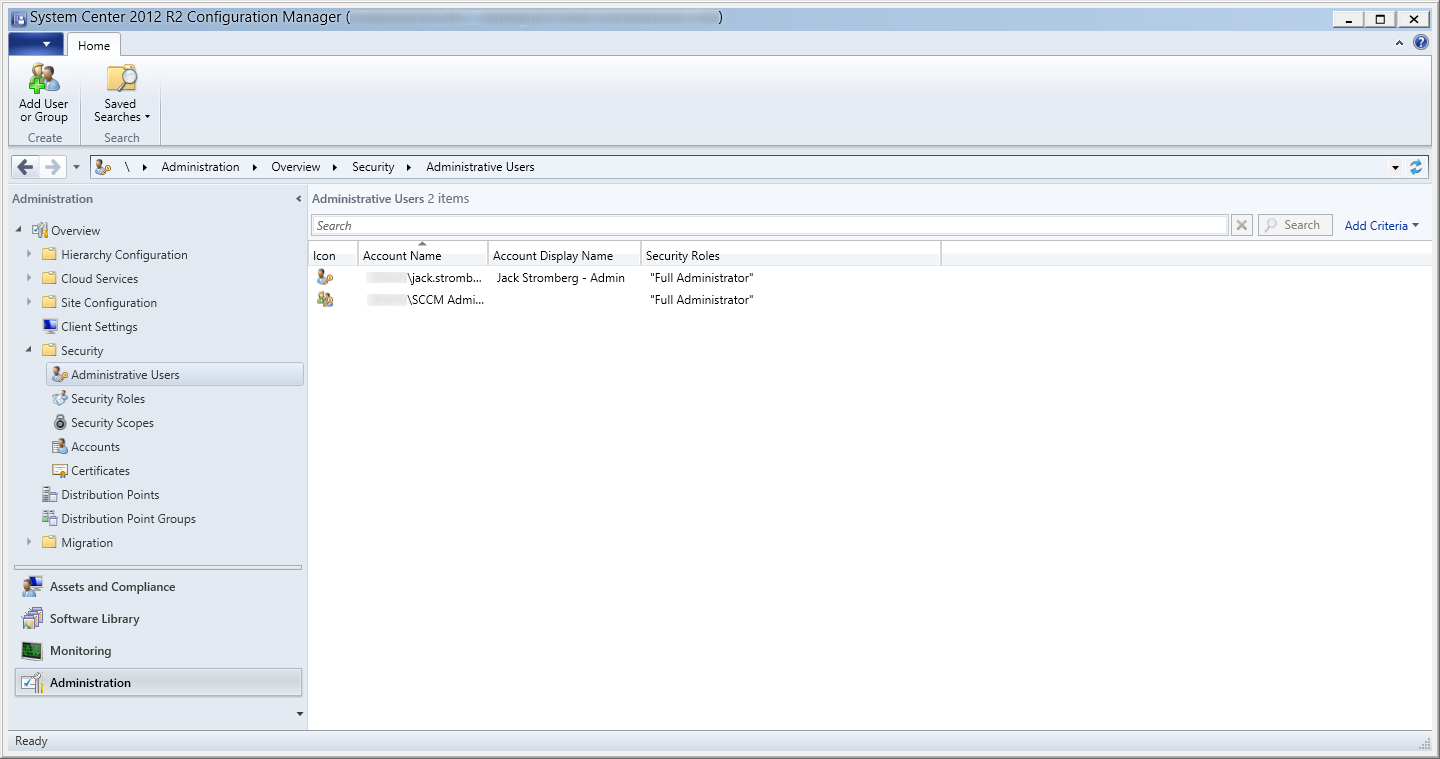
  8. The end result should now look like this.  At this point, any member or group inside of SCCM Admins should have access to manage SCCM now via the console.
    System Center 2012 R2 - Administration - Security - Administrative Users - Security Group and User

How to install .NET Framework 3.5 on Windows Server 2012 and Windows Server 2012 R2

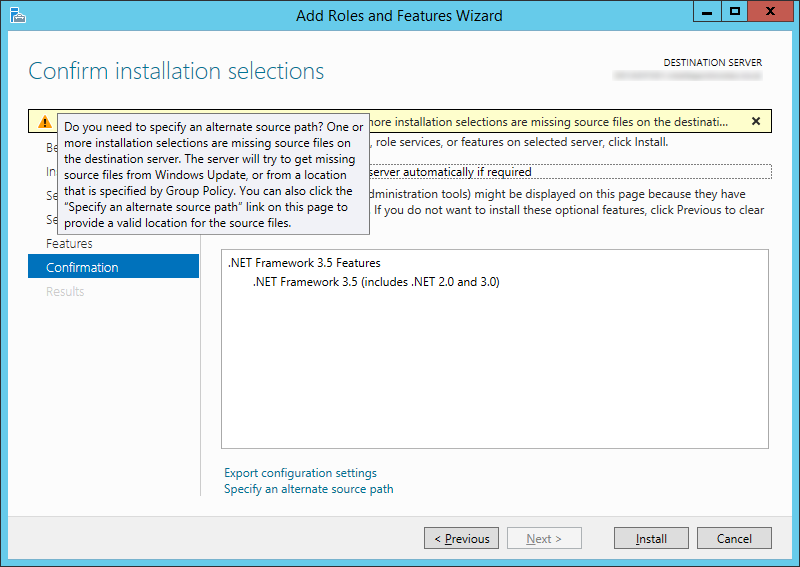
Symptom: When trying to add the .NET Framework 3.5 feature through the Add Roles and Features Wizard in Server 2012 (R2), you receive the following error:

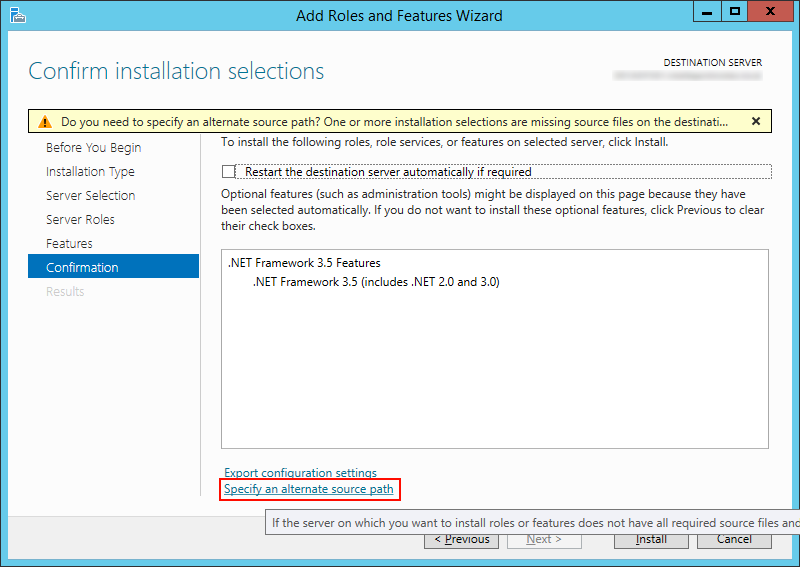
Do you need to specify an alternate source path?  One or more installation selections are missing source files on the destination server.  The server will try to get missing source files from Windows Update, or from a location that is specified by Group Policy.  You can also click the "Specify an alternate source path" link on this page to provide a valid location for the source files.

NET Framework 3-5 - Do you need to specify an alternate source path

Solution: Complete the steps below to manually install .NET Framework 3.5 from the Server 2012 (R2) installation media.  You can complete this task via command line or via the wizard.

  1. Option 1: Command Line
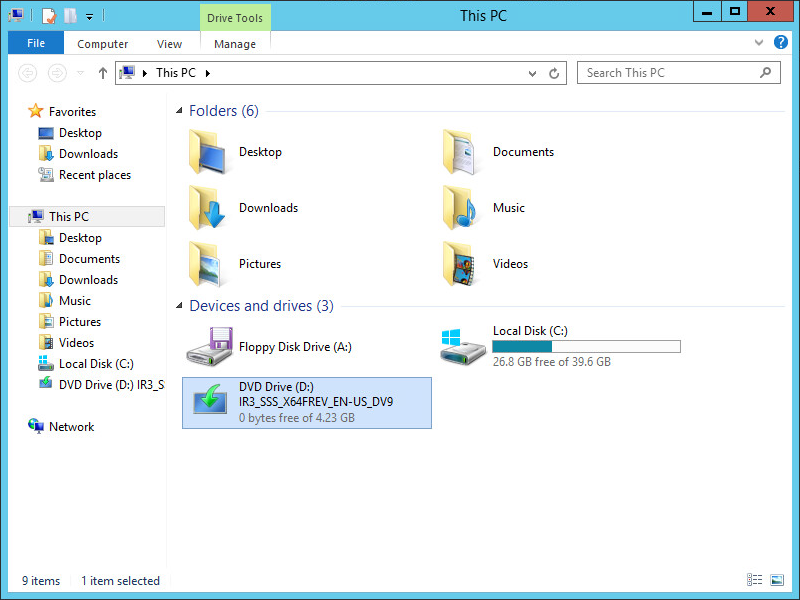
    1. Insert the Windows Sever 2012 installation media
      Server 2012 - Installation Media
    2. Open up an elevated command prompt
      Elevated Command Prompt
    3. Execute the following command
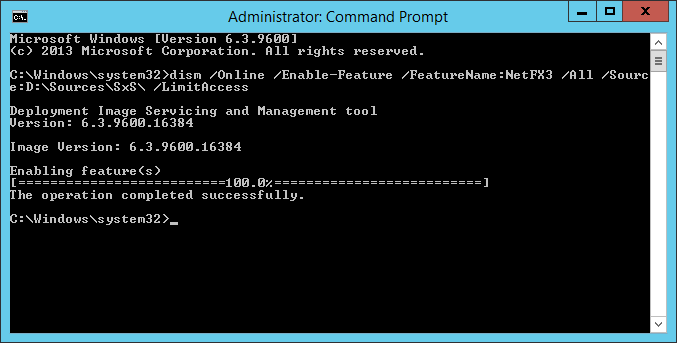
      1. dism /Online /Enable-Feature /FeatureName:NetFX3 /All /Source:D:\Sources\SxS\ /LimitAccess
        dism netfx3 from disk

        1. Here is a breakdown of the following command:
          /Online                 - Targets the running operating system.
          /Enable-Feature - Enables a specific feature in the image.
          /All                          - Enables all parent features of the specified feature.
          /LimitAccess        - Prevents DISM from contacting WU/WSUS.
  2. Option 2: GUI
    1. Insert the Windows Sever 2012 installation media
      Server 2012 - Installation Media
    2. On the Add Roles and Features wizard, click on Specify an alternate source path
      NET Framework 3-5 - Specify an alternate source path
    3. Enter D:\Sources\SxS\ to point to the Server 2012
      NET Framework 3-5 - Specify an alternate source path - Dialog

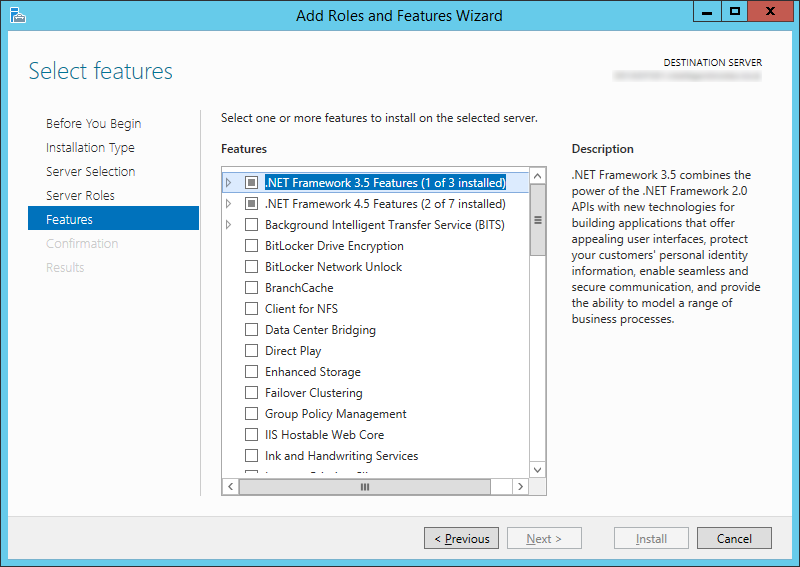
Once done installing through the GUI or command prompt, if you navigate back to the Add Roles and Features Wizard, you should see the feature has been successfully installed now.

Add Roles and Features Wizard - Server 2012 R2 - NET Framework 3

Windows 7 - Windows created a temporary paging file on your computer because of a problem that occured with your paging file configuration when you started your computer.

Symptom: Every time you boot your Windows 7 machine or access system settings, you receive the following error:

Windows created a temporary paging file on your computer beause of a problem that occurred with your paging file configuration when you started your computer.  The total paging file size for all disk drives may be somewhat larger than the size you specified.

Windows 7 Error - a problem occured with your paging file configuration

Solution: In this case, the page file had grown too large and corrupted itself.  I was able to resolve the issue by deleting the pagefile.sys file and having Windows recreate it from scratch.  Here are the steps on how to complete this task.

  1. Click Start, right-click Computer, and select Properties
  2. In the left pane, select Advanced system settings
  3. On the Advanced tab, click the Settings button under Performance
  4. On the Advanced tab, click the Change button under Virtual memory
  5. Clear the Automatically manage paging file size for all drives check box and check No paging file
  6. Click Set button next to No paging file
  7. Click OK on all open windows and restart your machine
  8. Open up Windows Explorer
  9. Navigate to the root of your system drive (C:\)
  10. Enable the showing of System Files
    1. On the View menu, click Options
    2. On the View tab, click Show All Files, and then click OK
  11. Delete the pagefile.sys file
  12. Click Start, right-click Computer, and select Properties
  13. In the left pane, select Advanced system settings
  14. On the Advanced tab, click the Settings button under Performance
  15. On the Advanced tab, click the Change button under Virtual memory
  16. Check the Automatically manage paging file size for all drives checkbox and click OK
  17. Restart your machine

Cisco VPN Client on Windows 8 - Secure VPN Connection terminated locally by the Client. Reason 442: Failed to enable Virtual Adapter

Symptom: When trying to use the Cisco VPN client under Windows 8 (and 8.1), you receive the following error.

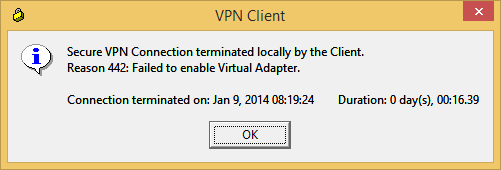
Secure VPN Connection terminated locally by the Client.
Reason 442: Failed to enable Virtual Adapter.

VPN Client - Reason 442 Failed to enable Virtual Adapter


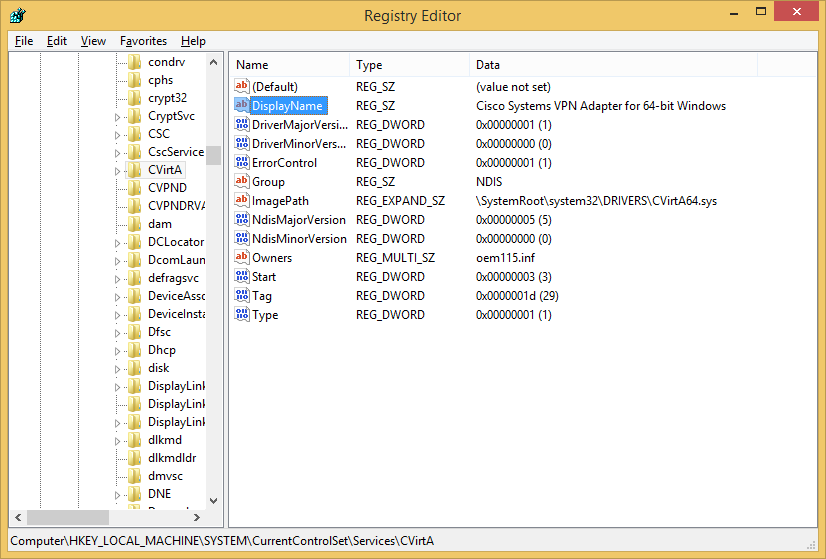
Solution: This is caused by an incompatible Windows 8 registry key.  You can fix this issue by running the powershell command below as an administrator or manually opening up the registry editor and changing the following value.

For 64 bit versions of Windows, use the registry value of Cisco Systems VPN Adapter for 64-bit Windows
For 32 bit versions of Windows, use the registry value of Cisco Systems VPN Adapter

Option 1: Execute the following powershell command:

Set-ItemProperty -Path HKLM:\SYSTEM\CurrentControlSet\Services\CVirtA -Name DisplayName -Value 'Cisco Systems VPN Adapter for 64-bit Windows'
PowerShell - Set CVirtA DisplayName - Cisco VPN

Option 2: Navigate to the following key using the registry editor:

Computer\HKEY_LOCAL_MACHINE\SYSTEM\CurrentControlSet\Services\CVirtA

Set the DisplayName value to Cisco Systems VPN Adapter for 64-bit Windows
RegEdit - CVirtA - Cisco VPN - DisplayName

[Tutorial] Upgrading from ADFS 2.0 (Server 2008 R2) to ADFS 3 (Server 2012 R2)

Scenario: You want to upgrade your ADFS 2.0 or 2.1 farm using WID (Windows Internal Database) from Server 2008 R2 to Server 2012 R2.  In this scenario, I have 2 ADFS servers (one as the primary and a second for failover purposes), and 2 ADFS Proxy servers (for load balancing/failover purposes).

NOTE: Prior to writing this article I had only found limited documentation provided by Microsoft on a proper upgrade path for this.  Since then, it apperas that tools had been included with the Server 2012 installation media which will greatly cutdown on the number of steps needed as well as provide as little downtime as possible.  I would highly recommend giving this article a read before proceeding with my article: http://blogs.technet.com/b/askpfeplat/archive/2014/03/31/how-to-build-your-adfs-lab-part4-upgrading-to-server-2012-r2.aspx

My article should still work, but it is definitely not the most efficient way to do an upgrade as pointed out in the technet article above.  My guide essentially goes over cutting over to a completely new ADFS deployment "an upgrade", side-by-side to your production environment. As pointed out below, you cannot add a Server 2012 R2 machine to a Server 2008 R2 ADFS farm as documented in their earlier help articles.

Tutorial

  1. Login to one of your slave ADFS nodes (secondary server) running Server 2008 R2
  2. Remove the node from your load balancer
  3. Stop the AD FS 2.0 Windows Service
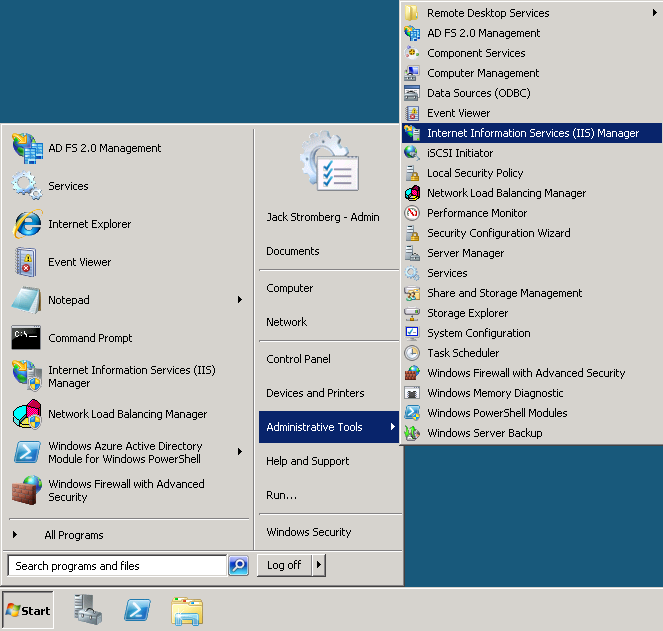
  4. Click Start -> Administrative Tools -> Internet Information Services (IIS) Manager Server 2008 R2 - Start - Administrative Tools - Internet Information Services IIS Manager
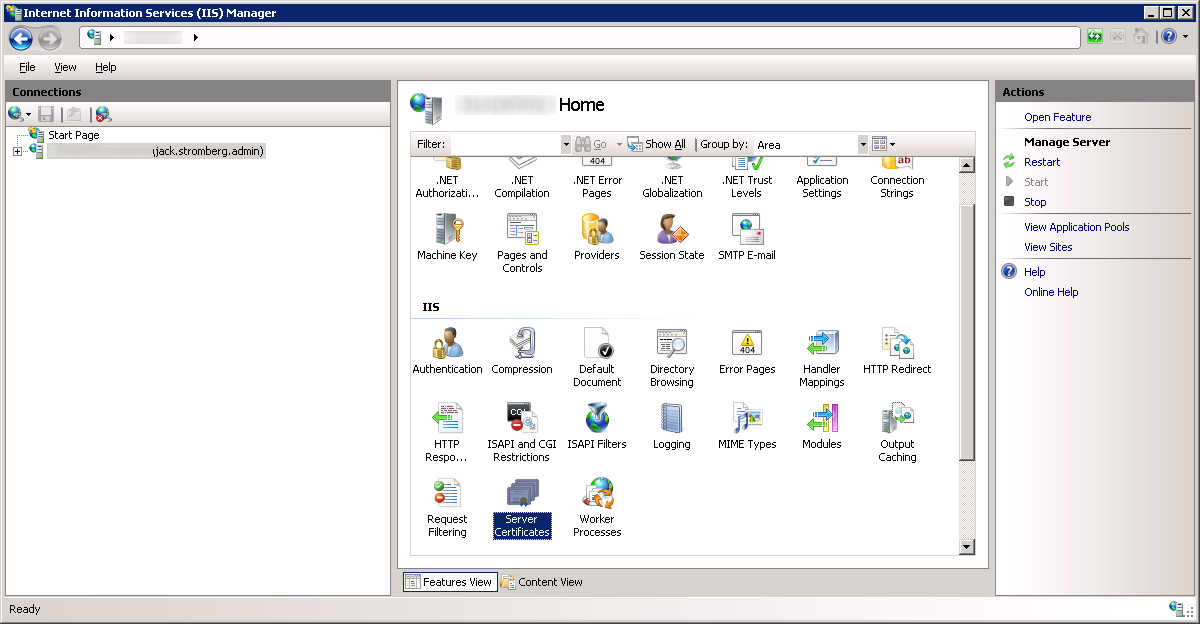
  5. Select your server and double click on Server Certificates Internet Information Services IIS Manager - Server Home
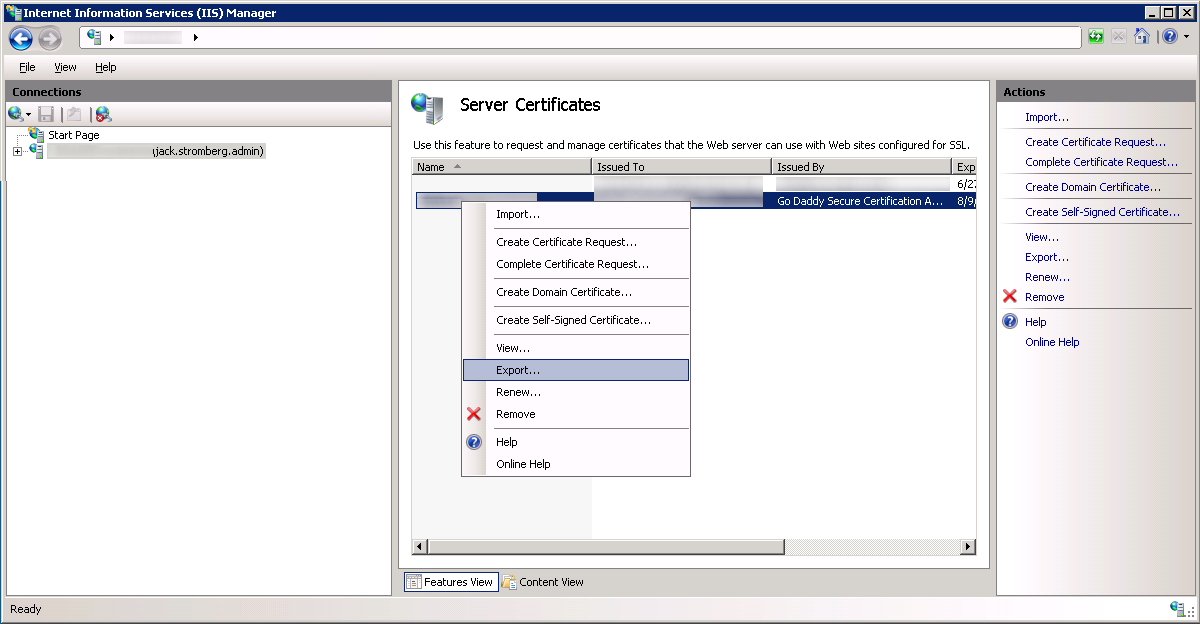
  6. Right click on your certificate and select Export... Internet Information Services IIS Manager - Export Certificate
  7. Export the certificate to your desktop, type in a password to protect the exported certificate/private key, and select OK
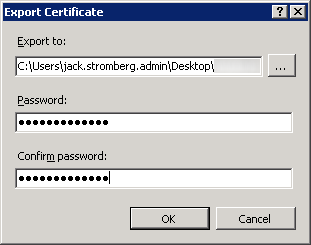
    Export Certificate Properties
  8. Copy the pfx (exported certificate/private key) to your local machine; we will import this on our new server later.
  9. Disjoin the ADFS machine from the domain
  10. Turn the ADFS machine off and retire it
  11. Create a new Server 2012 R2 machine with the same name and IP as your Server 2008 R2 ADFS machine
  12. While the new ADFS machine is being created, login to one of your ADFS proxy servers
  13. Remove the proxy from your load balancer
  14. Stop the AD FS 2.0 Windows Service
  15. Turn the machine off and retire it
  16. Create a new Server 2012 R2 machine with the same name and IP as your Server 2008 R2 ADFS Proxy machine
  17. While the new ADFS proxy machine is being created, login to your new ADFS Server 2012 R2 machine.
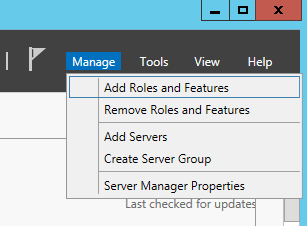
  18. Open up Server Manage and select Manage -> Add Roles and Features Server 2012 - Manage - Add Roles and Features
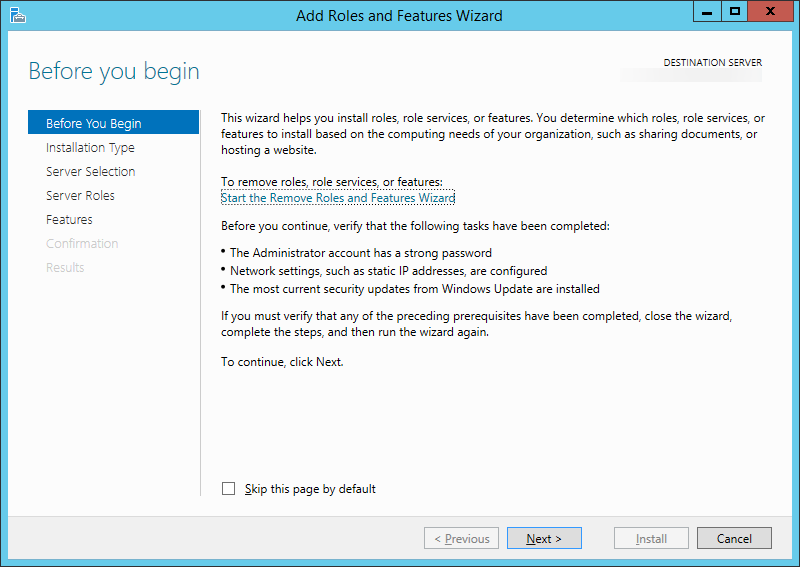
  19. On the Before You Begin screen, click Next > Add Roles and Features Wizard - Before you begin
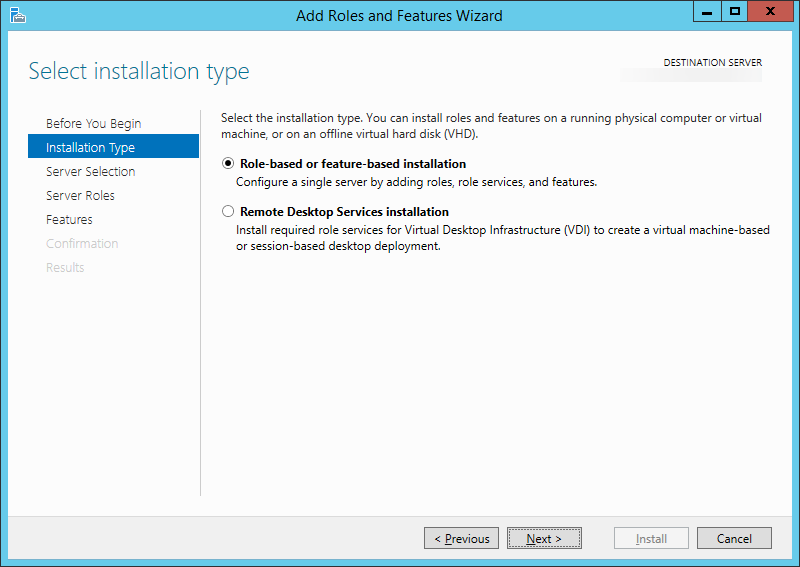
  20. Select Role-based or feature-based installation and click Next > Add Roles and Features Wizard - Select installation type
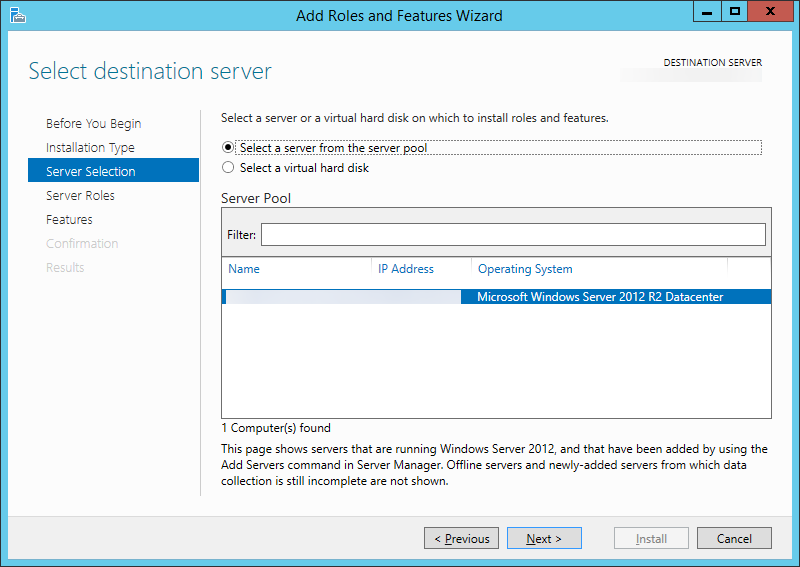
  21. Select your server and click Next > Add Roles and Features Wizard - Select destination server
  22. Check Active Directory Federation Services and click Next > Add Roles and Features Wizard - Server Roles - Active Directory Federation Services
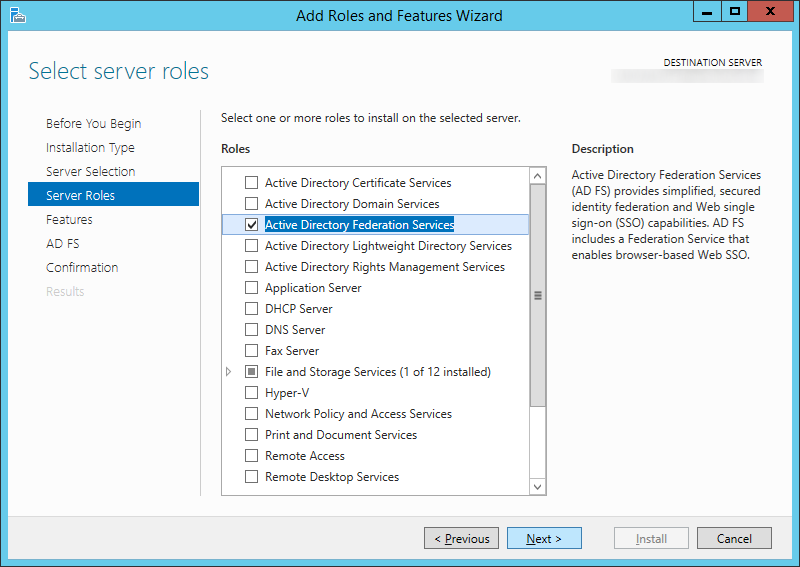
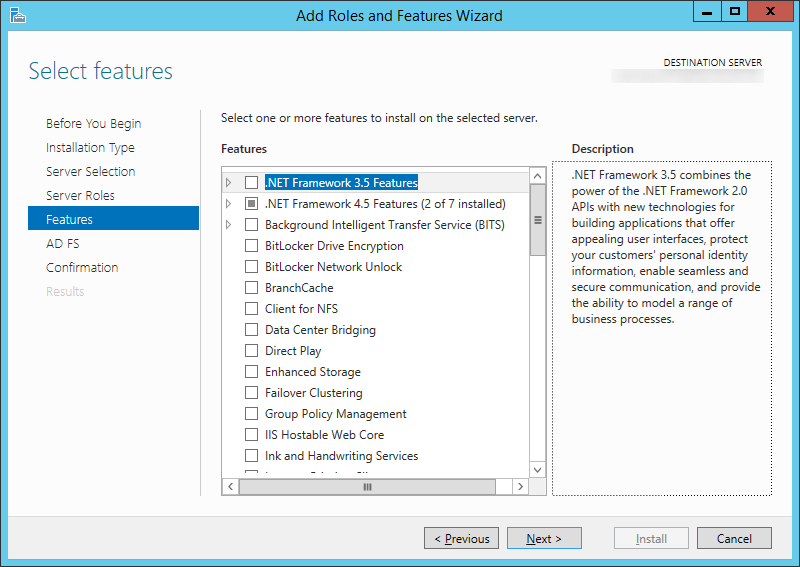
  23. Click Next > on Features Add Roles and Features Wizard - Features - Default
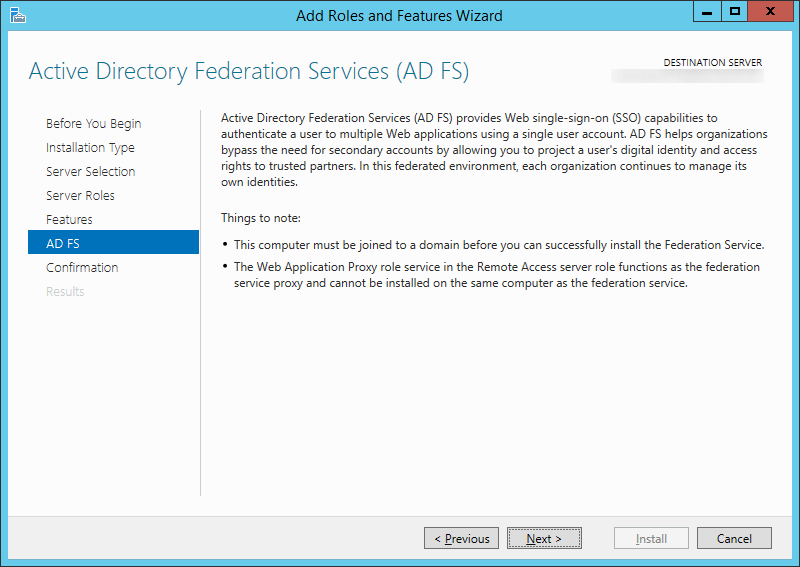
  24. Click Next > on AD FS Add Roles and Features Wizard - AD FS
  25. Click Install Add Roles and Features Wizard - Confirmation - Active Directory Federation Services
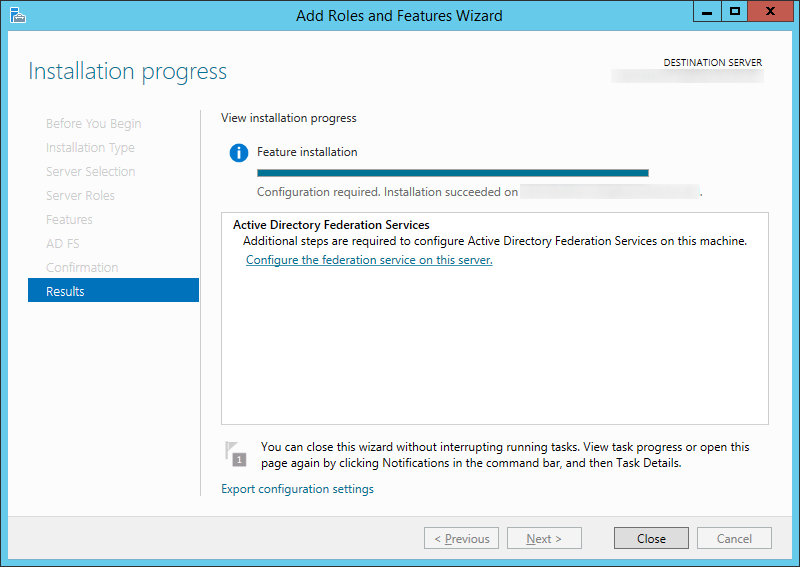
  26. Click on the Configure the federation service on this server. link once the installation has completed successfully. Add Roles and Features Wizard - Results - Configure the federation service on this server
  27. Check Create the first federation server in a federation server farm on the Welcome screen for the Active Directory Federation Services Configuration Wizard and then click Next > Active Directory Federation Services Configuration Wizard - Welcome
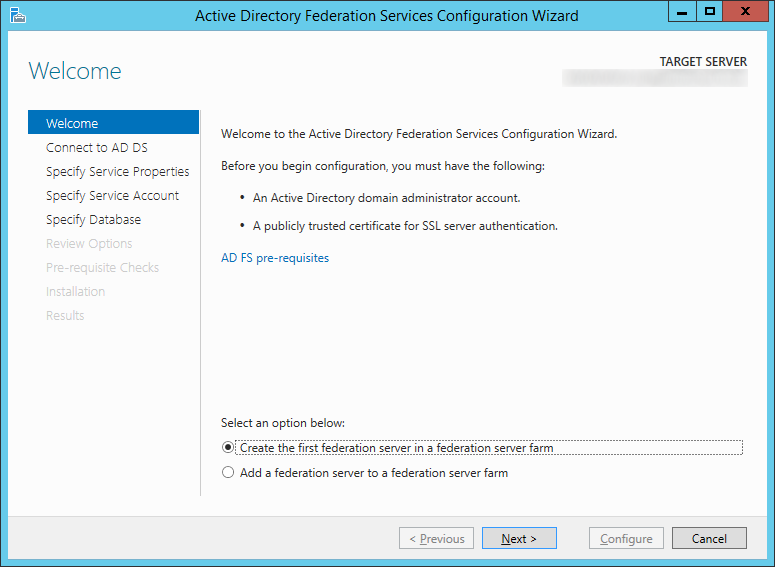
    1. Please see my notes below on why we did not check Create the first federation server in a federation server farm.
  28. Click Next > on the Connect to AD DS step
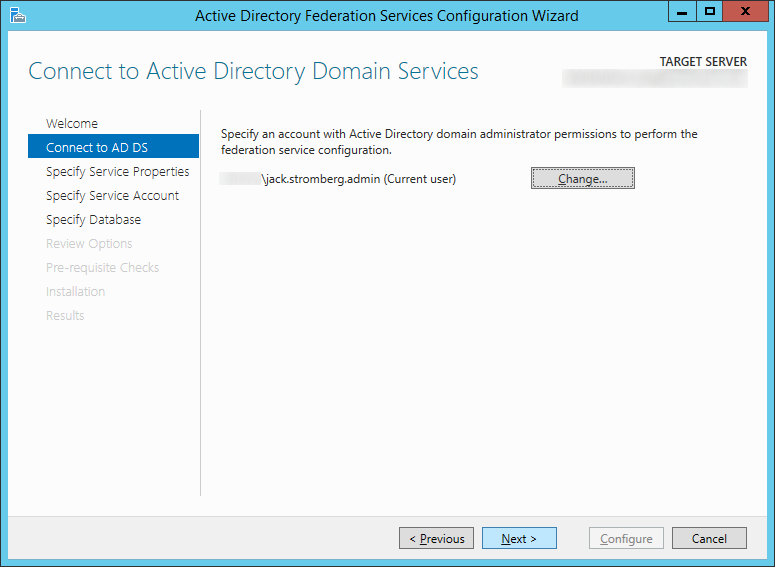
    Active-Directory-Federation-Services-Configuration-Wizard-Connect-to-AD-DS
  29. Copy the .pfx file we exported from the ADFS server earlier to the new ADFS server
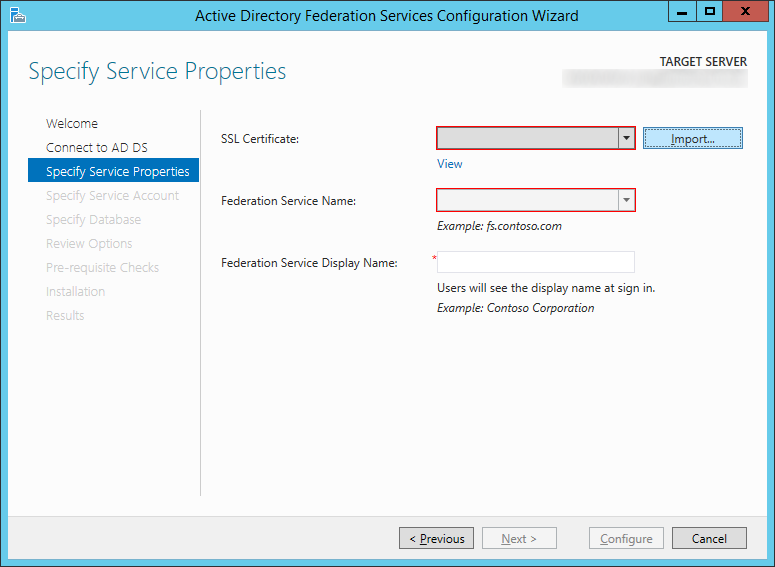
  30. On the Specify Service Properties screen, click on the Import... button Active Directory Federation Services Configuration Wizard - Specify Service Properties - Import
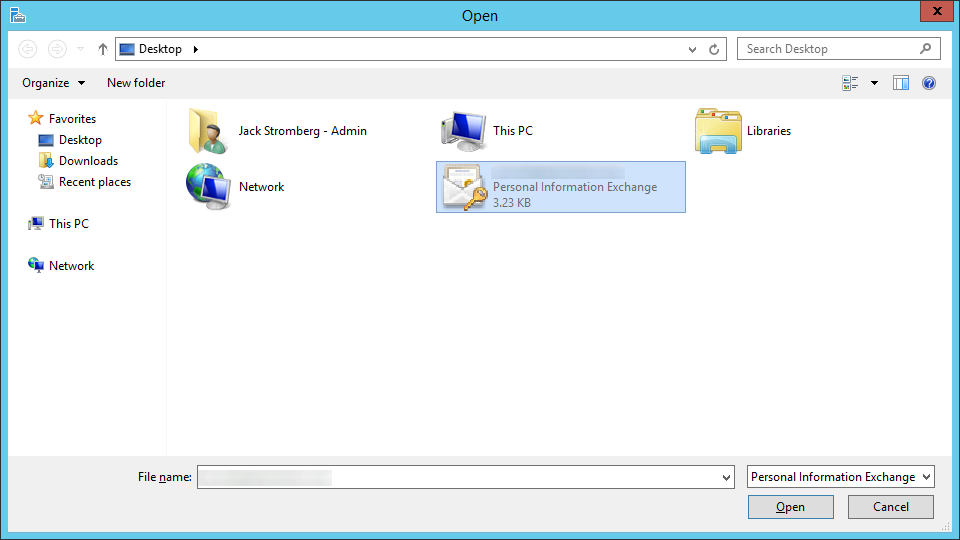
  31. Select your certificate and click Open Select Certificate
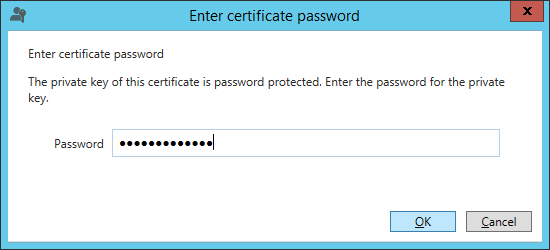
  32. Type in the password to the exported certificate and click OK Enter certificate password
  33. Type in a Federation Service Display Name that will be shown to your users when they login to the ADFS service (this can be anything), and click Next > Active Directory Federation Services Configuration Wizard - Specify Service Properties - Federation Service Display Name
  34. On the Specify Service Account screen, click the Select... button Active Directory Federation Services Configuration Wizard - Specify Service Properties - Use an existing domain user account or group Management Service Account
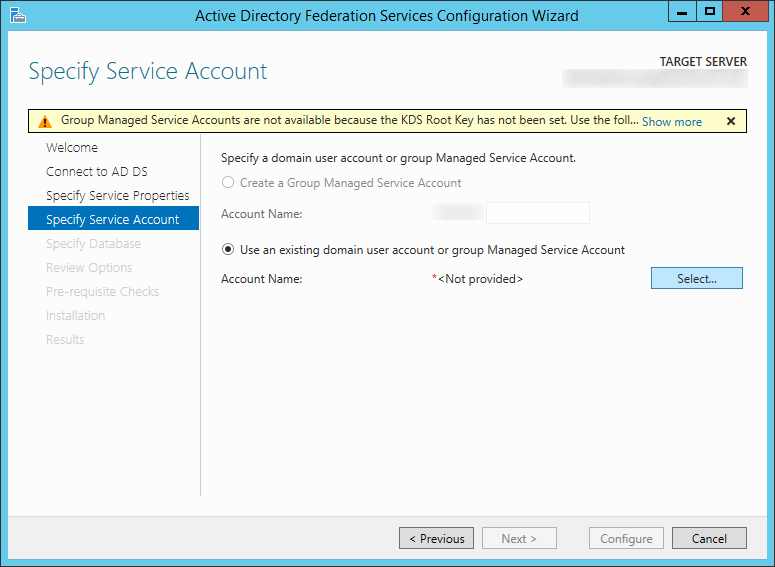
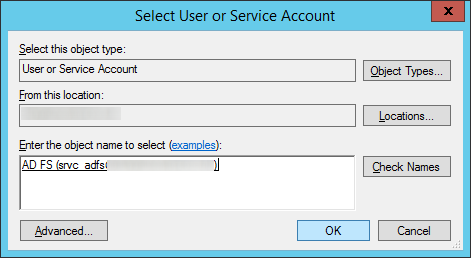
  35. Type in the name of your service account you wish to use for ADFS, click the Check Names button to verify you don't have any typos, and click OK Active Directory Federation Services Configuration Wizard - Specify Service Properties - Select User or Service Account
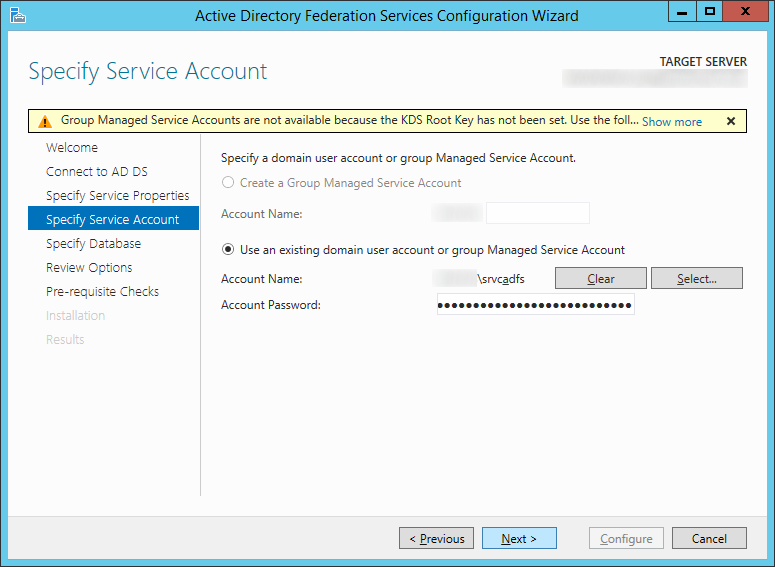
  36. Type in the password for the ADFS service account and click Next > Active Directory Federation Services Configuration Wizard - Specify Service Properties - Use an existing domain user account or group Management Service Account - Username password
  37. Click Next > on the Specify Configuration Database Active Directory Federation Services Configuration Wizard - Specify Database - Create a database on this server using Windows Internal Database
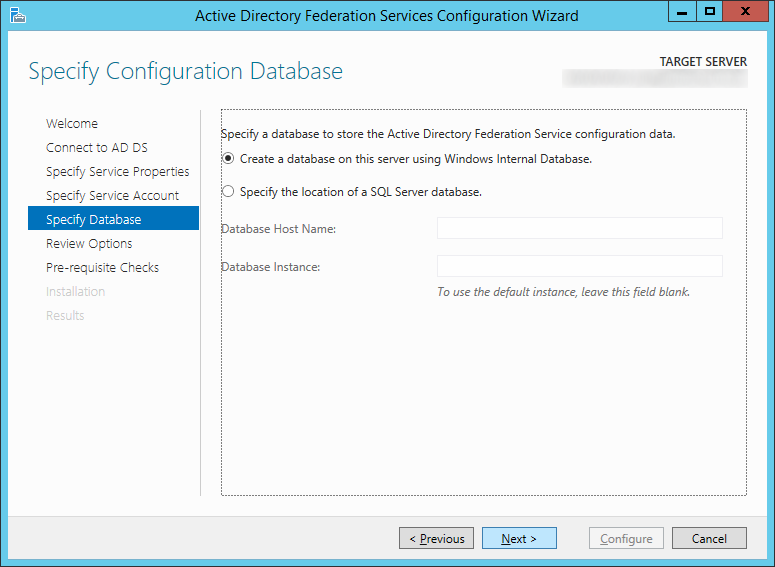
    1. Note: I choose to continue to use WID, you can switch to SQL if you would like now, however that is outside of the scope of this document.
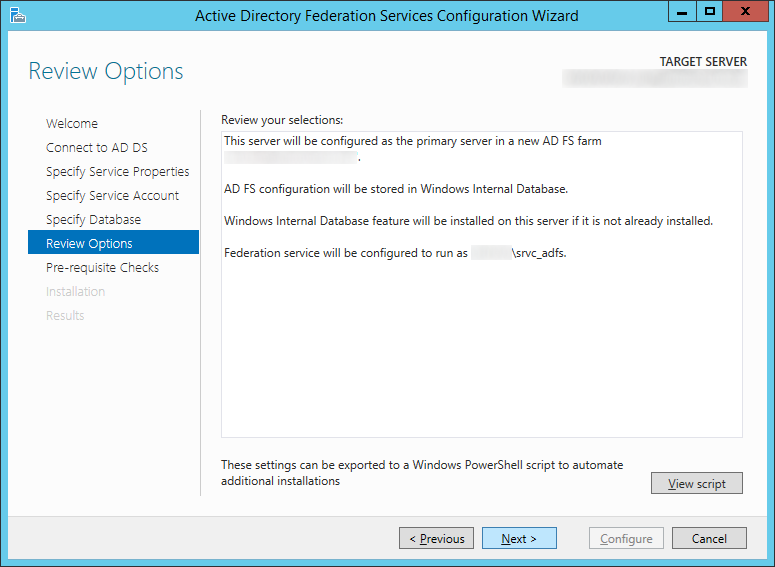
  38. Click Next > on the Review Options screen Active Directory Federation Services Configuration Wizard - Review Options
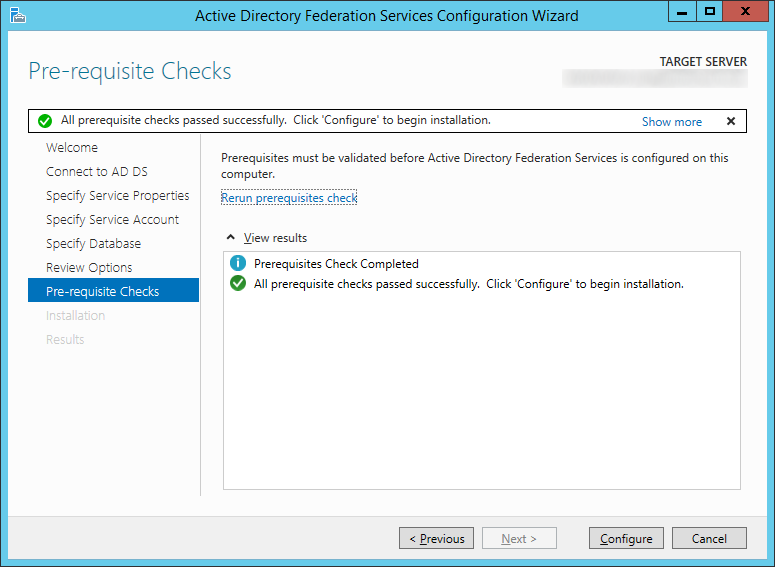
  39. Click the Configure button once all the prerequsite checks have passed successfully Active Directory Federation Services Configuration Wizard - Pre-requisite Checks
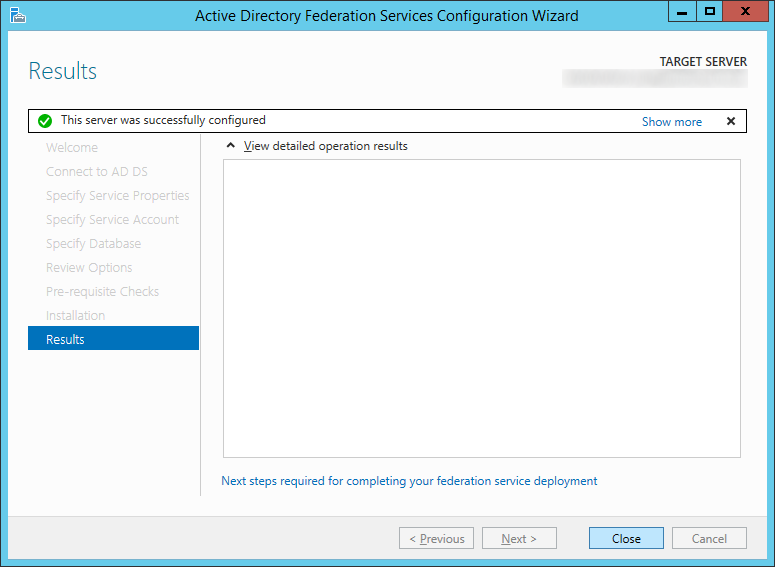
  40. Click Close once the server has successfully been configured Active Directory Federation Services Configuration Wizard - Results
  41. Open up Internet Explorer on the new ADFS machine and navigate to https://localhost/adfs/ls/IdpInitiatedSignon.aspx to ensure the service is properly running AD FS 3 Test
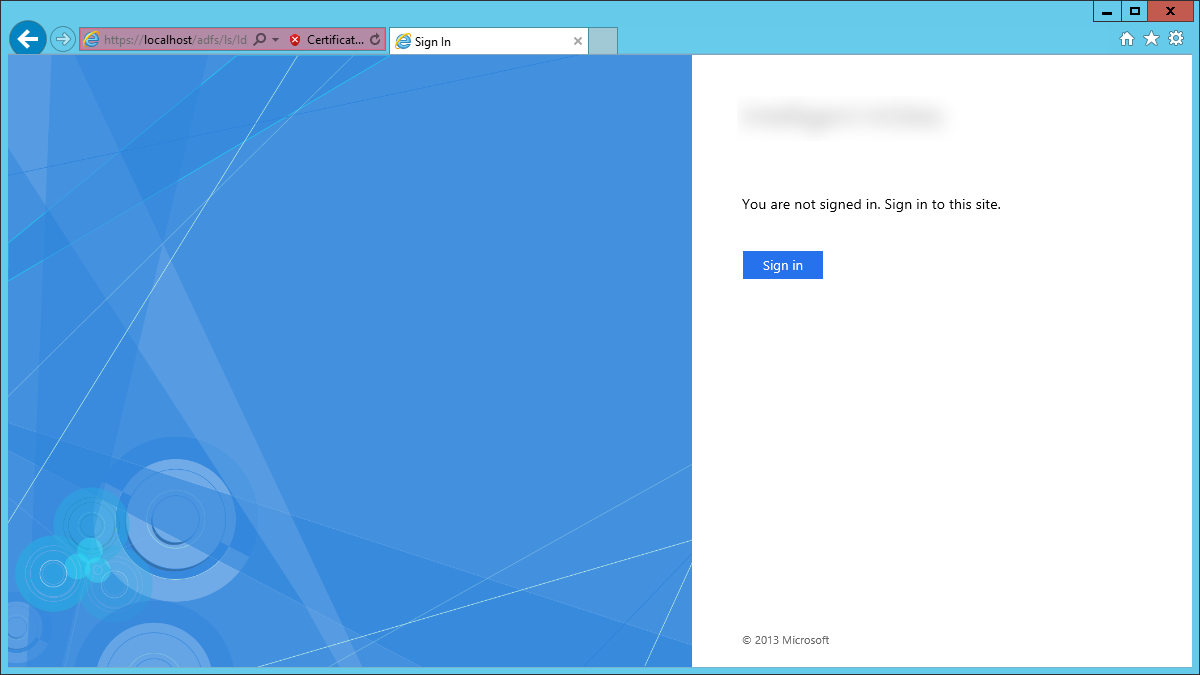
    1. Note: you should receive an invalid ssl certificate error; that is OK, we will switch the DNS records over once we are ready to transition from our old farm to the new one.
  42. Next, login to your Server 2008 R2 primary ADFS server and recreate the federation trusts on the new Server 2012 R2 primary ADFS server
    1. Start -> Administrative Tools -> AD FS 2.0 Management; select Trust Relationships -> Relying Party Trusts
    2. Recreate all the rules/trusts from your original ADFS server on your new Server 2012 R2 ADFS machine
      1. Note: If you are recreating rules for Office 365, you will need to wait until you switch over our new Server 2012 R2 environment to production.  The reason is when you setup the new ADFS instance, some of the certificates will change causing a certificate mismatch/preventing your users from logging in.  You will need to make sure you follow the following steps when resetting up the Office 365 trust to ensure your users don't receive "Error 80041317": http://support.microsoft.com/kb/2647020/en-us
  43. Login to your new ADFS Proxy server
  44. Import your SSL cerficate from your old ADFS server (from step 8) onto the server's Local Machine certificate store
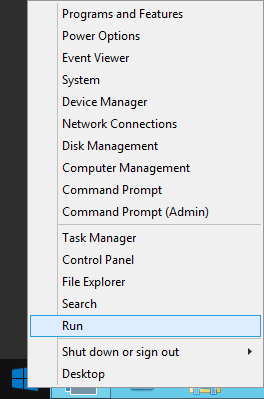
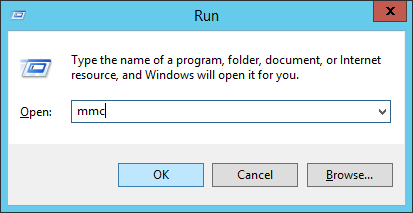
    1. Right click on Start and select Run
      Server 2012 - Start - Run
    2. Type MMC and click OK
      Server 2012 - Run - mmc
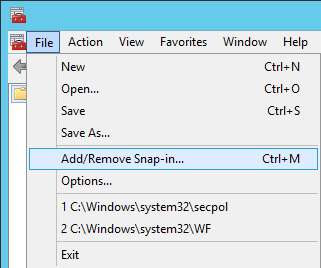
    3. Click File -> Add/Remove Snap-in...
      Server 2012 - mmc - Add Remove Snap-In
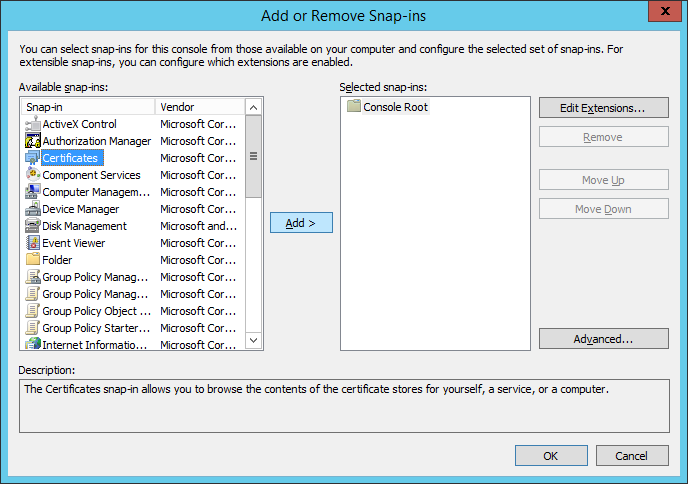
    4. Select Certificates and click Add > Add or Remote Snap-ins - Certificates
    5. Select Computer account and click Next > Certificates snap-in - Computer Account
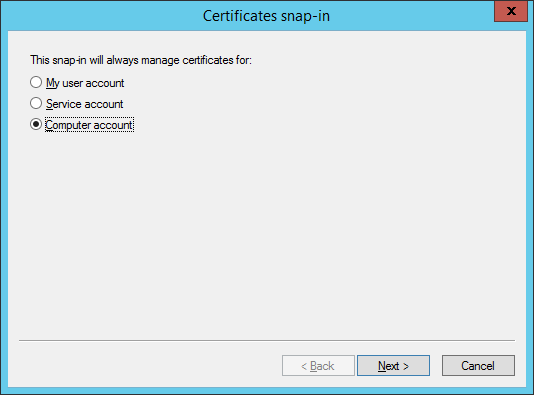
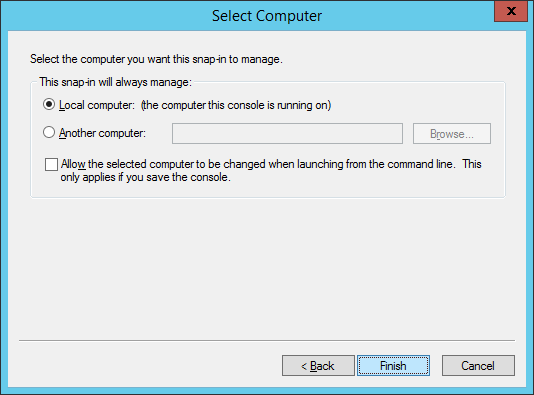
    6. Select Finish Certificates snap-in - Select Computer
    7. Click OK on the Add or Remove Snap-ins screen Add or Remove Snap-ins - Certificates - Local Computer
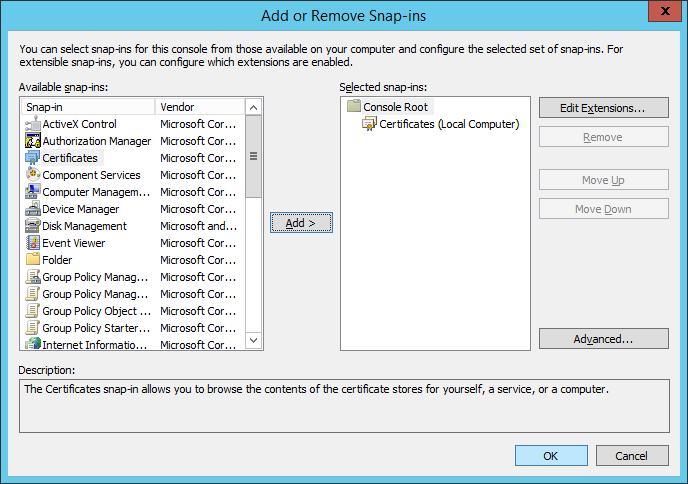
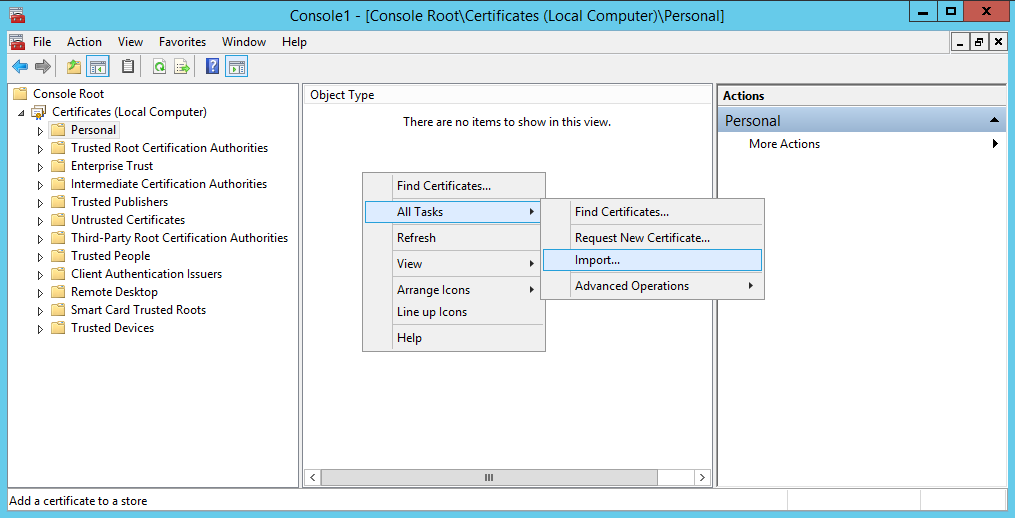
    8. Expand Certificates (Local Computer), select Personal, and right click, select All Tasks -> Import... Server 2012 - Certificates (Local Computer) - Personal - Import
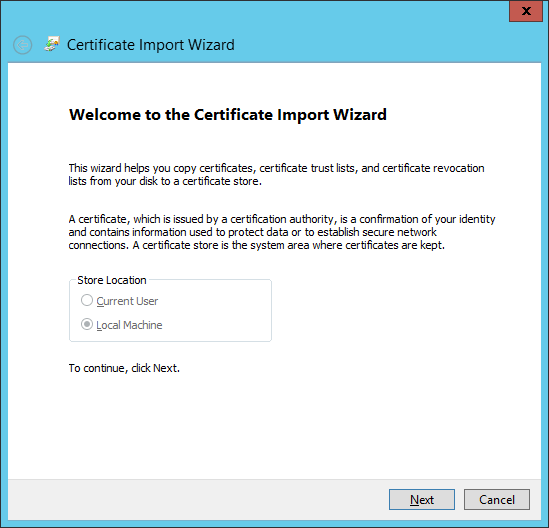
    9. Click Next on the Certificate Import Wizard Certificate Import Wizard - Welcome
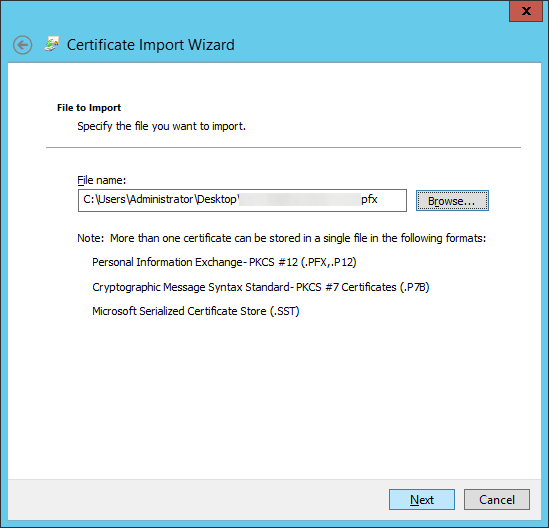
    10. Click the Browse... button Certificate Import Wizard - Browse
    11. Select your certificate and click Open Select Certificate
      1. Note: You may need to click on the dropdown box in the bottom right and select All Files for your pfx file to show up.
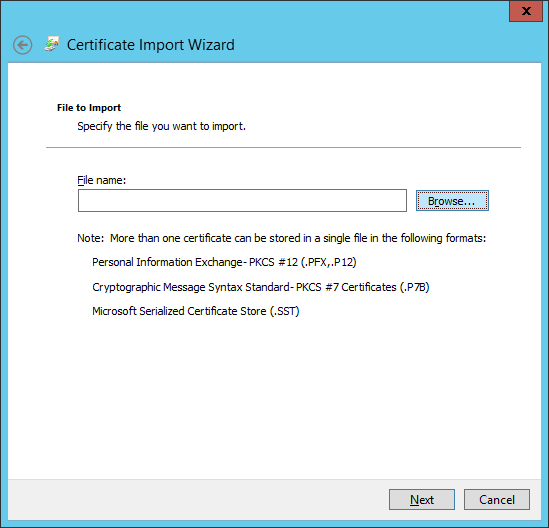
    12. Click Next on the File to Import screen Certificate Import Wizard - File to Import
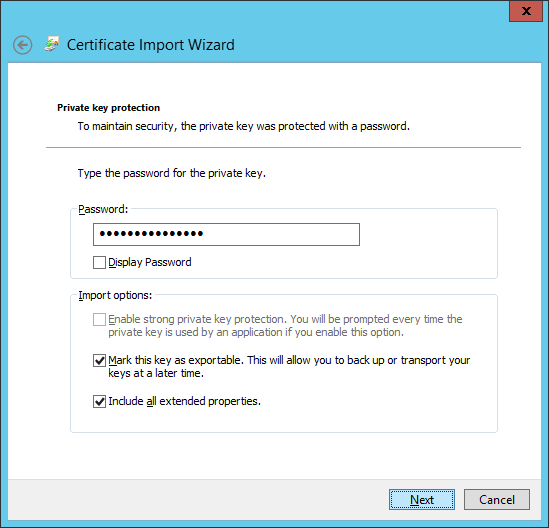
    13. Type in the password to the pfx file, check Mark this key as exportable, and click Next Certificate Import Wizard - Private key protection
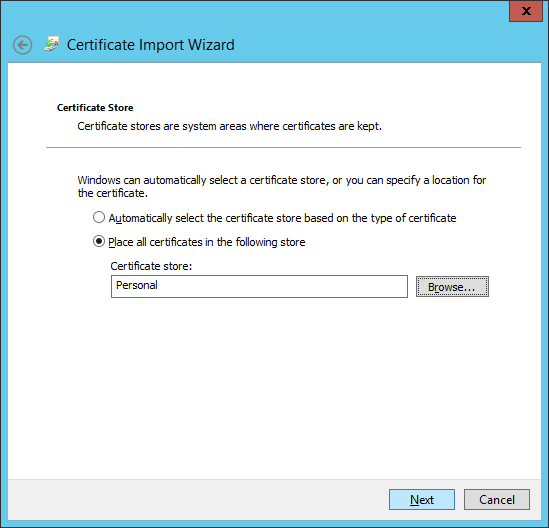
    14. Ensure Place all certificates in the following store shows Personal and click Next Certificate Import Wizard - Certificate Store
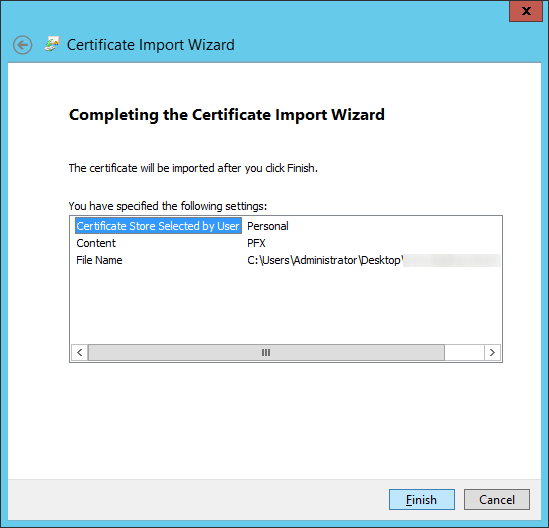
    15. Click Finish Certificate Import Wizard - Completing the Certificate Import Wizard
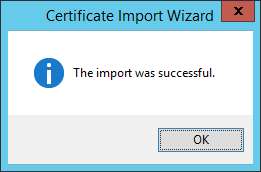
    16. Click OK on the Certificate Import Wizard successful dialog boxCertificate Import Wizard - Successful
  45. Edit the hosts file to point your DNS record to your new ADFS server
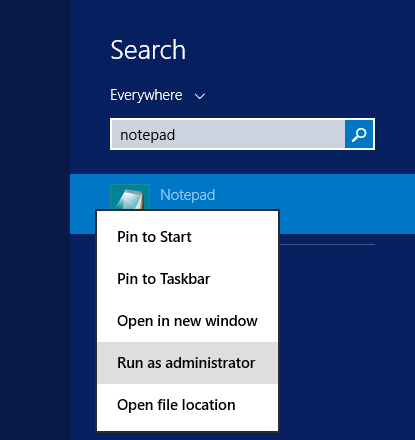
    1. Open Notepad as an Administrator Server 2012 - Notepad - Administrator
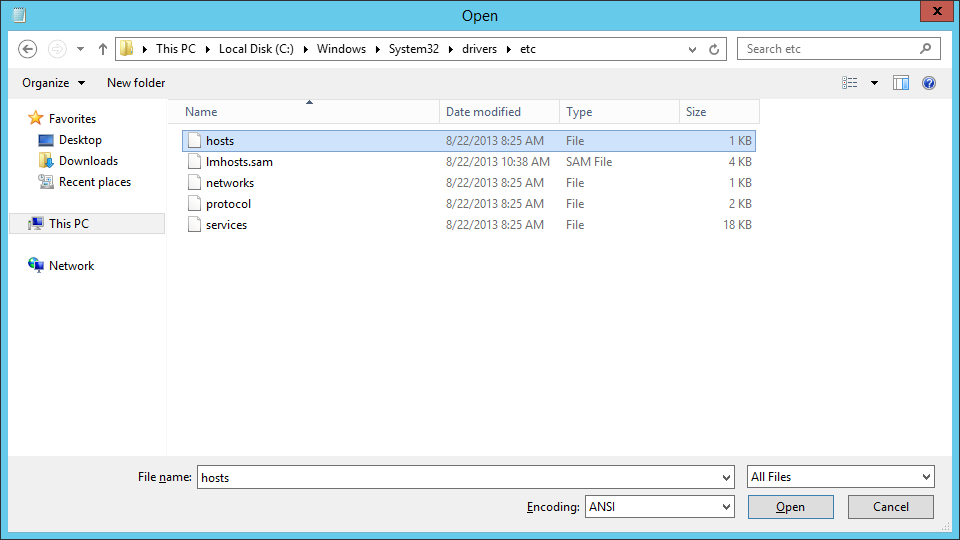
    2. Open the following file: C:\Windows\System32\drivers\etc\hosts Server 2012 - Hosts file
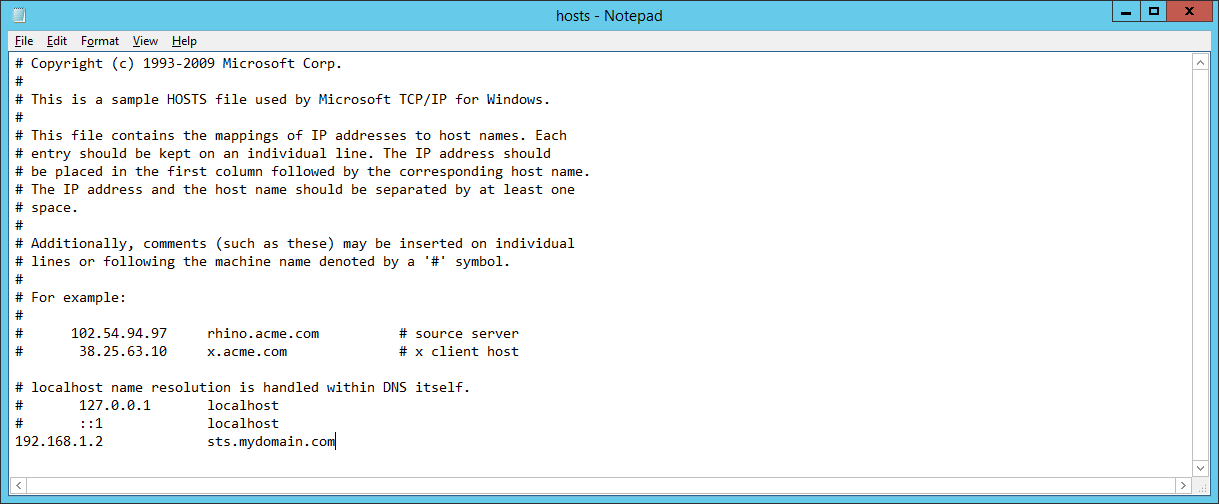
    3. Add in your DNS entry and point to your new ADFS server hosts file - adfs manual entry
    4. Save the file
      1. Note: We will come back to this later and update it to point to our load balancer once we switch over everything.  For now, this lets us test our new deployment while switching things over.
  46. Open up Server Manager
    Server 2012 R2 - Server Manager
  47. Click Manage -> Add Roles and Features
    Server 2012 - Manage - Add Roles and Features
  48. Click Next > on the Before you begin screen Add Roles and Features Wizard - Before you begin
  49. Select Role-based or feature based installation and click Next > Add Roles and Features Wizard - Select installation type
  50. Select your server and click Next > Add Roles and Features Wizard - Select destination server
  51. Check Remote Access on the Server Roles screen Add Roles and Features Wizard - Remote Access
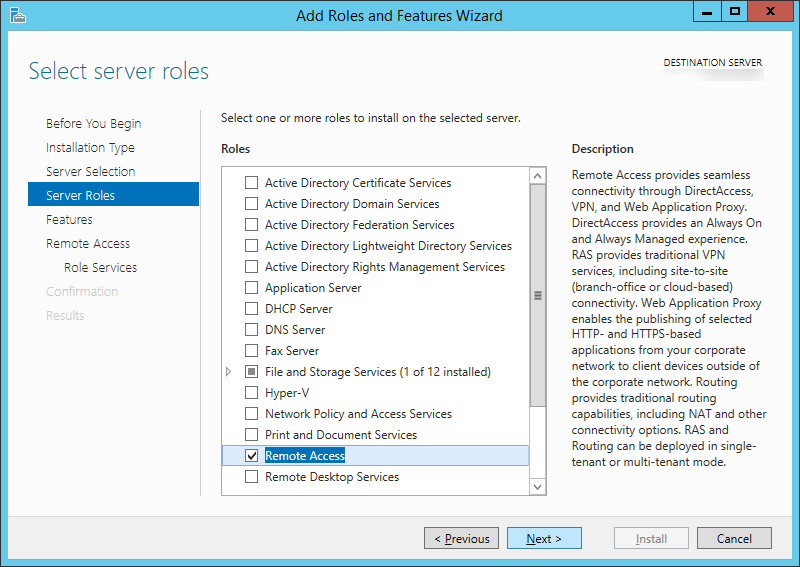
  52. Click Next > on the Features screen Add Roles and Features Wizard - Features - Default
  53. Click Next > on the Remote Access screen
  54. Check Web Application Proxy
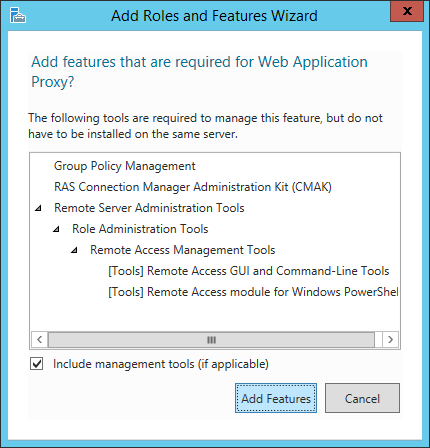
  55. ClickAdd Features on the Add Roles and Features Wizard dialog boxAdd Roles and Features Wizard - Web Application Proxy
  56. Click Next > on the Roles Services screen Add Roles and Features Wizard - Role Services - Web Application Proxy
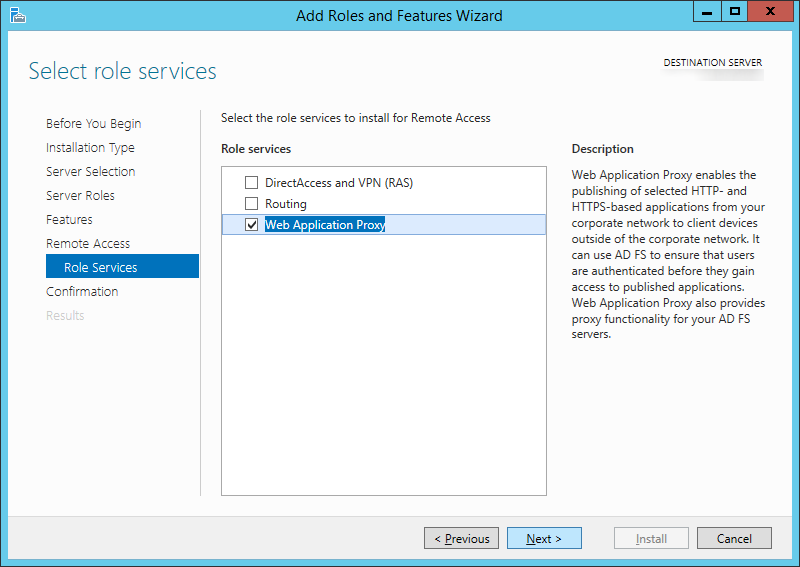
  57. Click Install on the Confirmation screen Add Roles and Features Wizard - Confirmation - Web Application Proxy
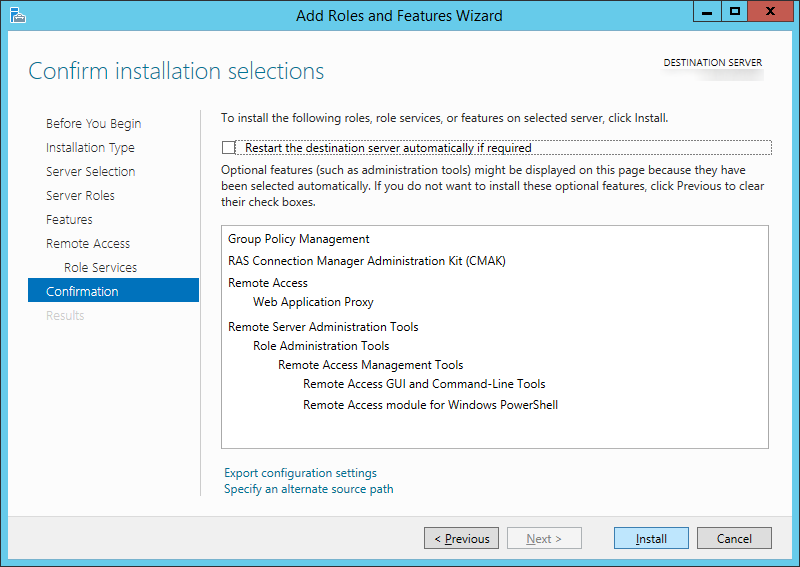
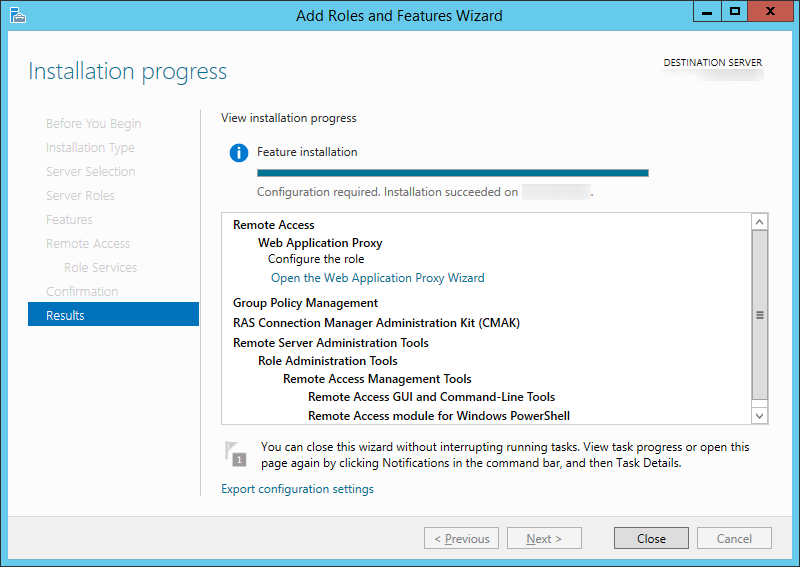
  58. Click on the Open the Web Application Proxy Wizard link once the installation succeeds Add Roles and Features Wizard - Confirmation - Web Application Proxy - Open the Web Application Proxy Wizard
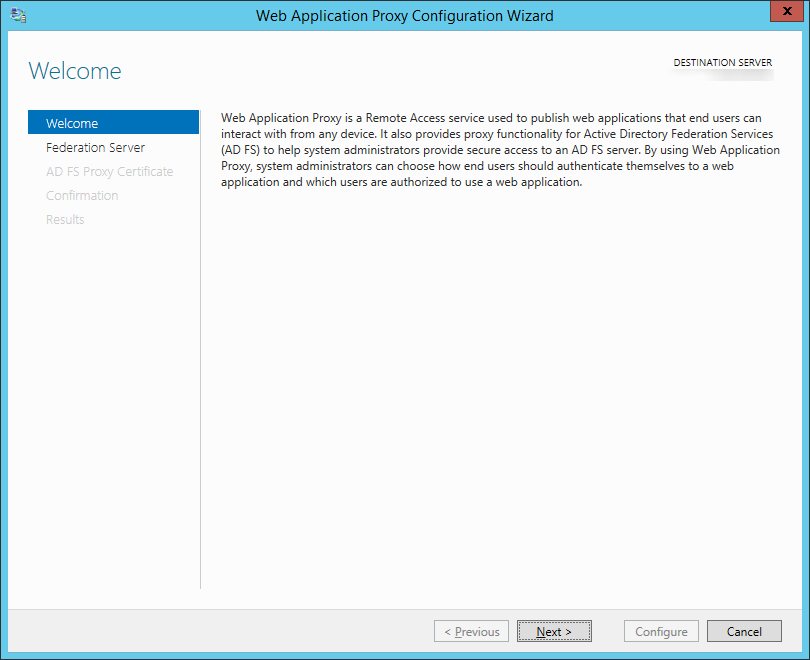
  59. Click Next > on the Welcome screen Web Application Proxy Configuration Wizard - Welcome
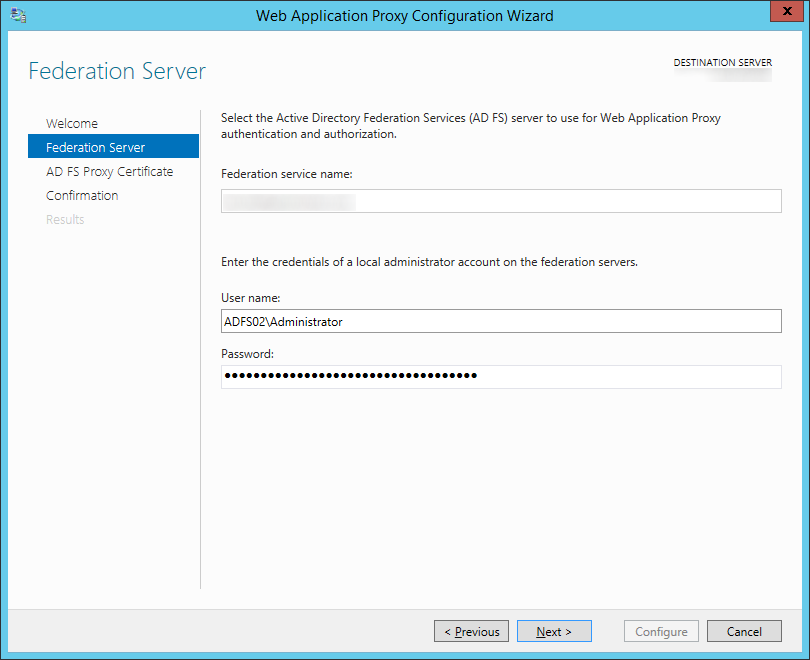
  60. Type in the FQDN to your ADFS server, the credentials of an account with local admin privileges, and then click Next >Web-Application-Proxy-Configuration-Wizard-Federation-Server
  61. Select your certificate on the AD FS Proxy Certificate screen and click Next >
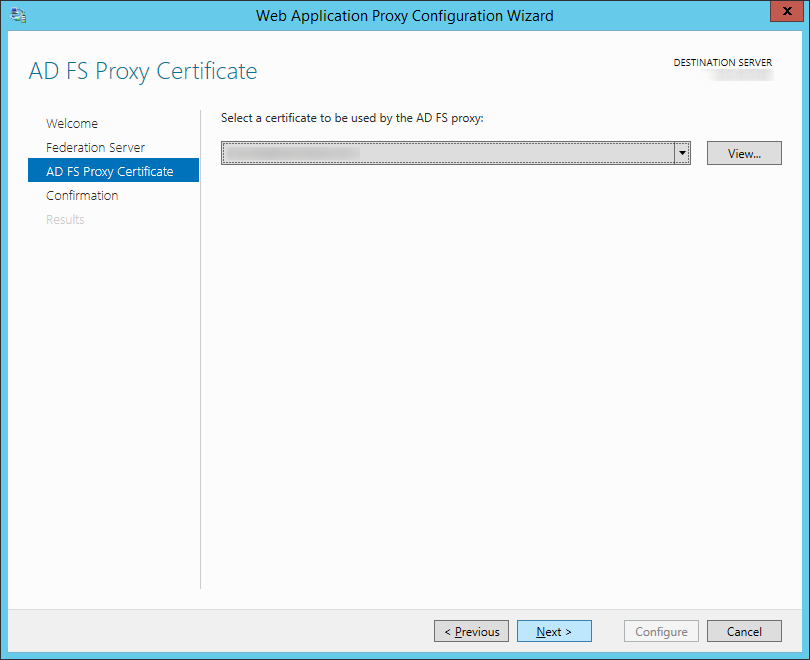
    Web-Application-Proxy-Configuration-Wizard-AD-FS-Proxy-Certificate
  62. Click Configure on the Confirmation screen Web Application Proxy Configuration Wizard - Confirmation
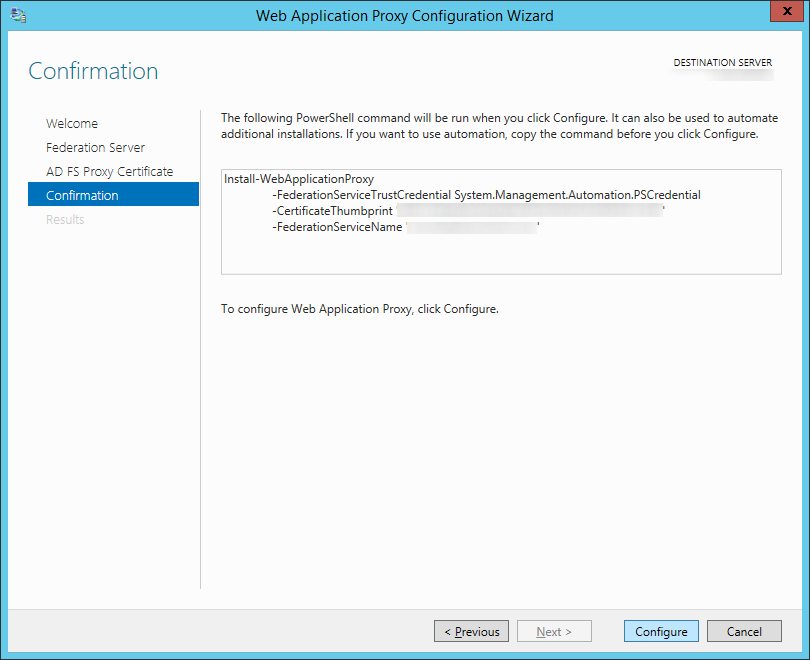
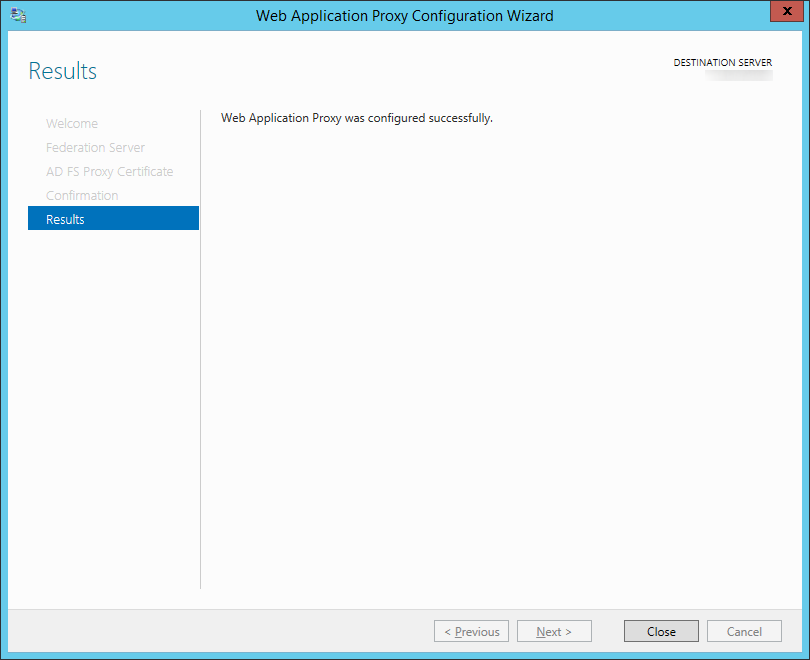
  63. Click Close once the Web Application Proxy has been successfully configured.Web-Application-Proxy-Configuration-Wizard-Results
  64. After you click close a new window should open.  On the Remote Access Management Console, select Publish
    1. Note: This step only needs to be done once.  It will replicate to all other proxy servers when you set those up at a later time.
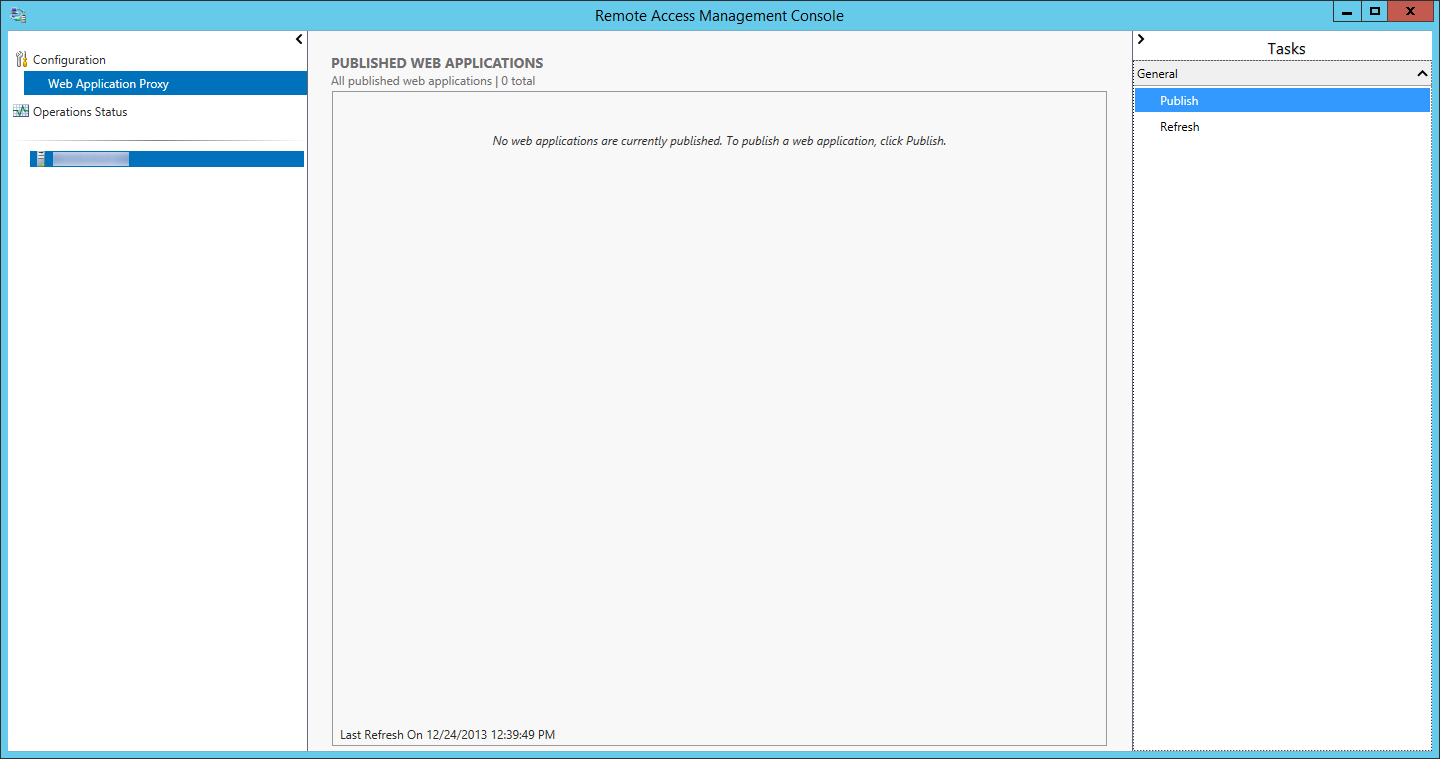
      Remote Access Management Console - Publish
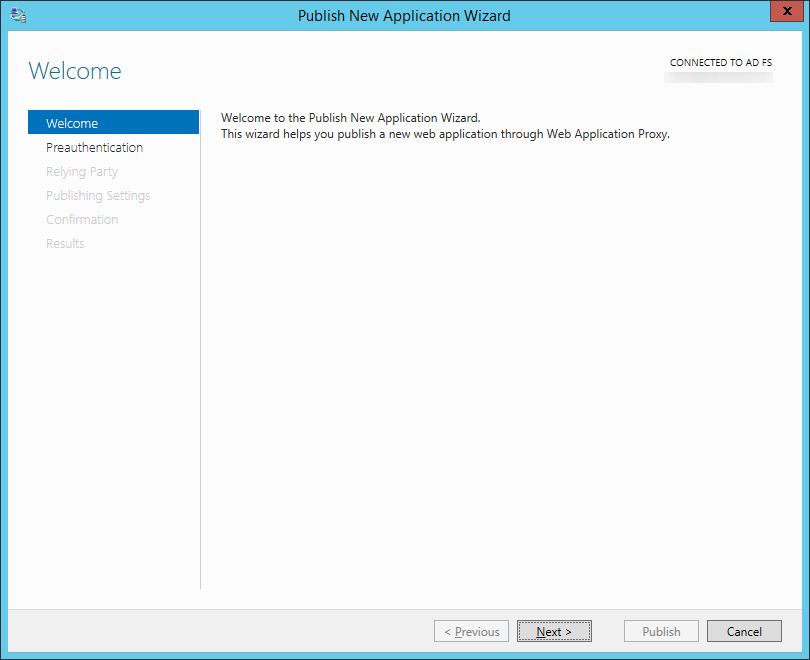
  65. Click Next > on the Welcome screen
    Publish New Application Wizard - Welcome
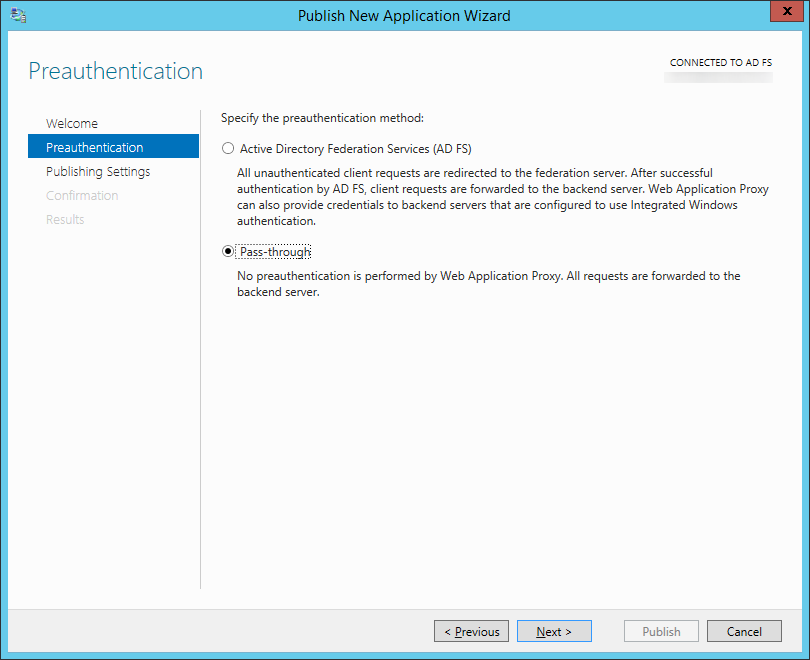
  66. Select Pass-through and click Next >
    Publish New Application Wizard - Preauthentication
  67. Enter in a name, external URL, and internal URL for your federated server (mine were both the same since I use split-dns).  Click Next >
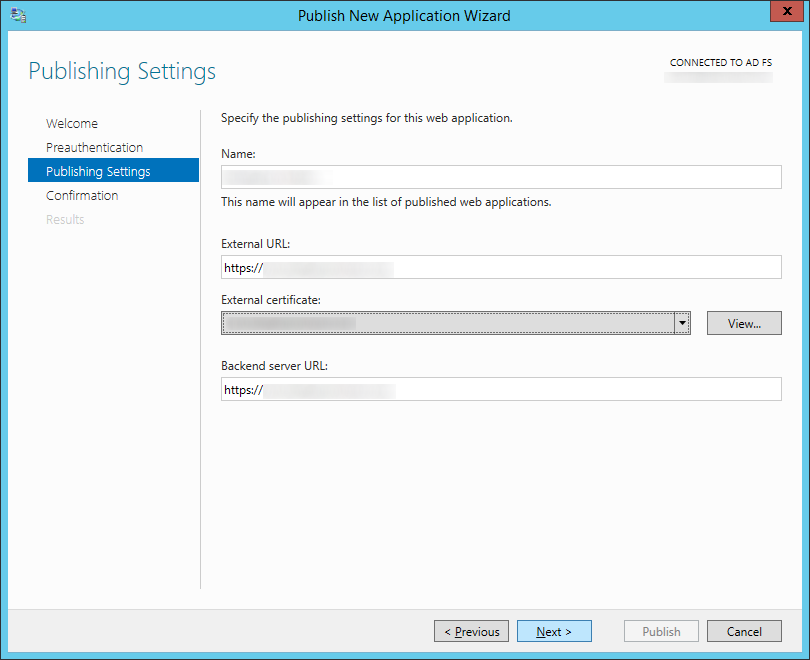
    Publish New Application Wizard - Publishing Settings
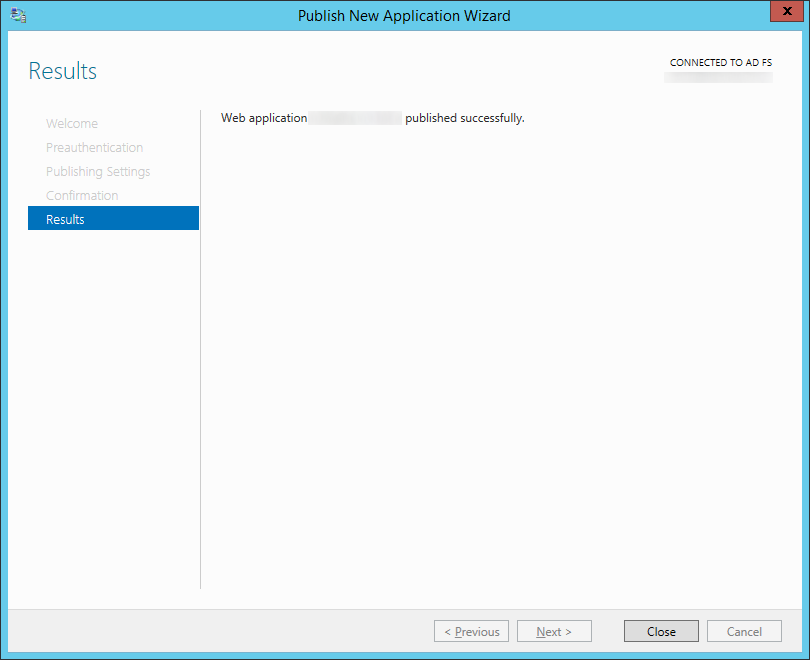
  68. Click Close
    Publish New Application Wizard - Results
  69. Add the new Server 2012 R2 ADFS machine to your load balancer and remove your Server 2008 R2 machine.
  70. Add the new Server 2012 R2 ADFS Proxy machine to your load balancer and remove your Server 2008 R2 proxy machine.
  71. Update the hosts file on your Server 2012 R2 proxy machine to point to your load balanced Server 2012 R2 ADFS environment
  72. Retire your Server 2008 R2 ADFS environment
    1. Disjoin the ADFS proxy server from the domain and recycle the machine
    2. Open up PowerShell as an Administrator
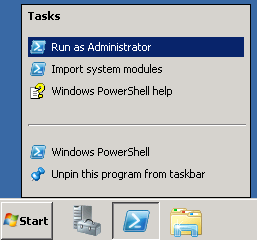
      Elevated Powershell
    3. Execute the following commands:
      1. Add-PsSnapin Microsoft.Adfs.Powershell
        Get-AdfsProperties
        get-adfsproperties certificatesharingcontainer
    4. Stop the service on your Server 2008 R2 ADFS machine running the old ADFS farm
    5. Execute the following command to remove the ADFS Farm info from AD (substituting in the information from the Get-AdfsProperties command):
      1. $delme = New-Object System.DirectoryServices.DirectoryEntry("LDAP://CN=484e24a8-5726-4186-8e24-825b77920798,CN=ADFS,CN=Microsoft,CN=Program Data,DC=mydomain,DC=local")
        $delme.DeleteTree()
        PowerShell DeleteTree
    6. Disjoin the ADFS machine from the domain and recycle the machine
  73. Add a new Server 2012 R2 machine and WAP machine to your new ADFS environment for redudnancy (same steps as above, except in Step 27, you will select Add a federation server to federation server farm

Notes: Here is the upgrade compatibility matrix for upgrading ADFS from a specific version to Server 2012: http://technet.microsoft.com/en-us/library/jj647765.aspx

Why did I not check Add a federation server to a federation server farm on the Welcome screen for the Active Directory Federation Services Configuration Wizard?

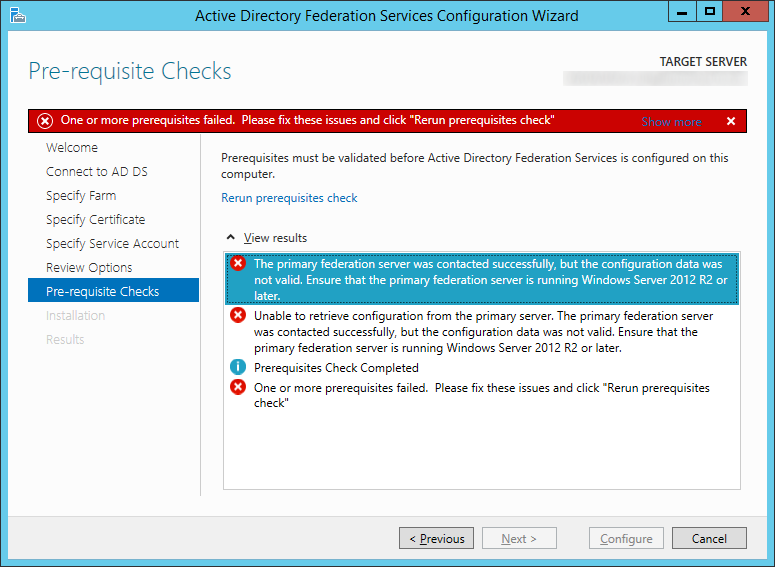
The reason behind not checking this is I believe Microsoft has a bug in their discovery tool in adding another machine to a farm running ADFS 3.0.  When adding a Server 2012 R2 machine to a farm with only Server 2008 R2 machines running ADFS 2.0, you will receive the following error:

The primary federation server was contacted successfully, but the configuration data was not valid. Ensure that the primary federation server is running Windows Server 2012 R2 or later. Unable to retrieve configuration from the primary server. The primary federation server was contacted successfully, but the configuration data was not valid. Ensure that the primary federation server is running Windows Server 2012 R2 or later. Prerequisites Check Completed One or more prerequisites failed.  Please fix these issues and click "Rerun prerequisites check" The primary federation server was contacted successfully, but the configuration data was not valid. Ensure that the primary federation server is running Windows Server 2012 R2 or later
Symptom: You receive the following error while setting up the WAP (proxy) server:

An error occurred when attempting to establish a trust relationship with the federation service. Error: Not Found An error occurred when attempting to establish a trust relationship with the federation service Error Not Found
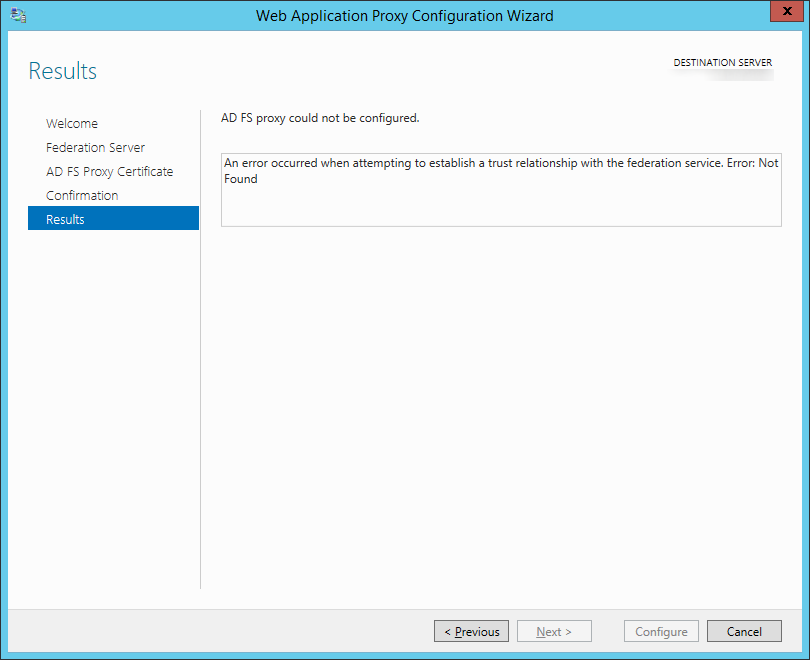
Resolution: Make sure you update the DNS records of your ADFS deployment to point to your new ADFS server.  Both the ADFS proxy and ADFS server must be running the same OS version (in this case, Server 2012 R2).