Category Archives: Microsoft Azure

All things Microsoft Azure

Uninstall all Azure PowerShell Modules

With Azure PowerShell modules changing all the time and the recent introduction of the PowerShell modules being renamed from AzureRm to Az, you may want to totally uninstall all modules and reinstall to make sure you are using the latest and greatest modules.

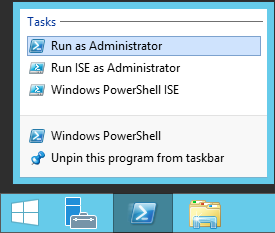
To do so, StackOverflow user BlueSky, wrote a handy dandy script that will go through and cleanup all the Azure(RM)(AD) modules.  Simply open up PowerShell as an Administrator and execute the following PowerShell workflow/commands:

workflow Uninstall-AzureModules
{
    $Modules = @()
    $Modules += (Get-Module -ListAvailable Azure*).Name
    $Modules += (Get-Module -ListAvailable Az.*).Name
    Foreach -parallel ($Module in ($Modules | Get-Unique))
    { 
        Write-Output ("Uninstalling: $Module")
        Uninstall-Module $Module -Force
    }
}
Uninstall-AzureModules
Uninstall-AzureModules   #second invocation to truly remove everything

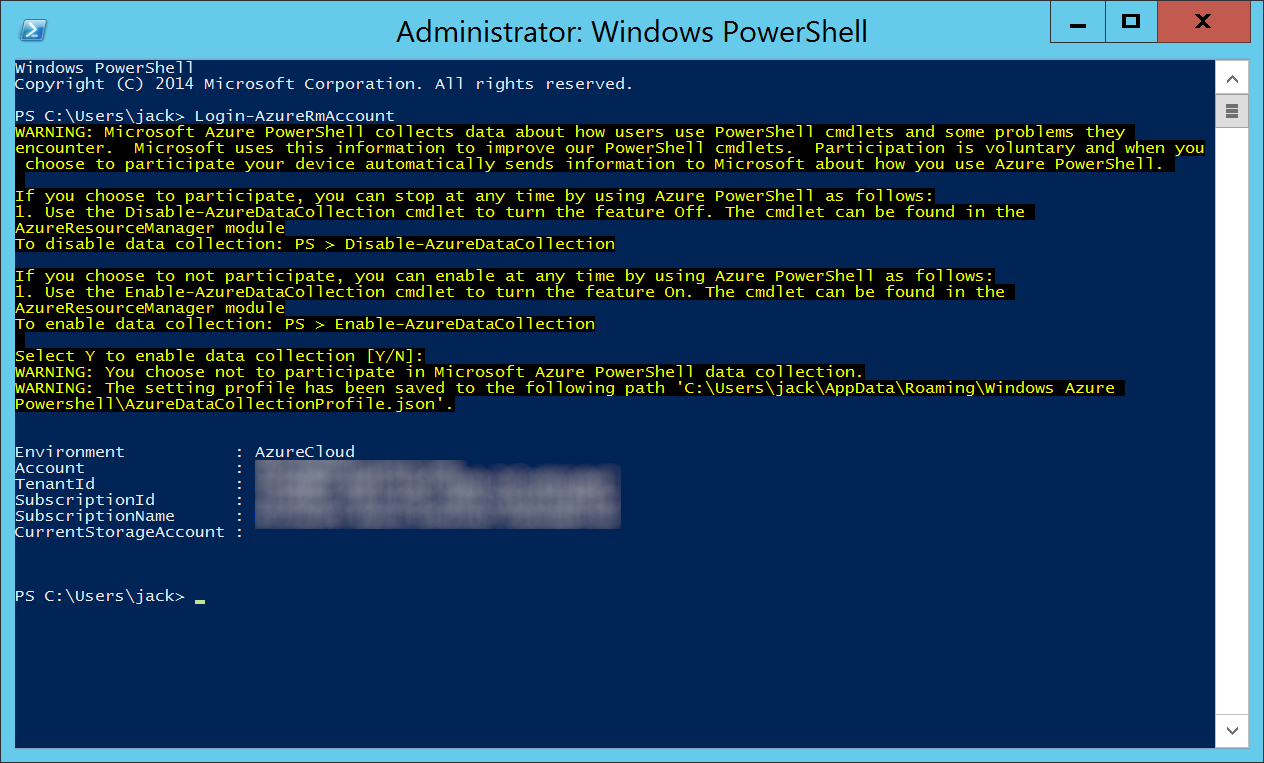
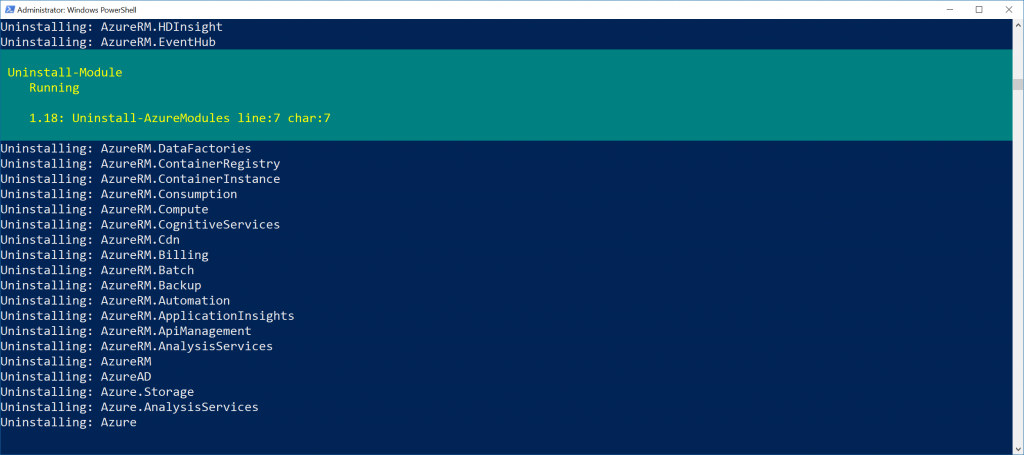
The thing about the PowerShell script above being a workflow is this allows you to remove all the modules in parallel vs one-by-one.  Here's a screenshot of the script in action.

Hope this helps!

Deploying Drupal on an Azure App Service Linux Docker Container

From a performance perspective, PHP applications running on Azure App Services tend to perform better on Linux than Windows.  While Azure provides a Drupal template in their Marketplace, it deploys to a regular Windows based App Service and installs version 8.3.3 (where as of the time of writing this article; 9/10/2018, the latest Drupal version is 8.6.1)

In this case, Microsoft has published a set of templates that provide flexibility to choose the Drupal version, deploy nginx, install PHP, and allow flexibility in installing any modules.  The templates are currently deployed and maintenace on GitHub, which can be found here: https://github.com/Azure/app-service-quickstart-docker-images/tree/master/drupal-nginx-fpm

So let's get started!

Download and install prerequisites:

  1. Download and install Git
  2. Download and install Docker
    1. Note: The above link is for Windows, here are the links to the other distributions for Docker: https://store.docker.com/search?offering=community&type=edition
    2. Note: On windows I recommend running the command git config core.autocrlf true to prevent issues with weird character returns.  Check out this awesome blog article by Tim Clem on why this is recommended: https://adaptivepatchwork.com/2012/03/01/mind-the-end-of-your-line/
  3. Download and install Visual Studio Code (free lightweight code editor for Windows, Linux, and Mac)

Note: I'm using a Windows 10 machine while writing this tutorial.  There will be some steps, like running Git Bash on Windows vs running Git natively on Linux.  Likely, you can just run Git from a regular terminal session and you'll be fine on the Linux/Mac side.

Clone the GitHub template

  1. Open up Git Bash
  2. Create a new directory for our project
    1. mkdir Drupal-Azure
    2. cd Drupal-Azure
  3. Clone the GitHub templat
    1. git clone https://github.com/Azure/app-service-quickstart-docker-images.git --config core.autocrlf=input
      1. Note: Unfortunately, we cannot just clone a specific directory easily, we have to download all the files.  This particular GitHub project contains several projects, so it'll be about a 50MB download as a heads up 
      2. Note: The --config core.autocrlf=input is used to prevent windows from using crlf vs lf's for line returns.  If you don't specify this, you might receive the following error if you tried running your docker container after being built:
        1. standard_init_linux.go:190: exec user process caused "no such file or directory"
  4. Navigate into the Drupal directory
    1. cd app-service-quickstart-docker-images/drupal-nginx-fpm/0.45

Modify the scripts to your desire

I personally prefer not to have PHPMyAdmin or MariaDB installed as I will leverage Azure MySQL PaaS services for the database.  In this case, I went ahead and modified the Dockerfile document accordingly.

Build the Docker container

Execute the following command to build your container:

docker build -t jackdrupalregistry.azurecr.io/azuredrupal:test .

Note: The . at the end is needed

Note: When building docker images, the repository name must be lowercase

Create Azure Container Registries

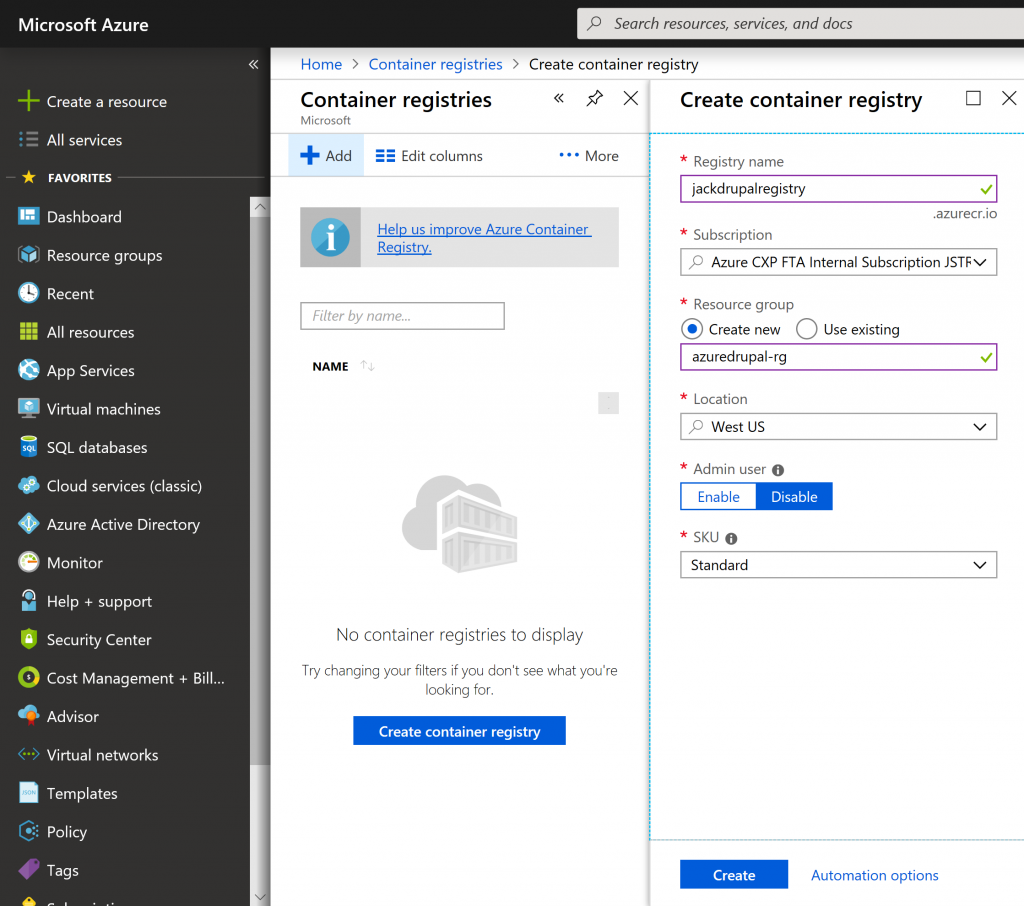
Select All Services -> Azure Container Registries.  Select Add and create a new container registry

Push the Docker container to your Azure Container Registry

  1. Navigate to  All Services -> Azure Container Registries -> Your Registry -> Access Keys
  2. Check Enable for Admin user
  3. Go back to Git Bash and execute the following commands
  4. Login to docker
    1. Execute the command:
      1. docker login jackdrupalregistry.azurecr.io -u yourusername -p yourpassword
  5. Push the image up to Azure Container Registry
    1. Execute the command:
      1. docker push jackdrupalregistry.azurecr.io/azuredrupal:test

Deploy the web app

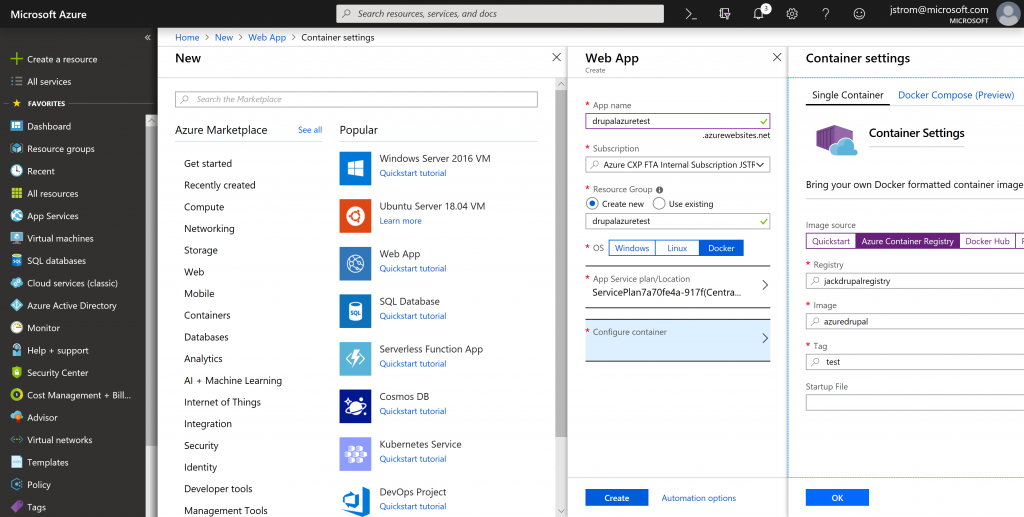
Navigate to Create a resource -> Web App.  Select Docker as the OS type, select Configure container, and leverage the following settings:

  • Image Source: Azure Container Registry
  • Registry: jackdrupalregistry
  • Image: azuredrupal
  • Tag: 0.45

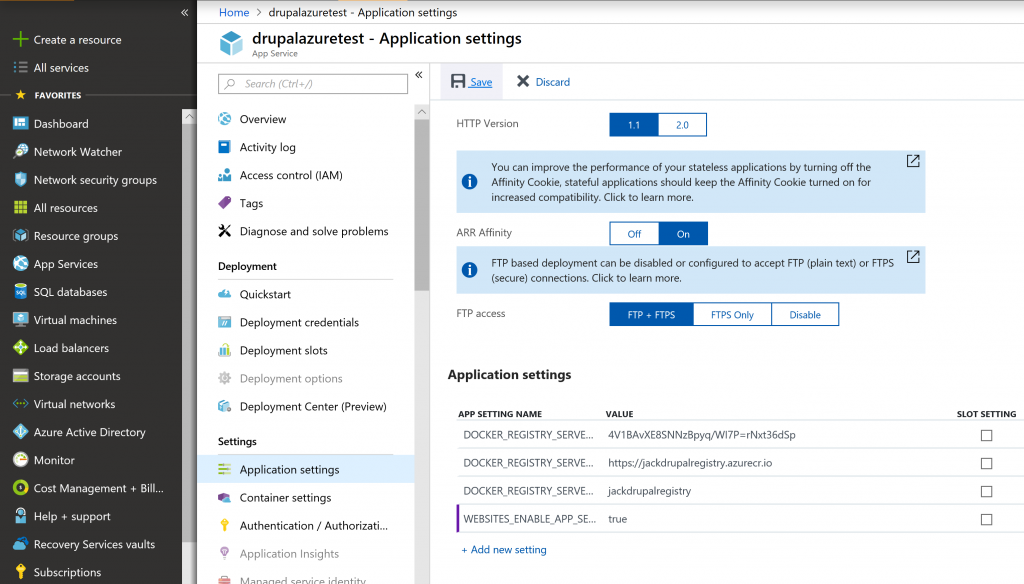
Navigate to All Services -> App Services -> Your App Service -> Application settings and set WEBSITES_ENABLE_APP_SERVICE_STORAGE to true, and click Save to help ensure data persists.  Essentially, anything you write to /home will persist.  Anything else will be reset when the container gets rebuilt.

Create a MySQL Database

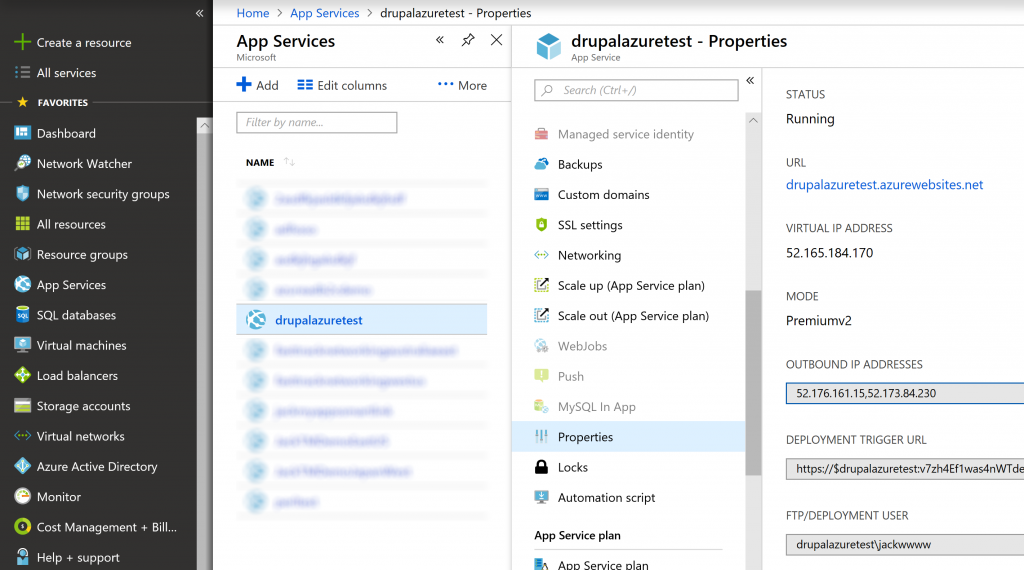
Navigate to All Services -> App Services -> Your App Service -> Properties and write down the Outbound IP Addresses; we will use these later.

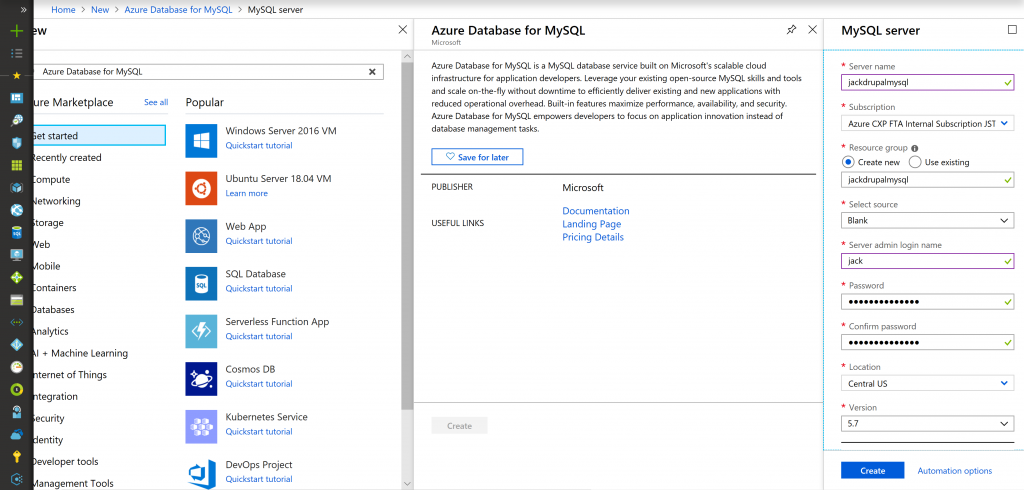
Select Create a Service -> Azure Database for MySQL -> Create -> create a blank database

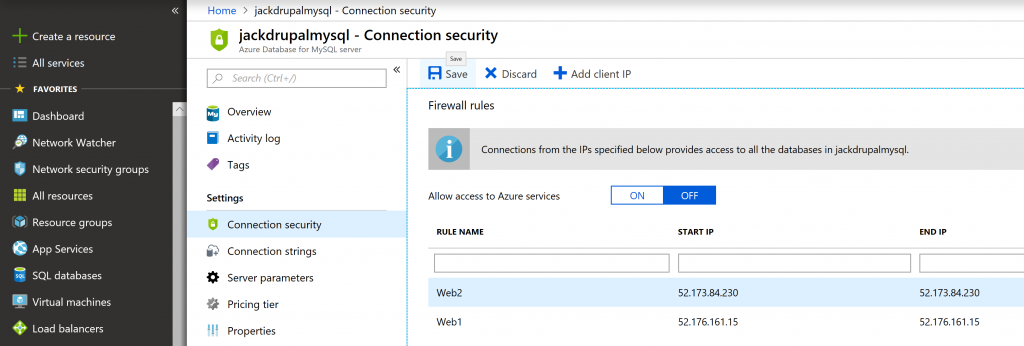
Select Connection security and enter the Outbound IP Addresses from your App Service and click Save

Note: I haven't found a way to get Drupal to allow SSL Connections, which would certainly be a best practice.  In this case, on the same Connection security blade, go ahead and set Enforce SSL Connection to Disabled.  If someone knows how to do this, please put a comment below, so I can update this guide.

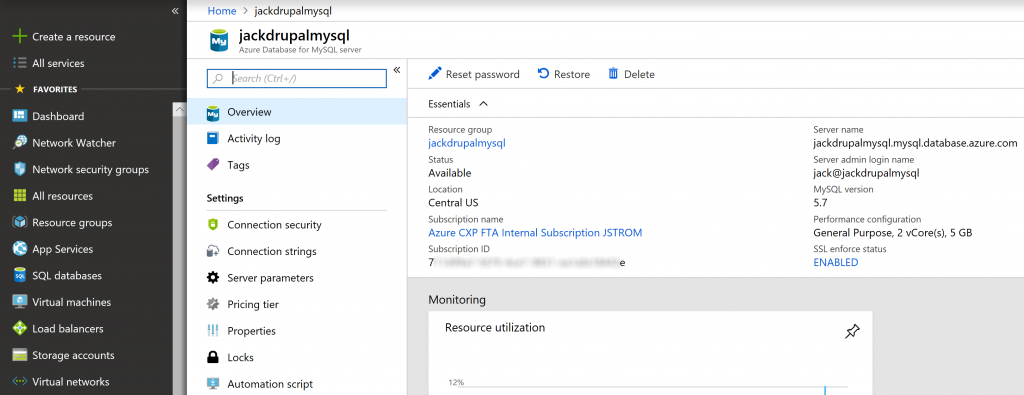
Go back to the Overview section and write down the Server admin login name and Server name; we will use these during the Drupal setup

Configure Drupal

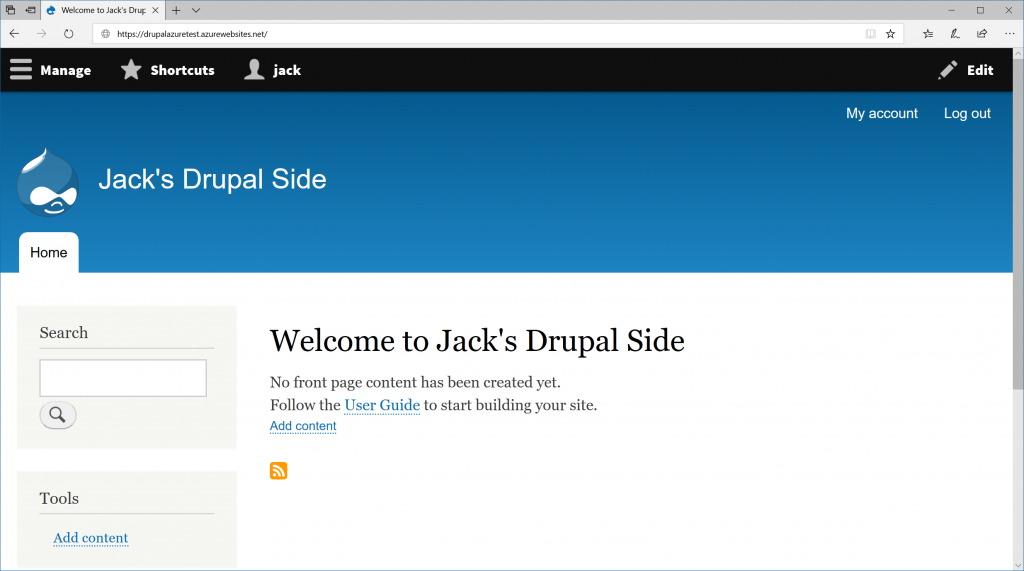
At this point, go ahead and browse out to your App Service.  You should have all the necessary details to complete the installation setup.  Once completed, you should see the Welcome to Drupal Side splash page.

Notes:

Email:

Upon installation of Drupal you'll receive an error that Drupal cannot send email.  Azure Web Apps don't allow open relay, so you will need to use a 3rd party mail service like SendGrid or Mailchimp to relay emails.

Helpful docker commands:

docker images

docker run -it azuredrupal:test

docker ps -a

docker rm containeridea

docker rmi image

Other deployment strategies:

In addition to deploying through the portal, you could easily deploy via PowerShell, Azure CLI, or ARM template.  Here's an Azure CLI 2.0 example of how to deploy (note: the script below uses PowerShell variables for demonstration, please substitute those as needed):

$resourceGroupName = "Drupal-Test"
$planName = $resourceGroupName
$appName = $planName
$containerName = "appsvcorg/drupal-nginx-fpm:0.45"
$location = "West US"

az group create -l $location -n $resourceGroupName

az appservice plan create `
    -n $planName `
    -g $resourceGroupName `
    --sku S3 --is-linux 

az webapp create `
    --resource-group $resourceGroupName `
    --plan $planName `
    --name $appName `
    --deployment-container-image-name $containerName

az webapp config appsettings set `
    --resource-group $resourceGroupName `
    --name $appName `
    --settings WEBSITES_ENABLE_APP_SERVICE_STORAGE="true"

az webapp config appsettings set `
    --resource-group $resourceGroupName `
    --name $appName `
    --settings WEBSITES_CONTAINER_START_TIME_LIMIT="600"

# please modify DB settings according to current condition
az webapp config appsettings set `
        --resource-group $resourceGroupName `
        --name $appName `
        --settings DATABASE_HOST="drupaldb.mysql.database.azure.com" `
            DATABASE_NAME="drupaldb" `
            DATABASE_USERNAME="user@drupaldb" `
            DATABASE_PASSWORD="abcdefghijklmnopqrstuvwxyz"

[Tutorial] Configuring an Azure Acitve Directory (AAD) Application to leverage multiple Reply URLs

Use Case:

I was recently asked if it is possible to configure multiple Sign-On URLs for a SalesForce application by a customer.  Per the customer, the Sign on URL and the Identifier URL are how Salesforce HR agents log in, in addition to the forms filled out via the web application. When multiple Reply URLs are configured, SSO is possible between both the agent and web application.  Without configuring multiple URLs, you will receive an error stating that the Reply URL is incorrect via the Agent or Web Application.

In this case, this tutorial will cover how to configure multiple Reply URLs for a single Azure AD Application; whether created from the Azure AD Marketplace or custom.

Here is a link to a customer on SalesForce's forums asking a very similar question as well: https://developer.salesforce.com/forums/?id=9060G000000ICYYQA4

Configure Multiple Reply URLs in Azure AD

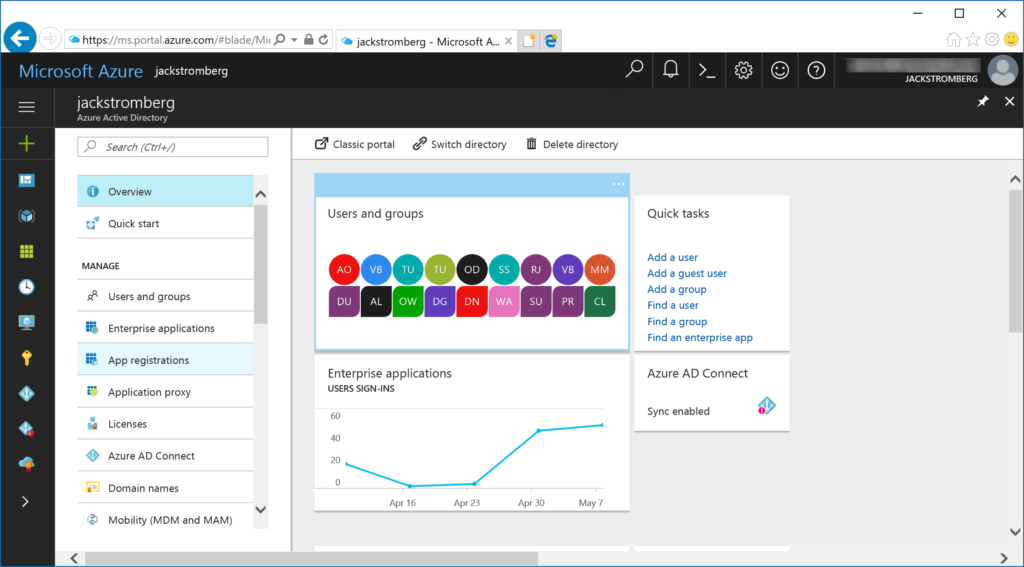
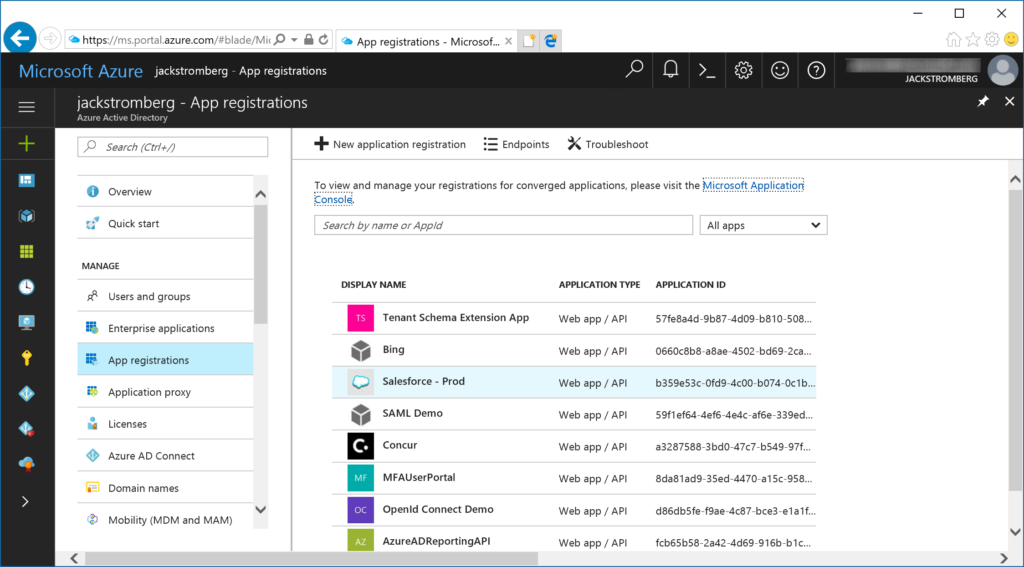
  1. Login to https://portal.azure.com and select Azure Active Directory
  2. Select App Registrations (even though an application may be an Enterprise application, please proceed with App registrations)
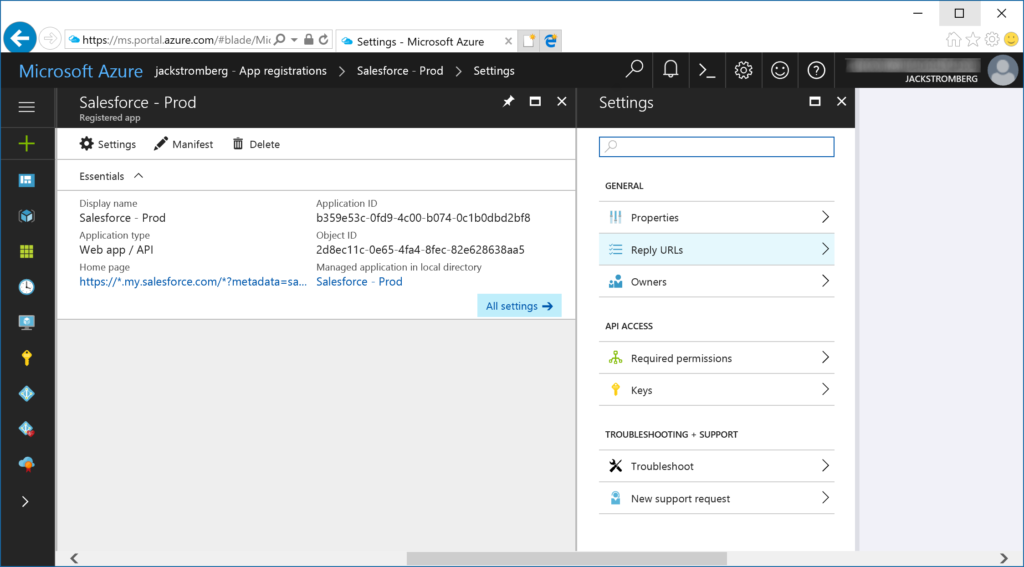
  3. Select your application from the list
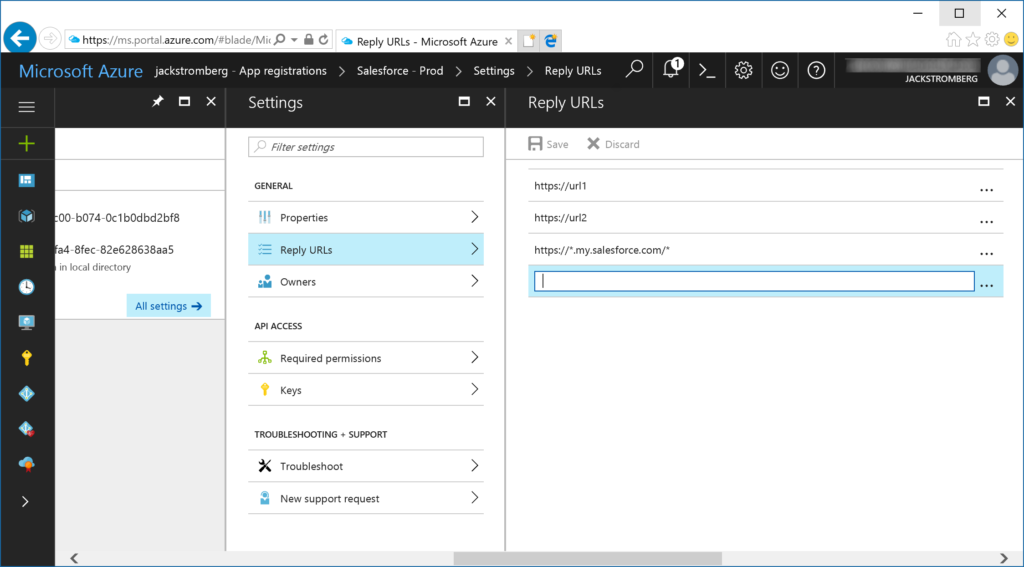
  4. Select Reply URLs on the right side of the blade
  5. Add/Remove the URLs to the desired configuration and then click Save

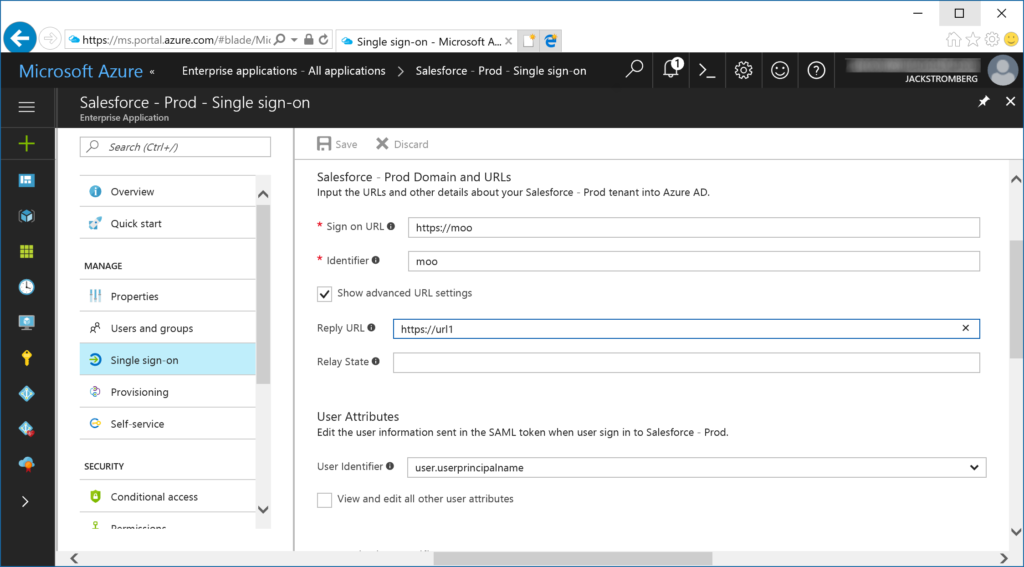
Please note that if you do browse back to Enterprise Applications, today the portal will only reflect one-URL as of 7/24/2017.

Configuring time for Azure IaaS Domain Joined Machines

Synopsis: When placing a Virtual Machine on the Azure Platform, by default it inherits time controls from the underlying hypervisor: Hyper-V.  The default behavior for these VMs is to synchronize the system clock with the host via the Hyper-V TimeSync service (VMIC) for Hyper-V hosts and guests running prior operating systems to Windows Server 2016.

Windows 2016 guests will find the most accurate clock, rather than defaulting to the host. It was for this reason that we advised to manually disable Hyper-V Time Provider setting for machines participating in a domain in Windows 2012R2 and below.  More information on Windows Server 2016 time can be found here: https://docs.microsoft.com/en-us/windows-server/identity/ad-ds/get-started/windows-time-service/windows-2016-accurate-time

To disable the Hyper-V Time Provider, we recommend creating a new Group Policy template and targeting your Azure VMs.

Validate that your machine is synchronized to the Hyper-V Time Provider

Open command prompt and execute the following command: w32tm /query /status

If you see VM IC Time Synchronization Provider, the Guest OS is synchronized to the VM Host

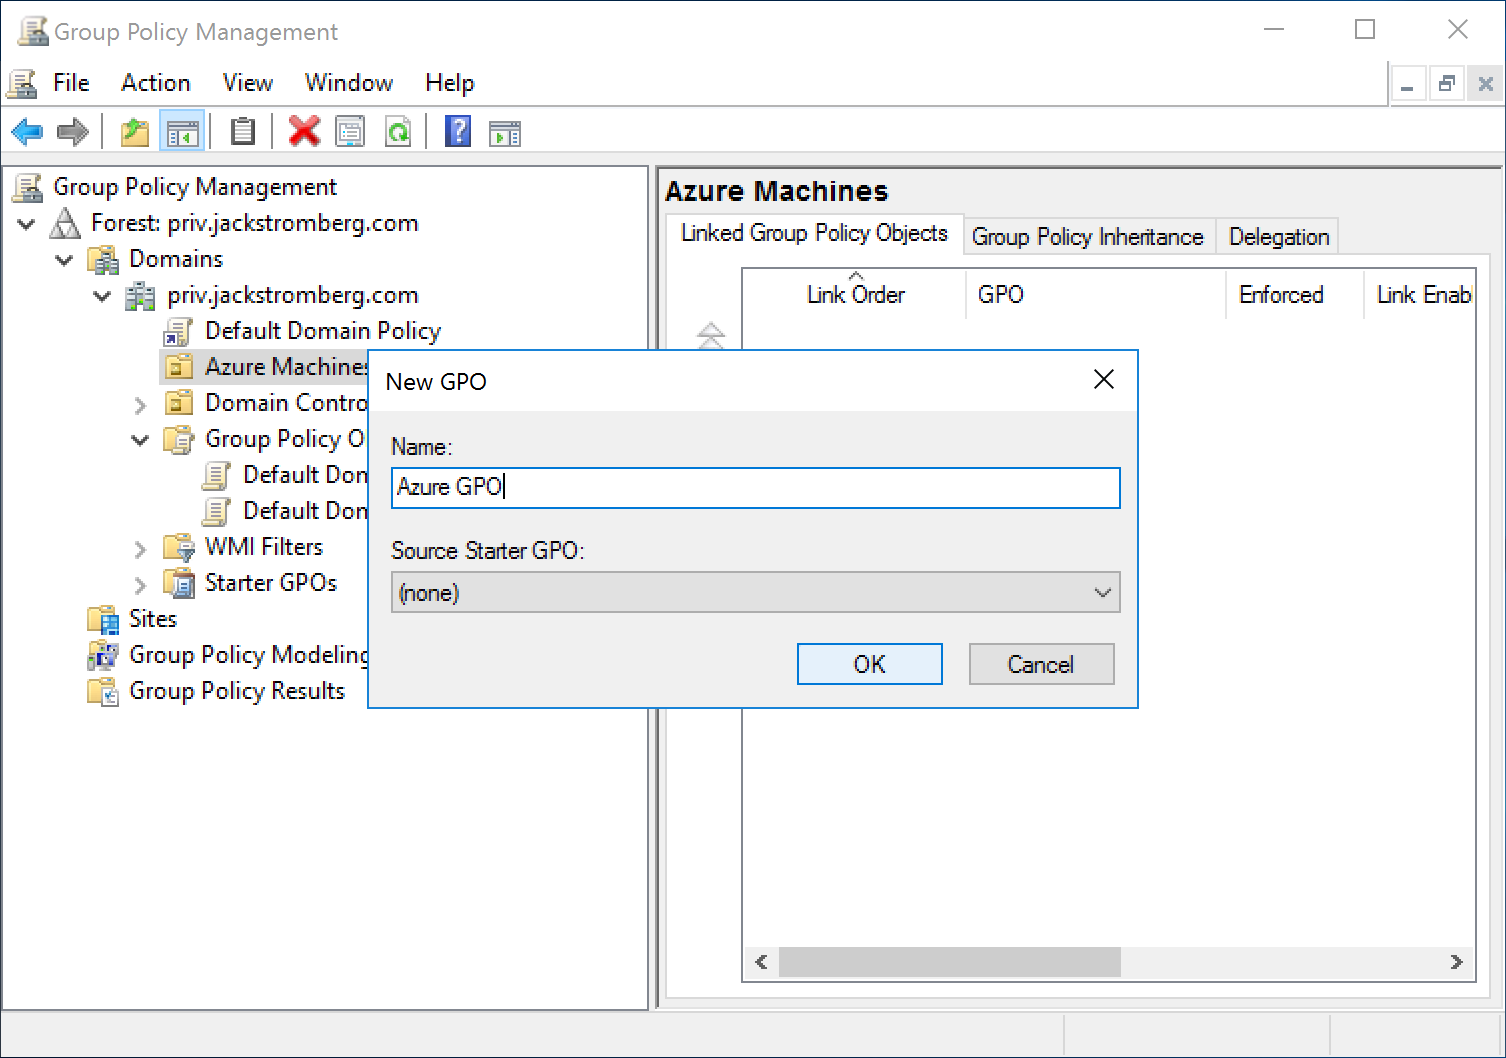
Create a new group policy to disable the Hyper-V Time Provider (VM IC Time Synchronization)

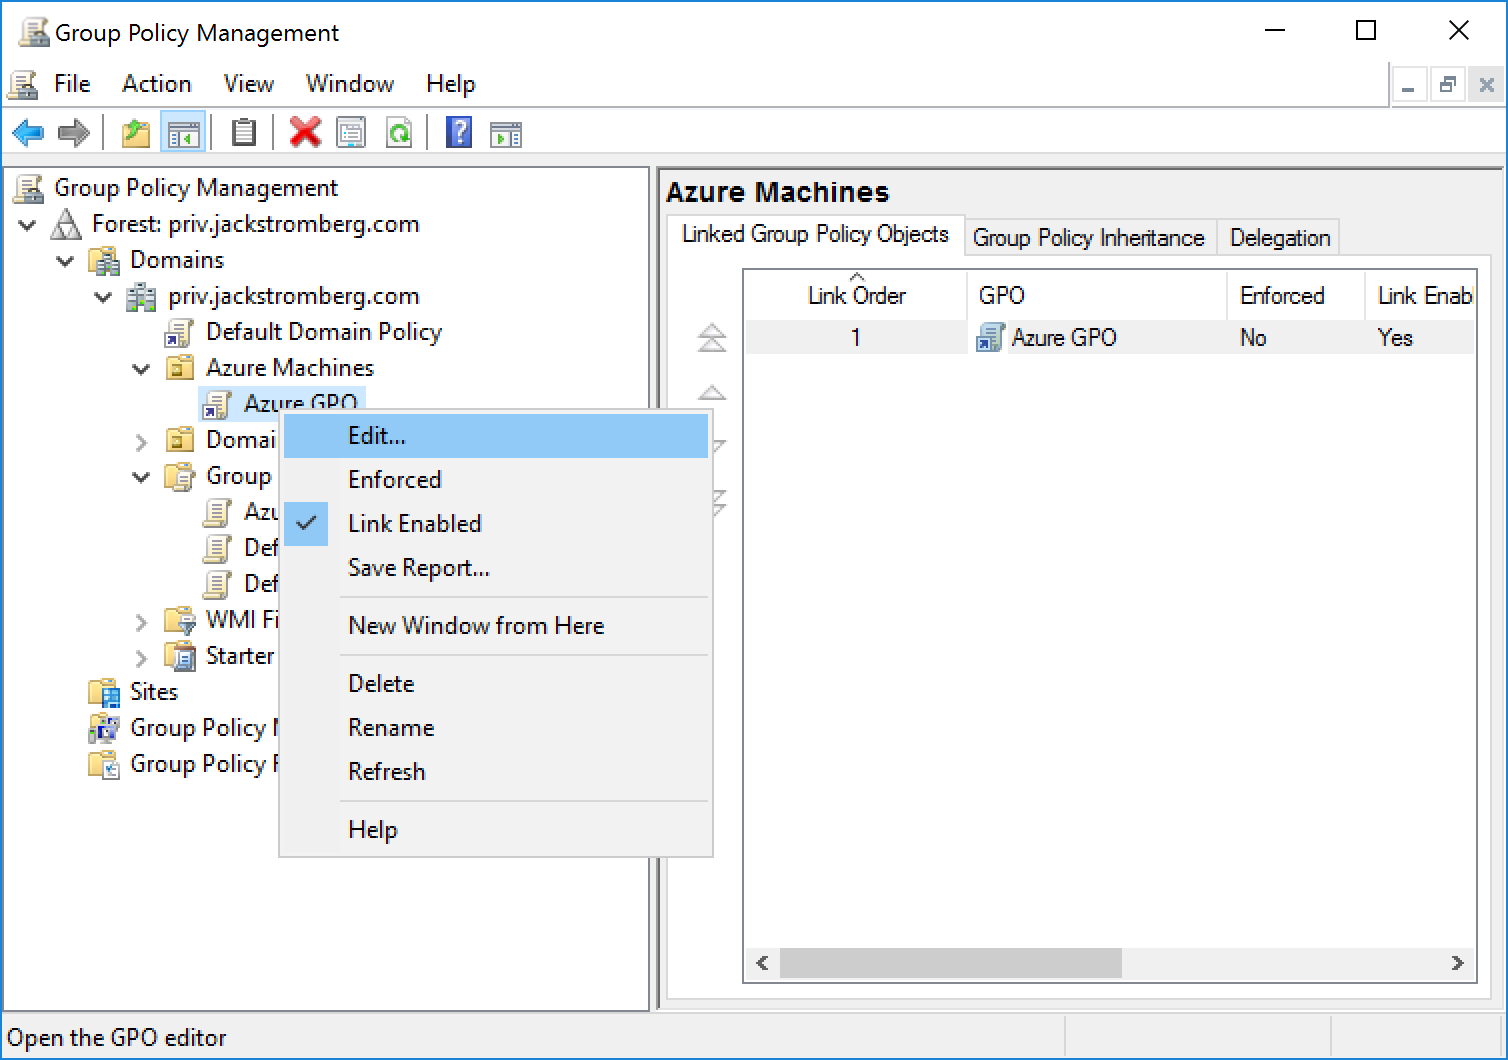
  1. Create a new Group Policy and target it to an OU that contains the machines synchronized to the Hyper-V Time Provider
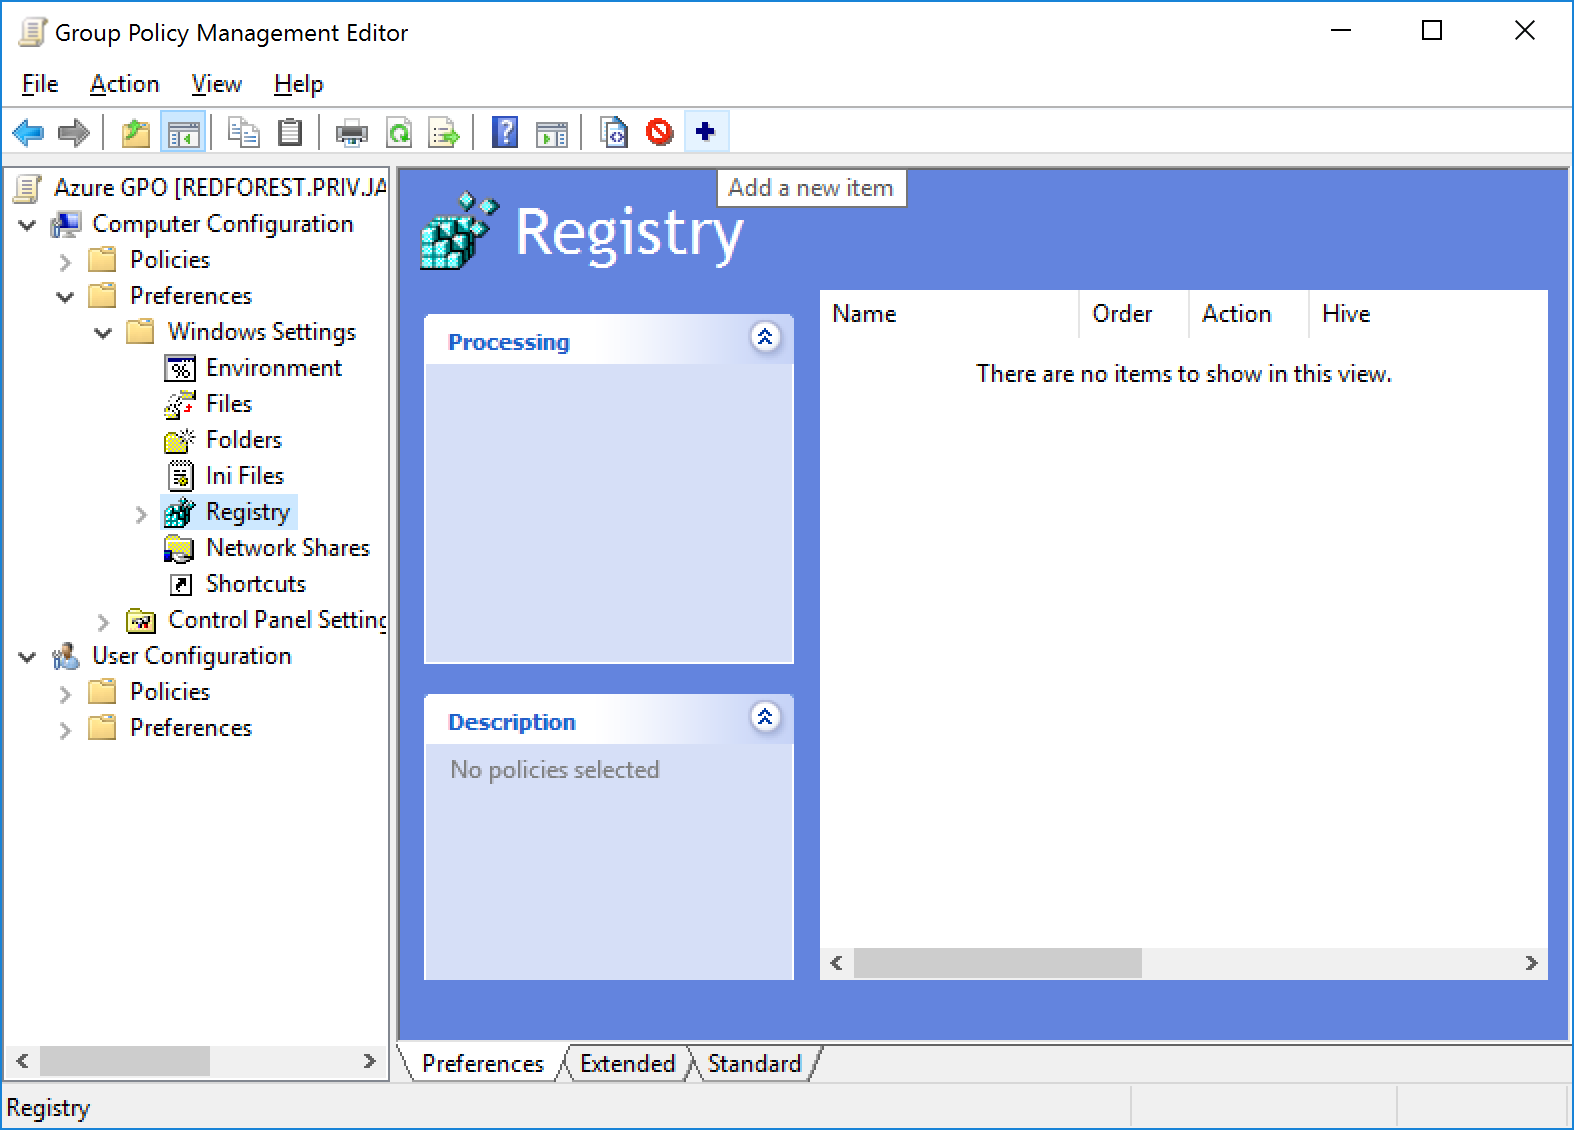
  2. Edit the new Group Policy Object
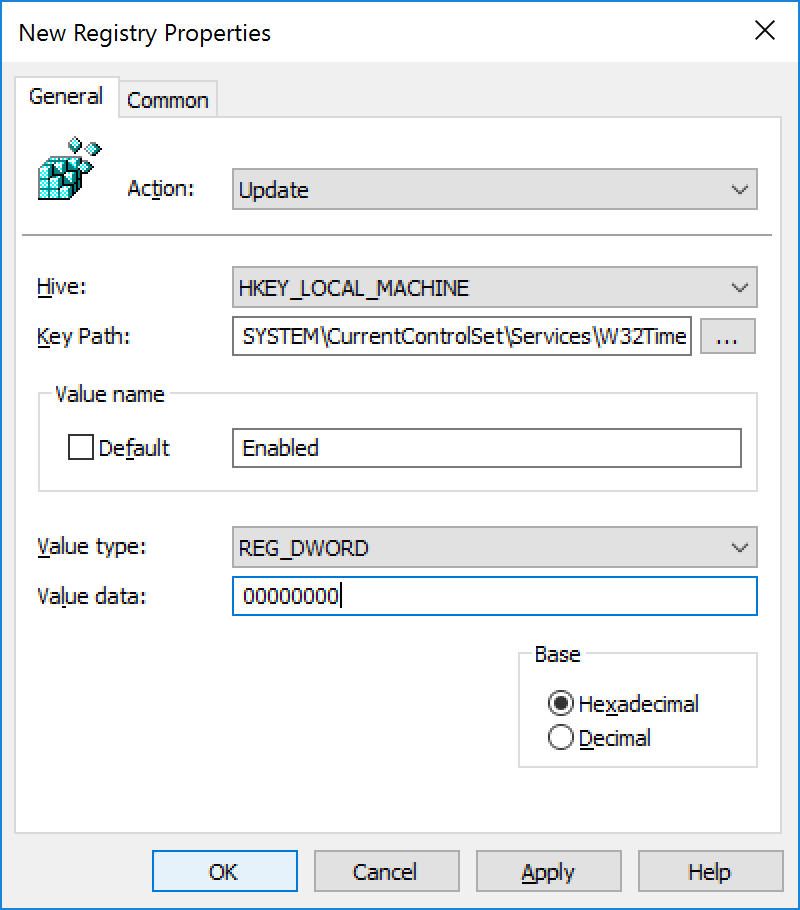
  3. Navigate to Computer configuration -> Preferences -> Windows Settings -> Registry and Add a new item

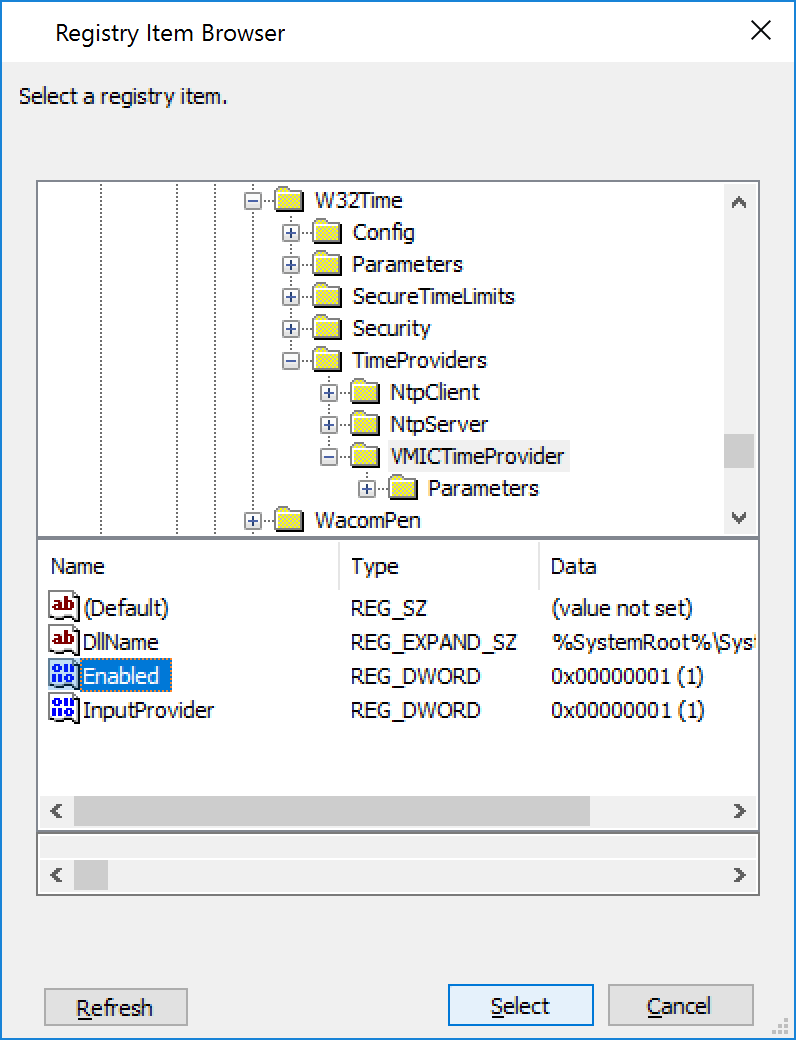
  4. Navigate to the following Key HKLM:SYSTEM\CurrentControlSet\Services\W32Time\TimeProviders\VMICTimeProvider and select the Enabled Value
  5. Change the Value data to 00000000 and click OK

  6. Restart each of the Azure Virtual Machines or login to each machine and execute the following command to restart the Windows Time service: net stop w32time && net start w32time

  7. Validate that the Source is now pointing to your NTP server/domain by running the following command: w32tm /query /status

List of time zones consumed by Azure

When creating Azure Automation scripts, you may have to reference time zones by name.  Below is a table of acceptable values you may use in your scripts to denote the proper time zone.

Name of Time Zone Time
Dateline Standard Time (UTC-12:00) International Date Line West
UTC-11 (UTC-11:00) Coordinated Universal Time-11
Hawaiian Standard Time (UTC-10:00) Hawaii
Alaskan Standard Time (UTC-09:00) Alaska
Pacific Standard Time (Mexico) (UTC-08:00) Baja California
Pacific Standard Time (UTC-08:00) Pacific Time (US & Canada)
US Mountain Standard Time (UTC-07:00) Arizona
Mountain Standard Time (Mexico) (UTC-07:00) Chihuahua, La Paz, Mazatlan
Mountain Standard Time (UTC-07:00) Mountain Time (US & Canada)
Central America Standard Time (UTC-06:00) Central America
Central Standard Time (UTC-06:00) Central Time (US & Canada)
Central Standard Time (Mexico) (UTC-06:00) Guadalajara, Mexico City, Monterrey
Canada Central Standard Time (UTC-06:00) Saskatchewan
SA Pacific Standard Time (UTC-05:00) Bogota, Lima, Quito, Rio Branco
Eastern Standard Time (Mexico) (UTC-05:00) Chetumal
Eastern Standard Time (UTC-05:00) Eastern Time (US & Canada)
US Eastern Standard Time (UTC-05:00) Indiana (East)
Venezuela Standard Time (UTC-04:30) Caracas
Paraguay Standard Time (UTC-04:00) Asuncion
Atlantic Standard Time (UTC-04:00) Atlantic Time (Canada)
Central Brazilian Standard Time (UTC-04:00) Cuiaba
SA Western Standard Time (UTC-04:00) Georgetown, La Paz, Manaus, San Juan
Newfoundland Standard Time (UTC-03:30) Newfoundland
E. South America Standard Time (UTC-03:00) Brasilia
SA Eastern Standard Time (UTC-03:00) Cayenne, Fortaleza
Argentina Standard Time (UTC-03:00) City of Buenos Aires
Greenland Standard Time (UTC-03:00) Greenland
Montevideo Standard Time (UTC-03:00) Montevideo
Bahia Standard Time (UTC-03:00) Salvador
Pacific SA Standard Time (UTC-03:00) Santiago
UTC-02 (UTC-02:00) Coordinated Universal Time-02
Azores Standard Time (UTC-01:00) Azores
Cape Verde Standard Time (UTC-01:00) Cabo Verde Is.
Morocco Standard Time (UTC) Casablanca
UTC (UTC) Coordinated Universal Time
GMT Standard Time (UTC) Dublin, Edinburgh, Lisbon, London
Greenwich Standard Time (UTC) Monrovia, Reykjavik
W. Europe Standard Time (UTC+01:00) Amsterdam, Berlin, Bern, Rome, Stockholm, Vienna
Central Europe Standard Time (UTC+01:00) Belgrade, Bratislava, Budapest, Ljubljana, Prague
Romance Standard Time (UTC+01:00) Brussels, Copenhagen, Madrid, Paris
Central European Standard Time (UTC+01:00) Sarajevo, Skopje, Warsaw, Zagreb
W. Central Africa Standard Time (UTC+01:00) West Central Africa
Namibia Standard Time (UTC+01:00) Windhoek
Jordan Standard Time (UTC+02:00) Amman
GTB Standard Time (UTC+02:00) Athens, Bucharest
Middle East Standard Time (UTC+02:00) Beirut
Egypt Standard Time (UTC+02:00) Cairo
Syria Standard Time (UTC+02:00) Damascus
E. Europe Standard Time (UTC+02:00) E. Europe
South Africa Standard Time (UTC+02:00) Harare, Pretoria
FLE Standard Time (UTC+02:00) Helsinki, Kyiv, Riga, Sofia, Tallinn, Vilnius
Turkey Standard Time (UTC+02:00) Istanbul
Israel Standard Time (UTC+02:00) Jerusalem
Kaliningrad Standard Time (UTC+02:00) Kaliningrad (RTZ 1)
Libya Standard Time (UTC+02:00) Tripoli
Arabic Standard Time (UTC+03:00) Baghdad
Arab Standard Time (UTC+03:00) Kuwait, Riyadh
Belarus Standard Time (UTC+03:00) Minsk
Russian Standard Time (UTC+03:00) Moscow, St. Petersburg, Volgograd (RTZ 2)
E. Africa Standard Time (UTC+03:00) Nairobi
Iran Standard Time (UTC+03:30) Tehran
Arabian Standard Time (UTC+04:00) Abu Dhabi, Muscat
Azerbaijan Standard Time (UTC+04:00) Baku
Russia Time Zone 3 (UTC+04:00) Izhevsk, Samara (RTZ 3)
Mauritius Standard Time (UTC+04:00) Port Louis
Georgian Standard Time (UTC+04:00) Tbilisi
Caucasus Standard Time (UTC+04:00) Yerevan
Afghanistan Standard Time (UTC+04:30) Kabul
West Asia Standard Time (UTC+05:00) Ashgabat, Tashkent
Ekaterinburg Standard Time (UTC+05:00) Ekaterinburg (RTZ 4)
Pakistan Standard Time (UTC+05:00) Islamabad, Karachi
India Standard Time (UTC+05:30) Chennai, Kolkata, Mumbai, New Delhi
Sri Lanka Standard Time (UTC+05:30) Sri Jayawardenepura
Nepal Standard Time (UTC+05:45) Kathmandu
Central Asia Standard Time (UTC+06:00) Astana
Bangladesh Standard Time (UTC+06:00) Dhaka
N. Central Asia Standard Time (UTC+06:00) Novosibirsk (RTZ 5)
Myanmar Standard Time (UTC+06:30) Yangon (Rangoon)
SE Asia Standard Time (UTC+07:00) Bangkok, Hanoi, Jakarta
North Asia Standard Time (UTC+07:00) Krasnoyarsk (RTZ 6)
China Standard Time (UTC+08:00) Beijing, Chongqing, Hong Kong, Urumqi
North Asia East Standard Time (UTC+08:00) Irkutsk (RTZ 7)
Singapore Standard Time (UTC+08:00) Kuala Lumpur, Singapore
W. Australia Standard Time (UTC+08:00) Perth
Taipei Standard Time (UTC+08:00) Taipei
Ulaanbaatar Standard Time (UTC+08:00) Ulaanbaatar
Tokyo Standard Time (UTC+09:00) Osaka, Sapporo, Tokyo
Korea Standard Time (UTC+09:00) Seoul
Yakutsk Standard Time (UTC+09:00) Yakutsk (RTZ 8)
Cen. Australia Standard Time (UTC+09:30) Adelaide
AUS Central Standard Time (UTC+09:30) Darwin
E. Australia Standard Time (UTC+10:00) Brisbane
AUS Eastern Standard Time (UTC+10:00) Canberra, Melbourne, Sydney
West Pacific Standard Time (UTC+10:00) Guam, Port Moresby
Tasmania Standard Time (UTC+10:00) Hobart
Magadan Standard Time (UTC+10:00) Magadan
Vladivostok Standard Time (UTC+10:00) Vladivostok, Magadan (RTZ 9)
Russia Time Zone 10 (UTC+11:00) Chokurdakh (RTZ 10)
Central Pacific Standard Time (UTC+11:00) Solomon Is., New Caledonia
Russia Time Zone 11 (UTC+12:00) Anadyr, Petropavlovsk-Kamchatsky (RTZ 11)
New Zealand Standard Time (UTC+12:00) Auckland, Wellington
UTC+12 (UTC+12:00) Coordinated Universal Time+12
Fiji Standard Time (UTC+12:00) Fiji
Tonga Standard Time (UTC+13:00) Nuku'alofa
Samoa Standard Time (UTC+13:00) Samoa
Line Islands Standard Time (UTC+14:00) Kiritimati Island

[How-To] Deploy HUB Licensed VMs in Azure

What is HUB and why should I use it?

For customers that are looking to go to Azure and help cut down on some of the running costs by utilizing existing licensing they own from on-premises, Microsoft has released a program called Hybrid Use Benefit (HUB).  The Hybrid Use Benefit program essentially allows you to run  VMs in Azure at a reduced rate (cost of a Linux VM for example), under the assumption that you have volume license keys covering the core totals of VMs running in Azure.

Official information on this program can be found here: https://azure.microsoft.com/en-us/pricing/hybrid-use-benefit/

A Microsoft employee has created some instructions on how Microsoft customers can take use of this program.  Unfortunately, as outlined in the document, there is no way as of 6/27/2016 to take an existing VM in Azure and convert it to the HUB program.  A VM must originate from on-premises in order to take advantage of this program, there are no workarounds such as building the VM in Azure, downloading it to on-prem, and reuploading it back to Azure.  In this case, this article will cover the necessary steps (step by step) on getting a "HUB" VM deployed in Azure.

Update: October 24, 2016: HUB is now supported on Azure Site Recovery for failed over instances to Azure from another datacenter.  Information on leveraging HUB for ASR instances can be found here: https://azure.microsoft.com/en-us/blog/hybrid-use-benefit-migration-with-asr/

Goal: This article will focus on 3 items:

  1. How to properly configure a VHD for the HUB program
  2. How to upload the VHD into Azure
  3. How to deploy VMs from your VHD

1. How to properly configure a VHD for the HUB program

There are two ways you can bring a HUB image into Azure.  You can convert the ISO from Microsoft to a VHD directly, or you can install Hyper-V, update/customize the VM, and generalize it.

In this tutorial, we will go over converting the Microsoft provided ISO to VHD, under the assumption you do not have Hyper-V installed.  In the scenario where you do not have Hyper-V, but you want to customize the image before uploading it into Azure, I would recommend installing the Hyper-V role on your Windows 7/10 machine and creating the VHD from that.  The only caveat you will run into is you must run SysPrep before uploading the VHD into Azure, as outlined here.

Hyper-V Way

For the Windows 7/10 machines, you can install the Hyper-V role by navigating to Programs and Features, select Turn Windows features on or off
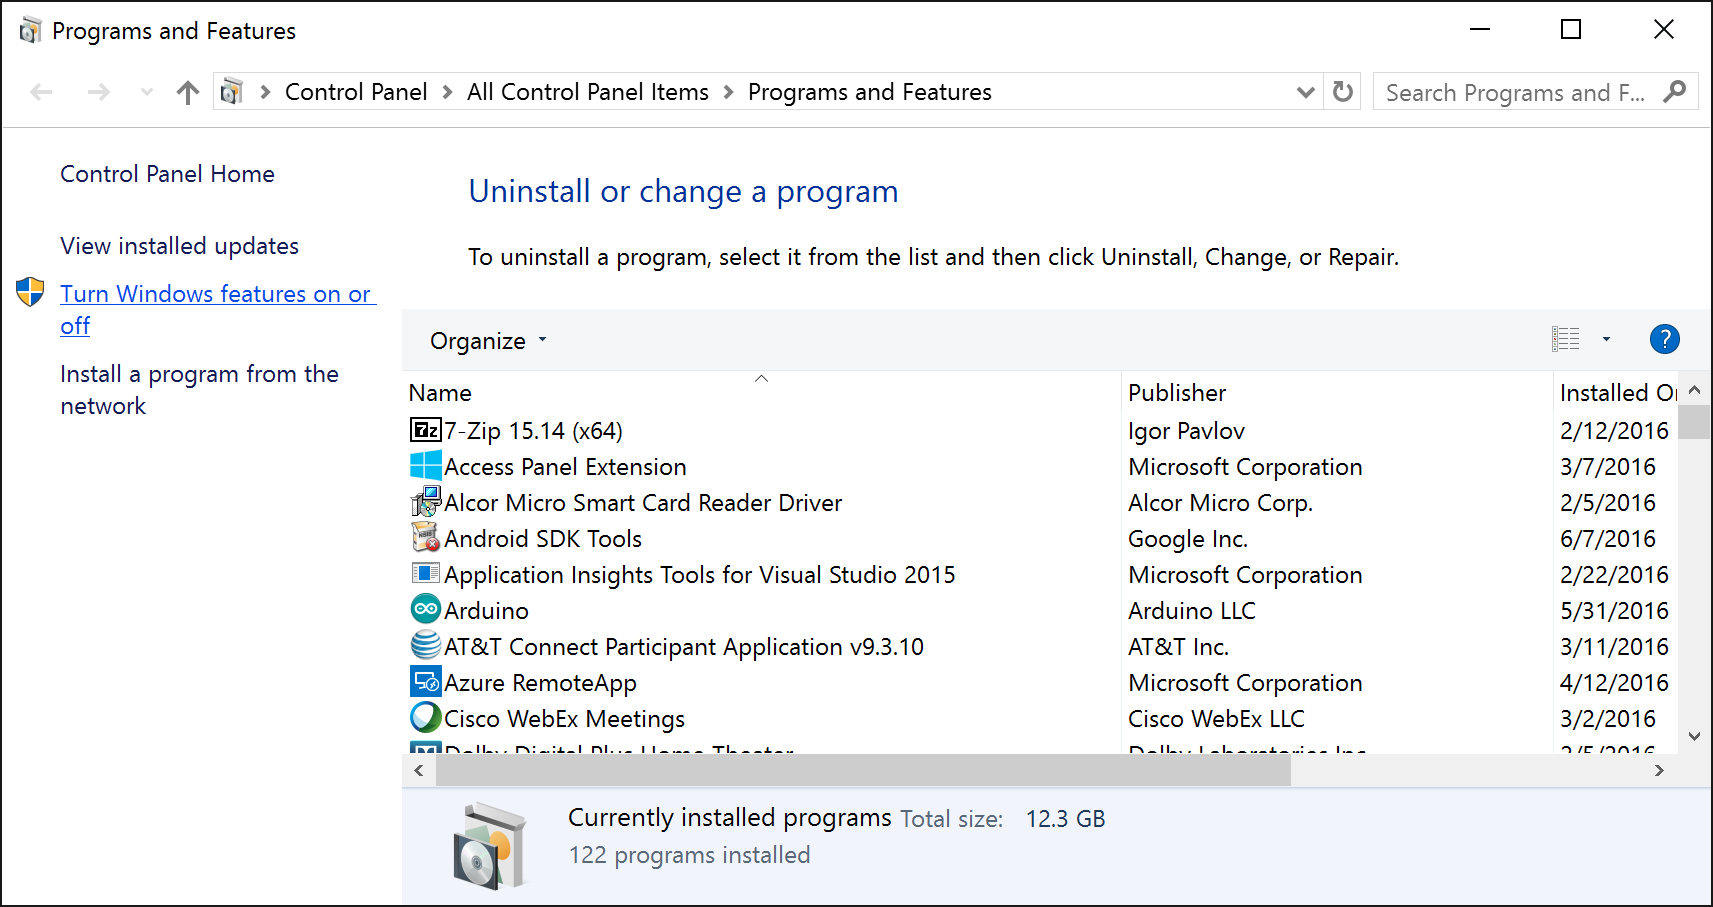
Control Panel - Programs and Features - Turn windows features on or off

Check Hyper-V from the list.
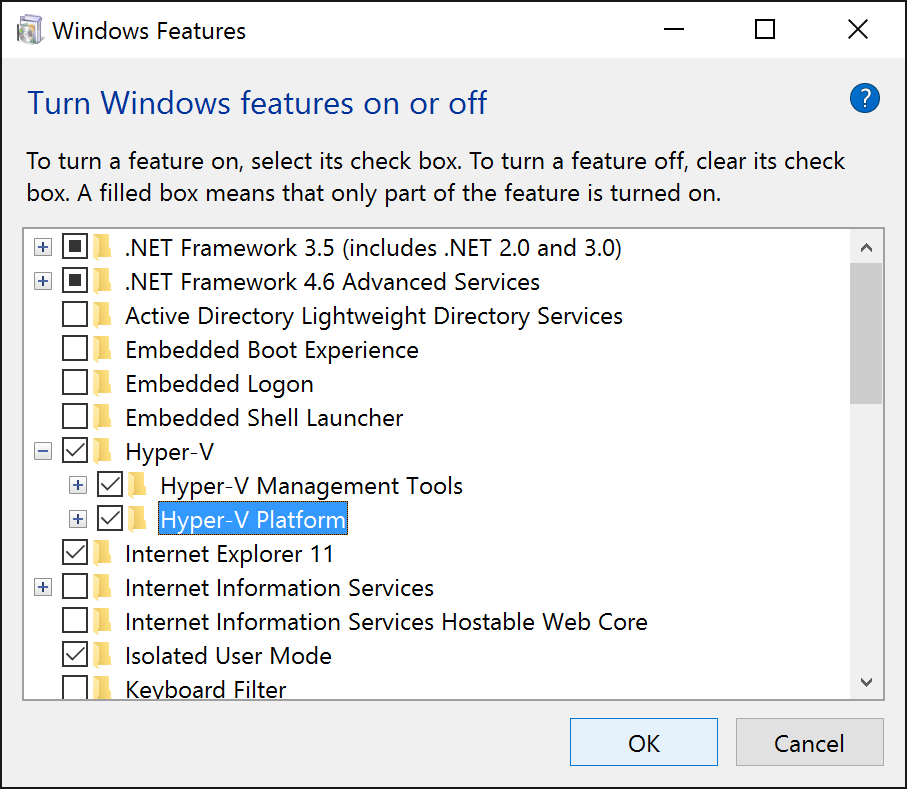
Control Panel - Programs and Features - Turn windows features on or off - Hyper-V

Additionally, installation via PowerShell or DISM is covered in this Microsoft blog post: https://msdn.microsoft.com/en-us/virtualization/hyperv_on_windows/quick_start/walkthrough_install

Again, ensure after making changes to your VHD, you generalize the machine and shut it down as outlined here: https://azure.microsoft.com/en-us/documentation/articles/virtual-machines-windows-upload-image/

PowerShell Way

A few Microsoft employees/consultants have released a PowerShell script that will take a Microsoft provided ISO and convert/generalize it into VHD format.  We can simply take this converted VHD and upload it into Azure as-is.  Please note, the only downside to creating the VM this way is that the machine may not be completely patched, so you will have to rely on the machines doing Windows Updates once they make it into the lands of Azure.

Pro Tip: If you are going to create the VHD from an ISO, I would recommend doing this from an Azure VM.  Since the VHD/disk we are creating will originate from the source media of a "local instance", your VM will deploy fine with HUB licensing.  The advantage of creating the VM in Azure is the upload of your VM will take significantly less time due to the high throughput of egress traffic in Azure.  When going through this tutorial, I ended up maxing out my storage account's read rate before hitting network connectivity bottlenecks.  Please note, bandwidth fees may apply in Azure for utilizing this method though.

  1. Download the Convert-WindowsImage.ps1 script from Microsoft
    1. https://gallery.technet.microsoft.com/scriptcenter/Convert-WindowsImageps1-0fe23a8f
  2. Download your Windows Server ISO from the Microsoft Volume Licensing center
    1. https://www.microsoft.com/Licensing/servicecenter/default.aspx
  3. Open PowerShell as an Administrator
    Server 2012 - PowerShell - Run as Administrator
  4. Navigate to the directory that contains both the ISO and the Covert-WindowsImage.ps1 script
    Convert-WindowsImage and Windows Server ISO - PowerShell
  5. Execute the following command to pre-load (dot-source) the PowerShell function
    Convert-WindowsImage and Windows Server ISO - PowerShell - Load Function

    . .\Convert-WindowsImage.ps1
  6. Execute the following command
    Convert-WindowsImage and Windows Server ISO - PowerShell - Execute Function

    Convert-WindowsImage -SourcePath "en_windows_server_2012_r2_with_update_x64_dvd_6052708.ISO" -VHDFormat VHD -Edition "ServerDataCenterCore" -VHDPartitionStyle MBR -BCDinVHD NativeBoot -ExpandOnNativeBoot:$false -RemoteDesktopEnable -Verbose
  7. You should receive a "Done" message once the VHD has been created
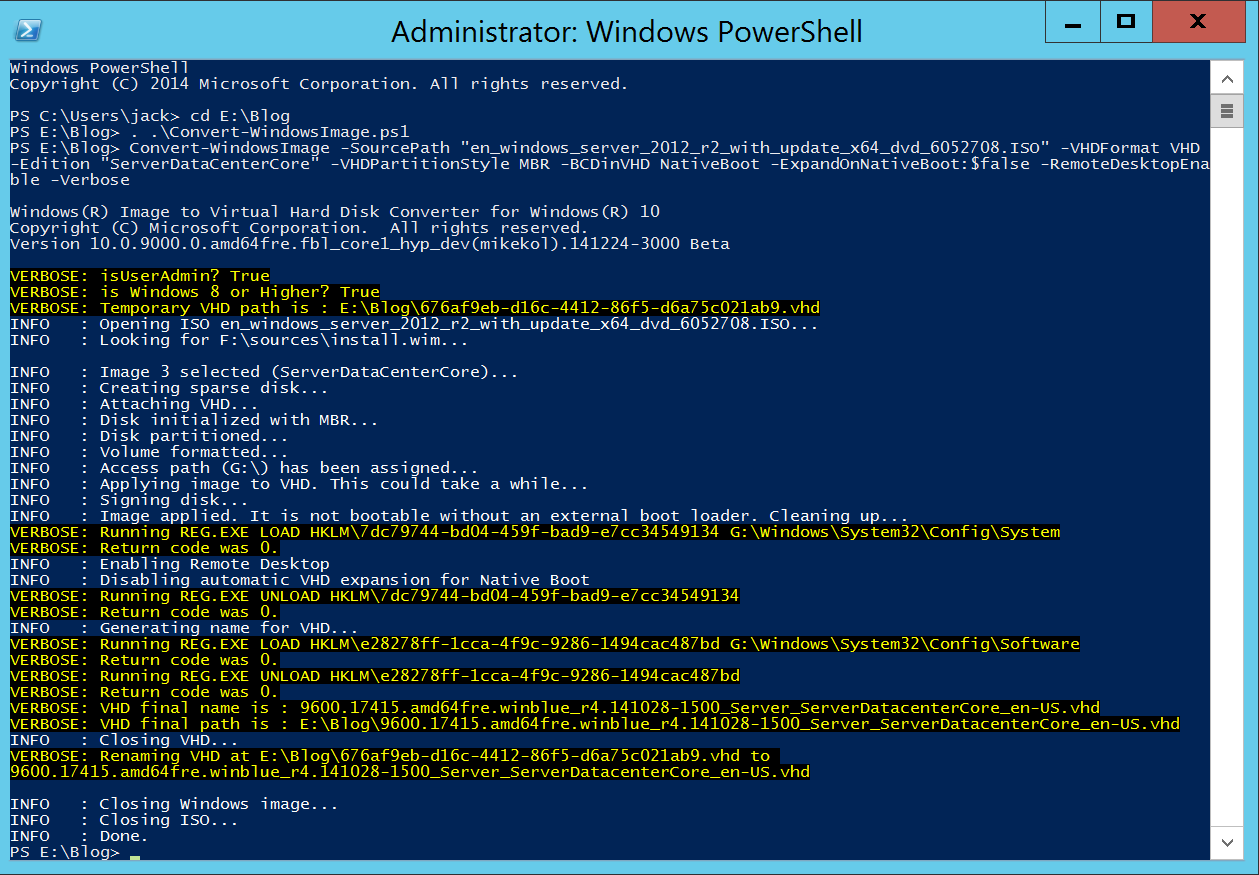
    Convert-WindowsImage and Windows Server ISO - PowerShell - Execute Function -Completed

2. How to upload the VHD into Azure

First, you will need the latest Azure PowerShell Modules.  These can be downloaded for free from the Azure website.  If you are new to Azure, this will be a link to the Web Platform installer, in which the link below should automatically select the Azure PowerShell modules to be downloaded.  You do not need the Command Line installer if prompted, only the Azure PowerShell Modules.

https://www.microsoft.com/web/handlers/webpi.ashx/getinstaller/WindowsAzurePowershellGet.3f.3f.3fnew.appids
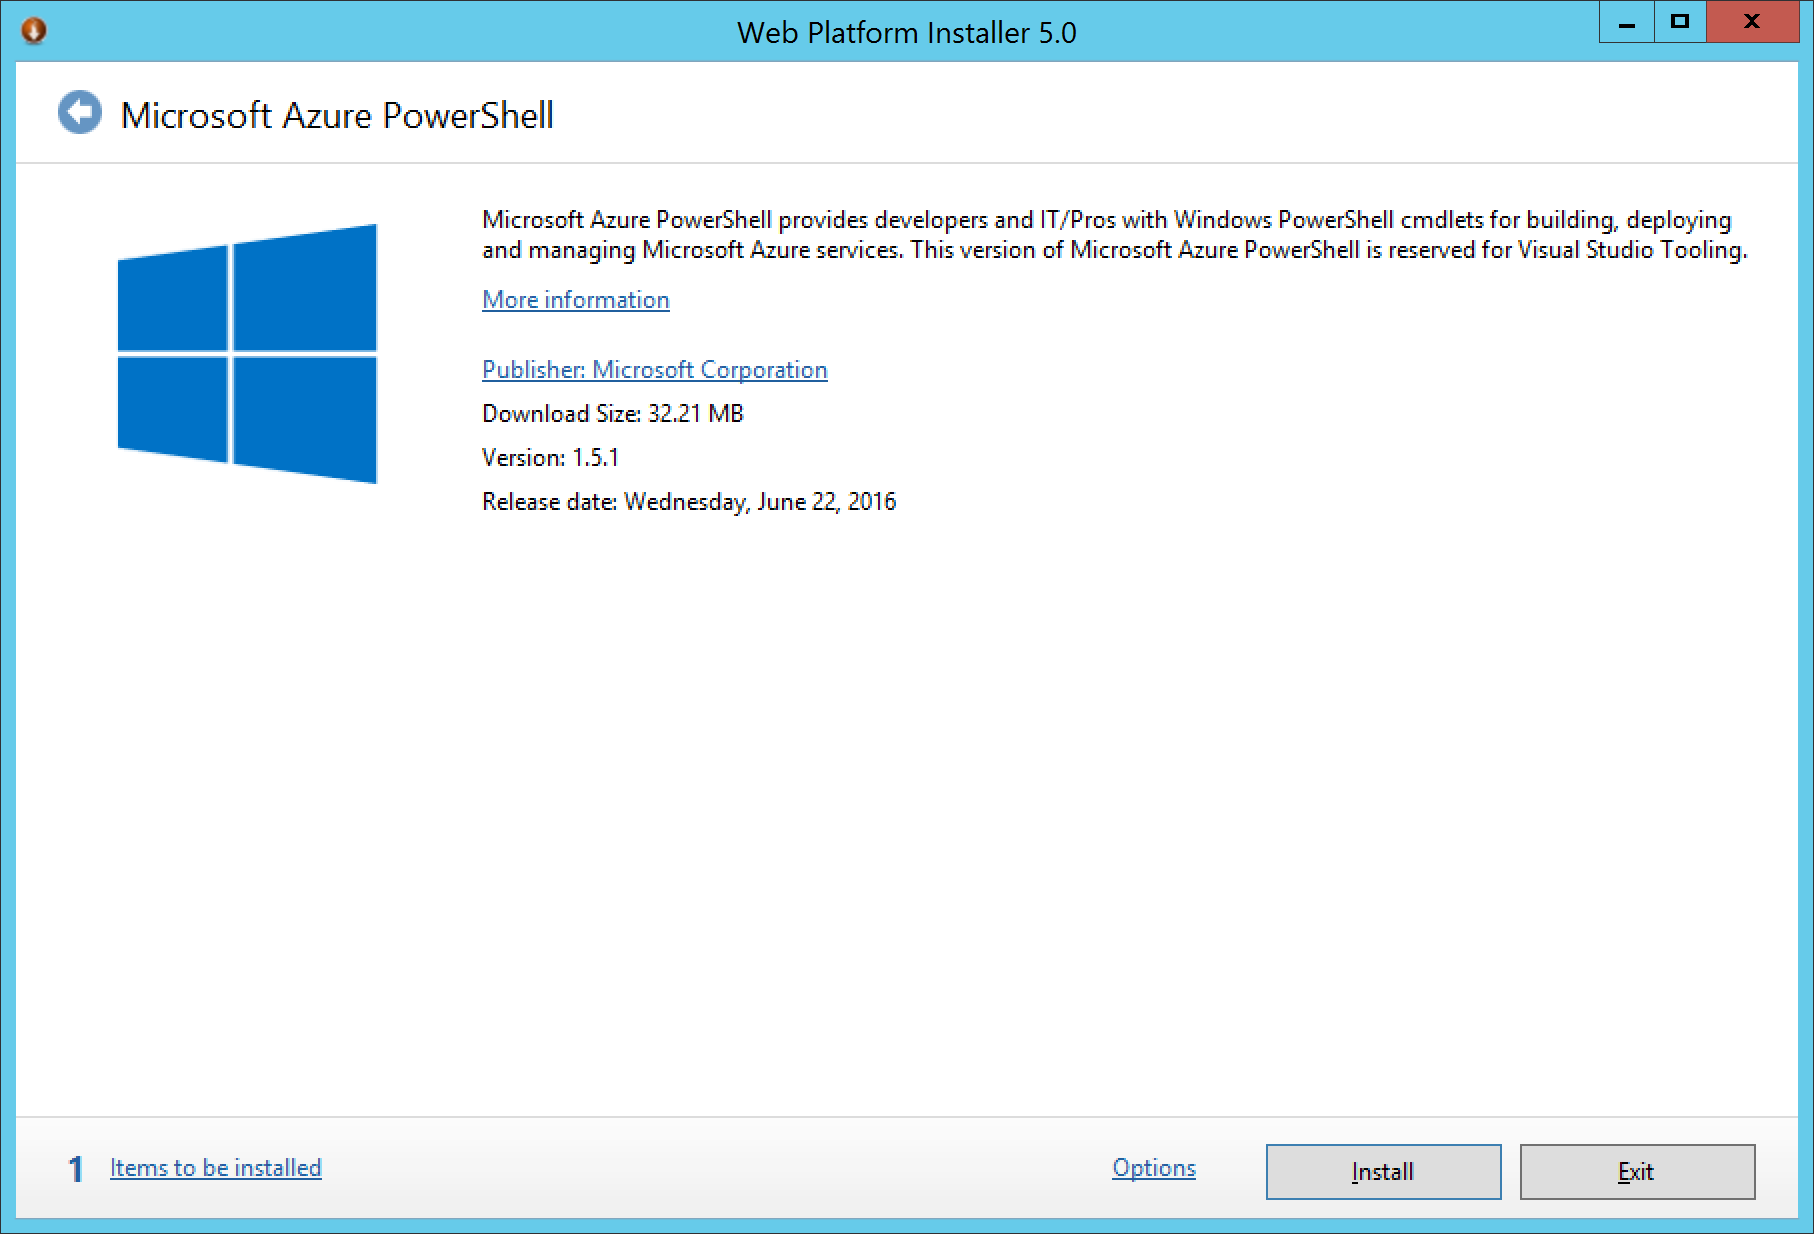
Web Platform Installer 5 - Microsoft Azure PowerShell

Once installed, complete the instructions below.

  1. Open up PowerShell
    Server 2012 - PowerShell - Run as Administrator
  2. Login to your Azure account
    Login-AzureRmAccount

    Login-AzureRmAccount
  3. Execute the following command below, substituting in the correct values applicable to your environment:
    -RessourceGroupName - Specifies the name of the resource group of the virtual machine.
    -Destination - Specifies the URI of a blob in Blob Storage. The parameter supports SAS URI, although patching scenarios destination cannot be an SAS URI.  My URL shows Premium storage, but Premium storage is not required for HUB.
    -LocalFilePath - Specifies the path of the local .vhd file.
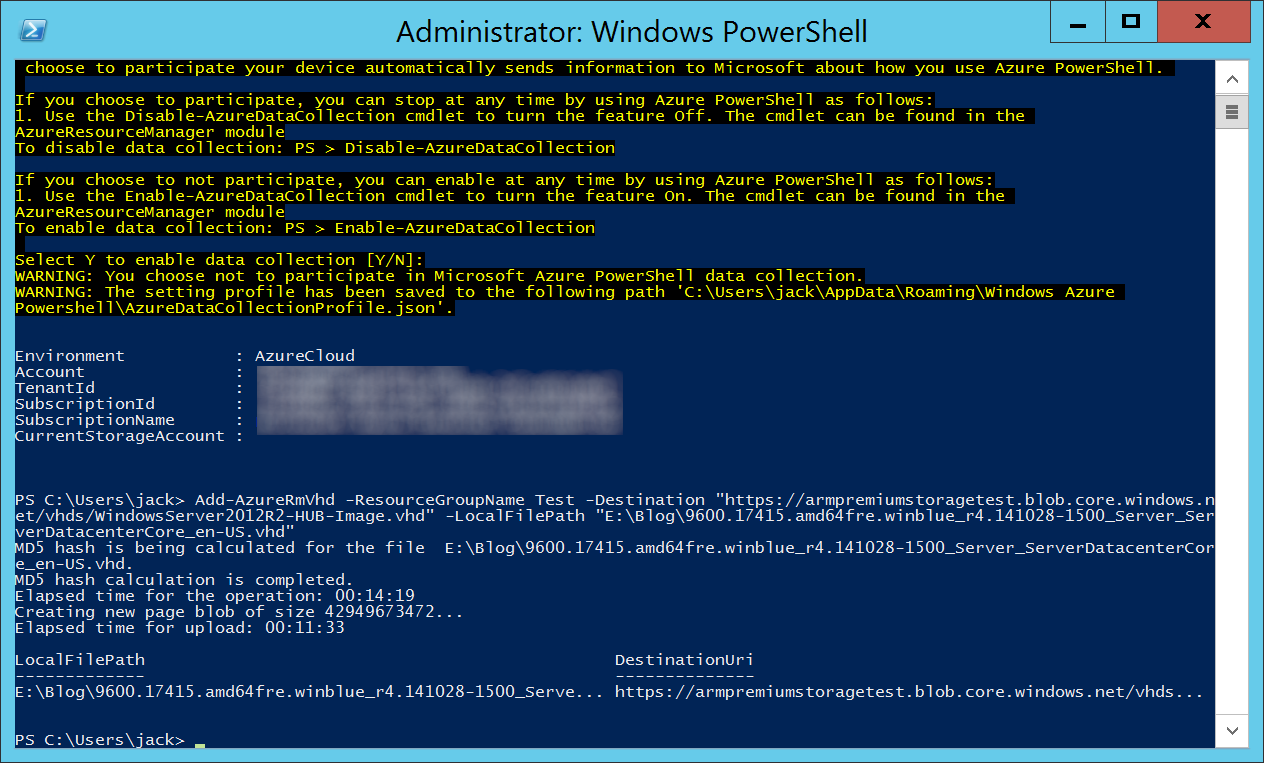
    Login-AzureRmAccount - Add-AzureRmVhd - Completed

    Add-AzureRmVhd -ResourceGroupName Test -Destination "https://armpremiumstoragetest.blob.core.windows.net/vhds/WindowsServer2012R2-HUB-Image.vhd" -LocalFilePath "E:\Blog\9600.17415.amd64fre.winblue_r4.141028-1500_Server_ServerDatacenterCore_en-US.vhd"

3. How to deploy VMs from your VHD

Copy the template below:

{
  "$schema": "https://schema.management.azure.com/schemas/2015-01-01/deploymentTemplate.json#",
  "contentVersion": "1.0.0.0",
  "parameters": {
    "vmName": {
      "type": "string",
      "metadata": {
        "description": "Name of the VM you wish to deploy"
      }
    },
	"VMStorageAccount": {
      "type": "string",
      "metadata": {
        "description": "This is the name of the your storage account to deploy the VM to"
      }
    },
	"virtualNetworkName": {
      "type": "string",
      "metadata": {
        "description": "Name of the virtual network the VM should be deployed to"
      }
    },
	"subnetName": {
      "type": "string",
      "metadata": {
        "description": "Name of the subnet the VM should be deployed to"
      }
    },
	"publicIPAddressName": {
      "type": "string",
      "metadata": {
        "description": "Name of the public IP address for your VM."
      }
    },
    "dnsLabelPrefix": {
      "type": "string",
      "metadata": {
        "description": "DNS Label for the Public IP. Must be lowercase. It should match with the following regular expression: ^[a-z][a-z0-9-]{1,61}[a-z0-9]$ or it will raise an error."
      }
    },
    "adminUserName": {
      "type": "string",
      "metadata": {
        "description": "UserName for the Virtual Machine"
      }
    },
    "adminPassword": {
      "type": "securestring",
      "metadata": {
        "description": "Password for the Virtual Machine"
      }
    },
	"publicIPAddressType": {
      "type": "string",
      "allowedValues": [
        "Dynamic",
        "Static"
      ],
	  "defaultValue": "Dynamic",
      "metadata": {
        "description": "IP Address type for the public IP of the VM"
      }
    },
    "vmSize": {
      "type": "string",
      "metadata": {
        "description": "This is the size of your VM"
      },
	  "defaultValue": "Standard_DS1_v2"
    }
  },
  "variables": {
    "location": "[resourceGroup().location]",
    "nicName": "[concat(parameters('vmName'),'nic')]",
	"osDiskVhdUri": "https://myosdiskvhduri.blob.core.windows.net/vhds/myimage.vhd",
	"osType": "Windows",
    "vnetID": "[resourceId('Microsoft.Network/virtualNetworks',parameters('virtualNetworkName'))]",
    "subnet1Ref": "[concat(variables('vnetID'),'/subnets/',parameters('subnetName'))]",
    "osDiskVhdName": "[concat('https://',parameters('VMStorageAccount'),'.blob.core.windows.net/vhds/',parameters('vmName'),'-osDisk.vhd')]",
    "apiVersion": "2015-06-15"
  },
  "resources": [
    {
      "apiVersion": "[variables('apiVersion')]",
      "type": "Microsoft.Network/publicIPAddresses",
      "name": "[parameters('publicIPAddressName')]",
      "location": "[variables('location')]",
      "properties": {
        "publicIPAllocationMethod": "[parameters('publicIPAddressType')]",
        "dnsSettings": {
          "domainNameLabel": "[parameters('dnsLabelPrefix')]"
        }     
      }
    },
    {
      "apiVersion": "[variables('apiVersion')]",
      "type": "Microsoft.Network/networkInterfaces",
      "name": "[variables('nicName')]",
      "location": "[variables('location')]",
      "dependsOn": [
        "[concat('Microsoft.Network/publicIPAddresses/', parameters('publicIPAddressName'))]"
      ],
      "properties": {
        "ipConfigurations": [
          {
            "name": "ipconfig1",
            "properties": {
              "privateIPAllocationMethod": "Dynamic",
              "publicIPAddress": {
                "id": "[resourceId('Microsoft.Network/publicIPAddresses',parameters('publicIPAddressName'))]"
              },
              "subnet": {
                "id": "[variables('subnet1Ref')]"
              }
            }
          }
        ]
      }
    },
    {
      "apiVersion": "[variables('apiVersion')]",
      "type": "Microsoft.Compute/virtualMachines",
      "name": "[parameters('vmName')]",
      "location": "[variables('location')]",
      "dependsOn": [
        "[concat('Microsoft.Network/networkInterfaces/', variables('nicName'))]"
      ],
      "properties": {
        "licenseType": "Windows_Server",
        "hardwareProfile": {
          "vmSize": "[parameters('vmSize')]"
        },
        "osProfile": {
          "computerName": "[parameters('vmName')]",
          "adminUsername": "[parameters('adminUsername')]",
          "adminPassword": "[parameters('adminPassword')]"
                 },
        "storageProfile": {
          "osDisk": {
            "name": "[concat(parameters('vmName'),'-osDisk')]",
            "osType": "[variables('osType')]",
            "caching": "ReadWrite",
            "createOption": "FromImage",
            "image": {
              "uri": "[variables('osDiskVhdUri')]"
            },
            "vhd": {
              "uri": "[variables('osDiskVhdName')]"
            }
          }
        },
        "networkProfile": {
          "networkInterfaces": [
            {
              "id": "[resourceId('Microsoft.Network/networkInterfaces',variables('nicName'))]"
            }
          ]
        },
        "diagnosticsProfile": {
          "bootDiagnostics": {
             "enabled": "true",
             "storageUri": "[concat('https://',parameters('VMStorageAccount'),'.blob.core.windows.net')]"
          }
        }
      }
    }
  ]
}
  1. Login to the Azure Portal
    1. https://portal.azure.com
  2. Select Browse, click Templates, click Add
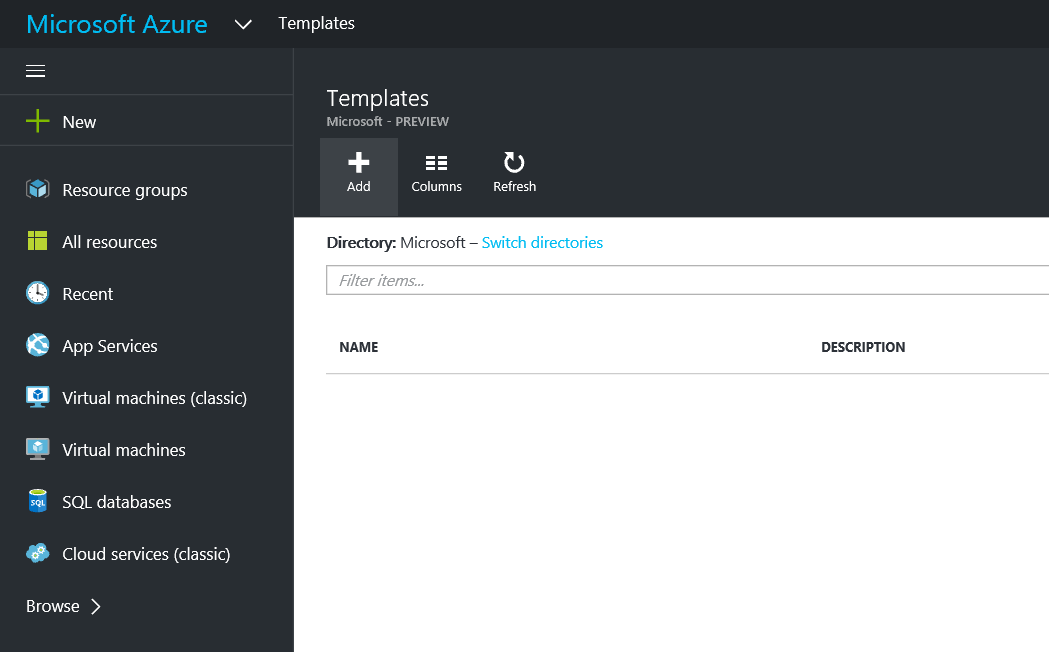
    Azure - Browse - Templates - Add
  3. Type in a Name and Description, click OK
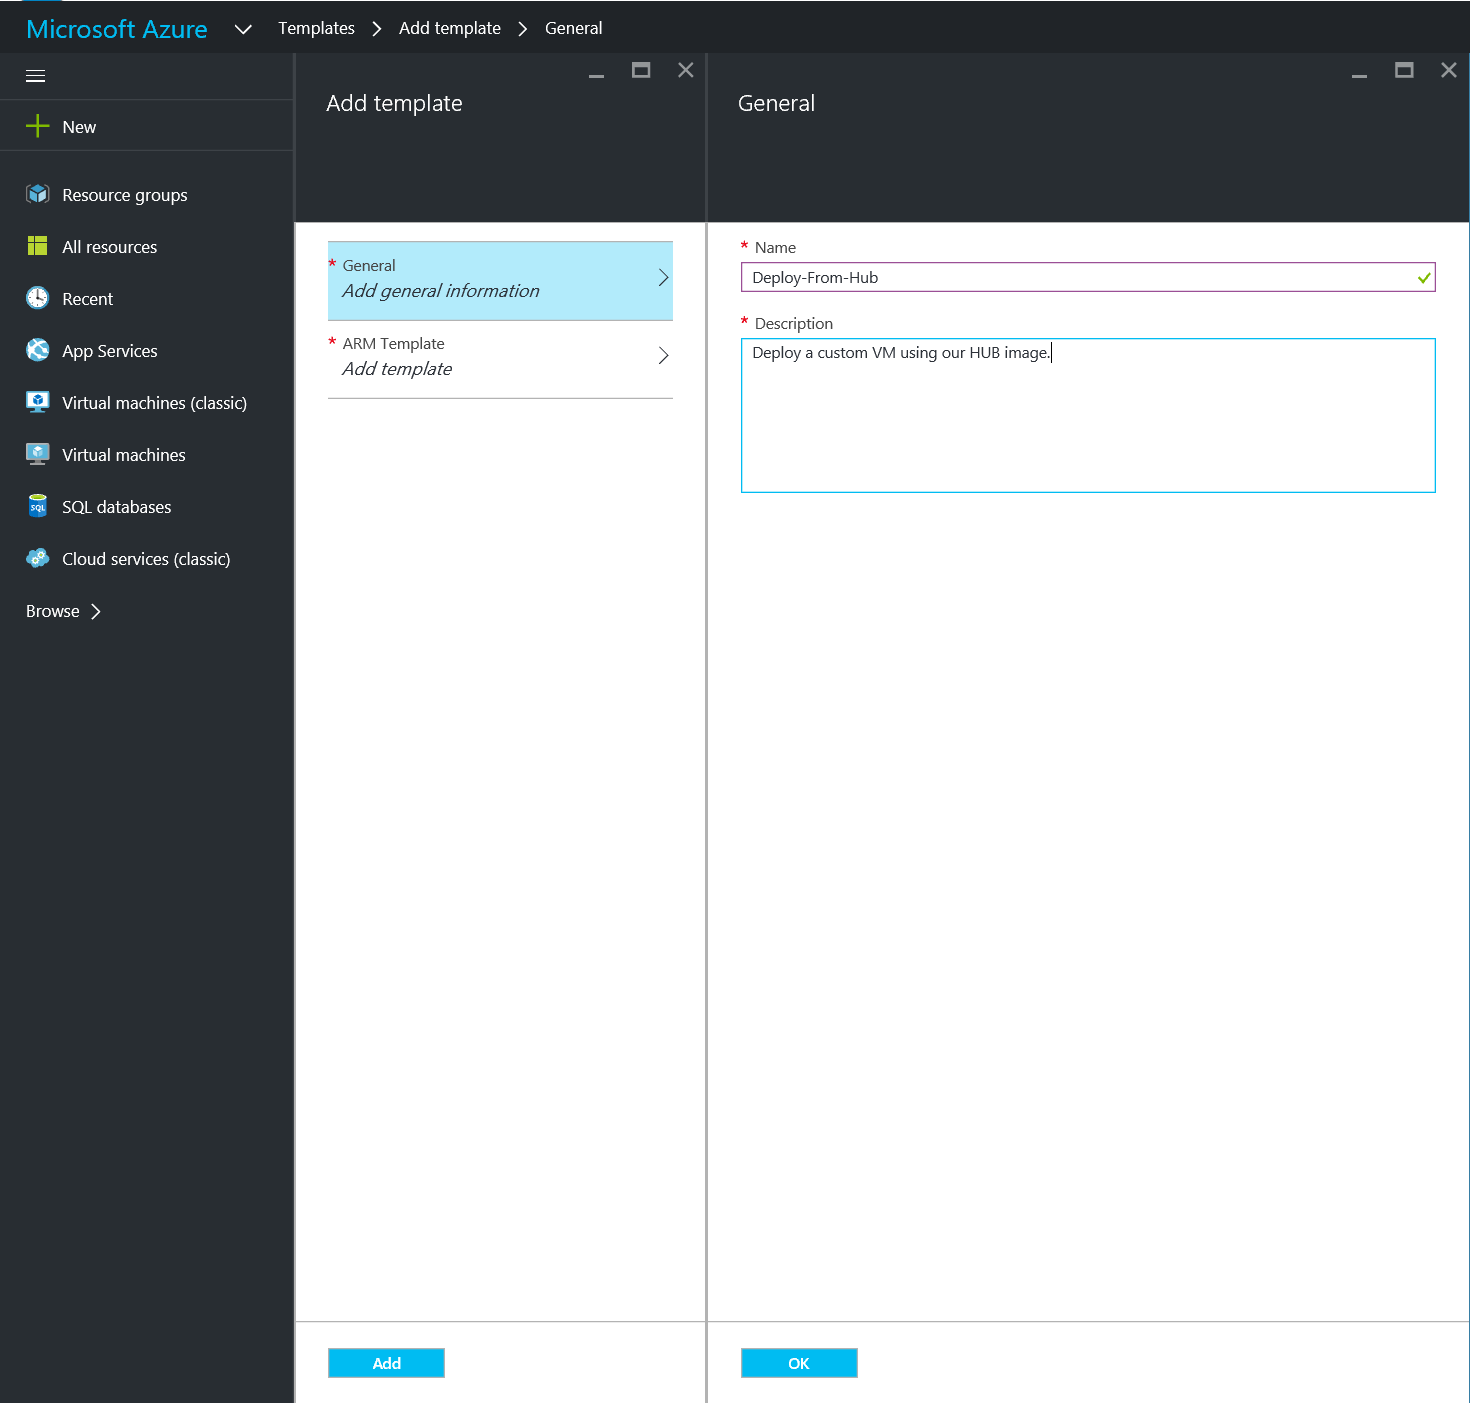
    Azure - Browse - Templates - Add - General
  4. Paste in the template above, ensure you change the osDiskVhdUri, and click OK
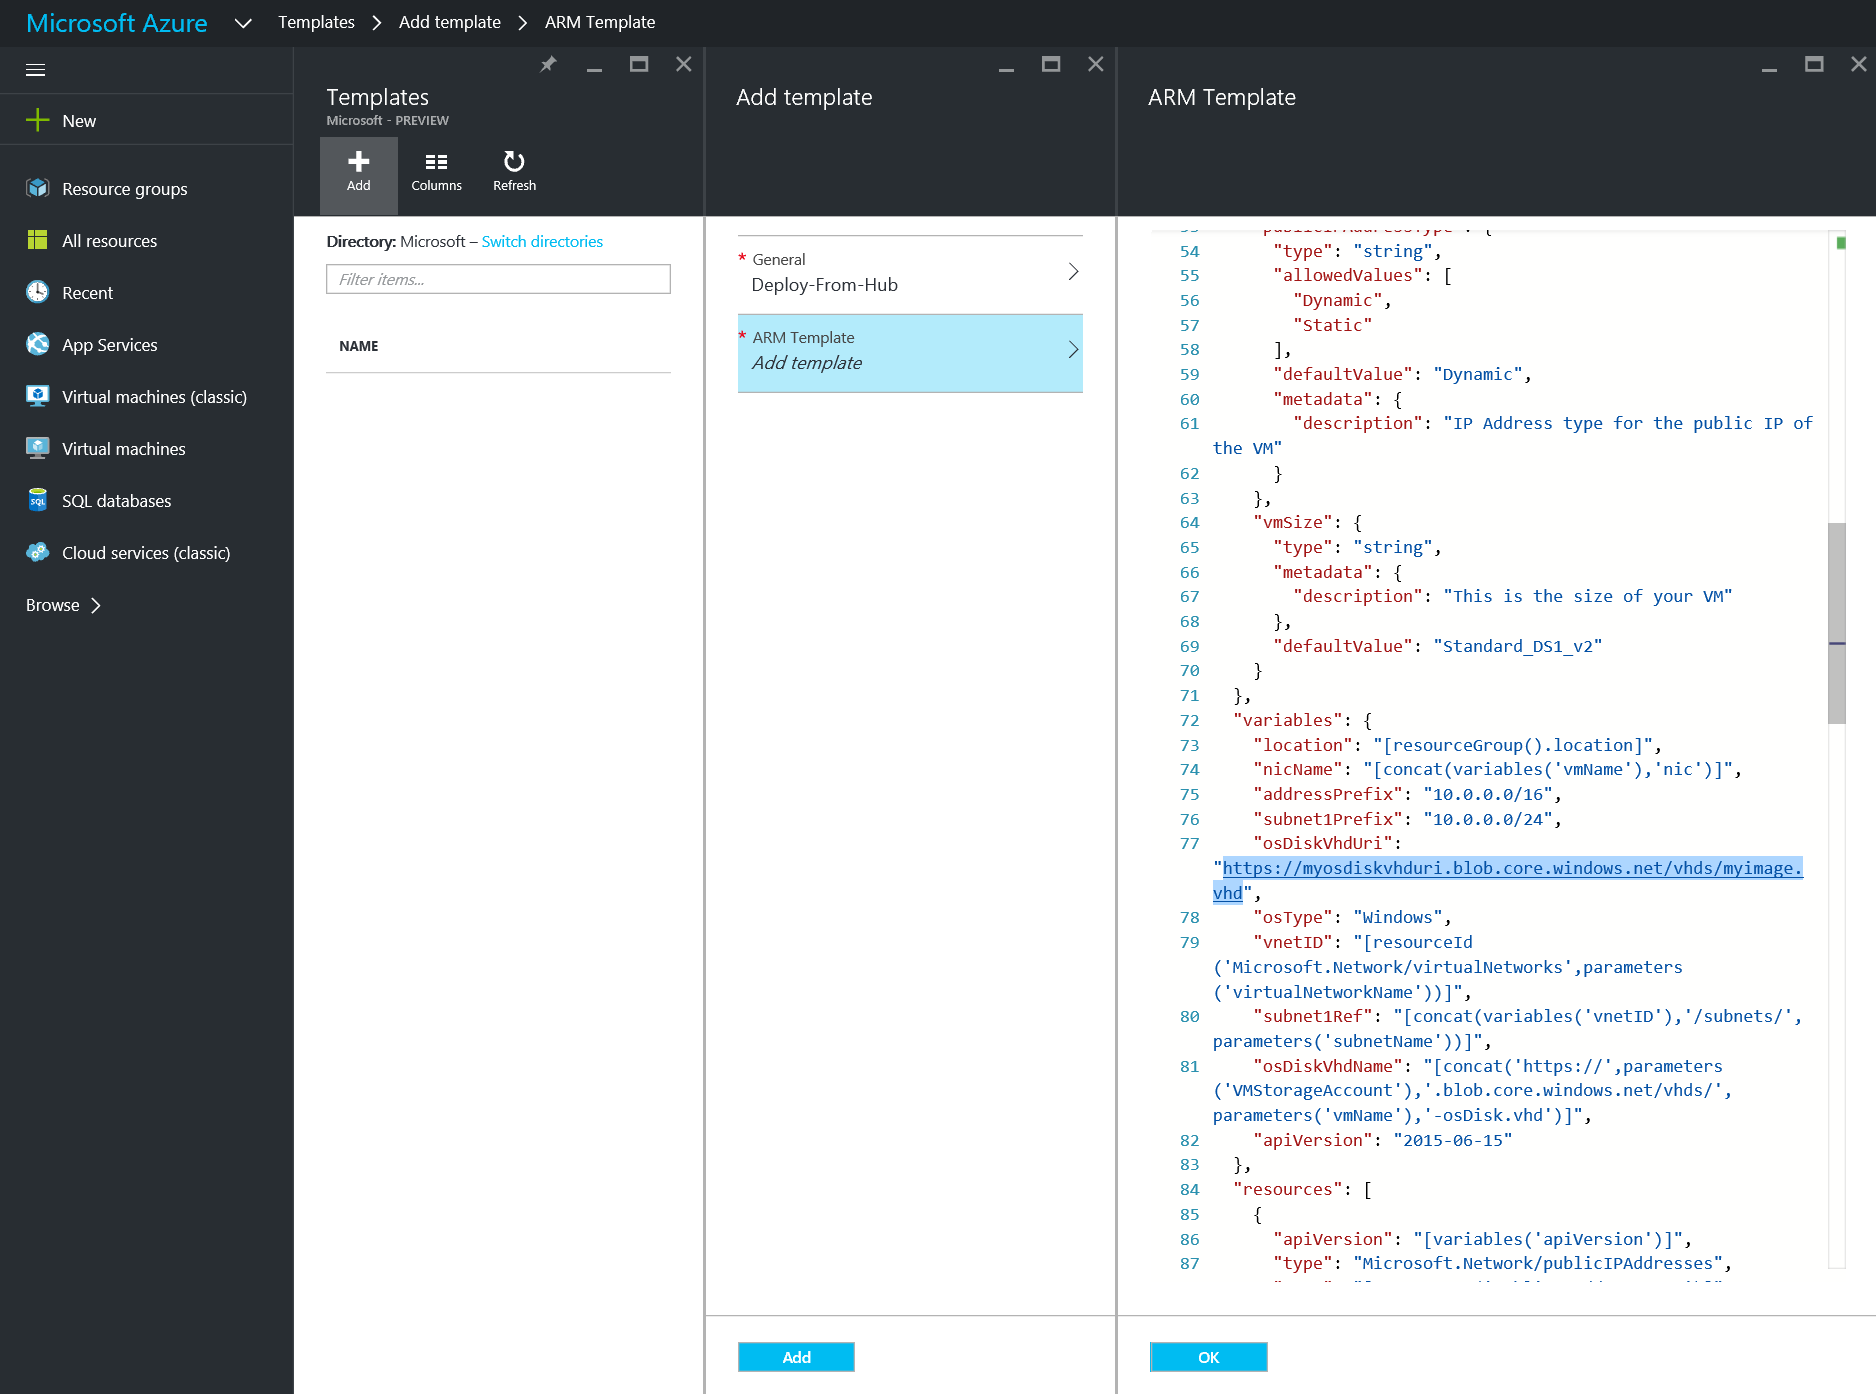
    Azure - Browse - Templates - Add - General - change uri
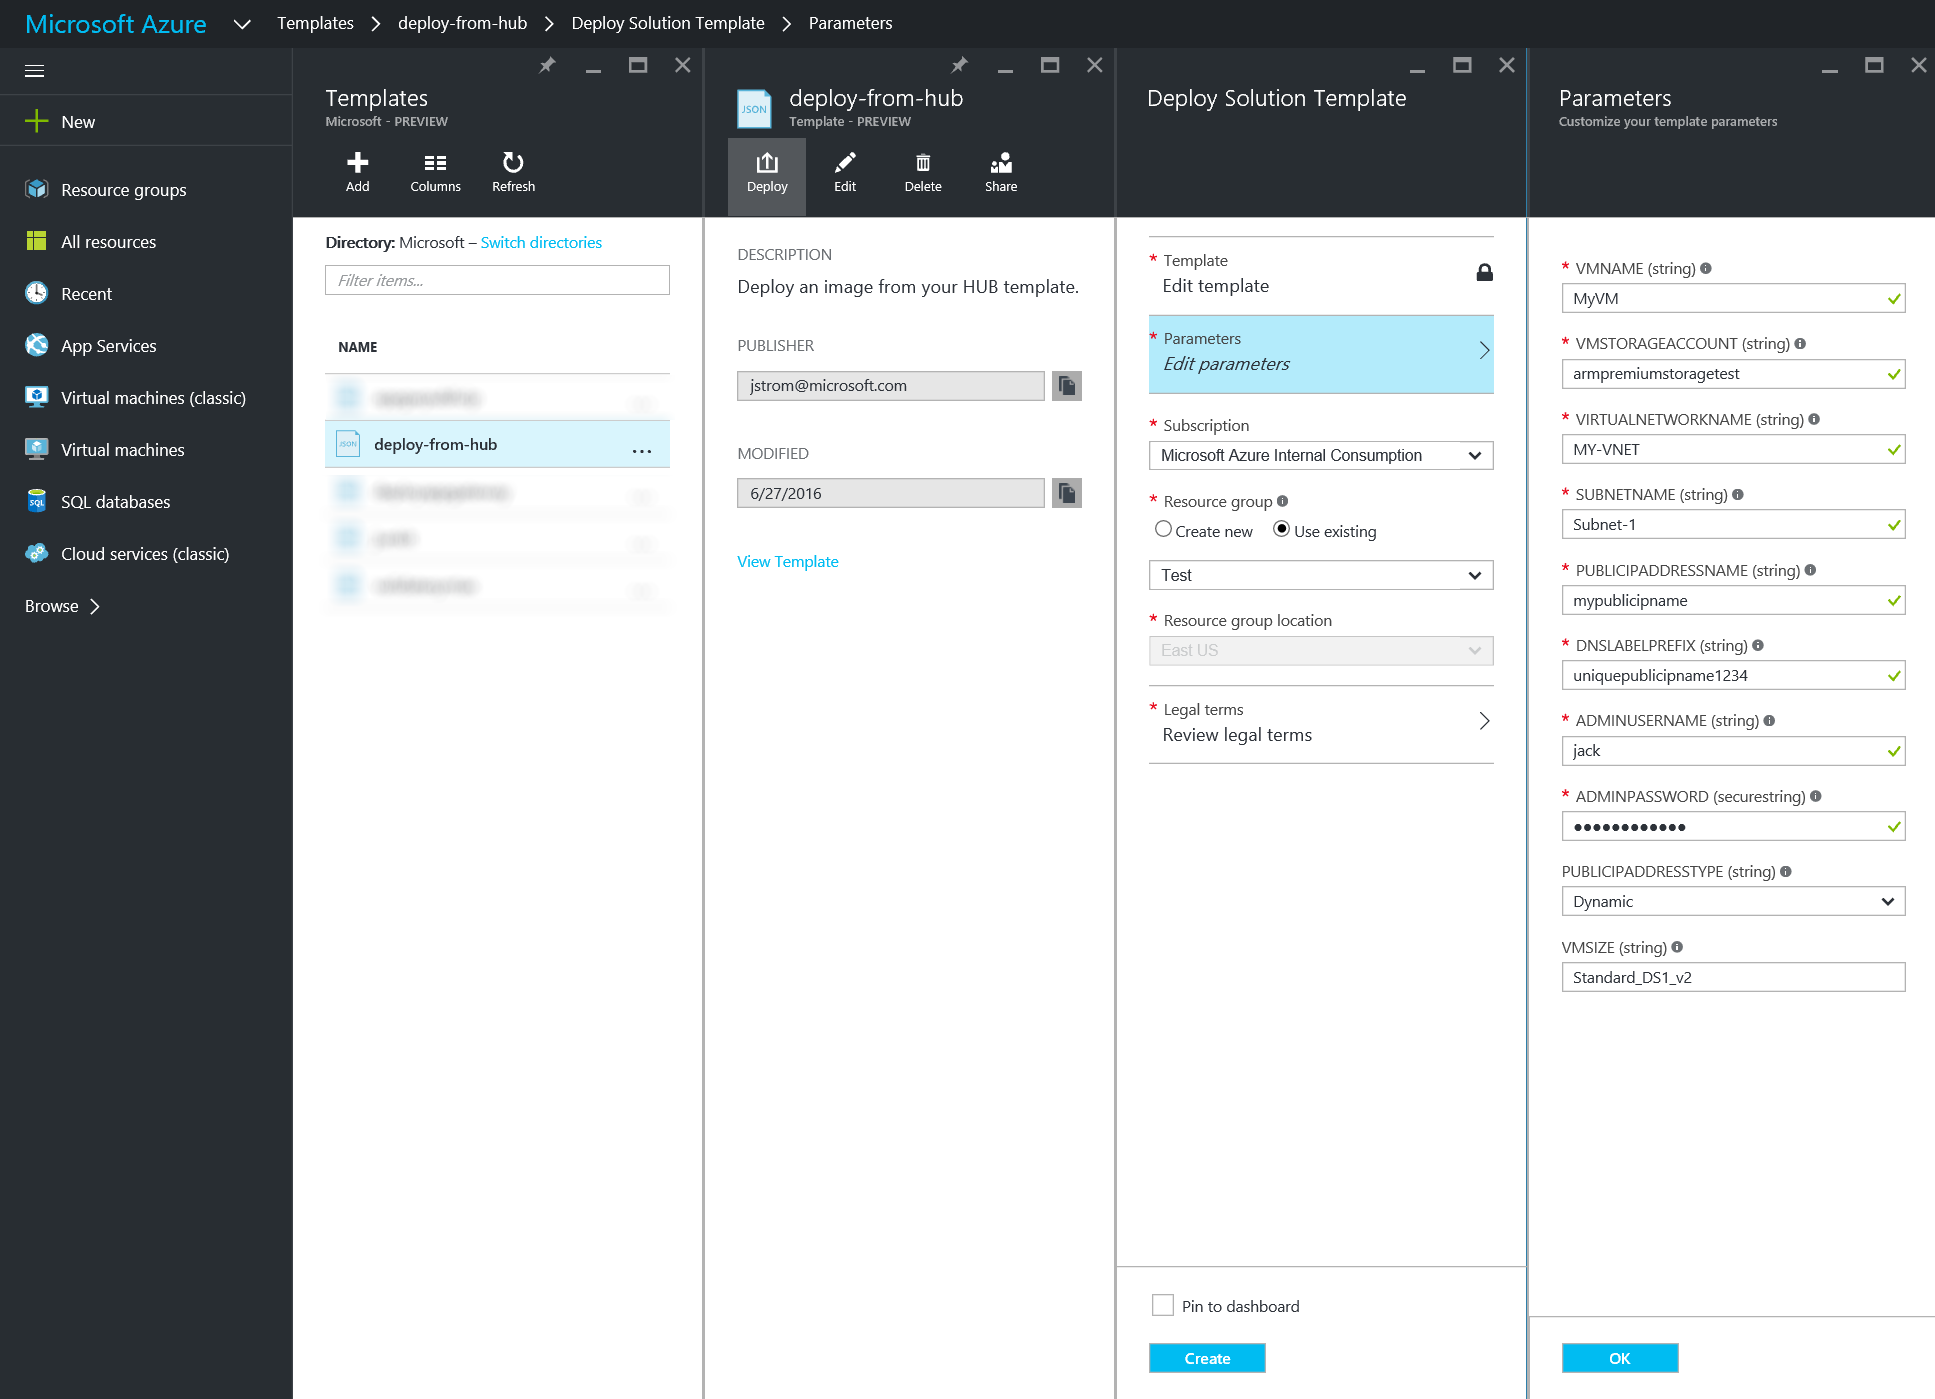
  5. Once you have deploy the script, click Add, select your template, and click DeployDeploy from Template

At this point, you should be able to deploy from the template and create your VM from the HUB licensed VHD! 🙂

Notes: The above script takes into account that you are deploying against standard storage.  You may need to edit the above script if you want to deploy to premium storage as diagnostics data does not support being deployed to a Premium Storage account as of 6/27/2016.

Notes: The above script assumes your Virtual Network and Subnet have been previously created.  It will not create a virtual network and subnet if they do not exist.
Enable SSO (Single Sign On) to On-Premises Exchange OWA (Outlook Web Access) via Azure AD Application Proxy

Edit: This scenario is unofrtunately no longer supported by Microsoft.  More details can be found here: https://learn.microsoft.com/microsoft-365/enterprise/configure-exchange-server-for-hybrid-modern-authentication
Wouldn't it be awesome to be able to do the following with Outlook Web Access being published in your on-premises environment today?

  • Cheap proxy solution to prevent direct internet access to your servers
  • Mask the IPs of your on-premises infrastructure
  • Enable Azure MFA (Multi-Factor Authentication) for OWA?
  • Have a Single-Sign on experience into Outlook Web Application via federation?
  • Have the application be selectable from your "My Apps" page (myapps.microsoft.com)
  • Have the application be selectable from the "Waffle Menu" of Office 365

If you are looking for any of the above, you are in-luck and we can enable this easily through Azure AD Application Proxy.  If you organization is using Office 365 or Azure AD already and have licensing for Azure AD Premium or Basic, you are good to go.  If you have the Enterprise Mobility Suite, this will grant you to Azure AD Premium licensing which should make you good to go as well.
Configuration

  1. Prerequisite: Enable Kerberos Authentication for Outlook Web Access On-Premises
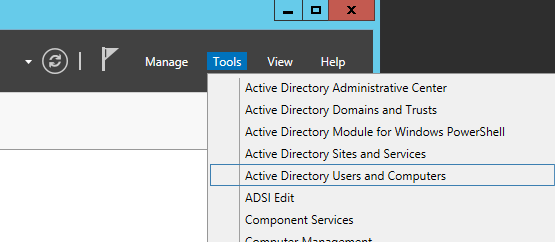
    1. Login to one of your domain controllers and open up Active Directory Users and Computers
      Server Manager - Active Directory Users and Computers
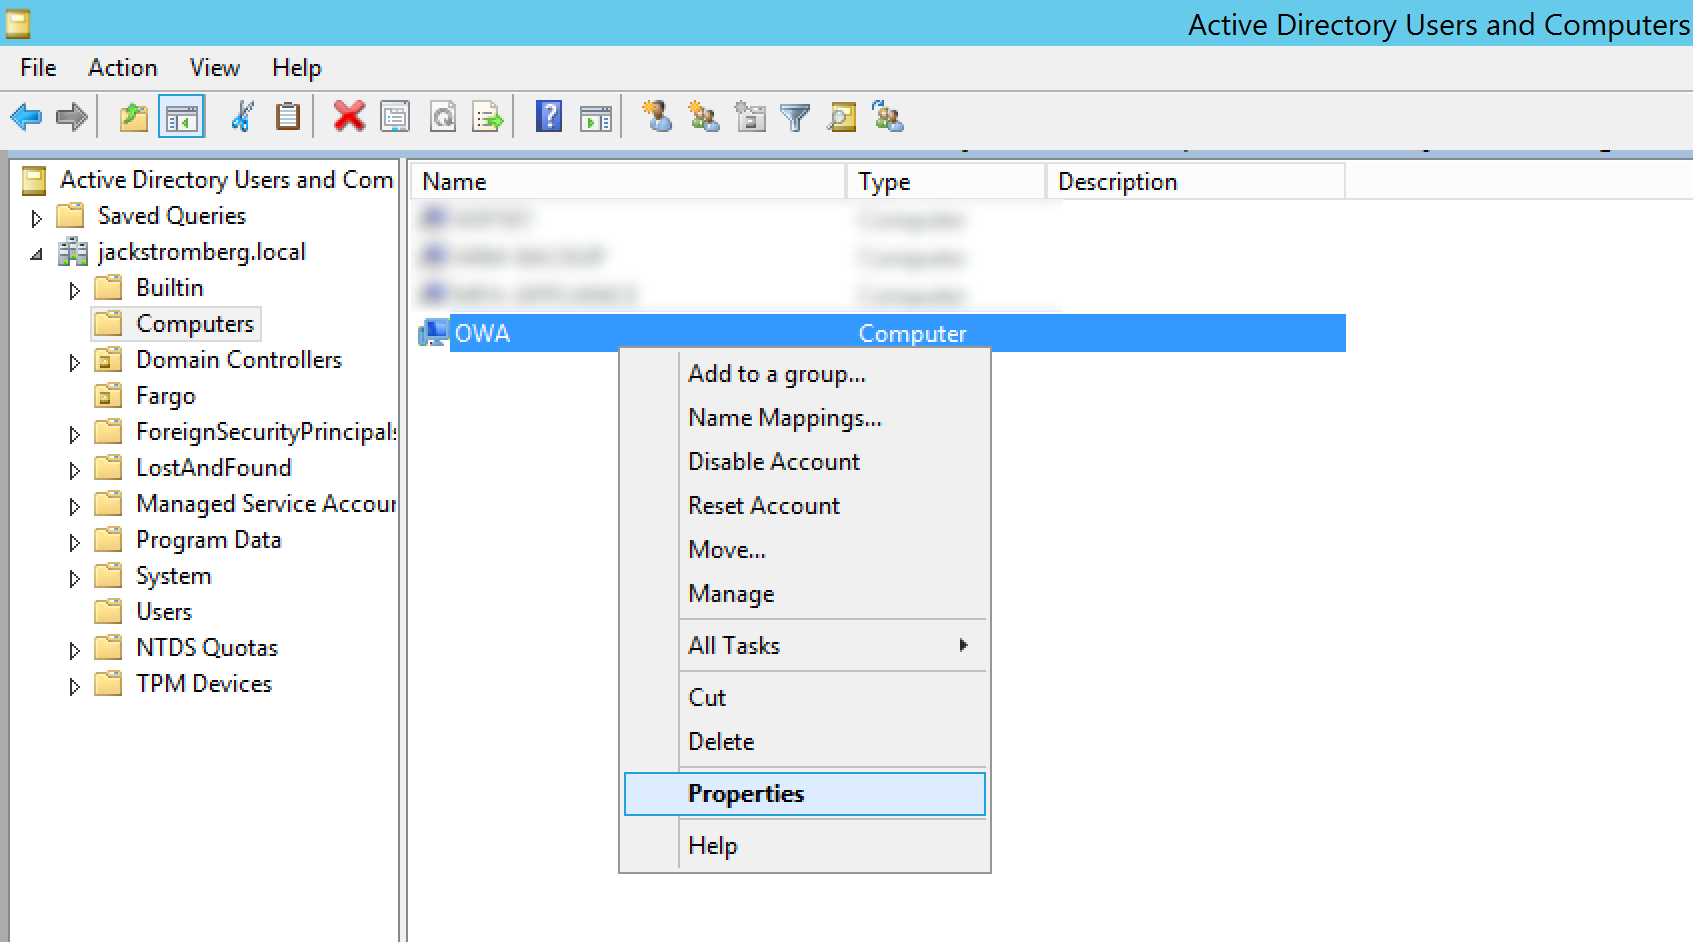
    2. Find the Computer object within your organization we will run the Azure AD Connector on later in the tutorial and right click Properties on it
      Active Directory Users and Computers - Computers - OWA - Properties
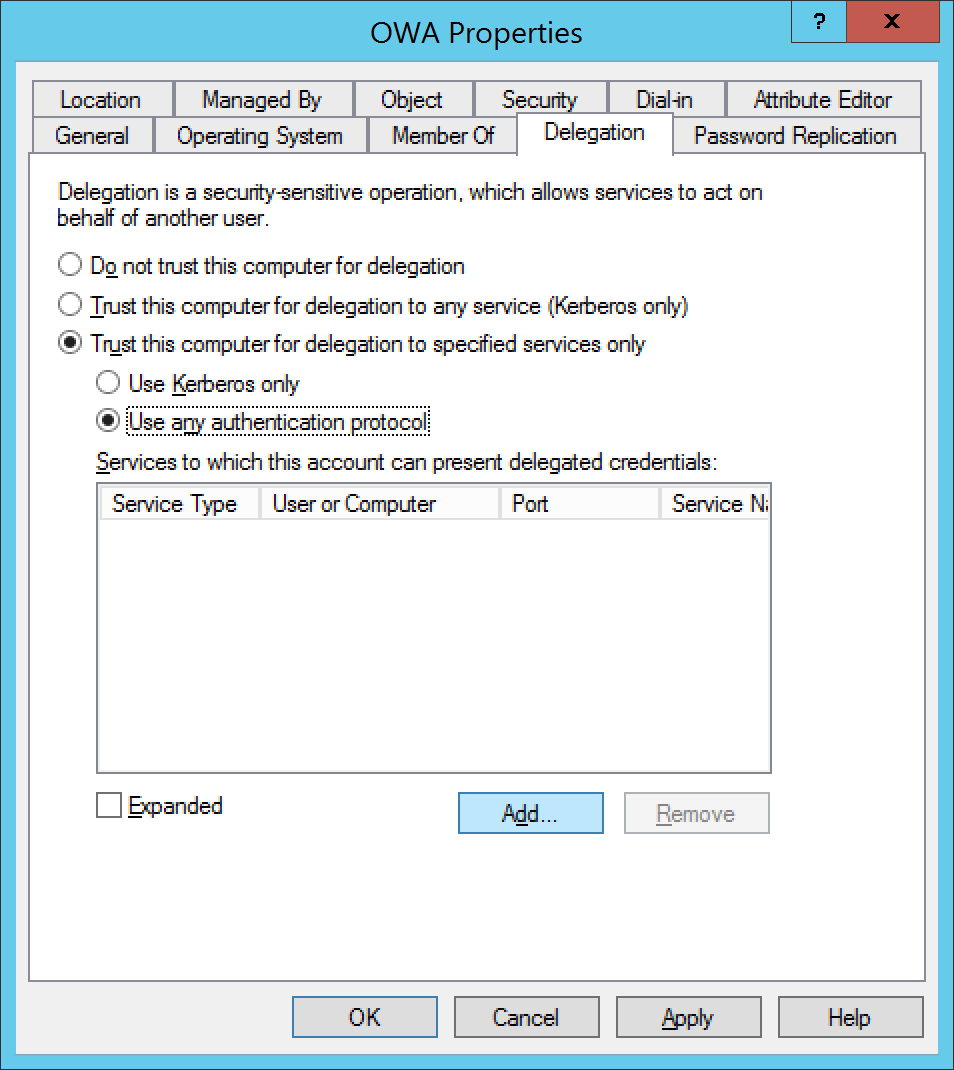
    3. Select the Delegation tab, select Trust this computer for delegation to specified services only, check Use any authentication protocol, and click on Add...
      Active Directory Users and Computers - Computers - OWA - Properties - Delegation - Add
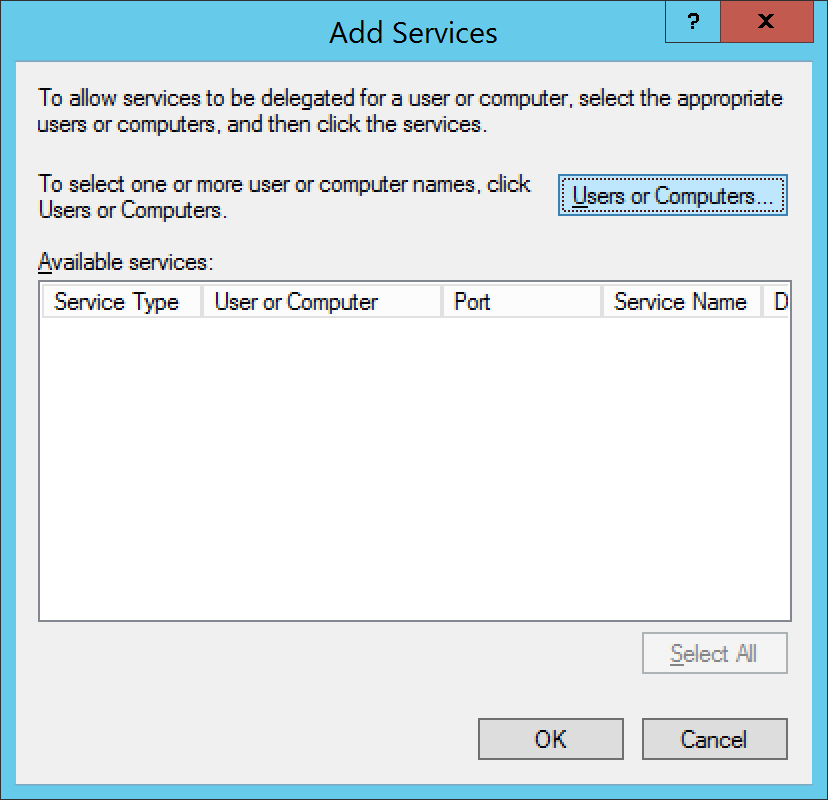
    4. Select Users or Computers...
      Active Directory Users and Computers - Computers - OWA - Properties - Delegation - Add - users or Computers
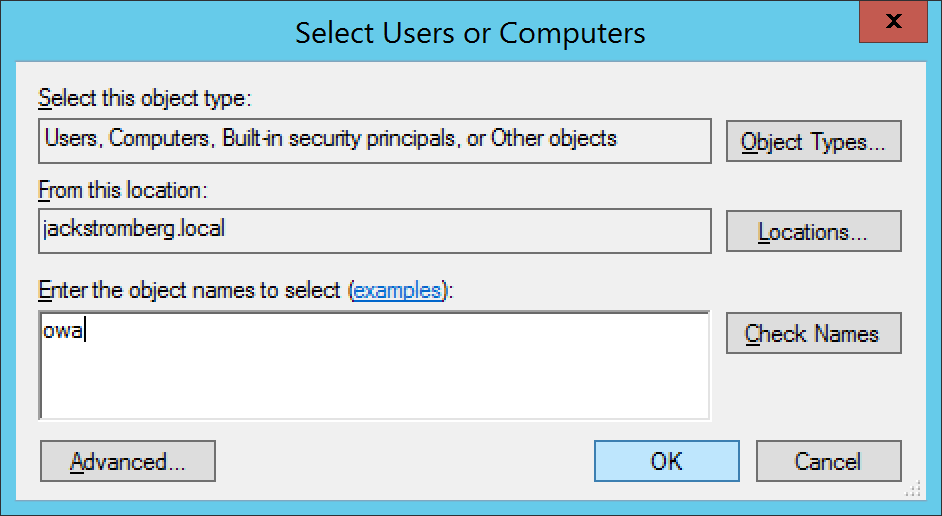
    5. Type in the machine name and click OK
      Active Directory Users and Computers - Computers - OWA - Properties - Delegation - Add - users or Computers - Select Users or Computers
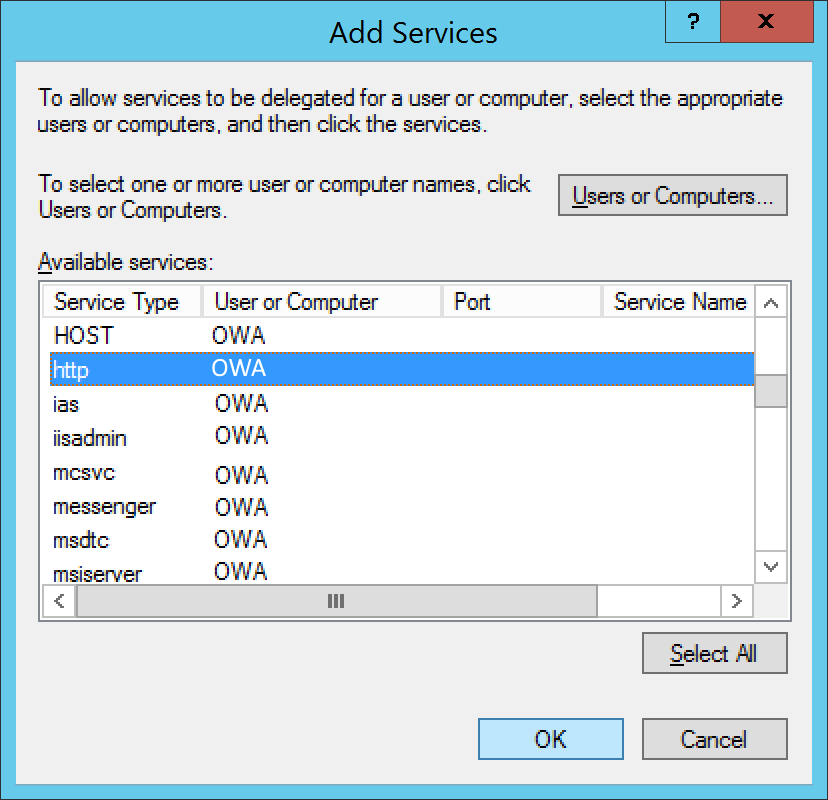
    6. Select http and click OK
      Active Directory Users and Computers - Computers - OWA - Properties - Delegation - Add - users or Computers - http
    7. Click OK on the Add Services page
  2. Pre-Requisite: Enable Exchange On-Premises to use Integrated Windows Authentication (instructions for Exchange 2010 or 2013 can be found below)
    1. Exchange 2010
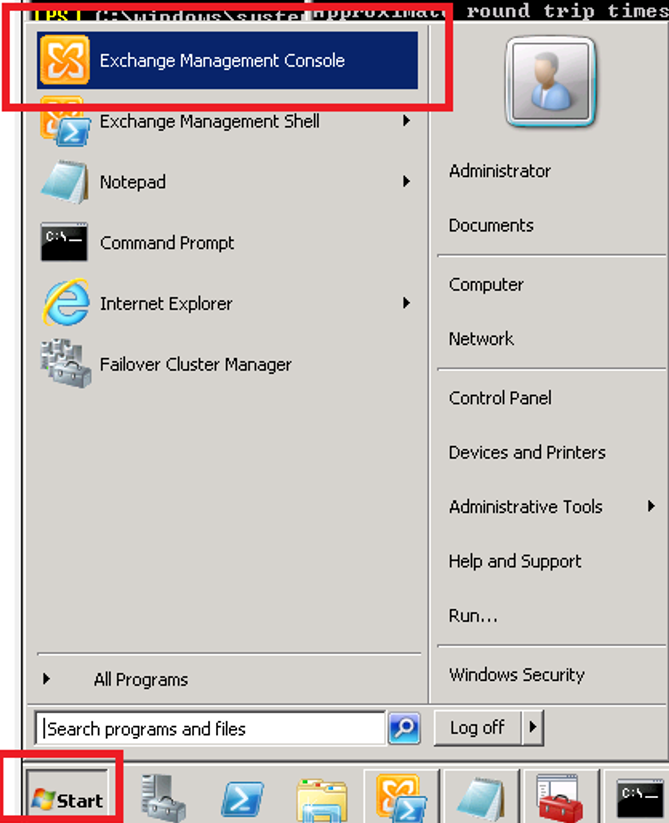
      1. Open the Exchange Management Console for your Exchange server
        Exchange Management Console (2010)
      2. Expand Server Configuration, select Client Access, under Outlook Web App, right click on your web app and select Properties
        Exchange Management Console (2010) - Outlook Web App
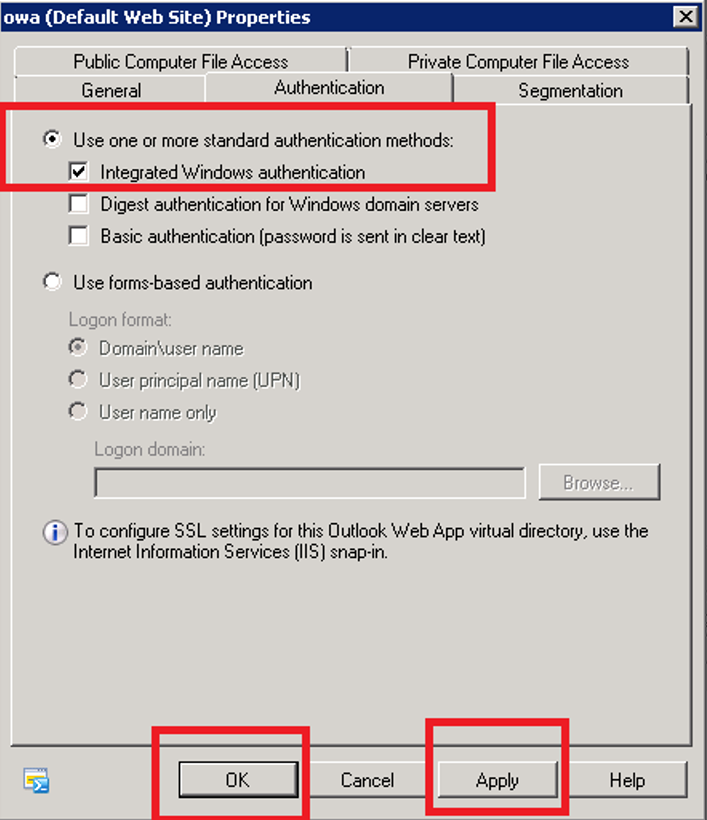
      3. Select the Authentication tab and check Use one or more standard authentication methods.  Once checked, check Integrated Windows authentication and click the Apply and OK buttons.
        Exchange Management Console (2010) - Outlook Web App Properties - Authentication - Integrated Windows Authentication
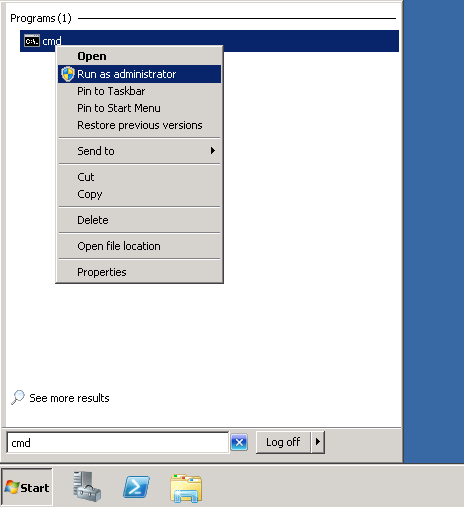
      4. Open a command prompt
        cmd as Administrator
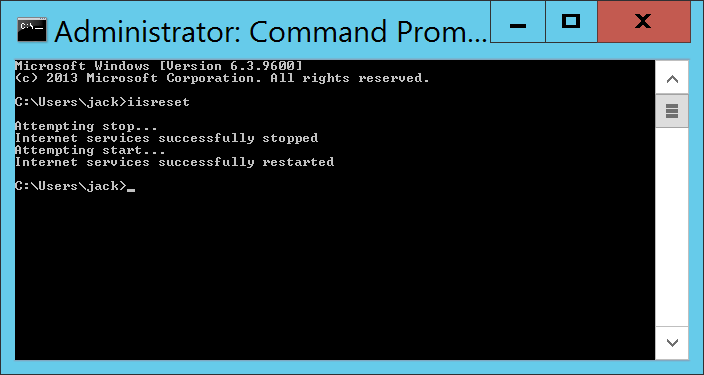
      5. Execute the iisreset command
        cmd - iisreset
    2. Exchange 2013
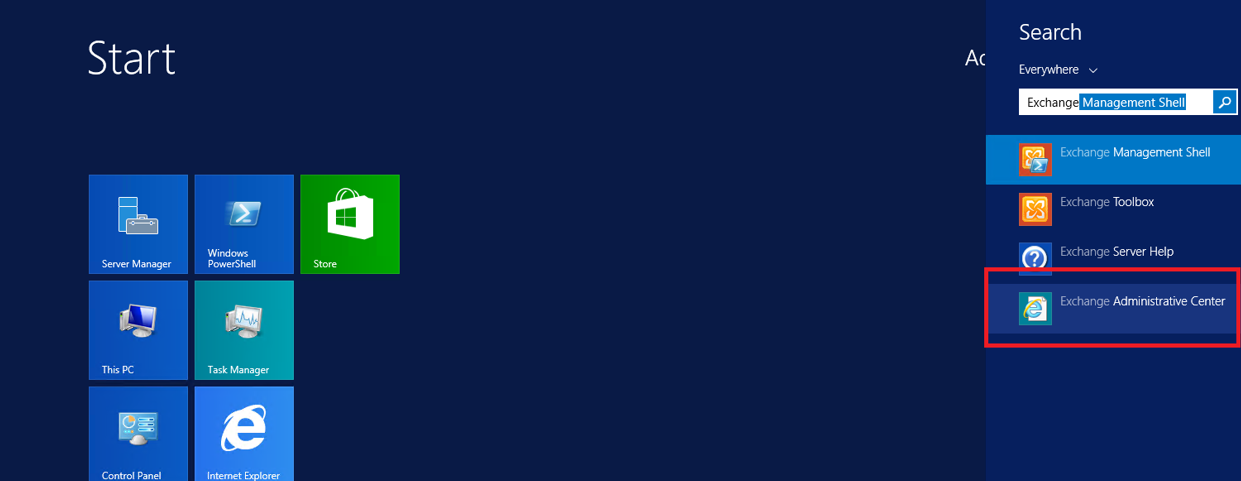
      1. Open the Exchange Administrative Center
        Exchange Administrative Center (2013)
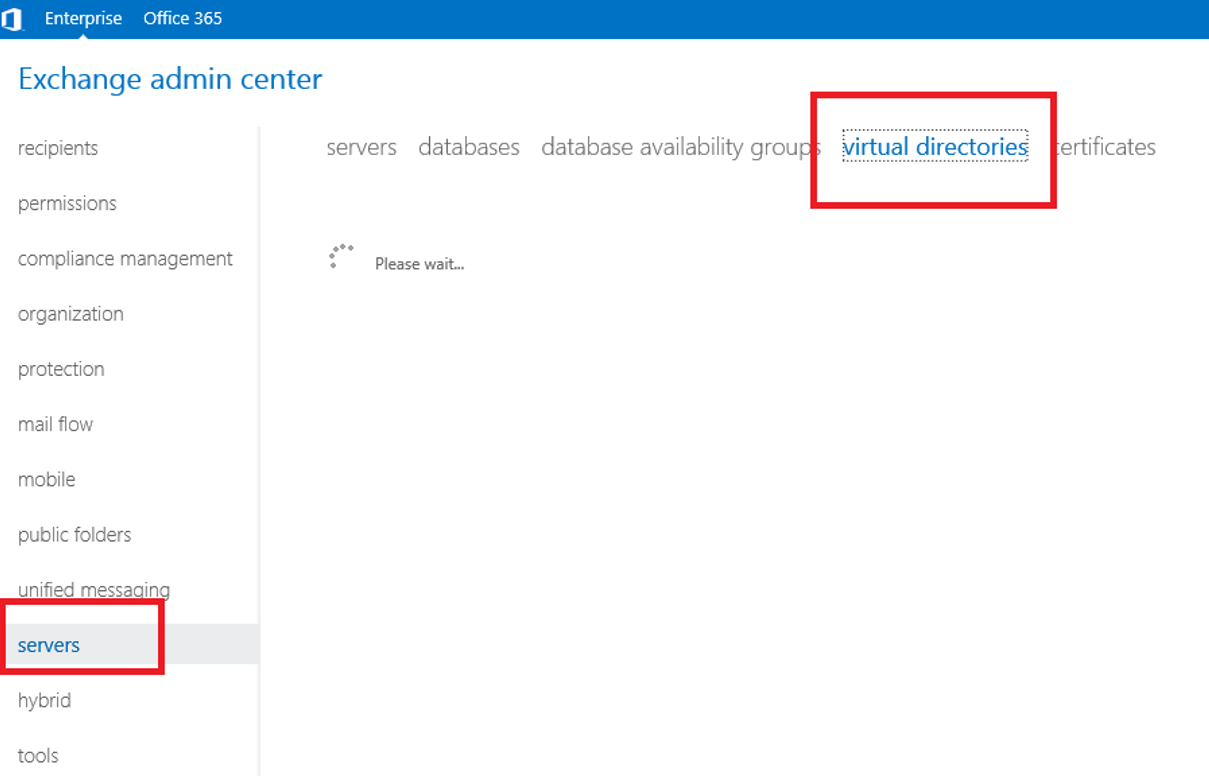
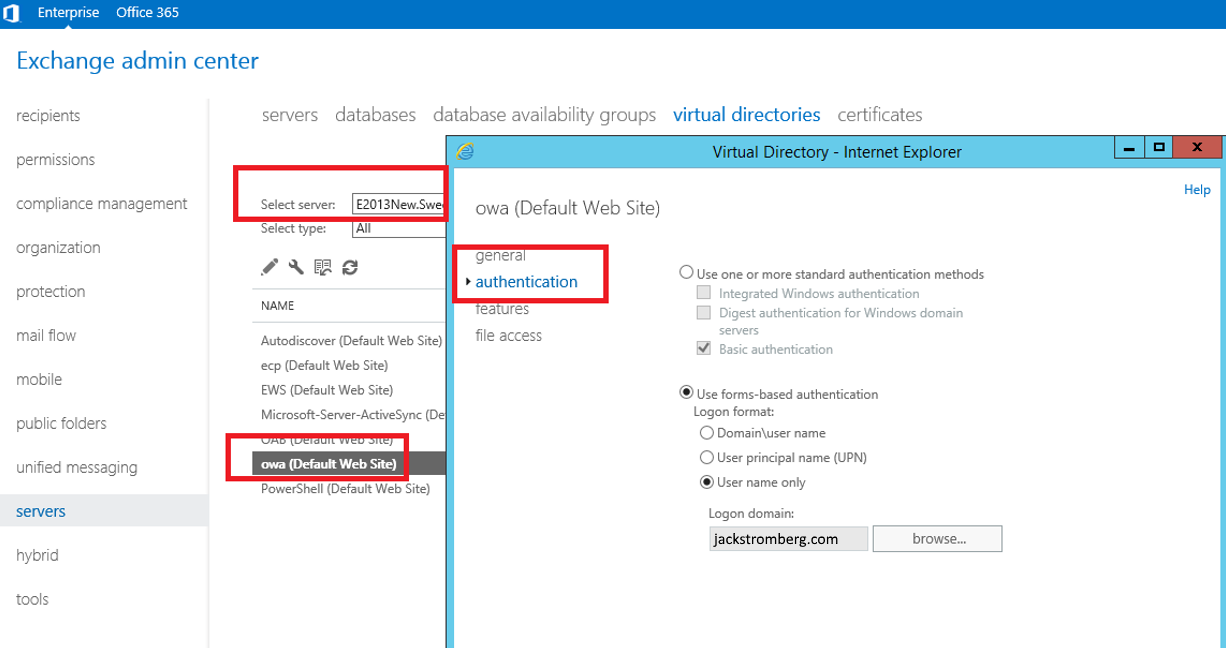
      2. Login to the admin center, click on Servers and select the Virtual Directories tab
        Exchange Administrative Center (2013) - admin center - servers -virtual directories
      3. Select server and then double click on the OWA Virtual Directory and select the applications tab
        Exchange Administrative Center (2013) - admin center - servers -virtual directories - owa - authentication
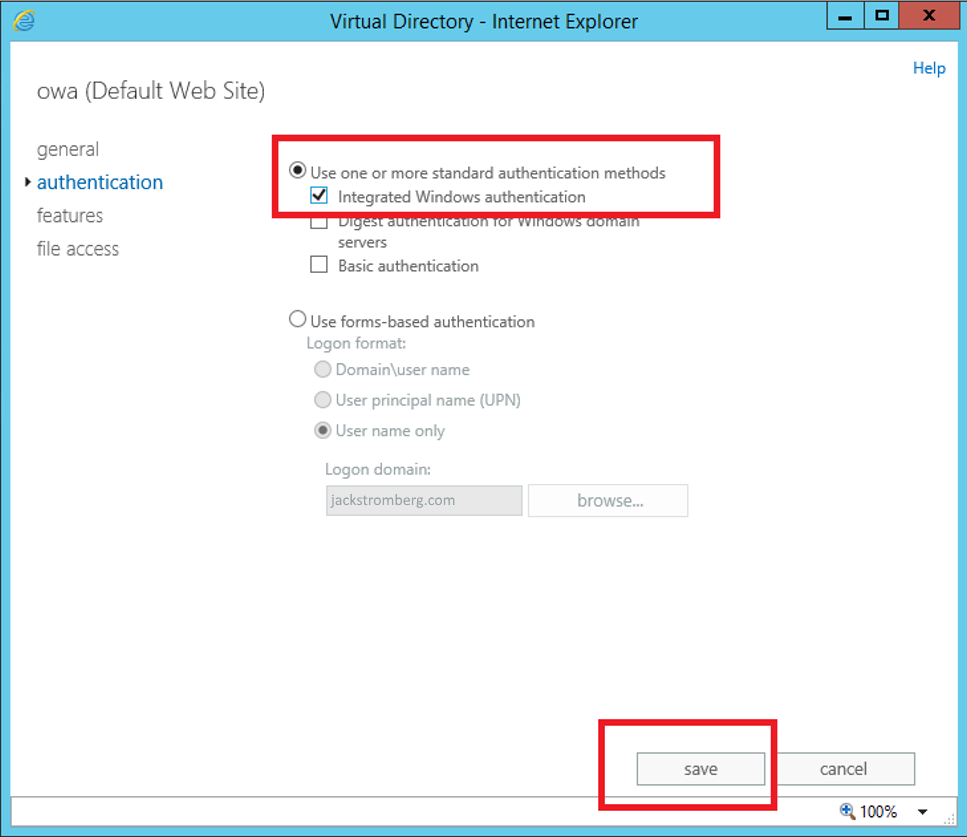
      4. On the authentication tab, select Use one or more standard authentication methods, select Integrated Windows authentication, and click save
        Exchange Administrative Center (2013) - admin center - servers -virtual directories - owa - authentication - integrated windows authentication
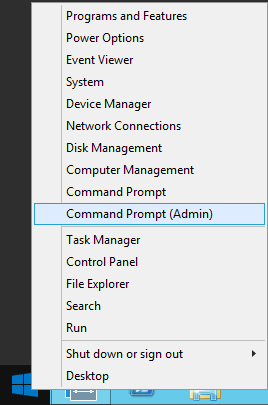
      5. Open a command prompt
        Elevated Command Prompt
      6. Execute the iisrest command
        cmd - iisreset
  3. Login to the Azure Portal
    1. https://portal.azure.com
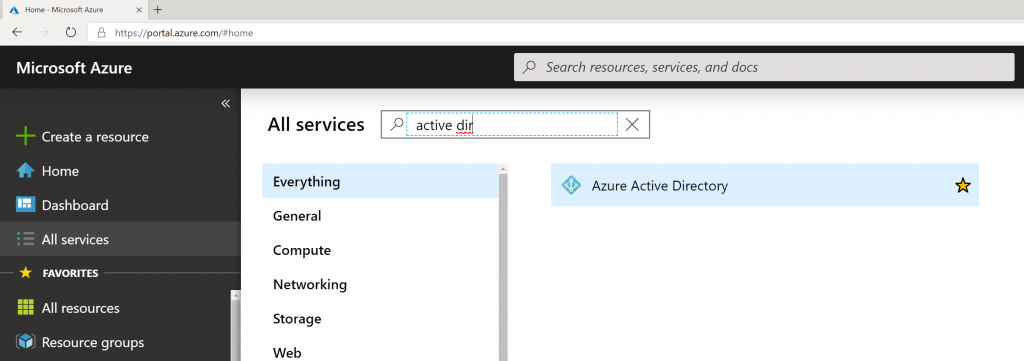
  4. Select All services -> Azure Active Directory on the left side
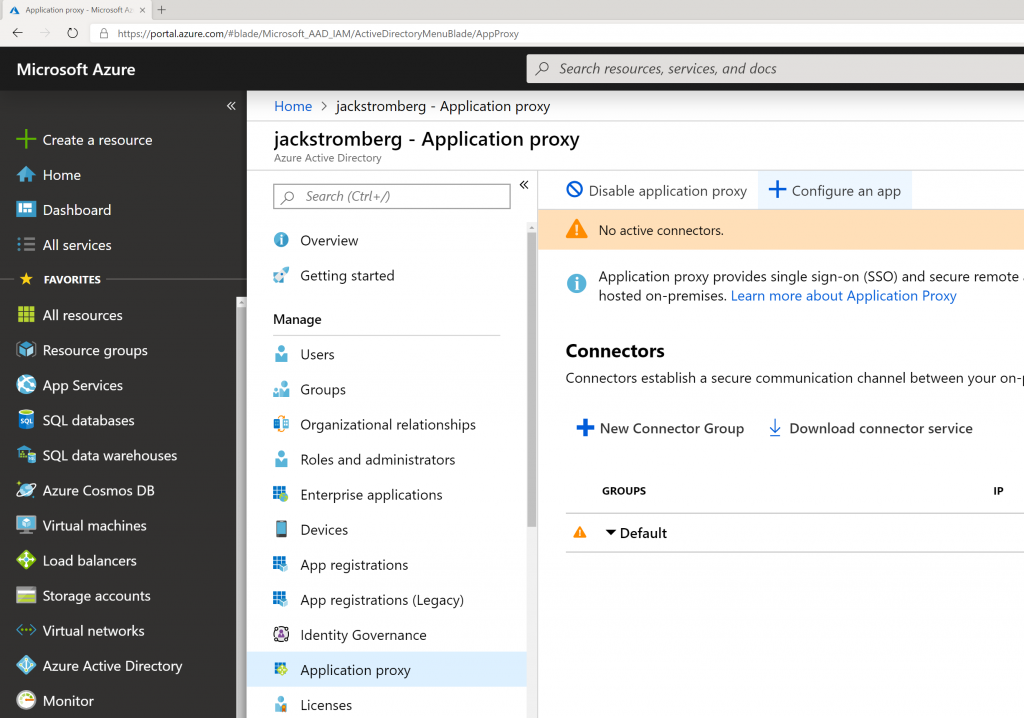
  5. Select Application proxy in the sub blade and select + Configure app

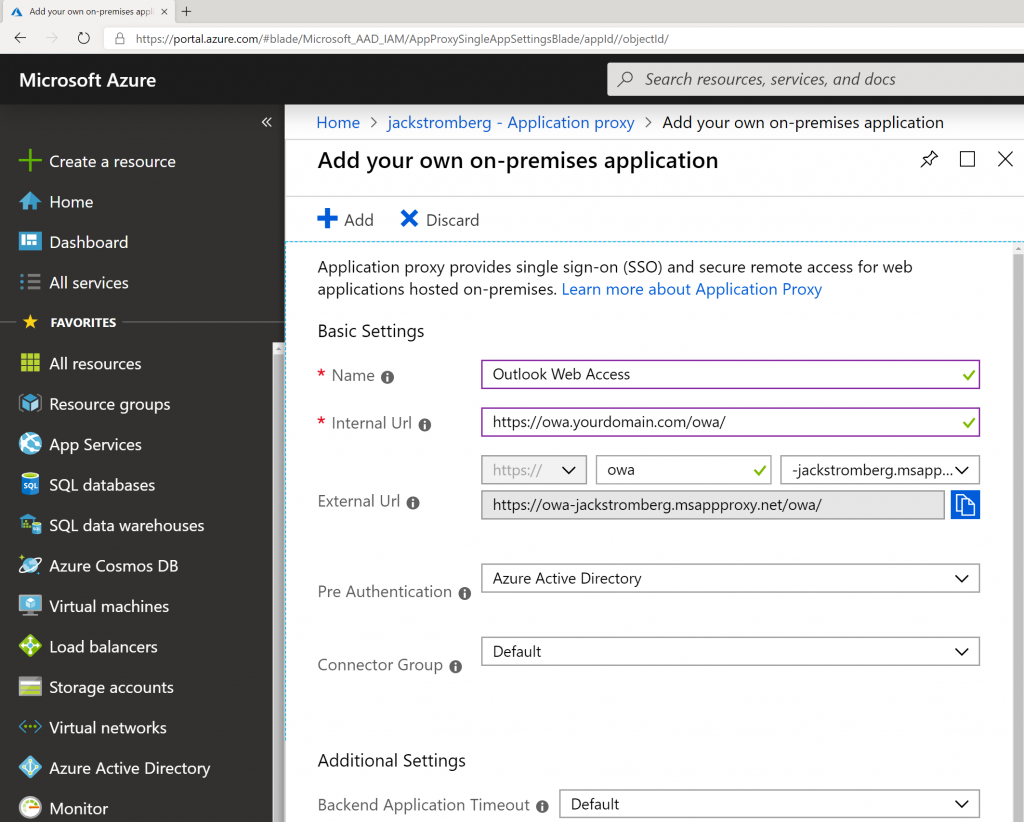
  6. Enter in the following information for the application:
    1. Name: Outlook Web Access
    2. Internal URL: https://owa.yourdomain.com/owa/ (this is the internal URL to owa)
    3. Pre-Authentication: Azure Active Directory
    4. Connector Group: Default
    5. Click + Add

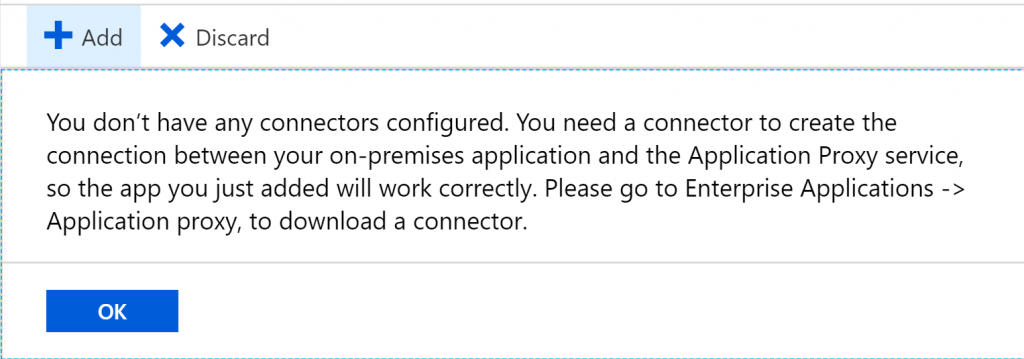
    6. Select OK if not prompted about having a connector
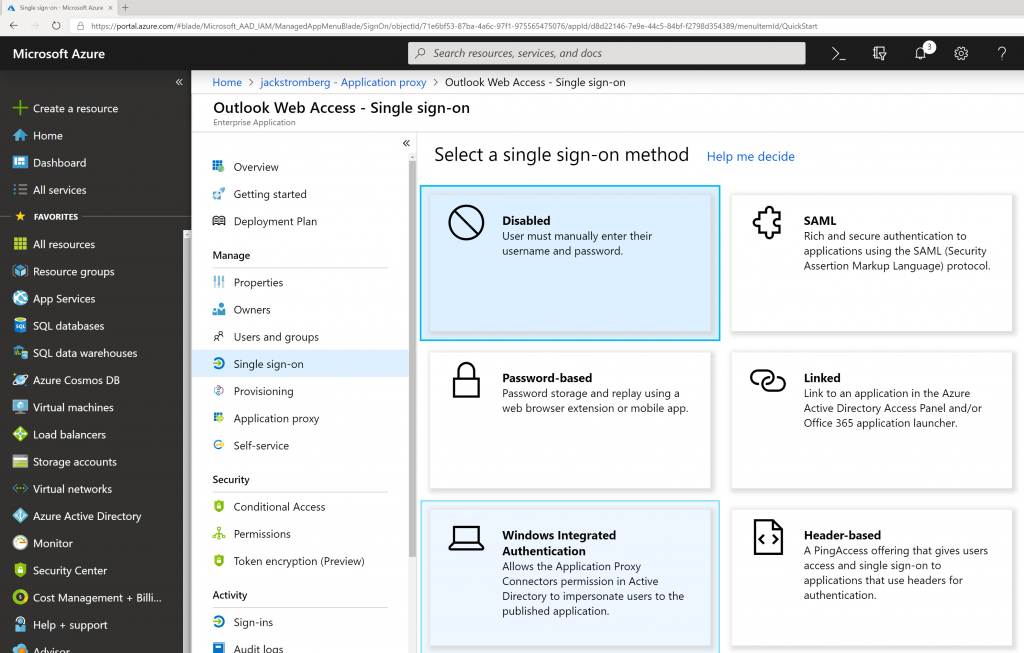
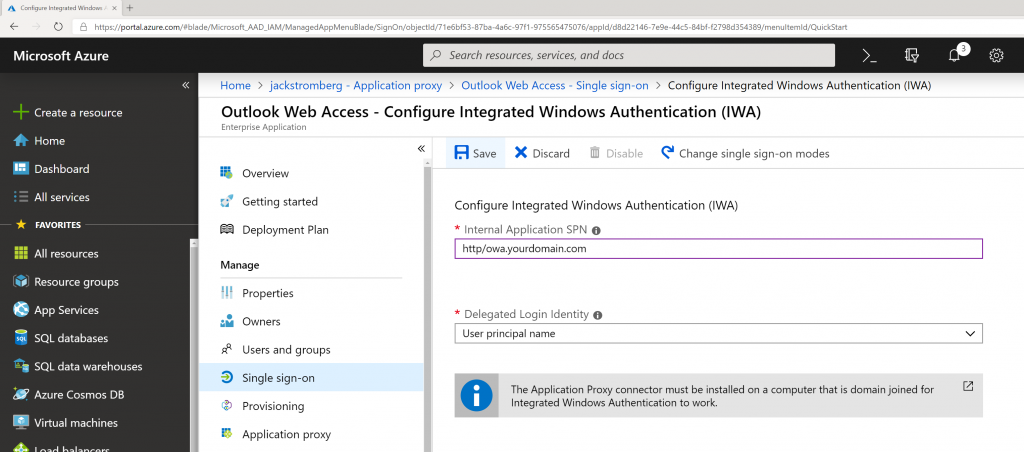
  7. Once your application is created, you should be redirected to Azure Active Directory -> Enterprise Applications -> Outlook Web Access.  On this blade, select Single sign-on and then select the Windows Integrated Authentication button

  8. Use the following configuration
    1. Internal Application SPN: http/owa.yourdomain.com
      1. This is the Service Principal Name to the Exchange Server.  The value for this was provided earlier in this tutorial.
    2. Delegated Login Identity: User Principal Name
    3. Click Save
    4. Note: If you cannot do Kerberos based authentication (Integrated Windows Authentication) in your environment, you can Discard the changes continue to use Azure AD Application proxy, however the end user will be prompted for credentials just as if they browsed directly to OWA.
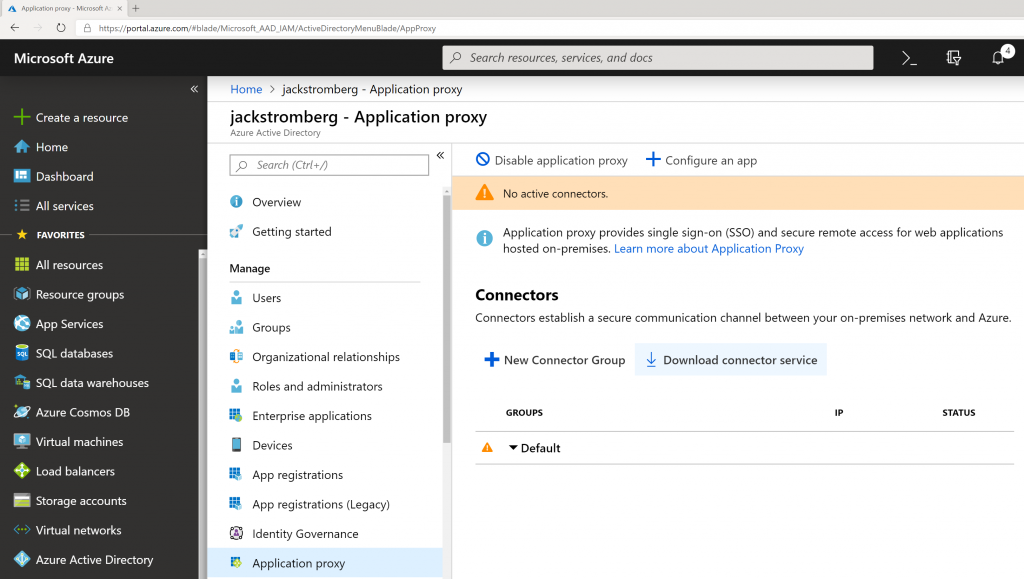
  9. Go back to All Services -> Azure Active Directory -> Application Proxy and click the Download connector service button


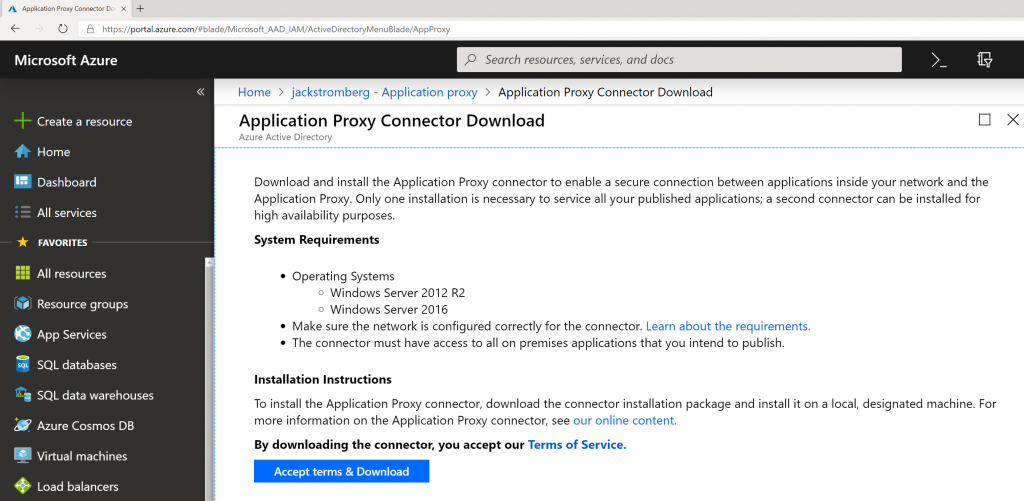
    1. Click the Accept terms & Download button
    2. Note: Although the download has a generic name, the download is customized specifically for your application (Outlook Web Access in this case).  If you create other applications within your Azure AD tenant, make sure you always use the Download button inside of each application so it generates the correct installer.
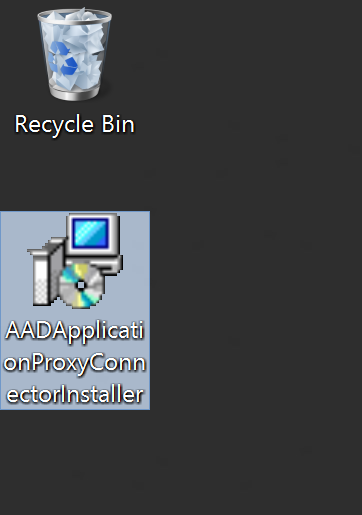
  10. Copy the AADApplicationProxyConnectorInstaller.exe connector to any server in your environment that can access your OWA instance internally and run the installer
    AADApplicationProxyConnectorInstaller Downloaded
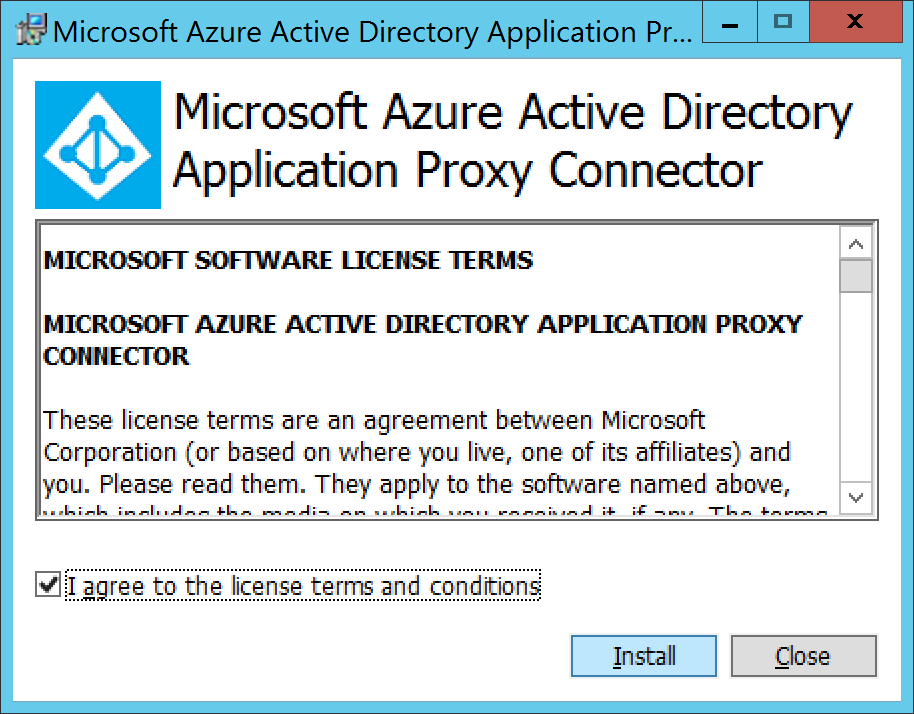
  11. Check I agree to the license terms and conditions and click Install
    Microsoft Azure Active Directory Application Proxy Connector - I agree
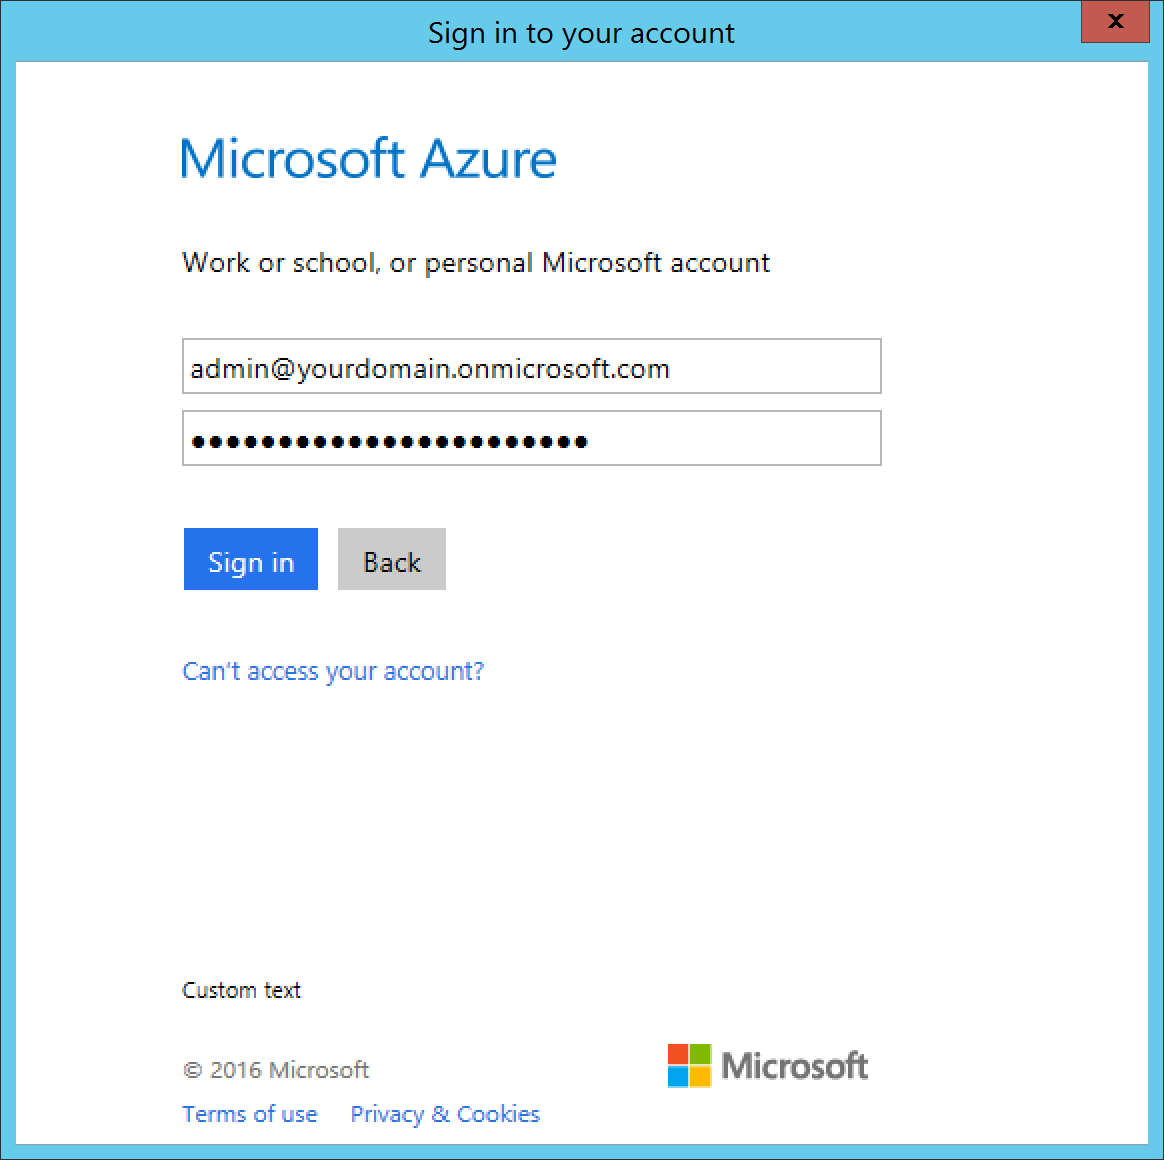
  12. Type in your Global Administrator credentials to register the agent to your Azure AD tenant and click Sign in
    Microsoft Azure Active Directory Application Proxy Connector - Credential Prompt
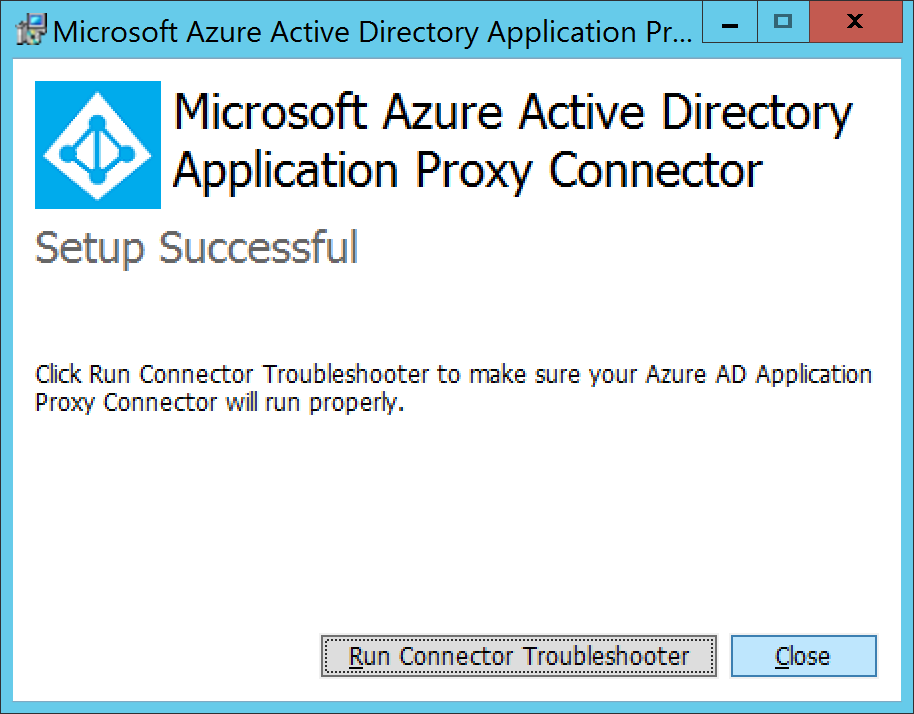
  13. Click Close if it shows Setup Success
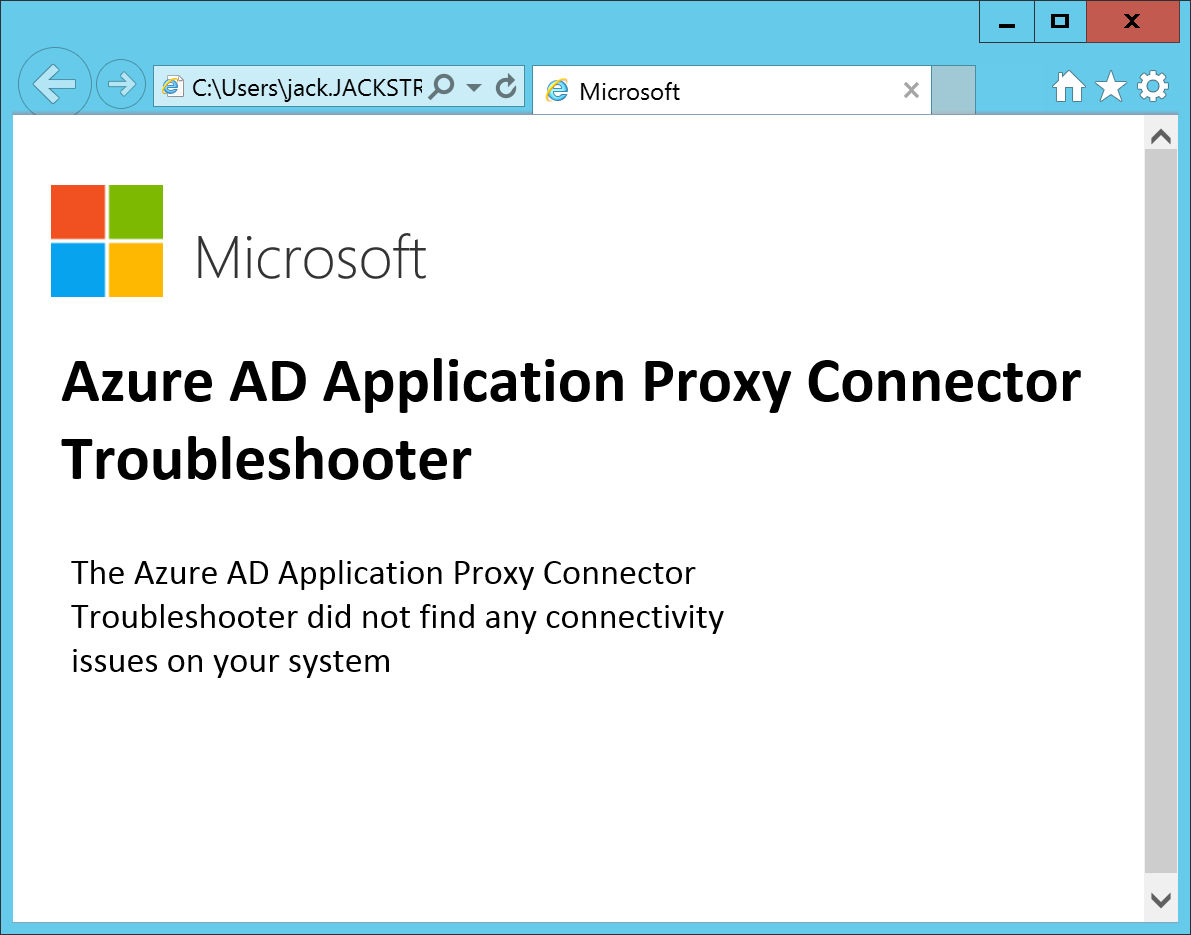
    Microsoft Azure Active Directory Application Proxy Connector - SuccessOptional: You can run the Connector Troubleshooter if you would like.  It will install a quick application that will show you the results of the test in your web browser once it has completed.
    Azure AD Application Proxy Connector Troubleshooter
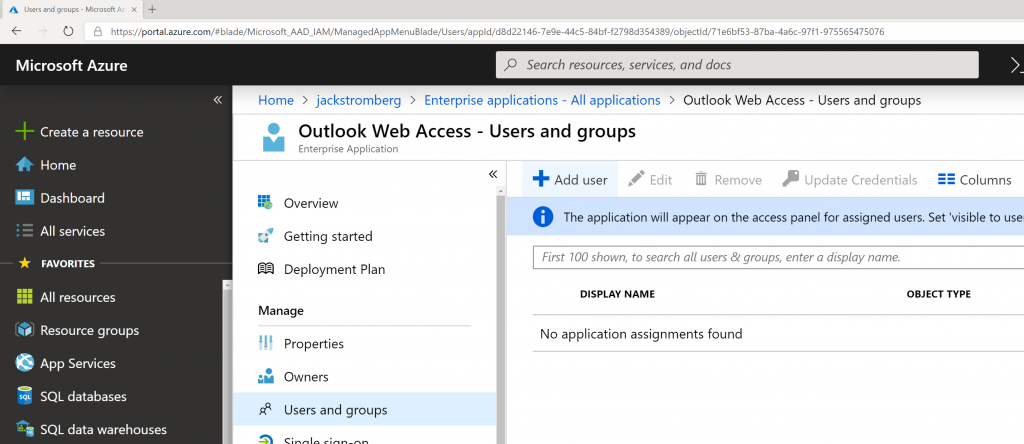
  14. Go back to the Azure Portal and navigate to Azure Active Directory -> Enterprise Applications -> Outlook Web Access.  Select Users and groups and click the +Add user button to assign the group or users that should use the application.
      

    1. Note: This group could be synchronized from on-premises to Azure AD or created in the cloud
    2. Note: Assigning a user or group to this application will automatically make the application show up in the My Apps portal
    3. Note: Users or Groups must be defined to use the application or they will receive an error upon logging in

Test

  1. Login to https://myapps.microsoft.com as one of the assigned users to the Outlook Web Access application
  2. Select the Outlook Web Access application

If all went well, you should be logged into Outlook Web Access on-premises and see your corresponding mailbox.  At this point, I would proceed with adding a vanity domain name that matches your organization as well as corresponding SSL certificate for the domain name instead of leveraging the default msapprpoxy.net domain name.  Additionally, you can always find a nice little icon for the application to make it look like OWA as well 🙂

[How To] Establish a Point-to-Site VPN connection between Azure and a client

In this guide, we will go over setting up a Point-to-Site VPN connection that will allow an on-premise virtual machine talk to a resource/VM that is hosted in Microsoft Azure.  In this guide, we will take advantage of the new Preview Portal for this guide.

  1. Login to the Microsoft Azure Preview Portal
    1. https://portal.azure.com/
  2. Create a VNET
    1. Click on the + New button
      Azure - New button
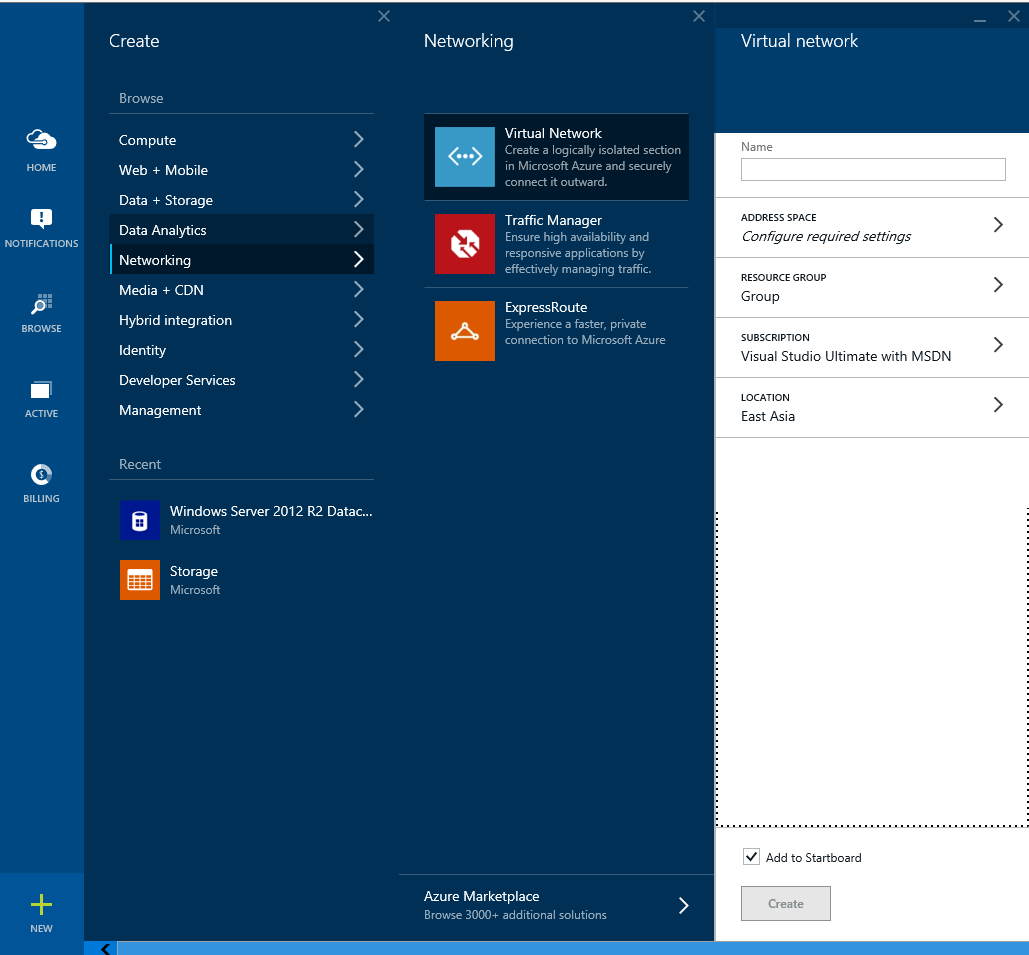
    2. Select Networking, Virtual NetworkAzure - Create - Networking - Virtual Networking
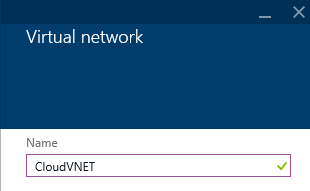
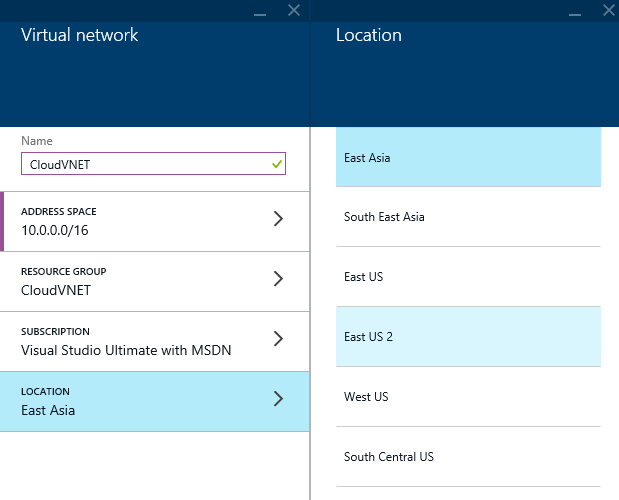
    3. Type in a Name for your VNET
      Azure - Create - Networking - Virtual Networking - Name
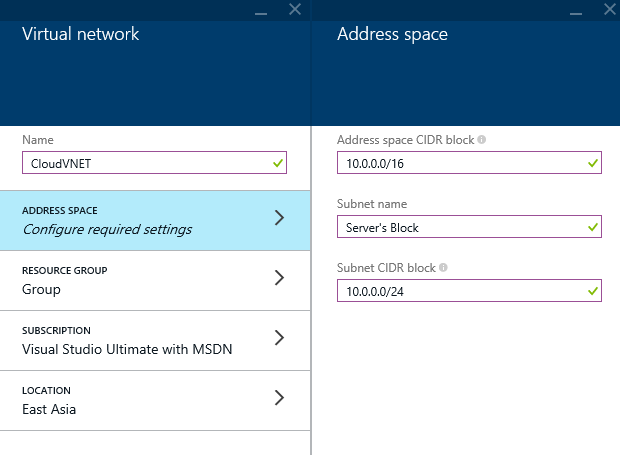
    4. Select Address Space, configure the parameters of your cloud based virtual network, and click OK
      Azure - Create - Networking - Virtual Networking - Address space
    5. Select Resource Group, Create a new resource group, enter a name for the group and click OK
      Azure - Create - Networking - Virtual Networking - Resource Group - Create resource group
    6. Click Location and select the location closest to you
      Azure - Create - Networking - Virtual Networking - Location - East US 2
    7. Click Create
      Azure - Create - Networking - Virtual Networking - Virtual Network - Create
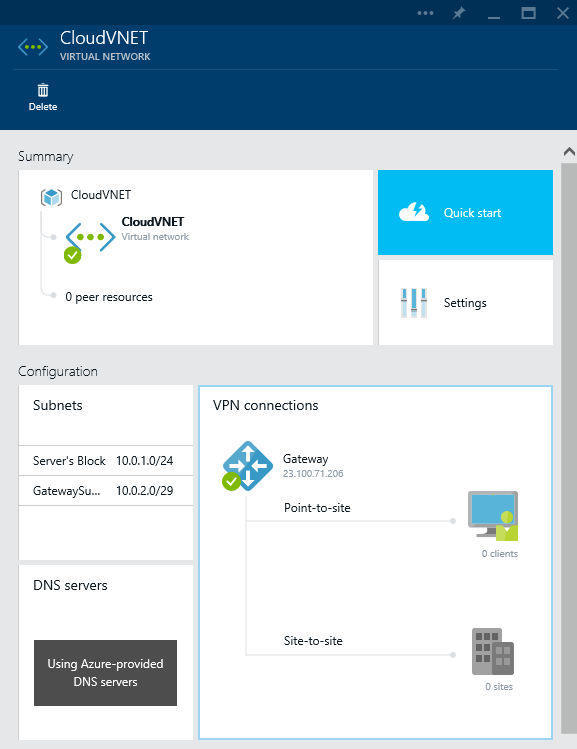
  3. With the Virtual Network blade still open, select VPN connections
    Azure - Create - Networking - Virtual Networking - Virtual Network - VPN Connections
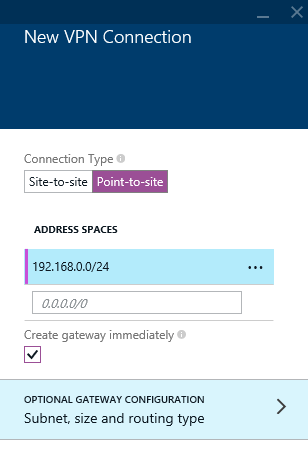
  4. On the New VPN Connection blade, select Point-to-site, in the Address Spaces prompts, enter in each of your subnets, ensure Create gateway immediately is checked and then click on Subnet, size and routing type
    Azure - Create - Networking - Virtual Networking - Virtual Network - VPN Connections - New VPN Connection
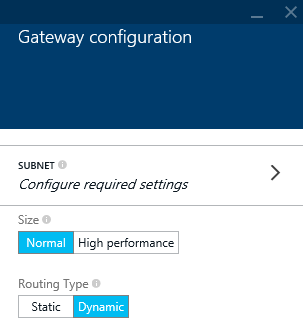
  5. Select Subnet on the Gateway configuration blade
    Azure - Create - Networking - Virtual Networking - Virtual Network - VPN Connections - Gateway configuration
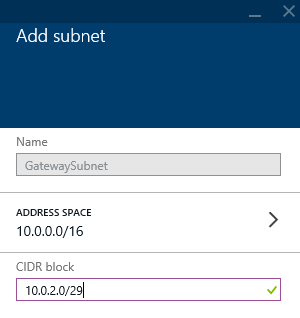
  6. Enter in a new subnet that will be used for clients connecting through the VPN tunnel and then click OK
    Azure - Create - Networking - Virtual Networking - Virtual Network - VPN Connections - Gateway configuration - Add subnet
  7. Click OK on the Gateway configuration blade
    Azure - Create - Networking - Virtual Networking - Virtual Network - VPN Connections - Gateway configuration w Subnet
  8. Click OK on the New VPN Connection blade
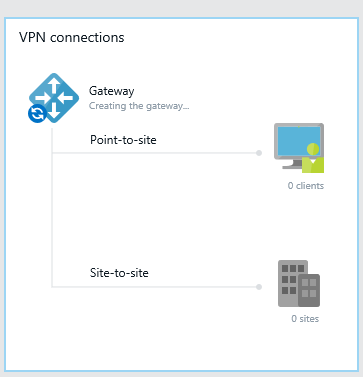
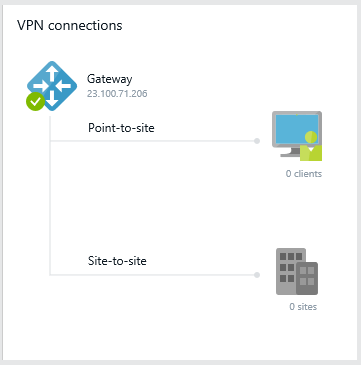
  9. If you refresh the Azure portal, you should now see on the VPN connections section that it is trying to create the gateway.  Based on my experience, this process can take awhile to setup (10-15 minutes), so this is something you will want to provision and then get up and grab a cup of coffee
    1. In the process of provisioning
      Azure - VPN Connections - Creating the gateway
    2. Provisioned gateway
      Azure - VPN Connections - Gateway created
  10. Generate and upload certificates
    1. Generate a self-signed SSL certificate via command prompt
      1. You can use whatever utility you are most comfortable with; I'd recommend using makecert if you have Visual Studio installed (can be found here: C:\Program Files (x86)\Microsoft SDKs\Windows\v7.1A\Bin\x64).  If you don't have Visual Studio, you can use openSSL
      2. Using Visual Studio's command prompt
        1. Execute the following command to generate a root certificate
          1. makecert -sky exchange -r -n "CN=AzureVLANRootCertificate" -pe -a sha1 -len 2048 -ss My "AzureVLANRootCertificate.cer"
        2. Execute the following command to generate a client certificate
          1. makecert.exe -n "CN=AzureVLANClientCertificate" -pe -sky exchange -m 96 -ss My -in "AzureVLANRootCertificate" -is my -a sha1
        3. Notes: The root certificate and client certificate can have whatever name you wish, just ensure that in the client certificate, the root certificate's name matches the root certificate you just generated
  11. Upload your root certificate
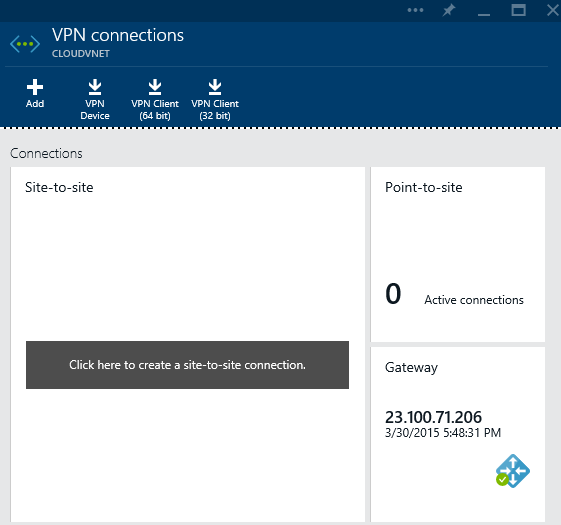
    1. On the Virtual Network blade, click on VPN Connections
      Azure - Create - Networking - Virtual Networking - Virtual Network - VPN Connections Provisioned
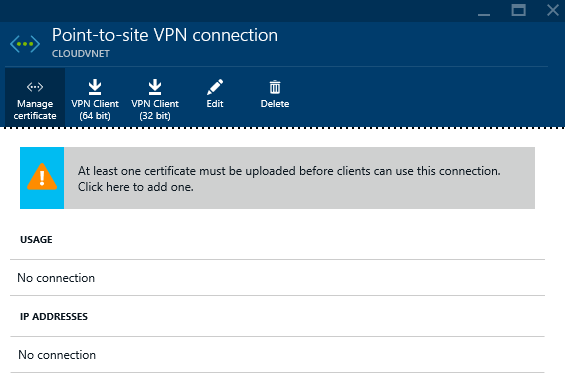
    2. Click on Point-to-siteAzure - Create - Networking - Virtual Networking - Virtual Network - VPN Connections Provisioned - VPN connections - Point-to-Site
    3. Click on Manage Certificate
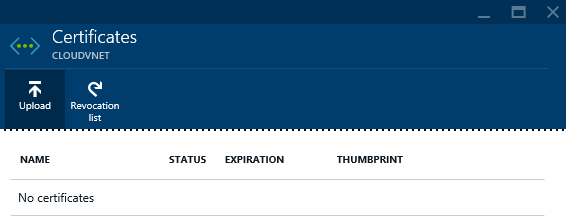
      Azure - Create - Networking - Virtual Networking - Virtual Network - VPN Connections Provisioned - VPN connections - Point-to-Site - Manage Certificate
    4. Click on Upload
      Azure - Create - Networking - Virtual Networking - Virtual Network - VPN Connections Provisioned - VPN connections - Point-to-Site - Manage Certificate - Upload
    5. Select your certificate and click OK
      Azure - Create - Networking - Virtual Networking - Virtual Network - VPN Connections Provisioned - VPN connections - Point-to-Site - Manage Certificate - Upload - Certificate
  12. Establish a connection
    1. Go back to the Point-to-site connection blade and select the VPN Client for your supported OS
      Azure - Create - Networking - Virtual Networking - Virtual Network - VPN Connections Provisioned - VPN connections - Point-to-Site - VPN Client 64-bit
    2. Save and Run the VPN installer
      Azure - Save - Point-to-site VPN
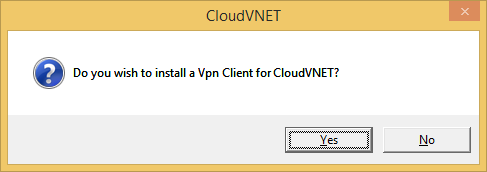
    3. Install the VPN Client by clicking on Yes
      Azure - Save - Point-to-site VPN - Install
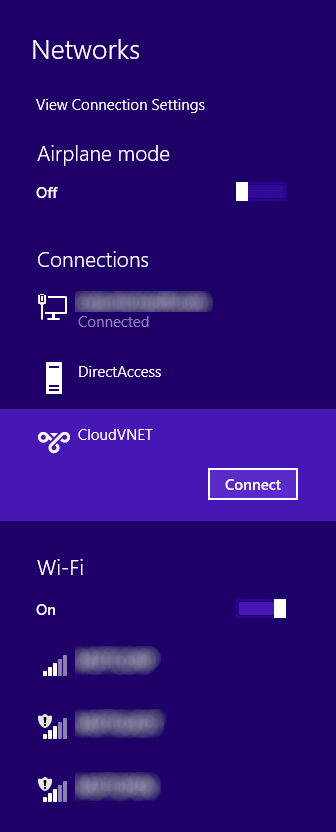
    4. Connect to Azure via the VPN connection
      Windows 8 - Networks - CloudVNET
    5. Click Connect on the VPN dialog
      Windows 8 - Networks - CloudVNET - CloudVNET
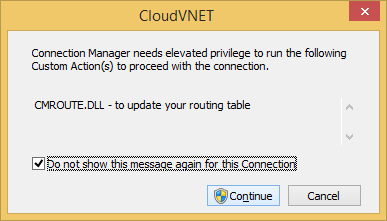
    6. Click Continue to temporarily add routes to Azure while the VPN connection is established
      Windows 8 - Networks - CloudVNET - CloudVNET Routes
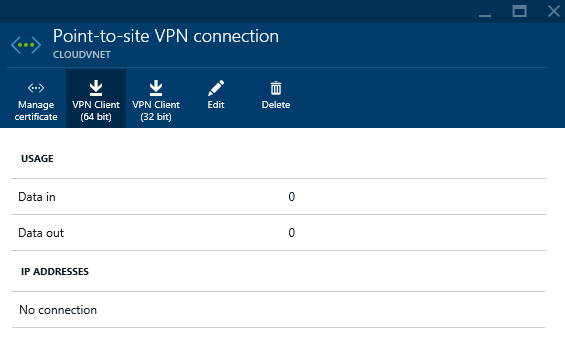
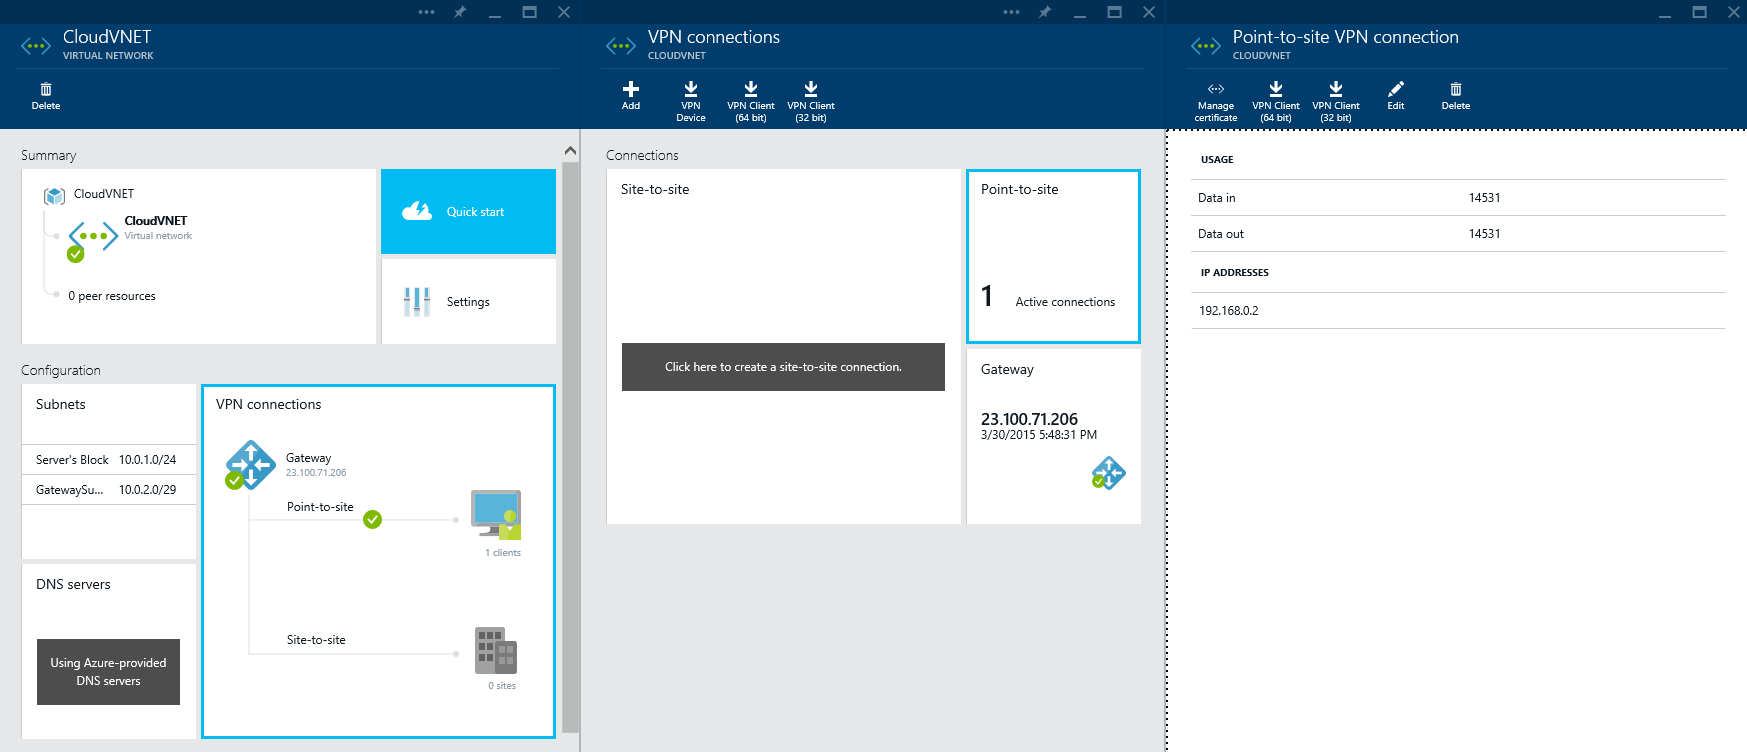
  13. Verify you are connected via the Point-to-site connections blade
    Azure - Networking - Point-to-site VPN connection established

At this point, this specific client that is connected to Azure should have access to all internal devices on the Server's subnet we created in step 2-4! 🙂

Notes:

Official MSDN information can be found here: https://msdn.microsoft.com/en-us/library/azure/dn133792.aspx

Azure - Error Number: 18456 Error Code: -2146232060 Message: Login failed for user 'yourusername'

Symptom: When trying o provision a new website or database, you receive the following error message:

Error Number: 18456 Error Code: -2146232060 Message: Login failed for user 'yourusername'
Error Number 18456 Error Code -2146232060 Message Login failed for user yourusername

Solution: The username or password you specified for your database is incorrect; you should be using the credentials your provided when you provisioned your existing SQL server, not what you would like as a virtual user to provision with the new database.

---

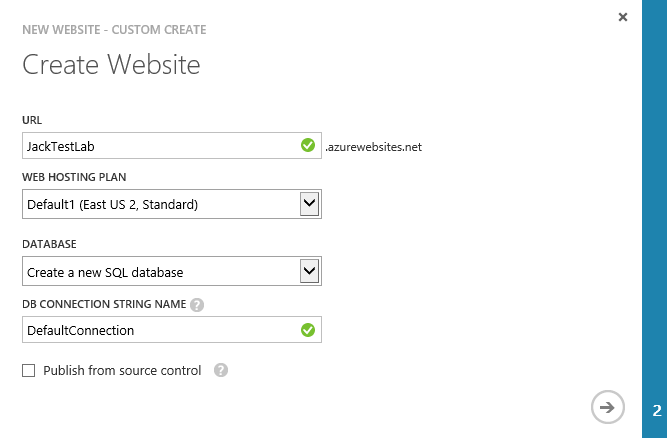
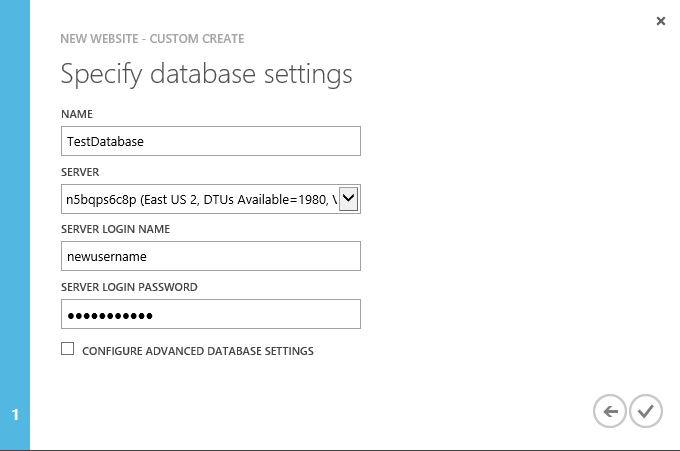
Since it is early this AM, I rushed through the portal thinking, oh since I am creating a new database, the portal will prompt me to create a new virtual account; this is not intended functionality. In the screenshot below you can see we select "Create a new SQL database"

Create Website - Create a new SQL database

In this scenario, I actually wish to use an existing database server I have already provisioned.  When using an existing database, you will need to provide the credentials to the server itself so the new database can be provisioned.  If you wish to add a separate user account that only has access to this database for a specific application, which is a recommended practice for security, you will need to use SQL Manager, Visual Studio, or another utility to connect to the database and provision a new virtual user account with privileges to this particular database.

New Website - Custom Create - Specify database settings - existing server