Tag Archives: server 2012 r2

[Tutorial] Configuring BitLocker to store recovery keys in Active Directory

This guide is more of a reflection on the steps I took to publish the BitLocker recovery keys of machines deployed on an Active Directory domain.  Microsoft has gobs and gobs of information on this subject which can be a tad overwhelming, so I have tried to consolidate this article down as much as possible, citing Microsoft sources where found.  If you have any questions, comments, feedback, please feel free to leave a message below.

Prerequisites

  • Domain Controllers are running Windows Server 2003 SP1 or greater
  • Schema Admin or an Enterprise Admin user account privileges

Step 1: Verify your schema is ready (and extend it if applicable)

Based on what I have read, if your DCs were introduced with Server 2008 Beta 3 or later, your schema will be ready, if you started with anything older, your AD environment will more than likely will not have the schema objects/attributes.

Verify you have the schema changes if running Server 2003 R2 or older:

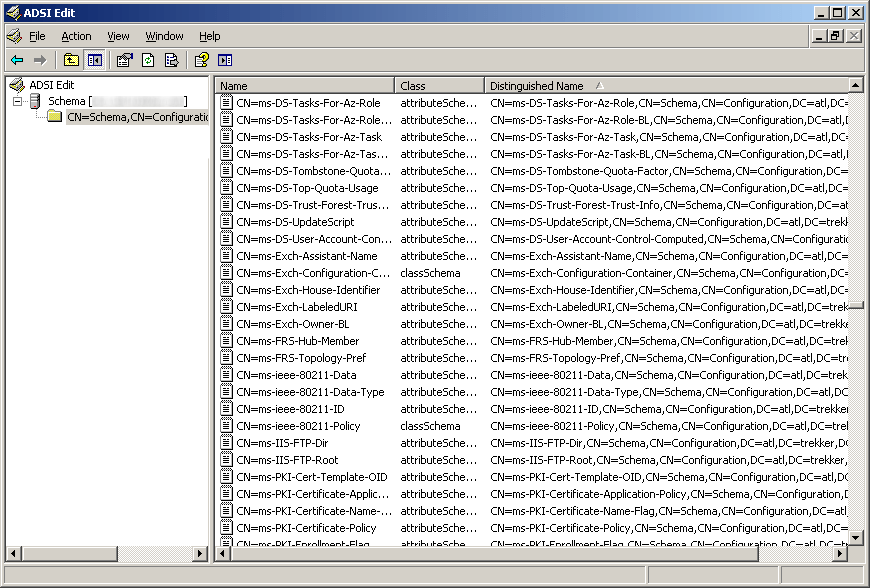
If you are on Server 2003 you will need to open up ADSI edit and verify you have the schema changes (here you can see we are missing the five schema changes for BitLocker)

ADSI Edit - Server 2003 R2 - BitLocker

Verify you have the schema changes if running Server 2008 or newer:

If you are on Server 2008 or greater and have powershell, you can execute the following command (here you can see we have the necessary schema changes to proceed, if you receive 0 results, you will need to extend your schema):

Get-ADObject -SearchBase ((GET-ADRootDSE).SchemaNamingContext) -Filter {Name -like "ms-FVE-*"}

AD-Schema objects for BitLocker

Extending your schema if you don't have the schema changes above

If you need the schema update (you are missing the five schema objects listed in the above powershell command), you can execute the following command via Command Prompt on your Domain Controller:

Note: If you are on Server 2008 r2, it is recommended you extend your schema to Server 2012 or if you just want the BitLocker attributes, use these two ldf files: https://technet.microsoft.com/en-us/library/jj635854.aspx

ldifde -i -v -f BitLockerTPMSchemaExtension.ldf -c "DC=X" "DC=mydomain,DC=local" -k -j .

Yes, you do want the trailing period (.) at the end of the command.  It is literally apart of the command, so ensure you execute the command exactly like above (changing your domain of course).   You can see the official technet article here for more information on the command: https://technet.microsoft.com/en-us/library/cc766015(v=ws.10).aspx

If you would like to verify everything went well, Microsoft has posted some output on what the command should write: https://technet.microsoft.com/en-us/library/cc722060(v=ws.10).aspx

Step 2: Set the required permissions for backing up TPM password information

Next, we need to add an access control entry (ACE) so that backing up TPM recovery information is possible.

Head over to the following Microsoft document and download each of the VBS scripts they have displayed: Save the following VBS scripts from the following website: https://technet.microsoft.com/en-us/library/dn466534.aspx#Sample scripts

  1. Ensure you are on one of your domain controllers
  2. Open up a command prompt as an administrator
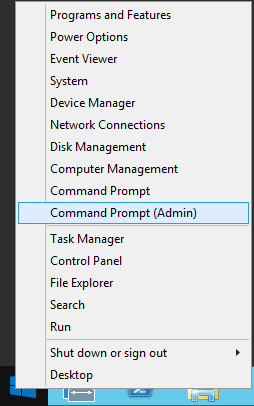
    Server 2012 - Administrative Command Prompt
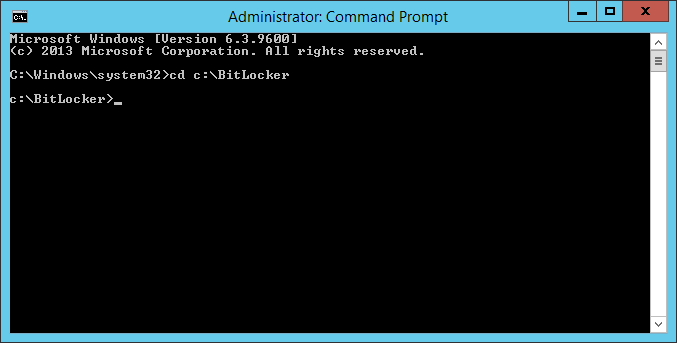
  3. Navigate to your BitLocker folder
    BitLocker Folder C Drive
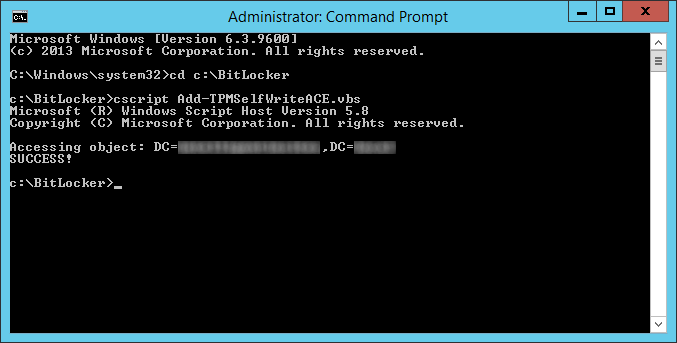
  4. Execute the following command on your domain controller
    1. cscript Add-TPMSelfWriteACE.vbs
      cscript add-tpmselfwriteace for bitlocker
  5. Delegate msTPM-OwnerInformation
    1. Open up Active Directory Users and Computers
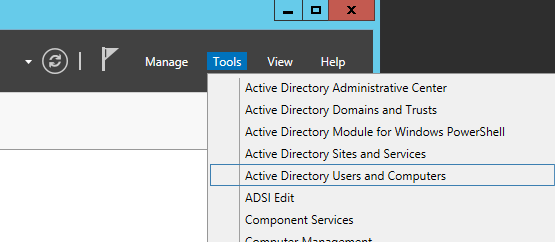
      Server Manager - Active Directory Users and Computers
    2. Navigate to the OU that stores your computers, right click, and select Delegate Control...
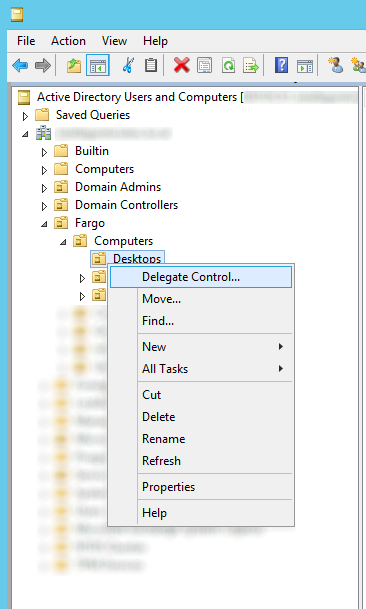
      Active Directory Users and Computers - Computers - Delegate Control
    3. Click Next > button on the welcome screen
      Delegation of Control Wizard - Welcome
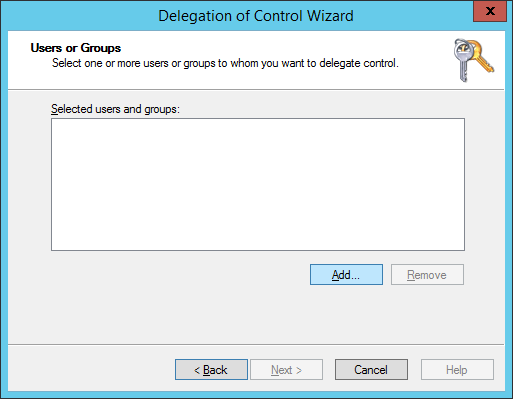
    4. Click the Add... button
      Delegation of Control Wizard - Users or Groups - Add
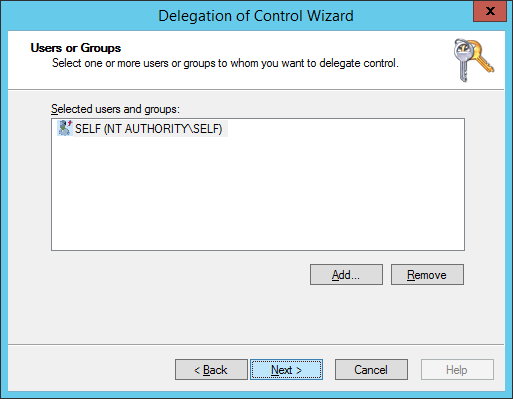
    5. Type in SELF, hit the Check Names button, and click OK
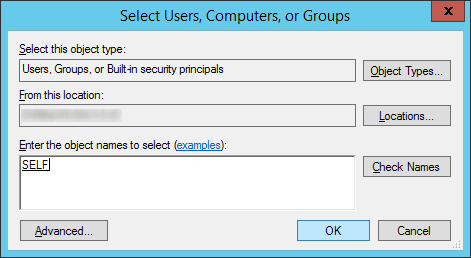
      Delegation of Control Wizard - Users or Groups - Add - SELF
    6. Click Next >
      Delegation of Control Wizard - Users or Groups - Add - SELF - Next
    7. Select Create a custom task to delegate and click Next >
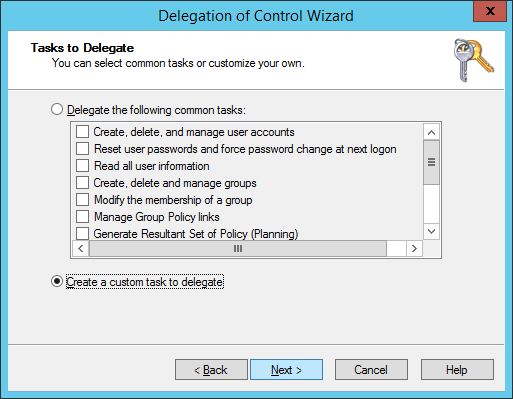
      Delegation of Control Wizard - Tasks to Delegate - Create a custom task to delegate
    8. Check Only the following objects in the folder, check Computer objects, click Next >
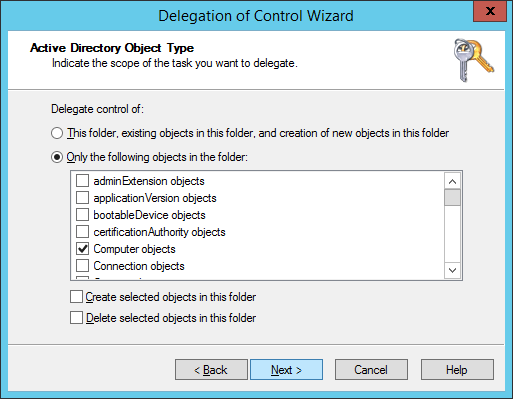
      Delegation of Control Wizard - Active Directory Object Type - Only the following objects in the folder - Computer Objects
    9. Check Property-specific, scroll down and find Write msTPM-OwnerInformation and click Next >
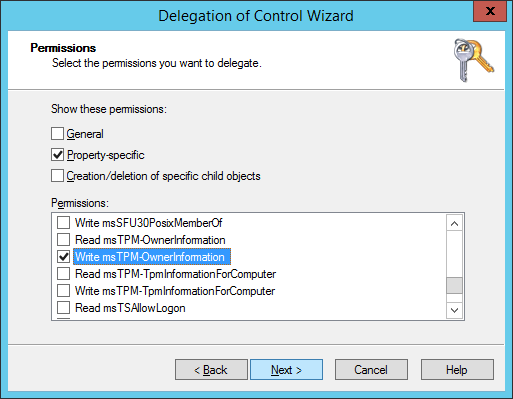
      Delegation of Control Wizard - Permissions - Property-specific - Write msTPM-OwnerInformation
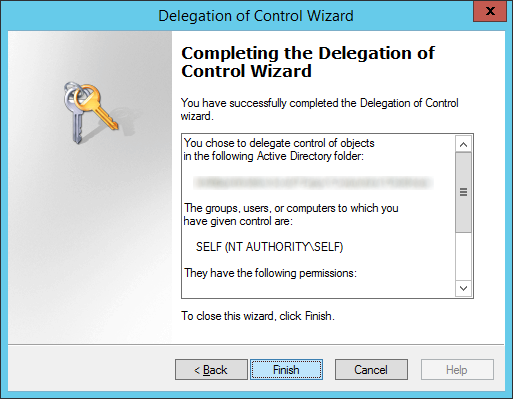
    10. Click Finish
      Delegation of Control Wizard - SELF - Finish

Step 3: Configure group policy to back up BitLocker and TPM recovery information to Active Directory

In this step, we will push out the actual policy that tells the machine to push BitLocker and TPM recovery info to Active Directory.  We will try to follow some of Microsoft's best practices on deploying the group policy here: https://technet.microsoft.com/en-us/library/dd875532(WS.10).aspx

  1. Login to your domain controller
  2. In Server Manager, open up Group Policy Management
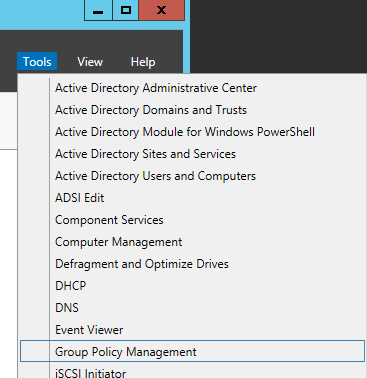
    Server Manager - Tools - Group Policy Management
  3. Select the policy you want to edit/deploy for this and hit Edit...
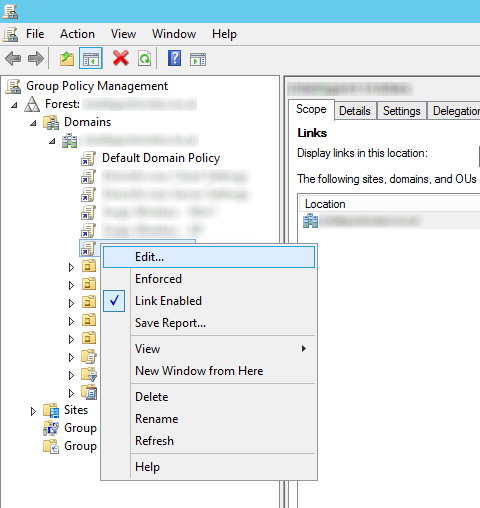
    Group Policy Management - Edit
  4. Expand Computer Configuration, expand Policies, expand Administrative Templates, open Windows Components, and then select BitLocker Drive Encryption
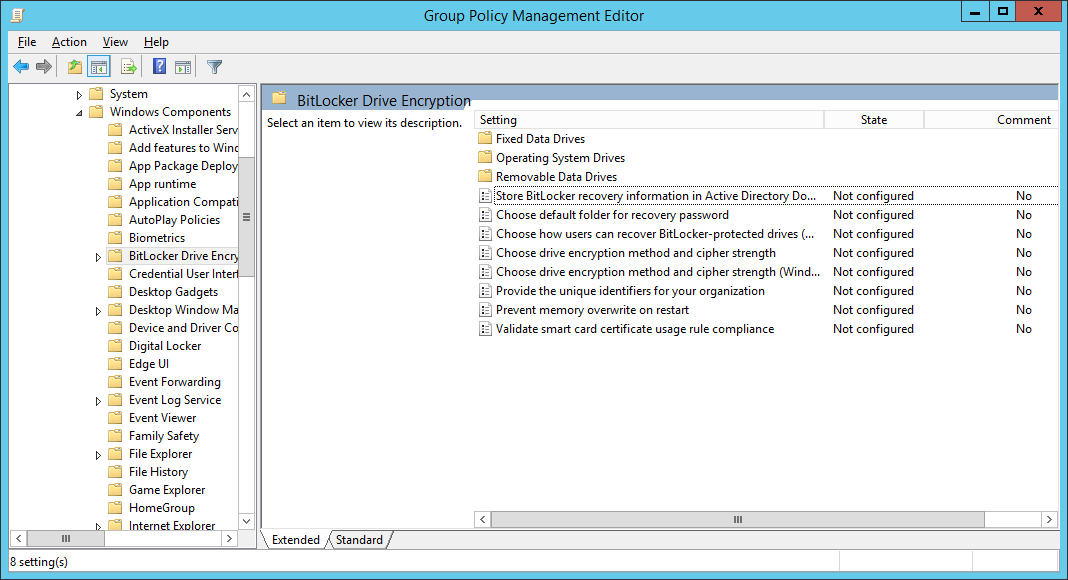
    Group Policy Management Editor - Computer - Configuration - Administrative Templates - Windows Components - BitLocker Drive Encryption
  5. Follow the below configuration for each policy (most of these are Microsoft's best practices with a few notes I have made in the Settings)
    CATEGORY SETTING NAME SETTING
    Global Store BitLocker recovery information in Active Directory Domain Services  Set to enabled, check Require BitLocker backup to AD DS, ensure Recovery passwords and key packages is selected
    Global Choose drive encryption method and cipher strength Set to not configured.
    Global Prevent memory overwrite on restart Set to not configured.
    Global Provide the unique identifiers for your organization Set to enabled, and enter an identifier in the BitLocker identification field (based on what I can tell, you can enter your organization name here).
    Operating system drives Choose how BitLocker-protected operating system drives can be recovered Set to enabled, Allow 48-digit recovery password, Allow 256-bit recovery key, omit recovery options from the BitLocker setup wizard, Store recovery passwords and key packages, Do not enable BitLocker until recovery information is stored to AD DS for operating system drives.For more information about storing BitLocker recovery information in AD DS, see Backing Up BitLocker and TPM Recovery Information to AD DS.
    Operating system drives Configure minimum PIN length for startup Set to enabled, and require a personal identification number (PIN) of at least seven numerals.
    Operating system drives Require additional authentication at startup Set to enabled, and require the use of a startup PIN with a Trusted Platform Module (TPM).
    Fixed data drives Choose how BitLocker-protected fixed drives can be recovered Set to enabled, Allow 48-digit recovery password, Allow 256-bit recovery key, omit recovery options from the BitLocker setup wizard, Store recovery passwords and key packages, Do not enable BitLocker until recovery information is stored to AD DS for operating system drives.
    Fixed data drives Configure use of passwords for fixed data drives If your organization does not have a public key infrastructure (PKI), set to enabled, require password complexity, and set a minimum password length of at least 12 characters.
    Fixed data drives Configure use of smart cards on fixed data drives If your organization has a PKI, set to enabled, and require the use of smart cards with fixed data drives.
    Removable data drives Choose how BitLocker-protected removable drives can be recovered Set to enabled, Allow 48-digit recovery password, Allow 256-bit recovery key, omit recovery options from the BitLocker setup wizard, Store recovery passwords and key packages, Do not enable BitLocker until recovery information is stored to AD DS for operating system drives.
    Removable data drives Configure use of passwords for removable data drives Set to enabled, set a minimum password length of at least 12 characters, and require password complexity if your organization does not have a PKI or if there is a need to access BitLocker-protected drives from computers running Windows XP or Windows Vista.
    Removable data drives Configure use of smart cards on removable data drives Set to enabled, and require the use of smart cards with removable data drives if your organization has a PKI.
    Removable data drives Control use of BitLocker on removable drives Set to enabled, Allow users to apply BitLocker protection on removable data drives, and uncheck Allow users to suspend and decrypt BitLocker protection on removable data drives.
    Removable data drives Deny write access to removable data drives not protected by BitLocker Set to enabled, and Do not allow write access to devices configured in another organization.

    noteNOTE
    This policy cannot be enabled if your organization uses recovery keys or startup keys. Recovery keys and startup keys must be stored on unencrypted USB drives.
  6. Next, configure Group Policy to backup the TPM owner information; open Computer Configuration, open Administrative Templates, open System, and then open Trusted Platform Module Services
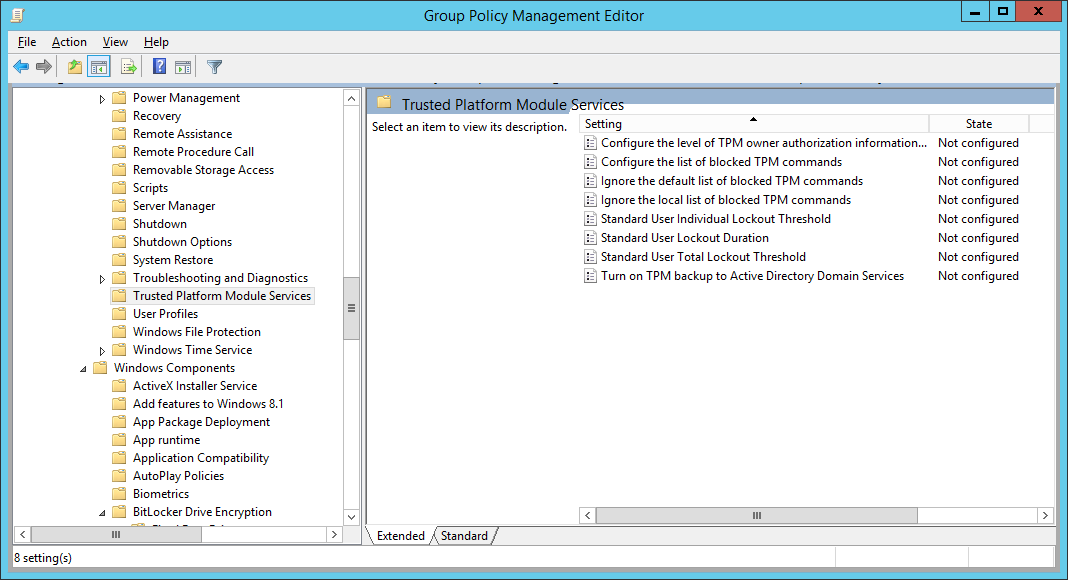
    Group Policy Management Editor - Computer - Configuration - Administrative Templates - System - Trusted Platform Module Services
  7. Double-click Turn on TPM backup to Active Directory, check Enabled, and click OK
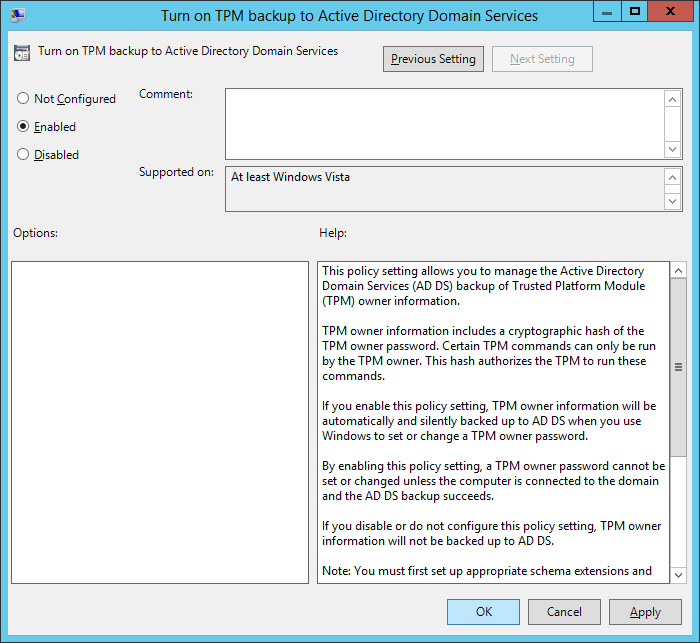
    Group Policy Management Editor - Computer - Configuration - Administrative Templates - System - Trusted Platform Module Services - Turn on TPM backup to ADDS - Enabled

    1. Note: If you are on Server 2008 R2, make sure you select Require TPM backup to AD DS.  Based on what I can find, if you are on Server 2012 R2, this option has been removed.
  8. Define a BitLocker Drive Encryption Data Recovery Agent
    1. Open Computer Configuration, open Policies, open Windows Settings, open Security Settings, open Public Key Policies, and right click on BitLocker Drive Encryption and select Add Data Recovery Agent...
    2. Click Next > on the Add Recovery Agent Wizard
    3. Select a Recovery agent and click Next >
      1. If you are using PKI, select the Browse Directory... button and select a user that has been configured with an EFS certificate.  I found this guide the most helpful on setting this process up (if anyone has a guide to an official Microsoft document explaining the best practices on configuring this, please drop a comment below: http://technetlibrary.com/use-data-recovery-agent-dra-decrypt-encrypted-files-domain/163)
        1. Here is the only official Microsoft article that I could find that explains the configuration of the Data Recovery Agent: https://technet.microsoft.com/en-us/library/dd875560%28v=ws.10%29.aspx#BKMK_proc_dra
      2. If you don't have a PKI environment setup, you can use a self signed certificate by opening up a command prompt and executing the following command: cipher /r:administrator
        1. Copied from the cipher command: This command generates an EFS recovery key and certificate, then writes them to a .PFX file (containing certificate and private key) and a .CER file (containing only the certificate). An administrator may add the contents of the .CER to the EFS recovery policy to create the recovery key for users, and import the .PFX to recover individual files. If SMARTCARD is specified, then writes the recovery key and certificate to a smart card. A .CER file is generated (containing only the certificate). No .PFX file is generated.
    4. Click Finish on the Add Recovery Agent Wizard

Step 4: Install the BitLocker Password Recovery Viewer

  1. On your domain controller, open up Server Manager
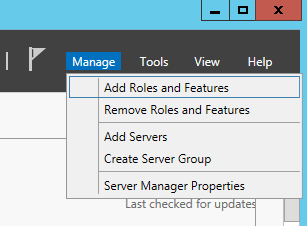
  2. Select Manage, Add Roles and Features
    Server 2012 - Manage - Add Roles and Features
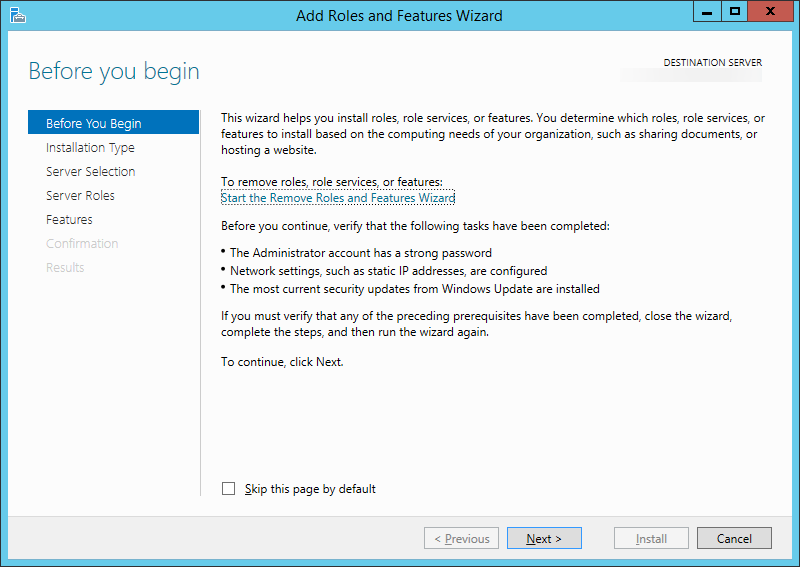
  3. Click Next >
    Add Roles and Features Wizard - Before you begin
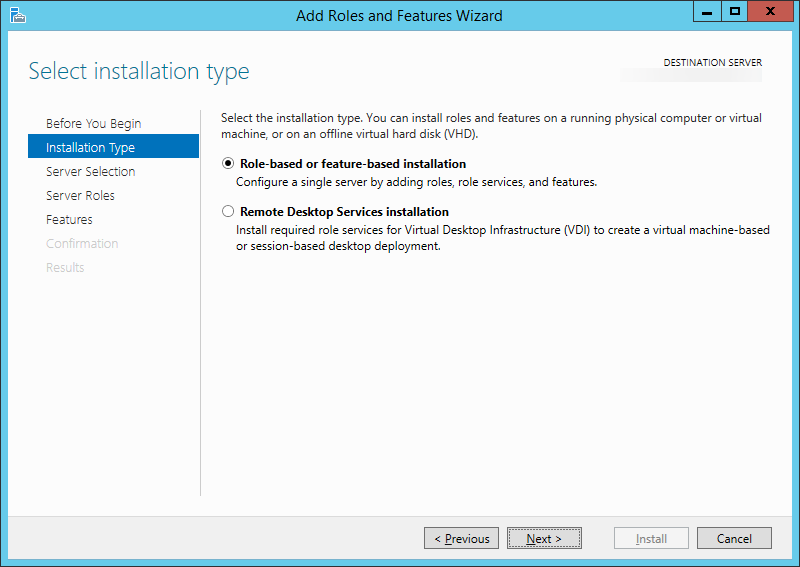
  4. Click Next >
    Add Roles and Features Wizard - Select installation type
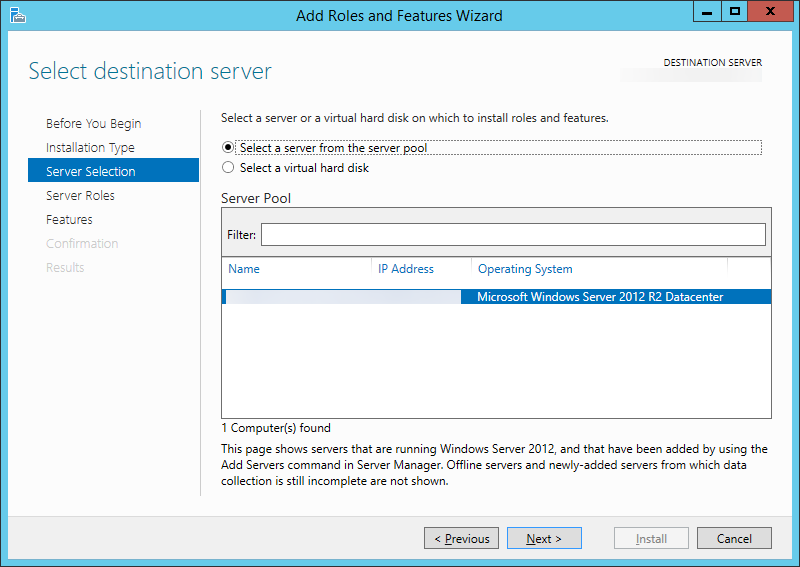
  5. Click Next >
    Add Roles and Features Wizard - Select destination server
  6. Click Next > (You don't need to add any additional roles)
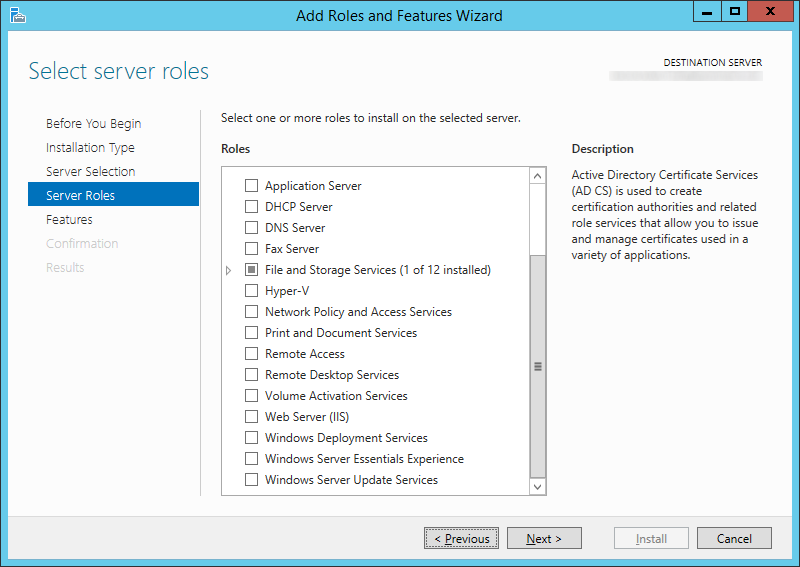
    Add Roles and Features Wizard - Server Roles - Default
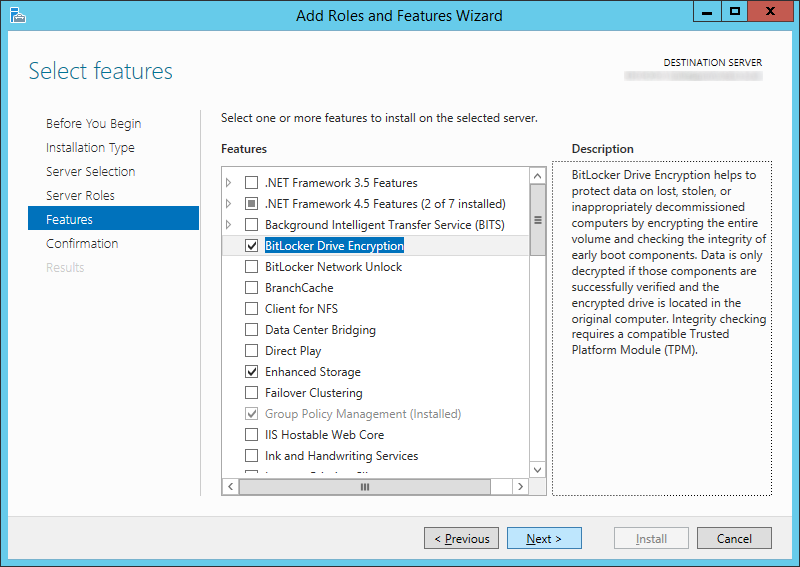
  7. Check BitLocker Drive Encryption (click Add Features when prompted) and click Next >
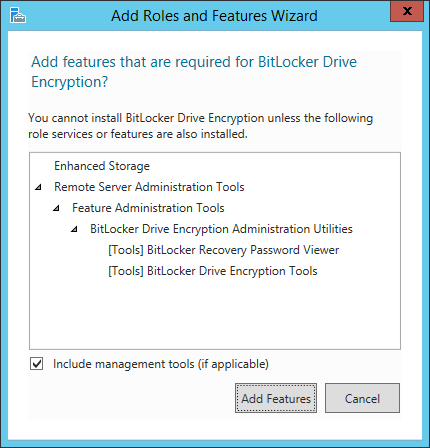
    Add Roles and Features Wizard - Features - BitLocker Drive Encryption - Add features dialog
    Add Roles and Features Wizard - Features - BitLocker Drive Encryption
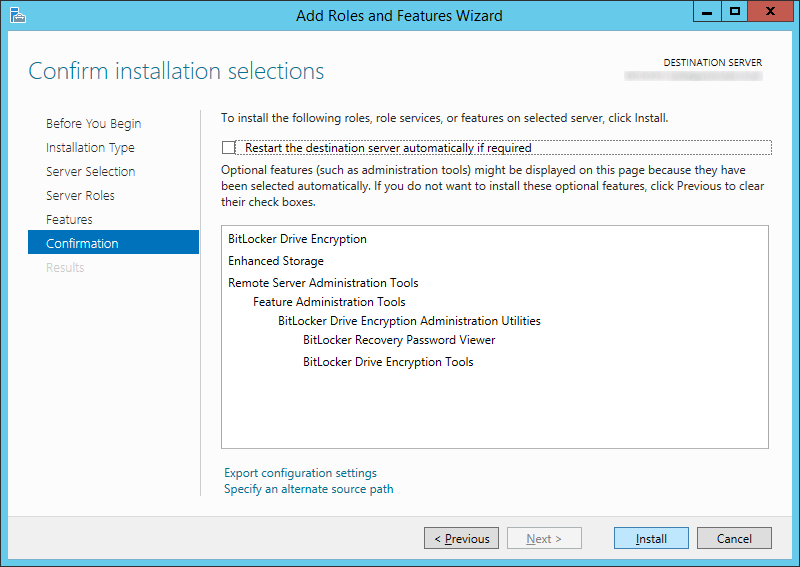
  8. Click Install
    Add Roles and Features Wizard - Features - BitLocker Drive Encryption - Install
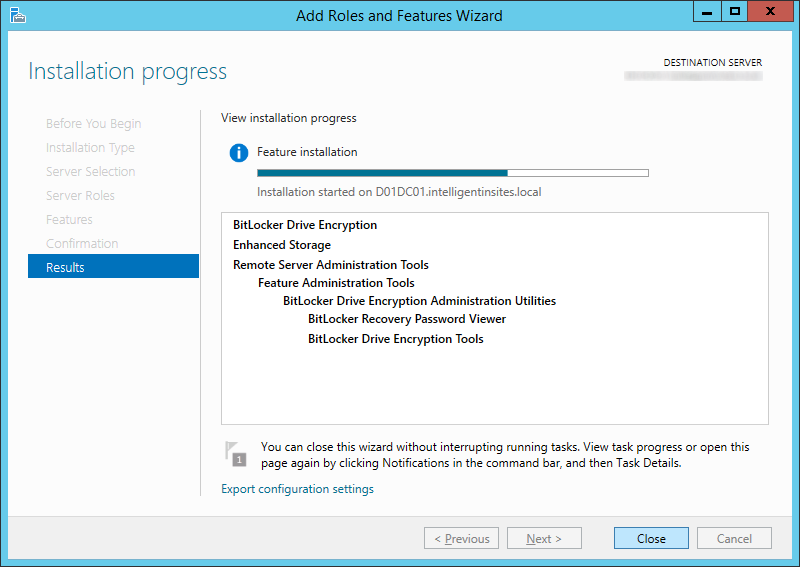
  9. Click Close
    Add Roles and Features Wizard - Features - BitLocker Drive Encryption - Install - Close
  10. Repeat these steps for each domain controller you want to manage BitLocker on

Step 5: Push existing BitLocker protected machines to Active Directory (optional step)

  1. Open an Administrative Command prompt on the client machine that has a BitLocker enabled drive
    Server 2012 - Administrative Command Prompt
  2. Execute the following command to get your current BitLocker information
    manage-bde -protectors -get c:
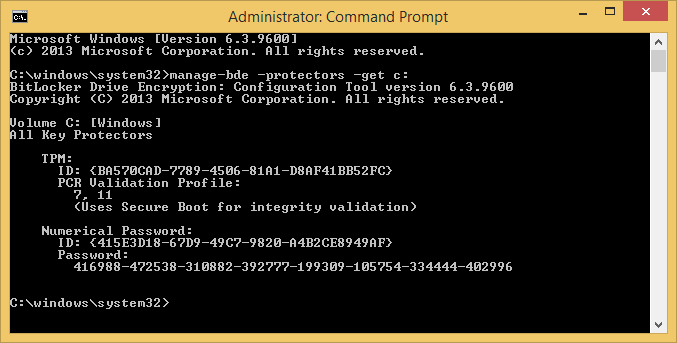
    command prompt - manage-bde -protectors -get c
  3. Execute the following command to publish this information to AD
    manage-bde -protectors -adbackup c: -id {yourNumericalPasswordID}
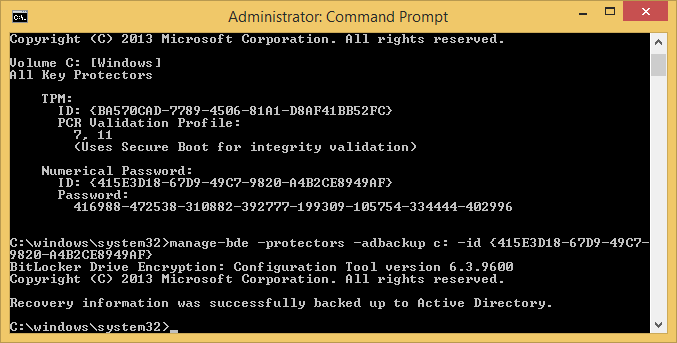
    command prompt - manage-bde -protectors -adbackup c-id
  4. Login to one of the domain controllers you installed the BitLocker Recovery Viewer feature and open up Active Directory Users and Computers
    Server Manager - Active Directory Users and Computers
  5. Find your computer object and right click Properties on it
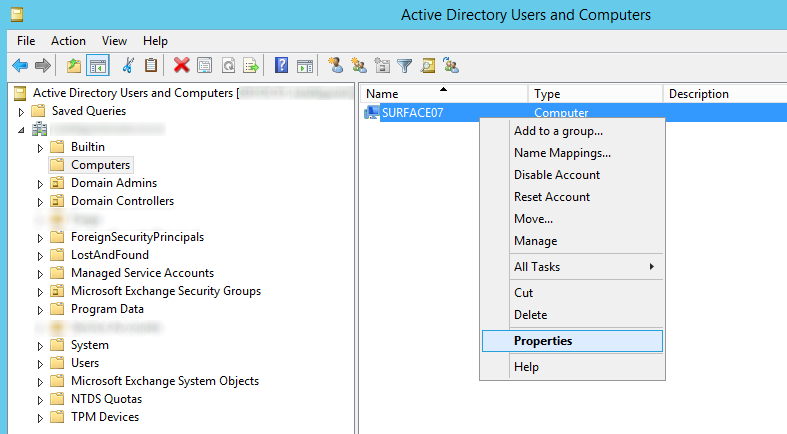
    Active Directory Users and Computers - Computers - Computer - Properties
  6. Select the BitLocker Recovery tab and verify the recovery passwords have been published
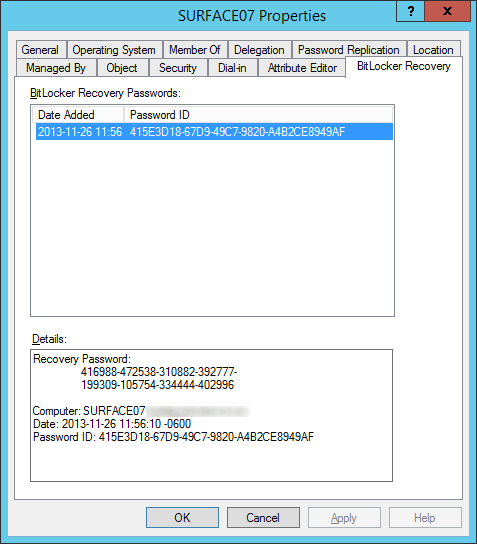
    Active Directory Users and Computers - Computers - Computer - Properties - BitLocker Recovery Tab


Notes: By default, Windows Vista and greater clients running BitLocker will backup the owner the owner password to the msTPM-OwnerInformation attribute.  If you notice this field is <Not Set> for your Windows 8 and greater machines, ensure you check the TPM Devices container in Active Directory Users and Computers for the recovery information.

To automate the process of looking up the Bitlocker Recovery Password and Owner TPM Recovery Key, I have written a powershell script which can be found here: http://jackstromberg.com/2015/02/exporting-tpm-owner-key-and-bitlocker-recovery-password-from-active-directory-via-powershell/
SYSVOL and Group Policy out of Sync on Server 2012 R2 DCs using DFSR

Recently while making changes to group policy, I noticed a slew of issues between clients not accepting the policy.  This eventually led me to the discovery that two of the DCs in this particular environment were not replicating properly and were resulting in inconsistent SYSVOL shares.

Symptoms

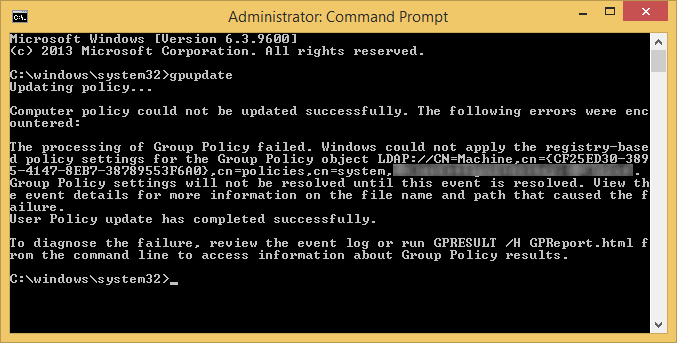
On the clients we were seeing the following errors when executing the gpupdate command:

gpupdate - processing of group policy failed - registry-based policy settings

Event Viewer Logs

Log Name: System
Source: Microsoft-Windows-GroupPolicy
Date: 7/25/2014 10:46:45 AM
Event ID: 1096
Task Category: None
Level: Error
Keywords:
User: SYSTEM
Computer: mymachine.mydomain.local
Description:
The processing of Group Policy failed. Windows could not apply the registry-based policy settings for the Group Policy object LDAP://CN=Machine,cn={CF25ED30-3895-4147-8EB7-38789553F6A0},cn=policies,cn=system,DC=mydomain,DC=local. Group Policy settings will not be resolved until this event is resolved. View the event details for more information on the file name and path that caused the failure.

On the DCs we were seeing the following events inside of Event Viewer -> Applications and Service Logs -> DFS Replication

Log Name: DFS Replication
Source: DFSR
Date: 7/25/2014 1:04:30 PM
Event ID: 4612
Task Category: None
Level: Error
Keywords: Classic
User: N/A
Computer: DC02.mydomain.local
Description:
The DFS Replication service initialized SYSVOL at local path C:\Windows\SYSVOL\domain and is waiting to perform initial replication. The replicated folder will remain in the initial synchronization state until it has replicated with its partner DC01.mydomain.local. If the server was in the process of being promoted to a domain controller, the domain controller will not advertise and function as a domain controller until this issue is resolved. This can occur if the specified partner is also in the initial synchronization state, or if sharing violations are encountered on this server or the sync partner. If this event occurred during the migration of SYSVOL from File Replication service (FRS) to DFS Replication, changes will not replicate out until this issue is resolved. This can cause the SYSVOL folder on this server to become out of sync with other domain controllers.

Additional Information:
Replicated Folder Name: SYSVOL Share
Replicated Folder ID: 2276C68D-BC24-46BF-B492-067919163EDA
Replication Group Name: Domain System Volume
Replication Group ID: D50C64AE-0A01-4F97-B838-069F0BCBE369
Member ID: 7ADF2D7C-7947-412C-A619-C0C0D72F6A9C
Read-Only: 0


Log Name: DFS Replication
Source: DFSR
Date: 7/25/2014 1:04:30 PM
Event ID: 5002
Task Category: None
Level: Error
Keywords: Classic
User: N/A
Computer: DC02.mydomain.local
Description:
The DFS Replication service encountered an error communicating with partner DC01 for replication group Domain System Volume.

Partner DNS address: DC01.mydomain.local

Optional data if available:
Partner WINS Address: DC01
Partner IP Address: 192.168.1.5

The service will retry the connection periodically.

Additional Information:
Error: 1753 (There are no more endpoints available from the endpoint mapper.)
Connection ID: D50C64AE-0A01-4F97-B838-069F0BCBE369
Replication Group ID: 4DCE6A8E-6271-48B6-A0D0-5447718B8FAB

Solution

We ended up having to manually preform an authoritive synchronization between the two DCs.  As you may know, DFSR no longer uses the same steps as FSR to do an authoritive sync.  Below are my notes and expereinces on completing an authoritive DFSR sync.  You can find the ofificial notes from Microsoft here: http://support.microsoft.com/kb/2218556/en-us

  1. Logon to your primary DC
  2. Stop the DFS Replication service
    1. Click on the Start menu, select Administrative Tools, and then click ServicesServices
    2. In the Name column, right-click DFS Replication or Netlogon, and then click Stop
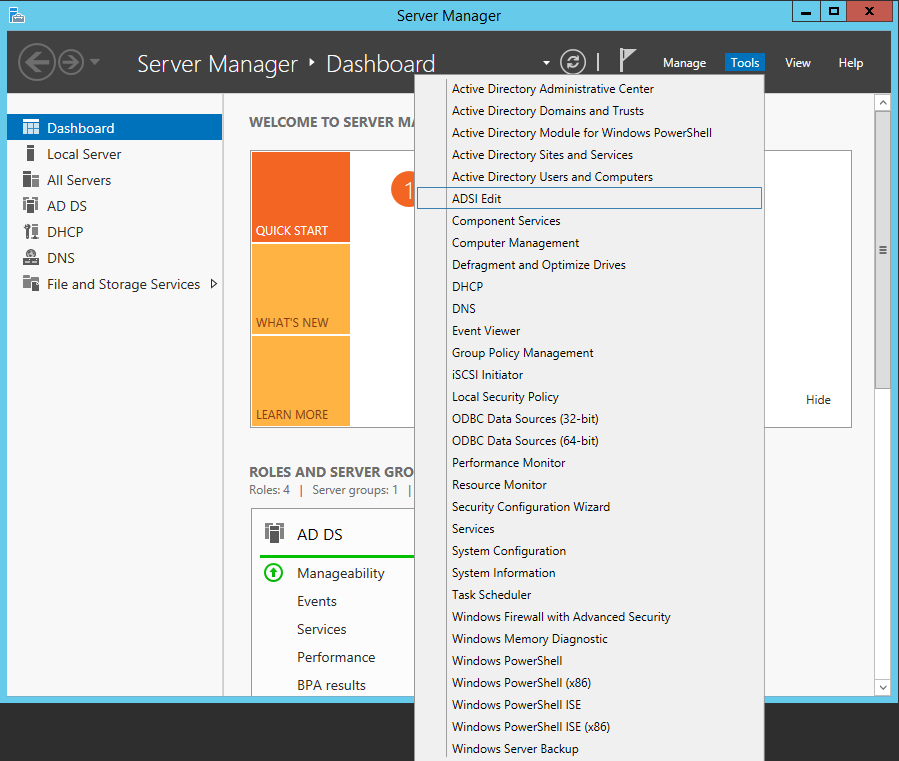
  3. Open up ADSI Edit
    Server Manager - ADSI Edit
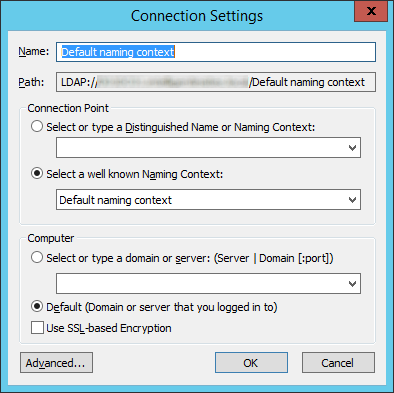
  4. Open up the Default naming context
    ADSI Edit - Connection Settings - Default naming context
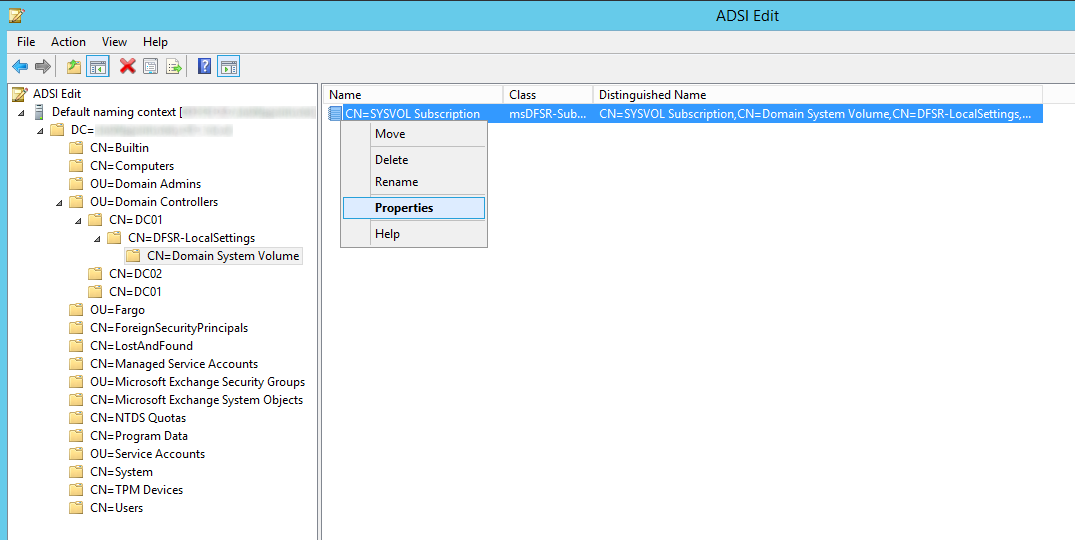
  5. Navigate to the following
    1. CN=SYSVOL Subscription,CN=Domain System Volume,CN=DFSR-LocalSettings,CN=<the server name to replicate from>,OU=Domain Controllers,DC=<domain>
      ADSI Edit - Default Naming Context - Domain Controllers - DC01 - DFSR-LocalSettings - Domain System Volume
  6. Change the following attributes to the following values
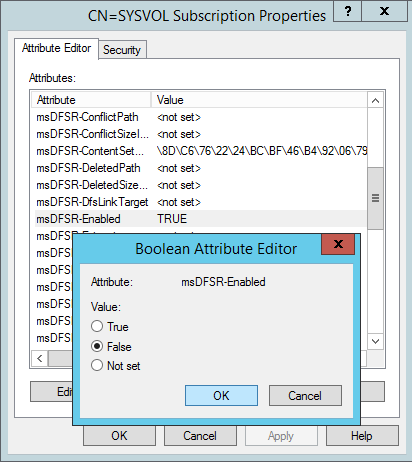
    1. msDFSR-Enabled=FALSE
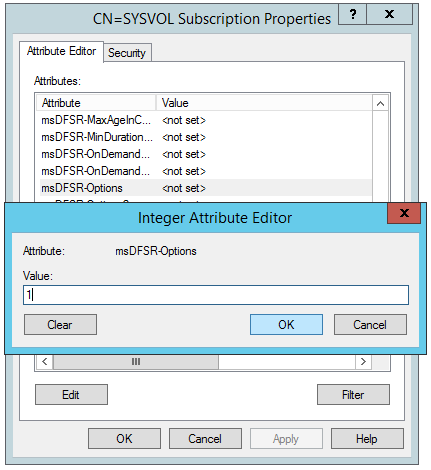
      msDFSR-options=1
      ADSI Edit - Default Naming Context - Domain Controllers - DC01 - DFSR-LocalSettings - Domain System Volume - msDFSR-Enabled - False
      ADSI Edit - Default Naming Context - Domain Controllers - DC01 - DFSR-LocalSettings - Domain System Volume - msDFSR-Options - 1
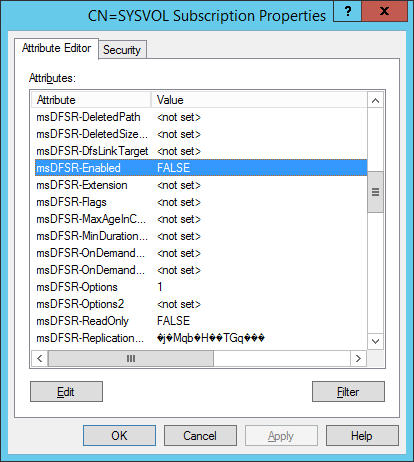
      Both values applied
      ADSI Edit - Default Naming Context - Domain Controllers - DC01 - DFSR-LocalSettings - Domain System Volume - msDFSR-Options - msDFSR-Enabled

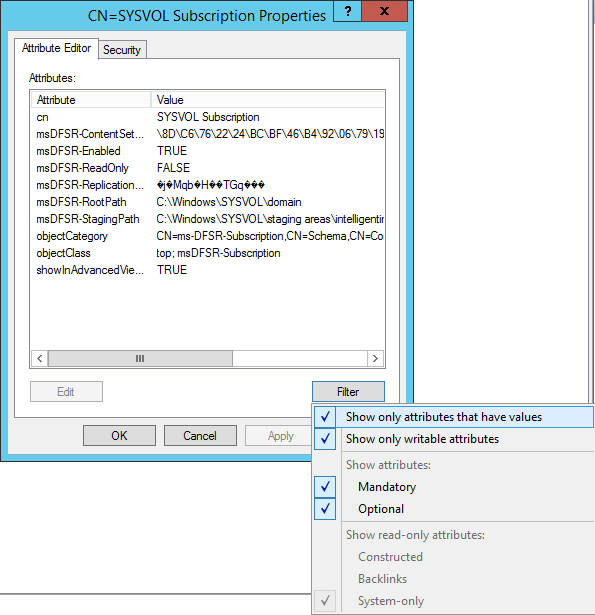
      1. Note: If you cannot see msDFSR-options, uncheck Show only attributes that have values
        ADSI Edit - Default Naming Context - Domain Controllers - DC01 - DFSR-LocalSettings - Domain System Volume - Show only attributes that have values
  7. On the ALL other DCs, change the msDFSR-Enabled attribute to False
    ADSI Edit - Default Naming Context - Domain Controllers - DC01 - DFSR-LocalSettings - Domain System Volume - msDFSR-Enabled - False
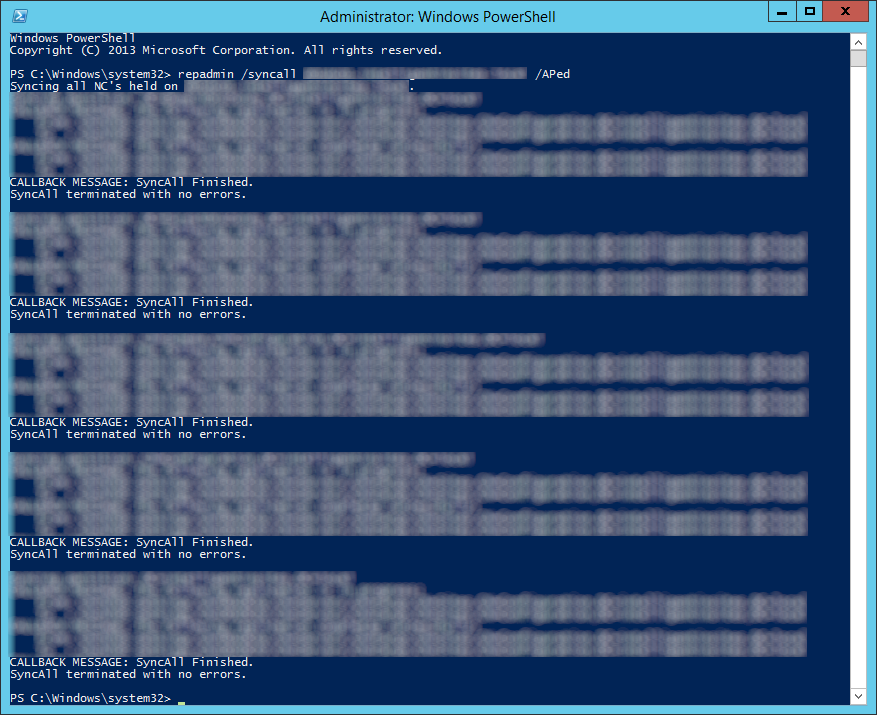
  8. Force Active Directory replication throughout the domain (ensure all sync resposnes terminate with no errors).
    1. repadmin /syncall primary_dc_name /APed
      repadmin -syncall -aped

      1. NOTE: Here is a list of what the switches mean
        1. /A: Perform /SyncAll for all NC's held by <Dest DSA> (ignores <Naming Context>)
        2. /P: Push changes outward from home server (default: pull changes)
        3. /e: Enterprise, cross sites (default: only home site)
        4. /d: ID servers by DN in messages (instead of GUID DNS)
  9. Start the DFSR service back up on the authoritive DC
    1. Click on the Start menu, select Administrative Tools, and then click Services
      Services
    2. In the Name column, right-click DFS Replication or Netlogon, and then click Start
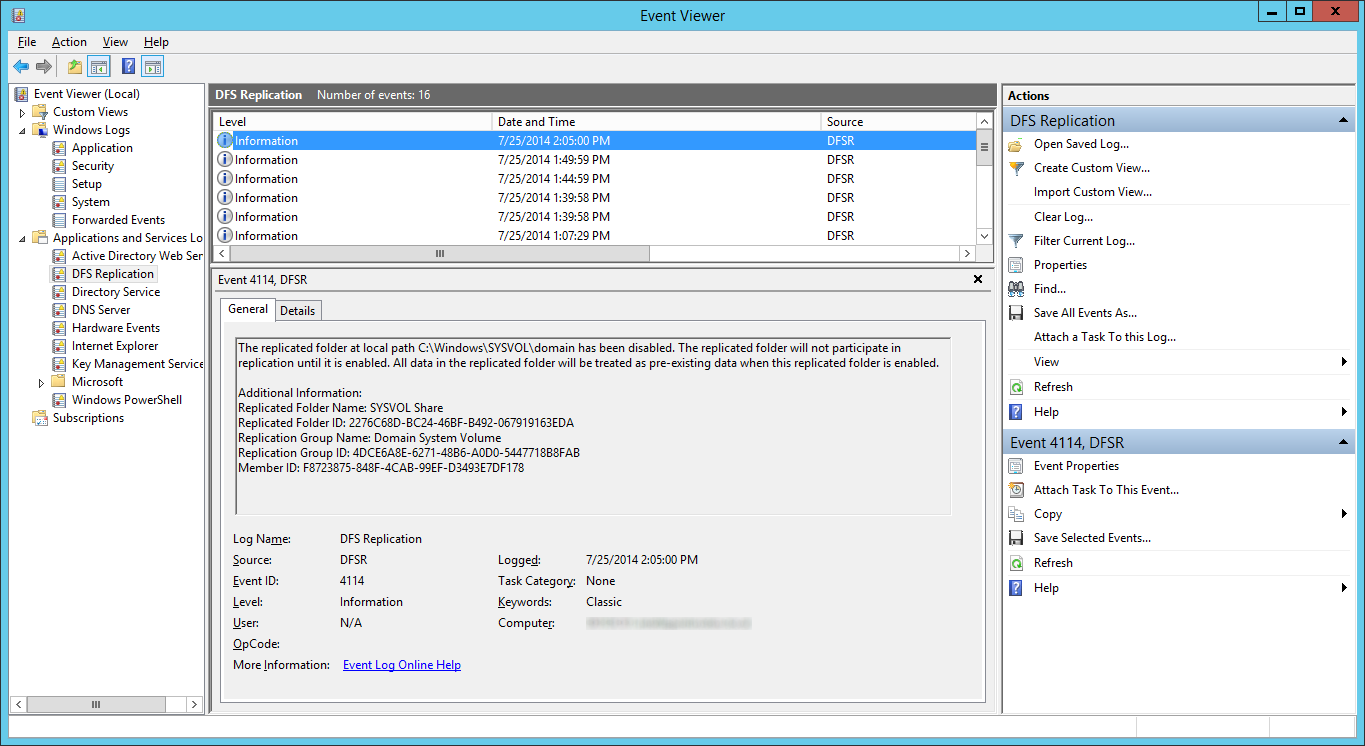
  10. Open up event viewer and navigate to Applications and Services Logs -> DFS Replication.  Verify you see Event ID 4114.
    Event Viewer - Applications and Services Logs - DFS Replication - Event 4114
  11. Navigate back to the following in ADSI
      1. CN=SYSVOL Subscription,CN=Domain System Volume,CN=DFSR-LocalSettings,CN=<the server name to replicate from>,OU=Domain Controllers,DC=<domain>
        ADSI Edit - Default Naming Context - Domain Controllers - DC01 - DFSR-LocalSettings - Domain System Volume
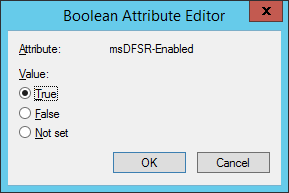
  12. Set the value of msDFSR-Enabled to TRUE
    ADSI Edit - Default Naming Context - Domain Controllers - DC01 - DFSR-LocalSettings - Domain System Volume - msDFSR-Enabled - True
  13. Execute the following via an elevated command prompt
    1. DFSRDIAG POLLAD
      1. NOTE: This is a utility apart of DFS Managment Tools.  I completed the guide successfully without running this command, but Microsoft recommends you do run this command.
  14. Force Active Directory replication throughout the domain
    1. repadmin /syncall primary_dc_name /APed
      repadmin -syncall -aped
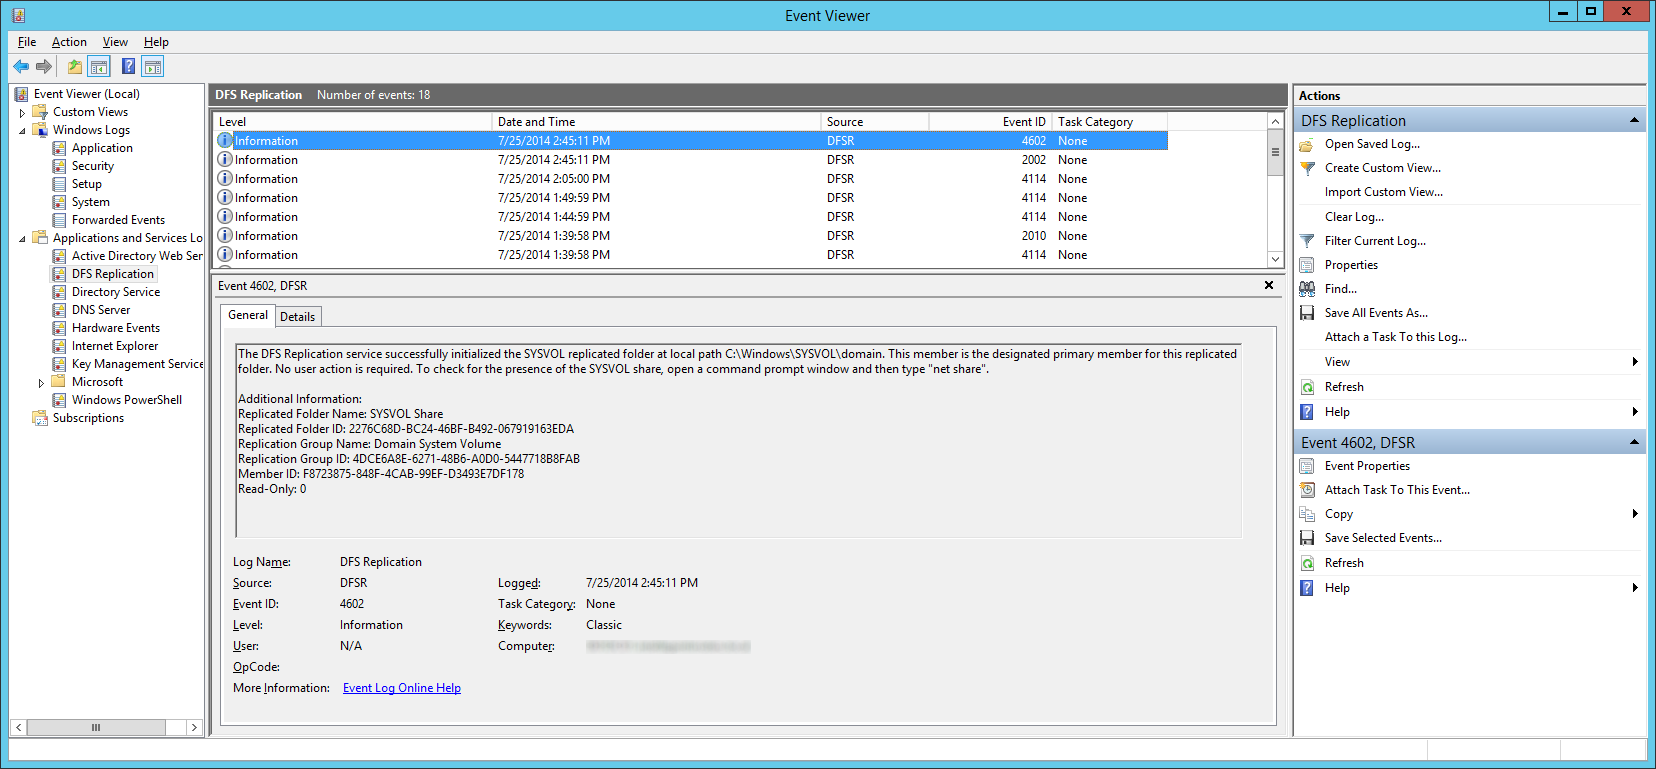
  15. Wait a few minutes and you should see Event ID 2002 and 4602
    Event Viewer - Applications and Services Logs - DFS Replication - Event 4602 - Event 2002
  16. Navigate back to each of your secondary DCs and change the value of msDFSR-Enabled to TRUE
    ADSI Edit - Default Naming Context - Domain Controllers - DC01 - DFSR-LocalSettings - Domain System Volume - msDFSR-Enabled - True
  17. Execute the following via an elevated command prompt
    1. DFSRDIAG POLLAD
      1. NOTE: This is a utility apart of DFS Managment Tools. I completed the guide successfully without running this command, but Microsoft recommends you do run this command. Force Active Directory replication throughout the domain
  18. Verify you see Event ID 2002 and 4602 on each of the secondary DCs
    Event Viewer - Applications and Services Logs - DFS Replication - Event 4602 - Event 2002

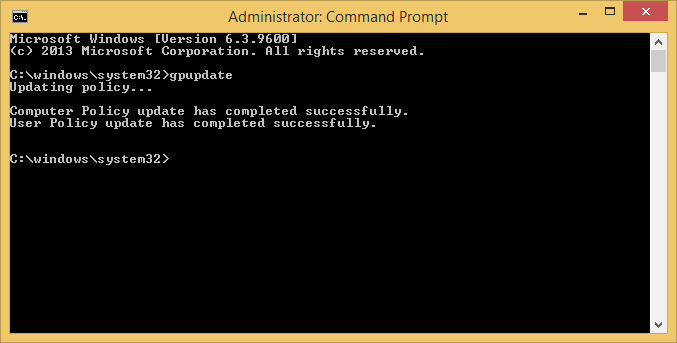
At this point, try running a gpupdate on your client.  If all has gone well, each of your shared SYSVOL folders on your DCs should contain the same amount of policies and your client should successfully pull down all policies.

gpupdate - success

Upgrading Network Policy Server from Server 2008 R2 to Server 2012 R2

Synopsis: This tutorial will cover a basic "upgrade" path to go from Server 2008 R2 to Server 2012 R2.  This tutorial assumes you have a single Network Policy Server and you are wishing to reuse the same machine name, IP, and settings.  In environments needing high availability, you will need to complete each of the steps below, adding/removing each server being upgraded from your network load balancer.

In a standalone instance, you will experience some downtime as you will have to retire the old machine and setup a new one.

Tutorial

  1. Login to your Server 2008 R2 NPS server
  2. Open up a command prompt with Administrative Privileges
  3. Execute the following command
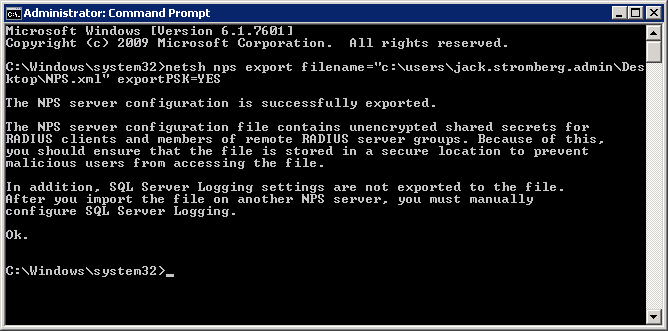
    1. netsh nps export filename="c:\users\YOURUSERNAME\Desktop\NPS.xml" exportPSK=YES
      netsh nps export
  4. Copy the NPS.xml file to your local machine
  5. Disjoin the NPS server from the domain
  6. Retire the machine
  7. Recreate a new Server 2012 R2 machine with the same name and IP address
  8. Join the Server 2012 R2 machine to the domain
  9. Open up Server Manager and select Add Roles and Features
    Server 2012 - Manage - Add Roles and Features
  10. Click Next > on the Before You Begin screen
    Add Roles and Features Wizard - Before you begin
  11. Click Next > on the Installation Type screen
    Add Roles and Features Wizard - Select installation type
  12. Click Next > on the Server Selection screen
    Add Roles and Features Wizard - Select destination server
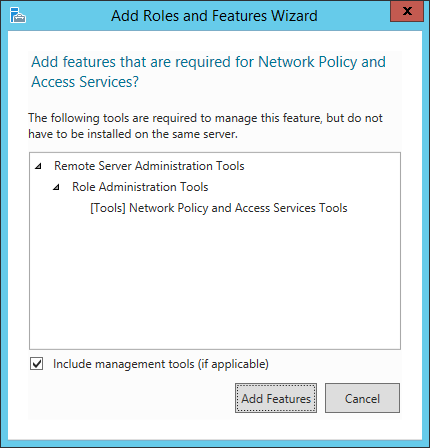
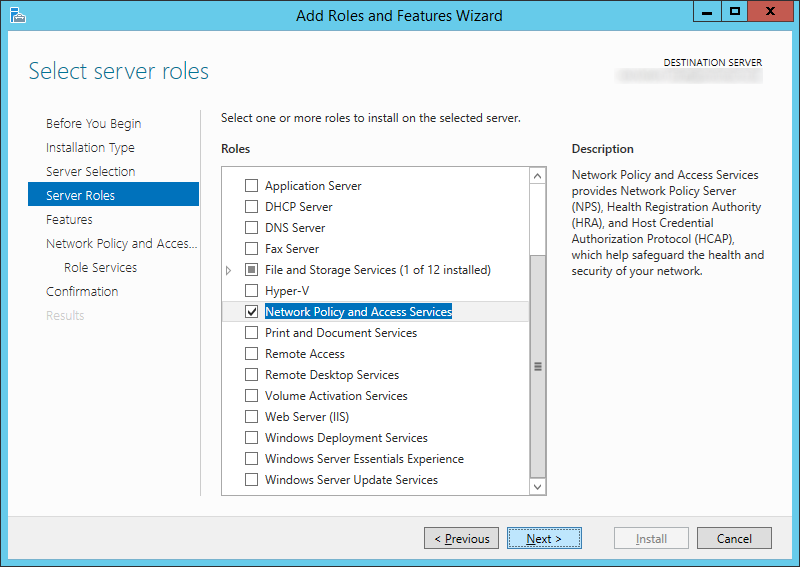
  13. Check Network Policy and Access Services (click Add Features when the screen pops up)
    Add Roles and Features Wizard - Network Policy and Access Services
    Add Roles and Features Wizard - Server Roles - Network Policy and Access Services
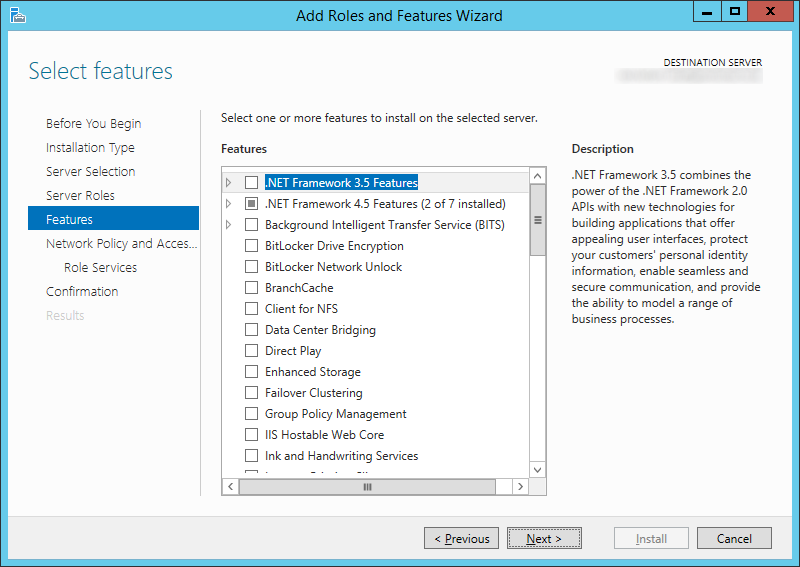
  14. Click Next > on the Features screen
    Add Roles and Features Wizard - Default - Network Policy and Access Services
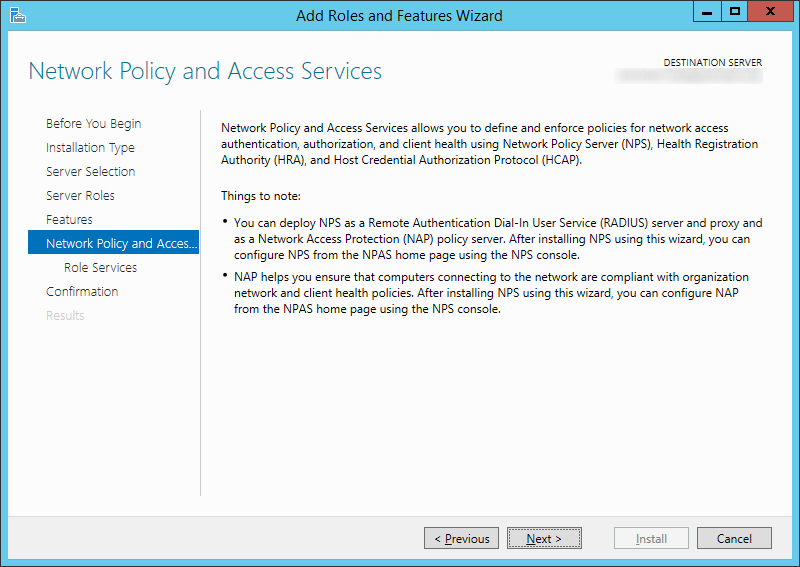
  15. Click Next > on the Network Policy and Access Services screen
    Add Roles and Features Wizard - Network Policy and Access Services Welcome
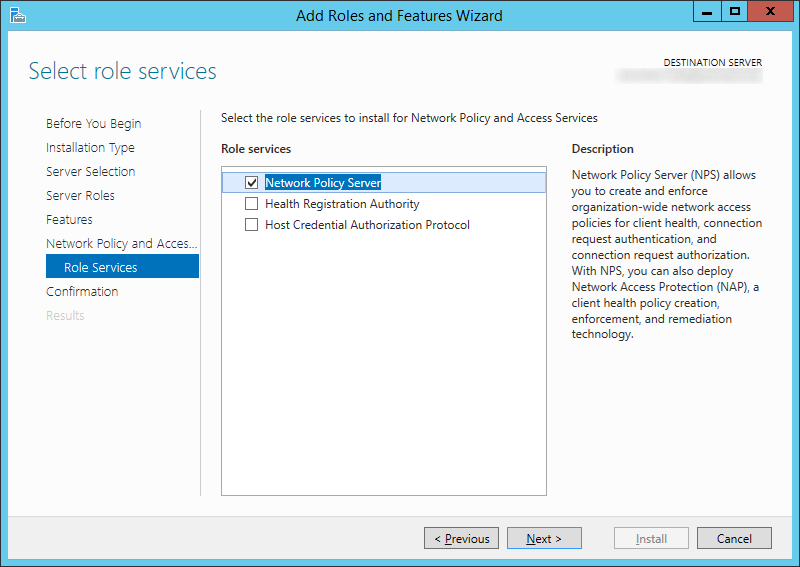
  16. Check Network Policy Server and click Next >
    Add Roles and Features Wizard - Role Services - Network Policy Server
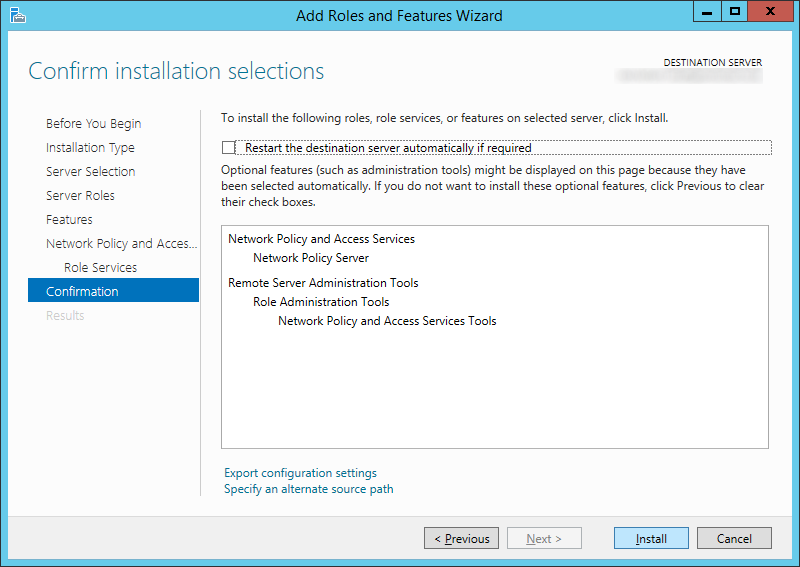
  17. Click Install
    Add Roles and Features Wizard - Network Policy and Access Services - Confirmation
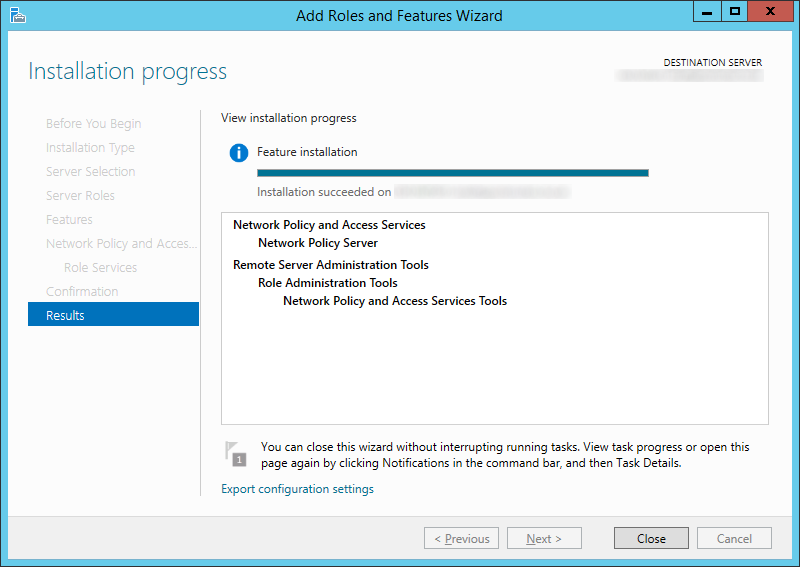
  18. Click Close once the installation has successfully completed
    Add Roles and Features Wizard - Network Policy and Access Services - Results
  19. Copy over your XML file from the old NPS server to your new Server 2012 R2 NPS server.
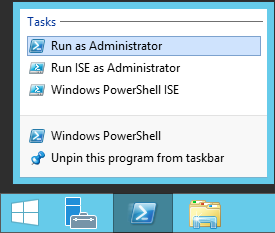
  20. Open up an administrative powershell prompt
    Server 2012 - PowerShell - Run as Administrator
  21. Execute the following command
    1. Import-NpsConfiguration -Path c:\users\YOURUSERNAME\Desktop\NPS.xml
      Server 2012 R2 - Powershell - Import-npsconfiguration
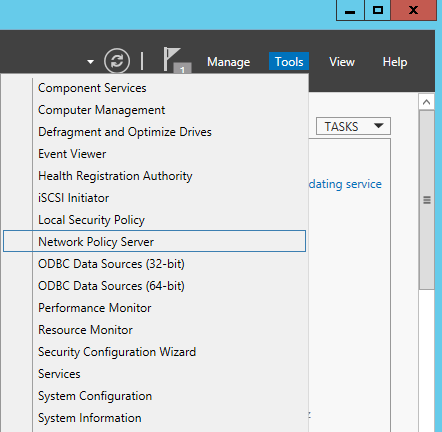
  22. Head over to Server Manager and select Tools -> Network Policy Server
    Server Manager - Tools - Network Policy Server
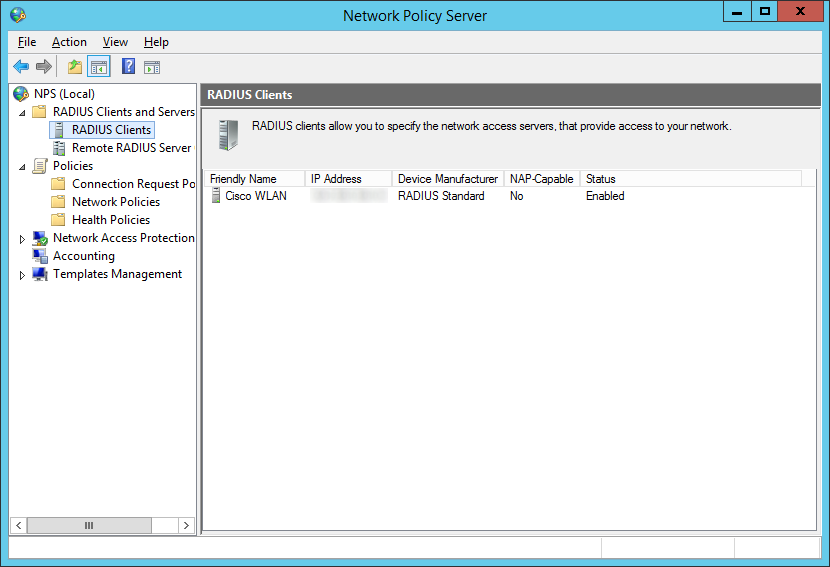
  23. Verify the rules imported (I selected RADIUS Clients and Servers -> RADIUS Clients to see if it imported my WLAN controller)
    Network Policy Server - RADIUS Clients
  24. Connect your machine to your wireless network! 🙂

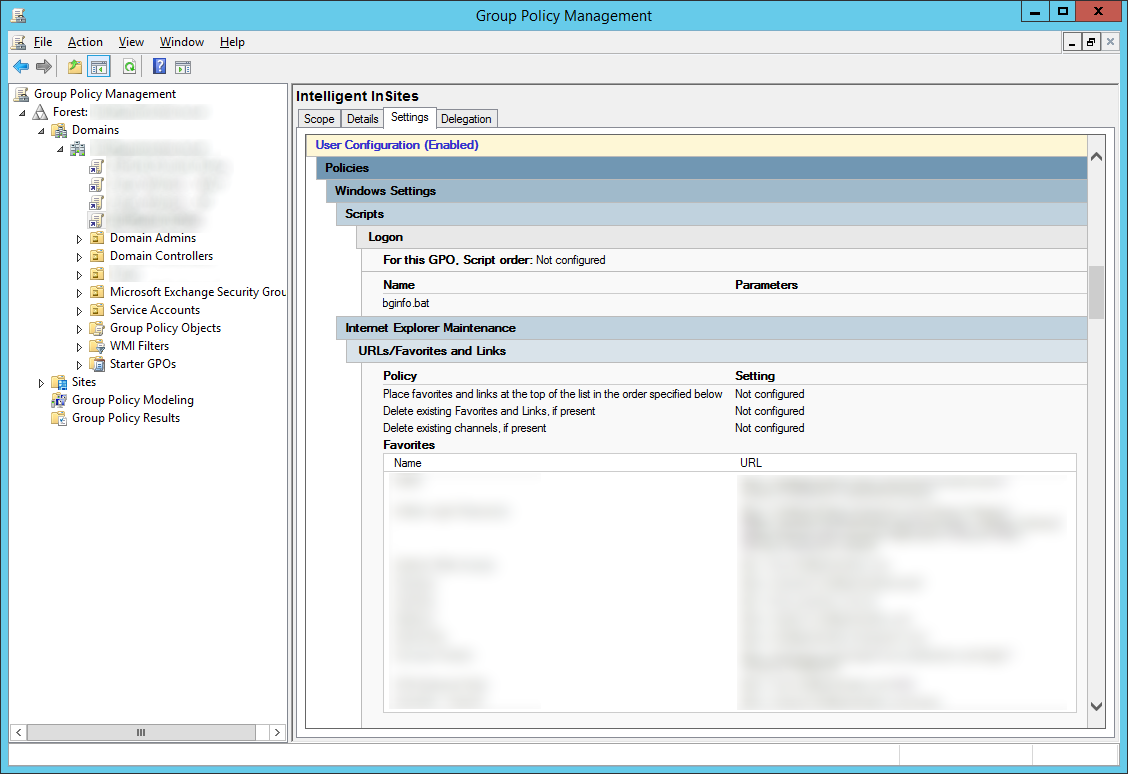
Server 2012 R2 - Missing Group Policy - Internet Explorer Maintenance

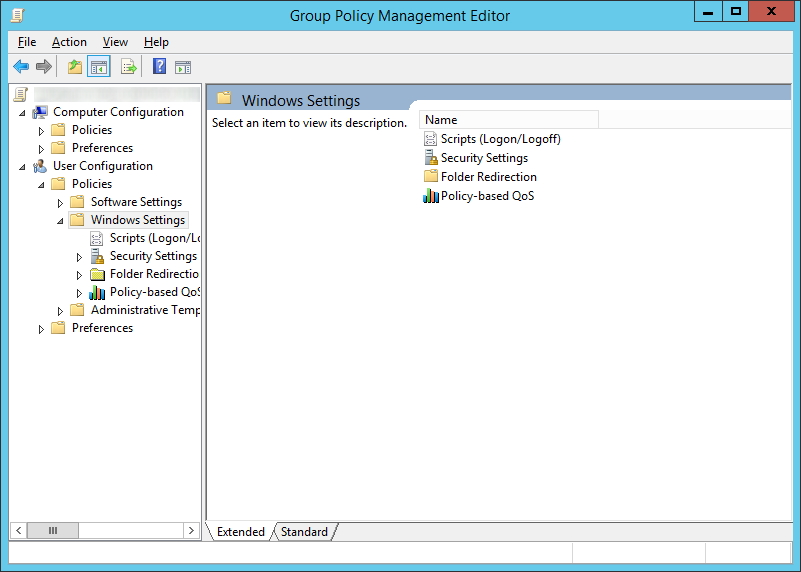
Symptom: When navigating to User Configuration - Policies - Windows Settings via Group Policy Management Editor, Internet Explorer Maintenance is missing from the list of configurable policies.

Server 2012 - Group Policy Management Editor - User Configuration - Policies - Windows Settings

Explanation: Internet Explorer 10 (which is installed by Default on Server 2012 R2) deprecates Internet Explorer Maintenance (IEM) in favor of a more robust tool called Group Policy Preferences.  As you can see in the following Microsoft KB article, a link to the Internet Explorer Maintenance policy alternatives can be found here: http://technet.microsoft.com/library/hh846772.aspx

Solution: Remove the old Internet Explorer Maintenance policies and switch over to use Preferences to manage your domain machines.  This tutorial will not go into using Preferences, however it will go over removing the Internet Explorer Maintenance policies from your GPO.  Since I went ahead and upgraded our environment to Server 2012 R2 I ended up having to configure a new Server 2008 R2 machine.  If someone has an easier solution, please let me know in the comments below.

  1. Login to any member machine of the domain that is running Server 2008 R2 or earlier and does not contain Internet Explorer 10 or greater
  2. Open up Server Manager
    Server Manager
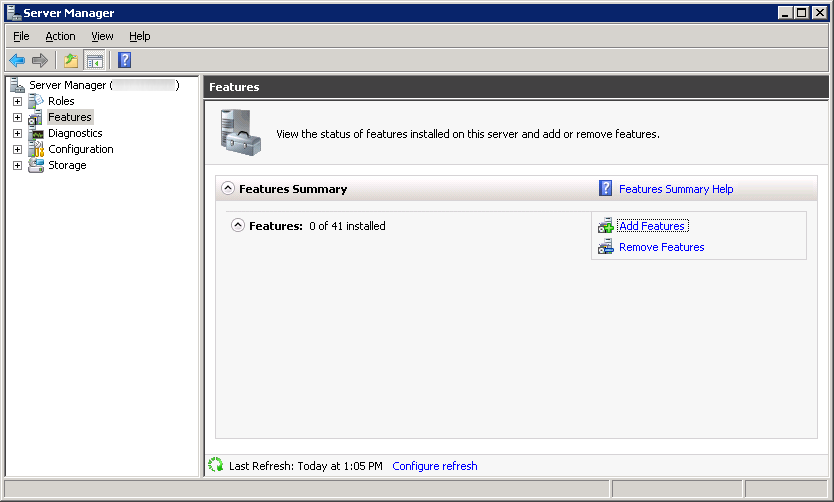
  3. Install Group Policy Management if it is not installed
    1. Select Features and click Add Features
      Server Manager 2008 R2 - Add Features
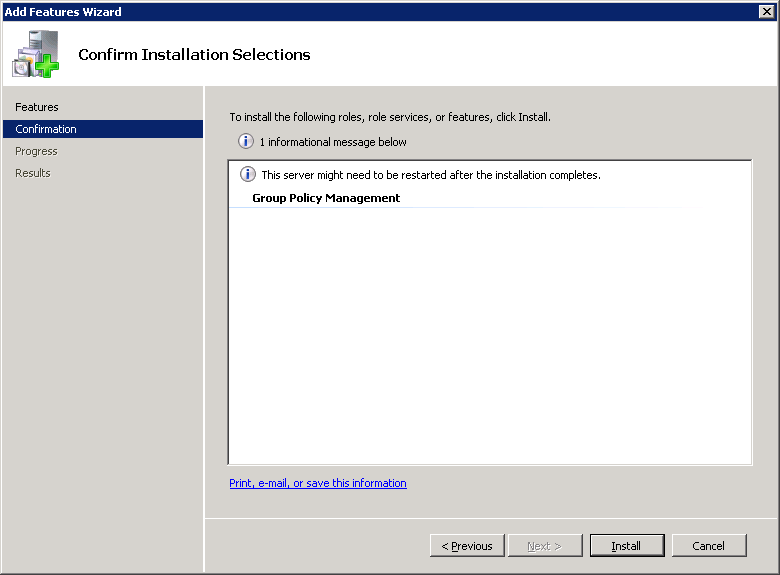
    2. Select Group Policy Management and click Next >
      Server 2008 R2 - Add Features Wizard - Group Policy Management
    3. Click Install
      Server 2008 R2 - Add Features Wizard - Group Policy Management - Install
    4. Click Close
      Server 2008 R2 - Add Features Wizard - Group Policy Management - Close
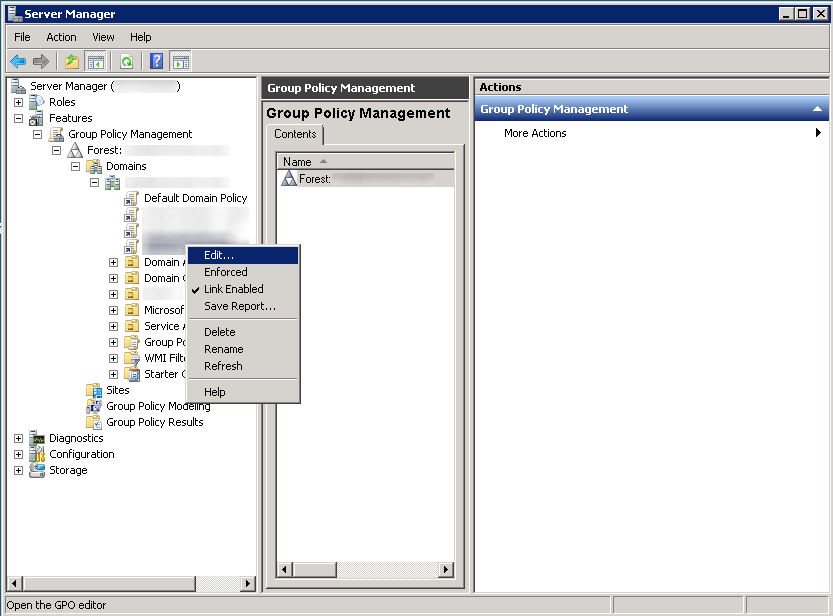
  4. Select Features- > Group Policy management -> Expand your forest -> Expand Domains -> Select your domain -> Right click and Edit... one of your policies
    Server Manager 2008 R2 - Features - Group Policy Management - Edit GPO
  5. Expand User Configuration -> Policies -> Software Settings -> Windows Settings and select Internet Explorer Maintenance.
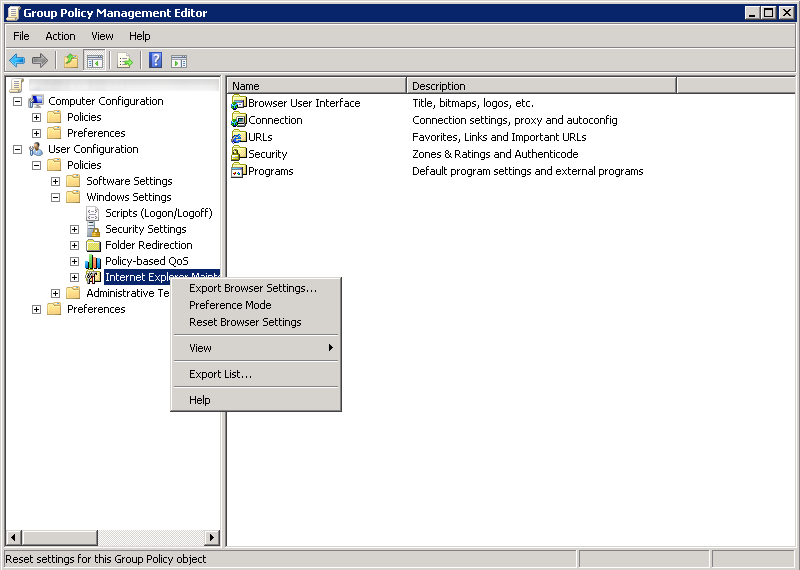
  6. Right click on Internet Explorer Maintenance and select Reset Browser Settings
    Group Policy Management Editor - User Configuration - Policies - Windows Settings - Internet Explorer Maintenance - Reset Browser Settings
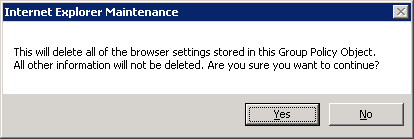
  7. Click Yes on the Internet Explorer Maintenance dialog box
    Internet Explorer Maintenance Dialog Box
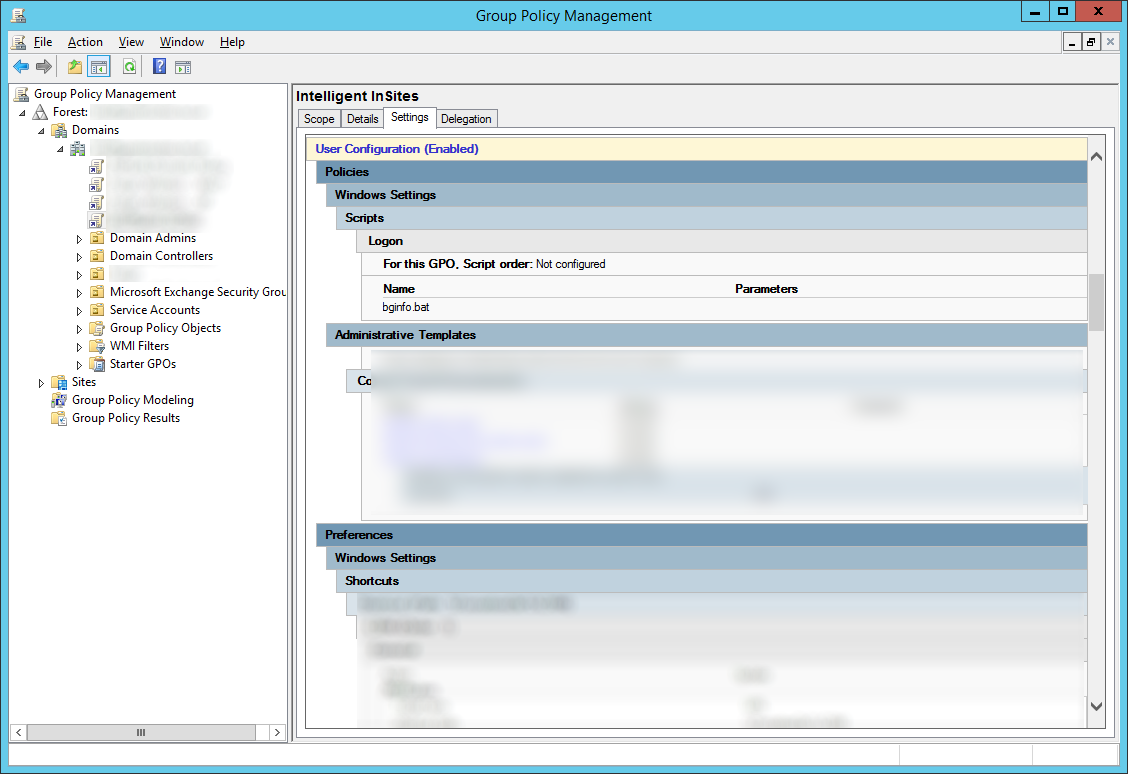
  8. If all went well, you should now see all of the deprecated Internet Explorer Maintenance policies removed from your Group Policy Object.
    Before
    Group Policy Management - Before
    After
    Group Policy Management - After

Notes:
Official KB on installed Group Policy Manager: http://technet.microsoft.com/en-us/library/cc725932.aspx

Official KB article on replacements for Internet Explorer Maintenance: http://technet.microsoft.com/en-us/library/jj890998.aspx

Forum post showing frustration over this: http://social.technet.microsoft.com/Forums/windowsserver/en-US/1f6a0d43-e81f-4038-88f6-75d8921fdf82/missing-group-policy-internet-explorer-maintenance?forum=winserver8gen

Enabling SSL on Windows Server Update Services (WSUS)

Here are the steps to configure SSL on your servers running the Windows Server Update Services.  This guide was written using Server 2012 R2, however it should be the same steps for Windows Server 2008 R2 as well.  This guide also assumes you have a working instance of WSUS installed and configured, using default ports.

  1. Login to your WSUS server
  2. Open up Server Manager
    Server 2012 R2 - Server Manager
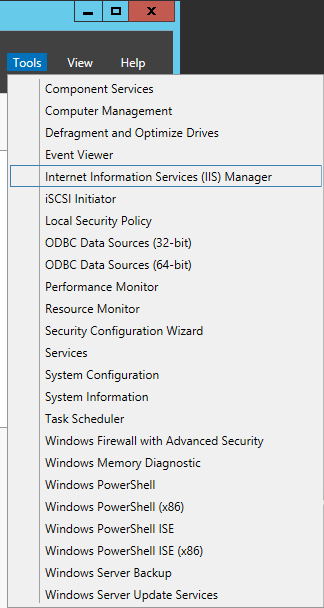
  3. Select Tools -> Internet Information Services (IIS) Manager
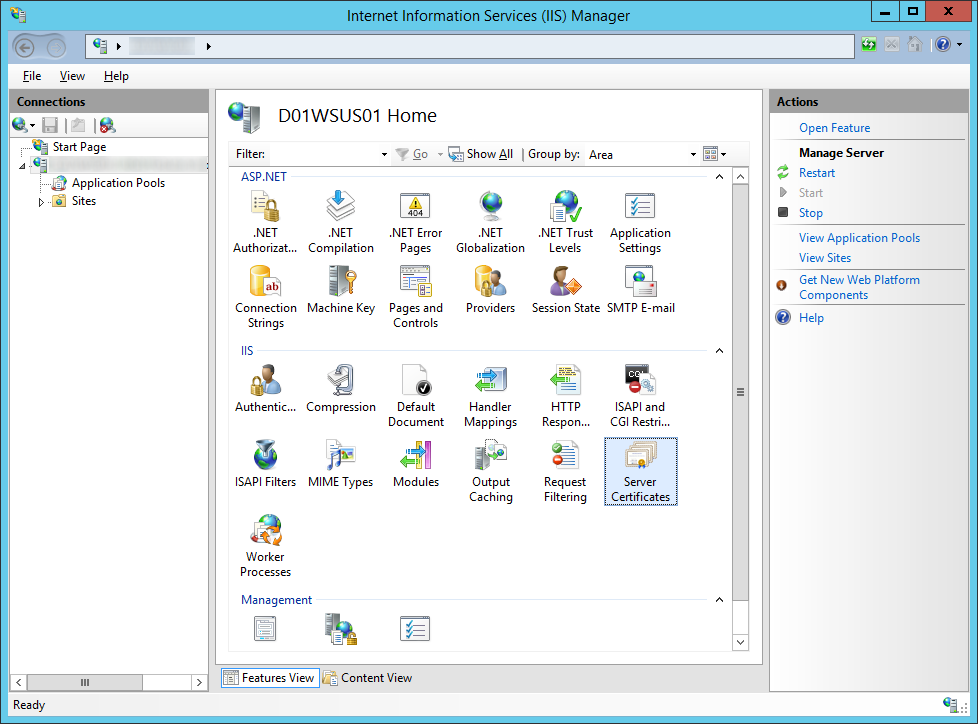
    Server Manager - Tools - Internet Information Services IIS Manager
  4. Generate a SSL certificate
    1. Click on your Server and select Server Certificates
      Internet Information Services (IIS) Manager - Server Certificates
    2. If you have your own PKI environment, follow these steps, if not, jump to step three
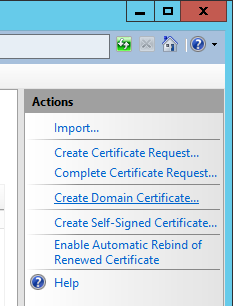
      1. Click Create Domain Certificate on the right side
        Internet Information Services (IIS) Manager - Server Certificates - Create Domain Certificate
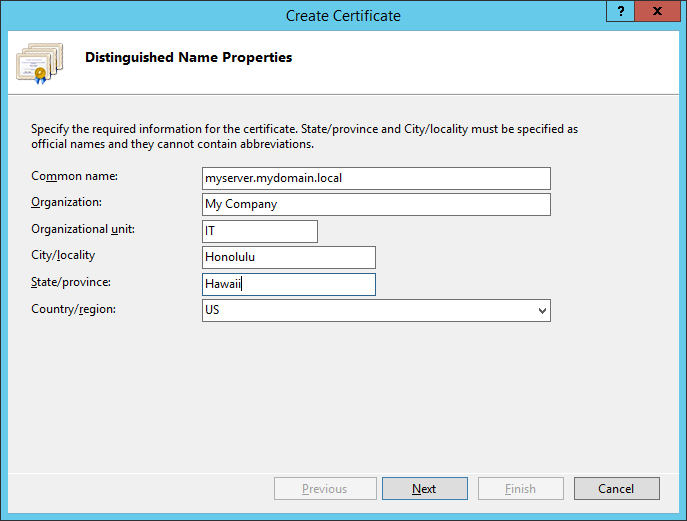
      2. Fill in the requested information on the Distinguished Name Properties page and click Next
        Internet Information Services (IIS) Manager - Server Certificates - Distinguished Name Properties
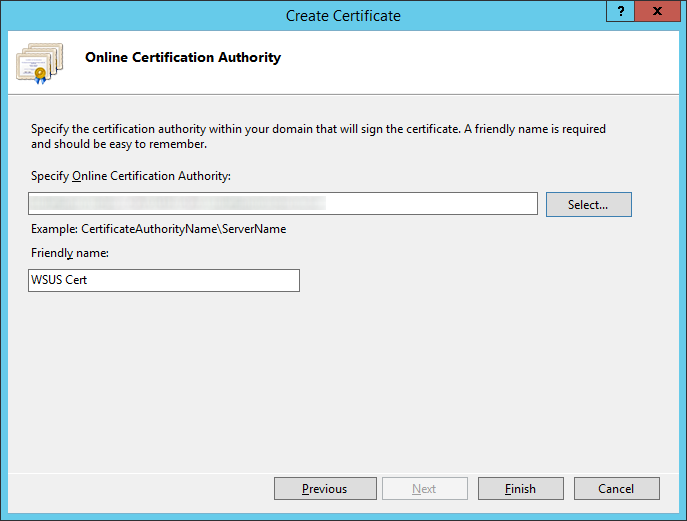
      3. Select your certificate authority and enter a friendly name (this can be anything), and then click Finish
      4. Internet Information Services (IIS) Manager - Server Certificates - Create Domain Certificate - Online Certification Authority
    3. If you need to submit a certificate request to an external certificate authority like Goaddy, Verisgn, Comodo; follow these steps
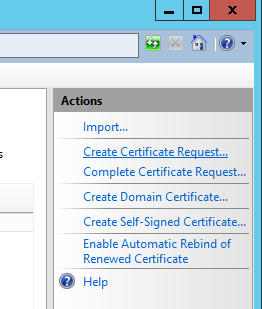
      1. Click Create Certificate Request on the right side
        Internet Information Services (IIS) Manager - Server Certificates - Create Certificate Request
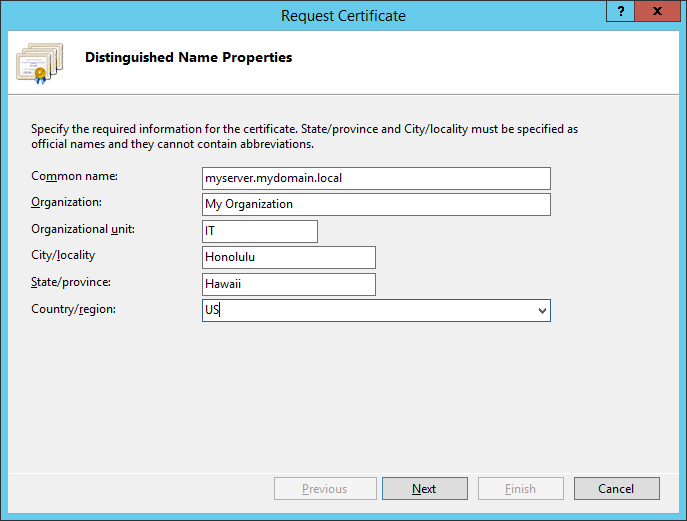
      2. Fill out the Distinguished Name Properties and click Next
        Internet Information Services (IIS) Manager - Server Certificates - Request Certificate - Distinguished Name Properties
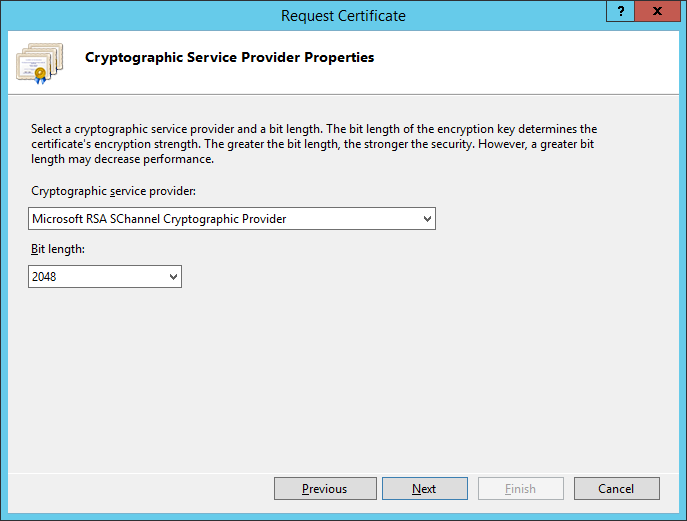
      3. Change the Bit length to 2048 and click Next
        Internet Information Services (IIS) Manager - Server Certificates - Request Certificate - Crytographic Service Provider Properties
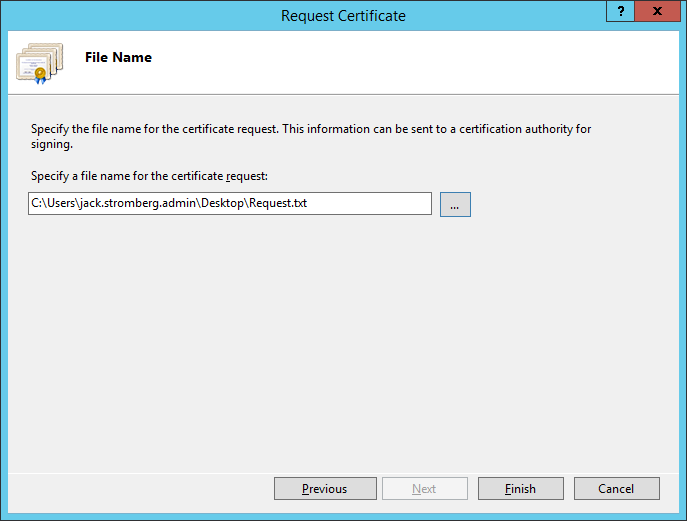
      4. Select a location on where to place the CSR file that will be generated by the wizard and click Finish
        Internet Information Services (IIS) Manager - Server Certificates - Request Certificate - File Name
      5. At this point, send the request to your certificate authority (like GoDaddy, Verisign, or your own internal certificate authority). You should receive back a .cer file once the claim has been fulfilled.
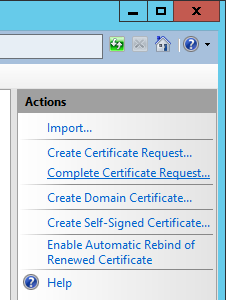
      6. Click on Complete Certificate Request on the right side
        Internet Information Services (IIS) Manager - Server Certificates - Complete Certificate Request
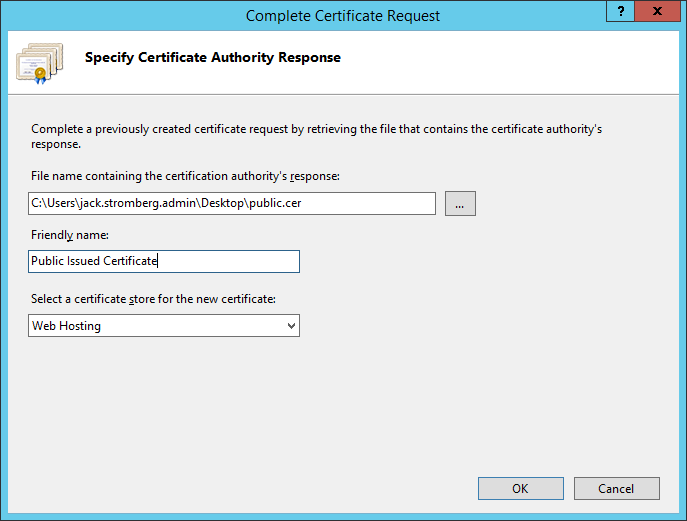
      7. Select the .cer file that your public certificate authority provided you, type in a friendly name (this can be anything), select Web Hosting for the certificate store, and click OK
        Internet Information Services (IIS) Manager - Server Certificates - Request Certificate - Specify Certificate Authority Response
  5. Next, we need to bind the SSL certificate to your network adapter.
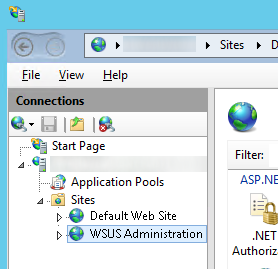
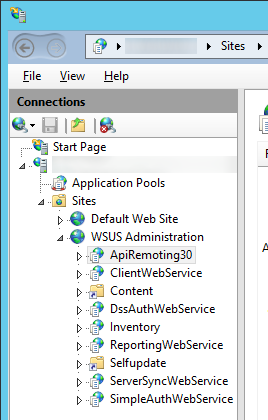
    1. Expand your server, expand Sites, and select WSUS Administration
      IIS - Sites - WSUS Administration
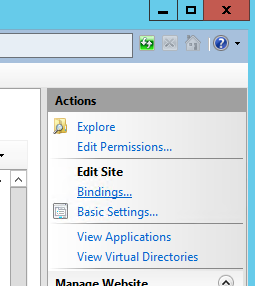
    2. Select Bindings... on the right side
      IIS - Bindings
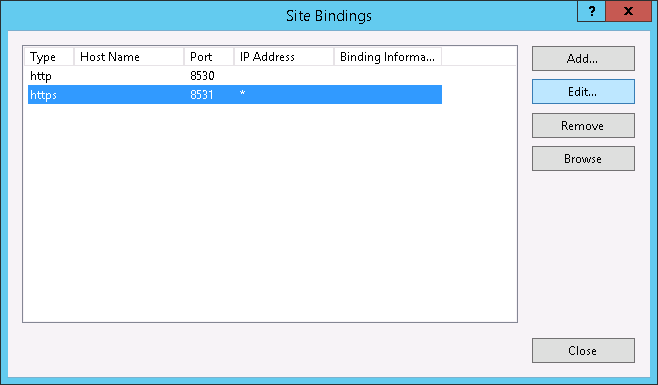
    3. Select the https site and hit the Edit... button
      Site Bindings - Port 8531
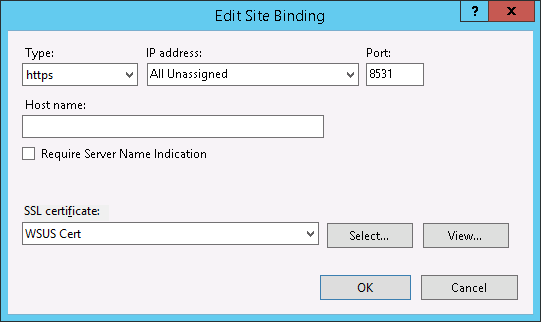
    4. Select https for the type, select the SSL certificate you created above, and click OK
      IIS - Edit Site Binding - WSUS
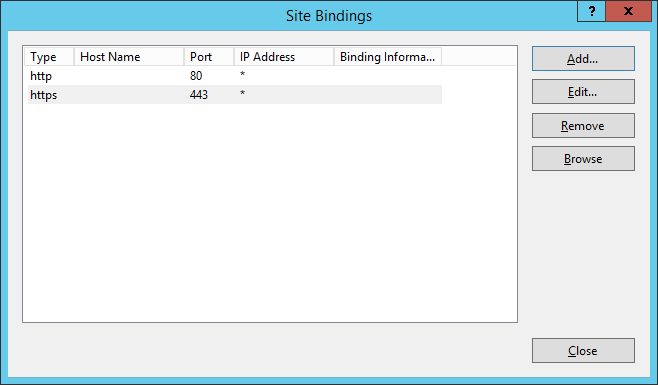
    5. Click Close on the Site Bindings window
      IIS - Site Bindings - https
  6. Next, we need to enforce SSL encryption on the following virtual roots
    • ApiRemoting30
    • ClientWebService
    • DSSAuthWebService
    • ServerSyncWebService
    • SimpleAuthWebService

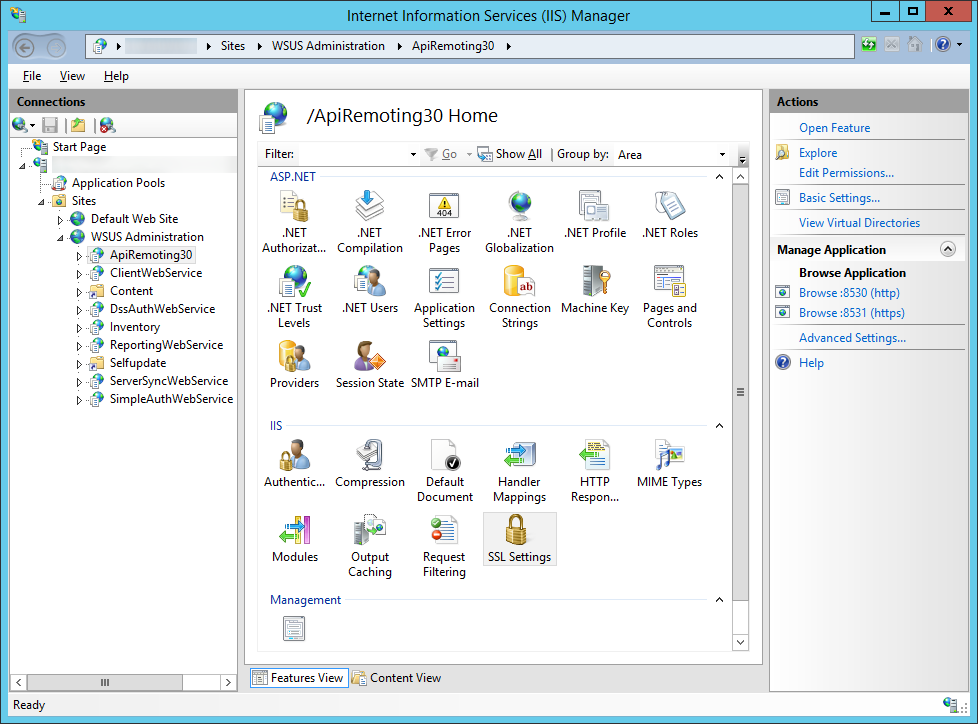
    1. Expand WSUS Administration and foreach of the directories above, complete the following steps
      1. Select the virtual site
        IIS - WSUS Administration
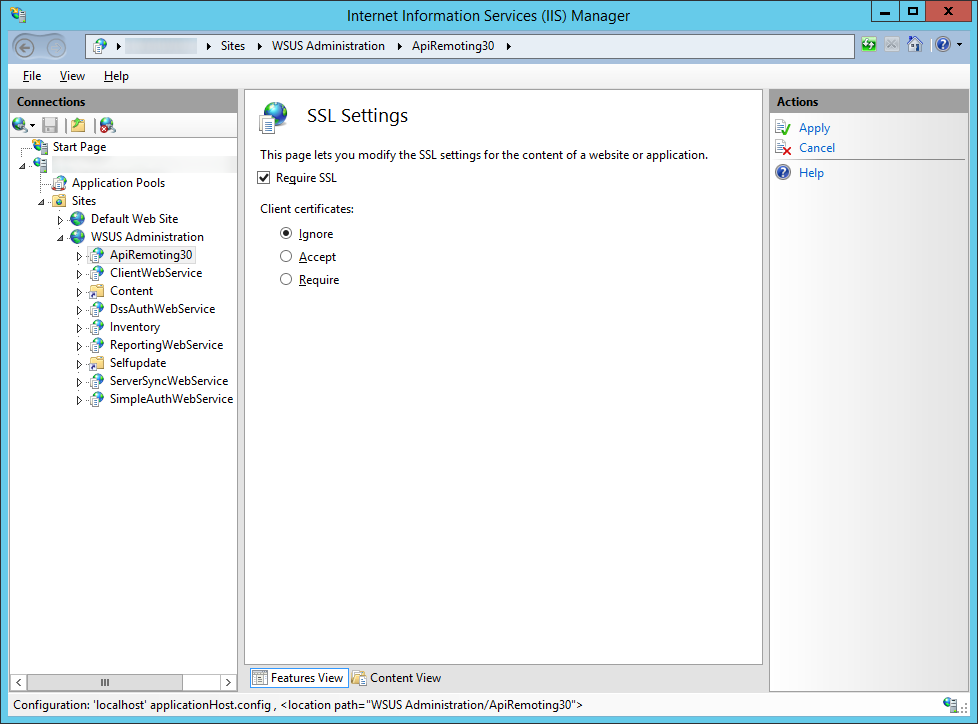
      2. Double click on SSL Settings
        IIS - WSUS Administration - SSL Settings
      3. Check Require SSL and leave client certificates to ignore
        IIS - WSUS Administration - SSL Settings - Require SSL
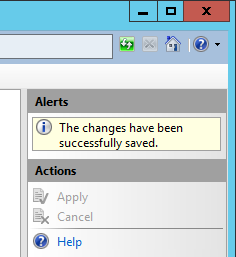
      4. Click Apply in the top right corner
        IIS - SSL Settings - Apply
  7. Next, we need to execute a command to tell WSUS to use ssl
    1. Open up an elevated command prompt
      Server 2012 - Administrative Command Prompt
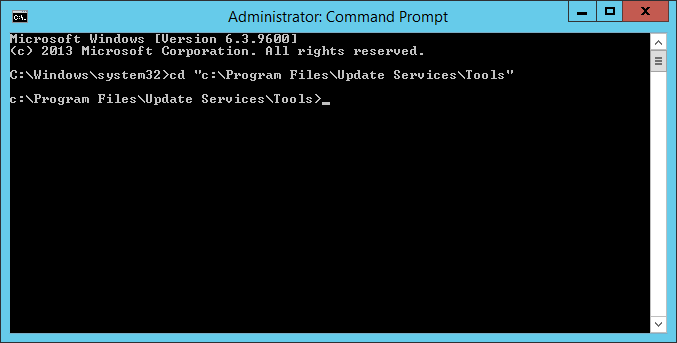
    2. Navigate to your WSUS installation folder
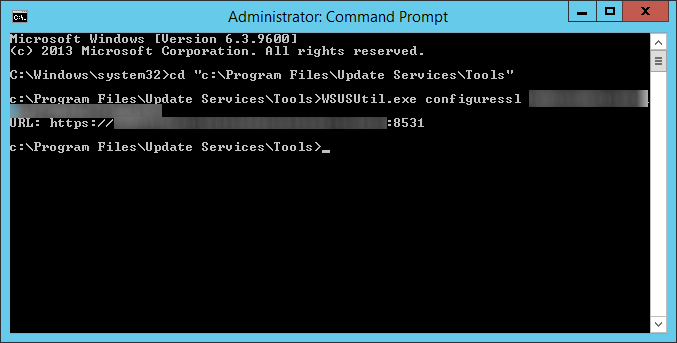
      1. cd "c:\Program Files\Update Services\Tools"
        cmd - program files - update services - tools
    3. Execute the following command (replace your server with the correct FQDN)
      1. WSUSUtil.exe configuressl myserver.mydomain.local
        wsusutil configuressl
  8. Restart the WSUS server to make sure all changes take effect.  You should be able to bring up the WSUS management console if all went well.
  9. Configure your clients to connect via SSL to the WSUS server via Group Policy
    1. Login to your domain controller
    2. Open up Server Manager
      Server 2012 R2 - Server Manager
    3. Open up Group Policy Management
      Server Manager - Tools - Group Policy Management
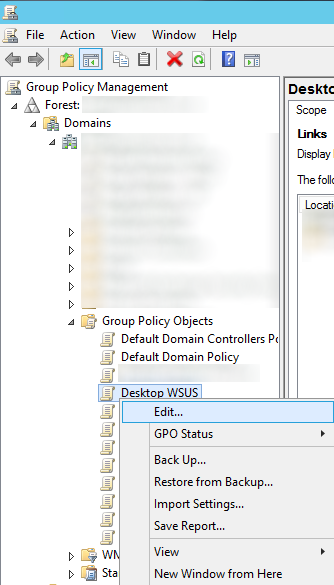
    4. Right click on the policy you want to edit and select Edit
      Edit GPO
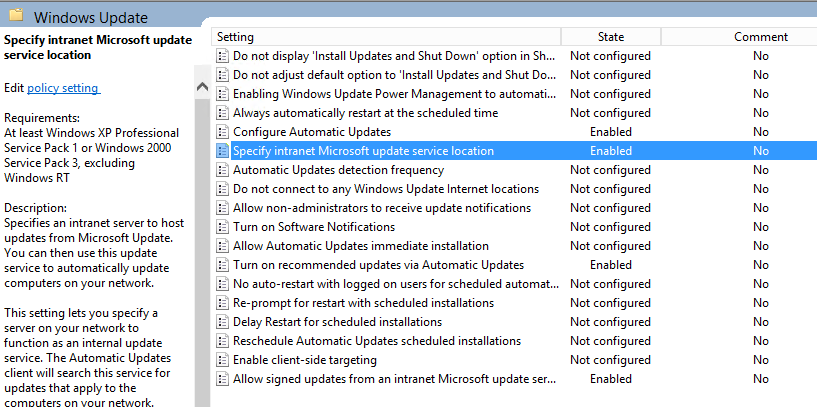
    5. Expand Computer Configuration -> Polices -> Administrative Templates -> Windows Components -> Windows Update
    6. Double click on Specify intranet Microsoft update service location
      Specify intranet Microsoft update service location
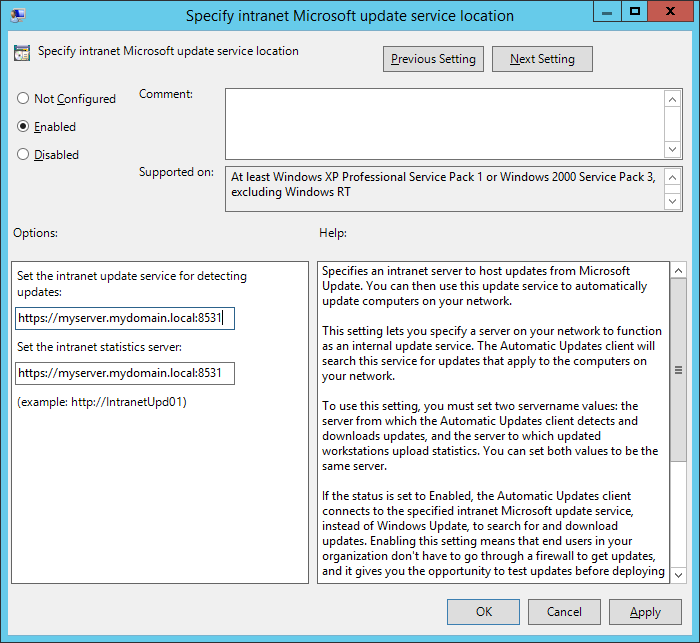
    7. Change the intranet update service url to https and specify port 8531 and then click Apply.
      Specify intranet Microsoft update service location - options

That should do it!  Try doing a gpupdate /force on your local machine and the check for windows updates.  If windows successfully completes checking for updates, you should be good to go! 🙂

Notes: Official documentation from Microsoft in regards to using SSL and WSUS can be found here: http://technet.microsoft.com/en-us/library/hh852346.aspx#consswsus

Migrating Domain Controllers From Server 2008 R2 to Server 2012 R2

In this article, I have documented the steps I took to update our two domain controllers to Server 2012 R2 from Server 2008 R2.  While this can be considered a tutorial, it is more a reflection of what I did during my migration process.  This guide assumes you have already made backups of your environment, all Windows Active Directory Domain Controllers in the forest are running Server 2003 or later, and we will be recycling (reusing) the same two servers you deployed.  Last, Microsoft strongly recommends we do a clean install and not directly upgrade each server, so we will decommission a DC, reinstall windows, and then redeploy the DC until the entire environment has been upgraded.

  1. Prepare the AD Schema for Server 2012 R2
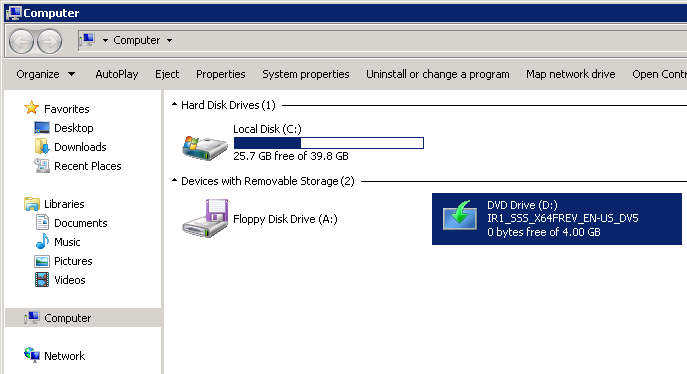
    1. Mount the Server 2012 R2 installation disk on one of your Domain Controllers
      Windows Server 2012 R2 - Mounted DVD
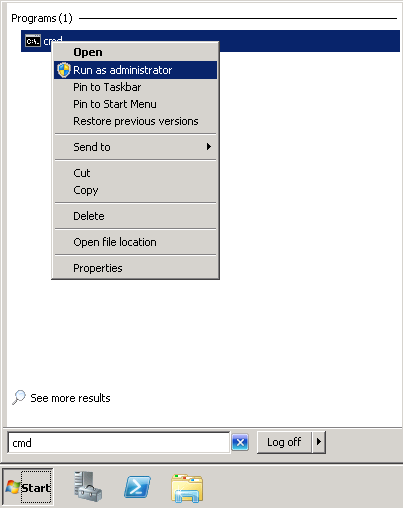
    2. Open up a command prompt with Administrative Privileges and navigate to the /support/adprep folder on the installation media.
      1. Click Start, type cmd, right click select Run as administrator
        Administrative cmd prompt
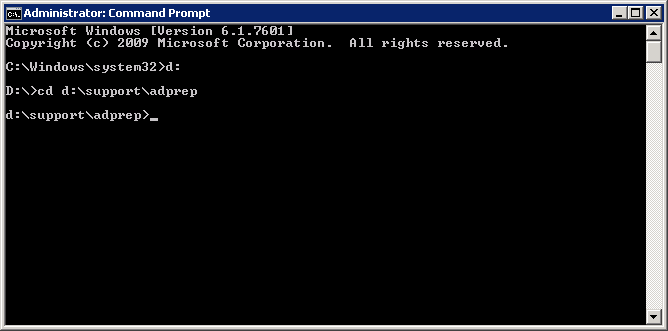
      2. Execute the command: d:
      3. Execute the command: cd d:\support\adprep
      4. Windows Server 2012 R2 - support-adprep folder
    3. Execute the following command (don't close out of this until after we verify the schema version in an upcoming step):
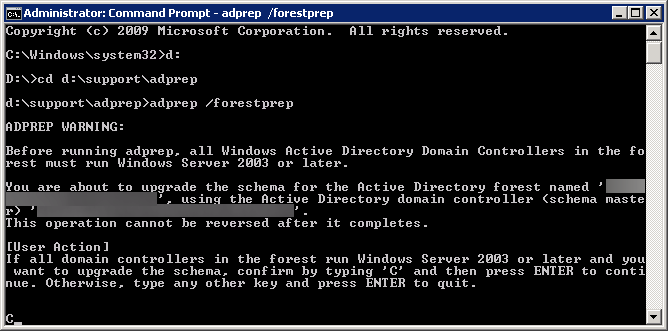
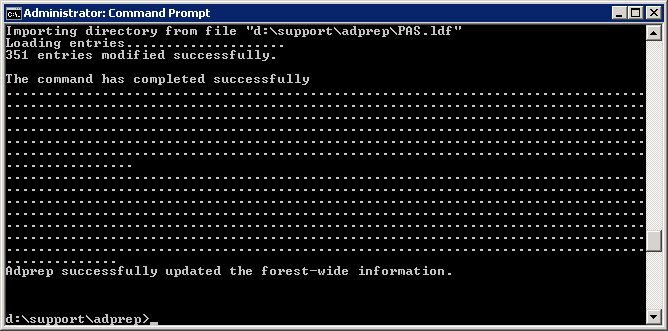
      1. adprep /forestprep
      2. Type the letter C and press the enter key to begin the process
        adprep forestprep
        adprep forestprep success
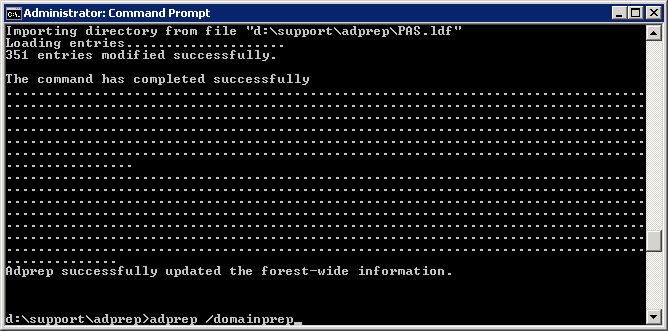
    4. Execute the following command:
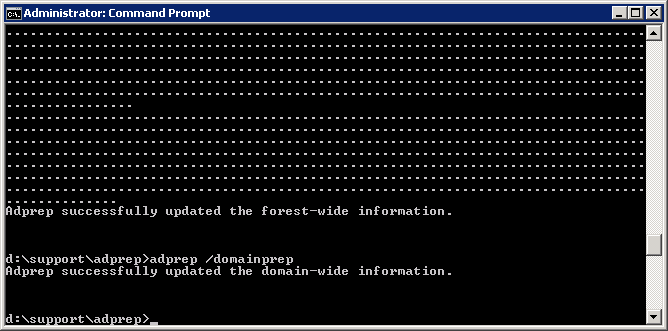
      1. adprep /domainprep
        adprep domainprep
        adprep domainprep success
    5. Verify the schema version has been updated
      1. Click Start and search for regedit
        regedit
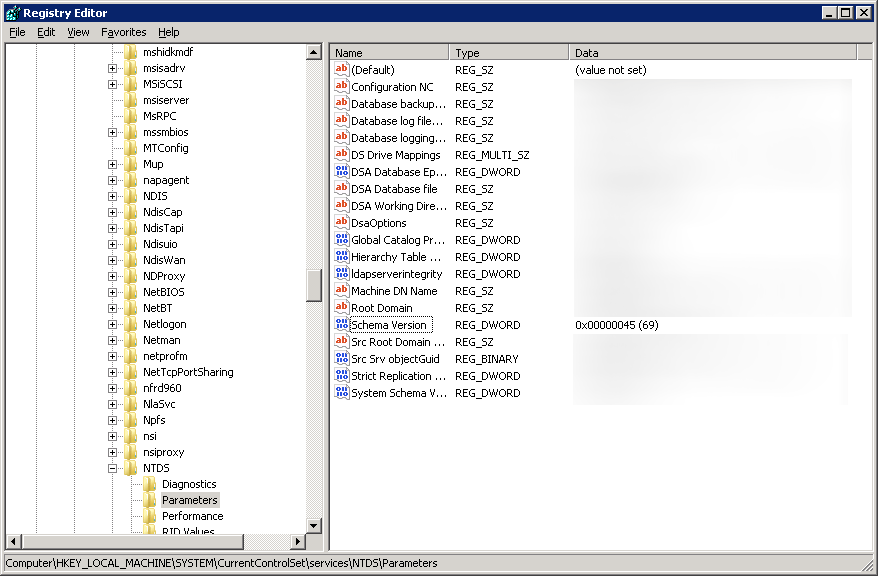
    6. Open up regedit and navigate to Computer\HKEY_LOCAL_MACHINE\SYSTEM\CurrentControlSet\services\NTDS\Parameters
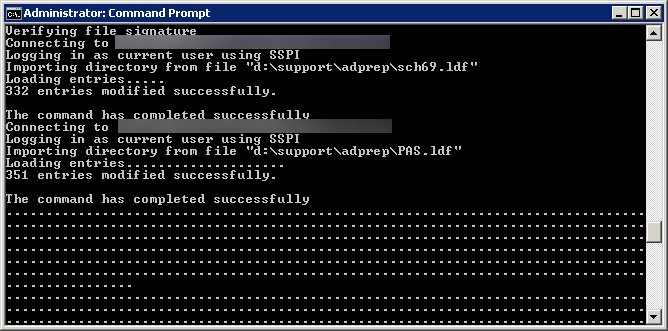
    7. Verify the Schema Version value matches the last entry shown in your upgrade results.  In my case, the Schema Version should be 69.
      adprep forestprep schema version
      regedit - schema version
  2. Demote and decommission secondary domain controller
    1. Click Start, Run...
      Start-Run
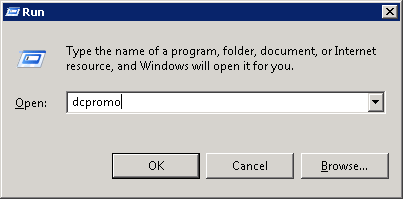
    2. Type dcpromo and click OK
      Run - dcpromo
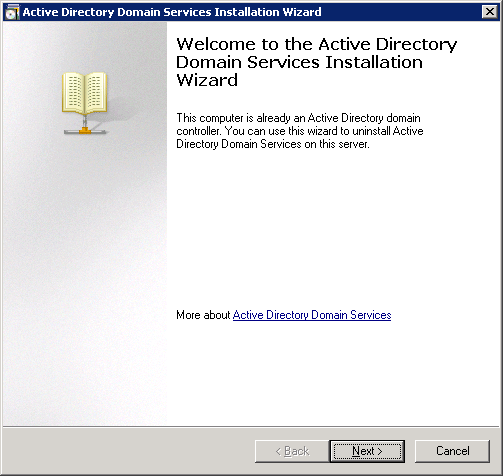
    3. Click Next > on the Welcome page
      Active Directory Domain Services Installation Wizard - Welcome to the Active Directory Domain Services Installation Wizard
    4. If the domain controller has the global catalog service, make sure your primary DC also has the service enabled and click OK.  This can be done by opening up Active Directory Sites and Services and viewing the services for each domain controller.
      Active Directory Domain Services Installation Wizard - Active Directory domain controller is a global catalog server dialog
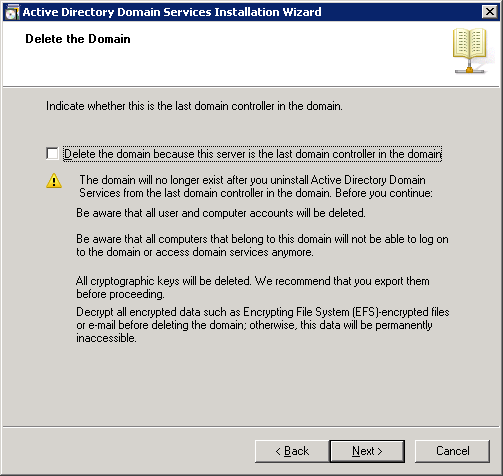
    5. Make sure the Delete this domain because this server is the last domain controller in the domain is UNCHECKED, and click Next >
      Active Directory Domain Services Installation Wizard - Delete the domain because this server is the last domain controller in the domain
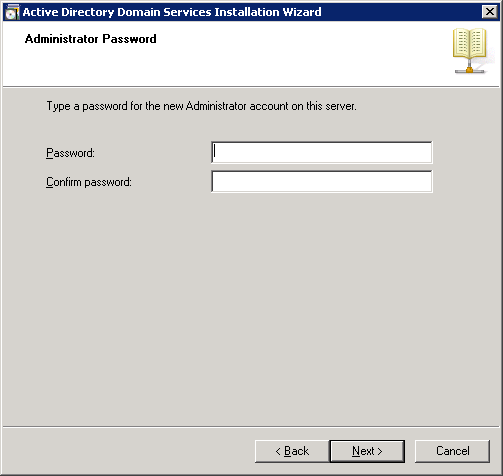
    6. Type in a new password to be used for the Local Administrator account the machine will contain after it is demoted.
      Active Directory Domain Services Installation Wizard - Administrator Password
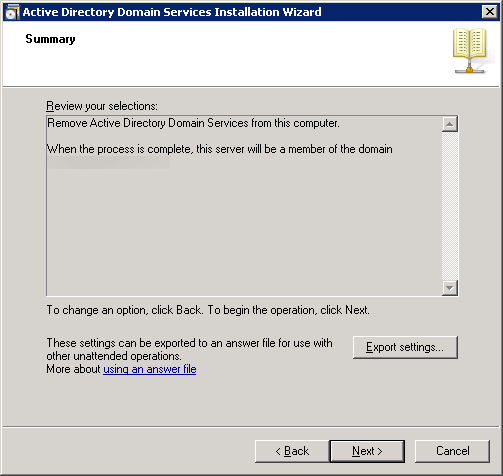
    7. Click Next > on the Summary page
      Active Directory Domain Services Installation Wizard - Summary
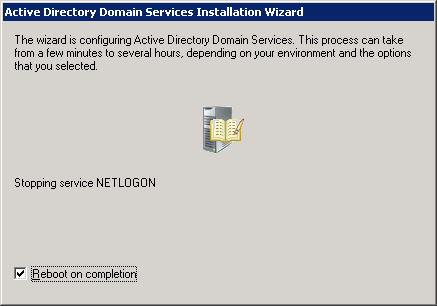
    8. Check the Reboot on completion box to restart the server after the service has been removed
      Active Directory Domain Services Installation Wizard - Reboot on completion
    9. Log back into the DC upon reboot and open up Server Manager
      Server Manager
    10. In Roles Summary, click Remove Roles
      Server Manager - Remove Role
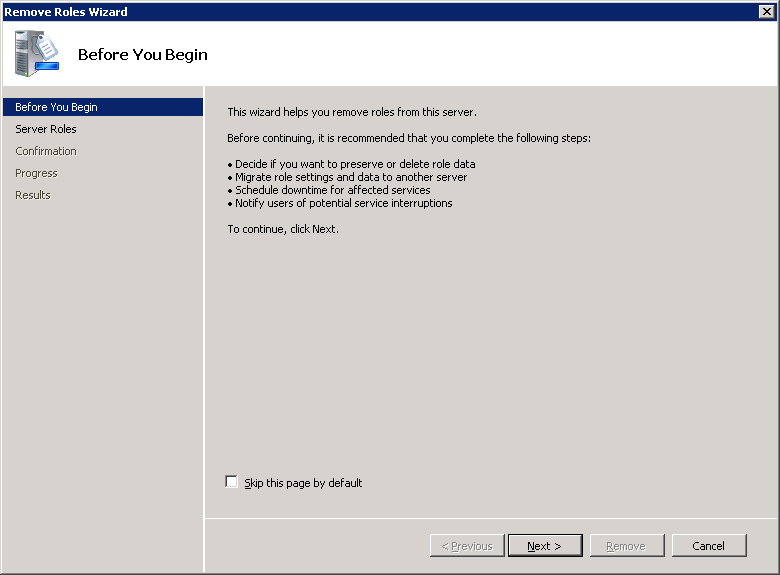
    11. Click Next > on the Before You Begin page
      Remove Roles Wizard - Before You Begin
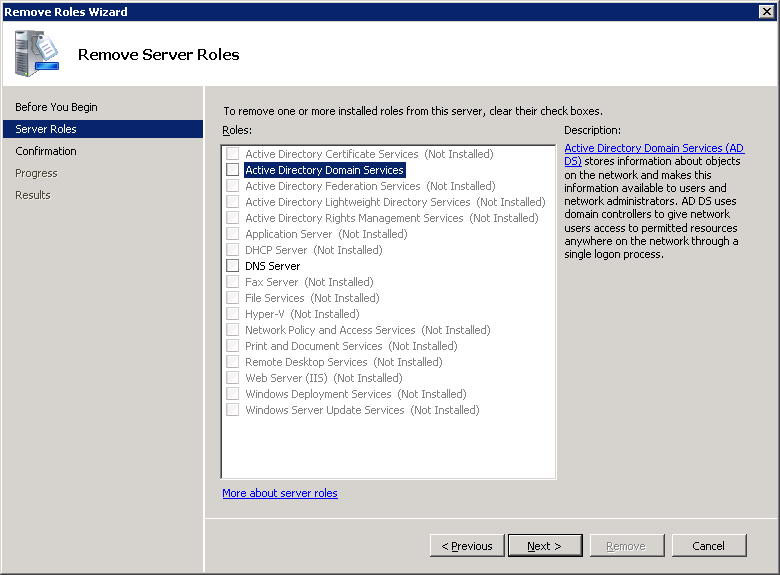
    12. Uncheck Active Directory Domain Services and DNS Server (if the role is installed) and click Next >
      Remove Roles Wizard - Remove Server Roles - Active Directory Domain Services - DNS
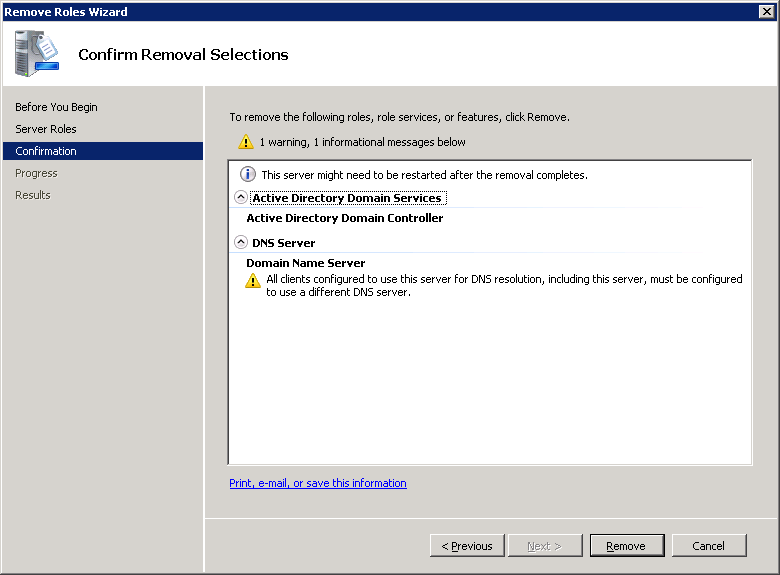
    13. Click Remove
      Remove Roles Wizard - Confirm Removal Selections
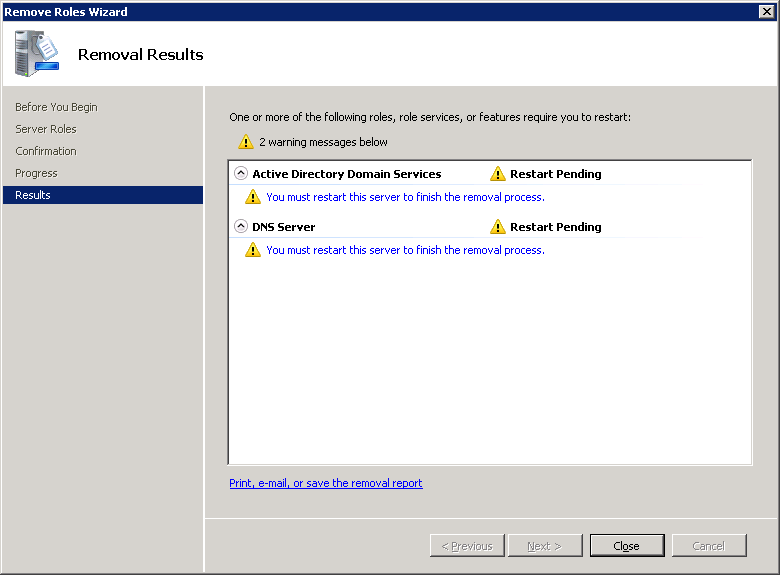
    14. Click Close
      Remove Roles Wizard - Removal Results
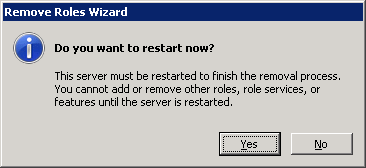
    15. Select Yes on the Do you want to restart now? dialog box
      Remove Roles Wizard - Restart Dialog
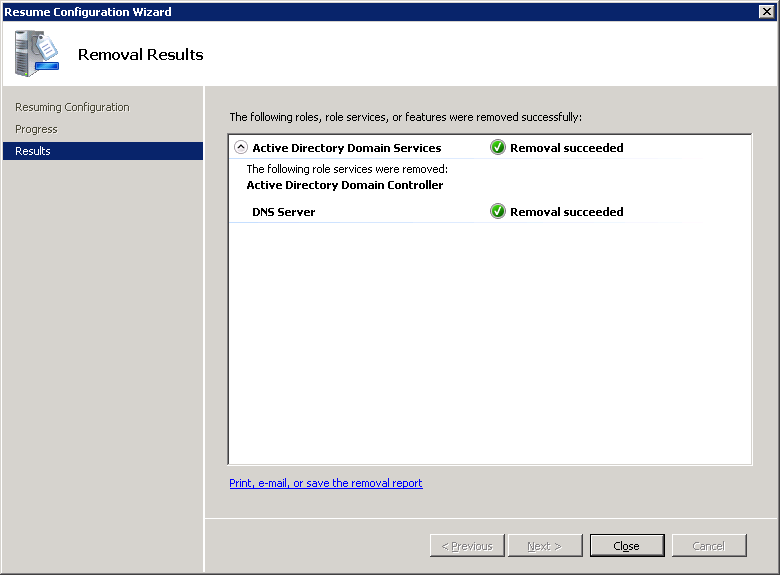
    16. Log back into the DC upon reboot and you should greeted by a Removal Results window.  Let the process finish and select Close upon removal success.
      Remove Roles Wizard - Resume Configuration Wizard
    17. Disjoin the machine from the domain
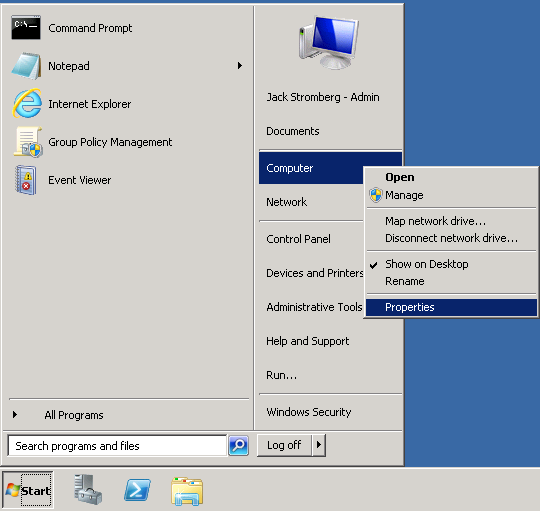
      1. Click Start, right click Computer, select Properties
        Start - Computer - Properties
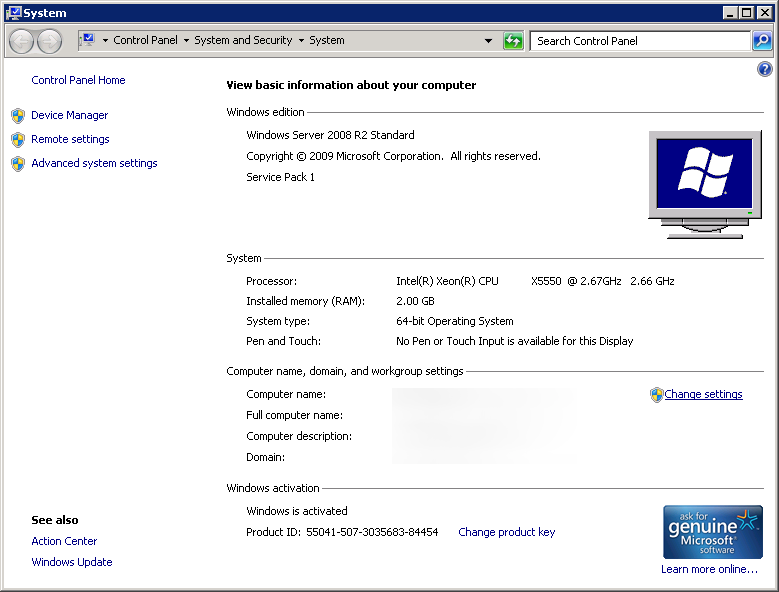
      2. Click Change settings
        Control Panel - System and Security - System - Change settings
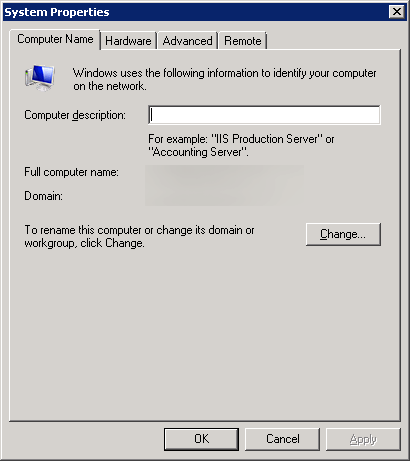
      3. Click Change... on the System Properties page
        System Properties
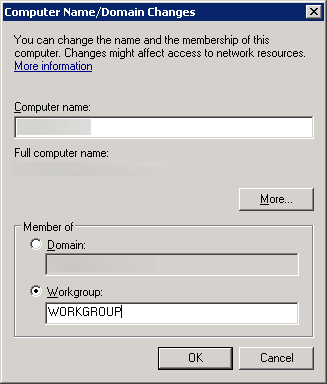
      4. Check Workgroup, type in a workgroup name, and click OK
        Computer Name - Domain Changes - Workgroup
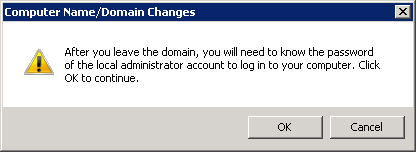
      5. Click OK on the warning dialog
        Computer Name - Domain Changes - Leave domain dialog
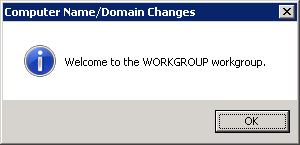
      6. Click OK on the Welcome to the workgroup dialog
        Welcome to the workgroup dialog
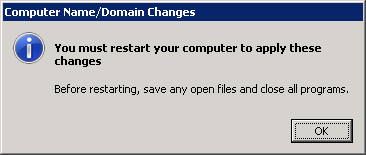
      7. Click OK on the restart dialog
        You must restart your computer to apply these changes
      8. Click Close on the System Properties window
        (oops, forgot to make a screenshot!)
      9. Click Restart Later on the Microsoft Windows dialog box
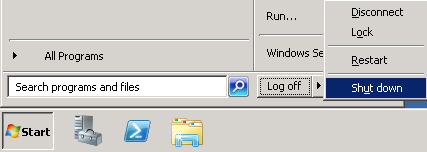
      10. Shutdown the machine
        Start - Shut down
    18. Format the decommissioned machine, reinstall a clean copy of Server 2012 R2, and join the machine to the domain.
  3. Add first Server 2012 R2 Domain Controller
    1. At this point, you should have one Server 2008 R2 Domain Controller and a blank Server 2012 R2 machine joined to the domain ready for the Active Directory services.  If you are at this point, continue on, if not, you might want to read back a couple steps and see where things ventured off course.
    2. Start Server Manager on your new Server 2012 R2 machine.
      Server 2012 R2 - Server Manager
    3. Select Manage in the top right and select Add Roles and Features
      Server 2012 - Manage - Add Roles and Features
    4. Click Next > on the Before you begin screen
      Add Roles and Features Wizard - Before you begin
    5. Click Next > on the Select installation type screen
      Add Roles and Features Wizard - Select installation type
    6. Ensure your new server is selected and click Next >
      Add Roles and Features Wizard - Select destination server
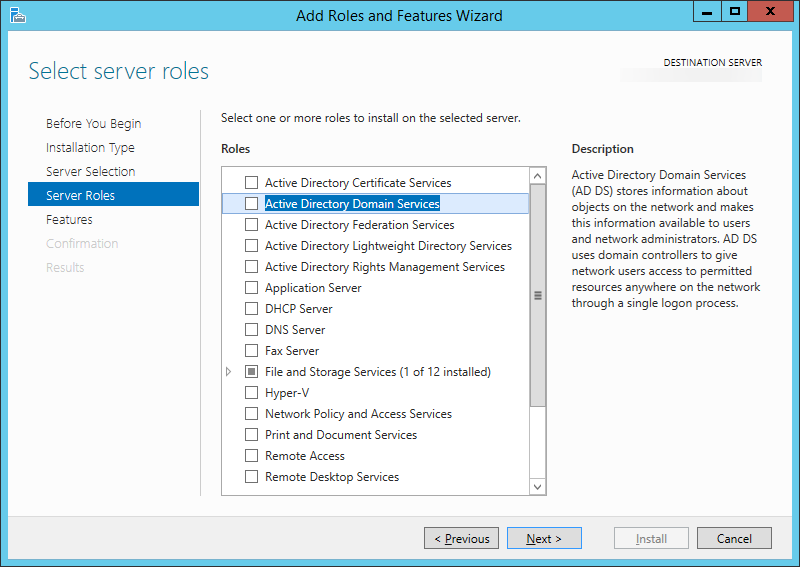
    7. Check the box next to Active Directory Domain Services
      Add Roles and Features Wizard - Select server roles
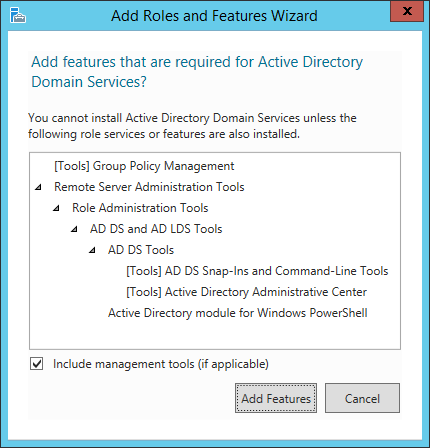
    8. On the Add features that are required for Active Directory Domain Services? dialog, click the Add Features button
      Add Roles and Features Wizard - Add features that are required for Active Directory Domain Services Dialog
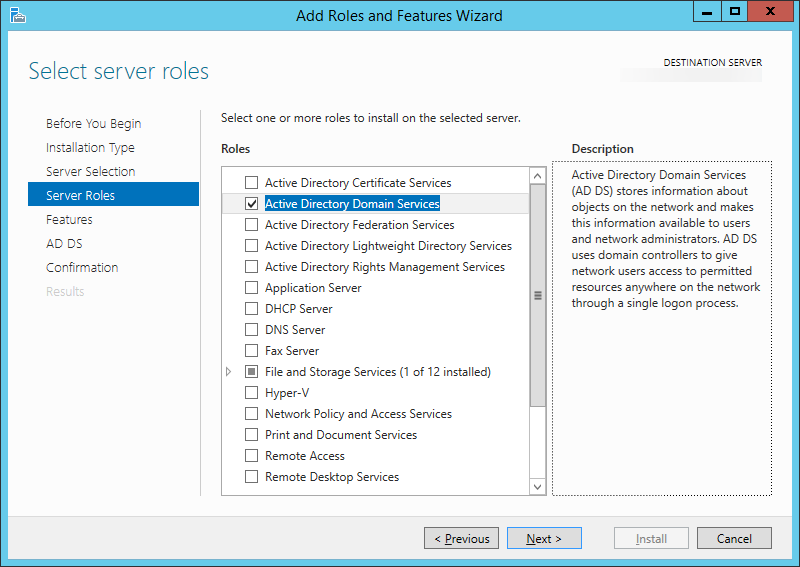
    9. Click Next >
      Add Roles and Features Wizard - Select server roles - Active Directory Domain Services Checked
    10. Click Next >
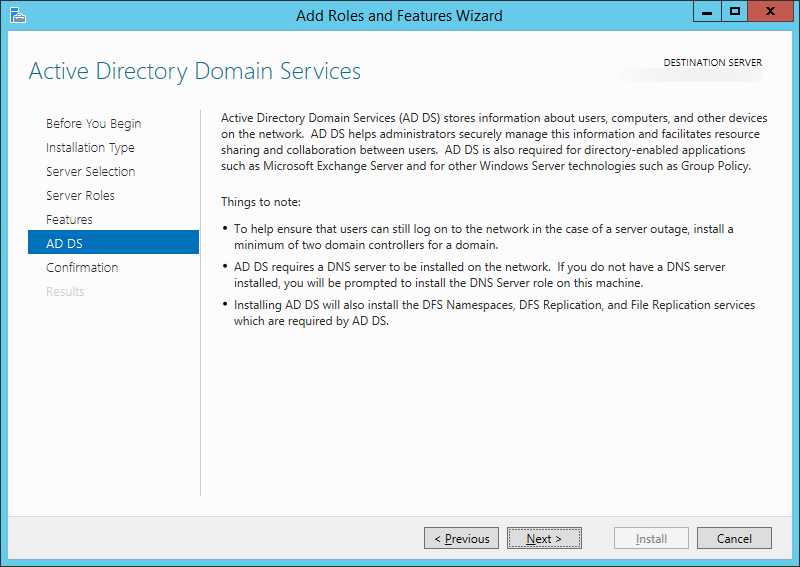
      Add Roles and Features Wizard - Active Directory Domain Services
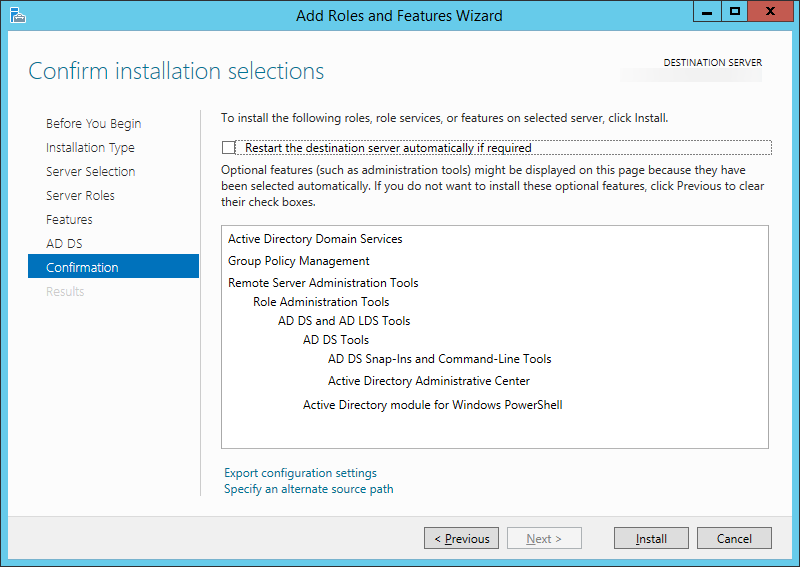
    11. Check the box that says Restart the destination server automatically if required
      (Click Yes on the restart dialog if it pops up)
      Add Roles and Features Wizard - Confirm installation selections
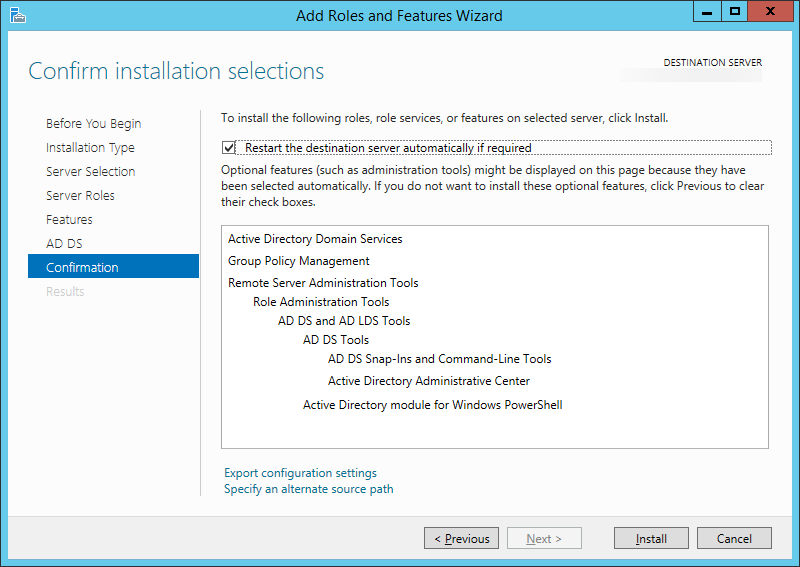
    12. Click the Install button
      Add Roles and Features Wizard - Confirm installation selections - restart
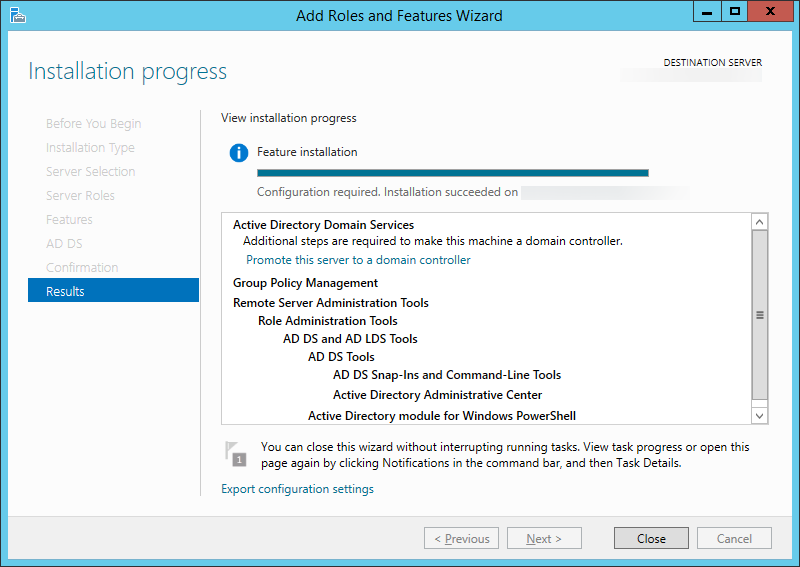
    13. Once the install is done, click the Close button
      Add Roles and Features Wizard - Installation progress
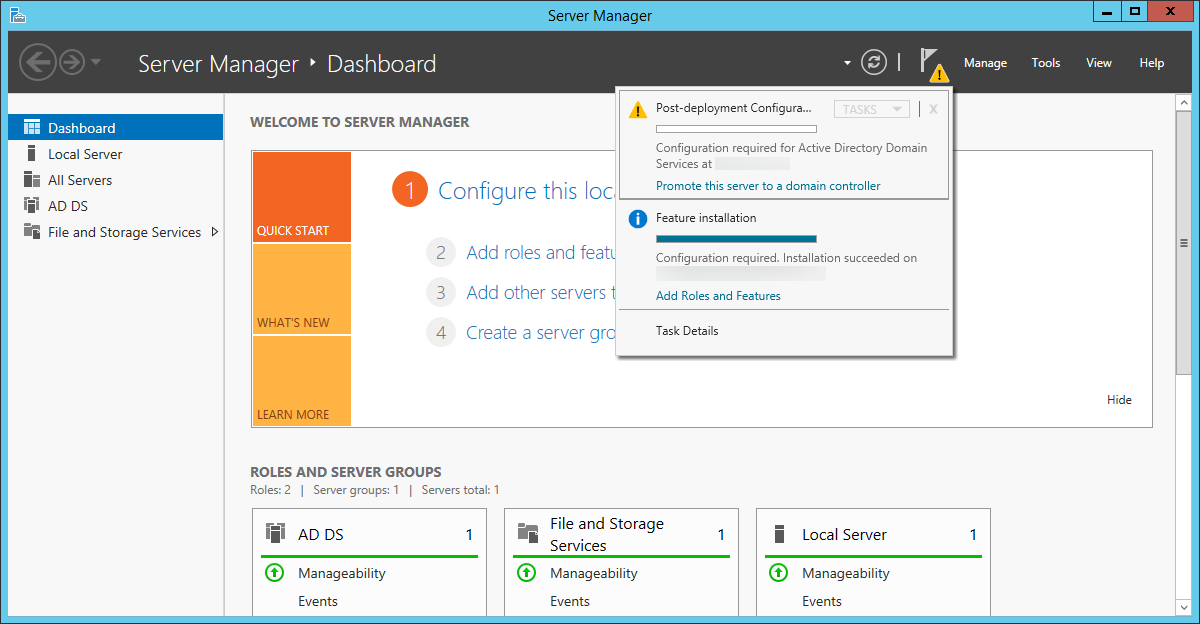
    14. Next, head back to the Server Manager screen and select the warning icon with the flag; then select Promote this server to a domain controller.
      Server Manager - Promote this server to a domain controller
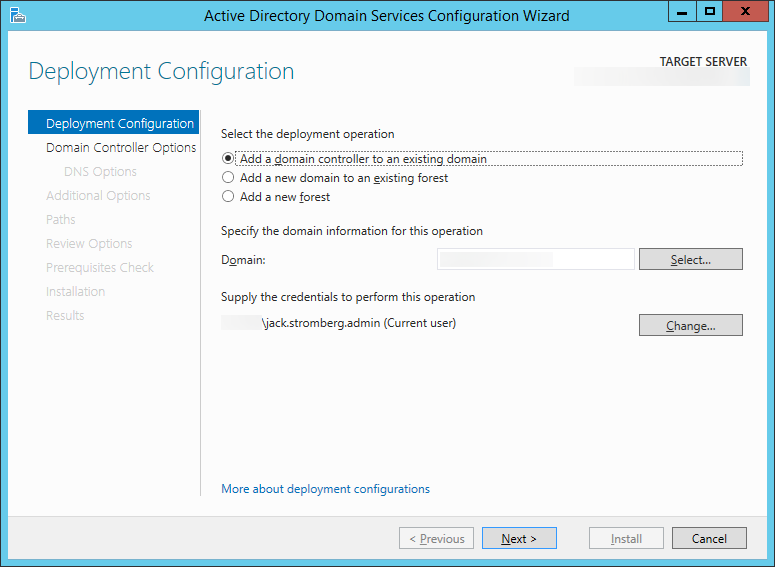
    15. On the Deployment Configuration page, make sure Add a domain controller to an existing domain is checked and hit Next >
      Active Directory Domain Services Configuration Wizard - Deployment Configuration
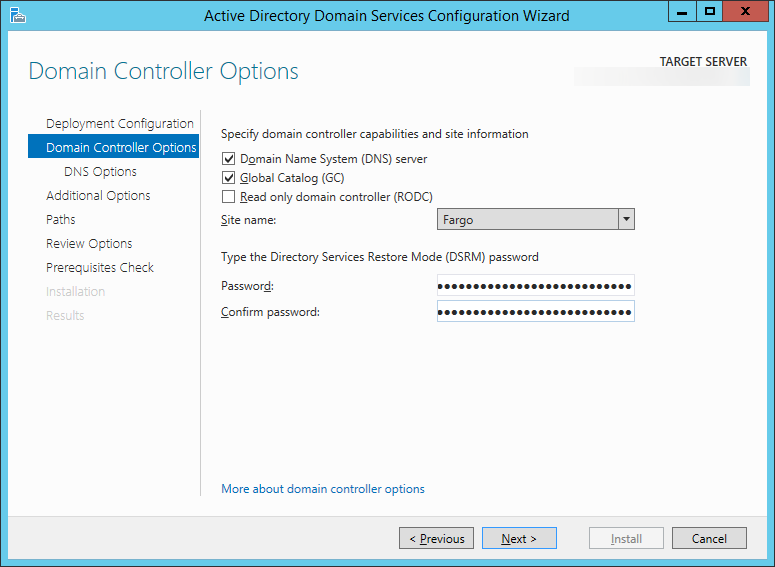
    16. Check Domain Name System (DNS) server, Check Global Catalog (GC), and uncheck Read only domain controller (RODC).  Enter a strong password to be used to access Directory Services Restore Mode and click Next >
      Active Directory Domain Services Configuration Wizard - Domain Controller Options
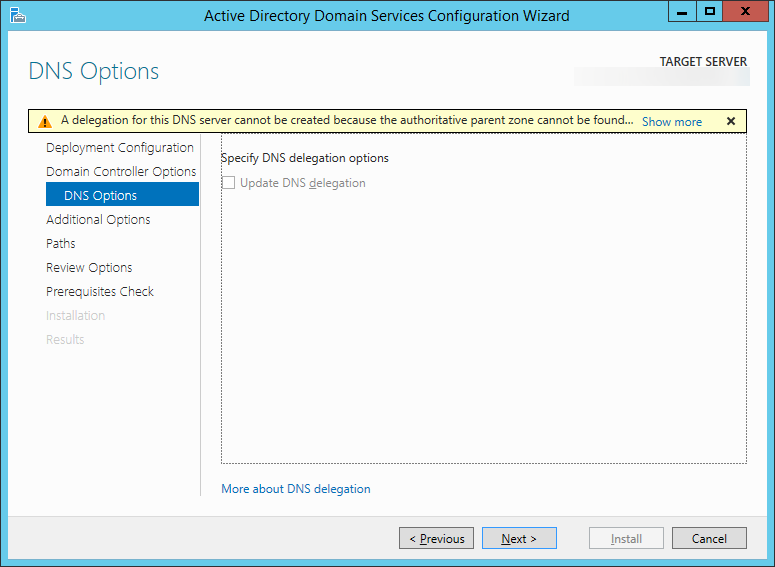
    17. Click Next > on the DNS Options page
      Active Directory Domain Services Configuration Wizard - DNS Options
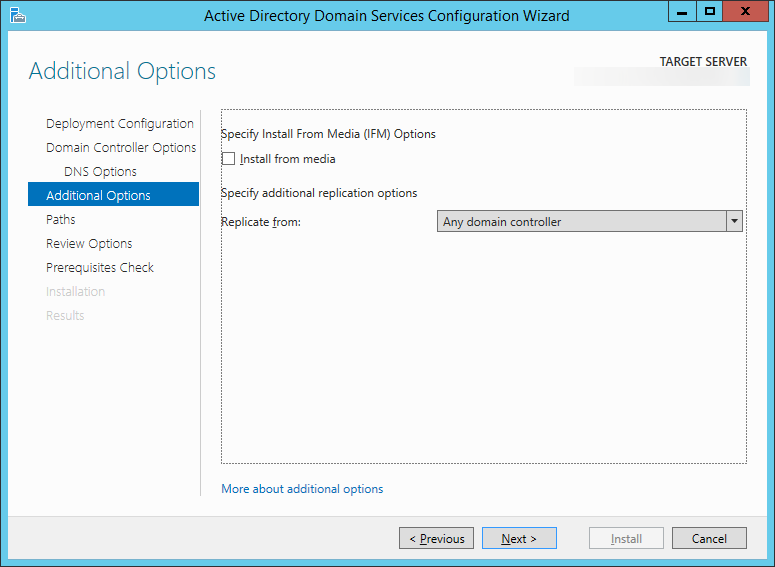
    18. Click Next > on the Additional Options page, or if you would like, you can manually select a domain controller to replicate data from and then hit Next >.
      Active Directory Domain Services Configuration Wizard - Additional Options
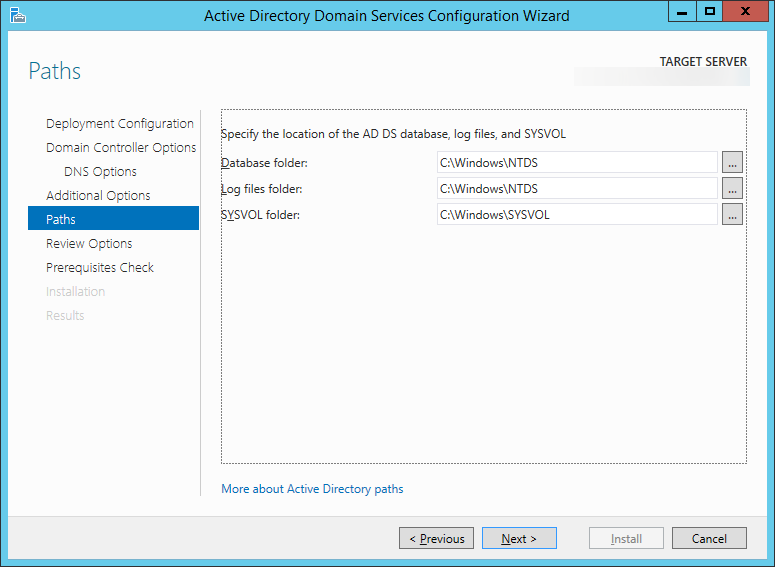
    19. Click Next > on the Paths page
      Active Directory Domain Services Configuration Wizard - Paths
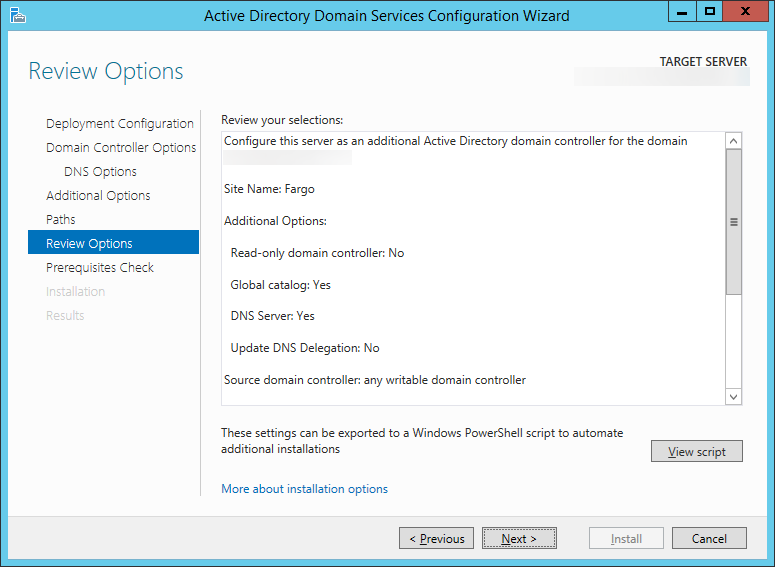
    20. Click Next > on the Review Options page
      Active Directory Domain Services Configuration Wizard - Review Options
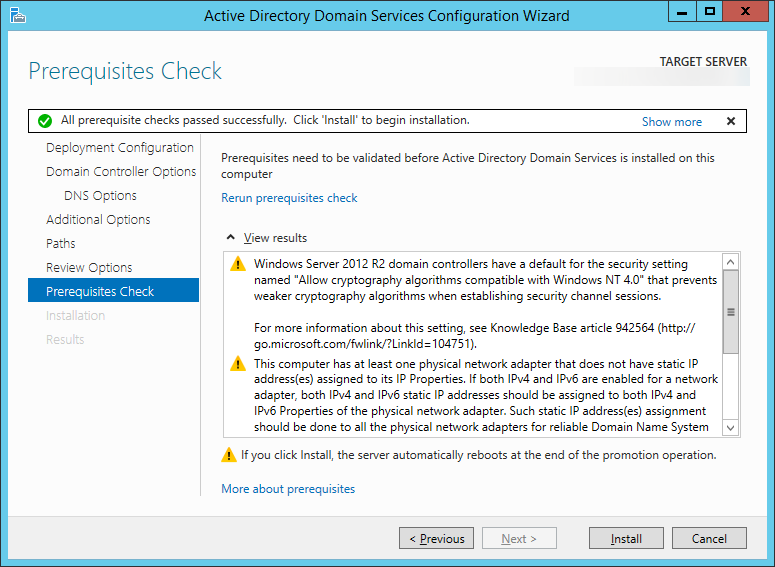
    21. Click Install on the Prerequisites Check page
      Active Directory Domain Services Configuration Wizard - Prerequisites Check
    22. Once the domain controller reboots after installation, open up Server Manager and select Tools, Active Directory Users and Computers
      Server Manager - Active Directory Users and Computers
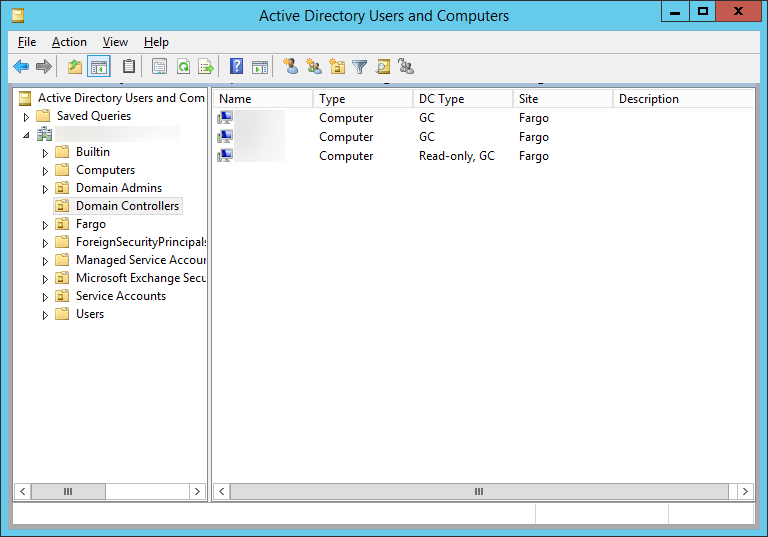
    23. Expand your Domain and select Domain Controllers; ensure your new machine shows up here.
      Active Directory Users and Computers - Domain Controllers
    24. Next, verify DNS works properly
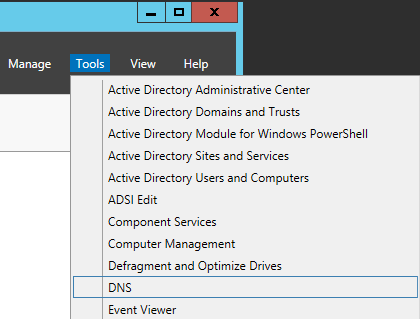
      1. Go back to Server Manager, select Tools, DNS
        Server Manager - DNS
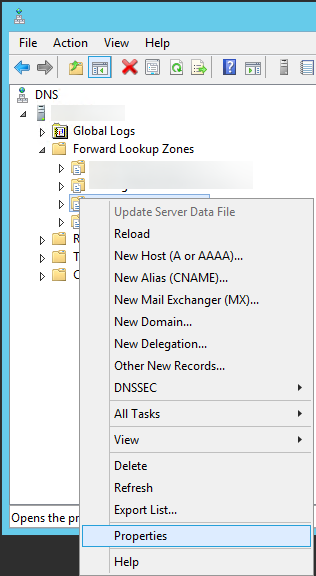
      2. Expand your server, Forward Lookup Zones, and right click on your domain name and select Properties
        DNS - Domain Name - Properties
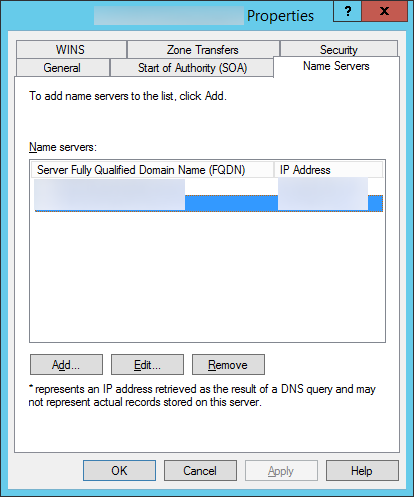
      3. Select the Name Servers tab and ensure all DCs are listed
        DNS - Properties - Name Servers
  4. Next, we need to verify the FSMO (Flexible Single Master Operations) roles are stored on our other server 2008 DC
    1. On the new Server 2012 R2 DC we joined, open up a command prompt with administrative privileges.
      Server 2012 - Administrative Command Prompt
    2. Execute the following command to verify FSMO roles are on our 2008 DC:
      netdom query fsmo
      netdom query fsmo
  5. Next, we need to transfer the FSMO roles from our primary DC to our new one
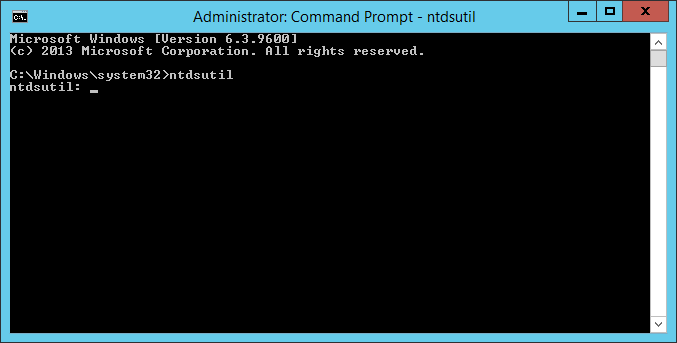
    1. Execute the following command using the same command prompt in the previous steps: ntdsutil
      ntdsutil
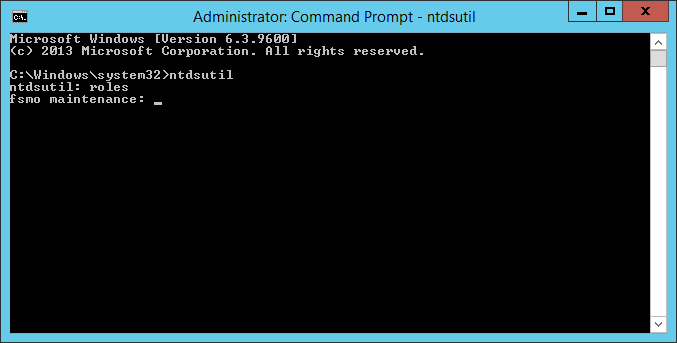
    2. Type roles when prompted and hit enter
      ntdsutil - roles
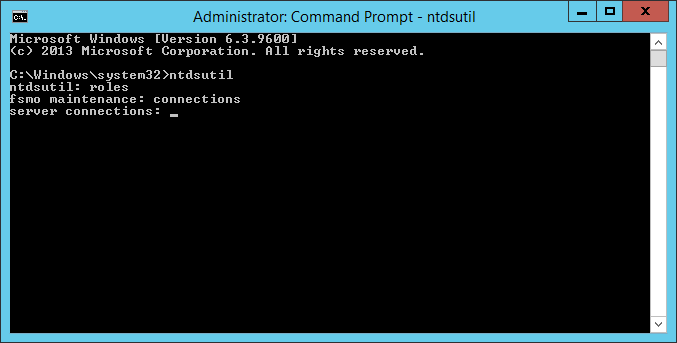
    3. Type connections when prompted and hit enter
      ntdsutil - roles - connections
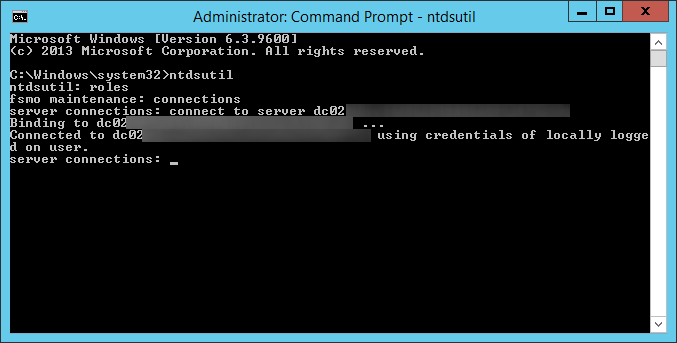
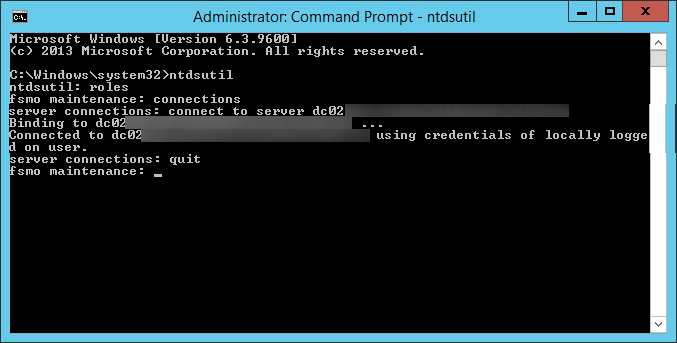
    4. Type connect to server server2012DC.mydomain.com, where server2012DC is the new DC we just deployed, when prompted and hit enter
      ntdsutil - roles - connections - connect to server
    5. Type quit and hit enter
      ntdsutil - roles - connections - connect to server - quit
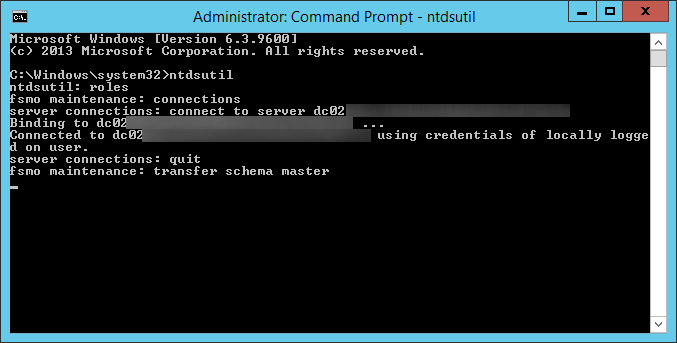
    6. Type transfer schema master and hit enter
      ntdsutil - transfer schema master
    7. Click Yes on the Role Transfer Dialog for the Schema Master role
      Role Transfer Confirmation Dialog - Schema Master
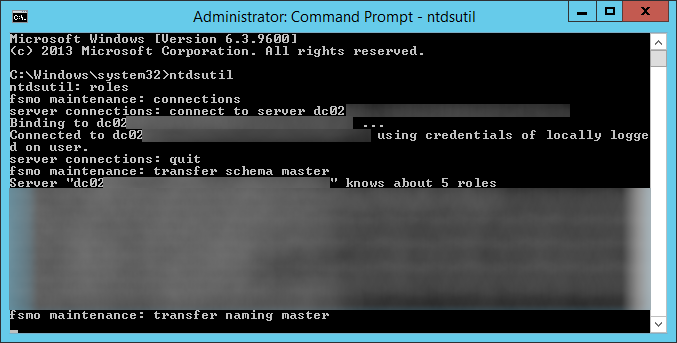
    8. Type transfer naming master and hit enter
      ntdsutil - transfer naming master
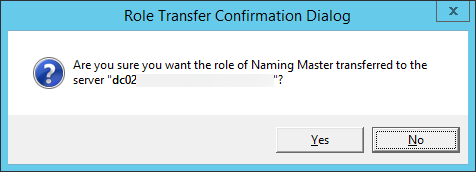
    9. Click Yes on the Role Transfer Confirmation Dialog for the Naming Master role
      Role Transfer Confirmation Dialog - Naming Master
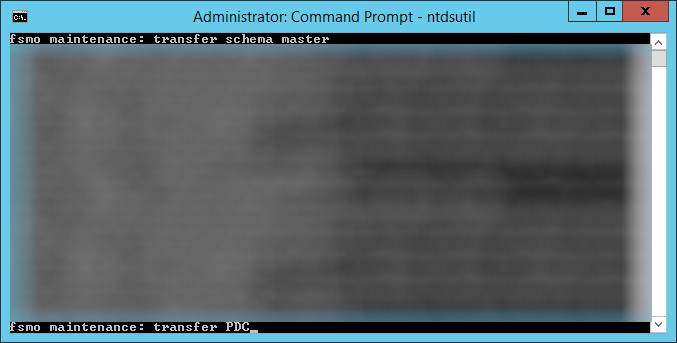
    10. Type transfer PDC and hit enter
      ntdsutil - transfer PDC
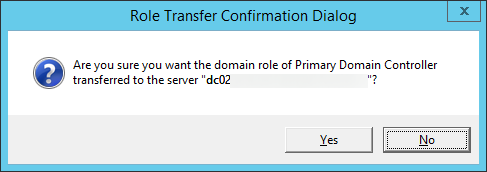
    11. Click Yes on the Role Transfer Configuration Dialog for the Primary Domain Controller role
      Role Transfer Confirmation Dialog - Primary Domain Controller
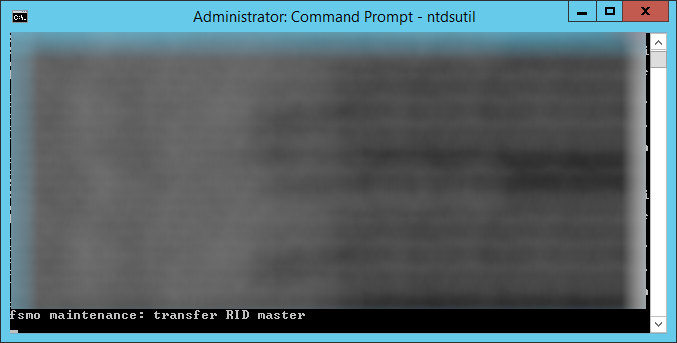
    12. Type transfer RID master and hit enter
      ntdsutil - transfer RID master
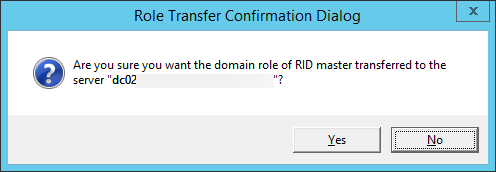
    13. Click Yes on the Role Transfer Configuration Dialog for the RID master role
      Role Transfer Confirmation Dialog - RID master
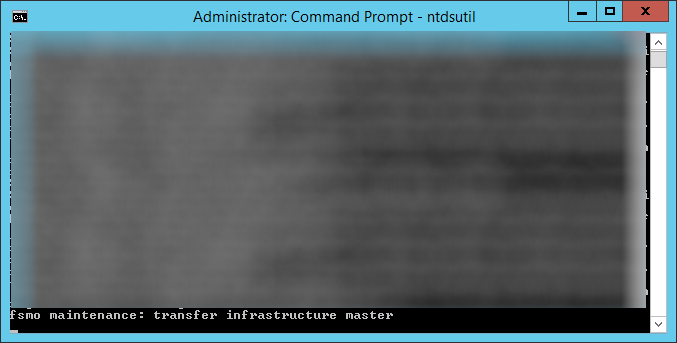
    14. Type transfer infrastructure master and hit enter
      ntdsutil - transfer infrastructure master
    15. Click Yes on the Role Transfer Configuration Dialog for the Infrastructure Master role
      Role Transfer Confirmation Dialog - Infrastructure Master
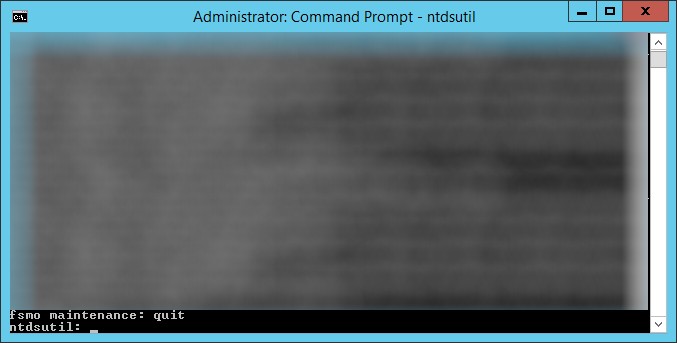
    16. Type quit and hit enter
      ntdsutil - fsmo maintenance - quit
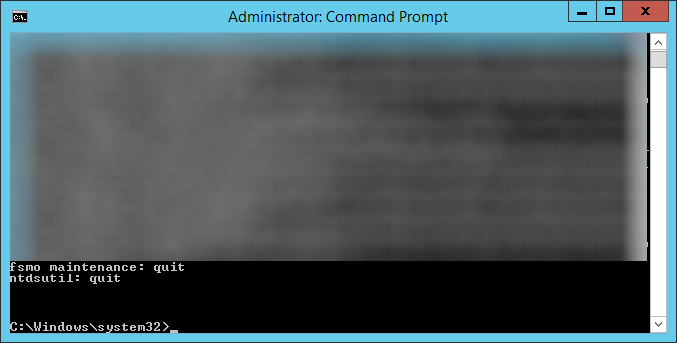
    17. Type quit and hit enter
      ntdsutil - quit
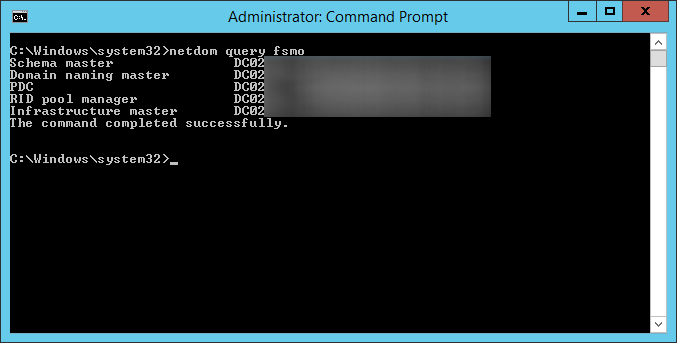
    18. Execute the following command to ensure the FSMO services are on the new Server 2012 R2 machine: netdom query fsmo
      netdom query fsmo - moved dc
  6. At this point, you should have a Server 2012 R2 DC with the FSMO roles and a secondary 2008 R2 Domain Controller.  If not, please go back and complete the steps to get to this point.
  7. Optional Step: After upgrading the first DC, you may want to reconfigure the machine to keep its time in sync with an external source.  To do this, please follow my guide here: http://jackstromberg.com/2013/10/configuring-external-time-source-on-your-primary-domain-controller/
  8. Next, decommission the last Server 2008 R2 domain controller that used to function as the primary DC.
    1. Follow the same instructions in Step 2 above called Demote and decommission secondary domain controller
  9. Next, add the machine back to the domain
    1. Follow the same instructions in Step 3 above called Add first Server 2012 R2 Domain Controller
  10. At this point, your environment should be up and running with Windows Server 2012 R2!  You can optionally transfer the FSMO roles back to your "primary" DC that you had before, or continue on with the roles left on the current DC.

Notes

Official information on removing a domain controller from the domain can be found on Microsoft's website here: http://technet.microsoft.com/en-us/library/cc771844(v=ws.10).aspx