Notice: Home Assistant has released a new integration called Z-Wave JS. You should be using that integration vs the older Z-Wave integration that this article covers. I will be updating this guide soon.
A few years back I had a SmartThings Hub and for the most part it worked great. It was simple to setup, can be accessed anywhere, and for the most part automatically updated itself. Unfortunately, with the acquisition of it by Samsung, it seems to have turned into bloatware with poor responsiveness, the mobile application's UI is horrific, and they have a less than desirable security/privacy policy.
Luckily, the open source community has thrown together Home Assistant, an open source home automation project backed by hundreds/thousands of individuals. Over the years, they have now brought native support for mobile devices, at time of writing this there are 1500+ integrations for dang near any device, and the software puts you in control of who has access to and where your data is accessible.
The one trade-off though is while Home Assistant works well and is very extensible, the documentation and usability of the application can be overwhelming to understand for someone new to home automation, unfamiliar with Linux/Open Source technologies, or new to debugging/command line interfaces.
In this case, I've tried to document a crash course in getting Home Assistant up and running as quickly as possible for those that want to get started with Z-Wave devices and Home Assistant.
Hardware
You can leverage pretty much any hardware with Home Assistant, but here are the two items I used in my venture. Home Assistant has a full list of recommendations for what hardware to use for Home Assistant (https://www.home-assistant.io/getting-started/#suggested-hardware) as well as what Z-Wave controllers are supported (https://www.home-assistant.io/docs/z-wave/controllers/).
- RaspberryPi 4 Model B
- Home Assistant will run on any version of Raspberry Pi, but it is recommended to use version 3 or 4 for best performance. In this guide, I use a Raspberry Pi 4 for reference. Below is a link to the Raspberry Pi kit, which contains everything you need to get started.
- Z-Wave USB Stick
- I used a Zooz Z-Wave Plus S2 USB Stick
Update your Raspberry Pi
First things first, update your Raspberry Pi with the latest updates. Open up Terminal or SSH to your Raspberry Pi and execute the following command:
sudo apt-get update && sudo apt-get upgradePrepare your Z-Wave USB Stick
Plug in your Z-Wave USB stick. Once plugged in, we need to find the device path so that we can reference it for Home Assistant. Execute the lsusb command to find your device ID. In this case, you can see my device ID begins with 0658.
root@raspberrypi:/dev# lsusb
Bus 002 Device 001: ID 1d6b:0003 Linux Foundation 3.0 root hub
Bus 001 Device 003: ID 0658:0200 Sigma Designs, Inc. Aeotec Z-Stick Gen5 (ZW090) - UZB
Bus 001 Device 002: ID 2109:3431 VIA Labs, Inc. Hub
Bus 001 Device 001: ID 1d6b:0002 Linux Foundation 2.0 root hub
Next, let's find what the device path is for the USB stick. You can do this by executing the following command: dmesg | egrep '0658|acm' Please note, if you purchased a difference device, 0658 may be a different number. In this case, you can see my device is presented on ttyACM0.
root@raspberrypi:/dev# dmesg | egrep '0658|acm'
[    1.405327] usb 1-1.2: New USB device found, idVendor=0658, idProduct=0200, bcdDevice= 0.00
[    3.468875] cdc_acm 1-1.2:1.0: ttyACM0: USB ACM device
[    3.471348] usbcore: registered new interface driver cdc_acm
[    3.471359] cdc_acm: USB Abstract Control Model driver for USB modems and ISDN adapters
Install Docker
Home Assistant doesn't require Docker, but by leveraging Docker you can easily copy/backup your configuration and simply redeploy the container if something goes wrong. As updates are made, you can simply remove your container and redeploy. To install Docker, execute the following command:
curl -sSL https://get.docker.com | shDeploy Home Assistant Docker Container
Once Docker is installed, you can deploy the container from Docker Hub. Docker Hub is a public repository that has tons of different prebuilt containers to deploy. Here you can find the official homeassistant containers: https://hub.docker.com/u/homeassistant
To deploy the container, execute the following line, replacing the following variables with your desired configuration:
- --name="the name of your container"
- -e "TM=YourTimezone"
- TZ Database column here contains a list of acceptable values: https://en.wikipedia.org/wiki/List_of_tz_database_time_zones
- --device=/dev/ttyACM0
- This allows the container to leverage the Z-Wave USB device. Make sure you specify the path to your device found in the previous step
- -v /home/docker/home-assistant:/config
- This is the path that the home assistant configuration files should be stored to. You can specify a fileshare or other path to place your configuration files.
- --net=host homeassistant/raspberrypi4-homeassistant:stable
- The first half of this is the container you wish to deploy and the second half is the version. You can find all of Home Assistant's official containers here: https://hub.docker.com/u/homeassistant
sudo docker run -d --restart=always --name="home-assistant" -e "TZ=America/Chicago" --device=/dev/ttyACM0 -v /home/docker/home-assistant:/config --net=host homeassistant/raspberrypi4-homeassistant:stableNote: In newer versions of the docker container --init should not be specified in the docker run command. Specifying --init will result with the following error: "s6-overlay-suexec: fatal: can only run as pid 1". This was mentioned as a breaking change in: 2022-06-01 update: 2022.6: Gaining new insights! - Home Assistant (home-assistant.io)
Setup Home Assistant
Give the container a few minutes to deploy and configure itself for the first time. After a few minutes, try opening your web browser and navigating to the IP address assigned to your machine, using port number 8123: http://192.168.1.2:8123/
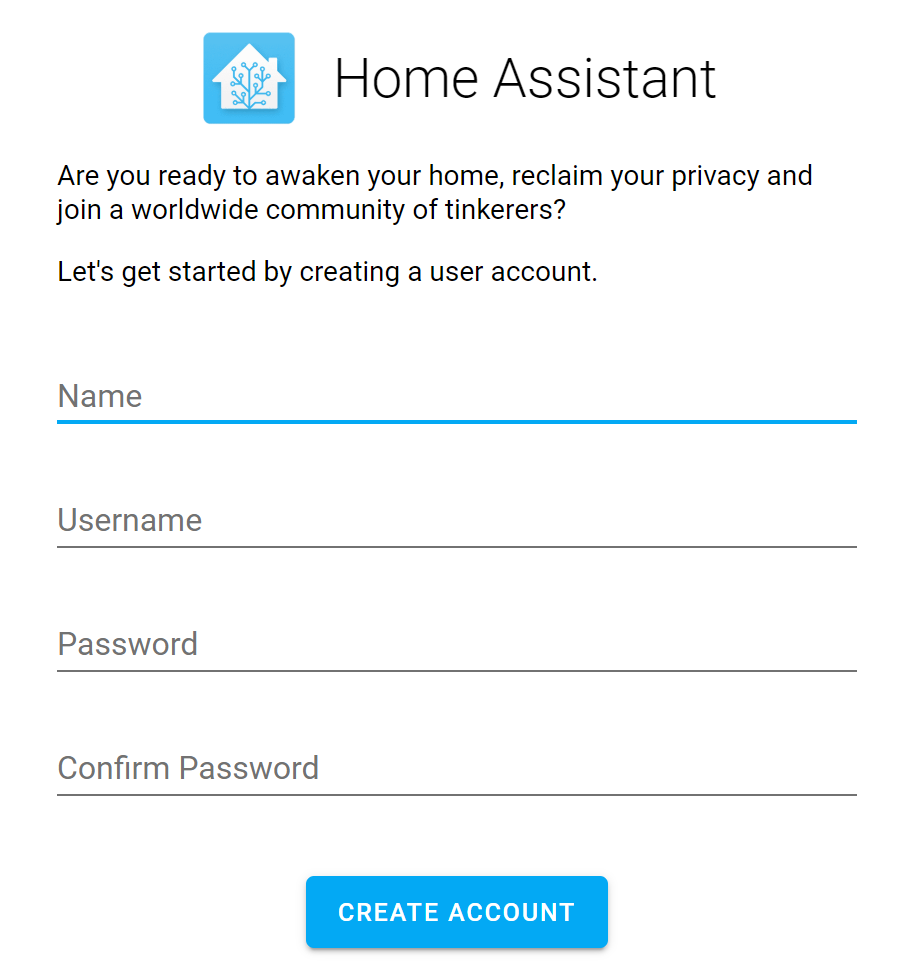
When the page loads, it should first ask for your Name, Username, and Password. This is the username and password you will use to login to Home Assistant.
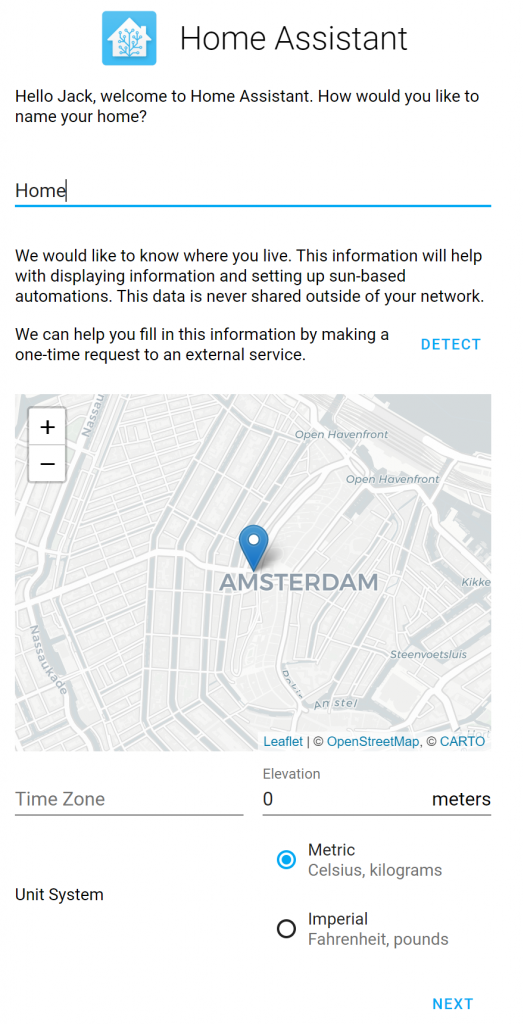
Next, specify the location of where your Home Assistant deployment is located. Oddly enough, you cannot type in a location, but you can place the pin near your location by dragging the map around and clicking once to set the pin.
Once you click Next, Home Assistant may have already found a few devices connected to your network. You can add them now or skip and add them later.
Tell Home Assistant to use your Z-Wave USB Stick
Although we granted access to the container to use the Z-Wave USB Stick, you need to tell Home Assistant how to leverage the device. To do so, you will need to open up Terminal or SSH to your machine and edit the configuration.yaml file to point to the device. Before we get into modifying the configuration.yaml file, first execute the following command to generate a Z-Wave Security Key. This key may be required by Z-Wave security devices (Door Locks, Keypads, etc), as an extra layer of security. More information on this can be found here: https://www.home-assistant.io/docs/z-wave/adding#network-key
Execute the following command via Terminal or SSH:
cat /dev/urandom | tr -dc '0-9A-F' | fold -w 32 | head -n 1 | sed -e 's/\(..\)/0x\1, /g' -e 's/, $//'Once you execute the command, it should give you a string of characters that look something like:
"0x01, 0x02, 0x03, 0x04, 0x05, 0x06, 0x07, 0x08, 0x09, 0x0A, 0x0B, 0x0C, 0x0D, 0x0E, 0x0F, 0x10"
Next, we need to edit the configuration.yaml file, which can be found in the path specified when the Docker container was deployed (using the -v parameter). For the purpose of this article, /home/docker/home-assistant/configuration.yaml is where the file is located. Using your favorite text editor, add the following lines of code:
zwave:
  usb_path: /dev/ttyACM0
  network_key: "0x01, 0x02, 0x03, 0x04, 0x05, 0x06, 0x07, 0x08, 0x09, 0x0A, 0x0B, 0x0C, 0x0D, 0x0E, 0x0F, 0x10"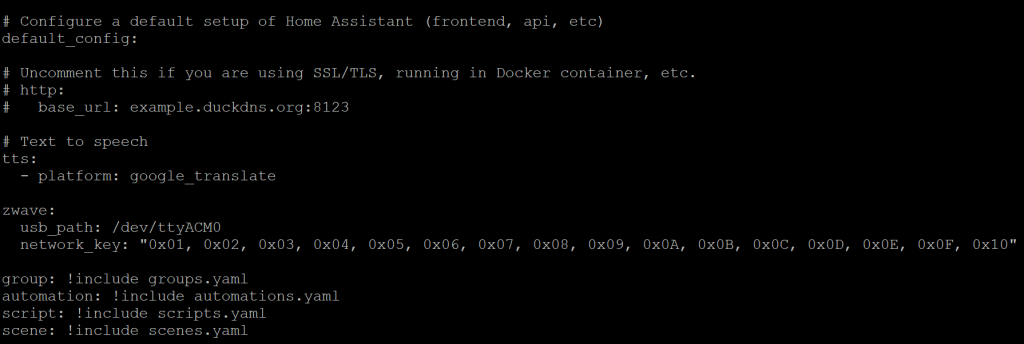
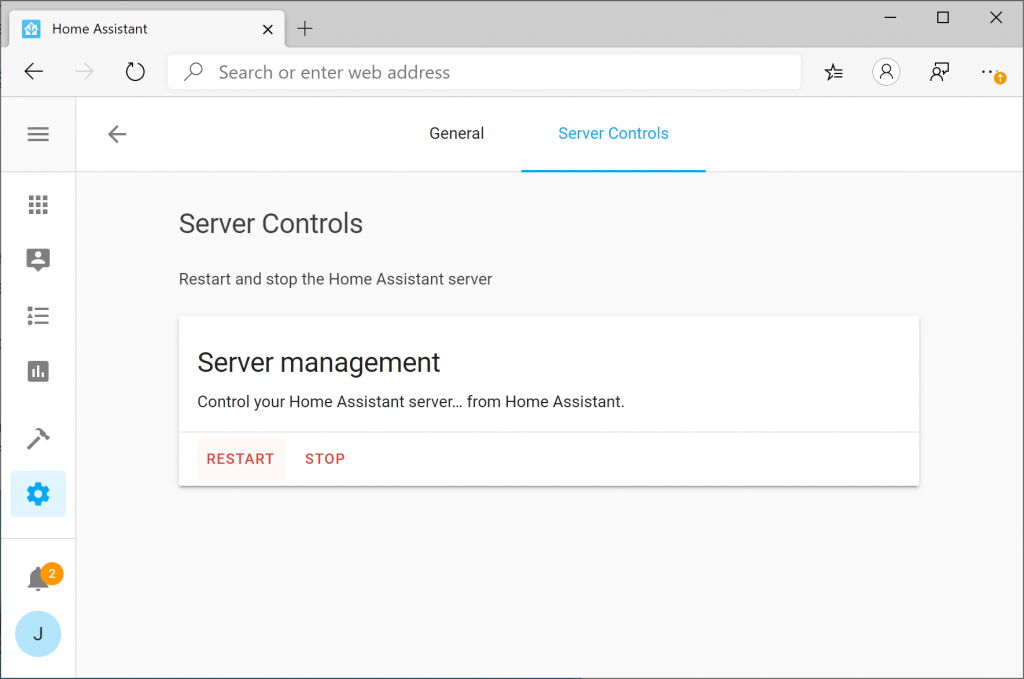
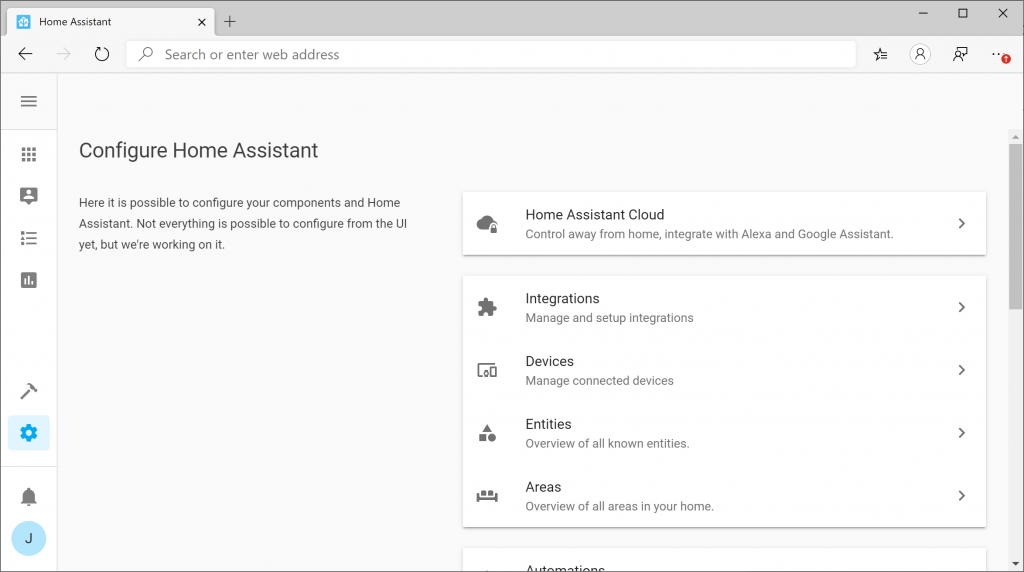
Once saved, go back to Home Assistant and click the Gear icon and then select Server Controls
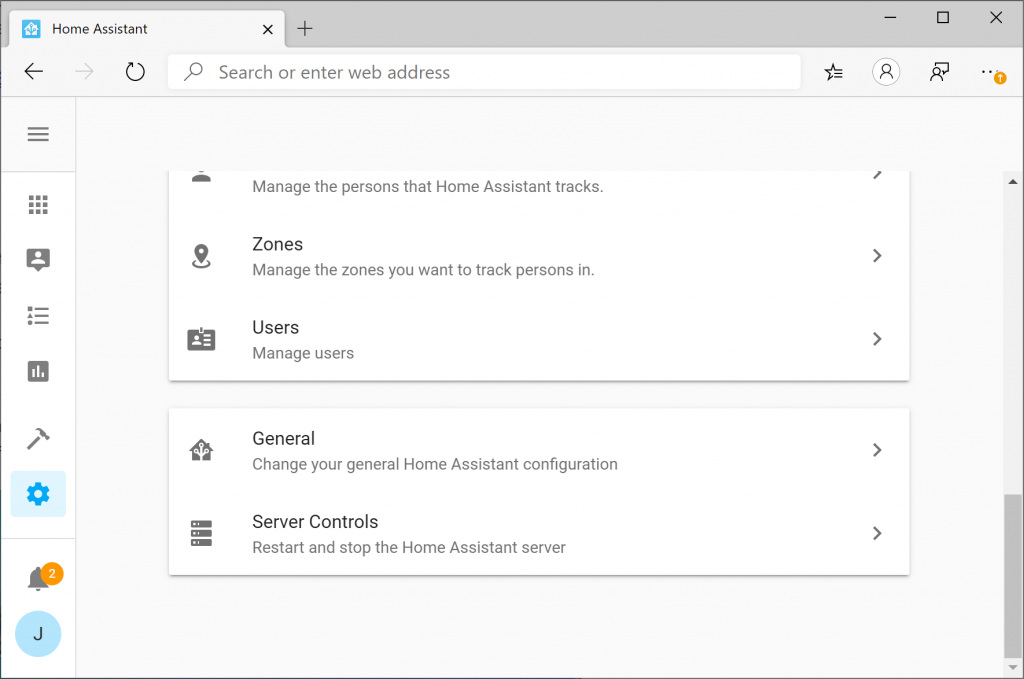
Select the Restart button to restart Home Assistant. Any time you make a change to the configuration.yaml file, you will need to restart Home Assistant to pickup the configuration changes.
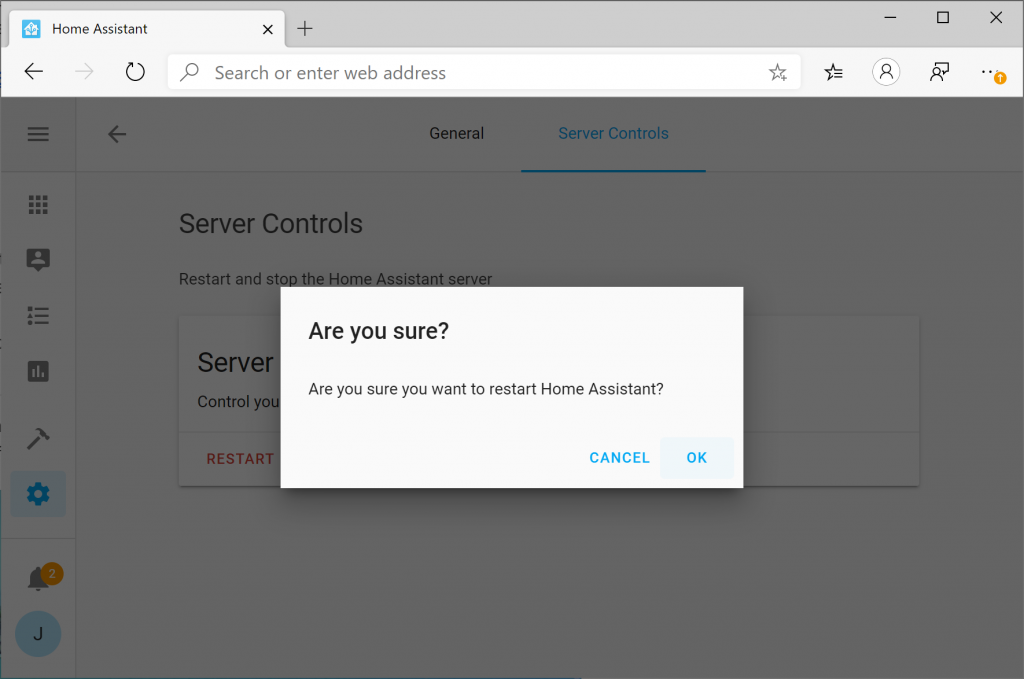
Click OK to Restart
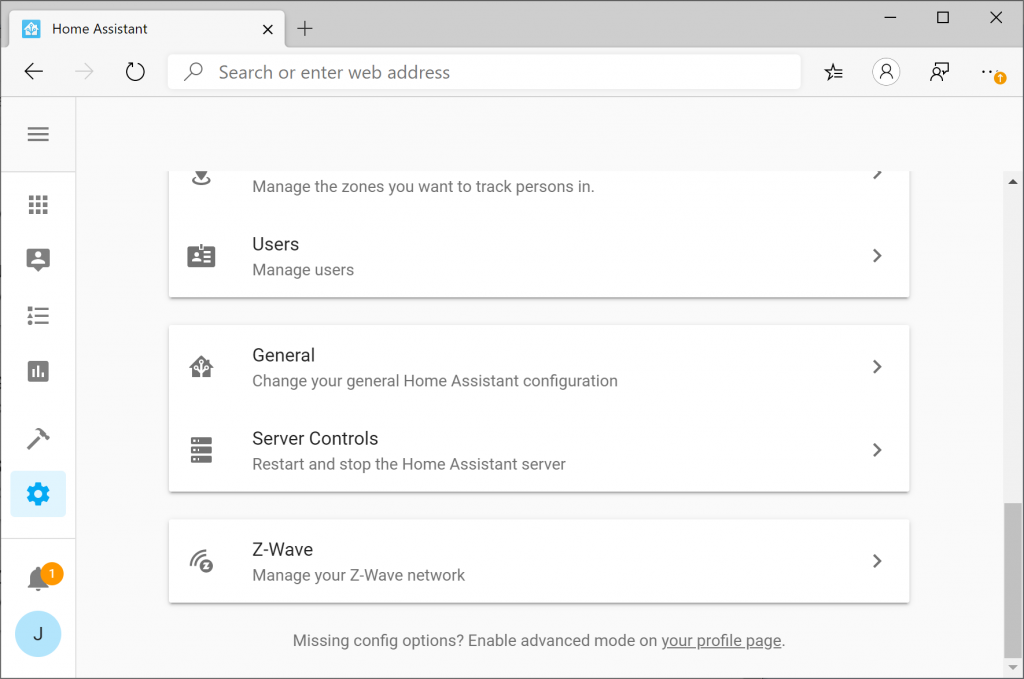
Upon restart, navigate back to the Gear icon and you should see a new entry in the Config portal for Z-Wave. If you do not see the "Z-Wave" section, scroll down to the troubleshooting step at the end of this article.
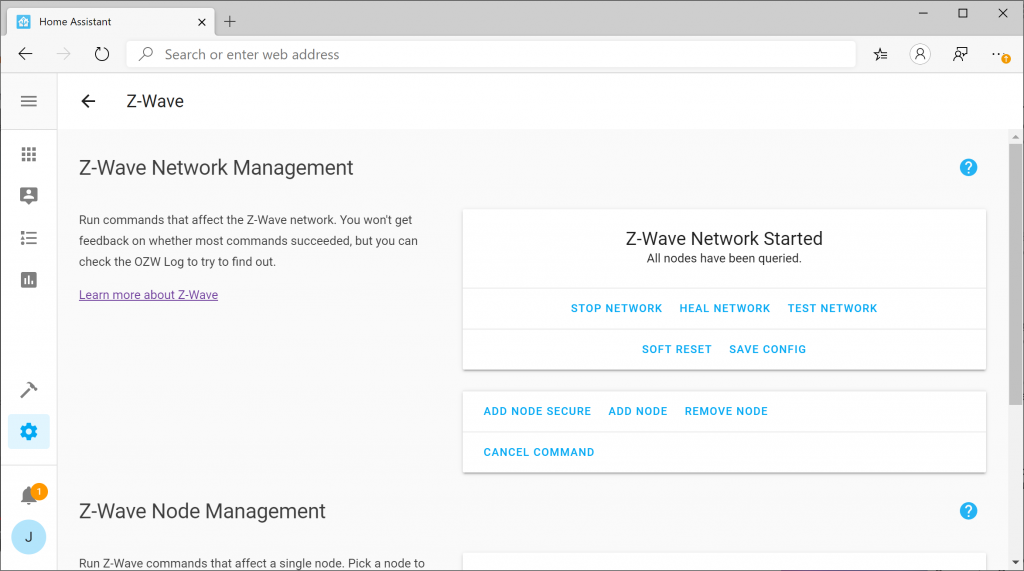
Add a Z-Wave device
Once you see that your Z-Wave network has started, adding a device is a piece of cake. First click the Add Node button. When you click the button, nothing will happen, but go ahead and put your device in inclusion mode. Once the device is in inclusion mode, Home Assistant should automatically add the device.
At this point, if you navigate back to Configuration (Gear icon) and select Devices
You should see your newly added Z-Wave device!
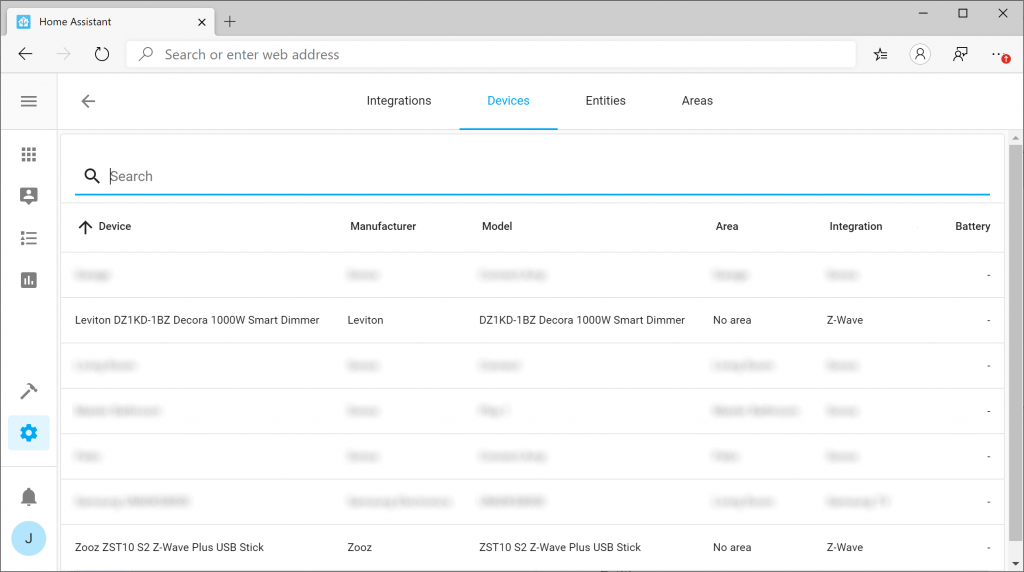
At this point, you can select the Device to give it a friendly name or start to work on building your own home automation actions.
Hope this helped! If you have any comments or suggestions on how to improve this guide, please drop it below.
Troubleshooting Missing Z-Wave Configuration
The first time I ran through this, I noticed I was missing the Z-Wave configuration tile after making changes to the configuration.yaml file. It turned out I specified the wrong device path in the configuration file. To verify, you can check the logs from your Docker container by executing the following command in your Terminal or via SSH. (Replace home-assistant with the name of your container if you specified something else)
sudo docker logs home-assistantIn my case, I had the following error:
2020-02-16 21:08:01 INFO (MainThread) [homeassistant.components.scene] Setting up scene.homeassistant
2020-02-16 21:08:02 INFO (MainThread) [homeassistant.components.zwave] Z-Wave USB path is /dev/ttyACM01
2020-02-16 21:08:02 ERROR (MainThread) [homeassistant.config_entries] Error setting up entry Z-Wave (import from configuration.yaml) for zwave
Traceback (most recent call last):
  File "/usr/local/lib/python3.7/site-packages/openzwave/option.py", line 78, in __init__
    raise ZWaveException(u"Can't find device %s : %s" % (device, traceback.format_exception(*sys.exc_info())))
openzwave.object.ZWaveException: "Zwave Generic Exception : Can't find device /dev/ttyACM01 : ['NoneType: None\\n']"

During handling of the above exception, another exception occurred:

Traceback (most recent call last):
  File "/usr/src/homeassistant/homeassistant/config_entries.py", line 215, in async_setup
    hass, self
  File "/usr/src/homeassistant/homeassistant/components/zwave/__init__.py", line 369, in async_setup_entry
    config_path=config.get(CONF_CONFIG_PATH),
  File "/usr/local/lib/python3.7/site-packages/openzwave/option.py", line 81, in __init__
    raise ZWaveException(u"Error when retrieving device %s : %s" % (device, traceback.format_exception(*sys.exc_info())))
openzwave.object.ZWaveException: 'Zwave Generic Exception : Error when retrieving device /dev/ttyACM01 : [\'Traceback (most recent call last):\\n\', \'  File "/usr/local/lib/python3.7/site-packages/openzwave/option.py", line 78, in __init__\\n    raise ZWaveException(u"Can\\\'t find device %s : %s" % (device, traceback.format_exception(*sys.exc_info())))\\n\', \'openzwave.object.ZWaveException: "Zwave Generic Exception : Can\\\'t find device /dev/ttyACM01 : [\\\'NoneType: None\\\\\\\\n\\\']"\\n\']'
Here you can see I accidentally specified /dev/ttyACM01 vs /dev/ttyACM0. Simply updating the configuration.yaml file with the correct device path solved the issue.
Pingback: How to update Home Assistant Docker Container | Jack Stromberg
Hi!
Thanks for this good guide, "Home Assistant + Docker + Z-Wave + Raspberry Pi"!
Do you have any instructions how I should do if I want to use Zwave JS instead of Zwave (which is depreceated)? Or do you not recommend using Zwave JS yet?
Best,
Bengt
Thank you for your message! ZWave JS was released last month, but definitely is the direction moving forward and is recommended to be used for new installations. You can read more about the announcement of it here: https://www.home-assistant.io/blog/2021/02/03/release-20212/#z-wave-js
I'll see if I can update the guide later this evening.
Pingback: How to upgrade Home Assistant Z-Wave integration to Z-Wave JS for Docker | Jack Stromberg