Installing NodeJS on a Raspberry Pi can be a bit tricky. Over the years, the ARM based processor has gone through several versions (ARMv6, ARMv7, and ARMv8), in which there are different flavors of NodeJS to each of these architectures.
Depending on the version you have, you will need to manually install NodeJS vs grabbing the packages via a traditional apt-get install nodejs.
Step 1: Validate what version of the ARM chipset you have
First let's find out what ARM version you have for your Raspberry Pi. To do that, execute the following command:
uname -m
You should receive something like: armv61
Step 2: Find the latest package to download from nodeJS's website
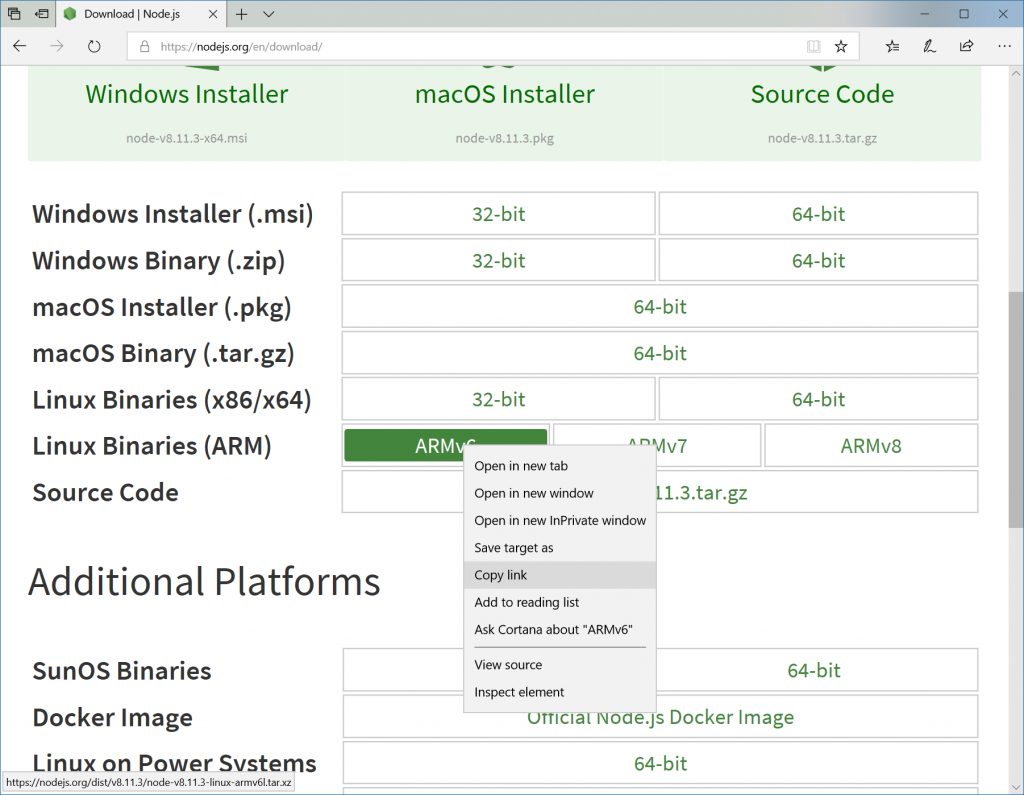
Navigate to https://nodejs.org/en/download/ and scroll down to the latest Linux Binaries for ARM that match your instance. Right click and copy the address to the instance that matches your processor's architecture. For example, if you saw armv61, you'd copy the download for ARMv6
Step 3: Download and install nodeJS
Within your SSH/console session on the Raspberry Pi, change to your local home directory and execute the following command (substituting in the URL you copied in the previous step in what's outlined in red below). For example:
cd ~
wget https://nodejs.org/dist/v8.11.3/node-v8.11.3-linux-armv6l.tar.xz
Next, extract the tarball (substituting in the name of the tarball you downloaded in the previous step) and change the directory to the extracted files
tar -xvf node-v8.11.3-linux-armv6l.tar.xz
cd node-v8.11.3-linux-armv6l
Next, remove a few files that aren't used and copy the files to /usr/local
rm CHANGELOG.md LICENSE README.md
cp -R * /usr/local/
Step 4: Validate the installation
You can validate that you have successfully installed NodeJS by running the following commands to return the version numbers for NodeJS and npm
node -v
npm -v
That's it! Have fun!


