Tag Archives: Server 2008

Configuring external time source on your Primary Domain Controller

Here we will configure your primary domain controller (PDC) to connect to an external source to keep your time synchronized up with the rest of the world.  By changing the primary DC's time source to an external source, the changes will be replicated from the PDC to other clients in your domain; limiting the amount of bandwidth needed to synchronize with an external source.  First, I am going to reference much of the information provided by .  I would highly recommend you check out his blog post as it contains a ton of valuable information on the subject as well as more information/best practicies in regards to keeping time in your organization's infrastrucutre: http://binarynature.blogspot.co.uk/2012/04/configure-active-directory.html

  1. Find out what your primary domain controller (PDC) is for your domain by executing the following powershell commands from any machine in the domain
    1. [System.DirectoryServices.ActiveDirectory.Forest]::GetCurrentForest().RootDomain.PdcRoleOwner.Name
      PowerShell - PdcRoleOwner
  2. Login to your primary domain controller
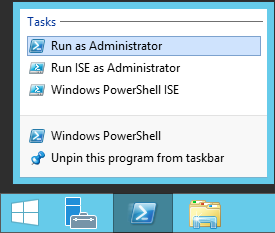
  3. Open up a command prompt/powershell window with administrative privilegesServer 2012 - PowerShell - Run as Administrator
  4. Execute the following command to configure the domain controller to look at an external time source
    1. w32tm.exe /config /manualpeerlist:"0.us.pool.ntp.org 1.us.pool.ntp.org 2.us.pool.ntp.org 3.us.pool.ntp.org" /syncfromflags:manual /reliable:YES /update
      w32tm config manualpeerlist syncfromflags manual ntp

      1. Notes: You can find the closest time server near you by browsing the following page and clicking on the nearest zone: http://www.pool.ntp.org/zone/@
  5. Execute the following command to actually perform a time synchronization with the external source
    1. w32tm.exe /config /update
      w32tm config update
  6. Execute the following command for the changes to take effect
    1. Restart-Service w32time
      Restart-Service w32time

That's all that is to it!

Migrate DHCP Role from Server 2008 R2 to Server 2012 R2

After doing a quick google search, it appears you can easily migrate your DHCP server as long as you have both your current DHCP server (running Server 2008 R2) and a new Windows Server 2012 server you are going to designate as a DHCP server.

  1. Login to your new Server 2012 R2 machine with the DHCP role installed
  2. Open up a Powershell shell
    Server 2012 - Powershell
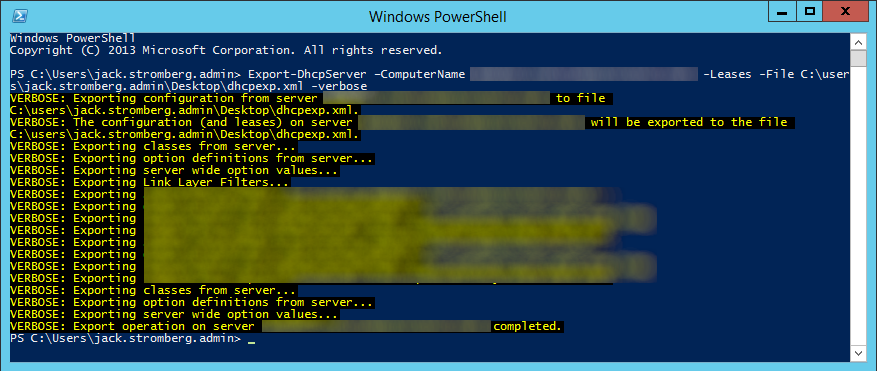
  3. Execute the following command to export the configuration from the Server 2008 R2 DHCP Server
    1. Export-DhcpServer –ComputerName win2k8r2-dhcp.corp.contoso.com -Leases -File c:\users\yourusername\Desktop\dhcpexp.xml -verbose
      Export-DhcpServer Server 2012
  4. Execute the following command to import the configuration into your new Server 2012 R2 DHCP Server; must be an Administrator running this PowerShell command.
    1. Import-DhcpServer –ComputerName win2k12r2.corp.contoso.com -Leases –File C:\users\yourusername\Desktop\dhcpexp.xml -BackupPath C:\users\yourusername\Desktop\backup\ -Verbose

Notes: Credit goes to the following technet article for the powershell commands and a more in-depth explanation: http://blogs.technet.com/b/teamdhcp/archive/2012/09/11/migrating-existing-dhcp-server-deployment-to-windows-server-2012-dhcp-failover.aspx

Preventing Drive Letters From Changing During SysPrep

One thing that I found really annoying when doing a sysprep was my drive letters changing. In some environments, drive letters need to remain constant when the machine is being deployed/cloned. Unfortunately, I don't have too awful much experience with sysprep's new unattended.xml file and there doesn't seem to be any clear cut tutorials on how to do this, so I found a nice workaround.

To prevent the drive letters from chaning, use the following steps.
1. Open up the registry (Start->Run->regedit)
2. Navigate to HKEY_LOCAL_MACHINE\System\MountedDrives
3. Make a backup of this. File->Export (save to a place where you can access it soon).
4. Make sure you leave regedit open and run sysprep via command line. Use the /quit switch when running sysprep as we do not want to restart the machine yet.
5. Once sysprep finishes, go back to the registry editor.
6. Import your registry backup. File->Import
7. Restart/Shutdown the machine and deploy

Credit to this answer goes to jthiessn for finding this trick. Make sure to "up" his answer on the Microsoft forum for his fine work 🙂 http://social.technet.microsoft.com/forums/en-US/itprovistadeployment/thread/694daccd-a48d-4529-9aaa-555cda297038

Enabling remote SQL connections for Server 2008

Here is how to enable remote SQL connections for Server 2008:

Open up SQL Server Configuration Manager

Click on SQL Server Network Configuration
--Enable Named Pipes
--Enable TCP/IP

Protocols for SQLEXPRESS (OR YOUR INSTANCE)
-Double click on TCP/IP

Find the IP addresses with your IP and IP of 127.0.0.1
--TCP Dyanmic Ports (Remove the 0 and leave empty)
--TCP Port 1433

Open up Windows Firewall with Advanced Security
-Click on Inbound Rules
--Create the following rules

SQL
1433 - TCP - Check if you want Domain, Private, and Public Access

SQL
1434 - UDP - Check if you want Domain, Private, and Public Access

Transact-SQL debugger (Used for Visual Studio)
135 - TCP - Check if you want Domain, Private, and Public Access