This is a quick reflection of the steps I took to establish two IPSec tunnels between AWS' VPG and Azure's Virtual WAN VPN Gateway, propagating routes dynamically via BPG and ensuring High Availability. The design itself is a bit interesting since AWS and Azure differ on how connections are established to remote peers. When everything is said and done, you'll end up with a diagram that conceptually looks something like this:

Note: It is recommended to start with the Virtual WAN side first since you cannot modify the IP address of a Customer Gateway in AWS
Create Azure Virtual WAN and Virtual WAN Hub
On the Azure side, first we need to create a Virtual WAN resource and a Virtual WAN Hub, which will contain our VPN Gateway. If you have already created these, you can skip to the next session.
First, click the "Hamburger" icon and select Create a resource

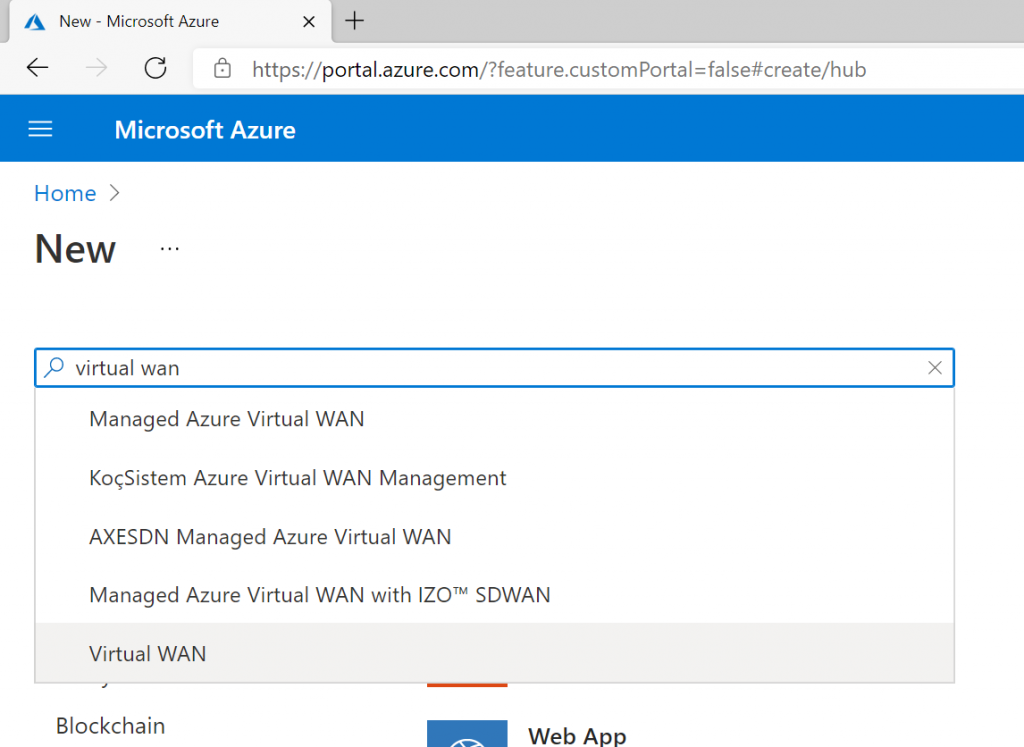
Search for Virtual WAN and select it from the list in the marketplace.
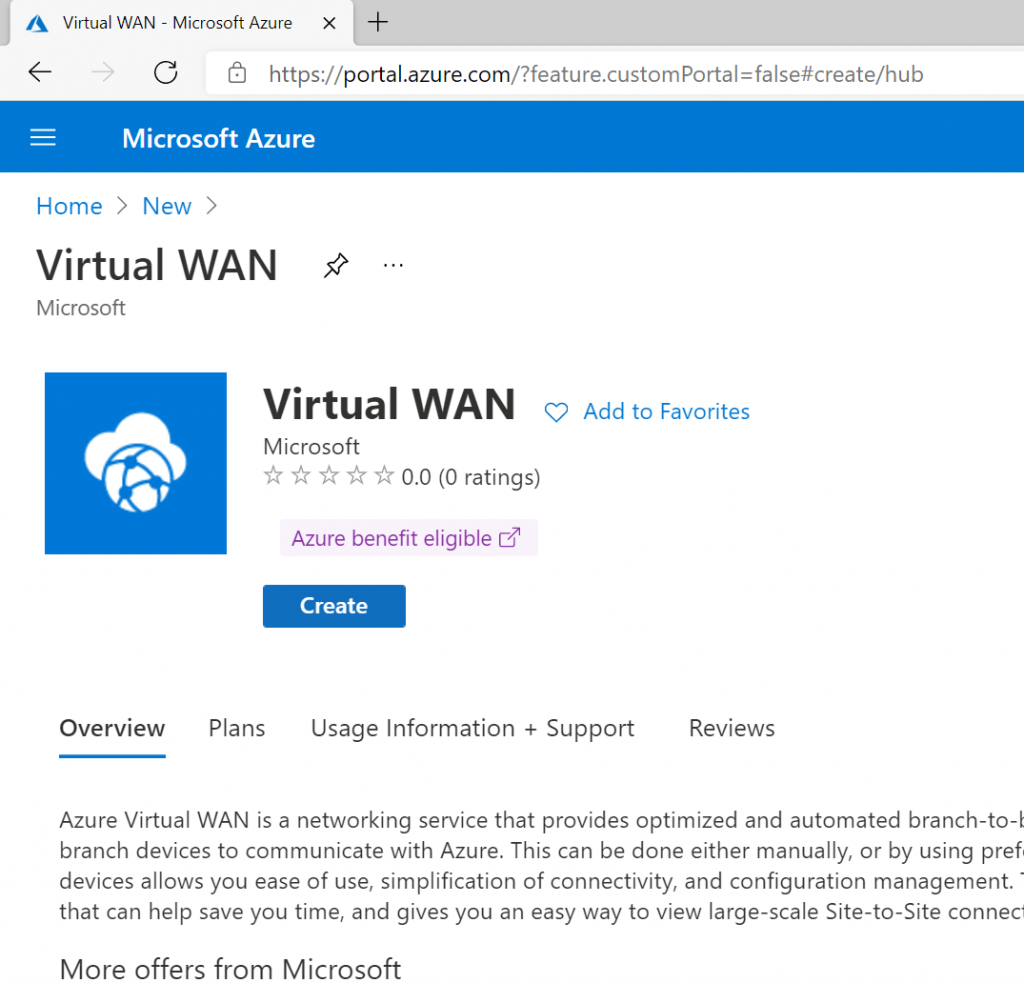
Select Create
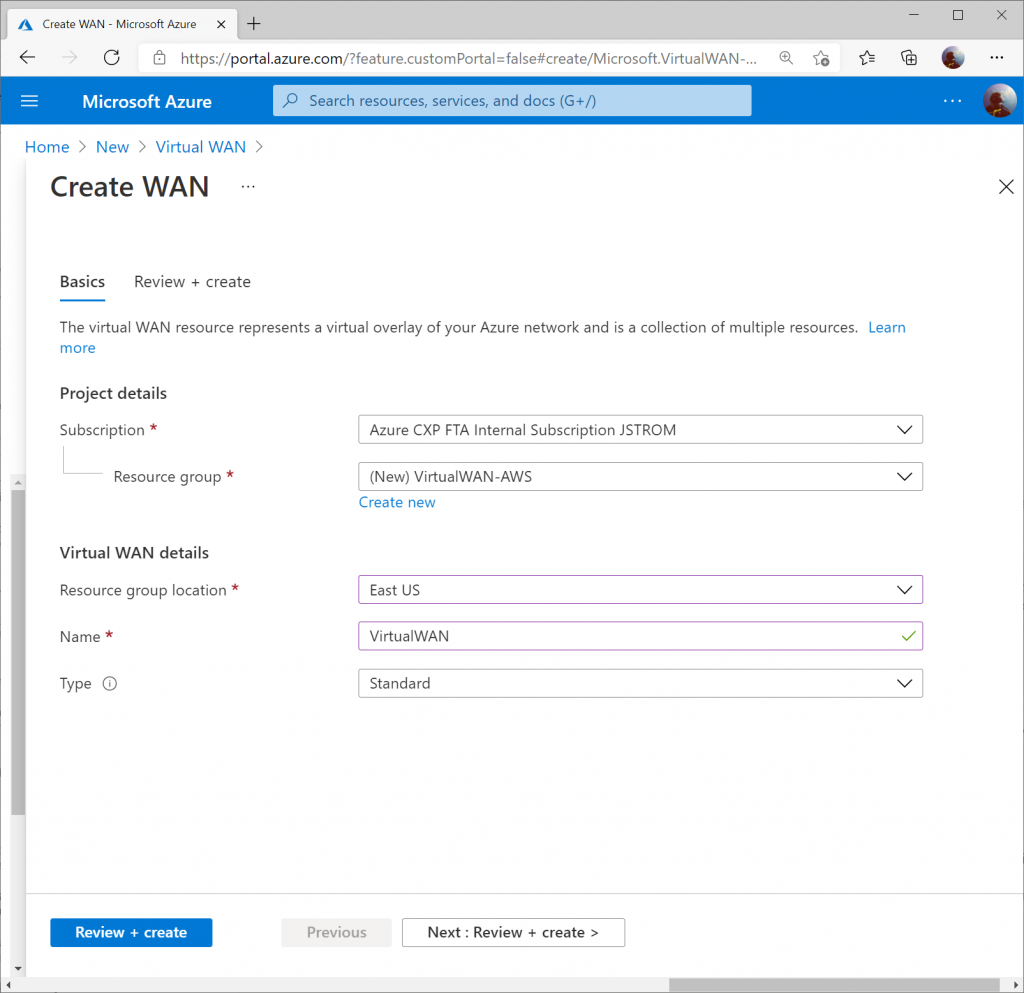
Specify the resource group and region you wish to deploy the Virtual WAN resource to. Specify a name for your Virtual WAN resource and click Review + Create
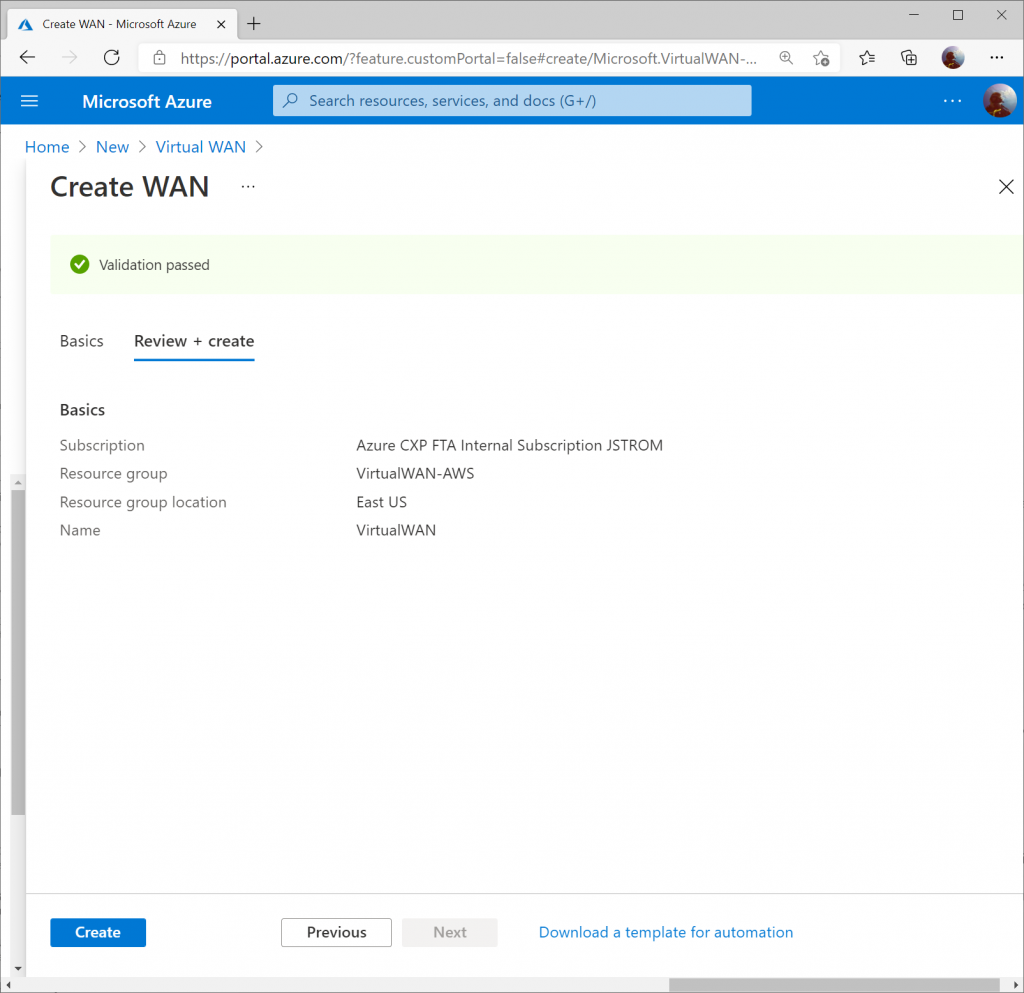
Click Create to start provisioning the Virtual WAN resource.
Once the resource is created, click Go to resource to navigate to your Virtual WAN resource.
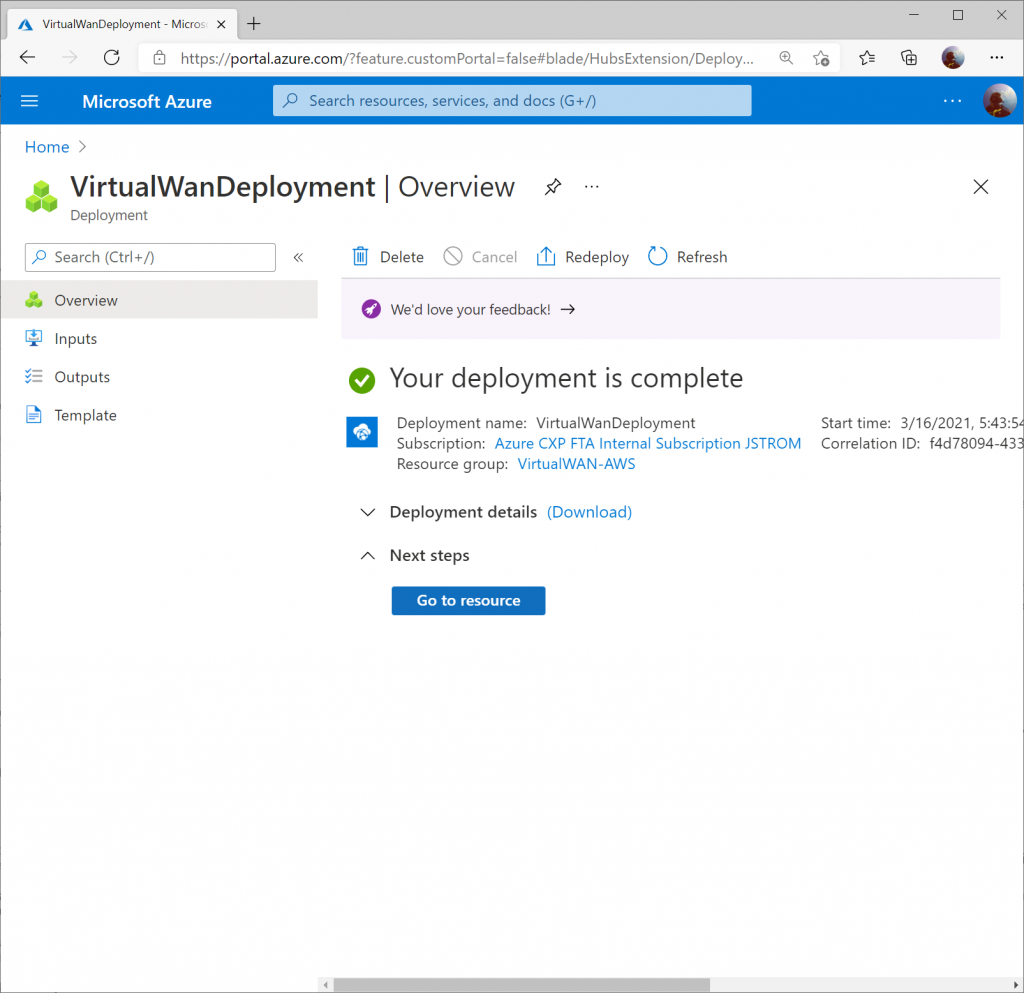
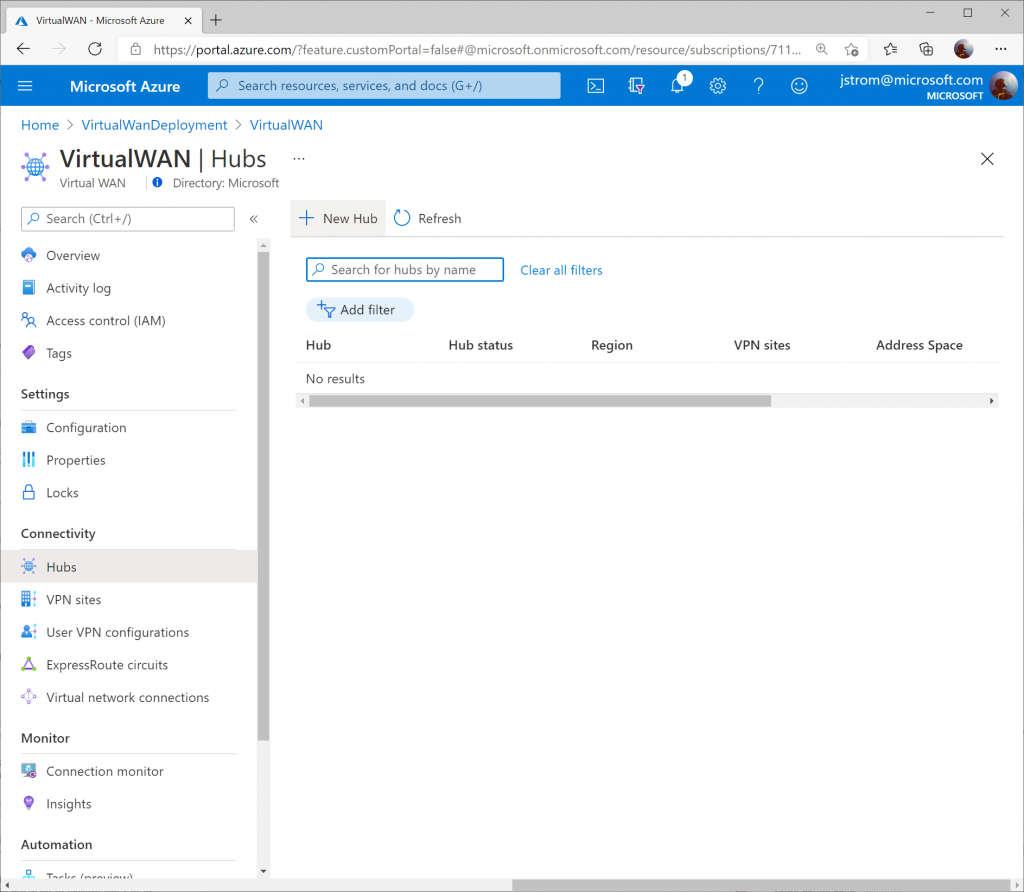
On the Virtual WAN resource, select New Hub from the top menu.
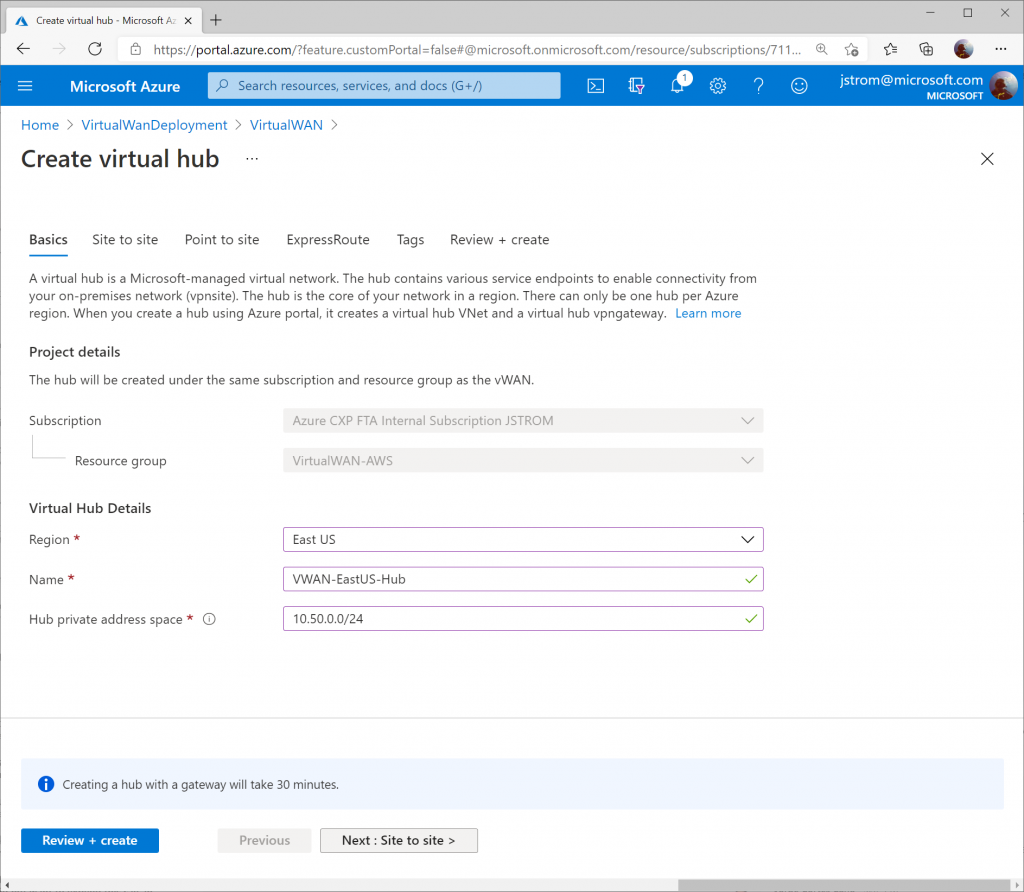
Specify the name of the Hub and an address space that can be used for all the networking components Virtual WAN will deploy into the Virtual Hub. Click Next : Site to Site >
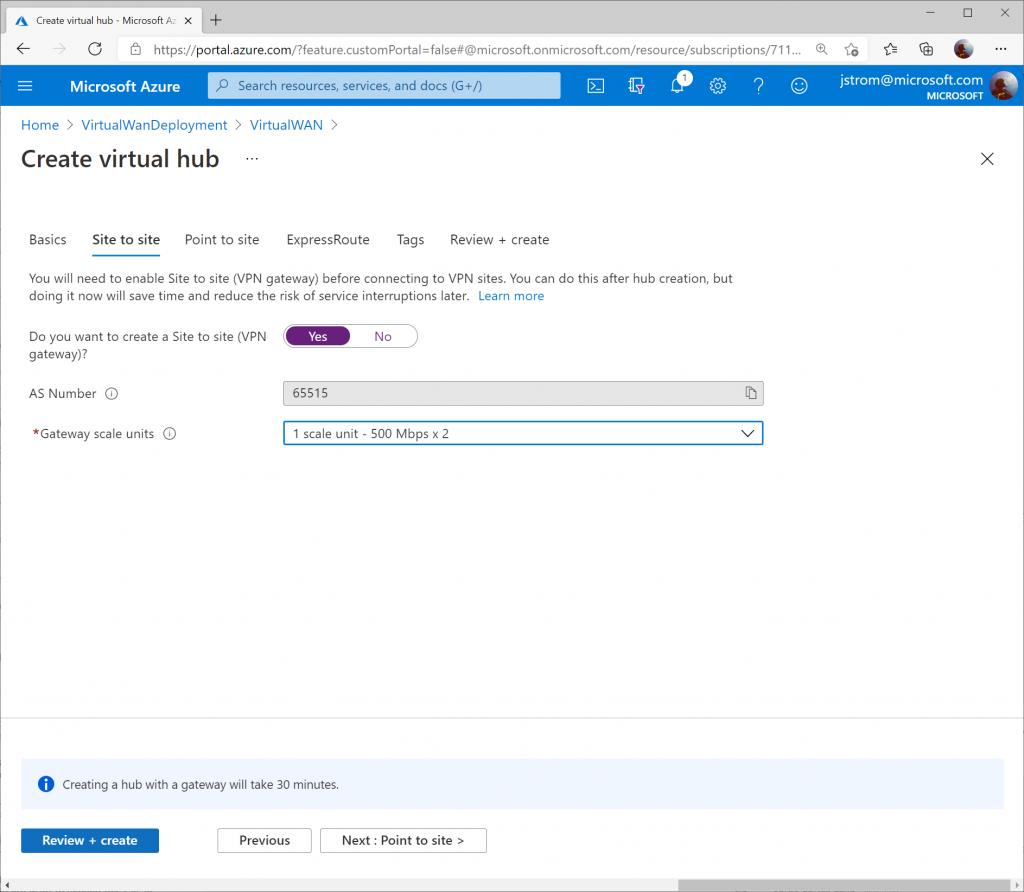
On the Site to Site tab, toggle Yes that you want to provision a VPN Gateway, and specify the scale units you need. Click the Review + create button when done.
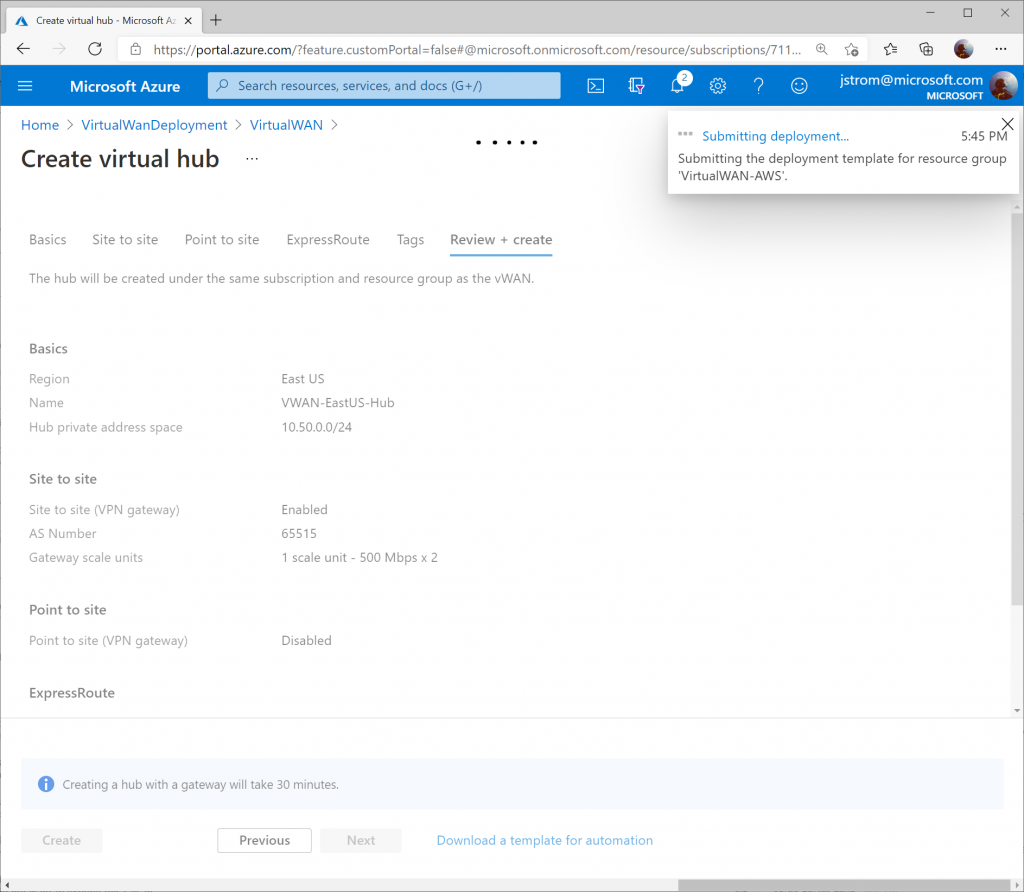
Click the Create button to start provisioning the Hub and VPN Gateway. Please note this can take up to 30 minutes to complete.
Configure customer BGP IP Address for Virtual WAN VPN Gateway Instances
Once provisioning is completed, navigate back to the Virtual WAN resource. You can do this by clicking the "Hamburger" icon and searching for Virtual WAN
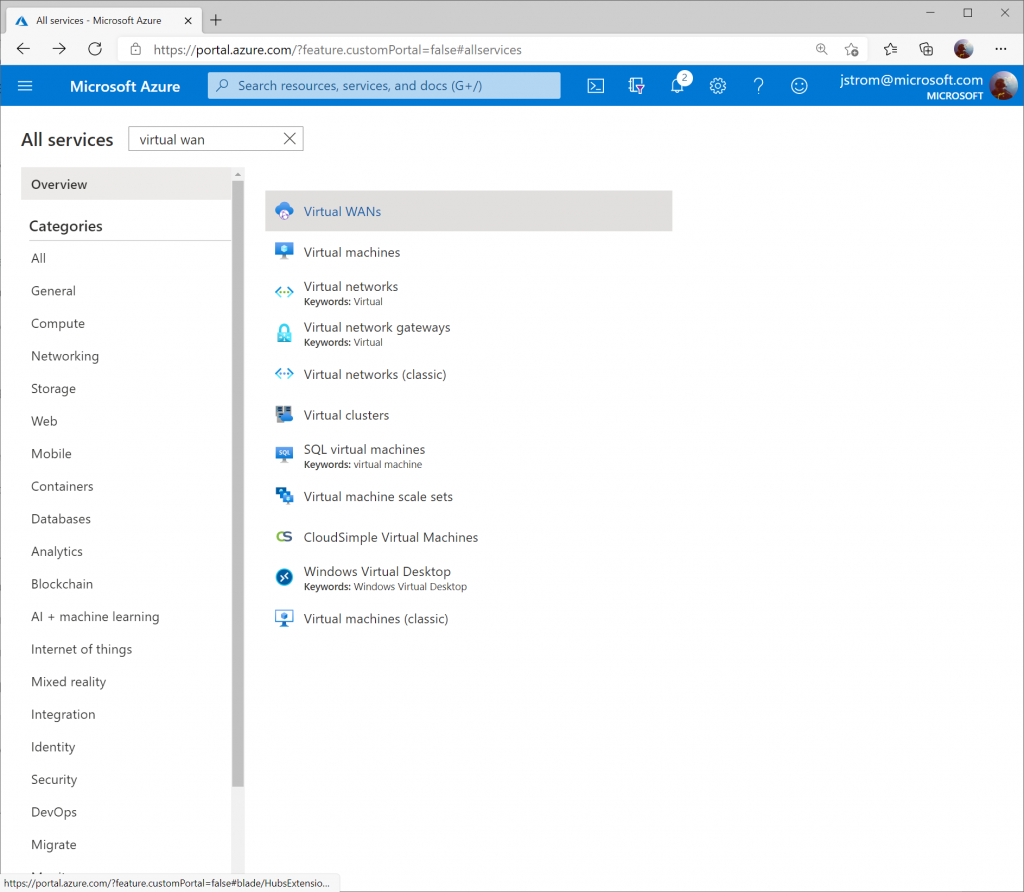
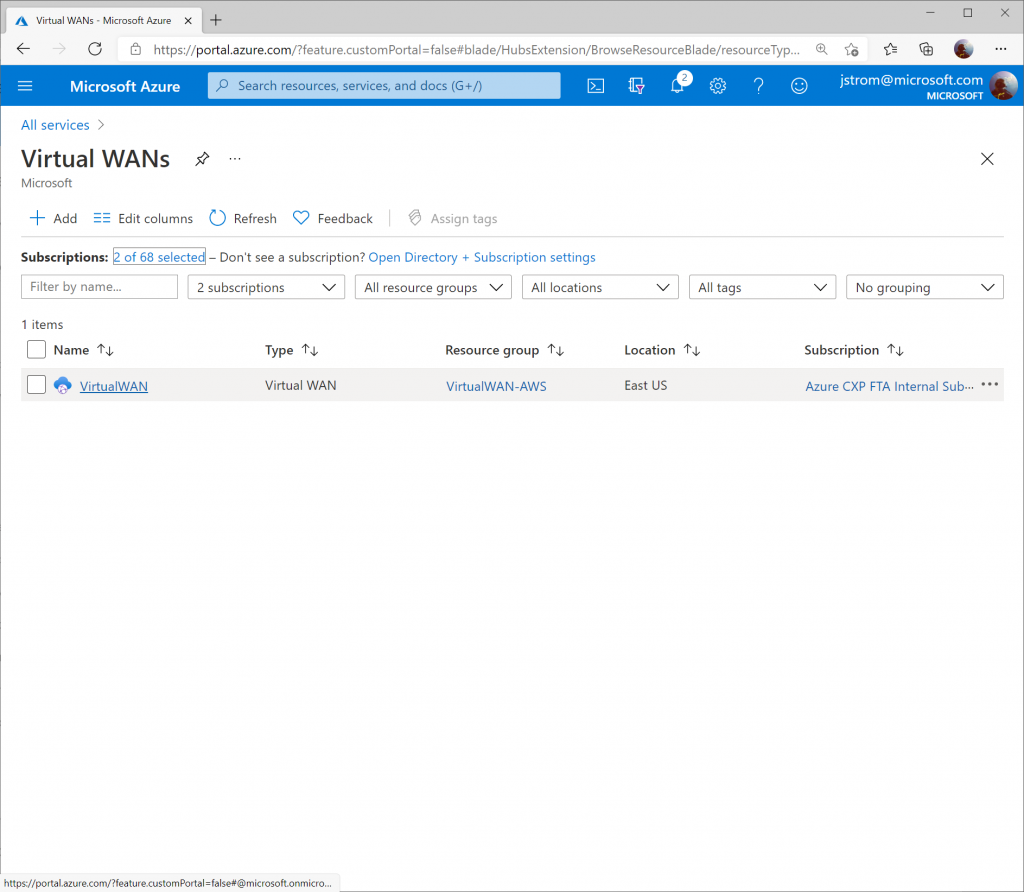
Select your Virtual WAN resource.
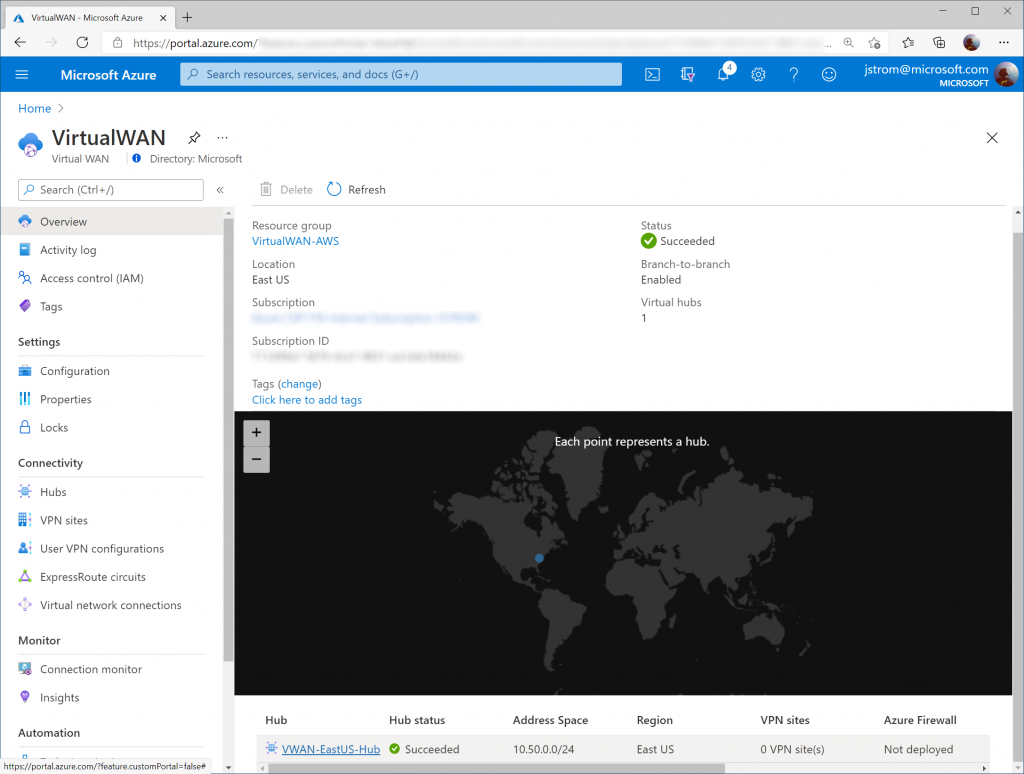
You should now see your Virtual WAN Hub resource you provisioned. Select the Virtual WAN Hub.
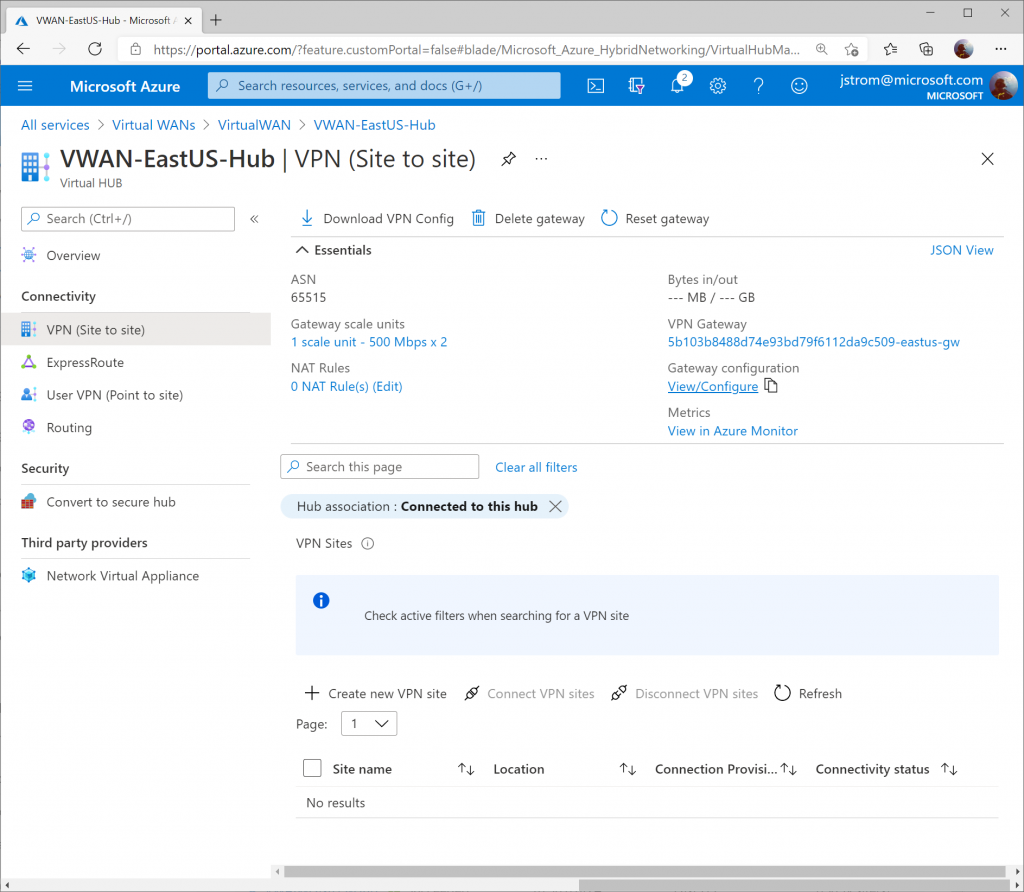
On the Virtual WAN Hub, click on the View/Configure link.
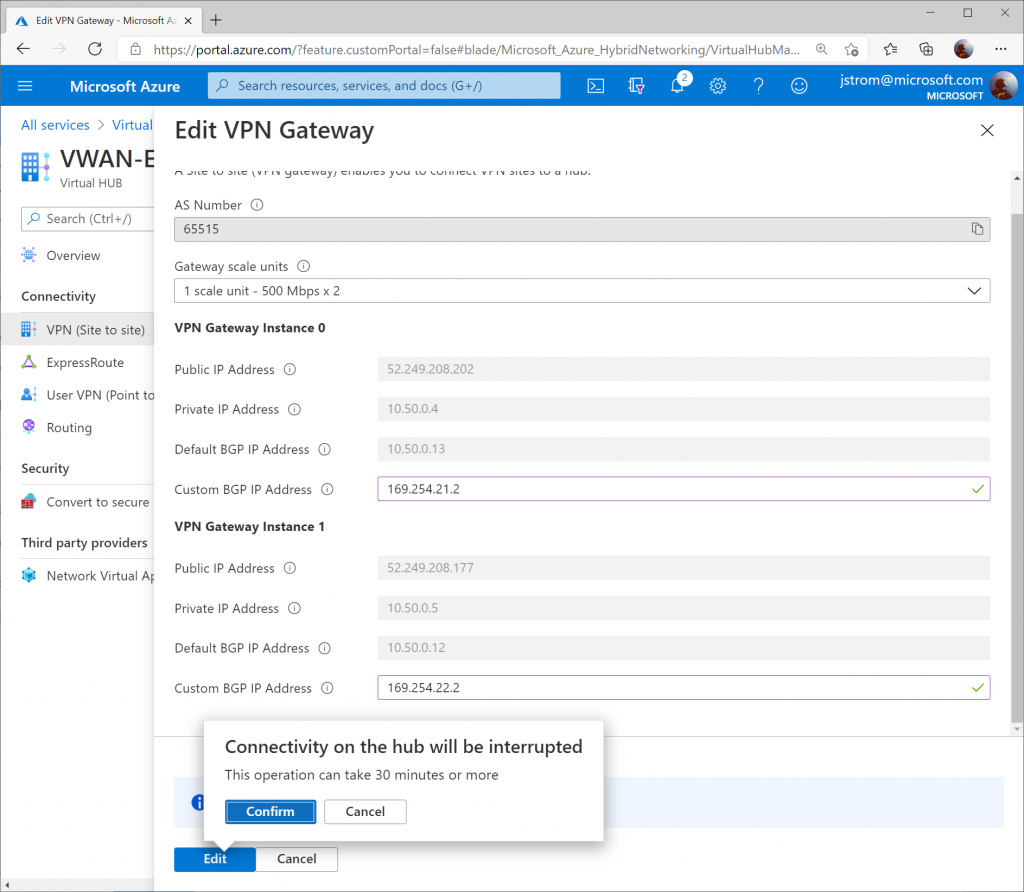
On the View/Configure Gateway Configuration blade, specify 169.254.21.2 as the Custom BGP IP address for Instance 0 and 169.254.22.2 as the Custom BGP IP address for Instance 1. Notate the Public IP address uses for Instance 0 and 1 and then click Edit and Confirm to apply the changes.
Create Virtual WAN VPN Site
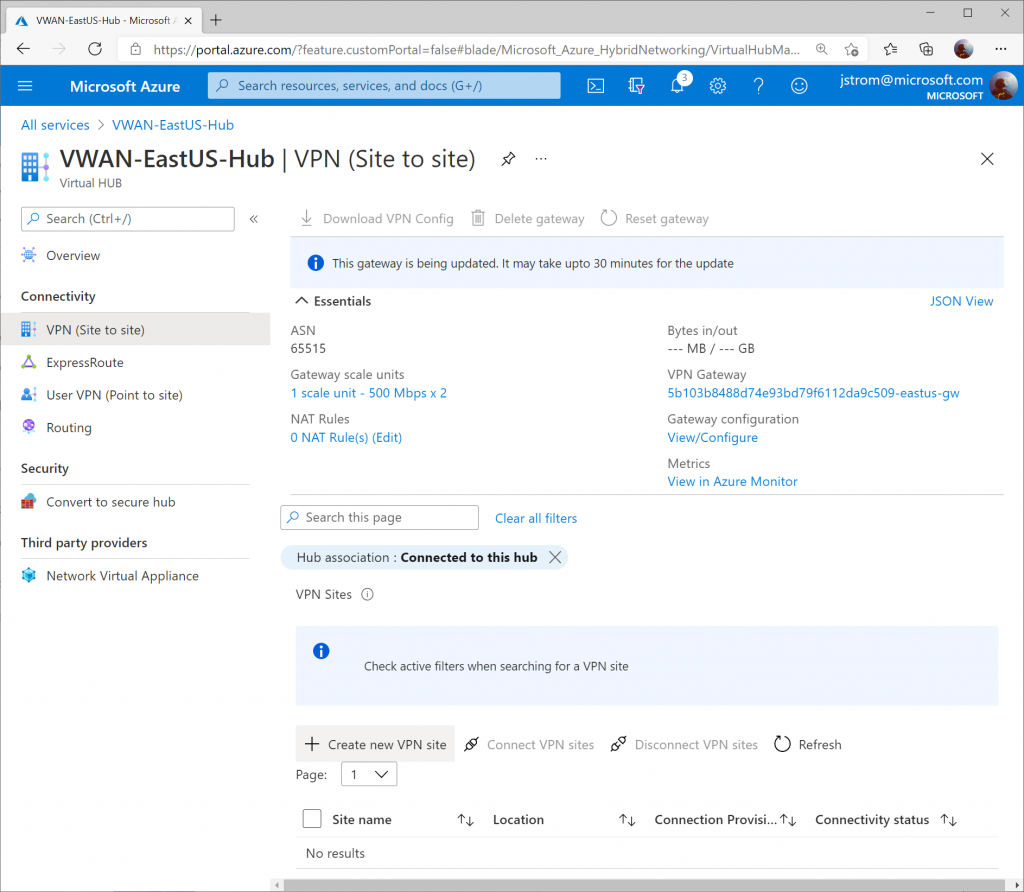
On the Virtual WAN Hub, click Create new VPN Site
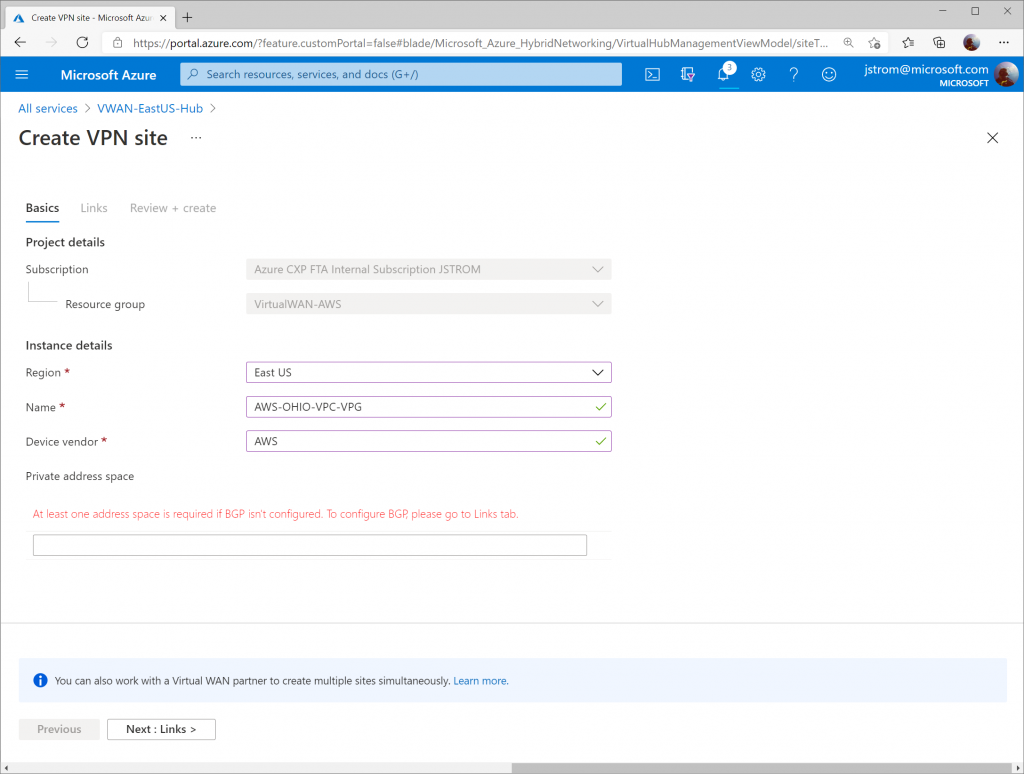
Specify a name for your VPN Site to define the connection connecting to AWS. Click Next : Links >
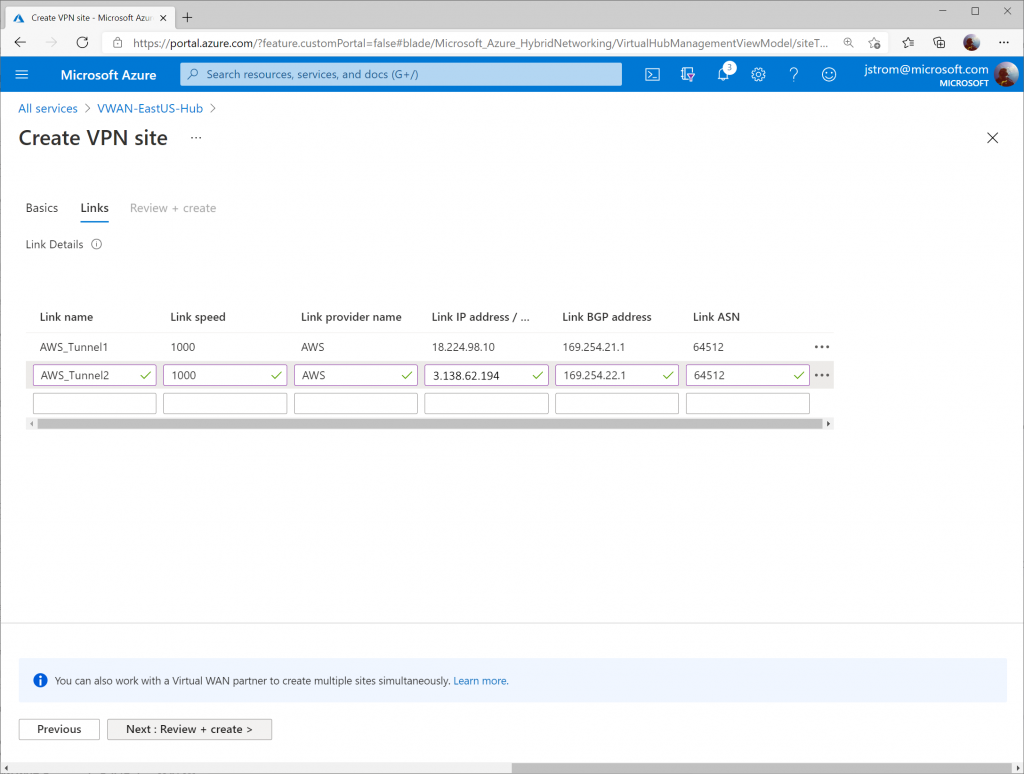
On the Links tab, add two entries with the following values (to tell VWAN how to connect to each of the AWS Site-to-Site connections). Note: this is very similar to AWS' Customer Gateway section.
Link 1:
- Link Name; AWS_Tunnel1
- Link Speed: 1000
- Link Provider Name: AWS
- Link IP address: 1.1.1.1 (this is a placeholder value until we configure the AWS side)
- Link BGP address: 169.254.21.1
- Link ASN: 64512
Link 2:
- Link Name; AWS_Tunnel2
- Link Speed: 1000
- Link Provider Name: AWS
- Link IP address: 1.1.1.2 (this is placeholder value until we configure the AWS side)
- Link BGP address: 169.254.22.1
- Link ASN: 64512
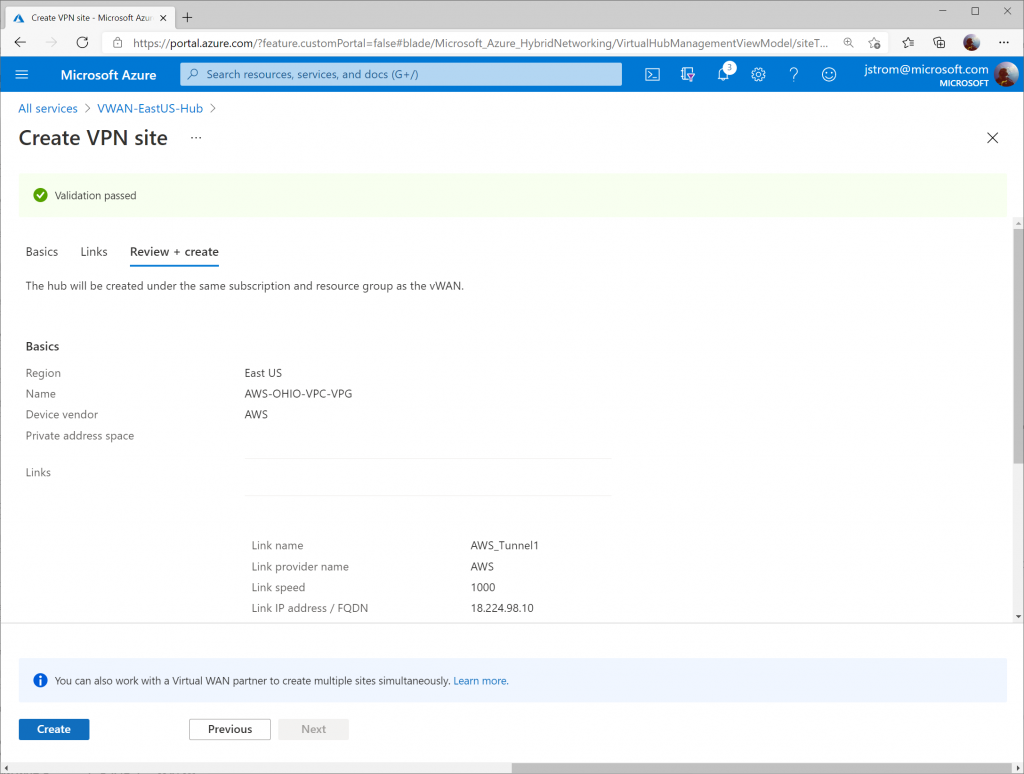
Click Next: Review + Create >
Click Create
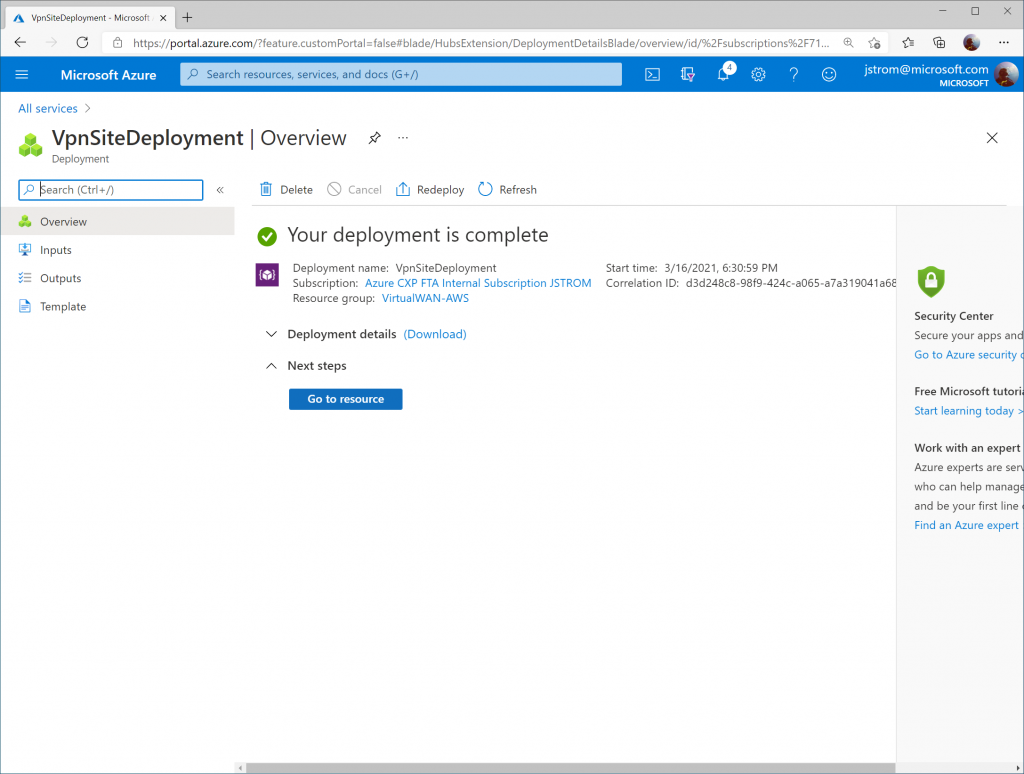
Click Go to resource once the links have finished being created.
Configure Phase 1/2 Proposals
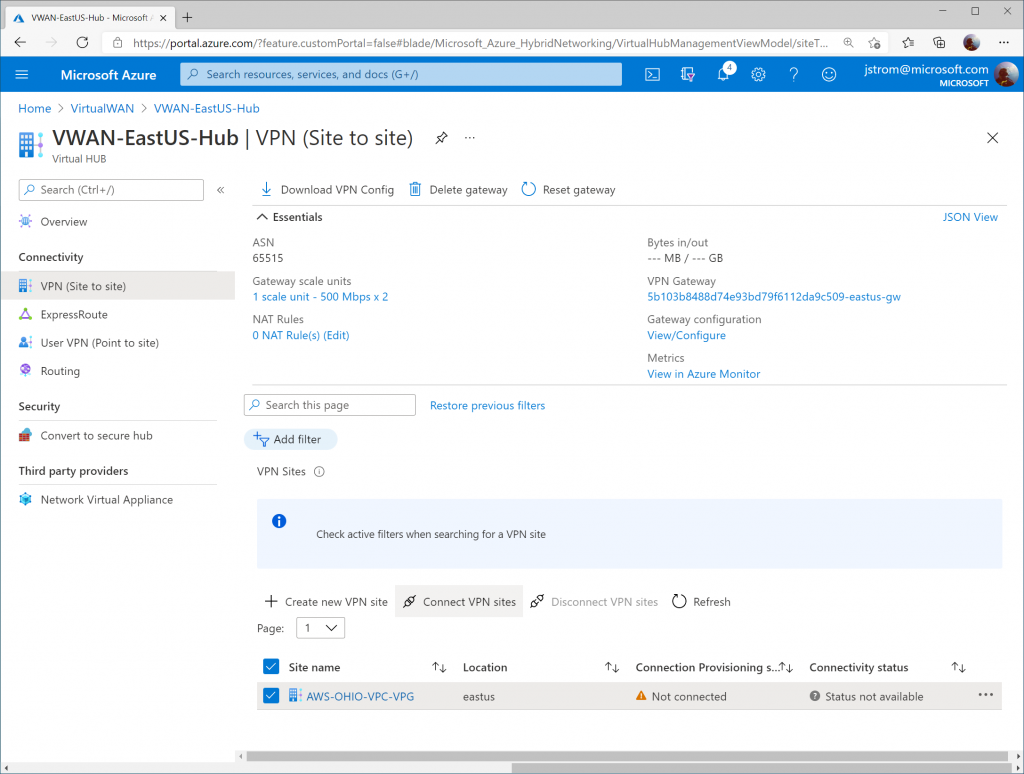
Select your Virtual WAN hub on the Virtual WAN Overview blade.

Check the box for the new VPN Site Name and click the Connect VPN sites button
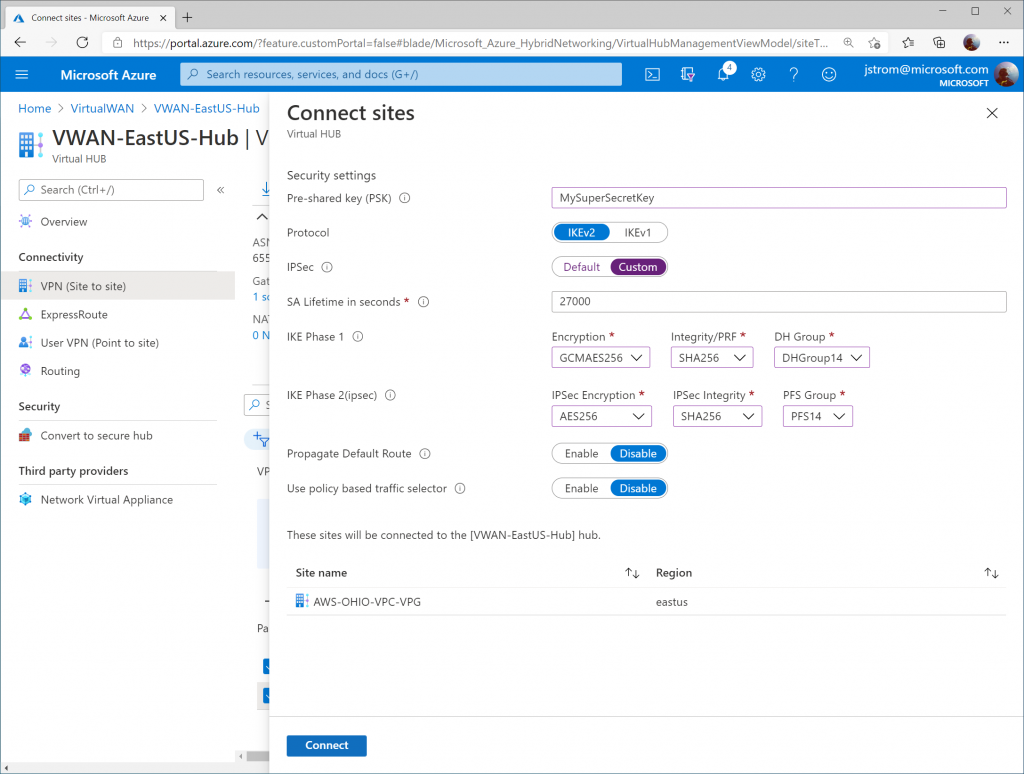
Specify the following configuration:
- Pre-shared key (PSK): YourSecretKeyWithNumb3rs
- Must be a 8-64 character string with alphanumeric, underscore(_), and dot(.). It cannot start with 0.
- Protocol: IKEv2
- IPSec: Custom
- IKE Phase 1:
- Encryption: GCMAES256
- GCM algorithm is more efficient and can improve throughput on the Azure Gateways
- Integrity/PRF: SHA256
- DH Group: DHGroup14
- Encryption: GCMAES256
- IKE Phase 2 (ipsec):
- IPSec Encryption: AES256
- AWS does not support GCM algorithm for IPSec integrity at time of writing this, but if it is available, you may want to opt for that
- IPSec Integrity: SHA256
- PFS Group: PFS14
- IPSec Encryption: AES256
Click Connect
Configure AWS
Prerequisites
This guide assumes you have a VPC already (in my case, mine is called AWS-OHIO-VPC), a corresponding set of subnets for your servers, and a route table associated to your VPC.
Note: An AWS VPC is the equivalent of a VNet in Azure. One thing that is different between AWS and Azure is that in AWS you do not need to specify a subnet for your Gateways (i.e. "GatewaySubnet").
Create the Customer Gateways
Customer Gateways in AWS are the equivalent of a local network gateway that you'd associate to a connection for a traditional VPN Gateway in Azure. It is also the equivalent of a defined Site Link for Azure's Virtual WAN VPN configuration.
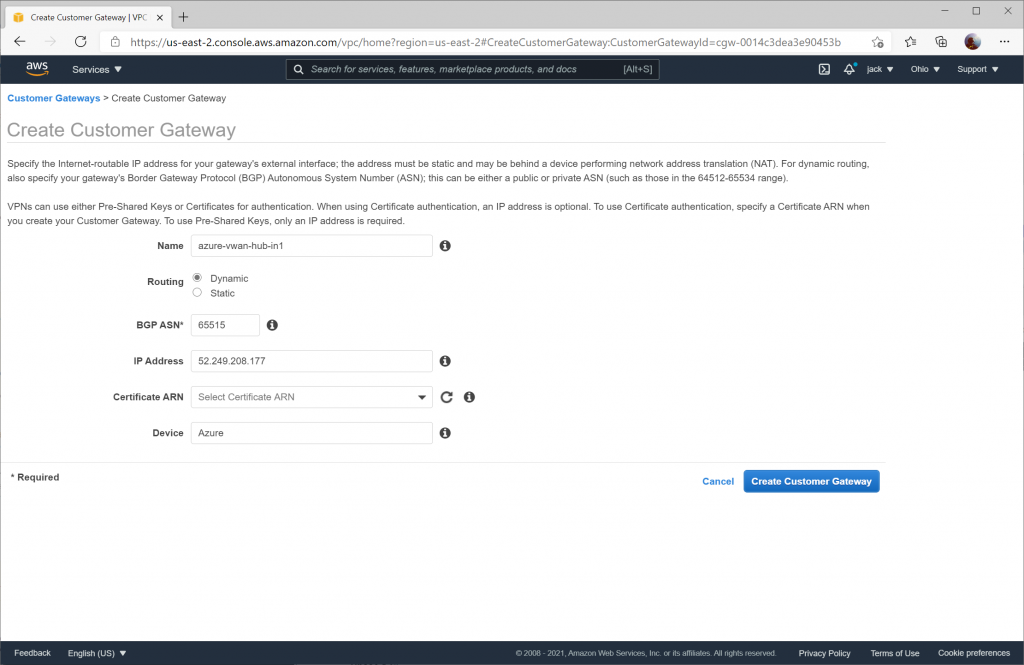
In this section, you will need to create two Customer Gateways. Specify the corresponding instance value obtained from the Configure Customer BPG IP address section. When creating the Customer Gateways ensure Dynamic routing is enabled and the BGP ASN is specified as 65515.
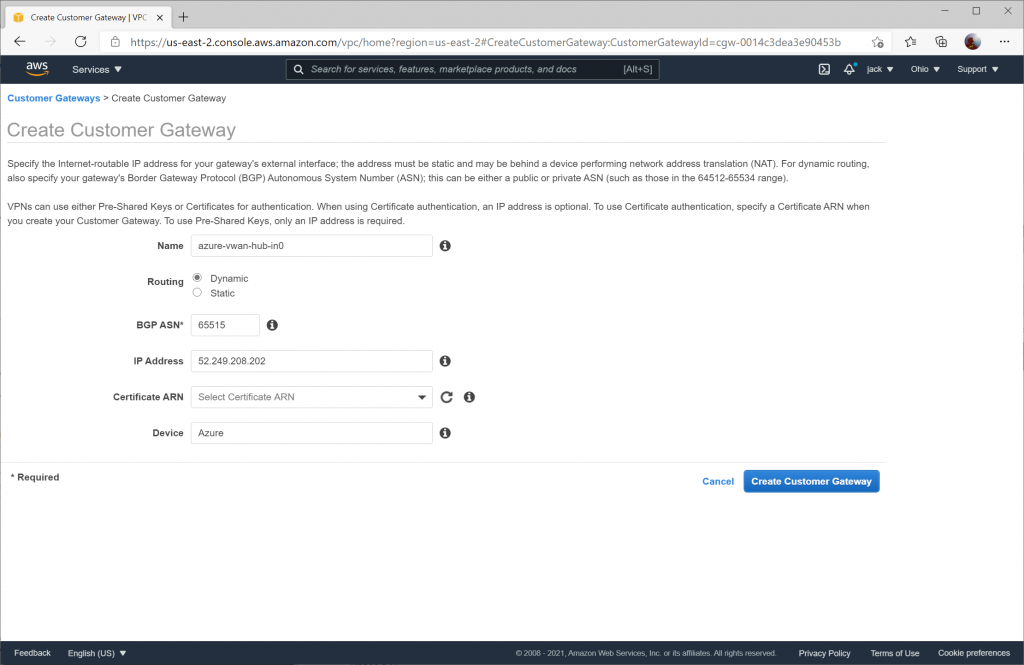
Configuration for the second Customer Gateway using the Instance 1 Gateway Public IP address.
Create a Virtual Private Gateway
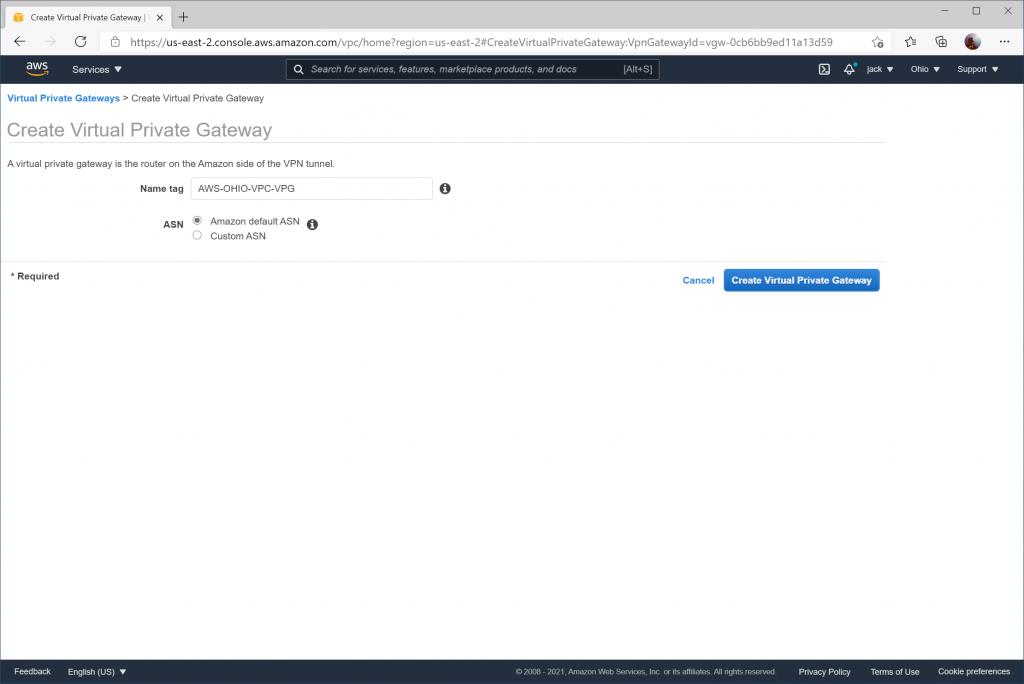
Next we need to create an AWS Virtual Private Gateway. This is the equivalent of Azure's VPN Gateway.
Create VPN Connections
We need to create two VPN Connections, each VPN Connection linked to its corresponding Customer Gateway and VPC.
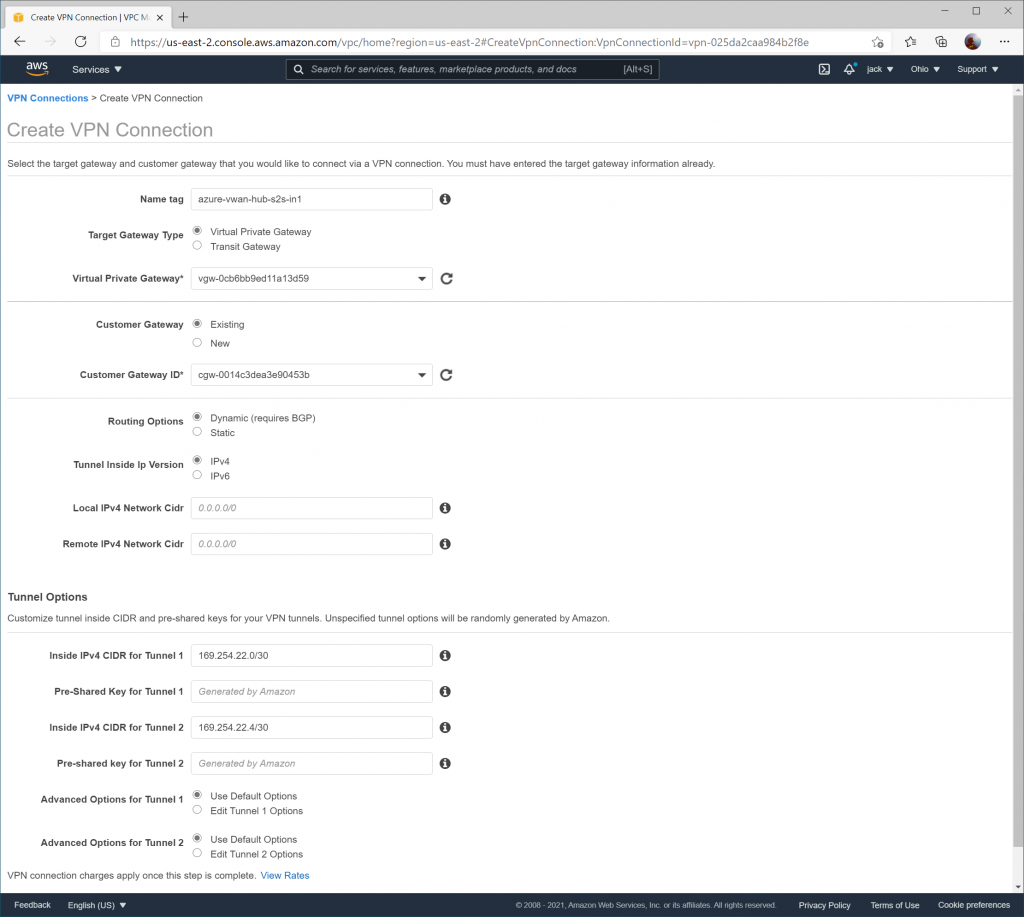
On the Inside IPv4 CIDR for Tunnel 1 on the first VPN Connection, ensure you use 169.254.21.0/30 as the BGP Peer addresses and 169.254.21.4/30 for the second tunnel. Due to the way that the VPN Connection works, we are using a placeholder value of 169.254.21.4/30 tunnel, which will never be used in practice since we cannot point it to leverage Azure's secondary VPN Gateway instance. This value must be specified as if we define the secondary BGP Peer address that will be created for the secondary instance in VWAN, you will receive an error that overlapping address space exists between this VPN Connection and the secondary VPN connection we create in AWS. Add the pre-shared key value you specified in Azure during this time as well.
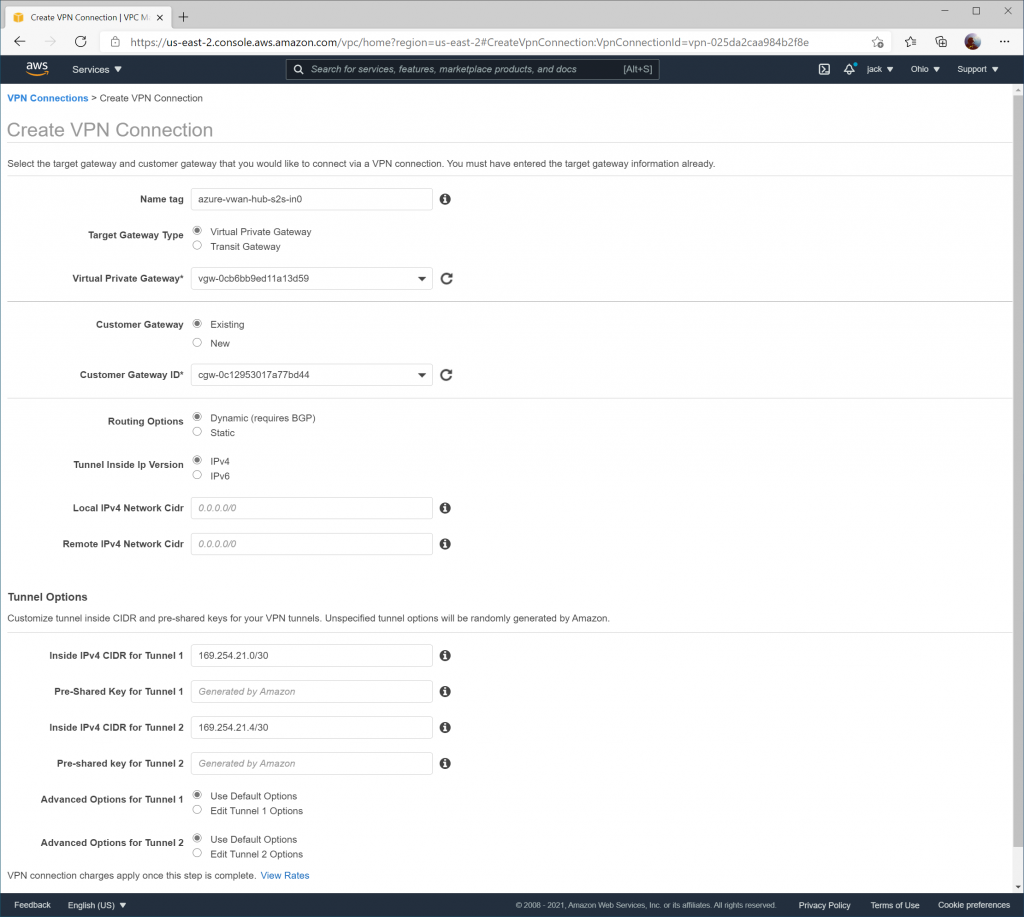
When creating the second VPN connection, ensure 169.254.22.0/30 is specified for Inside IPv4 CIDR for Tunnel 1 and 169.254.22.4/30 is specified for Inside IPv4 CIDR for Tunnel 2 (which is again a placeholder value that won't be used).
Configure Route Table to Propagate Routes
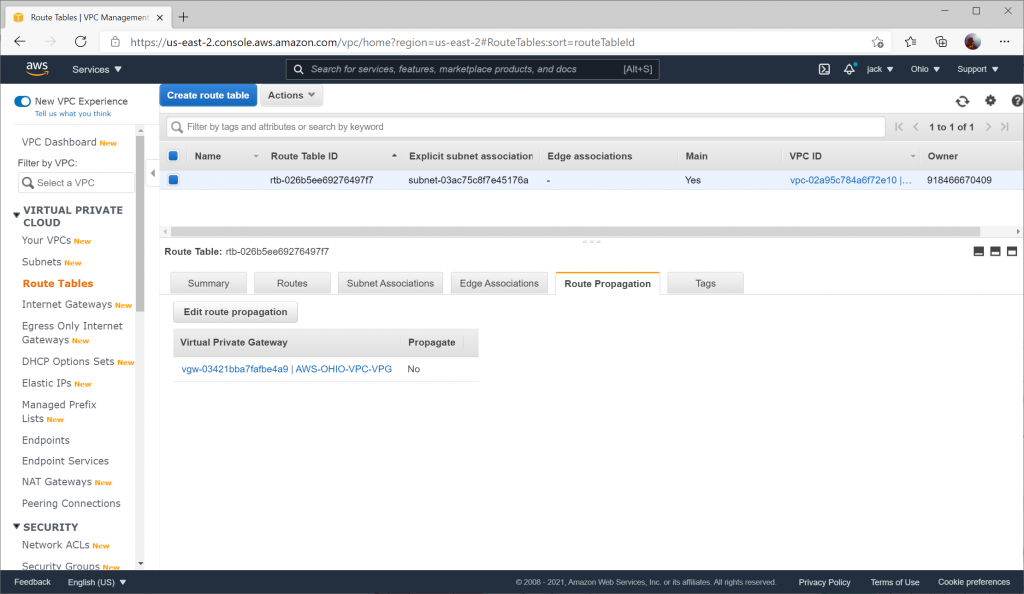
To allow the learned routes from BGP propagate to the VPC, you need to enable route propagation on your Route Table.
Navigate to Route Tables and select your Route Table and click the Route Propagation tab and select Edit route propagation
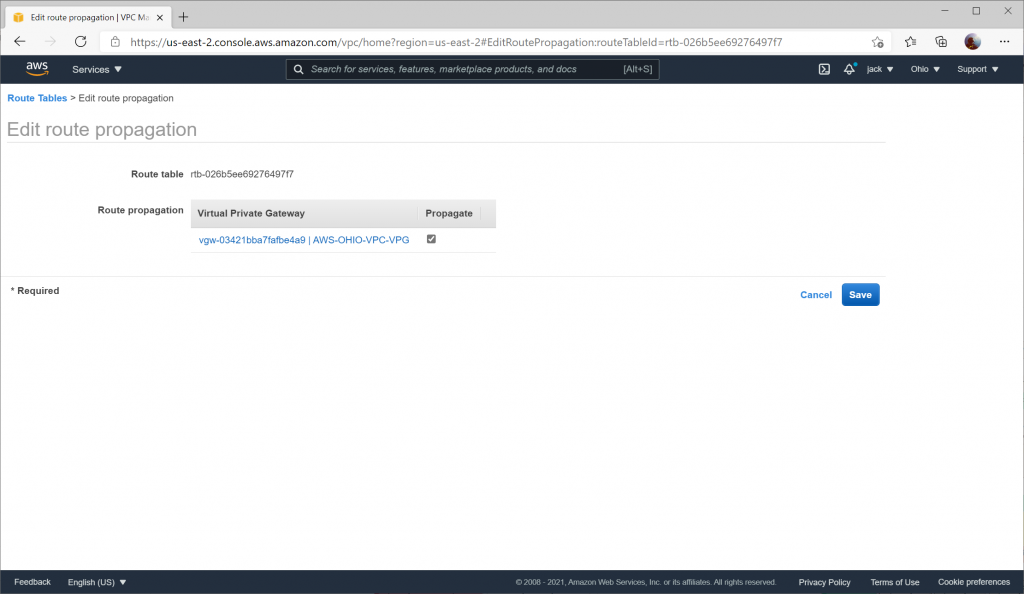
Check the Propagate box and click Save
Update Azure
Update Azure Site Link IP addresses
As per the Configure Phase 1/2 Proposals section for Azure Virtual WAN, you specified 1.1.1.1 and 1.1.1.2 as a placeholder value for the Public IP addresses of the AWS VPN Gateway instances. We will need to update these addresses with the proper values.
Naviate to your Virtual WAN instance and select your Virtual WAN hub

Select VPN (Site to site) and choose click on the Site name you created
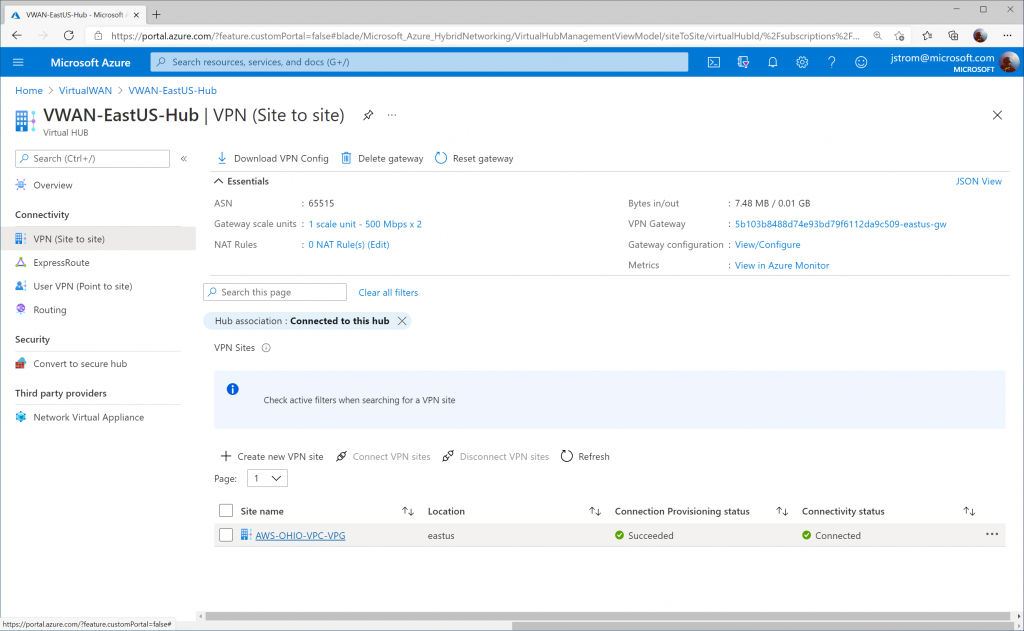
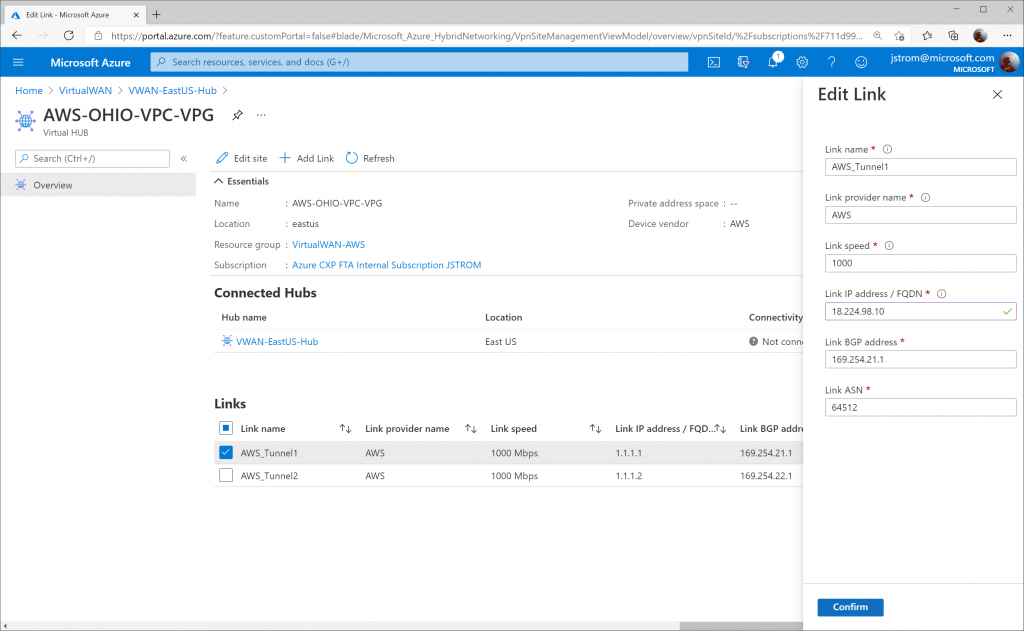
Click on the three dots (ellipsis) for AWS_Tunnel1 and click Edit Link.
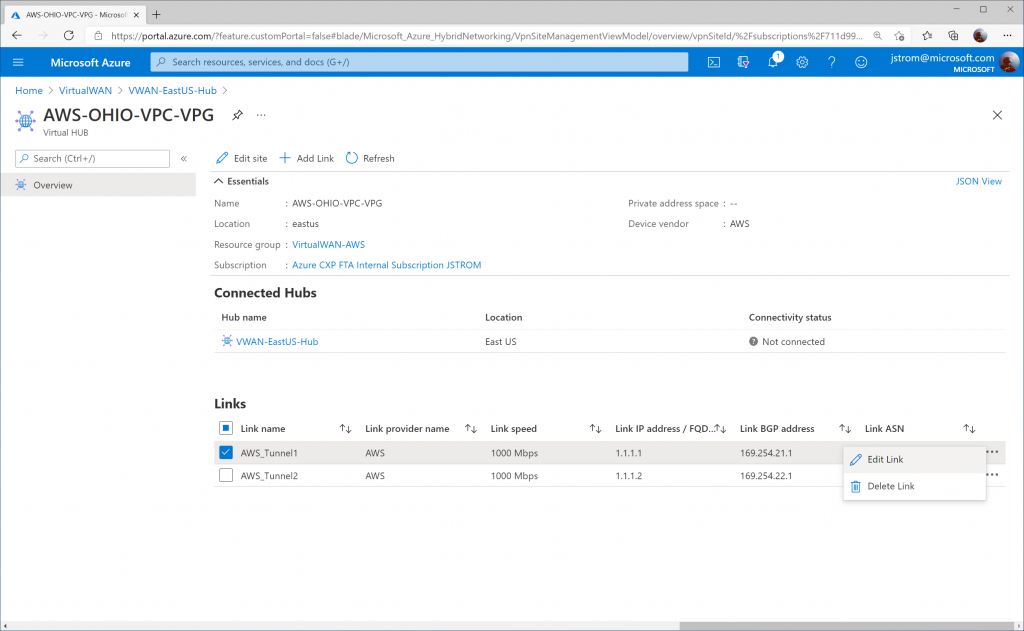
Specify the proper IP address for Tunnel 1 on AWS Site-to-Site connection 1. Click Confirm.
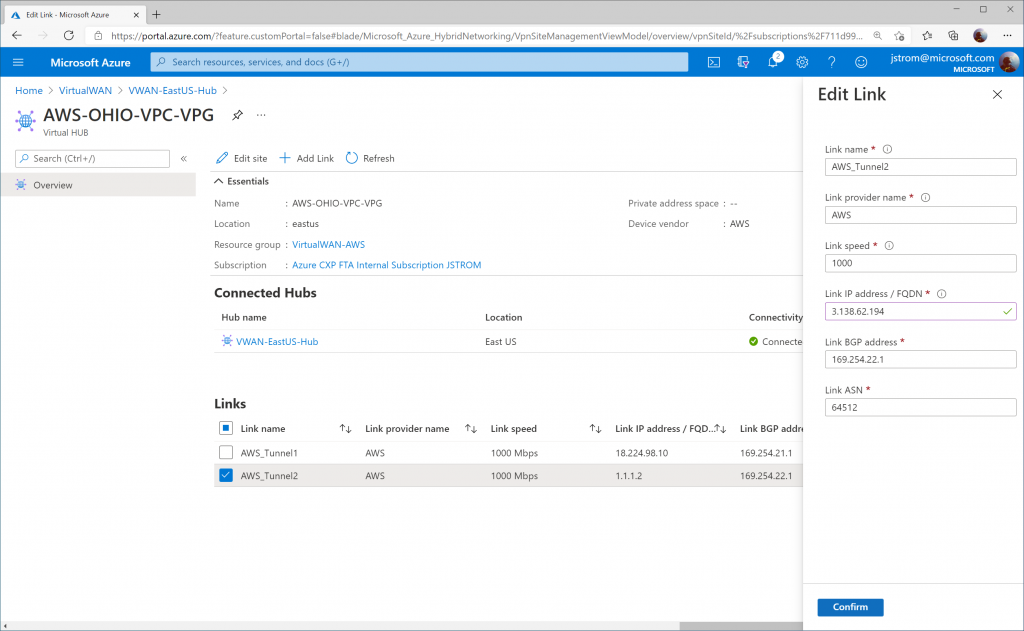
Click on the three dots (ellipsis) for AWS_Tunnel2 and click Edit Link.
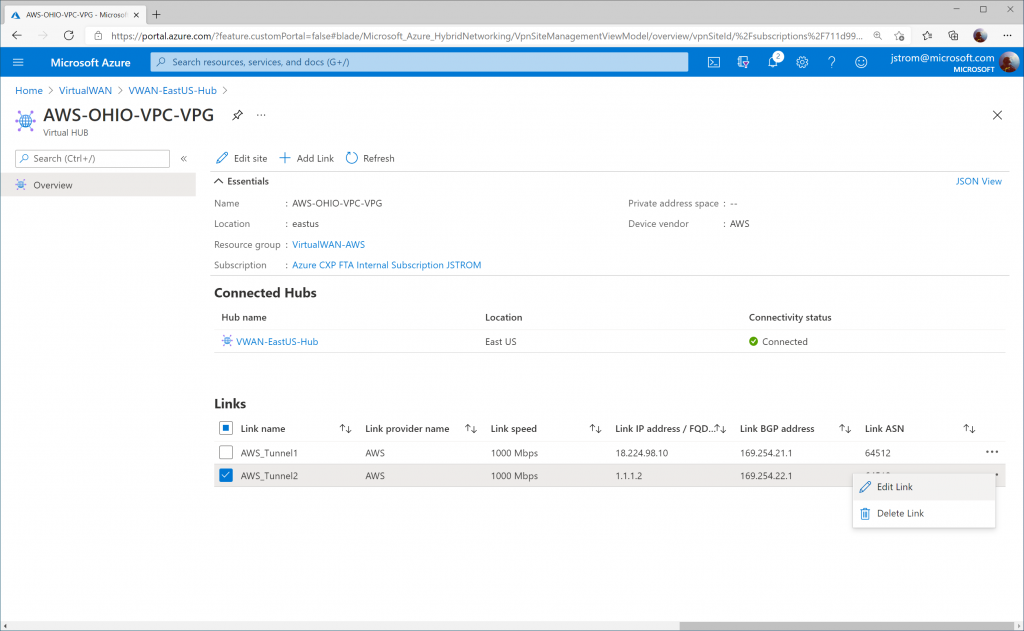
Specify the proper IP address for Tunnel 1 on AWS Site-to-Site connection 2. Click Confirm.
Verify connectivity
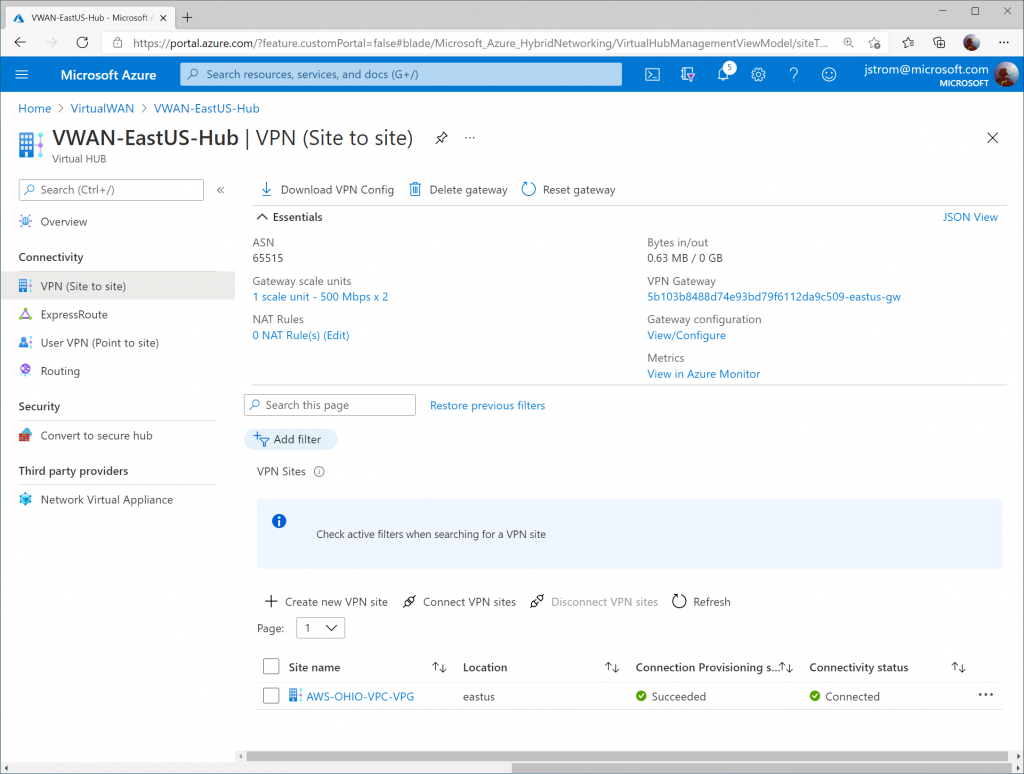
On the Azure Side, you should see the VPN Site's Connectivity status change to Connected
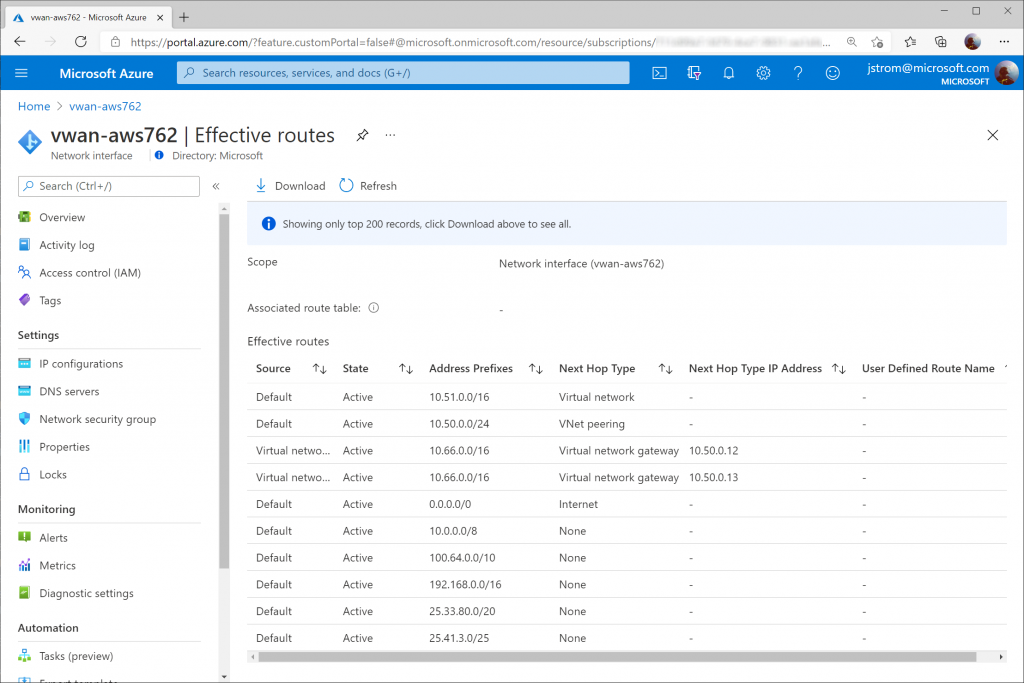
You can also select a Virtual Machine that may have it's virtual network attached to the VWAN Hub and validate you see learned routes from the VWAN Hub (and AWS) propagated into the VNet.
Tip: You can see the same route twice as we have both VPN Gateway instance BGP Peers actively connected to AWS. In the event you lose a peer, you would only see one route to one gateway listed.
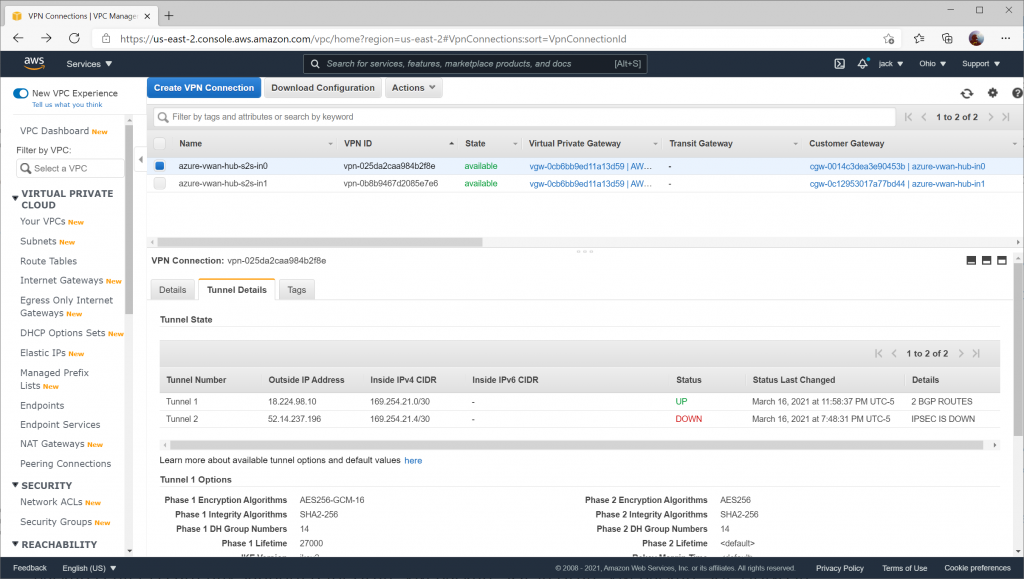
On the AWS side, you can validate for each Site to Site VPN connection that you see Tunnel 1's status as UP and Tunnel 2's status as DOWN (remember, Tunnel 2 will always be listed as down because a fictitious BGP is specified).
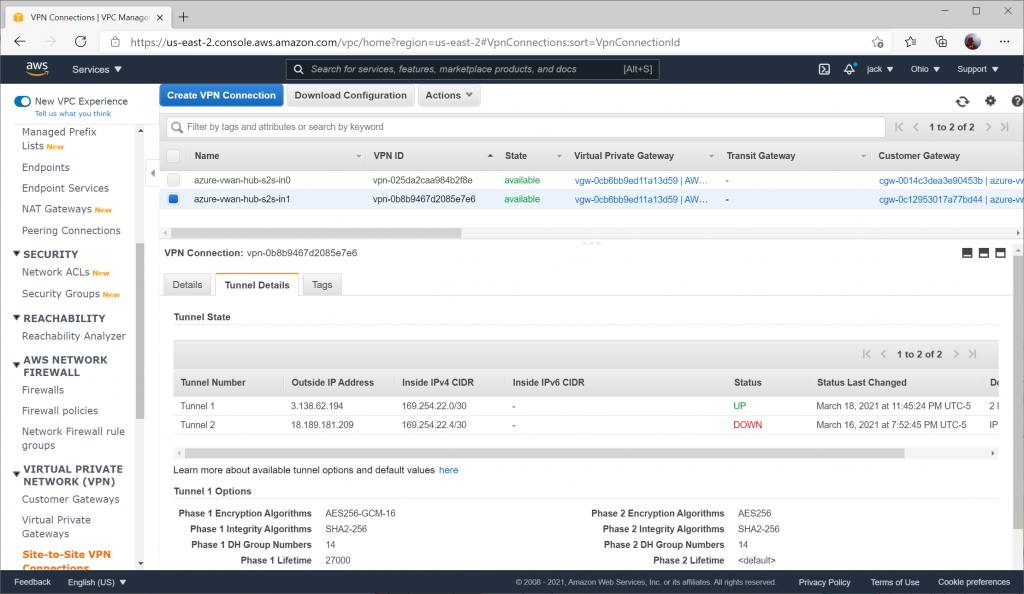
Here you can see the secondary Site-to-Site connection with the same status: UP for Tunnel 1, DOWN for Tunnel 2
Hi Jack, thanks for a well organized post.
Were following an hub and spoke VNET architecture, We've already created these VNETs and have assigned CIDR addresses. in the the hub VNET we have assigned CIDR address 10.30.1.0/24. In the Hub VNET we have a gateway subnet which is 10.30.1.0 /27 and a Azure firewall subnet which is 10.30.1.64/26. MY question is in order to utilize the virtual WAN and Virtual WAN HUB, is the Virtual WAN HUB a separate VNET? If not, can I create the Virtual WAN HUB inside our gateway subnet and assign it the gateway subnet's address 10.30.1.0/27 or do I have to assign that another set of private address within 10.30.1.0/24. Does the Virtual WAN HUB's private address range have to be /24 or can it be smaller? I really would like to stick to our HUB-Spoke VNET architecture where we only have one HUB VNET.
Thanks and best regards,
Anthony
Virtual WAN Hub is a bit different from traditional hub in Azure from the standpoint that the hub is a managed part of the service in Virtual WAN. You specify what prefix should be used and the service will own/create the virtual network, subnets, and corresponding services behind the scenes (you won't see a Virtual Network resource, Gateways, etc; they will be abstracted as part of the Virtual WAN resources). In other words, with Virtual WAN you only create the spoke VNets and peer them to the hub, you don't create any of the hub resources outside the context of what the Virtual WAN resources offer.
You can achieve this same design in a traditional hub/spoke model as well, but I don't have a tutorial for that specific scenario.
Jack
This is very helpful! Thank you for sharing this 🙂
Pingback: Establishing a GCP VPN Tunnel to Azure Virtual WAN; Active/Active BPG Configuration | Jack Stromberg
Thanks for sharing.
FYI, I had to modify the VPN tunnel options on the AWS side (Pre-Shared Key) to match the one configured on the Azure side.
Thanks! Added some blurbs about the pre-shared key.
How can we verify the learned BGP routes on AWS side. It shows 2 or 3 BGP routes, but what routes/prefixes are being learned. Is this possible to check?
TIA
It's been awhile since I've opened AWS portal. Publishing this so others can maybe guide you a bit better. I think flow logs may contain the BGP advertisements learned from Azure. There may be some list of routes shown on the VPC as well.
Thanks for the article. I was able to bring up the tunnel however the route was not propagated on the Azure side to the vNet. On the AWS side it did. Any step I am missing? I have connected the vNET to vWAN and I can see the vNET route in the default route table but not the AWS route.
I would triple check the connection is associated to the VPC and customer gateway. Also ensure you have dynamic routing enabled.
I've been trying to wrap my head around end-to-end NSX, Azure Virtual WAN/Hub, VPN, and BGP configurations and connectivity. This resource put it all together and made sense to me. Thanks!