One of the hidden gems of Azure is HCM (Hybrid Connection Manager), which addresses the issue of Azure's App Services (Web App, API App, Functions) having the ability to connect to resources hosted in other Azure environments, clouds, or on-premises. In many cases, VPN or ExpressRoute connectivity may be overkill or not a possibility in establishing connectivity to the requested service. The great thing is Hybrid Connections is all the traffic will be egress TCP 443 traffic to Azure via TLS 1.2, which can easily attest to the needs of many secured environments and not require ports to be opened inbound into the environment.
There are two ways to leverage Hybrid Connections for App Services in Azure:
For the purposes of this article, we are going to cover how to connect to a web service "on-premises" via the HCM Agent. While we are using a Web App as an example, keep in mind that this concept can be applied to all App Services such as Web Apps, API Apps, Logic Apps, and Azure Functions. In addition, this article will make a call to a web service on-premises, however keep in mind that HCM is able to connect to any TCP service such as MSSQL, MySQL, Oracle, Web Services, custom TCP service, mainframes, etc.
Tutorial
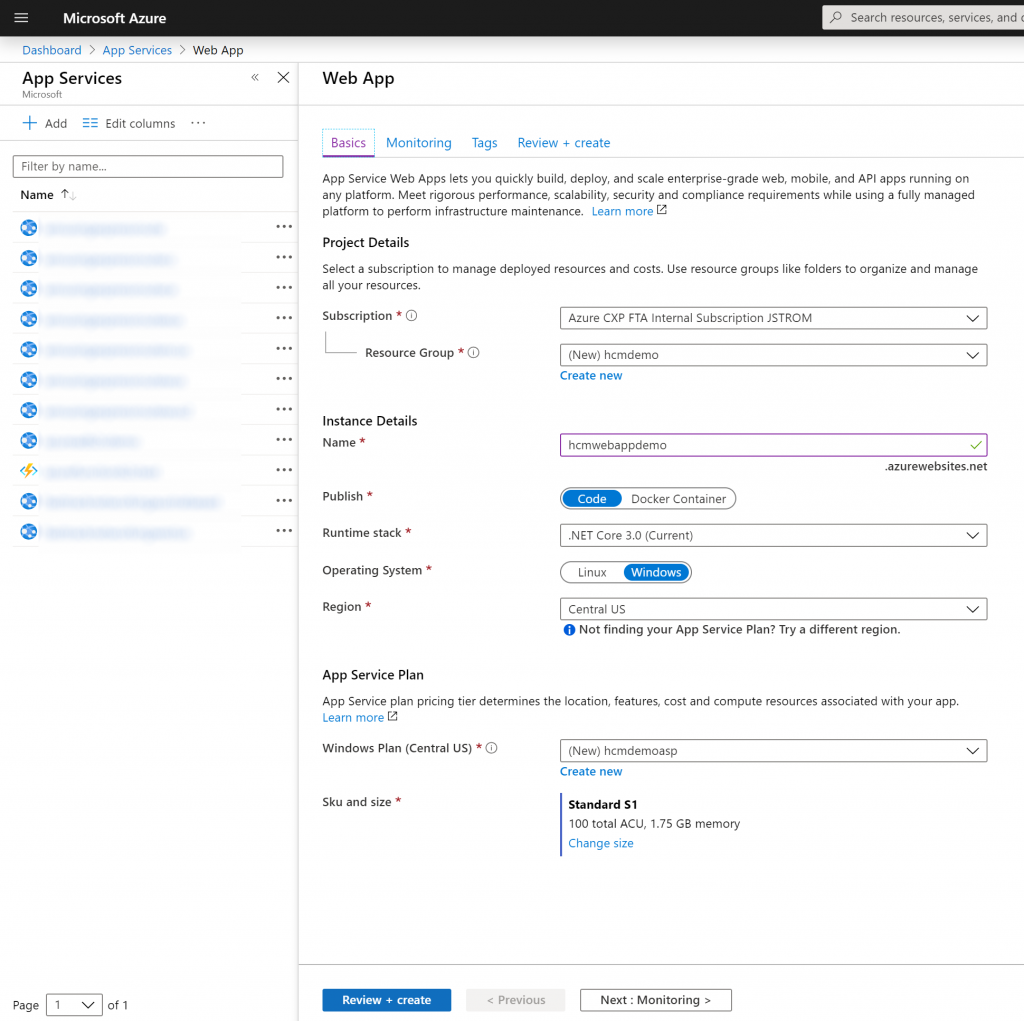
To begin, we will first deploy a Web App from the Azure Portal to give us access to the Hybrid Connection Manager blade. Note: You can leverage any App Service to create the hybrid connection manager instance, but you must be on a paid tier (Free tier will not work).
- Login to the Azure Portal (portal.azure.com)
- Select All services -> App Services -> click + Add
- Fill out the required information, ensuring you are on a plan greater than Free. Select Review + create and Create
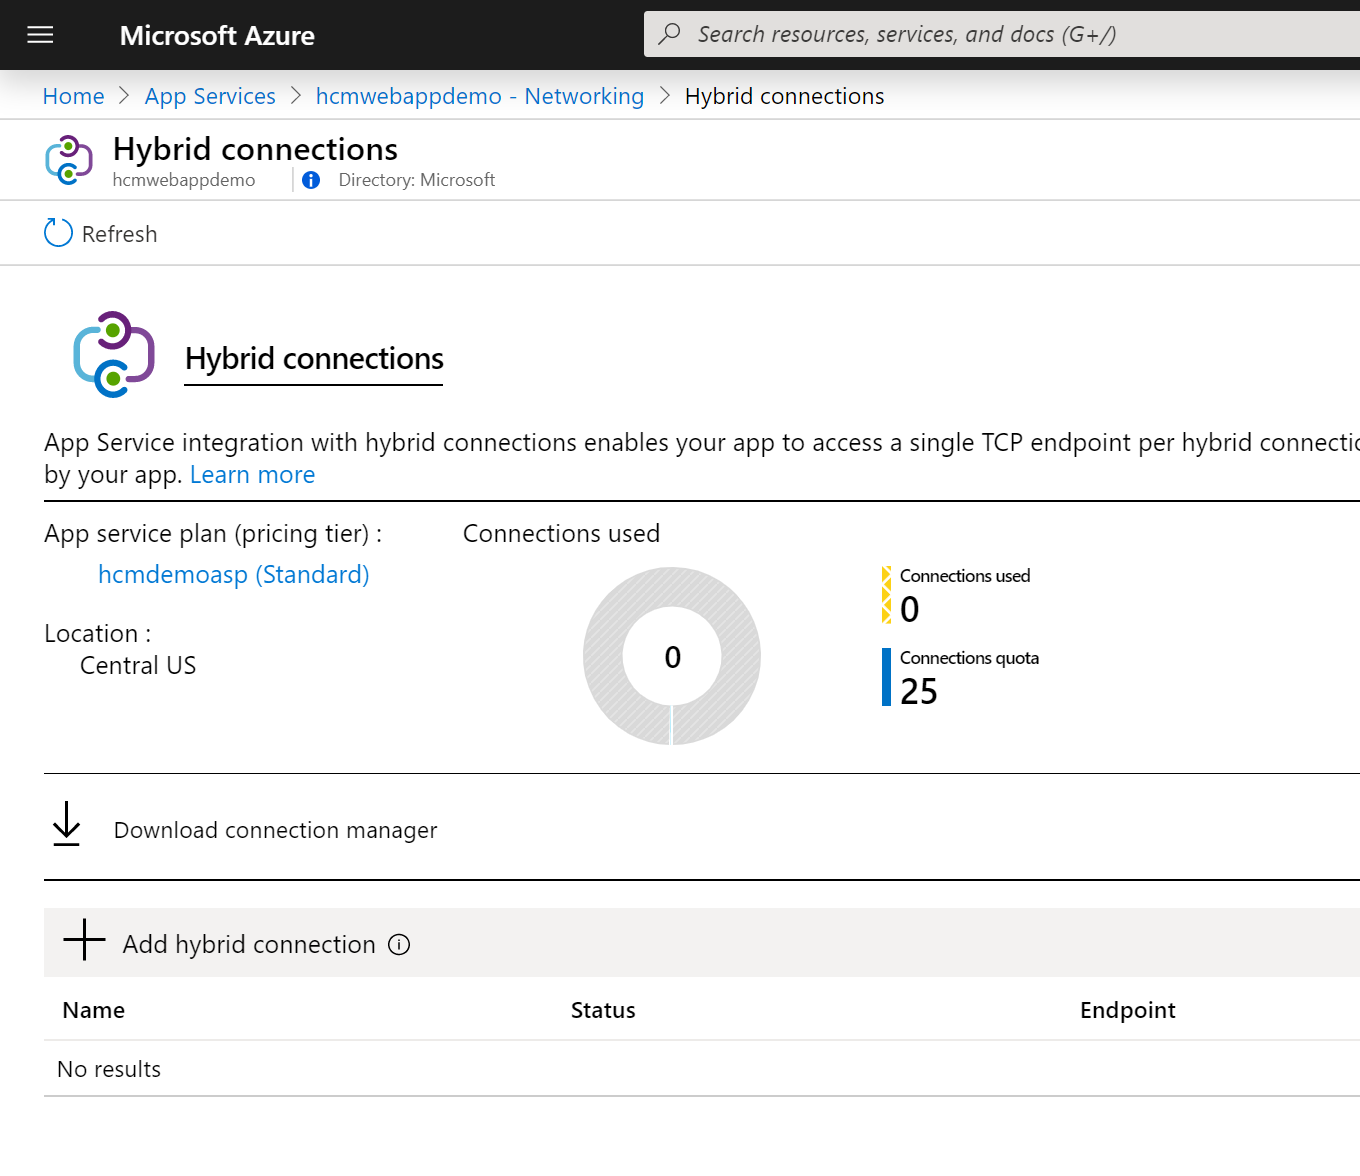
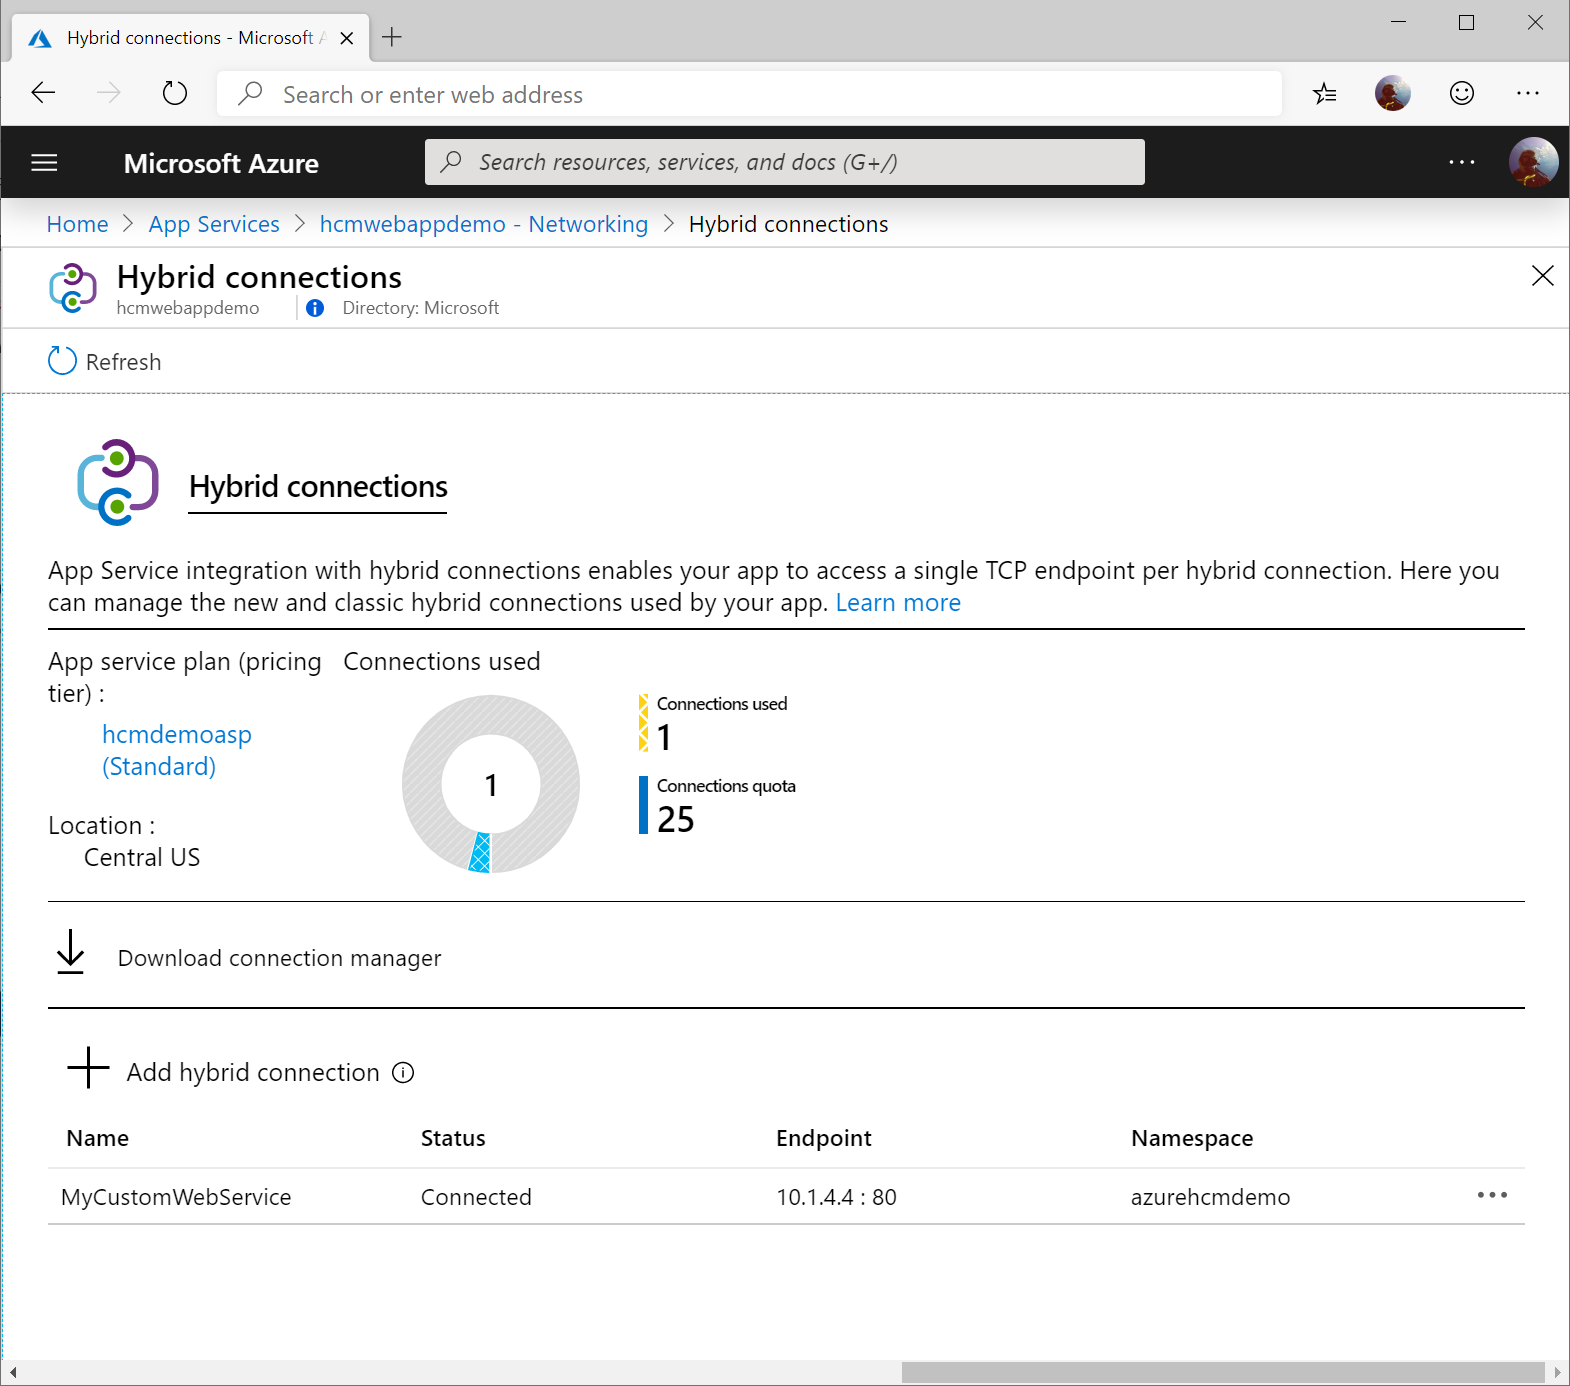
Once deployed, navigate to your Web App, select Networking, and click on Configure your hybrid connection endpoints
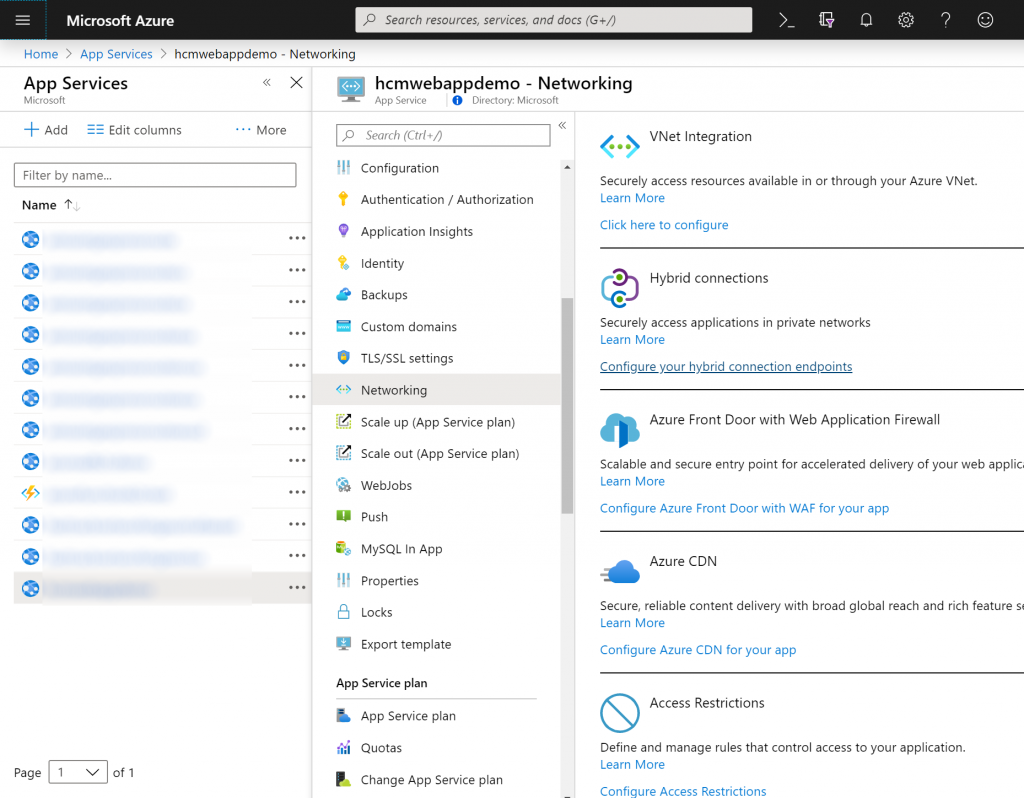
On the Hybrid connections screen, click on Download connection manager.
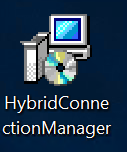
Note: This is the agent you will need to install in the environment that contains the service you are trying to access. The agent itself can be deployed on any machine as long as the machine can access the service you are trying to reach.

Installation of the agent is very straightforward. Complete the steps below.
-
- Select HybridConnectionManager.msi
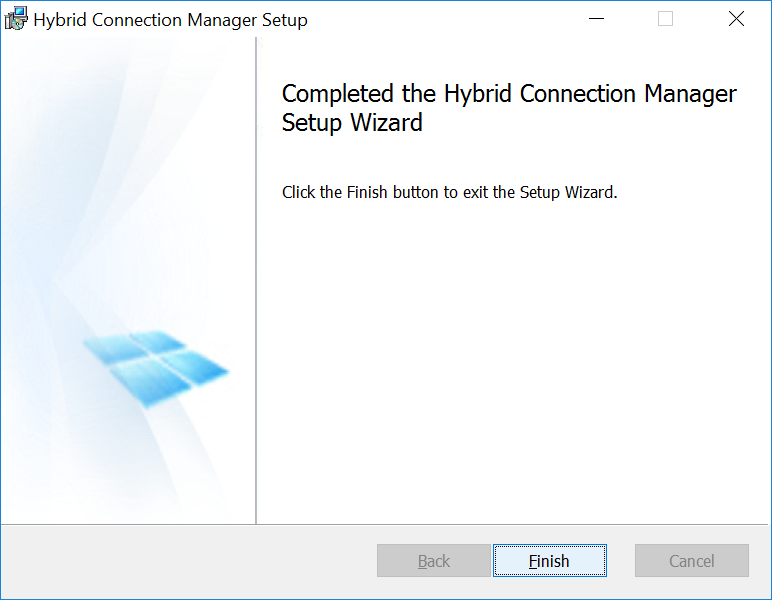
- Read the EULA, select I accept the terms in the License Agreement, and click Install
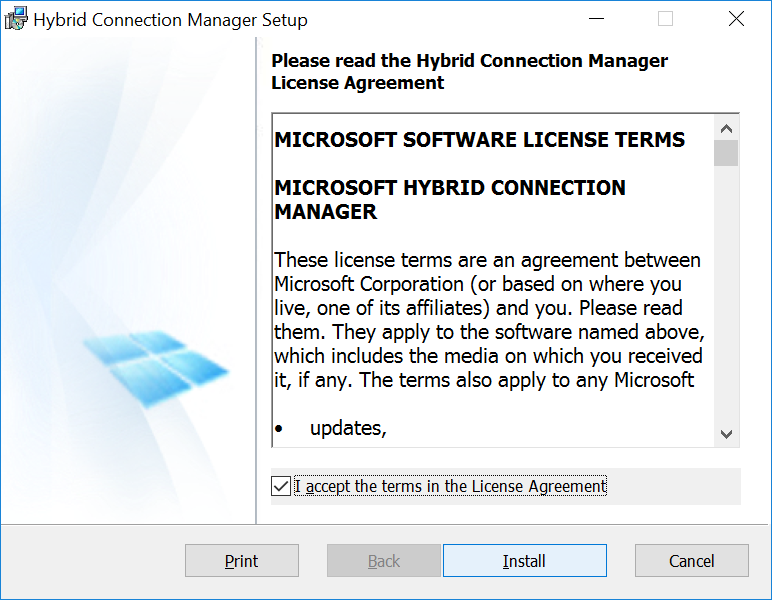
- Click Finish
- Select HybridConnectionManager.msi
Once installed, navigate back to the Azure Portal (portal.azure.com), click All services -> App Services -> Select your webapp, click Networking, select Configure your hybrid connection endpoints, and click Add hybrid connection.
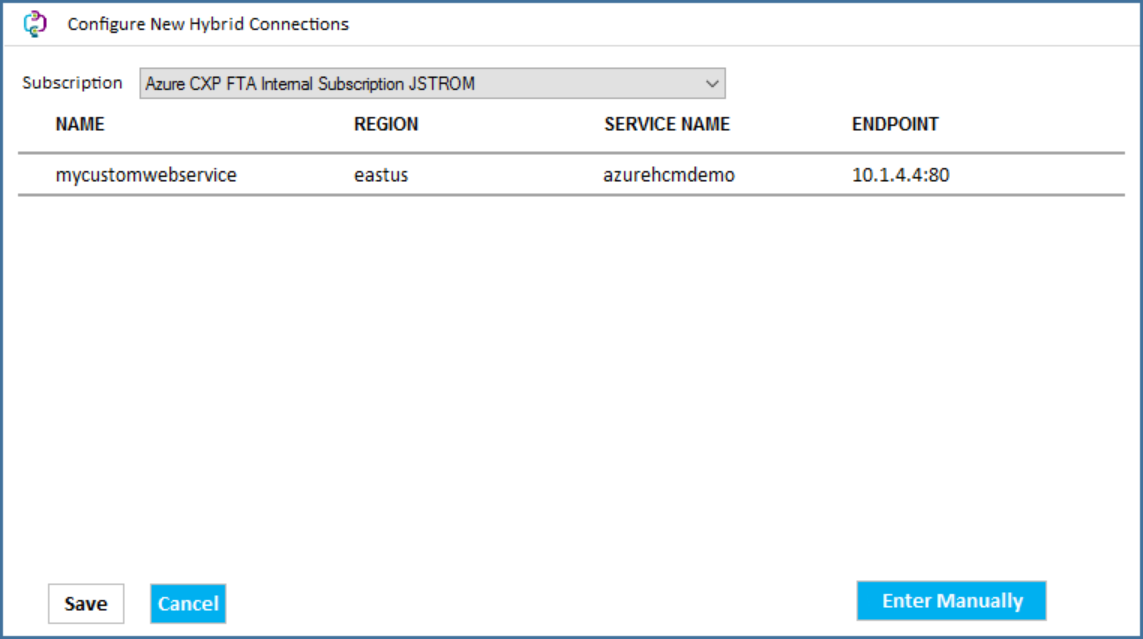
Click Create new hybrid connection and enter the following:
- Hybrid connection Name
- MyService
- Endpoint Host
- IPAddress or DNSNameOfTheService
- Endpoint Port
- PortNumberofYourService
- Servicebus namepsace
- Create new
- Location
- Pick the location of the Azure region you want to go to
- Name
- Enter a unique name for the service bus resource that will be created. This is a globally unique name accross all of Azure and must only consist of lowercase letters, numbers, and hyphens.
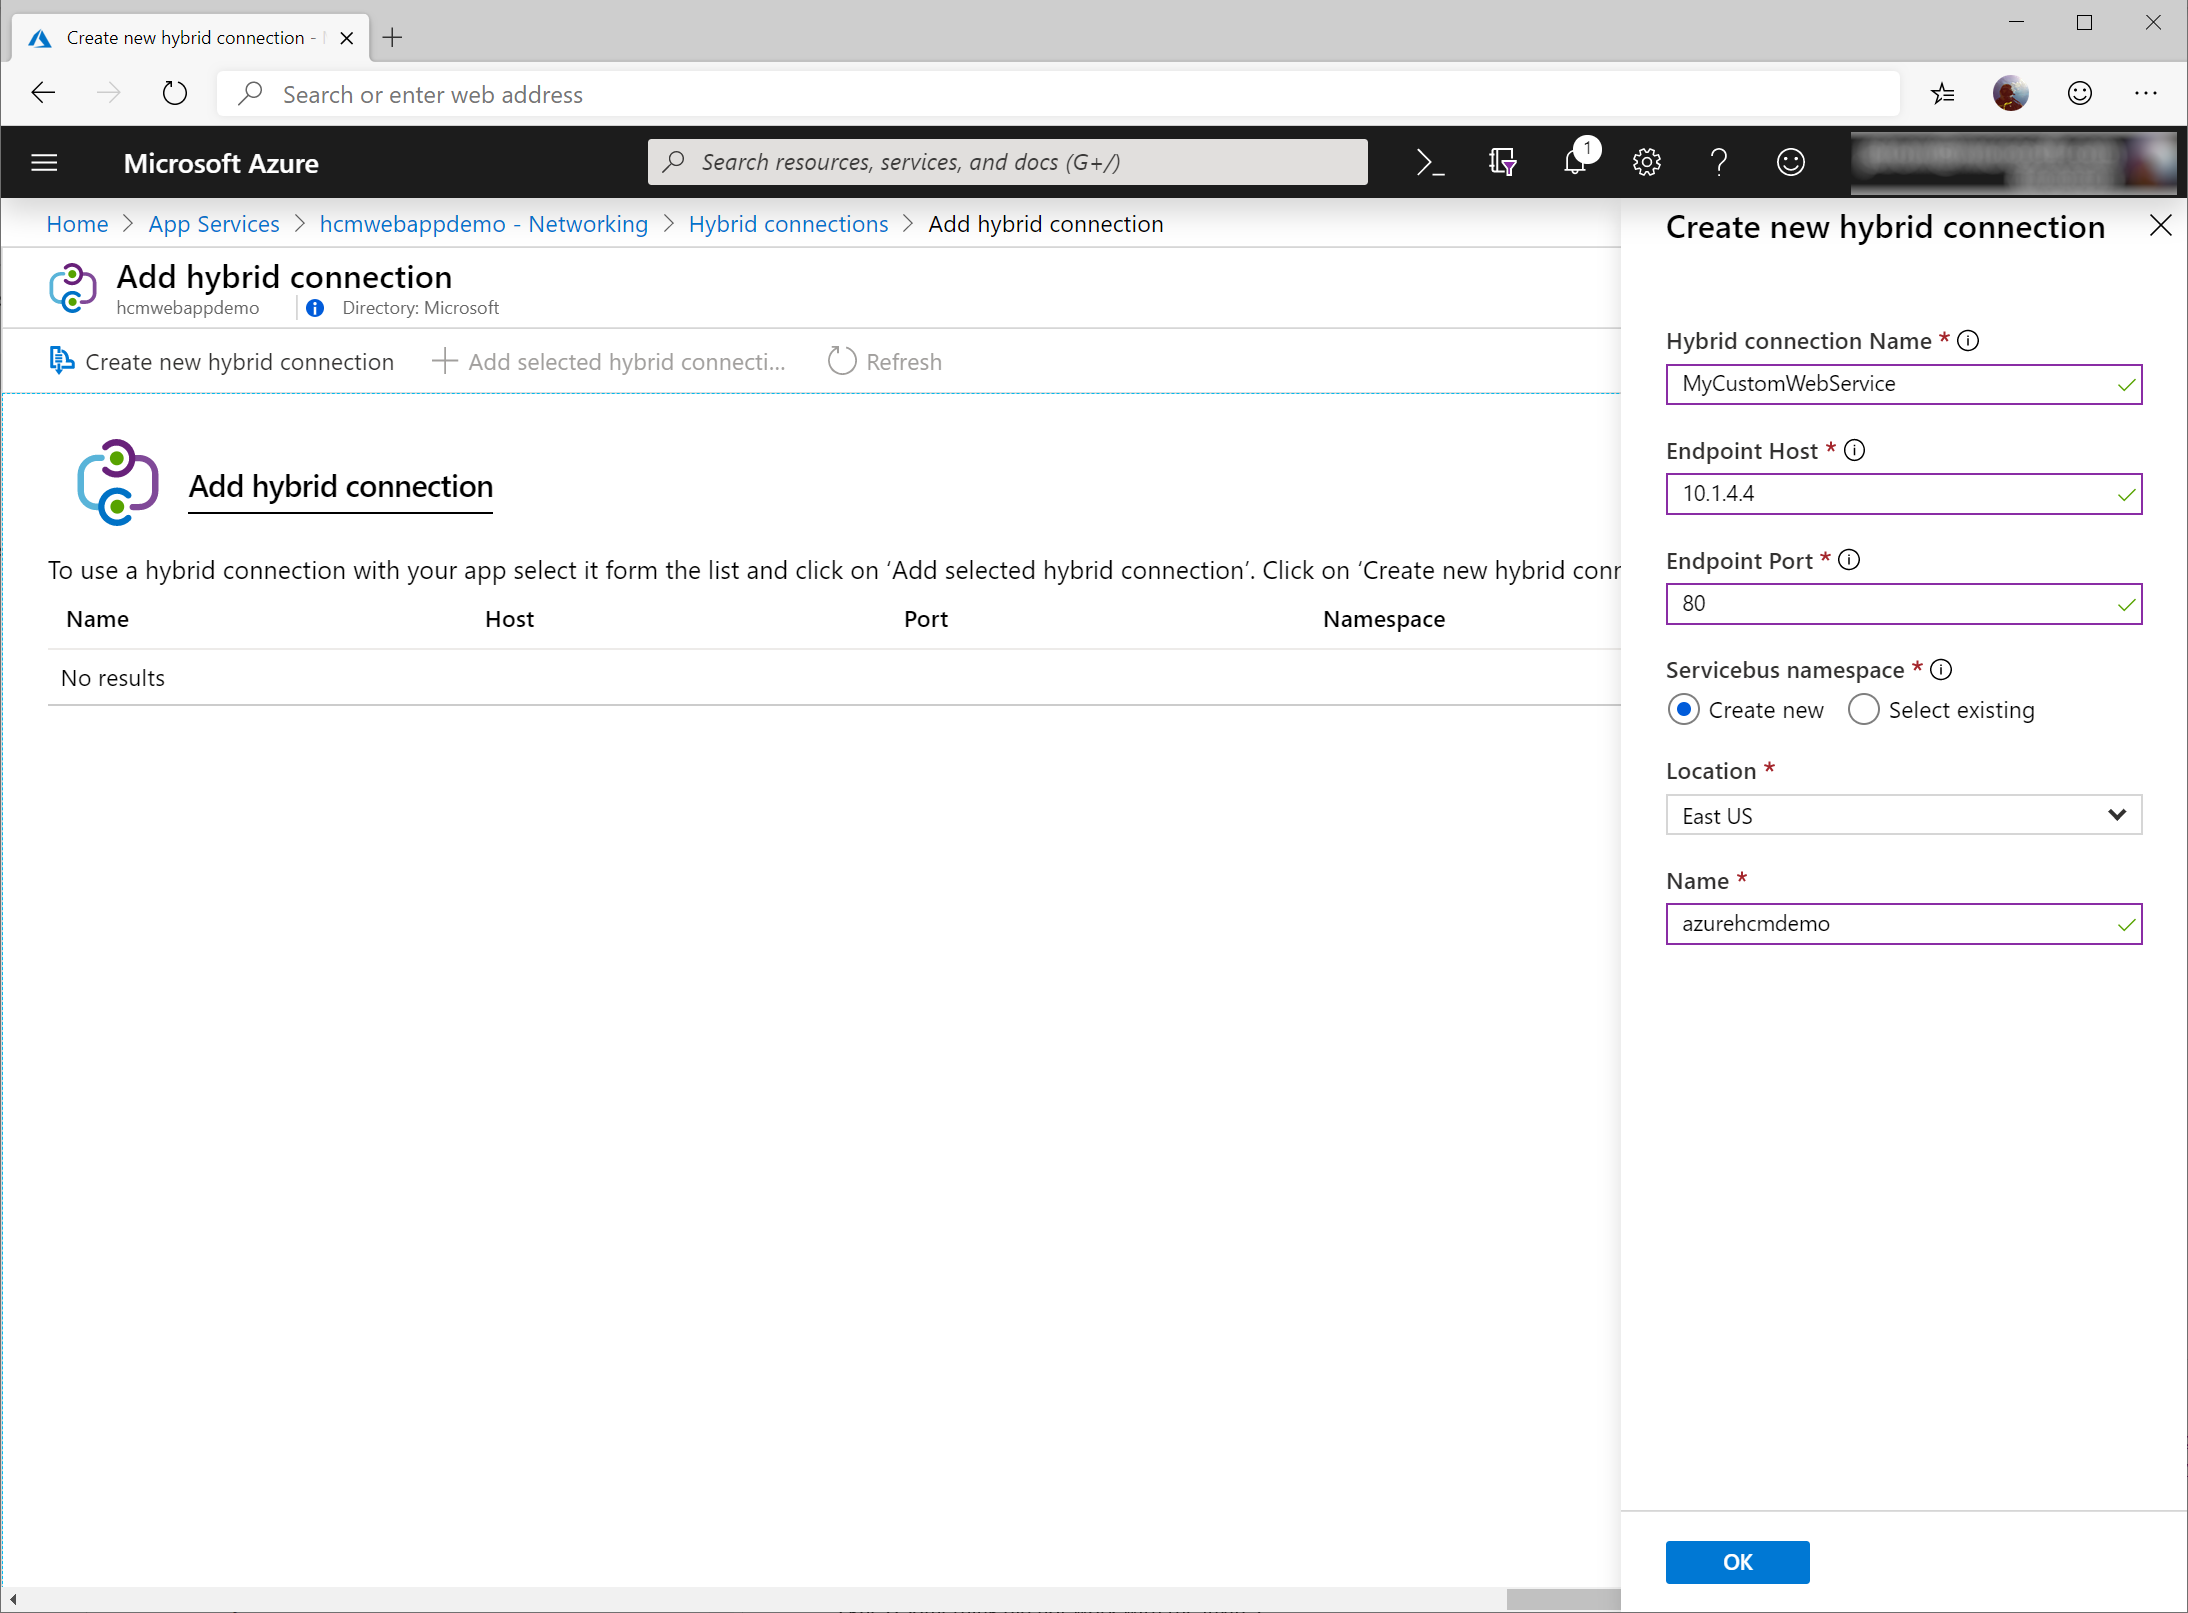
Click OK once you have filled out the information above. Once Azure has created the connection, navigate back to the machine you installed the agent on. On the machine, click Start, HybridConnectionManager, and select Hybrid Connection Manager UI.
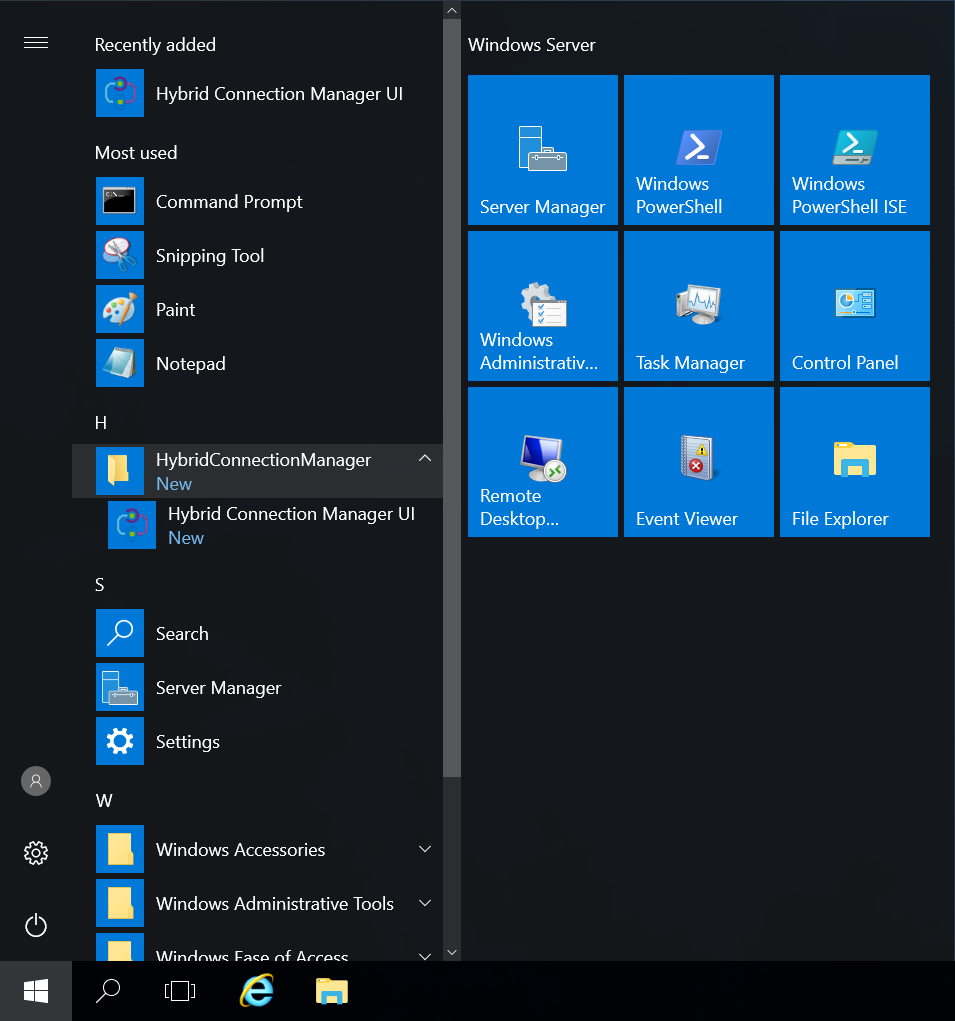
Once the agent has launched, select Add a new Hybrid Connection.

This will prompt you to enter your Azure credentials. Enter your credentials in the prompt.

Note: if the machine is locked down and cannot leverage javascript, you can close out of the sign-in window and select Enter Manually on the previous step. Back in the Azure Portal, you can select your connection and copy the "Gateway Connection String" to connect this agent to Azure.
Once you have authenticated click the Subscription dropdown to select your Azure Subscription, select the connection you created via the portal, and click Save.
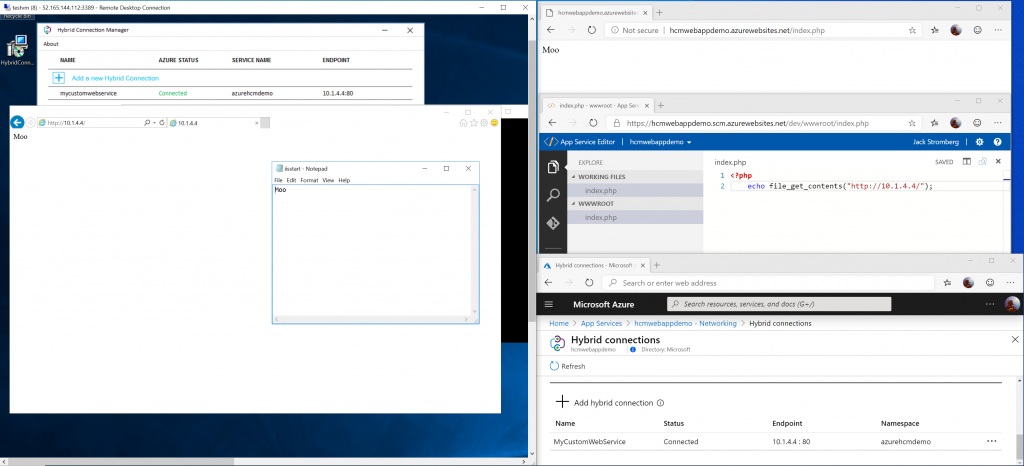
Once Saved, you should see the connection we created via the Azure Portal with the Azure Status of "Connected". If you don't see "Connected", double check you don't have a proxy blocking outbound TCP 443 requests to the Service Bus instance we created earlier (azurehcmdemo.servicebus.windows.net).

Note: To help with resiliency, you can deploy multiple agents on different machines to ensure resiliency/availability/scalability. When you select the same connection endpoint, HCM will automatically begin to load balance traffic between the agents.
Once you see the agent connected on-premises, you can validate from the Azure Portal we see the agent is connected as well. Via All services -> App Services -> your app service -> Networking -> Configure your hybrid connection endpoints, you should see "Connected" via the Status column on your Hybrid connections blade.
At this point, within your application, you should be able to reference the contents of the on-premises machine via the same connection string you may have used before. Below I've added an example showing an on-premises IIS server that displays the text "Moo" when you browse to the web page. Via my Web App in Azure, I created a quick PHP script that will request the on-premises server, in which HCM on the App Service will place the request on a Service Bus queue, the HCM agent on-premises will pull down the request, forward the request to the Web App on-premises, place the response back on the queue, and the web app will display the result "Moo".
Hope this helps! If you have any questions or comments feel free to reach out below.
Helpful Links/Sources
Azure Friday Video showing an example of this: https://www.youtube.com/watch?v=y_zAJZC_8Yk
Azure documentation on Hybrid Connections: https://docs.microsoft.com/en-us/azure/app-service/app-service-hybrid-connections
How to enable logging/debug HCM: https://blogs.msdn.microsoft.com/waws/2017/06/26/troubleshooting-hybrid-connections-with-logging/